
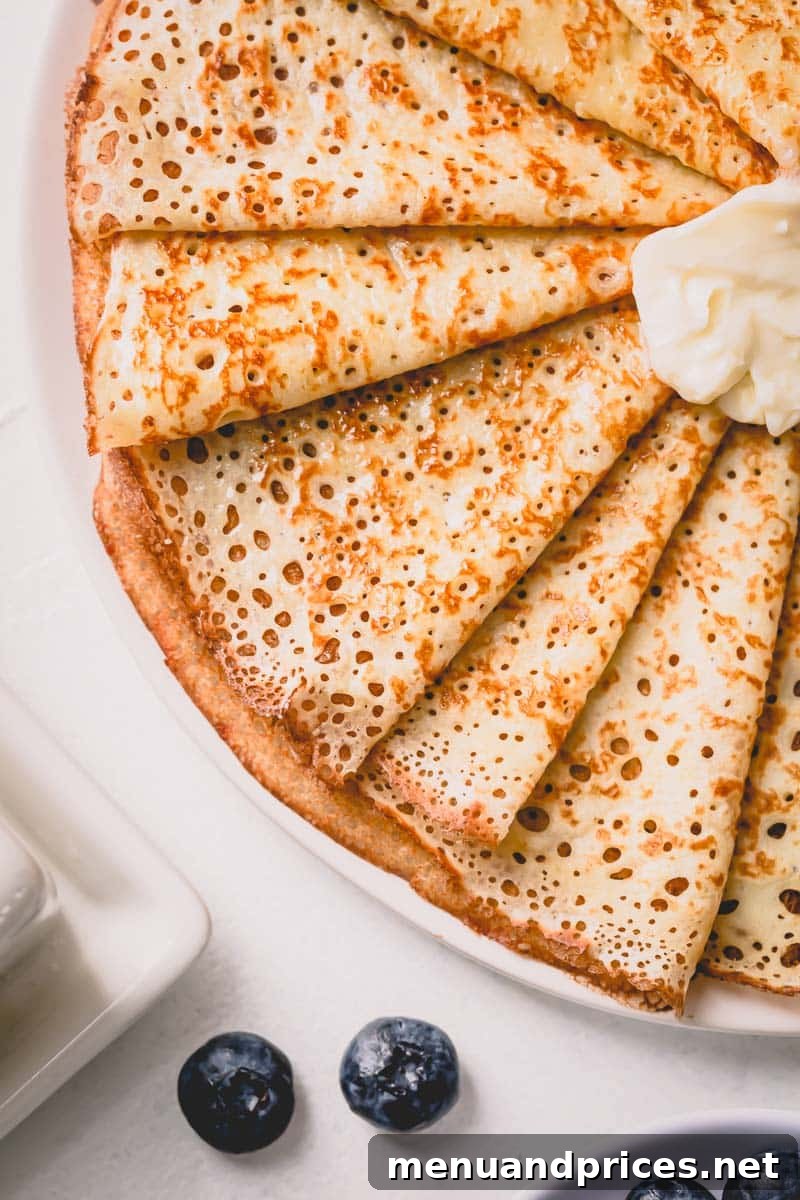
Welcome to the ultimate guide for crafting irresistibly delicate and perfectly lacy crepes right in your own kitchen! This foolproof recipe simplifies the art of crepe making, requiring just 8 common pantry staples and offering two convenient methods: a quick blender approach and a classic whisk technique. Whether you’re a seasoned chef or a beginner baker, you’ll be amazed at how easy it is to achieve restaurant-quality crepes that are both tender and flavorful. Say goodbye to complicated recipes and embrace this time-tested method for beautifully thin crepes, ideal for any occasion from a quick breakfast to an elegant dessert.
Crepes are a beloved culinary delight across the globe, celebrated for their incredible versatility and delicate texture. While the world is filled with countless variations – from sweet to savory, water-based to milk-based, and even those featuring different types of flour – the fundamental beauty of crepes lies in their simplicity. There’s truly no need to overcomplicate things when you have a solid basic recipe. A classic crepe provides the perfect, neutral canvas, ready to be adorned with an endless array of flavors, allowing your creativity to shine with every bite.
Why You’ll Fall in Love with This Easy Crepe Recipe
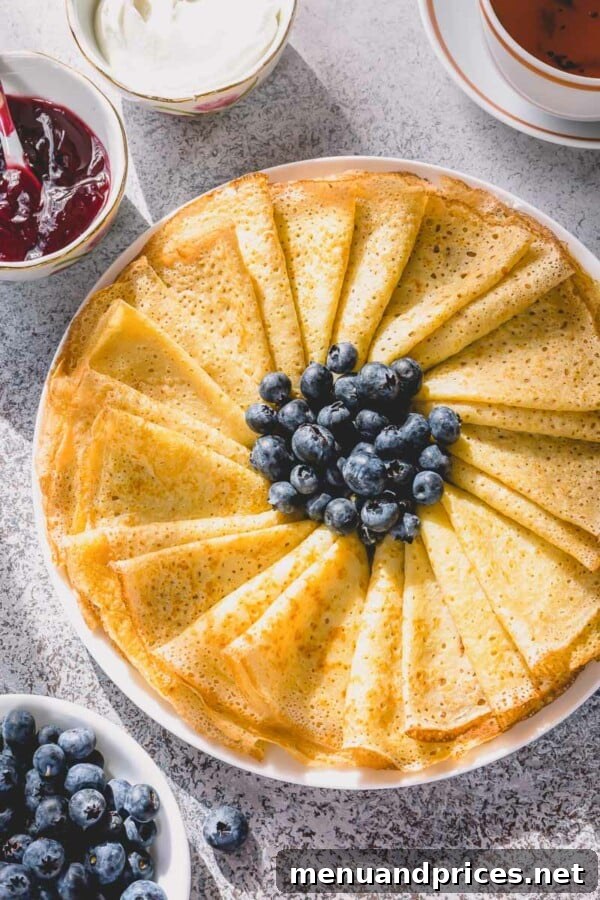
This isn’t just another crepe recipe; it’s the one you’ll come back to again and again. Here’s why these homemade crepes are guaranteed to become a staple in your culinary repertoire:
- Minimal Ingredients: You only need 8 everyday ingredients, most of which you likely already have on hand. No obscure specialty items required! This keeps the recipe approachable and budget-friendly.
- No Special Tools Required: Forget about fancy crepe makers. A good non-stick skillet and a whisk (or a blender) are all you need to achieve perfection. This recipe proves that you don’t need expensive gadgets to create impressive dishes.
- Beautiful Golden Brown Color: Each crepe cooks up to a gorgeous golden hue, indicating perfect caramelization and a delightful visual appeal that’s sure to impress.
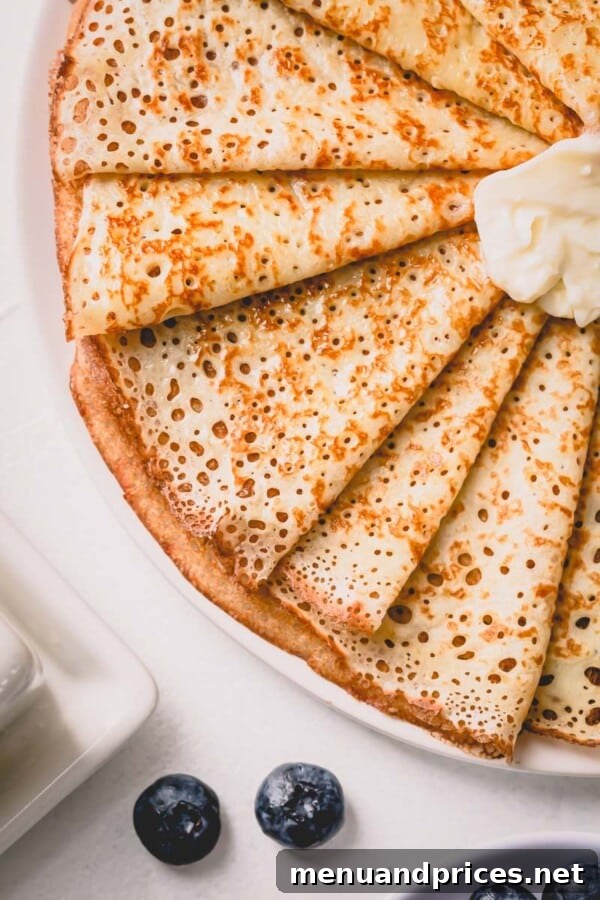
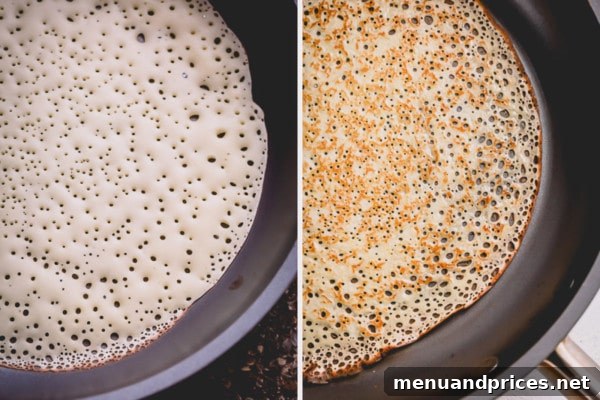
- Lacy Thin with Million Little Holes: The inclusion of a secret ingredient ensures that your crepes are exceptionally thin with that classic lacy texture, dotted with tiny, air-filled holes that make them incredibly tender and light.
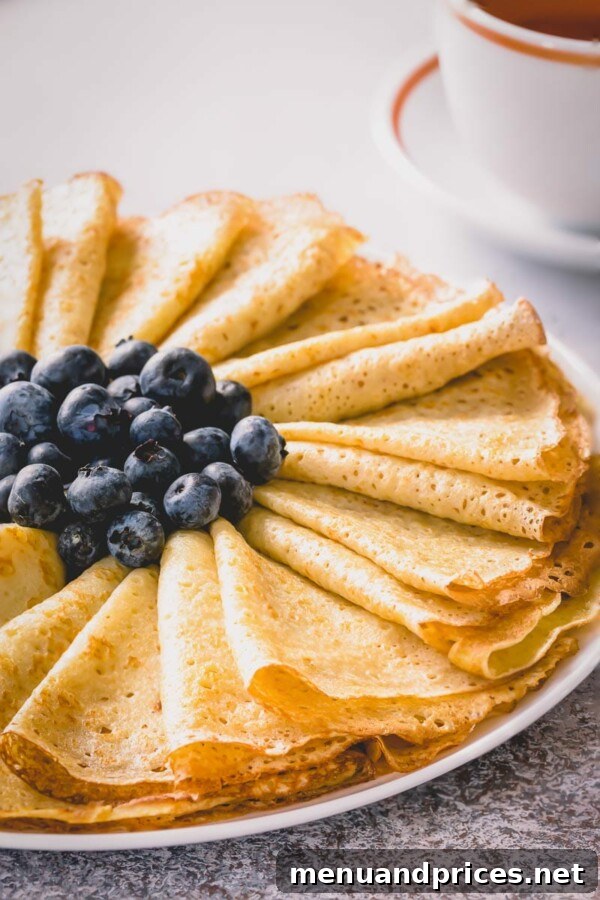
- Delicately Tender Texture: These crepes boast an unparalleled tenderness that melts in your mouth, making them a true joy to eat. They’re soft enough to fold or roll without tearing.
- Irresistibly Crispy Edges: The quick cooking process at the right temperature results in beautifully crisp edges that add a subtle textural contrast to the soft center.
- Versatility for Any Meal: From a delightful breakfast or brunch to a quick lunch or an elegant dessert, these crepes adapt effortlessly to whatever craving strikes.
- Make-Ahead & Freezer Friendly: Prepare a large batch and store them for future meals. They freeze beautifully, offering a convenient solution for busy mornings or unexpected guests.
8 Foolproof Tips for Crafting the Perfect Crepes Every Time
Achieving consistently perfect crepes is an art, but one that’s easily mastered with these essential tips. Follow these guidelines to elevate your crepe game and ensure delightful results:
- Use Tepid Milk for Softness: The temperature of your milk makes a difference! Using milk that is slightly warm (tepid) helps the ingredients combine more smoothly and allows the gluten in the flour to relax, resulting in crepes that are exceptionally soft and tender, never tough or rubbery.
- A Touch of Vegetable Oil in the Batter: This is a game-changer! Incorporating a small amount of vegetable oil directly into your crepe batter acts as a natural non-stick agent. This ingenious trick means you won’t need to butter or oil your pan before cooking each individual crepe, making the process faster, cleaner, and more efficient. It really works like magic!
- Baking Powder for Lacy Perfection: Want those iconic “million little holes” and a beautifully airy, lacy texture? Baking powder is your secret weapon! It creates tiny air bubbles within the batter, which expand when heated, resulting in those delicate perforations that are characteristic of truly great crepes. It’s what gives them that signature light-as-air quality.
- Rest Your Crepe Batter: Patience is a virtue, especially with crepe batter. Allowing the batter to rest for at least 10-15 minutes, or even better, overnight in the refrigerator, is crucial. This resting period allows the flour to fully hydrate and the gluten to relax. A well-rested batter spreads more easily and evenly on the skillet, prevents tearing, and yields incredibly tender and pliable crepes.
- A Quality Non-Stick Skillet is Your Best Friend: While a dedicated crepe pan isn’t necessary, a reliable non-stick skillet is absolutely essential for hassle-free crepe making. Its slick surface ensures your crepes lift off cleanly without sticking, preserving their delicate structure.
- Heat Your Skillet Thoroughly: Before you even think about pouring batter, make sure your skillet is properly heated over medium-high heat. A hot pan is vital for cooking crepes quickly and evenly. It prevents sticking and encourages the rapid formation of those beautiful lacy textures across the crepe surface. If the pan isn’t hot enough, your crepes might turn out dense or gummy.
- Master Portion Control with a Cookie Scoop: For perfectly uniform 7-inch crepes, a large cookie scoop (just shy of 1/4 cup of batter) is an invaluable tool. It ensures consistent portion sizes, leading to evenly cooked crepes that are all the same thickness and diameter, making stacking and serving a breeze.
- Embrace the “First Crepe Rule”: Don’t get discouraged if your very first crepe isn’t flawless. As the Russians wisely say, “Первый блин всегда комом!” (The first pancake is always lumpy/a lump). Think of it as a test run for calibrating your pan’s temperature and getting into the rhythm of swirling the batter. This inaugural crepe is traditionally the cook’s treat – a delicious reward for your efforts, so enjoy it without judgment!
Crafting Your Perfect Crepe Batter: Two Easy Methods
Creating smooth, lump-free crepe batter is simpler than you might think. Choose the method that best suits your kitchen and preferences:
Method #1: The Classic Bowl and Whisk Method
This traditional method is straightforward and doesn’t require any special equipment beyond a bowl and a whisk. It’s perfect for a hands-on approach to batter making.
- In a large mixing bowl, vigorously whisk together the eggs, granulated sugar, pure vanilla extract, and salt until well combined and slightly frothy. This ensures the flavors are evenly distributed.
- Pour in approximately half of the warm milk (about 1 cup) and whisk thoroughly into the egg mixture. This helps to create a smoother base for incorporating the dry ingredients.
- Gradually add the all-purpose flour to the mixture. Whisk continuously until the batter is smooth and completely lump-free. Taking your time here will prevent clumping.
- Pour in the remaining warm milk and continue to whisk until the batter is uniform and well-blended.
- Cover the bowl with plastic wrap or a clean kitchen towel and let the batter rest at room temperature for at least 15 minutes. For even better results, you can refrigerate it overnight. Resting allows the flour to hydrate fully and the gluten to relax, leading to more tender crepes that won’t tear easily.
- Just before cooking, stir in the vegetable oil and baking powder. Mix gently for about a minute until these are fully incorporated and the batter is smooth again.
Expert Tip
Adding the dry ingredients with only half of the milk initially is a clever trick to achieve a truly smooth and lump-free batter. This creates a thicker paste that’s easier to whisk without resistance, preventing pesky flour pockets.
Method #2: The Super Easy Blender Method
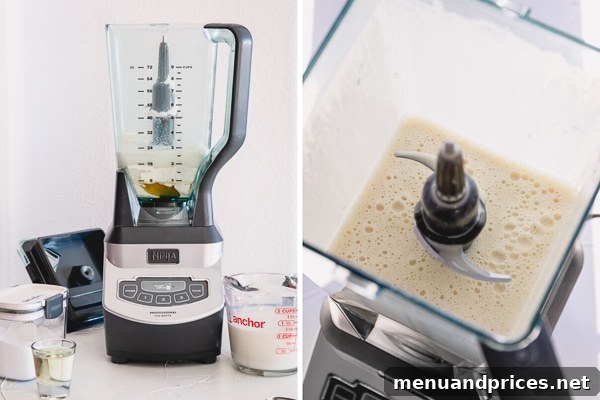
While a blender isn’t strictly necessary for this crepe recipe, it undoubtedly makes the process incredibly easy and fast, yielding a perfectly smooth batter with minimal effort. This is ideal for those busy mornings or when you need crepes in a hurry!
- Add all the ingredients – eggs, sugar, vanilla extract, salt, warm milk, all-purpose flour, vegetable oil, and baking powder – into your blender in the order they are listed.
- Secure the lid and process on medium-high speed until the mixture is completely smooth and all ingredients are fully combined. This usually takes less than a minute.
- Transfer the batter to a bowl, cover it, and let it rest for at least 15 minutes at room temperature, or refrigerate it overnight for optimal results. Just like the whisk method, resting is key for tender, non-tearing crepes.
Mastering the Art of Shaping and Cooking Your Crepes
Once your batter is perfectly rested and ready, it’s time for the exciting part: cooking those beautiful, lacy crepes! Precision and speed are your allies here:
- Preheat Your Skillet: Place a 10-inch non-stick skillet over medium-high heat. Allow it to heat thoroughly for a few minutes. A properly heated pan is crucial for preventing sticking and developing that signature lacy texture.
- Portion and Swirl: Once your pan is hot, drop approximately 1/4 cup of the crepe batter into the center of the skillet. Immediately lift the pan off the heat and quickly swirl it in a circular motion. This distributes the batter evenly across the entire bottom surface of the skillet, creating a perfectly thin and round crepe.
- The First Cook & Edge Release: Cook the crepe for about 30-60 seconds on the first side. You’ll know it’s ready to flip when the edges begin to appear slightly browned and crispy, and the surface looks set. Carefully run a thin spatula around the edges to loosen the crepe.
- Flip and Finish: Once loosened, gently insert the spatula completely under the crepe and quickly flip it over to the other side. Cook for another 20-30 seconds, or until it’s nicely golden brown and cooked through. Crepes cook very fast, so stay attentive!
- Stack and Continue: Transfer the cooked crepe onto a serving plate. You can cover the stack loosely with foil or a clean kitchen towel to keep them warm while you continue cooking the remaining batter. Repeat the process with the rest of your batter, remembering that consistency comes with practice.
Important Cooking Tip
Avoid the temptation to cook crepes over low to medium heat for an extended period. This will result in tougher, chewier crepes that lack the desired delicate texture. The key to lacy, tender crepes is high heat and quick cooking. So, crank up that heat and work swiftly!
Do I Really Need a Special Crepe Pan for Perfect Results?
The short answer is no, absolutely not! While dedicated crepe pans exist and might offer certain advantages like lower sides for easier flipping, they are by no means a necessity for making fantastic crepes. Many home cooks, including myself, have been successfully making delicious crepes for years using standard kitchen equipment. Any good quality, well-seasoned non-stick skillet will work perfectly fine. The key is to have a pan that conducts heat evenly and has a smooth, slick surface to prevent sticking. So, save your money on specialized gadgets and confidently use what you already have!
Delightful Ways to Serve Your Homemade Crepes
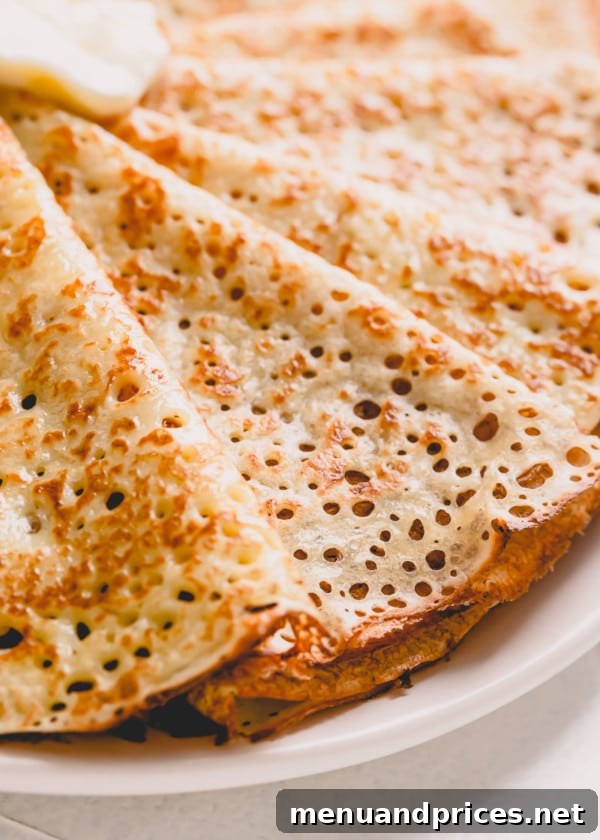
Soft, thin, and exquisitely delicate, these crepes are the ultimate blank canvas, eagerly awaiting a symphony of toppings and fillings. Their neutral flavor profile makes them incredibly versatile for both sweet and savory applications. Here are some of our favorite ways to enjoy them:
- Classic Butter & Jam: Our absolute go-to! A simple smear of butter and your favorite fruit jam (strawberry, raspberry, or apricot are fantastic) creates a timeless and comforting treat.
- Decadent Nutella with Banana Slices: For an indulgent experience, spread a generous layer of Nutella (or any chocolate hazelnut spread) and layer with fresh banana slices. This combination is pure bliss.
- Light & Fresh Whipped Cream with Berries: A dollop of homemade whipped cream paired with a medley of fresh seasonal berries (strawberries, blueberries, raspberries) is a light, elegant, and incredibly refreshing option.
- Sweet Drizzles: A simple drizzle of golden honey, rich maple syrup, or creamy sweetened condensed milk adds a wonderful touch of sweetness and moisture.
- Lemon & Sugar: For a truly classic French touch, sprinkle with granulated sugar and a squeeze of fresh lemon juice. The tartness balances the sweetness beautifully.
- Cream Cheese & Fruit: Spread with a sweetened cream cheese mixture and top with a compote of peaches, cherries, or apples.
- Savory Options: Don’t forget savory crepes! Fill them with ham and cheese, sautéed mushrooms and spinach, smoked salmon with dill cream cheese, or a simple mixture of scrambled eggs and chives for a delicious brunch or light dinner.
The Smart Way to Freeze Homemade Crepes for Later
Crepes are incredibly versatile, and their make-ahead potential is one of their greatest advantages. As they are a family favorite (especially for breakfast!), I often double the recipe and freeze a batch for future quick meals. This is a brilliant strategy for meal prepping or having a delicious option ready for unexpected cravings. Here’s a simple, step-by-step guide to freezing your homemade crepes effectively:
Step-by-Step Instructions to Freeze Crepes:
- Cool Completely: The most important first step is to ensure your freshly cooked crepes are entirely cool. Stacking and freezing warm crepes will lead to condensation and ice crystals, making them soggy and difficult to separate. Lay them out individually on a cooling rack if needed, then stack them once cool.
- Roll Each Crepe (Optional but Recommended): For optimal storage and easy thawing, roll each individual crepe into a tight tube. This minimizes air exposure and makes them less prone to sticking or breaking. Alternatively, you can stack them flat with parchment paper in between.
- Layer with Parchment Paper: If stacking flat, arrange the cooled crepes on a baking sheet lined with parchment or wax paper. For multiple layers, place a fresh sheet of parchment paper between each layer of crepes. This creates a barrier, preventing them from freezing together.
- Flash Freeze Until Solid: Place the baking sheet with the crepes (rolled or stacked with parchment) into the freezer. Let them flash freeze until completely solid, which usually takes a couple of hours. This step helps them hold their shape and prevents them from sticking together when transferred.
- Transfer to Freezer Bag: Once the crepes are solid, transfer the individual rolled crepes or the stacked layers into a freezer-safe, airtight bag or container. Squeeze out as much air as possible before sealing to prevent freezer burn. Label with the date and put them back into the freezer. Frozen crepes can be stored for up to 1-2 months.
Quick & Easy Ways to Thaw Frozen Crepes:
- Counter Thawing: Take out as many frozen crepes as you need from the freezer. Simply let them thaw on your kitchen counter for 10-15 minutes. They will soften up beautifully and be ready to fill or reheat.
- Microwave Method: For a quicker thaw, place the desired number of crepes on a microwave-safe plate. Cover them loosely with plastic wrap to retain moisture. Microwave on high for 30-45 seconds, or until warmed through and pliable.
Important Thawing Tip
When using the microwave, always cover your crepes with plastic wrap or a microwave-safe lid. Microwaving them uncovered will cause them to dry out quickly and become brittle.

I genuinely hope you take the opportunity to make and savor these incredibly perfect crepes. They are truly a joy to prepare and even more delightful to eat, offering endless possibilities for customization with your favorite fillings. Enjoy the process and the delicious rewards!

Basic Crepe Recipe: Easy & Delicious
Shinee Davaakhuu
5
30
50
20-25 crepes
Comment
Print Recipe
Ingredients
- 2 large eggs
- 2 tablespoons granulated sugar
- 1 teaspoon pure vanilla extract
- ½ teaspoon coarse kosher salt
- 2 cups (480ml) warm milk (Note 1)
- 1 ½ cups (190g) all-purpose flour
- 2 tablespoons vegetable oil
- 1 teaspoon baking powder
Instructions
Whisk Method:
-
In a medium bowl, whisk together eggs, sugar, vanilla extract, and salt until well combined.
-
Stir in 1 cup of the warm milk.
-
Gradually add the flour and mix until the batter is smooth and lump-free.
-
Pour in the remaining 1 cup of milk and mix well until fully incorporated.
-
Cover the bowl and let the batter rest for at least 15 minutes at room temperature, or refrigerate overnight for best results.
-
Just before cooking, stir in the vegetable oil and baking powder. Mix gently until the batter is smooth again, about one minute.
Blender Method:
-
In a blender, add all the ingredients (eggs, sugar, vanilla, salt, warm milk, flour, vegetable oil, baking powder) in the order they are listed.
-
Process until the mixture is completely smooth and all ingredients are fully combined.
-
Cover the blender pitcher or transfer to a bowl and let the batter rest for at least 15 minutes, or refrigerate overnight.
To Shape and Cook Crepes:
-
Heat a 10-inch non-stick skillet over medium-high heat. Ensure it is thoroughly hot before adding batter.
-
Pour a scant ¼ cup of batter into the hot pan. Immediately lift the pan off the heat and swirl it around to spread the batter evenly to cover the entire bottom of the skillet. (TIP: Use a large cookie scoop for consistent measuring.)
-
Cook for about 30-60 seconds. Once the edges begin to brown slightly and lift, carefully run a thin spatula around the edges of the crepe to loosen it. Then, insert the spatula fully under the crepe and quickly flip it over.
-
Cook the other side until it’s a nice golden brown, which typically takes about 20-30 seconds. Transfer the cooked crepe onto a serving plate. Repeat the process with the remaining batter, stacking the finished crepes.
-
Serve the crepes warm with your desired fillings, such as butter and jam, Nutella and banana, fresh fruits with whipped cream, or savory options.
⭐️ Did you make this recipe?
Please leave a review and let us know how you liked it!
Tips & Notes
STORING TIPS:
Store any leftover cooked crepes in an airtight container in the refrigerator for up to 3 days. Gently warm them in a microwave for a few seconds before serving to restore their tenderness.
For detailed freezing instructions, please refer to the “How to Freeze Crepes” section earlier in this post.
Nutrition (Approximate per crepe)
1 crepe
73kcal
10g
2g
3g
2g
96mg
Dessert, Breakfast
French, American

Did you make this?
Leave a rating and your feedback. Thank you!
This recipe was originally published on November 2, 2015, and last updated on February 18, 2021. The content has been extensively revised and expanded for improved readability and SEO.