
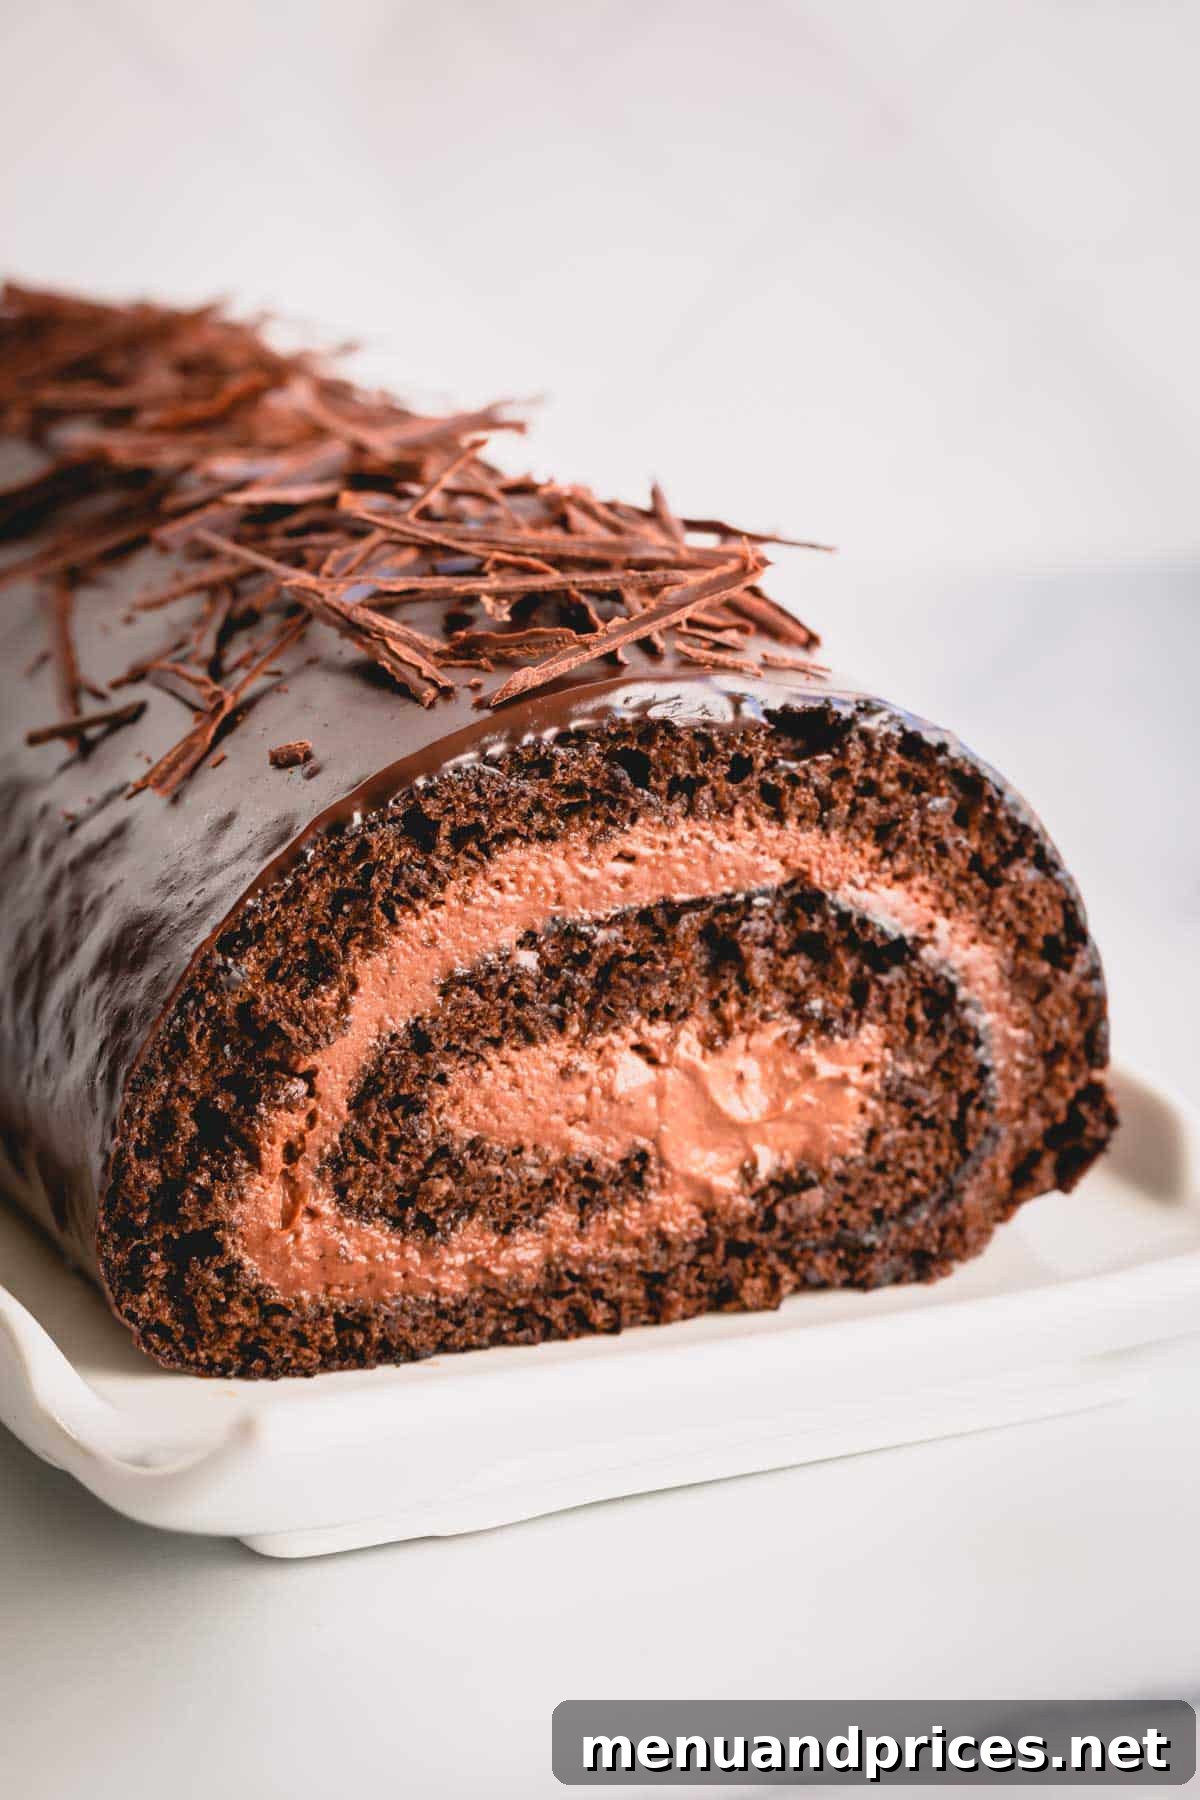
This exquisite chocolate roll cake is a culinary masterpiece, featuring an airy chocolate sponge cake, generously filled with creamy chocolate mousse, and elegantly drizzled with a rich ganache. It’s the perfect dessert for holidays, special occasions, or whenever you crave a truly memorable chocolate experience.
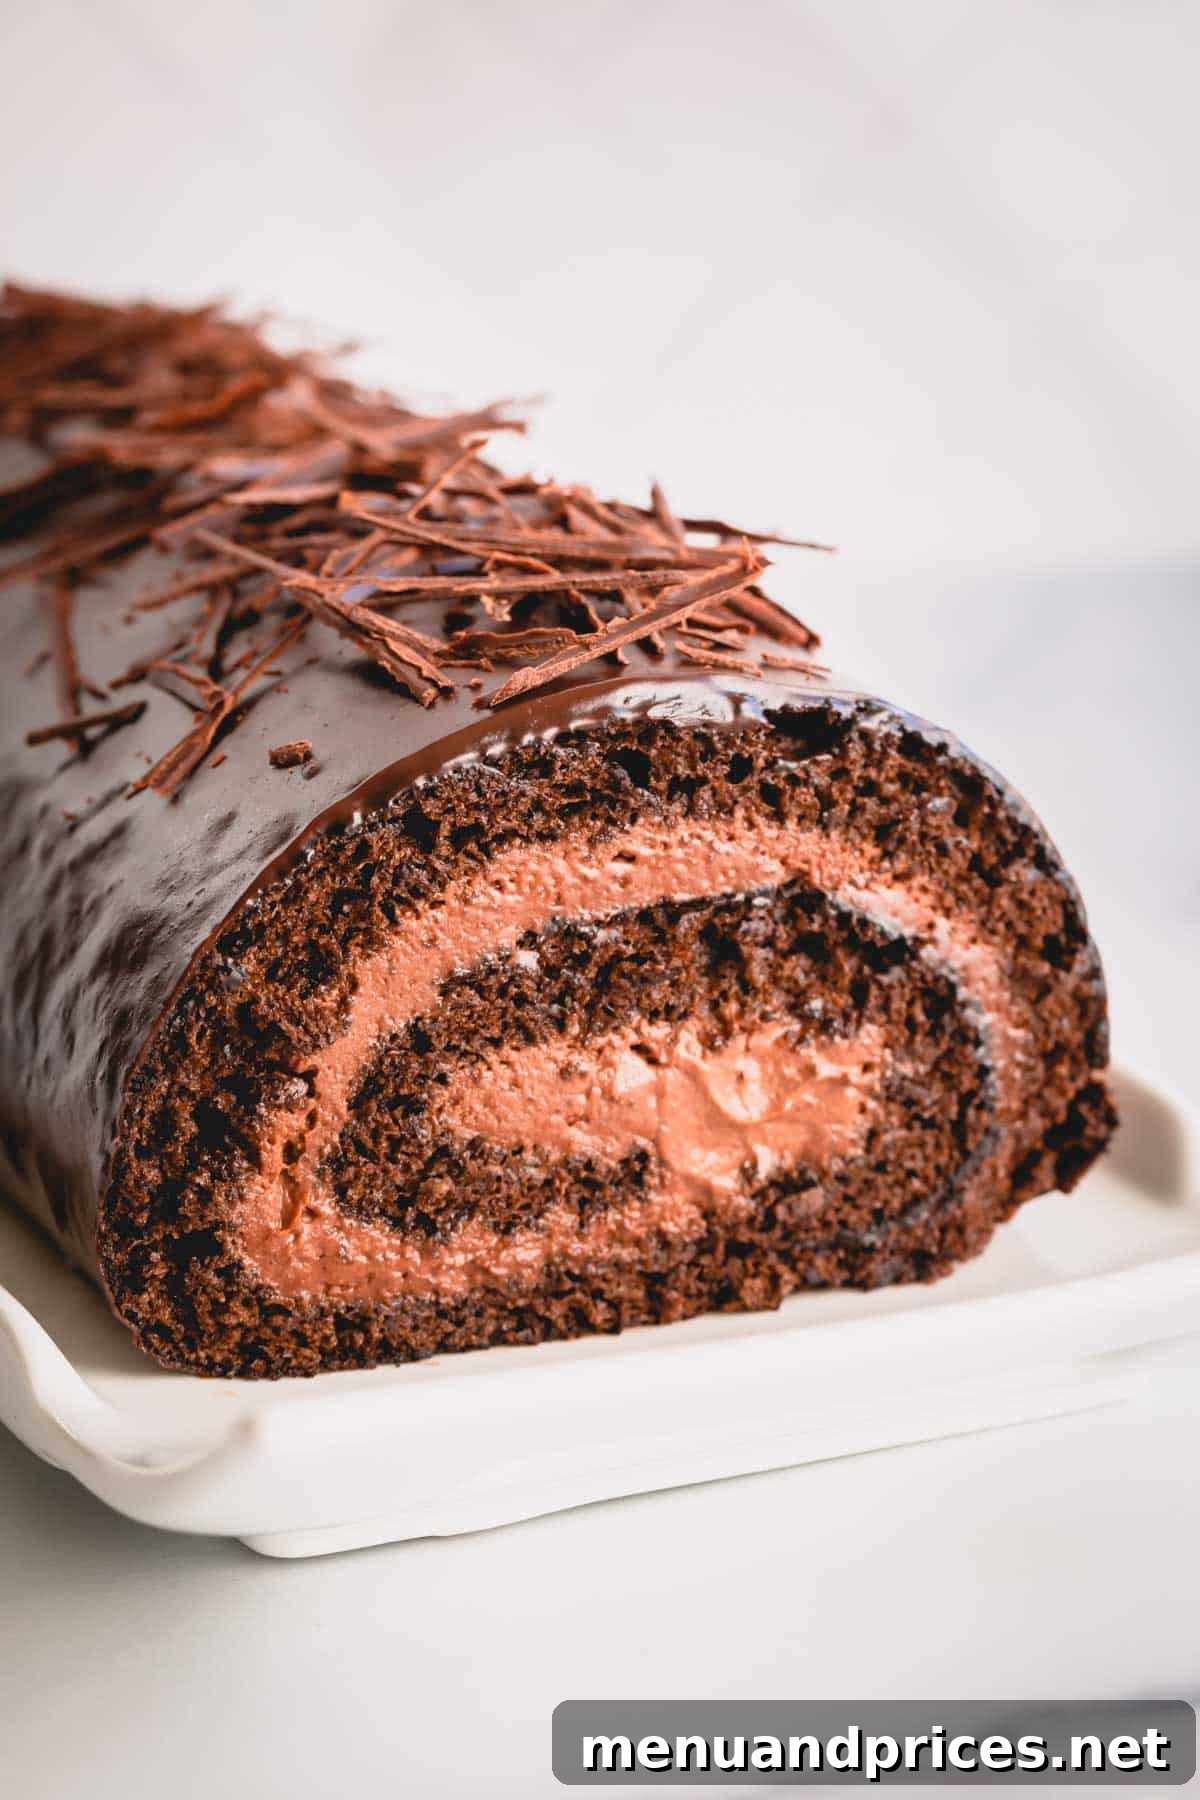
The Ultimate Chocolate Roll Cake Recipe: A Swiss Roll Masterpiece
Welcome to the ultimate guide for creating a truly show-stopping dessert: the Decadent Chocolate Roll Cake. Also affectionately known as a Chocolate Swiss Roll, Roulade, or Jelly Roll, this elegant confection combines a wonderfully light and pliable chocolate sponge cake with a luxurious, airy chocolate mousse filling, all crowned with a glistening, rich ganache. It’s a dessert that not only looks incredibly impressive but tastes absolutely divine, making it an ideal choice for holiday gatherings, special occasions, or simply to satisfy a serious chocolate craving.
Forget dry, crumbly roll cakes of the past. Our carefully crafted recipe focuses on proven techniques that guarantee a moist, tender sponge that rolls effortlessly without cracking. The secret lies in perfectly whipped eggs and a gentle folding method, resulting in an airy texture that beautifully complements the dense, velvety chocolate mousse within. To complete this masterpiece, a smooth, decadent chocolate ganache provides the perfect finishing touch, adding an extra layer of intense chocolatey goodness and a professional sheen.
Whether you’re an experienced baker looking to refine your technique or a home cook new to the world of roll cakes, this comprehensive guide will walk you through each step with clarity and confidence, ensuring a successful and incredibly delicious outcome. Get ready to impress your family and friends with this exquisite chocolate creation, a dessert that truly elevates any occasion!
Why This Chocolate Roll Cake Will Become Your Favorite Dessert
This chocolate roll cake is the perfect embodiment of light and decadent, offering a sophisticated dessert experience without being overly heavy or sweet. Here’s why this recipe stands out and why you’ll absolutely adore making (and, more importantly, eating!) it:
- Unforgettable Light & Airy Texture: Unlike many dense chocolate cakes, our recipe features a delicate chocolate sponge made from carefully whipped egg whites and finely milled cake flour. This results in an incredibly moist, pillowy-soft cake that is surprisingly light and airy, providing a delightful contrast to the rich fillings. This tender texture is key to a rollable, crack-free cake.
- Perfectly Balanced Sweetness & Intense Flavor: While undeniably rich in chocolate flavor, this chocolate roll cake is designed to be perfectly balanced, not overly sweet. Each component, from the subtly sweet sponge to the decadent mousse and the luxurious ganache, contributes to a harmonious symphony of flavors that will satisfy your sweet tooth without overwhelming your palate. The deep chocolate notes are truly exceptional.
- A Beautiful, Show-Stopping Presentation: With its elegant rolled form, smooth glossy ganache, and visually appealing spiral layers of cake and mousse, this dessert is a true showstopper. It’s guaranteed to draw gasps of admiration at any event, making you look like a seasoned pastry chef with minimal effort in the final plating.
- Easy-to-Master Cake Rolling Technique: Don’t be intimidated by the idea of rolling a cake! This recipe is specifically crafted to be easy-to-master, even for beginner bakers. We provide clear, step-by-step instructions and essential tips to ensure your chocolate sponge cake is pliable and rolls beautifully and seamlessly without a single crack.
- Versatile Filling Options: While our silky smooth chocolate mousse filling is highly recommended for its luxurious taste and texture, the chocolate sponge cake itself is incredibly versatile. Once you’ve mastered the roll, you can easily experiment with other delicious fillings like homemade whipped cream, vibrant fruit jams (raspberry or strawberry are excellent), classic buttercreams, or even a luscious caramel or cream cheese frosting.
- A Gourmet Upgrade to Classic Treats: This homemade chocolate Swiss roll is a million times better than any store-bought equivalent or the factory-produced “ho-ho’s” you might remember from childhood. It elevates the classic concept to a gourmet level, offering superior taste, texture, and a truly homemade touch that will be appreciated by all.
Prepare to fall deeply in love with this exquisite chocolate roll cake – it’s more than just a dessert; it’s a truly indulgent experience waiting to be shared and savored.
Key Ingredient Notes for Your Perfect Chocolate Roll Cake
The success of this decadent chocolate roll cake hinges significantly on the quality and proper handling of each ingredient. Pay close attention to these detailed notes to ensure your sponge is perfectly airy, your mousse is exquisitely silky, and your ganache is flawlessly glossy and rich.
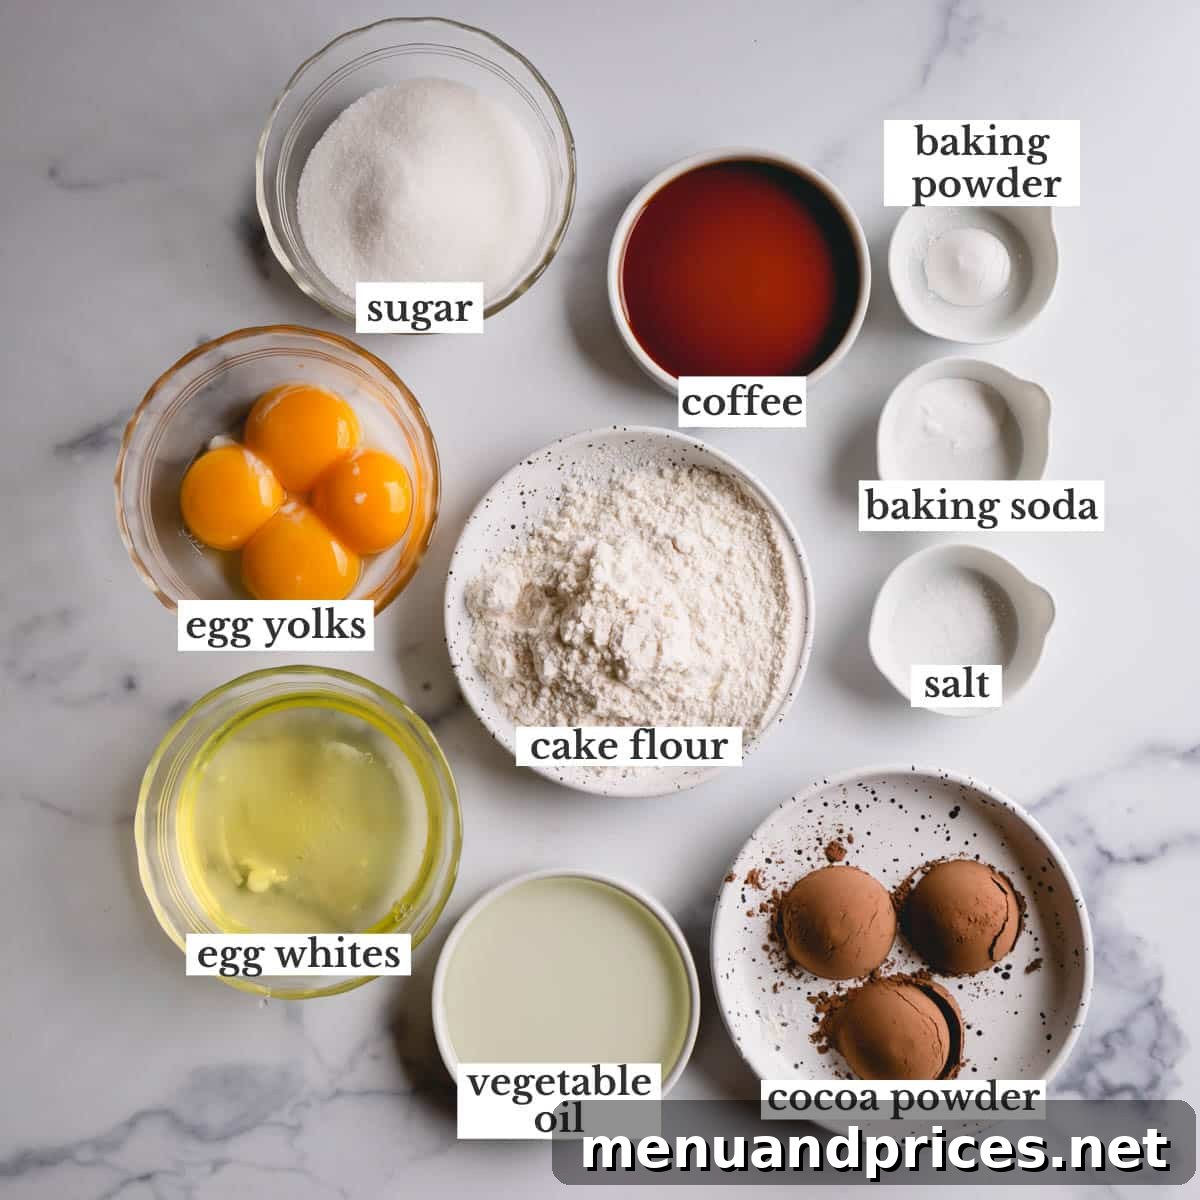
Chocolate Sponge Cake Ingredients: A Deep Dive
- Dutch-Processed Cocoa Powder: This is a non-negotiable ingredient for our chocolate sponge cake. Dutch-processed cocoa powder has been treated with an alkali to reduce its acidity, resulting in a smoother, less bitter, and intensely darker chocolate flavor and color. Crucially, it reacts differently with leavening agents than natural cocoa, so it is vital not to substitute it. Using Dutch-processed ensures the perfect rise and a rich, deep chocolate hue in your cake.
- Strong Coffee (or Espresso): Don’t worry, your cake won’t taste overtly like coffee! A small amount of strong brewed coffee, or instant espresso powder dissolved in water, dramatically enhances the inherent flavor of chocolate, making it taste even more pronounced, complex, and rich. It’s the ultimate secret ingredient for achieving deep, robust chocolate notes.
- Large Eggs (Separated yolks and whites): Both the egg yolks and whites play distinctly vital roles in the sponge cake. The perfectly whipped egg whites are the key to the sponge’s airy, light, and delicate texture, providing much-needed structure and elasticity that allows the cake to roll without cracking. Egg yolks, on the other hand, add richness, a beautiful golden color, and crucial moisture to the batter. For the best results, separate eggs when they are cold (the yolks are firmer and less likely to break), but allow the whites to come to room temperature (at least 30 minutes) before whipping for maximum volume and stability.
- Cake Flour: This specialized flour has a significantly lower protein content compared to standard all-purpose flour. This lower protein level minimizes gluten development, which is absolutely essential for creating an ultra-light, tender, and fine-crumbed chocolate sponge cake that remains exceptionally soft and pliable, making it easy to roll without tearing. Do not substitute with regular all-purpose flour unless you convert it by replacing a small amount with cornstarch (refer to the “Chef’s Notes & Tips” section for details).
- Baking Powder and Baking Soda: These chemical leavening agents work in conjunction with the other ingredients to provide the cake with its crucial lift and airy structure. Always ensure your baking powder and baking soda are fresh and potent; expired leavening agents can result in a flat, dense, and unappealing cake. It’s a good practice to check their expiration dates before baking.
- Granulated Sugar: Used in both the yolk and egg white mixtures, sugar not only provides sweetness but also plays a critical role in stabilizing the whipped egg whites, creating a more robust meringue that effectively holds its volume throughout the baking process.
- Vegetable Oil: Unlike butter, which solidifies as it cools, vegetable oil remains liquid at room temperature. This property is paramount for roll cakes as it contributes to a consistently moist and flexible cake that is far less prone to cracking when gently rolled.
Chocolate Mousse and Ganache Ingredients Explained
- High-Quality Semi-Sweet Chocolate Chips: Using high-quality chocolate chips is fundamental for both the mousse and the ganache. They provide the core chocolate flavor, richness, and essential texture. Choosing a good brand will noticeably elevate the overall taste and luxuriousness of your dessert.
- Heavy Cream (Temperature Specific): The temperature of your heavy cream is critically important for each component. For the chocolate mousse, heavy cream must be very cold to whip properly into stiff, airy peaks, which creates that light, cloud-like texture. Conversely, for the chocolate ganache, hot heavy cream is necessary to melt the chocolate chips into a smooth, glossy, and perfectly emulsified topping. Precise temperature control is crucial for the success of both the mousse and the ganache.
- Granulated Sugar (for Mousse): A small amount of granulated sugar is added to the heavy cream for the mousse. This sugar helps to stabilize the whipped cream, ensuring it holds its form beautifully and adds a subtle sweetness.
By understanding the precise role of each ingredient and selecting them wisely, you are setting yourself up for an incredibly successful, stunning, and delicious chocolate roll cake!
How to Make the Perfect Chocolate Roll Cake: A Comprehensive Step-by-Step Guide
Creating a beautiful chocolate Swiss roll cake, while involving a few more intricate steps than a standard layer cake, is an incredibly rewarding baking endeavor. Follow these detailed, step-by-step instructions closely to ensure every component of your chocolate roll cake comes together flawlessly, from the exquisitely airy sponge to the silky smooth mousse and the rich, glossy ganache.
1. Prepare the Luxurious Chocolate Mousse Filling
The creamy, light chocolate mousse is undoubtedly the decadent heart of this roll cake. It’s best to prepare it first so it has ample time to chill and set, ensuring a stable and delicious filling that holds its shape beautifully when sliced.
- Dissolve Cocoa and Espresso: In a small, heatproof bowl, combine the Dutch-processed cocoa powder and instant espresso powder with the hot water. Whisk these ingredients together until the powders are fully dissolved and you achieve a smooth, concentrated chocolate-coffee paste. This crucial step intensifies the chocolate flavor significantly.
- Melt Chocolate Chips: Using a double boiler (or a heatproof bowl carefully set over a saucepan of simmering water, ensuring the water does not touch the bottom of the bowl), gently melt the semi-sweet chocolate chips. Stir frequently with a rubber spatula until the chocolate is completely smooth, lustrous, and free of any lumps. Remove the bowl from the heat and allow the melted chocolate to cool slightly, but ensure it remains fluid and pourable.
- Combine Chocolate Mixtures: Carefully stir the dissolved cocoa-espresso mixture into the slightly cooled melted chocolate. Mix until thoroughly combined and uniformly dark and homogeneous.
- Whip Heavy Cream: In a separate, impeccably clean and chilled mixing bowl (preferably a stand mixer bowl or a large glass/stainless steel bowl) with a whisk attachment, whip the very cold heavy cream and granulated sugar on medium-high speed. Continue beating until stiff peaks form. This means that when you lift the whisk, the peaks of cream should stand firmly upright without drooping or collapsing.
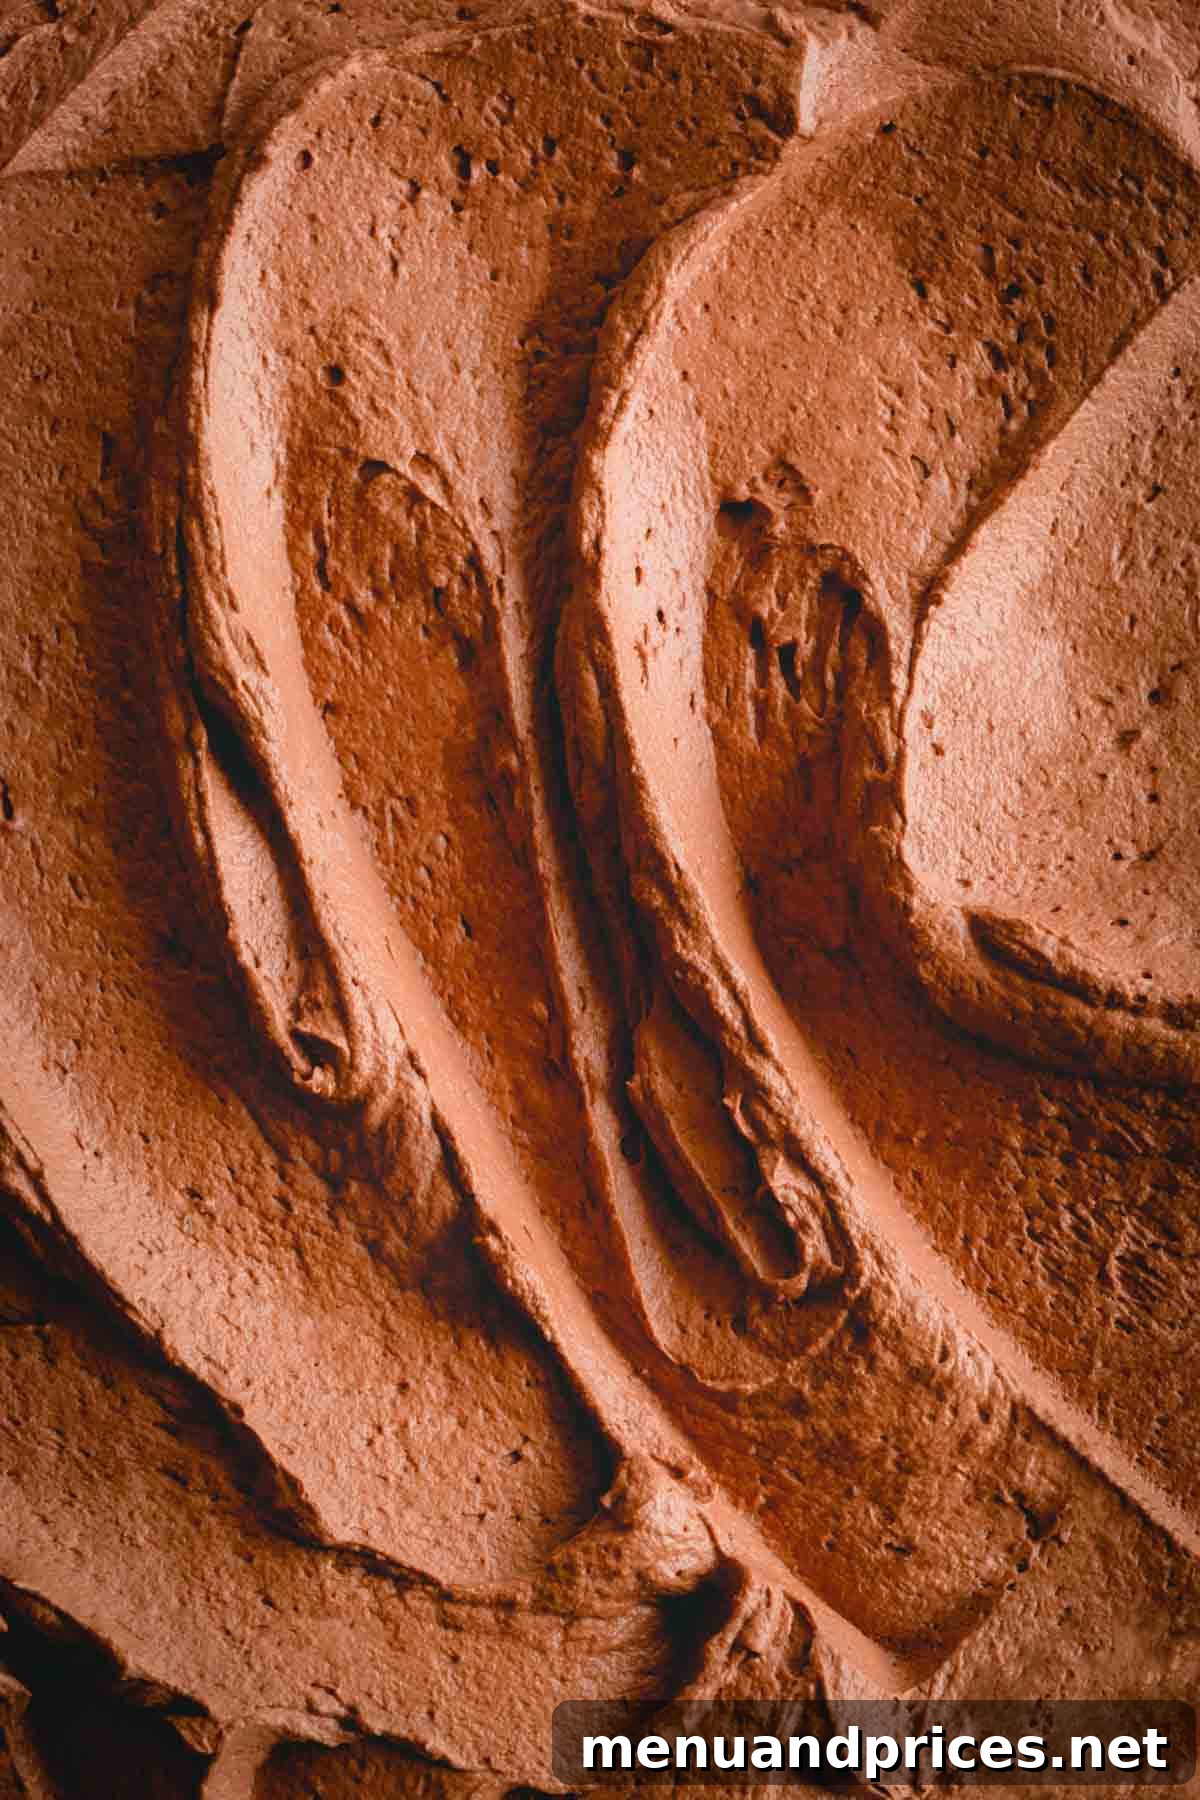
- Gently Fold in Whipped Cream: Take about one-third of the whipped cream and gently fold it into the chocolate mixture. This initial incorporation step lightens the dense chocolate base, making it much easier to fold in the remaining cream without deflating the delicate air bubbles. Once mostly combined, add the remaining whipped cream and carefully fold until no white streaks remain and the mousse is uniformly light, airy, and fluffy. Remember to be gentle to maintain the volume you’ve created.
- Chill the Mousse: Cover the finished chocolate mousse tightly with plastic wrap and refrigerate it immediately. Chilling allows it to firm up to the perfect spreadable consistency while you prepare and bake the cake.
2. Bake the Delicate Chocolate Sponge Cake
The chocolate sponge cake is the foundational element of your roll. Its elasticity, moistness, and airy texture are absolutely crucial for a successful, crack-free roll. Precision and careful technique are key in this important step.
- Prepare for Baking: Begin by preheating your oven to 350°F (175°C). Line a standard baker’s half baking sheet (approximately 18×13 inches or 45×33 cm) with parchment paper. Allow the parchment paper to overhang slightly on the longer sides; this creates “handles” for easy lifting and removal later. This step is vital to prevent sticking and aids in effortless cake transfer.
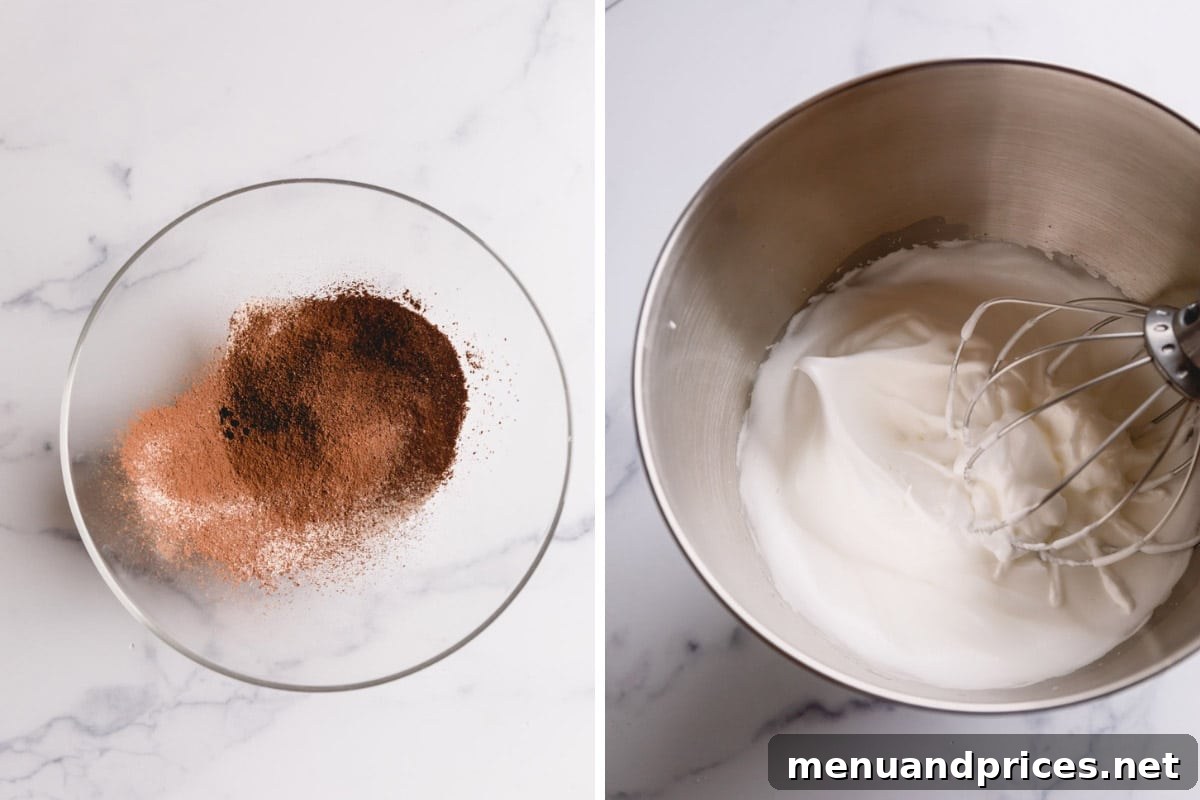
- Sift Dry Ingredients: In a medium-sized bowl, use a fine-mesh sieve to sift together the cake flour, Dutch-processed cocoa powder, baking powder, baking soda, and salt. Sifting is an essential step as it removes any lumps, aerates the dry ingredients, and ensures a light, even texture in the final cake. Set this mixture aside.
- Whip Egg Whites for Volume: In a very clean, large mixing bowl (ideally glass or stainless steel, as plastic can retain grease) with a whisk attachment, begin beating the room-temperature egg whites on medium speed until they become frothy and bubbly. Gradually add half of the granulated sugar (1/4 cup), incorporating it one tablespoon at a time, while continuously whipping. Increase the mixer speed to medium-high and continue to beat until stiff, glossy peaks form. The meringue should be firm and hold its shape when the whisk is lifted. (Remember: absolutely no fat or egg yolk should come into contact with the egg whites or they will not whip properly.)
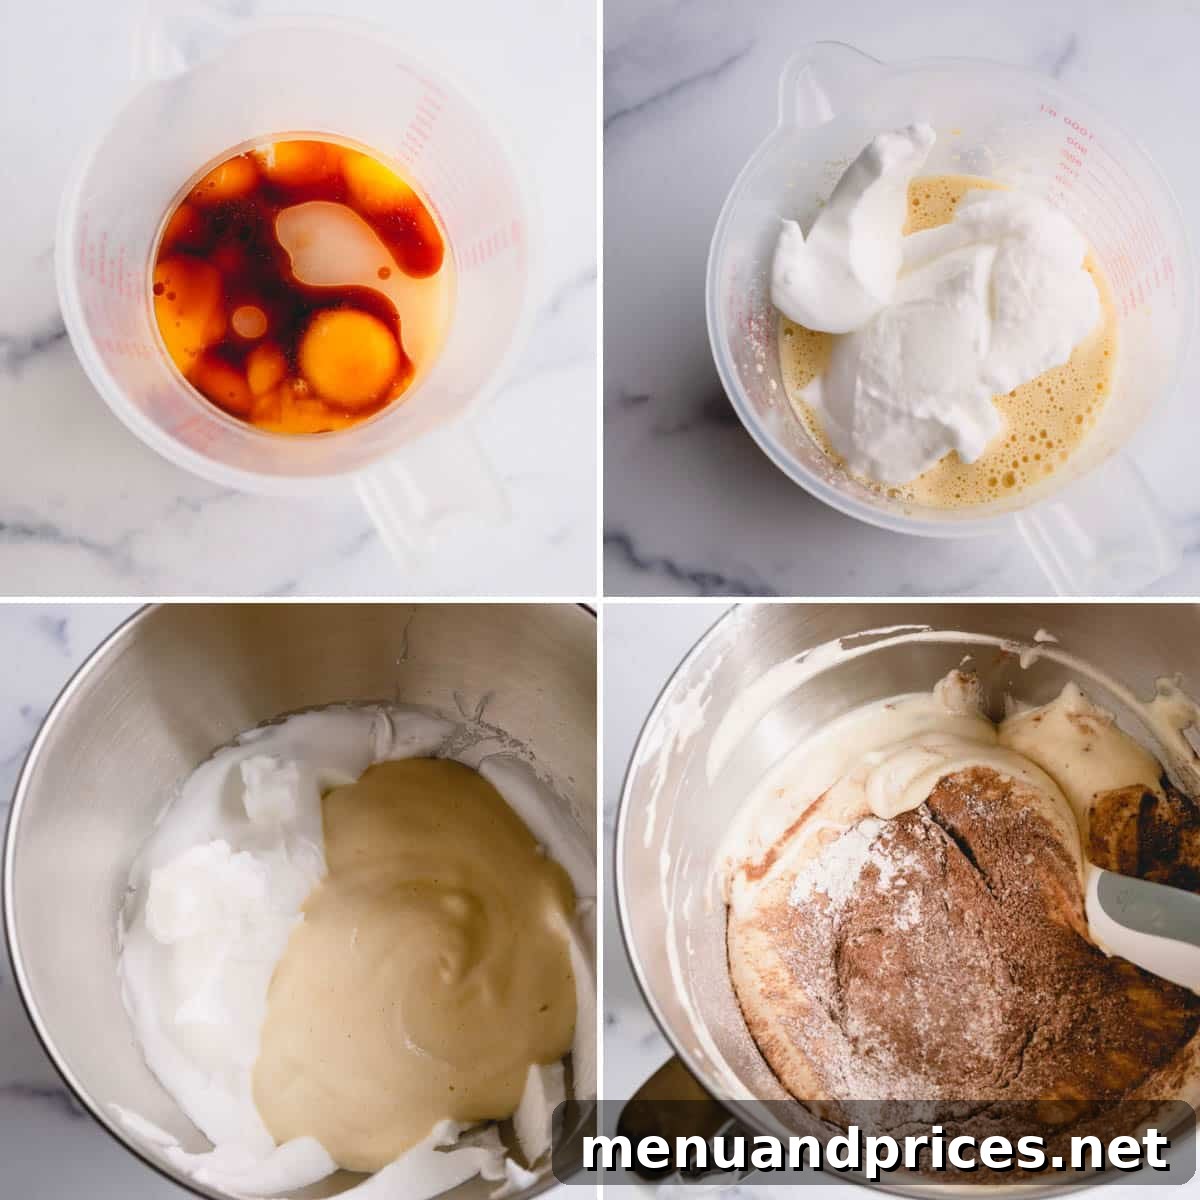
- Whip Egg Yolks for Richness: In a separate, clean bowl, ideally with the same whisk attachment (cleaned), beat the egg yolks, the remaining 1/4 cup of sugar, vegetable oil, and strong coffee. Whip this mixture vigorously on high speed until it triples in volume and lightens significantly in color, becoming a pale yellow and thick, ribbon-like consistency. This process incorporates air and creates a stable, emulsified base.
- Gently Combine Yolks and Whites: Carefully incorporate about half of the whipped egg whites into the egg yolk mixture. Use a rubber spatula to gently fold them together until they are mostly combined. This initial step lightens the denser yolk mixture, making it much easier to fold in the remaining delicate whites without deflating the precious air bubbles. Then, add the remaining whipped egg whites and continue to fold gently until the batter is smooth and homogeneous, with no visible streaks of white. Avoid overmixing at all costs, as this will collapse the air in the meringue, resulting in a dense cake.
- Fold in Dry Ingredients: Gradually add the sifted flour mixture to the batter, incorporating it in two or three additions. Use a rubber spatula to gently fold the dry ingredients into the wet batter until they are just fully incorporated and no pockets of dry flour remain. Overmixing at this stage will develop gluten, which will make the cake tough and significantly less pliable, increasing the risk of cracking when rolled.
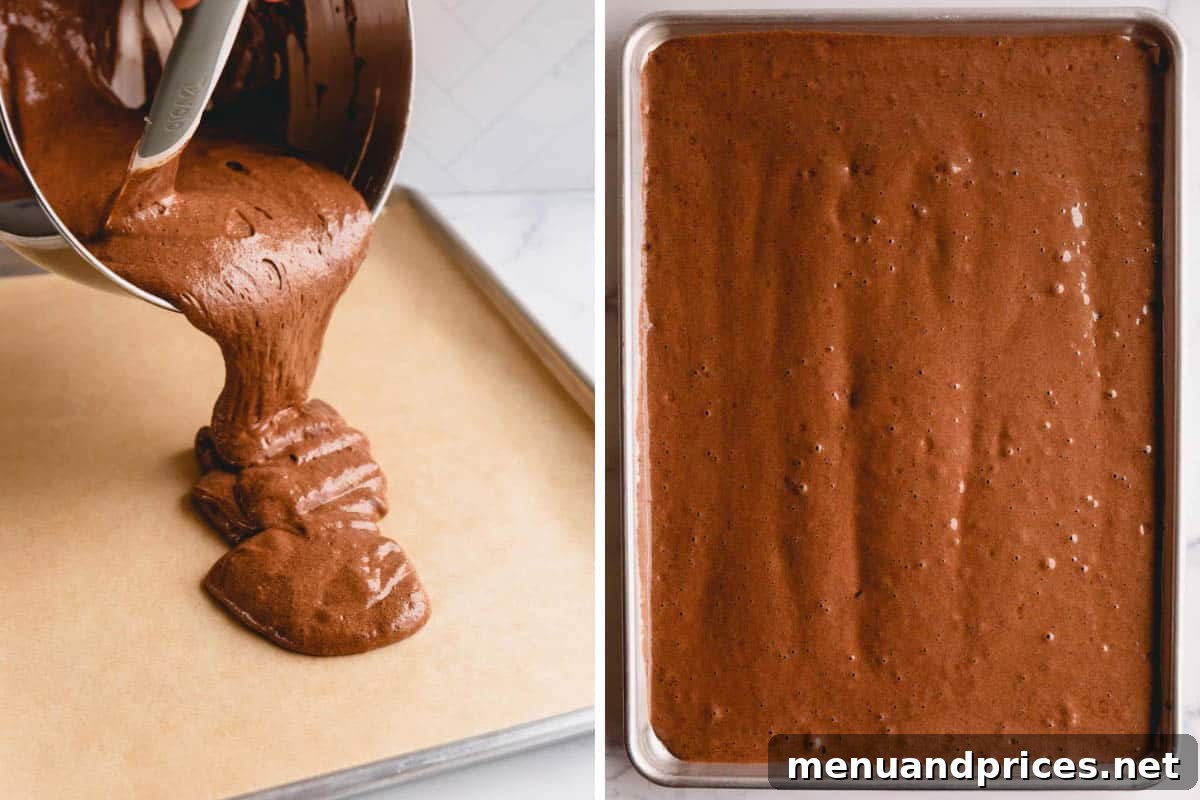
- Bake the Cake: Carefully pour the prepared chocolate cake batter evenly into the parchment-lined baking sheet. Use an offset spatula or a bench scraper to spread it into an even, thin layer, ensuring it reaches all corners of the pan. The cake layer will be relatively thin, which is exactly the desired consistency for easy and successful rolling.
- Quick Baking & Don’t Overbake: Bake for approximately 10 minutes, or until the cake springs back lightly when gently touched in the center and a toothpick inserted into the center comes out clean. Be exceptionally vigilant during this stage! Sponge cakes are thin and bake very quickly. Overbaking will dry out the cake, making it brittle, inflexible, and highly prone to cracking when you attempt to roll it.
- Prepare for Cooling and Rolling: As soon as the cake is removed from the oven, allow it to cool on a wire rack, still in the baking pan, for 5 to 10 minutes. This brief cooling period allows it to firm up slightly without drying out. Then, run a thin butter knife or flat spatula gently along the edges of the cake to loosen it from the pan. Lightly dust the top surface of the warm cake with a fine layer of unsweetened cocoa powder using a fine-mesh sieve. Immediately after dusting, carefully place a fresh, clean piece of parchment paper directly over the cocoa-dusted surface.
- The Effortless Flip Technique: To prevent the delicate warm cake from falling apart or tearing during transfer, place a large, sturdy cutting board or another flat baking sheet directly on top of the parchment paper-covered cake. In one swift, confident, and smooth motion, carefully flip the entire setup over so the cake is now inverted onto the clean surface. Gently and slowly peel off the original parchment paper from the bottom of the cake. Allow the cake to cool completely in this inverted position before proceeding with the filling.
Expert Tip for Effortlessly Flipping Your Cake
To make the cake-flipping process absolutely effortless and prevent any potential tears or mishaps, always use a large, flat, and sturdy surface like a robust cutting board or an extra baking sheet. Place it directly on top of the warm cake (with the new parchment paper already in place) before inverting. This provides complete support to the delicate cake and ensures a smooth, seamless transfer without any damage.
3. Roll the Cake with Creamy Chocolate Mousse
This is where the magic of the roll cake truly happens! A properly cooled cake and a perfectly chilled, firm mousse are the key elements for achieving a beautiful, crack-free, and uniformly spiraled roll.
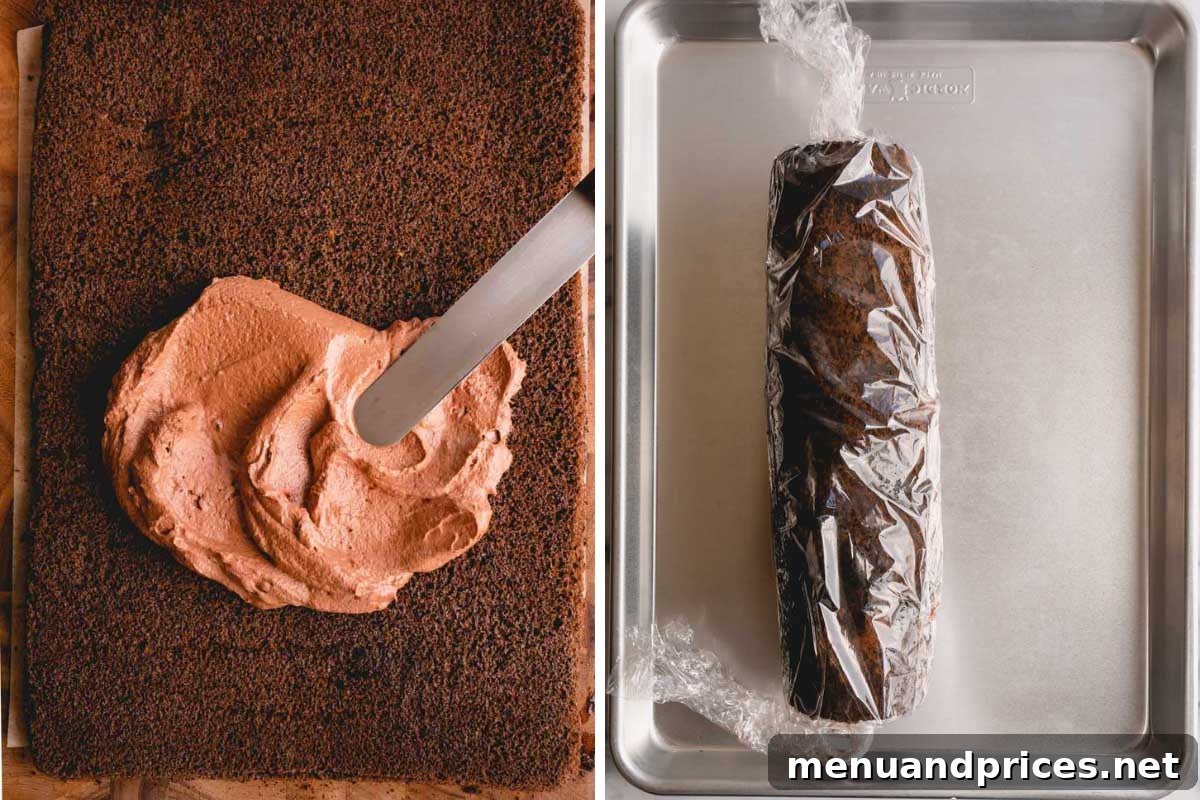
- Spread the Chilled Mousse: Once the chocolate sponge cake has completely and thoroughly cooled to room temperature (this step is absolutely critical!), retrieve your chilled chocolate mousse from the refrigerator. Evenly spread the luscious chocolate mousse over the entire surface of the cooled cake layer, making sure to leave a small border (about half an inch or 1-2 cm) around all the edges. It is paramount that you do not apply the mousse while the cake is even slightly warm, as the whipped cream in the mousse will quickly melt, resulting in a runny mess and a compromised cake structure.
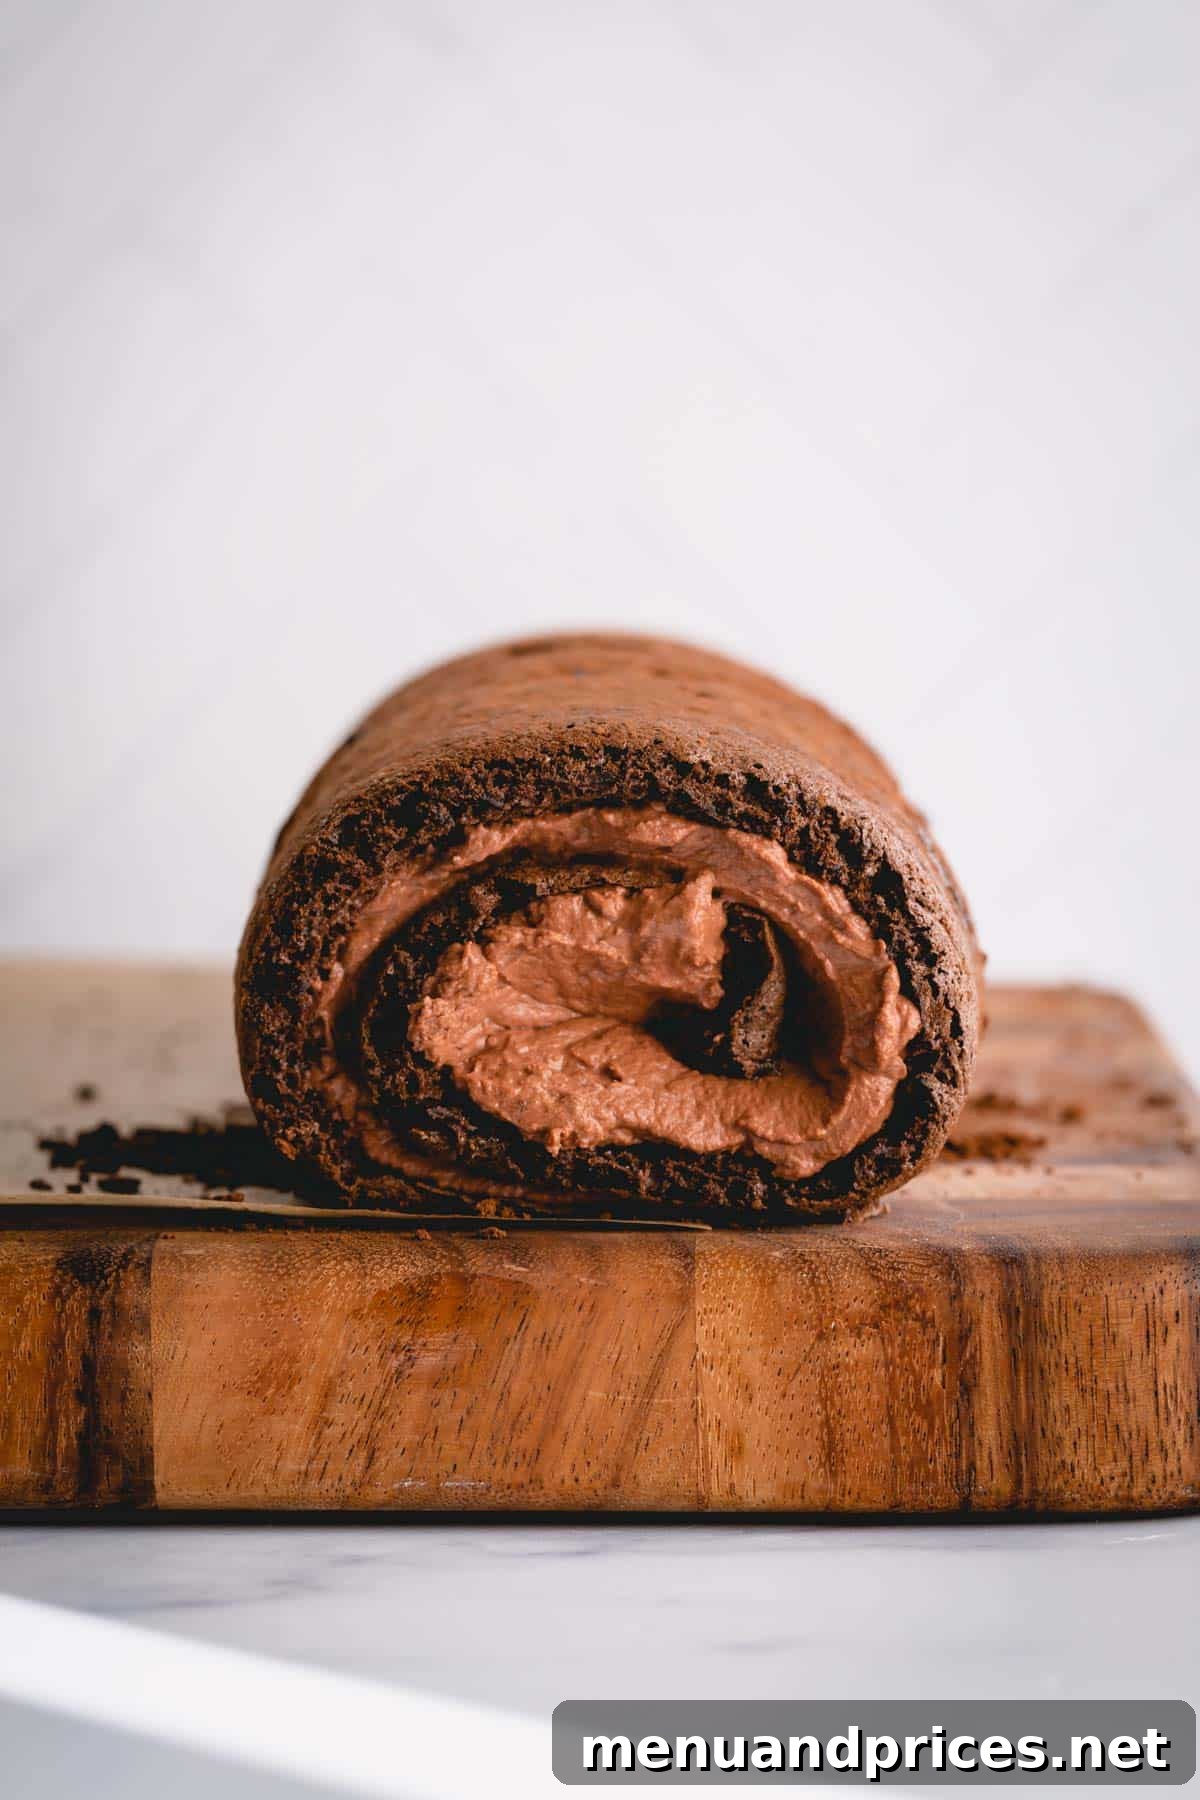
- The Rolling Technique: Starting from one of the shorter ends of the cake, begin to roll it up tightly but very gently. Use the parchment paper underneath the cake to help guide and tighten the roll as you go, ensuring the paper doesn’t get rolled into the cake itself. Apply steady, even pressure with your hands to ensure a uniform spiral, taking utmost care not to press so hard that the mousse squishes out from the ends or the delicate cake tears. Continue rolling until you reach the opposite end, forming a neat, compact log.
- Chill to Set: Once rolled, carefully wrap the entire chocolate Swiss roll tightly in a fresh piece of plastic wrap. The plastic wrap will help hold its shape securely and prevent it from drying out in the refrigerator. Refrigerate the cake for at least 1 hour, or preferably 2-3 hours, to allow the chocolate mousse to fully set and firm up within the rolled cake. This chilling time is absolutely crucial for easy, clean slicing and overall structural stability.
4. Finish with a Glossy Chocolate Ganache
The rich, smooth, and glossy chocolate ganache provides the perfect elegant finish and adds yet another layer of intense chocolate flavor to your stunning roll cake, making it truly irresistible.
- Heat Heavy Cream: Pour the heavy cream into a microwave-safe bowl. Heat it in the microwave until it is steaming hot but carefully ensure it does not boil over, typically about 1 minute. Boiling cream can cause it to separate. Alternatively, you can heat it in a small saucepan over medium heat until small bubbles just begin to form around the edges.
- Prepare the Ganache: Place the semi-sweet chocolate chips in a separate heatproof bowl. Pour the steaming hot cream directly over the chocolate chips. Let the mixture sit undisturbed for 2-3 minutes; this allows the residual heat from the cream to thoroughly melt the chocolate. After waiting, gently stir the mixture from the center outwards with a whisk or spatula until it is completely smooth, beautifully glossy, and perfectly emulsified. If any stubborn chocolate chunks remain, microwave the ganache in very short 10-15 second bursts, stirring vigorously after each interval, until it achieves a silky smooth consistency. Allow the ganache to cool slightly for a few minutes until it’s pourable but not too hot (which could melt the mousse) and not too thick.
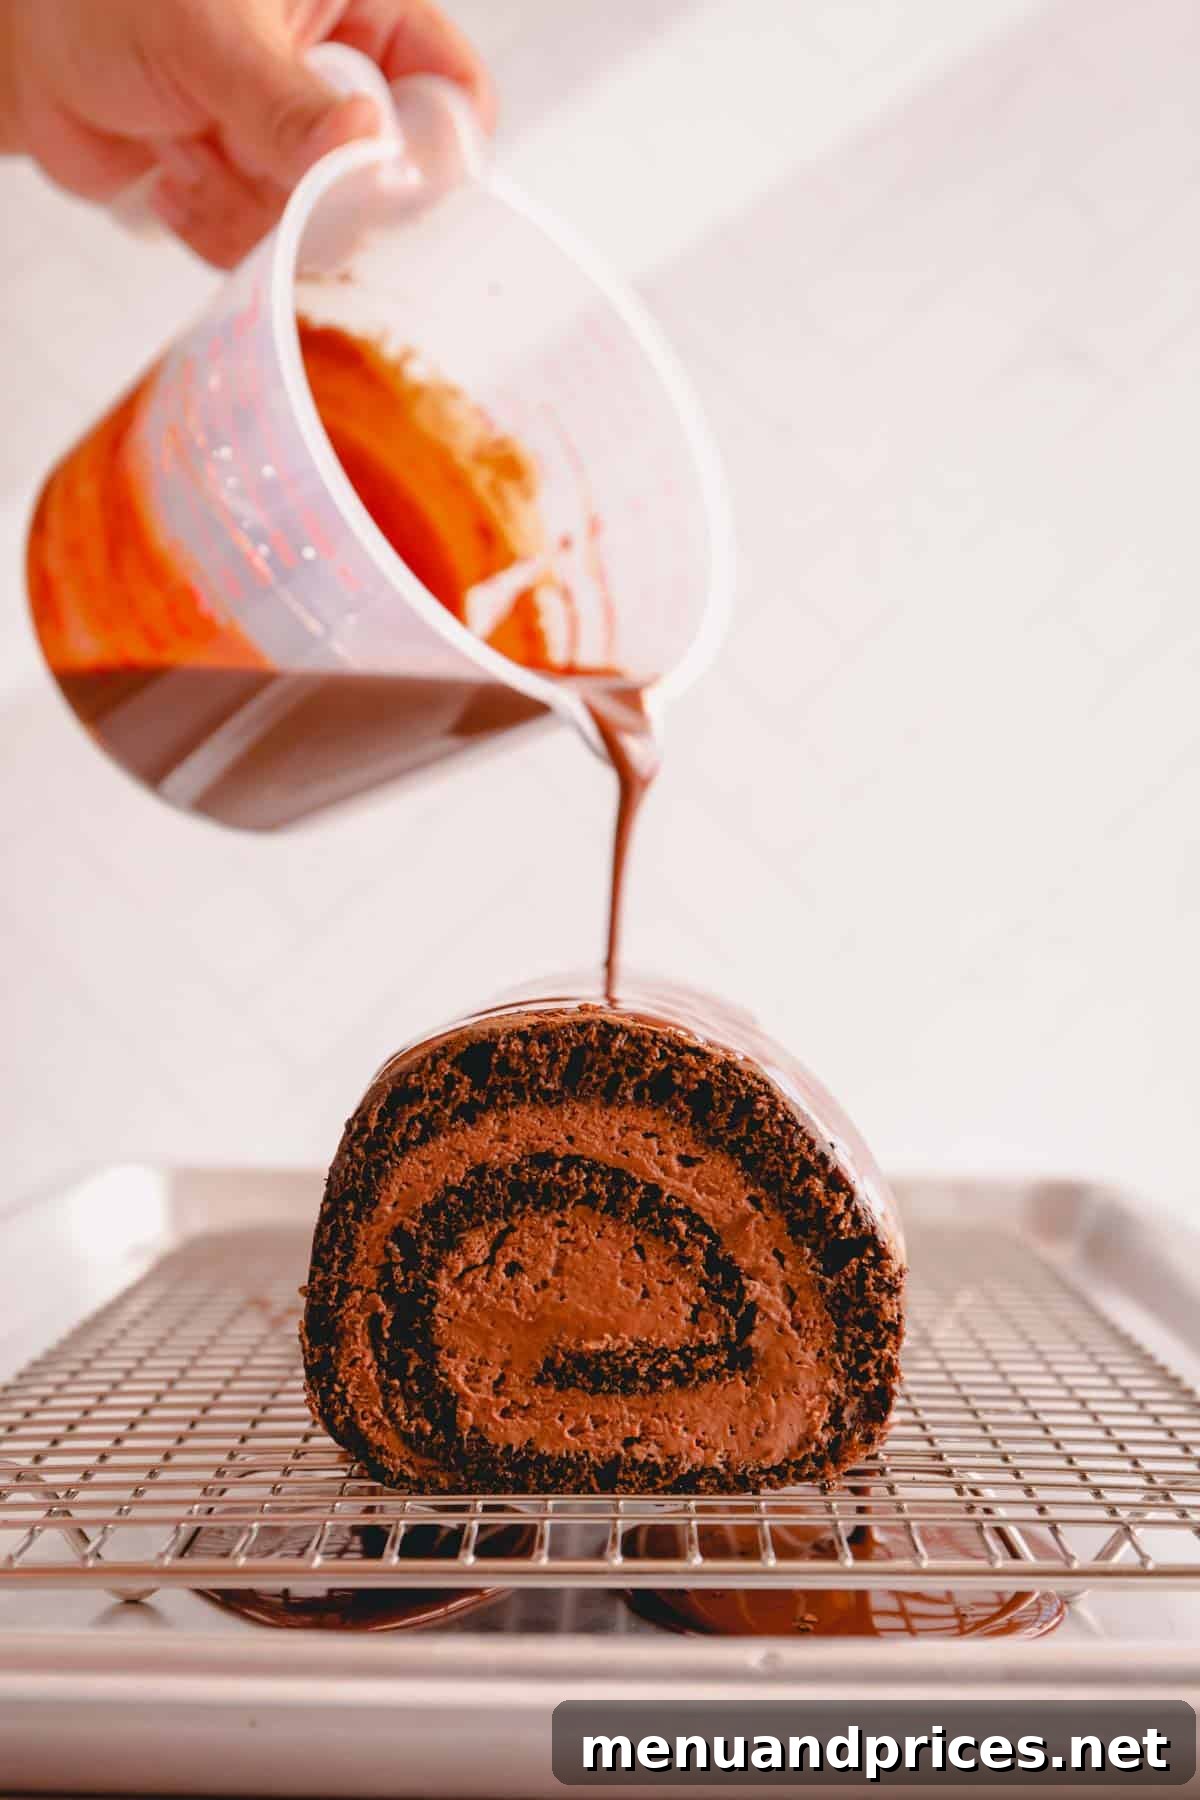
- Glaze the Cake: Carefully unwrap your well-chilled chocolate cake roll. For a clean, professional appearance, use a sharp, warm knife to trim a small portion off each end of the roll, revealing the beautiful spiral inside. Place the cake on a wire rack that has been positioned over a baking sheet (this setup will efficiently catch any excess ganache drips). Slowly and evenly pour the slightly cooled ganache over the top of the cake, ensuring it thoroughly coats all sides. Allow the excess ganache to drip off into the pan below. For an even thicker, more decadent coating, you can briefly chill the cake and apply a second layer of ganache.
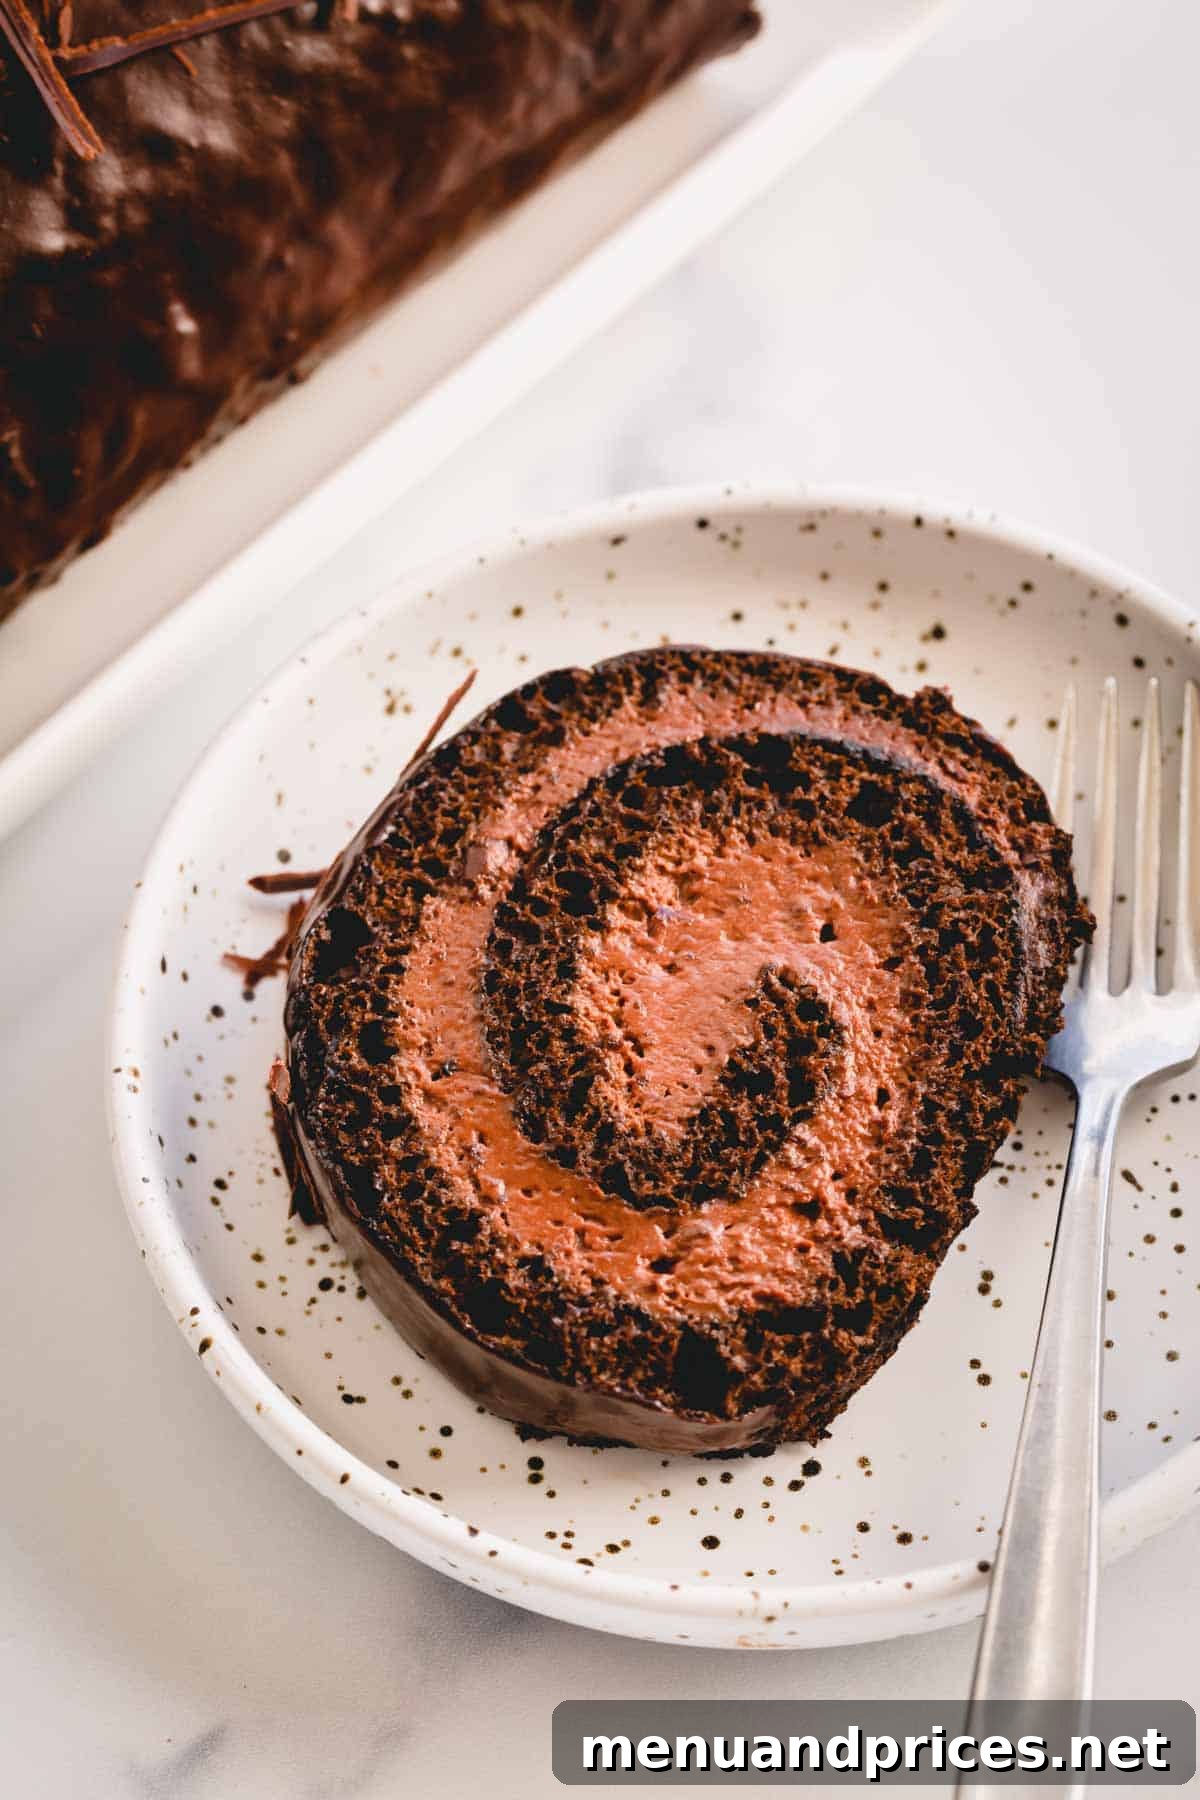
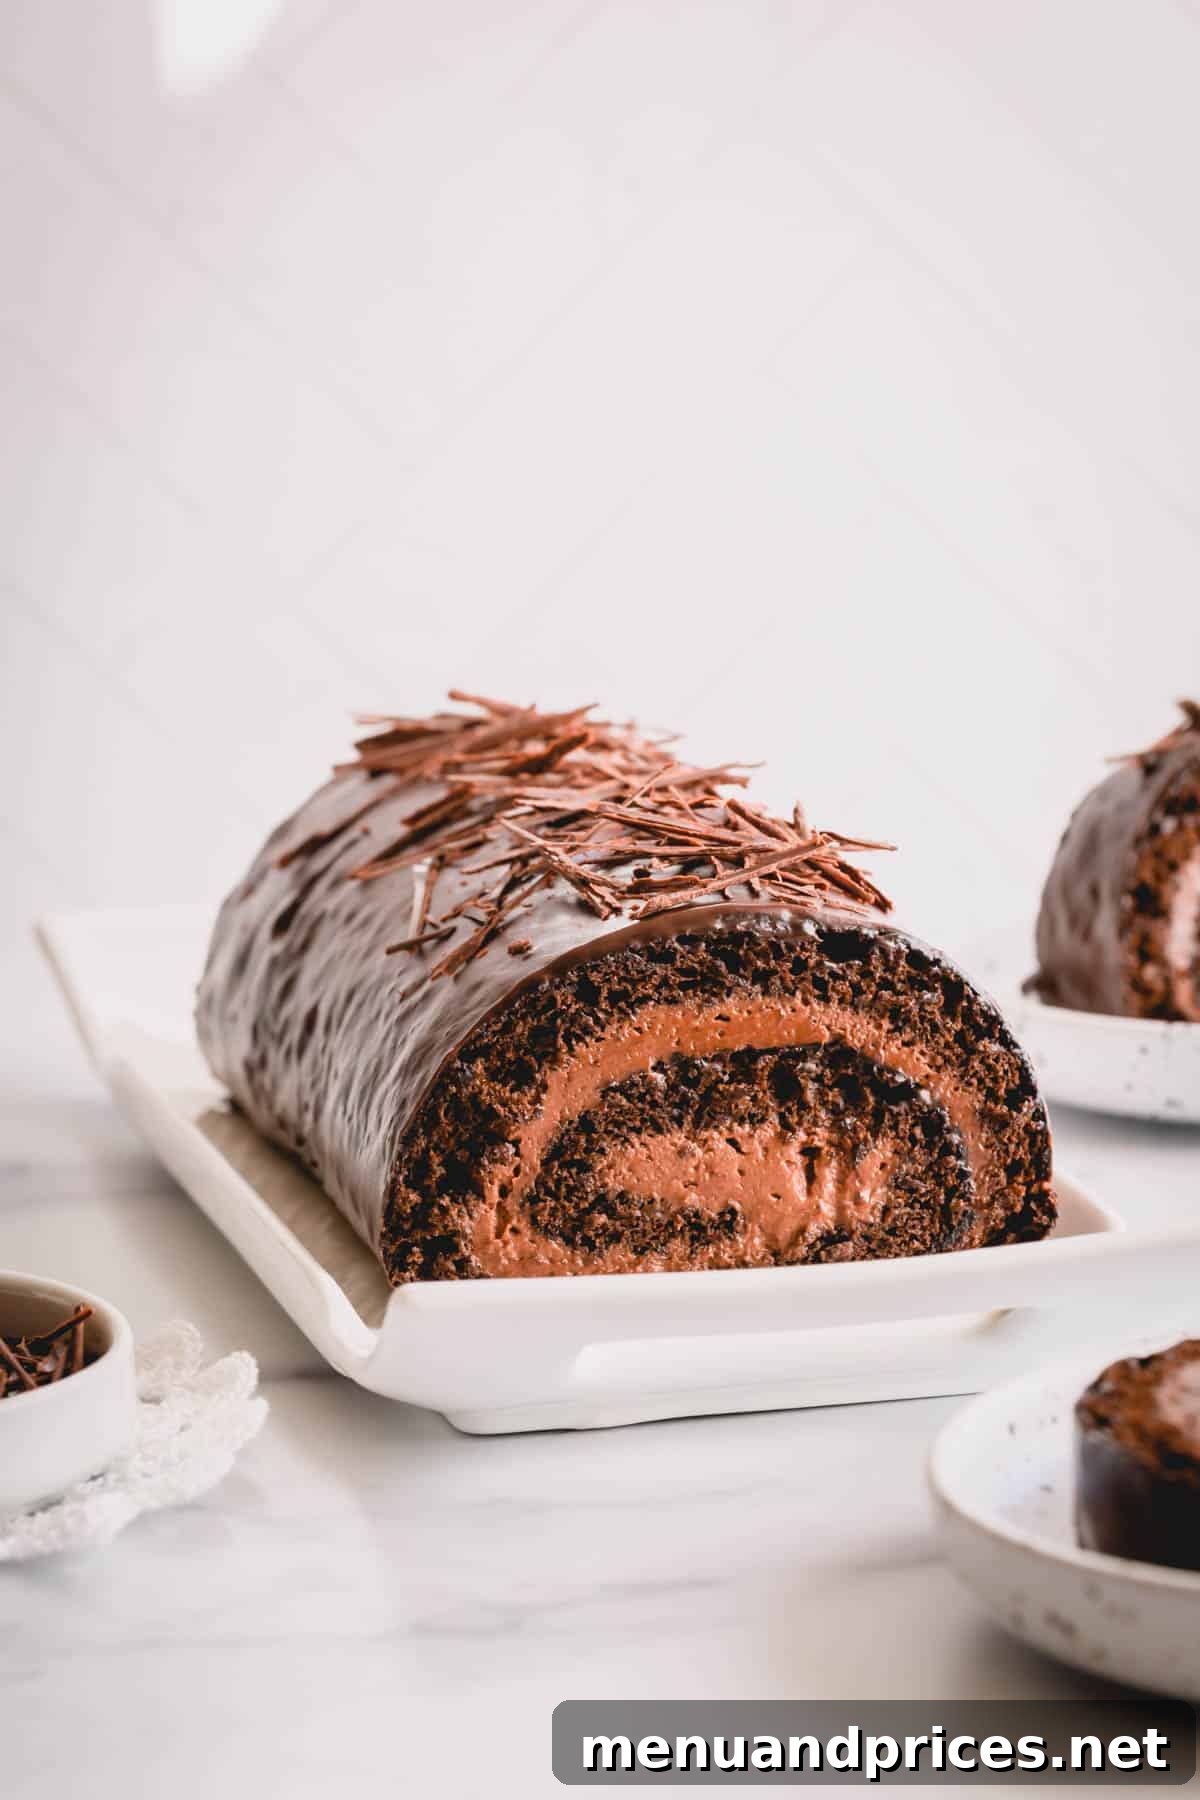
- Decorate and Serve: While the ganache is still slightly wet and pliable, this is your opportunity to decorate your masterpiece. Popular options include delicate shaved chocolate, elegant chocolate curls, festive sprinkles, or even a simple dusting of cocoa powder for a classic look. Allow the ganache to set completely, either at cool room temperature or in the refrigerator, before artfully slicing and serving your stunning chocolate roll cake.
Expert Tips for Chocolate Roll Cake Success
Achieving a perfect, crack-free chocolate roll cake with a beautifully light sponge and creamy filling is absolutely within your reach! Keep these crucial expert tips in mind as you embark on your baking journey to ensure a flawless and delicious outcome every time:
- Egg Temperature is Crucial: It is significantly easier to separate cold eggs because their yolks are firmer and less likely to break or rupture. However, for maximum volume and stability, egg whites whip up best and achieve the most impressive volume when they are at room temperature. Therefore, separate your eggs straight from the fridge, then allow the egg whites to sit out on the counter for at least 30 minutes (or even up to an hour) before you begin whipping them.
- Fat is the Enemy of Whipped Egg Whites: Even a tiny speck of egg yolk, residual grease, or oil can completely prevent egg whites from whipping properly to stiff peaks. Be extremely meticulous and careful when separating eggs to avoid any yolk contamination. Always use very clean, grease-free bowls and whisks. For whipping egg whites, it’s highly recommended to use glass or stainless steel bowls, as plastic bowls can sometimes retain residual grease even after thorough washing.
- Always Sift Your Dry Ingredients: Cake flour, in particular, tends to clump easily due to its fine texture. Sifting the flour, cocoa powder, and all leavening agents together ensures a completely lump-free mixture. This step is also crucial as it helps to aerate the ingredients, which prevents overmixing of the batter later on – a common culprit for tough cakes.
- Do NOT Overbake the Sponge Cake: This is arguably the single most critical tip for achieving a rollable cake that won’t crack! Sponge cake is inherently thin and bakes very quickly, typically requiring only about 8-12 minutes in the oven. An overbaked sponge cake will become excessively dry, brittle, and will inevitably crack and break apart when you try to roll it. Watch it diligently and remove it from the oven as soon as it springs back lightly when touched and a toothpick inserted into the center comes out clean.
- Opt for Vegetable Oil Over Butter: While butter certainly adds flavor, vegetable oil is superior for the delicate structure required in roll cakes. Butter solidifies as it cools, making the cake less pliable and significantly more prone to cracking. Vegetable oil, on the other hand, remains liquid at room temperature, which keeps the cake consistently moist, tender, and flexible, allowing for easy, graceful rolling.
- Ensure Heavy Cream for Mousse is Ice Cold: Just like egg whites, heavy cream whips best and achieves maximum volume and stability when it’s very cold. Ensure your heavy cream is straight from the refrigerator, and for even better results, consider chilling your mixing bowl and whisk attachment in the freezer for 10-15 minutes before you begin whipping. Warm cream simply will not whip to the desired volume and stiff consistency, leading to a runny mousse.
- Cool the Cake Completely Before Filling: This tip cannot be stressed enough! The delicious chocolate mousse filling is primarily made of whipped cream, which is highly sensitive to heat. If you spread the mousse onto a cake that is still warm or even slightly warm, the whipped cream will promptly melt, turning your beautiful mousse into a runny, unstable mess, compromising both the structure and texture of your entire roll cake. Patience in cooling is a virtue here.
- Master Gentle Folding: When combining the whipped egg white mixture with the egg yolk mixture, and subsequently when adding the dry ingredients, always use a gentle folding technique with a rubber spatula. The primary goal is to carefully incorporate all ingredients without deflating the precious air you’ve meticulously whipped into the eggs. This air is absolutely vital for the cake’s light, tender, and airy texture, which is essential for a successful roll.
By diligently following these expert tips, you’ll be well on your way to baking a stunning, perfectly rolled, and utterly delicious chocolate roll cake that is sure to impress everyone who tastes it!
Storing and Freezing Your Chocolate Roll Cake
Proper storage is absolutely essential to maintain the freshness, exquisite taste, and delicate quality of your homemade chocolate roll cake, especially given its creamy chocolate mousse filling. Here’s how to best keep your decadent dessert at its peak:
- Refrigeration for Freshness: Because the luxurious chocolate mousse filling contains whipped cream and other dairy ingredients, the entire chocolate jelly roll cake must be stored in the refrigerator. To keep it fresh and prevent it from drying out or absorbing any unwanted refrigerator odors, wrap the cake tightly in plastic wrap or place it securely in an airtight container. When stored correctly, your chocolate roll cake will remain fresh and delicious for up to 3 days.
- Freezing for Longer Storage: Chocolate roll cakes are remarkably freezer-friendly, making them an excellent dessert option for preparing in advance or saving any delightful leftovers for later enjoyment.
- Initial Freeze (Unwrapped): First, place the ganache-covered cake directly into the freezer, uncovered, for approximately 30-60 minutes, or until the chocolate ganache has completely solidified and is firm to the touch. This crucial step prevents the plastic wrap from sticking to and potentially marring the beautiful glaze.
- Double Wrap for Protection: Once the ganache is firm, wrap the cake tightly and securely in a layer of plastic wrap, ensuring no air gaps. Follow this with a second, outer layer of heavy-duty aluminum foil. This double layer provides superior protection against freezer burn and preserves the cake’s texture and flavor.
- Label and Freeze: Clearly label the package with the date of freezing. Your chocolate roll cake can be safely frozen for up to two months without any significant loss of quality, taste, or texture.
- Thawing Process: To properly thaw, transfer the wrapped frozen cake from the freezer to the refrigerator and allow it to defrost slowly overnight. A gradual thaw ensures the cake retains its moisture and texture. Once fully thawed, unwrap, and it’s perfectly ready to slice and serve.
By diligently following these comprehensive storage and freezing guidelines, you can ensure that you can enjoy your beautiful and delicious chocolate roll cake whenever the craving strikes, or have a ready-made dessert for any impromptu celebration!
Frequently Asked Questions About Chocolate Roll Cakes
What are the different names for a rolled cake?
A rolled cake is known by several delightful and charming names across various cultures and regions. These include Swiss roll, jelly roll, cream roll, roulade, or even a Swiss log. Regardless of the specific name used, it universally refers to a type of sponge cake that is baked in a thin, rectangular layer, then spread with a sweet filling (such as whipped cream, fruit jam, or chocolate mousse), and finally carefully rolled into an elegant cylindrical shape.
Why do my cake rolls crack when I try to roll them?
Cracked cake rolls are a very common frustration for many bakers, but the most frequent and significant culprit is often overbaking. An overbaked sponge cake becomes excessively dry, brittle, and loses its essential pliability, making it stiff and prone to cracking. To prevent cracking, ensure you bake the cake just until a toothpick inserted into the center comes out clean – no more! Another helpful tip is to use a cake recipe that specifically calls for vegetable oil instead of butter. Vegetable oil keeps the cake softer and more flexible as it cools, whereas butter solidifies, making the cake more rigid and unfortunately, more susceptible to breakage during the rolling process.
Can I make a chocolate roll cake ahead of time for a party?
Absolutely! This chocolate roll cake is an excellent dessert to prepare in advance, making it perfect for party planning or busy schedules. You can bake the chocolate sponge cake and prepare the chocolate mousse filling a day ahead, storing them separately and properly covered in the refrigerator. Assemble the entire cake the day before you plan to serve it, allowing it ample time (at least 2-3 hours, or preferably overnight) to chill and set beautifully in the refrigerator. The ganache can also be applied the day before. This advanced preparation strategy helps immensely with party planning and ensures the flavors meld together wonderfully, enhancing the overall taste and texture.
What other delicious fillings can I use for this versatile chocolate sponge cake?
While the creamy chocolate mousse filling is undeniably heavenly, this versatile chocolate sponge cake pairs exceptionally well with a wide array of other delightful fillings! You can certainly get creative and customize this classic dessert to your personal taste. Consider a simple, light, and airy vanilla whipped cream for a less rich option, a tangy raspberry or strawberry jam for a delightful fruity contrast, a decadent cream cheese frosting, or even a different flavored buttercream such as espresso, mint, or peanut butter. The possibilities are truly endless, allowing you to tailor this stunning dessert to any preference or occasion.
How do I get a clean slice of roll cake?
To achieve perfectly clean, elegant slices of your chocolate roll cake, ensure the cake is thoroughly chilled and set, preferably for several hours or overnight in the refrigerator. Before slicing, warm a sharp, thin knife under hot water, then wipe it completely dry. Make each cut with a single, firm downward motion. Between each slice, repeat the process: warm the knife, wipe it clean, and then make your next cut. This technique helps to prevent the ganache and mousse from sticking to the knife and creates beautifully neat slices every time.
More Delightful Roll Cake Recipes to Explore
If you’ve thoroughly enjoyed mastering the art of this chocolate roll cake and are looking to expand your baking horizons, you might be interested in trying other delightful variations of this charming and versatile dessert. Here are a few more roll cake recipes from our collection that are equally delicious and perfect for expanding your baking repertoire and impressing your guests:
- Strawberry Matcha Roll Cake
- Snow White Roll Cake with White Chocolate Mousse
- Berrylicious Roll Cake: A Comprehensive Guide to Making Any Roll Cake
- Chocolate Roll Cake with Raspberry Mousse Filling
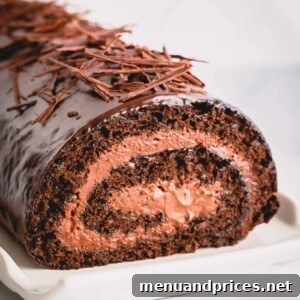
Death by Chocolate Roll Cake (Ultimate Chocolate Swiss Roll)
Shinee Davaakhuu
1 hour
10 minutes
10 minutes
1 hour
10 minutes
2 hours
30 minutes
10
slices
Comment
Print Recipe
Ingredients
For Chocolate Mousse Filling:
- ¼ cup (60 ml) hot water
- 2 tablespoons (15 g) unsweetened cocoa powder (Dutch-processed or natural, for mousse)
- ¼ teaspoon instant espresso coffee
- ¾ cup (130 g) semi-sweet chocolate chips
- 1 cup (240 ml) heavy cream (cold)
- 1 tablespoon (15 g) granulated sugar
For Chocolate Sponge Cake:
- 4 large eggs (separated, see notes)
- ½ cup (100 g) granulated sugar (divided)
- 3 tablespoons (50 g) vegetable oil
- 2 tablespoons (30 ml) strong coffee (or espresso, see notes)
- ½ cup (60 g) cake flour (see notes for substitute)
- 3 tablespoons (30 g) Dutch processed cocoa powder (do not substitute)
- 1 teaspoon baking powder
- ½ teaspoon baking soda
- ¼ teaspoon salt
For Chocolate Ganache:
- ½ cup (120 ml) heavy cream
- 4 ounce (120 g) semi-sweet chocolate chips
Equipment
-
Electric hand mixer or stand mixer with whisk attachment
-
Baker’s half baking sheet (18×13 inch)
Instructions
To make the Chocolate Mousse Filling:
-
In a small bowl, dissolve cocoa powder and instant espresso powder in hot water until smooth.
-
In a double boiler, gently melt semi-sweet chocolate chips until smooth. Remove from heat and cool slightly.
-
Stir the dissolved cocoa mixture into the melted chocolate until well combined.
-
In a separate mixing bowl with the whisk attachment, whip cold heavy cream and granulated sugar until hard peaks form.
-
Gently fold one-third of the whipped cream into the chocolate mixture to lighten it, then fold in the remaining whipped cream until no white streaks remain. Cover and refrigerate.
To make the Chocolate Sponge Cake:
-
Prepare Eggs: Separate egg yolks from egg whites. Store whites at room temperature for 30 minutes. (Cold eggs are easier to separate.)
-
Preheat oven to 350°F (175°C). Line a baker’s half baking sheet (18×13 inches) with parchment paper.
-
In a small bowl, sift together cake flour, cocoa powder, baking powder, baking soda, and salt.
-
In a mixing bowl, whisk egg yolks, ¼ cup sugar, vegetable oil, and coffee until tripled in size and light in color.
-
In another clean mixing bowl, beat room-temperature egg whites on medium speed until frothy.
-
Gradually add the remaining ¼ cup sugar, one tablespoon at a time, to the egg whites. Increase speed to medium-high and beat until stiff peaks form.
-
Gently fold half of the whipped egg whites into the yolk mixture until smooth, then fold in the remaining egg whites until just combined, being careful not to deflate.
-
Add the sifted flour mixture to the batter and gently fold until no dry flour is visible. Avoid overmixing.
-
Bake: Pour batter into the prepared baking sheet and spread evenly with a bench scraper or offset spatula.
-
Bake for about 10 minutes, or until a toothpick inserted into the center comes out clean. Do not overbake.
-
Cool the cake on a wire rack for 5-10 minutes. Loosen edges with a knife. Dust with cocoa powder, place new parchment paper on top, then flip onto a clean surface (e.g., large cutting board). Peel off original parchment paper and cool completely.
To Roll the Cake:
-
Once the cake is completely cool, spread the chilled chocolate mousse evenly over the cake layer. Tightly roll the cake from one short side. Wrap in plastic wrap and refrigerate for at least 1 hour to set.
To make Chocolate Ganache:
-
Heat heavy cream in the microwave until hot (about 1 minute), ensuring it doesn’t boil over.
-
Pour hot cream over chocolate chips. Let sit for 2 minutes, then stir until smooth. If lumps remain, microwave in 15-second increments, stirring after each, until smooth. Cool slightly.
-
Unwrap the chilled cake roll, trim both ends for a neat finish, and place it on a wire rack over a baking sheet.
-
Pour the ganache evenly over the top of the cake, allowing excess to drip off.
-
Decorate with shaved chocolate, chocolate curls, or sprinkles before the ganache sets. Let ganache set completely before slicing and serving.
⭐️ Did you make this recipe?
Please leave a review and let us know how you liked it!
Chef’s Notes & Tips
Fat-Free Egg Whites: Ensure no egg yolk or any grease comes into contact with the egg whites or their mixing bowl/whisk. Fat prevents whites from whipping properly. Use glass or stainless steel bowls, avoid plastic.
Coffee in Cake: Strong coffee or instant espresso enhances chocolate flavor without making the cake taste like coffee. If needed, you may use any kind of milk instead, but the chocolate flavor won’t be as intense.
Cake Flour Importance: Sifting cake flour is crucial as it clumps easily. Cake flour’s low protein content ensures a tender, pliable sponge that resists cracking.
Cake Flour Substitute: If you don’t have cake flour, you can make a substitute: For every 1 cup of all-purpose flour, remove 2 tablespoons, and replace with 2 tablespoons of cornstarch. Sift this mixture thoroughly before using.
Dutch-Processed Cocoa: Do not substitute natural cocoa powder for Dutch-processed cocoa powder in the sponge cake recipe. Their chemical properties differ significantly with leavening agents.
Storing Your Roll Cake:
– Keep the chocolate jelly roll cake wrapped in plastic and refrigerated for up to 3 days. Mousse-filled cakes require refrigeration.
– This cake is freezer-friendly! Freeze the ganache-covered cake until firm, then wrap tightly in plastic wrap and aluminum foil. Store for up to two months. Thaw in the refrigerator overnight.
Nutrition Facts
1 slice
398kcal
31g
6g
29g
21g
193mg
Dessert
American, Austrian, Swiss
Did you make this?
Leave a rating and your feedback. Thank you!