

Spooktacularly Sweet: Easy Ghost Meringue Cookies for a Hauntingly Good Halloween!
As the leaves begin to turn and a crisp chill fills the autumn air, October arrives, bringing with it the most anticipated holiday for many: Halloween! It’s a season brimming with magic, costumes, and, of course, delightful treats. What better way to celebrate this fun-filled month than by baking a new, exciting recipe that’s both easy and incredibly festive? This year, I’m thrilled to share a recipe for the most adorable and delicious Ghost Meringue Cookies, perfect for adding a touch of spooky sweetness to your celebrations.
These ethereal, melt-in-your-mouth meringues are not only incredibly simple to make but also offer a delightful visual appeal, transforming simple ingredients into charming little ghosts ready to haunt your dessert table. Whether you’re planning a big Halloween bash, a cozy family movie night, or simply looking for a fun activity with the kids, these ghost cookies are guaranteed to bring smiles and maybe a few playful “boos!”
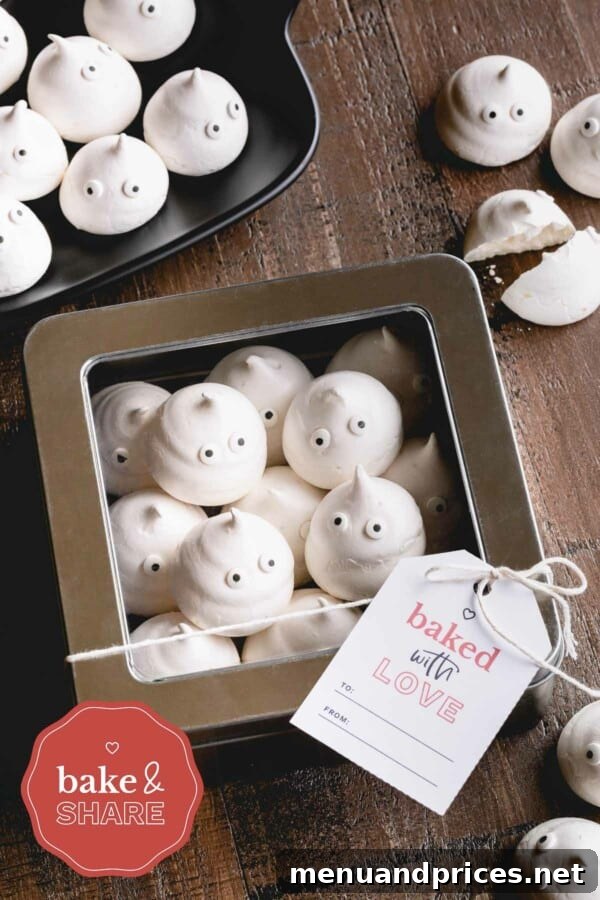
Get ready to whisk up some magic in your kitchen as we dive into creating these light-as-air confections. This recipe is designed to be straightforward, ensuring even novice bakers can achieve impressive results. From whipping the perfect meringue to piping those ghostly shapes, every step is explained to help you create a batch of these hauntingly cute treats that will be the talk of the season.
Why Choose Ghost Meringue Cookies for Halloween?
Meringue cookies are a fantastic choice for Halloween for several compelling reasons. Firstly, their natural white color makes them an ideal canvas for creating spooky ghost shapes. With just a few simple swirls of a piping bag and a couple of melted chocolate dots for eyes, you can bring these friendly spirits to life. Their delicate, crisp texture and sweet vanilla flavor are universally loved, making them a crowd-pleaser for all ages.
Secondly, meringue cookies are surprisingly light and airy, offering a welcome contrast to the heavier, richer desserts often associated with holiday baking. They’re fat-free and relatively low in calories, allowing you to indulge a little without feeling overly guilty. They also store well, making them perfect for preparing ahead of a busy Halloween night.
Finally, the process of making meringue can be incredibly therapeutic and fun, especially when shared with loved ones. It’s a wonderful opportunity to involve children in the kitchen, letting them help with piping the ghosts or drawing on the eyes. The transformation of simple egg whites and sugar into these delightful confections feels like a little bit of culinary magic.
Essential Ingredients for Your Ghostly Creations
One of the beauties of meringue cookies is the simplicity of their ingredients. You likely already have most of these staples in your pantry:
- Egg Whites: The star of the show! Ensure they are at room temperature for optimal whipping volume. Separation from the yolks must be meticulous; even a tiny bit of yolk can prevent the whites from stiffening.
- Granulated Sugar: Provides sweetness and stability to the meringue. Fine granulated sugar is preferred as it dissolves more easily.
- Cream of Tartar (or Lemon Juice/White Vinegar): A crucial stabilizer that helps the egg whites hold their structure and reach stiff peaks.
- Vanilla Extract: Adds a lovely aromatic warmth to the cookies. Feel free to experiment with other extracts like almond or peppermint for a different flavor profile.
- Melted Chocolate (or Edible Food Marker): For creating those adorable ghost eyes. Dark chocolate works best for a striking contrast.
Step-by-Step Guide to Baking Perfect Ghost Meringues
Let’s get baking! Follow these detailed steps to create your own batch of delightful ghost meringues.
1. Prepare Your Workspace and Oven
Start by preheating your oven to a low temperature, typically around 200-225°F (95-107°C). This low heat is essential for drying out the meringues rather than baking them, ensuring they become crisp all the way through without browning. Line several baking sheets with parchment paper. This prevents sticking and makes for easy cleanup. Prepare a piping bag fitted with a large round tip (or simply snip off the end of a Ziploc bag for a homemade version).
2. Whip the Egg Whites to Stiff Peaks
In a very clean, grease-free bowl (preferably metal or glass), add the room temperature egg whites. Using an electric mixer on medium-low speed, begin to whip the egg whites until they become foamy. Add the cream of tartar (or lemon juice/vinegar) at this stage. Gradually increase the speed to medium-high. Once soft peaks form (the whites will hold their shape briefly when the whisk is lifted), slowly add the granulated sugar, one tablespoon at a time, while the mixer is still running. This gradual addition allows the sugar to dissolve properly, resulting in a stable and glossy meringue. Continue whipping until very stiff, glossy peaks form. When you lift the whisk, the meringue should stand straight up and feel smooth when rubbed between your fingers.
3. Pipe Your Ghost Shapes
Gently fold in the vanilla extract. Transfer the meringue mixture to your prepared piping bag. Hold the piping bag perpendicular to the baking sheet and pipe small, dollop-like ghosts. Start by squeezing firmly to create the base, then release pressure and pull upwards to form the ghost’s tail or head. You can vary the sizes for different ghost personalities! Leave about an inch of space between each ghost as they won’t spread much, but you want good air circulation.
4. Bake and Dry to Perfection
Place the baking sheets in your preheated oven. Bake for approximately 1.5 to 2 hours, or until the meringues are completely dry and easily lift off the parchment paper. The key here is patience; resist the urge to open the oven door during the baking process, as sudden temperature changes can cause the meringues to crack or collapse. Once the baking time is complete, turn off the oven and leave the meringues inside to cool completely, ideally for another hour or two, or even overnight. This slow cooling process prevents cracking and ensures they are perfectly crisp.
5. Decorate Your Spooky Friends
Once the meringue ghosts are fully cooled and crisp, it’s time for the fun part: decorating! Melt a small amount of dark chocolate in a double boiler or in the microwave in short bursts, stirring until smooth. Using a toothpick, a small piping bag with a tiny hole, or a food-safe brush, carefully dab two small dots on each ghost to create their eyes. You can get creative here – add a little mouth, or even some tiny chocolate eyebrows for more expressive ghosts! Allow the chocolate to set completely before handling or storing the cookies.
Tips for Meringue Success
- Cleanliness is Key: Any trace of fat or grease (from egg yolks, oily bowls, or utensils) will prevent your egg whites from whipping properly. Ensure all equipment is impeccably clean.
- Room Temperature Egg Whites: They whip up with more volume and stability.
- Don’t Rush the Sugar: Adding sugar slowly allows it to dissolve fully, preventing gritty meringues and ensuring a stable structure.
- Low and Slow Baking: Meringues don’t bake; they dry. A low oven temperature for a longer period is crucial for crisp, hollow centers.
- Humidity is the Enemy: Meringues absorb moisture from the air, which can make them sticky or soft. Try to bake on a dry day, and store them in an airtight container immediately after they cool.
Sharing the Joy (and Your Creations!)
I’d absolutely love for you to join me in baking these delightful Ghost Meringue Cookies and experience the joy of creating something so fun and delicious! Baking is more than just making food; it’s about sharing love, creating memories, and connecting with others. And if you do decide to whip up a batch, please don’t hesitate to share your thoughts, tips, and any feedback you might have. Your experiences are incredibly valuable and inspiring!
What truly brightens my day is seeing your unique creations come to life in your own kitchens. So, if you manage to capture your ghostly masterpieces on camera, I’d be so appreciative if you could email me your photos. Alternatively, you can share them on your favorite social media platforms like Instagram or Facebook. Just be sure to tag me @shineshka so I can admire your beautiful work and celebrate your baking success. Let’s build a community of enthusiastic bakers who inspire each other!
FREE Printable Gift Tags for Your Spooky Treats!
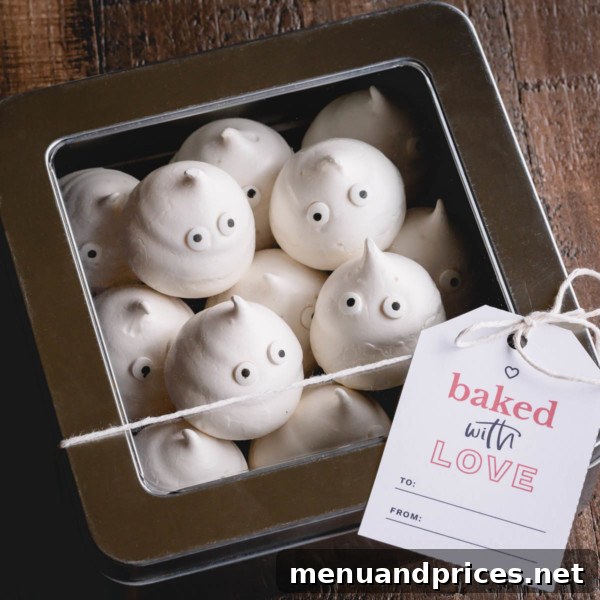
Planning to share your enchanting ghost meringues as gifts for friends, family, or trick-or-treaters? To make your thoughtful gesture even more special, I’ve created some adorable, themed gift tags that you can download and print for free! These tags will add a professional and charming touch to your homemade Halloween treats, making them perfect for gifting. Just print them out, attach them to your treat bags or boxes, and spread the Halloween cheer!
Click Here To Download My Free Gift Tags
So, will you join me to bake and share the joy this Halloween? Let’s make this October a month full of delicious, homemade treats and wonderful shared experiences. Happy baking, and happy Halloween!
Storage and Gifting Ideas
Once your Ghost Meringue Cookies are completely cooled and decorated, proper storage is key to maintaining their crisp texture. Store them in an airtight container at room temperature. Avoid refrigerating meringues, as the moisture can make them soft and sticky. If stored correctly, they can remain fresh and crisp for up to two weeks, though they rarely last that long!
These delightful cookies make fantastic edible gifts. Package them in clear cellophane bags tied with festive ribbons, or arrange them in decorative boxes with windows to show off their adorable faces. Don’t forget to attach your free printable gift tags for that extra special touch. They are also perfect for dessert platters at Halloween parties, adding a whimsical and light option amidst heavier sweets. Imagine them perched on cupcakes, or as edible decorations on a larger Halloween cake!
Whether you’re new to meringue making or a seasoned pro, these Ghost Meringue Cookies are a fun, approachable, and incredibly rewarding baking project. They embody the playful spirit of Halloween and offer a truly delightful treat for everyone. So gather your ingredients, fire up your oven, and prepare to enchant your friends and family with these spooktacularly sweet creations. Happy haunting and happy baking!