
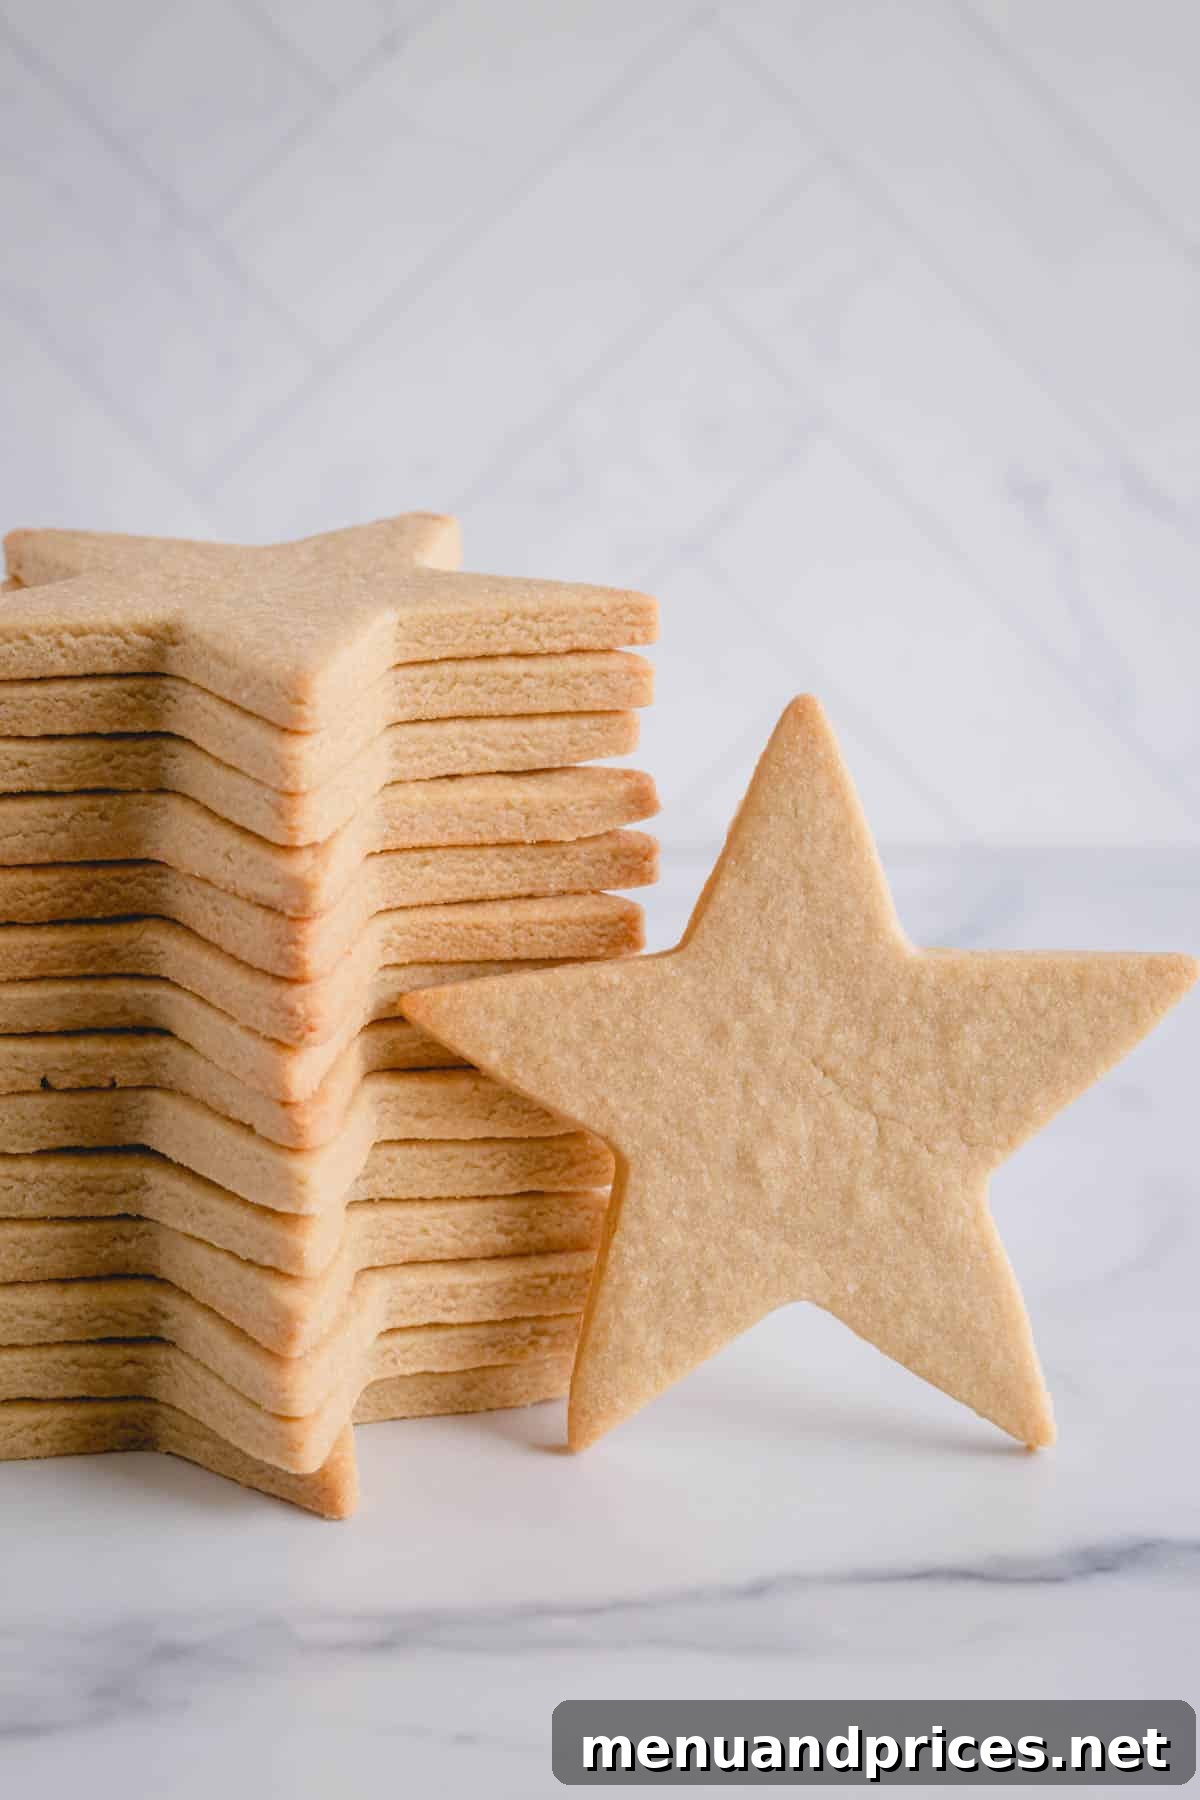
Effortless No-Spread Sugar Cookies: Perfect Cut-Outs Every Time – No Chilling Required!
Say goodbye to puffy, misshapen cookies and hello to beautifully flat, crisp-edged sugar cookies that maintain their intricate shapes. This revolutionary recipe for no-spread sugar cookies promises a soft, tender bite and a rich vanilla flavor, all while being incredibly easy to make. Best of all, these delightful treats are ready from start to finish in under an hour, as no chilling time is required! Our unique mixing method is the game-changer, ensuring consistently flat cookies perfect for any decorating adventure.
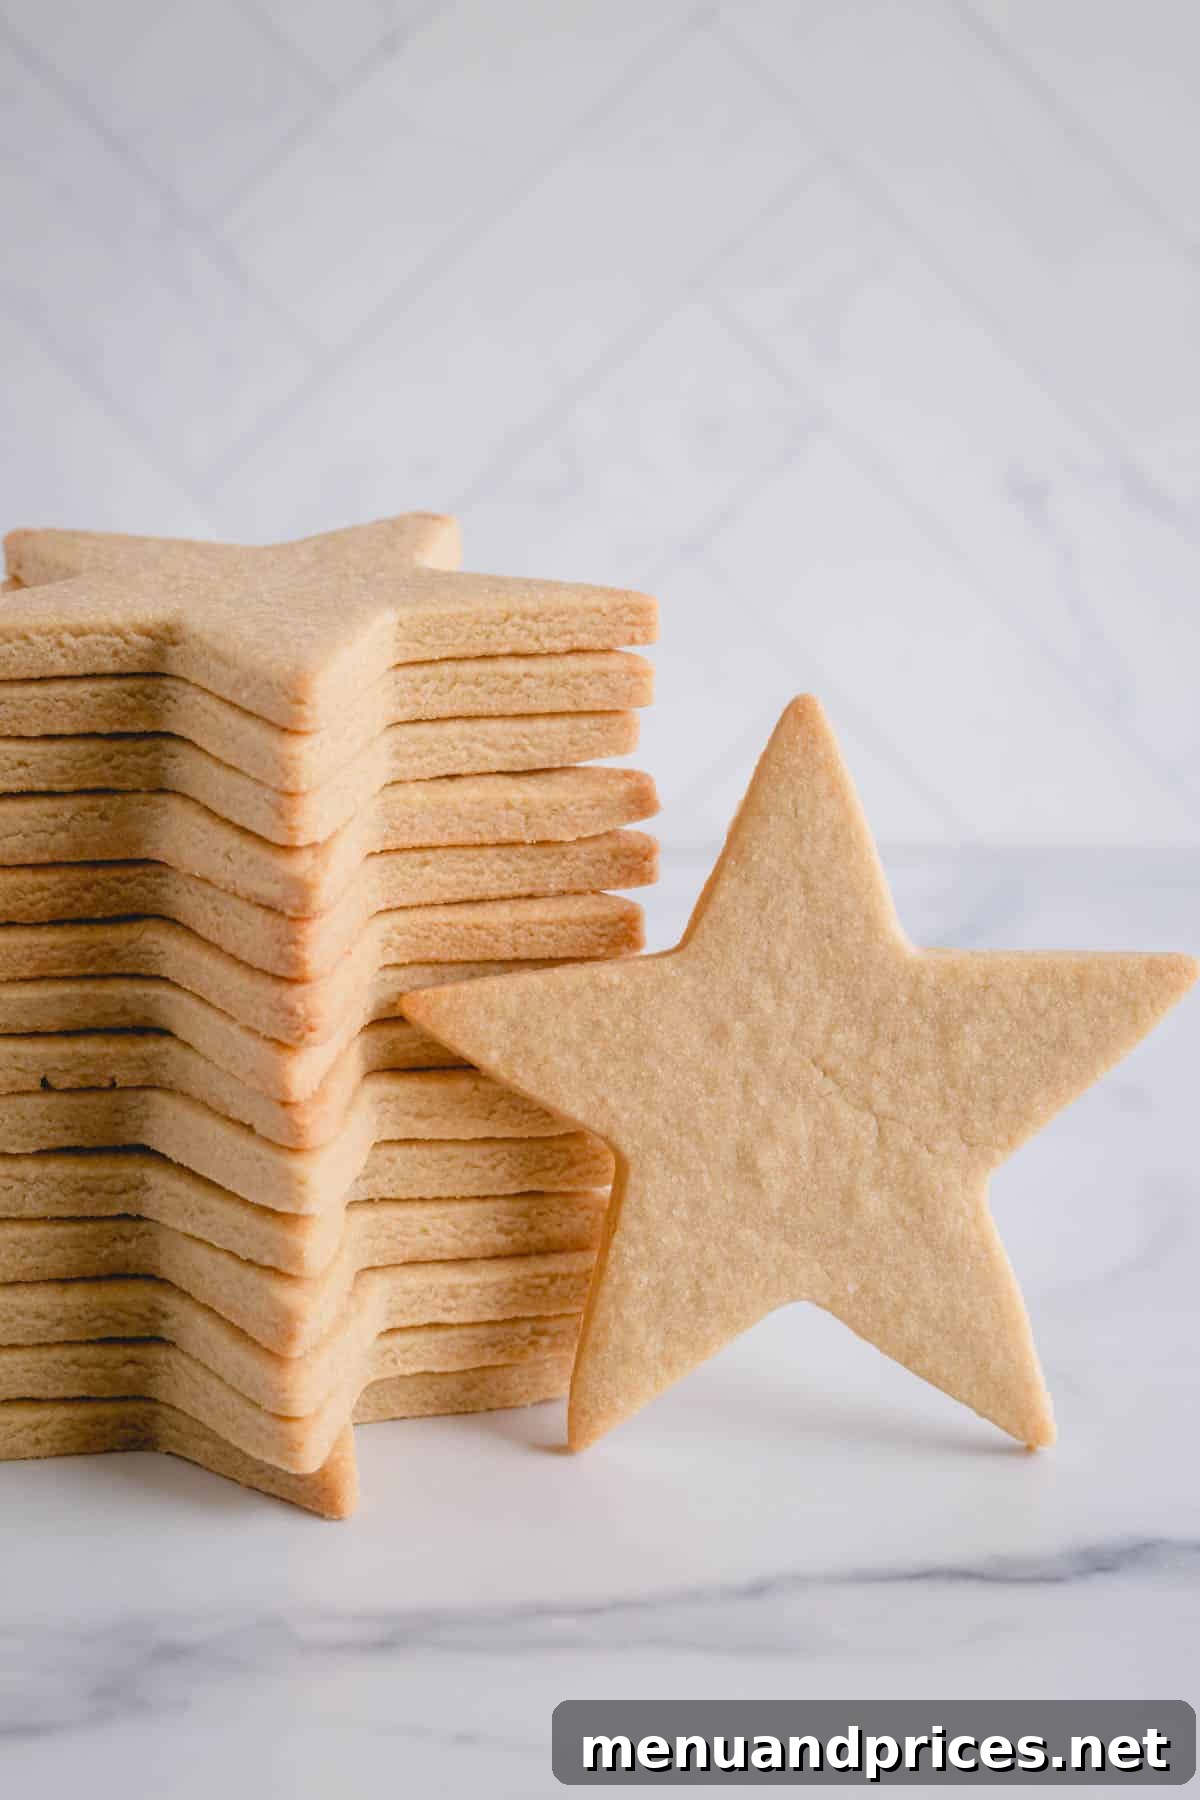
Pin this recipe to your favorite board and find it easily later!
Pin It
Why You’ll Adore These Vanilla Sugar Cookies
You might wonder, does the internet truly need another sugar cookie recipe? With countless options available, it’s a fair question. However, we firmly believe this recipe brings something truly exceptional to your baking table, offering unparalleled results that will make these your new go-to sugar cookies. Here’s why these no-spread vanilla sugar cookies will become an instant favorite:
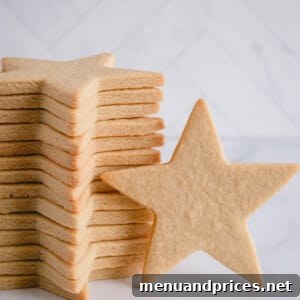
- Impeccable Appearance: Guaranteed no-spread cookies with perfectly crisp, sharp edges every single time. Your cookie cutters’ designs will be beautifully preserved, making them ideal for elaborate decorating.
- Remarkably Simple Method: Forget complicated steps! This vanilla sugar cookie recipe is incredibly straightforward, perfect for bakers of all skill levels, from beginners to seasoned pros.
- Lightning-Fast Total Time: From gathering your ingredients to pulling warm cookies from the oven, the entire process takes less than an hour. The best part? No chilling time is required for the dough, meaning instant gratification!
- Delightful Texture: These cookies boast a wonderfully soft and tender interior. For those who prefer a crisper, snappier cookie, simply roll the dough a bit thinner. The versatility is unmatched!
- Irresistible Flavor Profile: Indulge in rich, buttery notes complemented by a prominent, sweet vanilla essence. The quality of your vanilla extract truly shines here, making a good pure vanilla extract essential for the best taste.

The Science Behind This Easy No-Spread Sugar Cookie Recipe
Traditional sugar cookie recipes often rely on the creaming method—beating butter and sugar together until light and fluffy—followed by a lengthy chilling period for the dough. While effective for some, this can sometimes lead to puffy cookies that lose their shape. Our innovative approach breaks away from these conventional rules, ensuring flawlessly flat, no-spread sugar cookies with every batch. Here’s a deeper look into the factors that make this recipe a consistent winner:
- The Reverse-Creaming Method: A Game Changer: Instead of creaming butter and sugar, we first incorporate the butter into the dry ingredients. This unique reverse-creaming method coats the flour particles with fat, preventing excessive gluten development and inhibiting too much air from being incorporated into the dough. This results in a tender cookie that holds its shape beautifully, eliminating the common issue of puffy or spreading cookies. It’s a fundamental shift that ensures perfect cut-outs.
- Cold Ingredients for Immediate Baking: A key secret to bypassing the chilling phase is using cold butter and eggs. By starting with chilled ingredients, the dough remains cool and firm throughout the mixing and rolling process, providing the necessary stability to prevent spreading in the oven. This means you can mix, roll, cut, and bake immediately—a huge time-saver!
- Cornstarch and Baking Powder for Texture, Not Spread: While some leavening agents can contribute to spreading, both cornstarch and a controlled amount of baking powder in this recipe are strategically used for texture. Cornstarch works wonders as a tenderizer, contributing to the cookies’ delightful softness. Baking powder adds a touch of lightness without causing the cookies to puff up or spread, ensuring a delicate and airy crumb.
- Precision is Paramount: Weighing Ingredients for Success: For consistent, perfect results, weighing all your ingredients is absolutely crucial. Yes, even the egg! Measuring by volume (cups) can be inaccurate, especially with flour, leading to variations in dough consistency. A slightly larger egg, for example, can make the dough softer and stickier, potentially causing slight spreading. To achieve consistently beautiful cookies, invest in a reliable kitchen scale and skip the measuring cups for this recipe. Precision ensures perfection.
Essential Ingredients for Perfect Sugar Cookies
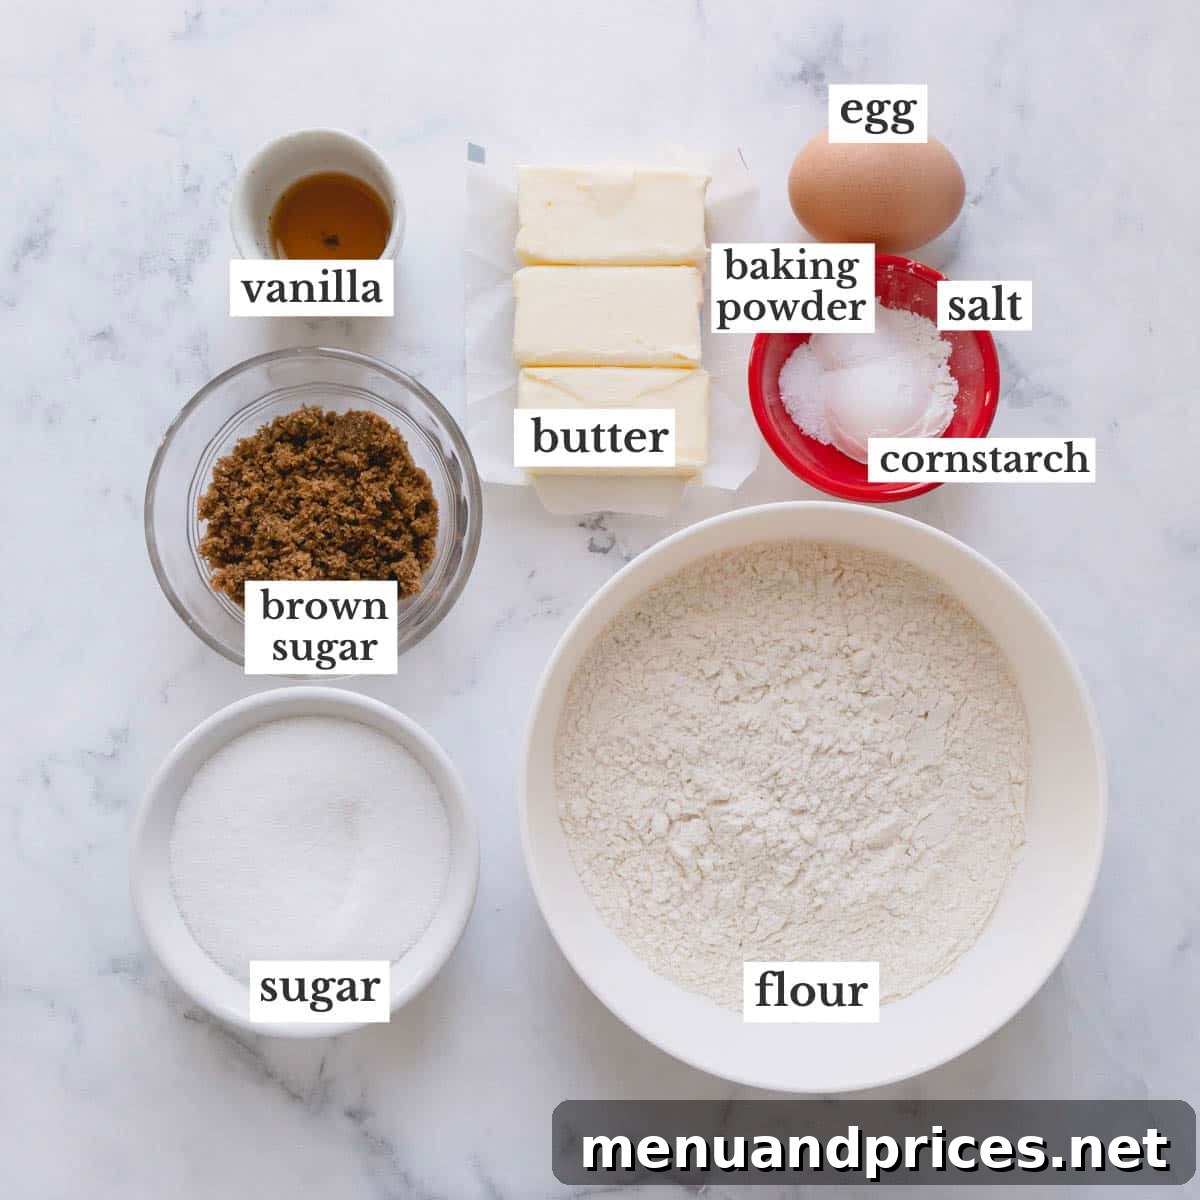
This simple yet effective recipe calls for just nine basic pantry staples, each playing a vital role in achieving the ideal texture and flavor for your no-spread sugar cookies. Using high-quality ingredients will elevate your cookies from good to absolutely unforgettable.
- Butter: We recommend using unsalted butter for better control over the salt content in your recipe. If salted butter is all you have, simply omit the additional salt specified in the instructions. It’s important to use cold butter for this recipe; if it’s too hard straight from the fridge, slice it into smaller pieces to facilitate mixing. The butter contributes to the rich, tender crumb of the cookies.
- All-Purpose Flour: The foundation of any good cookie, all-purpose flour provides the necessary structure. As highlighted previously, precise measurement is crucial. For best results and to prevent a dry or overly soft dough, always weigh your flour rather than relying on volume measurements.
- Sugar: This recipe utilizes a harmonious blend of granulated sugar and light brown sugar. Granulated sugar provides crispness and sweetness, while brown sugar adds a subtle caramel note, depth of flavor, and contributes to the cookies’ tender texture. While dark brown sugar can be used, be aware that it will result in slightly darker cookies. Light brown sugar is preferred for a classic golden hue.
- Cornstarch: A secret weapon in baking, cornstarch plays a crucial role in tenderizing the cookies. It reduces gluten formation, leading to a softer, more delicate crumb that practically melts in your mouth, enhancing the overall bite of these sugar cookies.
- Baking Powder: Unlike some leavening agents that can cause cookies to spread, baking powder in this specific formula helps to create a slightly airy and light texture without sacrificing shape. It contributes to a pleasant mouthfeel without causing the dreaded puffiness.
- Pure Vanilla Extract: The star of the flavor profile, pure vanilla extract is indispensable. Avoid imitation vanilla, as it lacks the complex, rich notes of pure extract. While high-quality vanilla can be an investment, consider making your own DIY vanilla extract for a cost-effective and superior alternative that will infuse your cookies with an incredible aroma and taste.
- Almond Extract: This ingredient is optional but highly recommended for an elevated flavor experience. A mere ¼ teaspoon of almond extract works wonders, enhancing the overall sweetness and complexity of the cookies without imparting an overpowering almond taste. It rounds out the vanilla beautifully, making these cookies truly irresistible.
- Egg: A single large cold egg binds the ingredients and adds richness. Just like flour, weighing your egg (approximately 53g for a large egg) ensures the dough has the perfect consistency, preventing it from being too soft or sticky.
- Coarse Kosher Salt: A pinch of salt is essential to balance the sweetness and enhance all the other flavors, bringing out the best in the butter and vanilla. If using salted butter, remember to adjust or omit the added salt.
Step-by-Step Guide: Crafting Your Perfect Sugar Cookies
Get ready to bake! Before you begin, preheat your oven to 350°F (175°C). Prepare 2-3 baking sheets by lining them with parchment paper or silicone baking mats. This ensures easy removal and prevents sticking.
1. Master the Cookie Dough with Reverse-Creaming
Our unique mixing method, known as the reverse-creaming method, is key to achieving tender, no-spread cookies that retain their shape perfectly. Unlike traditional creaming, this technique prevents excessive air incorporation, which often leads to puffy, misshapen cookies.
- Combine Dry Ingredients: In a large mixing bowl equipped with a paddle attachment, thoroughly combine your all-purpose flour, both granulated and light brown sugars, cornstarch, baking powder, and salt. Mix on low speed for about 30 seconds to ensure everything is well distributed.
- Incorporate Butter: Add the cold, diced unsalted butter directly into the dry ingredient mixture. Mix on low speed for approximately 2 minutes. Continue mixing until the butter is completely and evenly distributed throughout the dry ingredients, resembling wet sand or coarse meal. There should be no visible large chunks of butter, only a uniform, sandy mixture.
- Add Wet Ingredients: Introduce the cold large egg, pure vanilla extract, and optional almond extract to the mixture. Begin mixing on low speed, then gradually increase to medium-high speed. Mix for another 2 minutes until the dough just comes together.
- The Perfect Crumbly Dough: At this stage, your dough will appear crumbly, almost like dry clusters, but this is exactly the desired consistency! When you squeeze a small amount in your hand, it should easily come together to form a cohesive ball. This crumbly texture is a hallmark of the reverse-creaming method, indicating a tender, non-spreading dough.
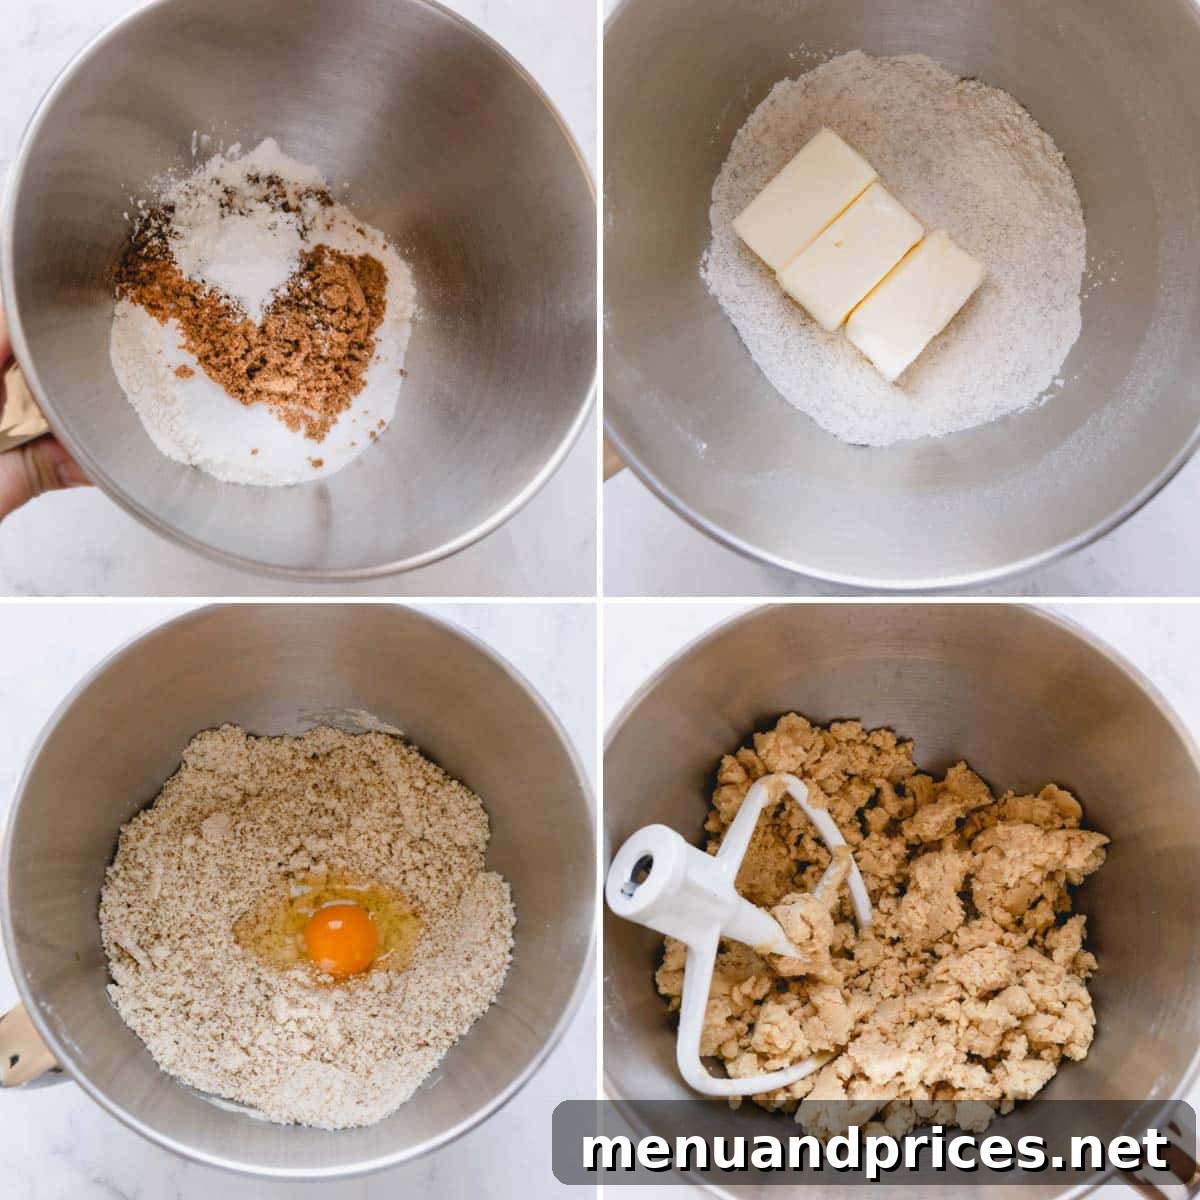
Quick Dough Cohesion Test: To confirm your dough is ready, take a small portion and firmly squeeze it in your hand. It should easily come together and hold its shape as a cohesive ball. This dough is designed to be pliable and easy to work with—soft but not at all sticky!
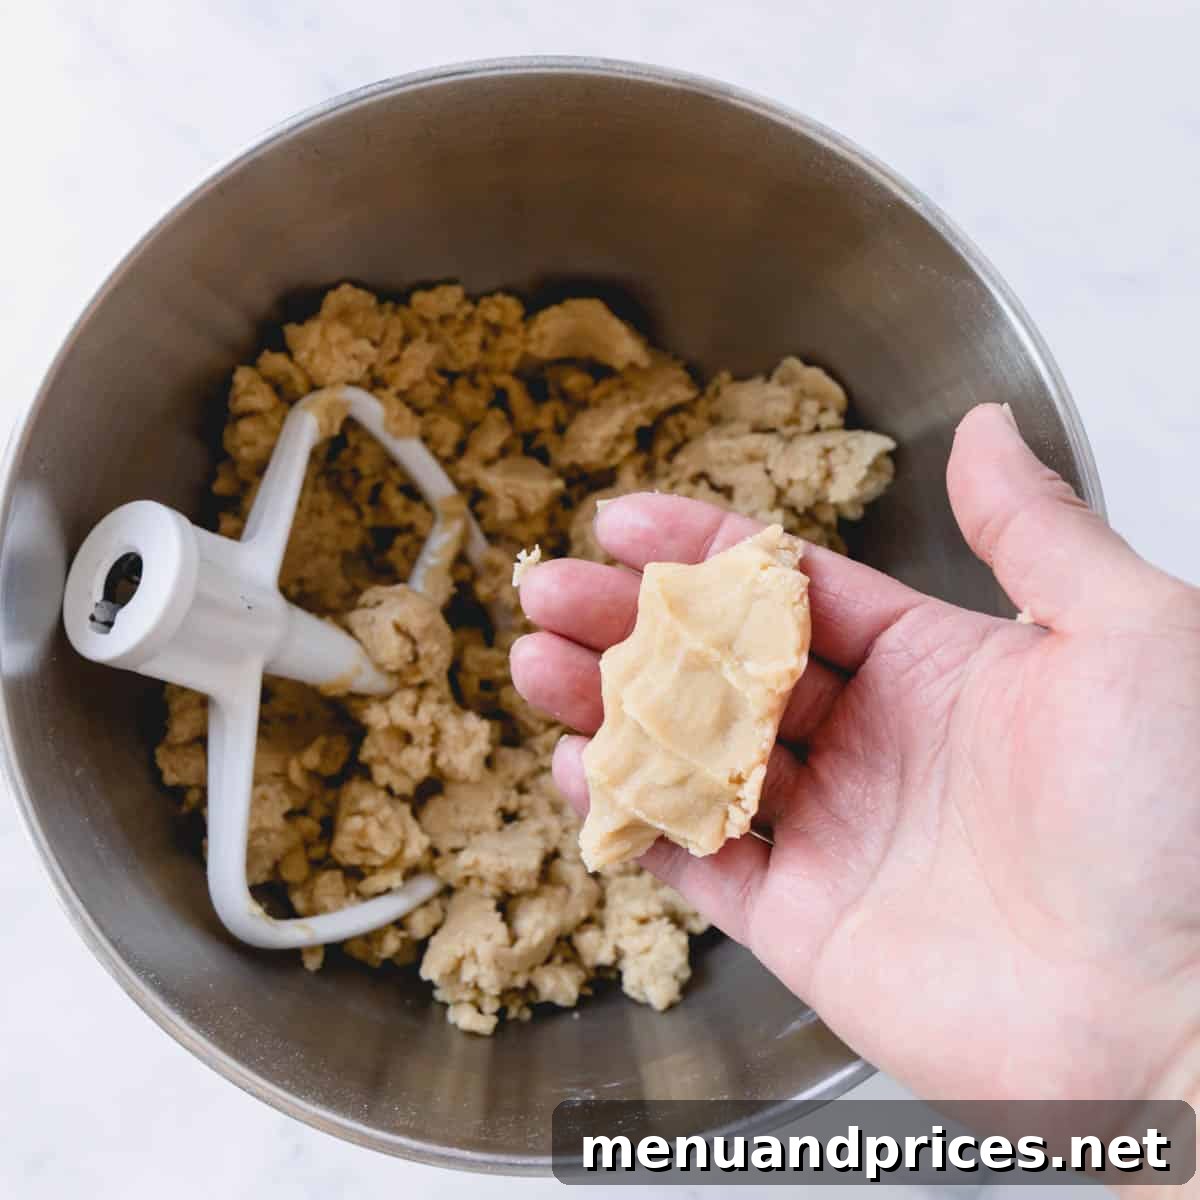
Expert Tip: The Reverse-Creaming Technique for Superior Texture
The reverse-creaming method, a brilliant technique I learned from “The New Best Recipes” cookbook by America’s Test Kitchen, is the cornerstone of these impeccable cookies. By thoroughly combining flour and butter before adding wet ingredients, this method ensures the butter is evenly distributed, eliminating any potential pockets of butter that could lead to uneven expansion or puffing during baking. This results in a consistently smooth, tender, and perfectly shaped cookie.
2. Effortlessly Roll and Shape Your Cookies
- Prepare for Rolling: Divide the crumbly dough into two equal portions. Gently knead each portion by hand just enough to form a smooth, pliable ball. Place one dough ball between two sheets of parchment paper. This prevents sticking and makes handling much easier.
- Achieve Uniform Thickness: Using a rolling pin, gently and evenly roll out the dough to a precise thickness of 5/16-inch (about 8mm). This uniform thickness is vital for even baking and consistent texture. An adjustable rolling pin with thickness guides can be a true game-changer here, ensuring perfect results every time.
- Cut and Transfer: Use your favorite cookie cutters to cut out desired shapes from the rolled dough. Carefully transfer the cut-out cookies to your prepared baking sheets using an offset spatula. This tool helps maintain the delicate shapes without distortion.
- Re-roll Scraps: Gather any dough scraps, gently form them into a ball, re-roll between parchment paper, and cut out more cookies. Continue this process until all the dough is used. If the dough becomes too soft at any point, simply refrigerate the rolled-out dough for 5-10 minutes to firm it up before cutting. This ensures those coveted crisp, sharp edges.
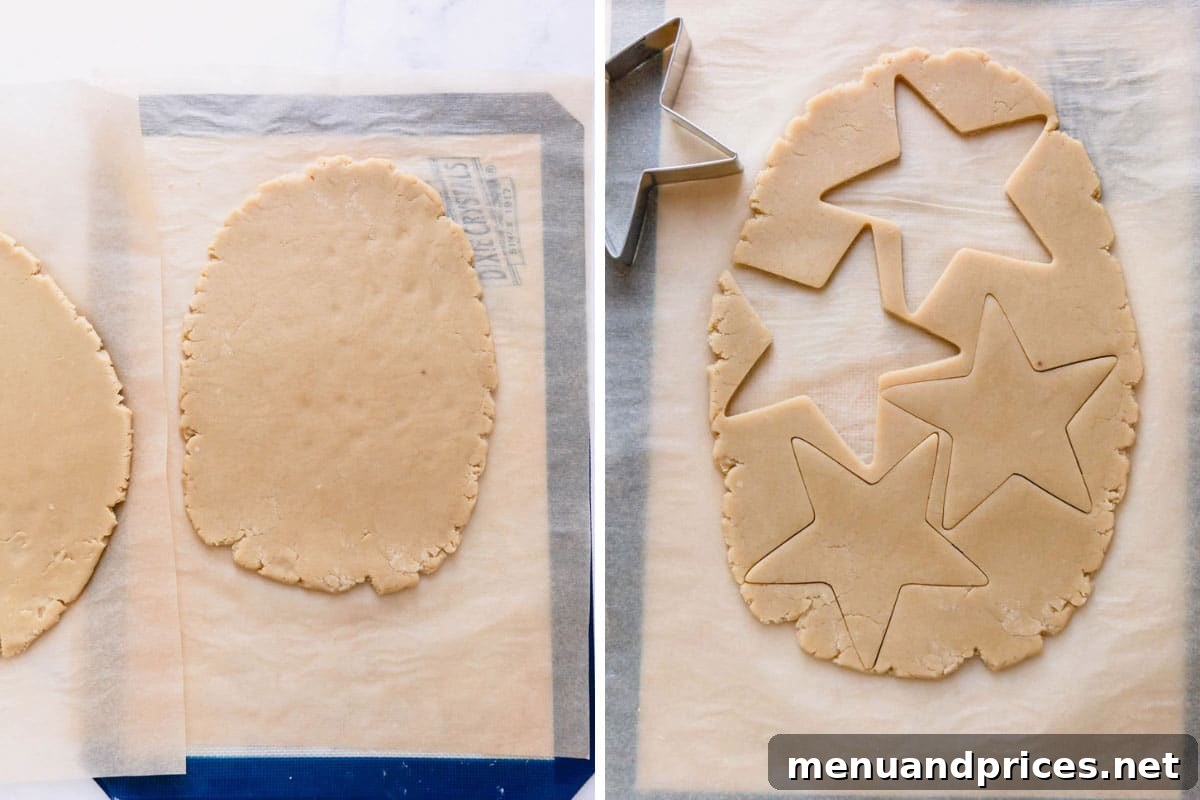
Pro Tips for Seamless Cookie Dough Rolling
- Stable Rolling Surface: To prevent the parchment paper (and your dough!) from shifting while rolling, place a silicone mat directly under the bottom sheet of parchment paper. The mat’s grip will keep everything securely in place.
- Precision Rolling: For consistent cookie thickness and uniform baking, an adjustable rolling pin is an invaluable tool. Its built-in guides ensure your dough is rolled to the exact desired thickness every time, making your cookies look and bake professionally.
3. Baking Your Beautiful No-Spread Cookies
- Baking Time: Bake the cookies in your preheated oven at 350°F (175°C) for 10-12 minutes. Keep a close eye on them; you’ll know they’re perfectly baked when the edges just begin to turn a light golden color. The centers may still appear soft, but they will firm up as they cool.
- Cooling Process: Once baked, remove the baking sheets from the oven. Allow the cookies to cool on the baking sheet for about 5 minutes. This brief resting period helps them set and become sturdy enough to handle.
- Transfer and Finish Cooling: After 5 minutes, carefully transfer the cookies from the baking sheet to a wire cooling rack. Let them cool completely on the rack. Full cooling is essential before any decorating to ensure icing sets properly and doesn’t melt or smudge.
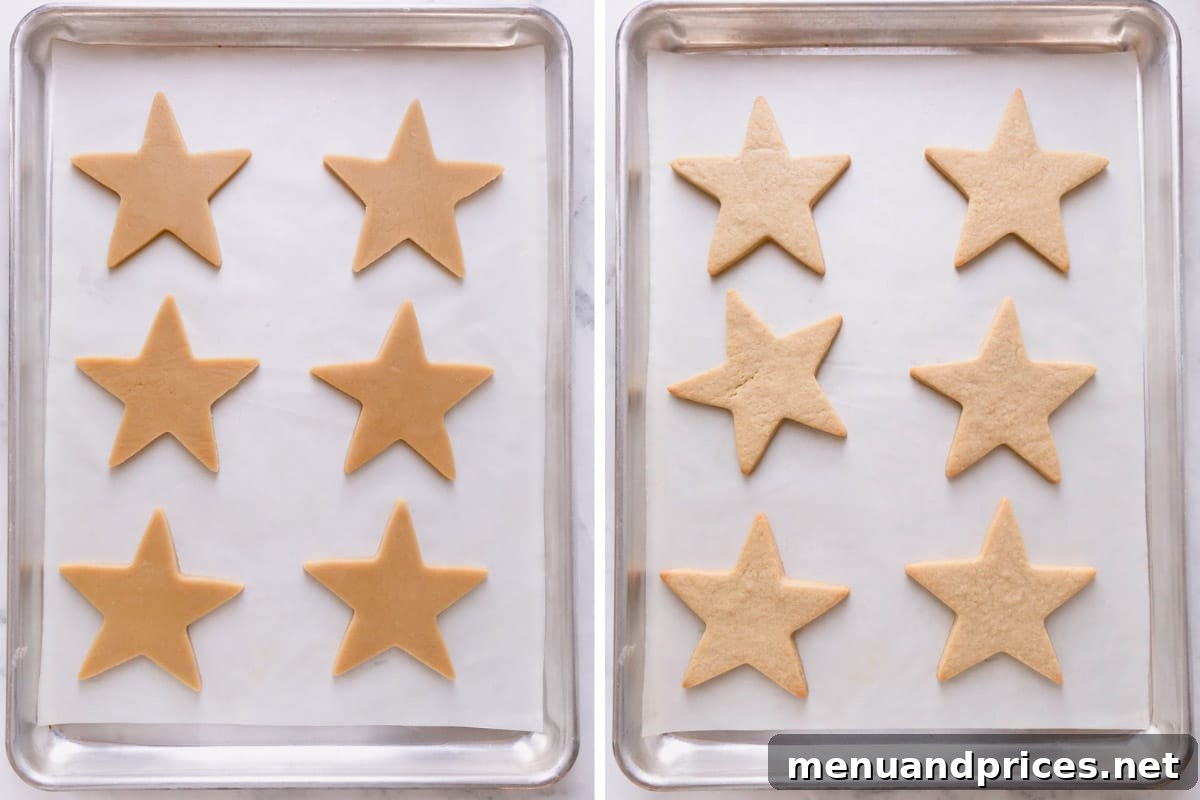
4. Unleash Your Creativity: Decorating Your Cookies!
Now, the real fun begins! Once your cookies are completely cooled, it’s time to bring them to life with vibrant decorations. This is a fantastic activity for all ages, so feel free to invite little helpers to join your cookie decorating party!
For a quick and easy approach, I love topping my sugar cookies with a simple powdered sugar icing, often combined with homemade colored sugar. Both of these are incredibly easy to prepare and add a festive touch without much fuss!

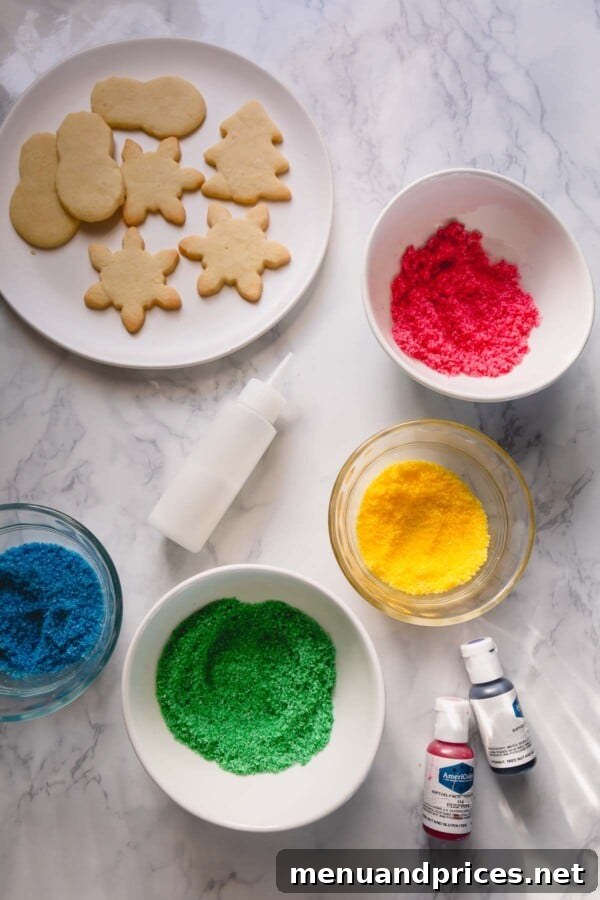
For those seeking a professional, flawless finish, I highly recommend my foolproof royal icing recipe. It dries hard and smooth, allowing for intricate designs and perfect for stacking once set.

Optimal Storage Solutions for Sugar Cookies
One of the many benefits of sugar cookies is their versatility for make-ahead preparation and excellent shelf life. Proper storage ensures your cookies remain fresh and delicious, whether they’re plain, decorated, or still in dough form.
Storing Sugar Cookie Dough
- Refrigeration (Short-Term): Raw cookie dough can be securely wrapped in plastic wrap and refrigerated for up to 3 days. This is perfect if you want to prepare the dough a few days in advance for a special event.
- Freezing (Long-Term): Sugar cookie dough freezes exceptionally well, allowing you to have freshly baked cookies ready at a moment’s notice. Divide the dough into two manageable portions, flatten each into a ½-inch thick disc, wrap tightly in plastic wrap, and then place them inside a freezer-safe bag. The dough can be frozen for up to 3 months.
- Thawing Frozen Dough: To thaw, simply transfer the frozen dough disc from the freezer to the refrigerator and allow it to thaw overnight. Once thawed, bring the dough out to room temperature for 15-30 minutes before rolling and shaping your cookies. This makes it pliable and easy to work with.
Storing Plain (Unfrosted) Sugar Cookies
- Room Temperature: Once your plain sugar cookies have completely cooled, store them in an airtight container at room temperature on your kitchen counter. They will remain fresh and delicious for up to one week. Ensure they are fully cooled before storing to prevent condensation.
- Freezing: Plain baked cookies also freeze beautifully. Arrange the cooled cookies in a single layer in an airtight freezer-safe container, using parchment paper between layers if stacking. They can be frozen for up to 3 months.
- Thawing Frozen Plain Cookies: To thaw, simply remove the container from the freezer and let the cookies come to room temperature on the counter. This usually takes a few hours.
Pro Tip: How to Keep Your Sugar Cookies Exceptionally Soft!
Want to maintain that wonderfully soft and tender texture in your sugar cookies even after baking? Here’s a clever trick: sprinkle a few mini marshmallows on the bottom of an airtight baking sheet or container. Then, place a cooling wire rack on top of the marshmallows and arrange your cooled cookies on the wire rack. Cover the baking sheet with a lid. The marshmallows release a small amount of moisture, creating a humid environment that keeps your cookies delightfully soft. This method works equally well for both plain and decorated cookies once the icing has fully set.

Storing Frosted or Decorated Sugar Cookies
- Room Temperature: Decorated cookies, especially those with royal icing or a hard-setting glaze, store wonderfully at room temperature. First, allow the iced sugar cookies to dry completely in a single layer on a baking sheet for up to 48 hours until the icing is fully hardened. This hard shell acts as a seal, locking in moisture and preventing the cookies from drying out. Once the icing is firm, stack the cookies in an airtight container with parchment paper placed between each layer to prevent sticking. Store at room temperature for up to a week.
- Freezing: Fully-set decorated cookies can also be frozen to extend their freshness. Place them in a single layer in an airtight freezer-safe container. Freeze for up to 1 month.
- Thawing Frozen Decorated Cookies: When retrieving frozen decorated cookies, the thawing process is crucial to prevent condensation and color bleeding. Remove the airtight container from the freezer and leave it sealed on the counter for 8-12 hours (or overnight) until the cookies have fully come to room temperature. It’s imperative NOT to open the container during this time. The gradual temperature change within the sealed container prevents sudden moisture buildup and preserves your intricate designs.
Important: Avoid Refrigerating Decorated or Plain Cookies!
A common mistake is refrigerating plain or decorated cut-out sugar cookies. The refrigerator’s dry environment can actually cause cookies to dry out and become stale quickly. Furthermore, for decorated cookies, the humidity and condensation in a refrigerator can cause icing colors to run, smudging your beautiful designs and ruining their aesthetic appeal. Always opt for room temperature or freezing as per the guidelines above.
Frequently Asked Questions About No-Spread Sugar Cookies
The primary reason sugar cookies become puffy is typically due to excessive air being whipped into the butter and sugar mixture during the initial creaming step of traditional recipes. When too much air is incorporated, it acts as a leavening agent, causing the cookies to rise and expand in the oven. Our reverse-creaming method specifically addresses this by mixing butter into dry ingredients first, minimizing air incorporation and ensuring your cookies bake up perfectly flat with sharp edges.
Yes, it is entirely normal for sugar cookies to be quite soft, almost underbaked, right when they emerge from the oven. This soft texture allows them to finish baking gently from residual heat. Do not try to move them immediately! It’s crucial to let them cool on the hot baking sheet for about 5 minutes. During this time, they will firm up significantly. After this initial cooling period, carefully transfer them to a wire rack to cool completely, where they will develop their characteristic crisp edges and tender centers.
While these three cookie types share similar basic ingredients (flour, sugar, butter), their ratios and preparation methods result in distinct textures and uses:
- Sugar Cookies: These typically have the least amount of butter relative to flour and a higher proportion of sugar compared to shortbread or butter cookies. This composition gives them a sturdy yet crisp texture, making them ideal for cut-outs that hold their shape and are perfect for decorating with icing. Their flavor is often enhanced with vanilla and sometimes almond extract.
- Butter Cookies: Similar to sugar cookies, butter cookies generally feature a higher ratio of butter to flour, resulting in a richer, more robust flavor and a slightly firmer texture. They are often piped or stamped and retain their shape well, offering a more indulgent, buttery experience without being as delicate as shortbread.
- Shortbread Cookies: Characterized by their classic 1:2:3 ratio of sugar to butter to flour (by weight), shortbread cookies are known for their incredibly rich, crumbly, and melt-in-your-mouth delicate texture. They often contain no leavening agents and are typically made with just butter, flour, and sugar, sometimes with a touch of flavoring. They are traditionally thicker and less suited for intricate cut-out designs than sugar cookies due to their delicate crumb.
No-Spread Sugar Cookies
Shinee Davaakhuu
20
12
1
3 dozen medium cookies
About 750g of cookie dough
Comment
Print Recipe
Ingredients
- 3 cups (375 g) all-purpose flour measured properly
- ½ cup (100 g) granulated sugar
- ¼ cup (50 g) light brown sugar Note 1
- 1 tablespoon (8 g) cornstarch
- ½ teaspoon baking powder
- ¼ teaspoon coarse kosher salt
- 1 ½ sticks (170 g) unsalted butter Note 2
- 1 (53 g) large egg cold
- 2 teaspoons pure vanilla extract
- ¼ teaspoon almond extract optional, but highly recommended Note 3
Instructions
-
Preheat the oven to 350°F (175°C). Line 2-3 baking sheets with parchment papers, or silicone mats.
To prepare the dough:
-
In a mixing bowl with a paddle attachment, mix flour, sugars, cornstarch, baking powder, and salt.
-
Add butter and mix on low speed until the mixture is evenly moistened, 2 minutes. The mixture should resemble wet sand.
-
Add egg, vanilla, and almond extracts and mix until just combined, about 2 minutes, gradually increasing the speed from low to medium high. The dough will be crumbly, but it should stick together when you squeeze it in your hand.
To shape and bake cookies:
-
Divide the dough into two equal parts and knead each dough into a smooth ball. (At this point, you can wrap the dough in a plastic wrap and put it in a freezer bag. Refrigerate for up to 3 days or freeze for up to 3 months.)
-
Place the dough ball between two sheets of parchment paper. Then gently roll it out into 5/16-inch (8mm) thick disc. (This adjustable rolling pin is a game-changer!) (TIP: Place a silicone mat under the parchment paper with the dough, so it stays in place.)
-
Cut out the cookies using your desired cookie cutter and transfer the cookies using an offset spatula to the prepared baking sheets.
-
Using cookie cutters, cut out the cookies and arrange them on the prepared baking sheets.
-
Gather the scraps of dough, roll and cut out more cookies. Repeat until all the dough is used. (TIP: If the dough is too soft, you may refrigerate the rolled out dough for 5 minutes to firm it up. This will ensure nice crisp edges on your cookies.)
-
Bake the cookies for 10-13 minutes, or until the edges start to turn light golden color.
-
Cool the cookies on the baking sheet for 5 minutes, then transfer them onto a cooling rack to cool completely.
To decorate:
-
Once the cookies are completely cooled, decorate with easy powdered sugar icing, colored sugars or royal icing.
⭐️ Did you make this recipe?
Please leave a review and let us know how you liked it!
Tips & Notes
Note 2: Use cold butter; just bring it out on the counter 10-15 minutes before use. If too hard, slice into 1-tablespoon chunks. Unsalted butter is preferred; if using salted, omit the salt from the recipe.
Note 3: The almond extract flavor is subtle in the final cookies, but it perfectly rounds up the overall taste, making these sugar cookies irresistible!
Sugar Cookie Sizes: This recipe yields approximately 3 dozen medium cookies (around 3-inches) and about 2 dozen large cookies (around 4.5-inches).
Storing Tips:
- Cookie Dough: Freezes well. Divide into 2 parts, flatten into ½-inch thick discs, wrap in plastic wrap, and freeze for up to 3 months. Thaw overnight in the fridge, then 15-30 minutes at room temperature before rolling.
- Plain Sugar Cookies: Freeze well in an airtight container for up to 3 months. Thaw at room temperature. Store at room temperature for up to a week in an airtight container.
- Frosted Sugar Cookies: Store well once glaze is fully set. Place in an airtight container with parchment paper between layers; store at room temperature for up to a week. Freeze fully-set decorated cookies in an airtight container for up to 1 month. To thaw, leave the sealed container on the counter for 8-12 hours to prevent condensation and color run.
- Avoid Refrigeration: Never refrigerate plain or decorated cut-out sugar cookies; they will dry out, and condensation may ruin decorations.
Nutrition
1 cookie
93kcal
10g
1g
5g
4g
25mg
Dessert
American
Did you make this?
Leave a rating and your feedback. Thank you!