
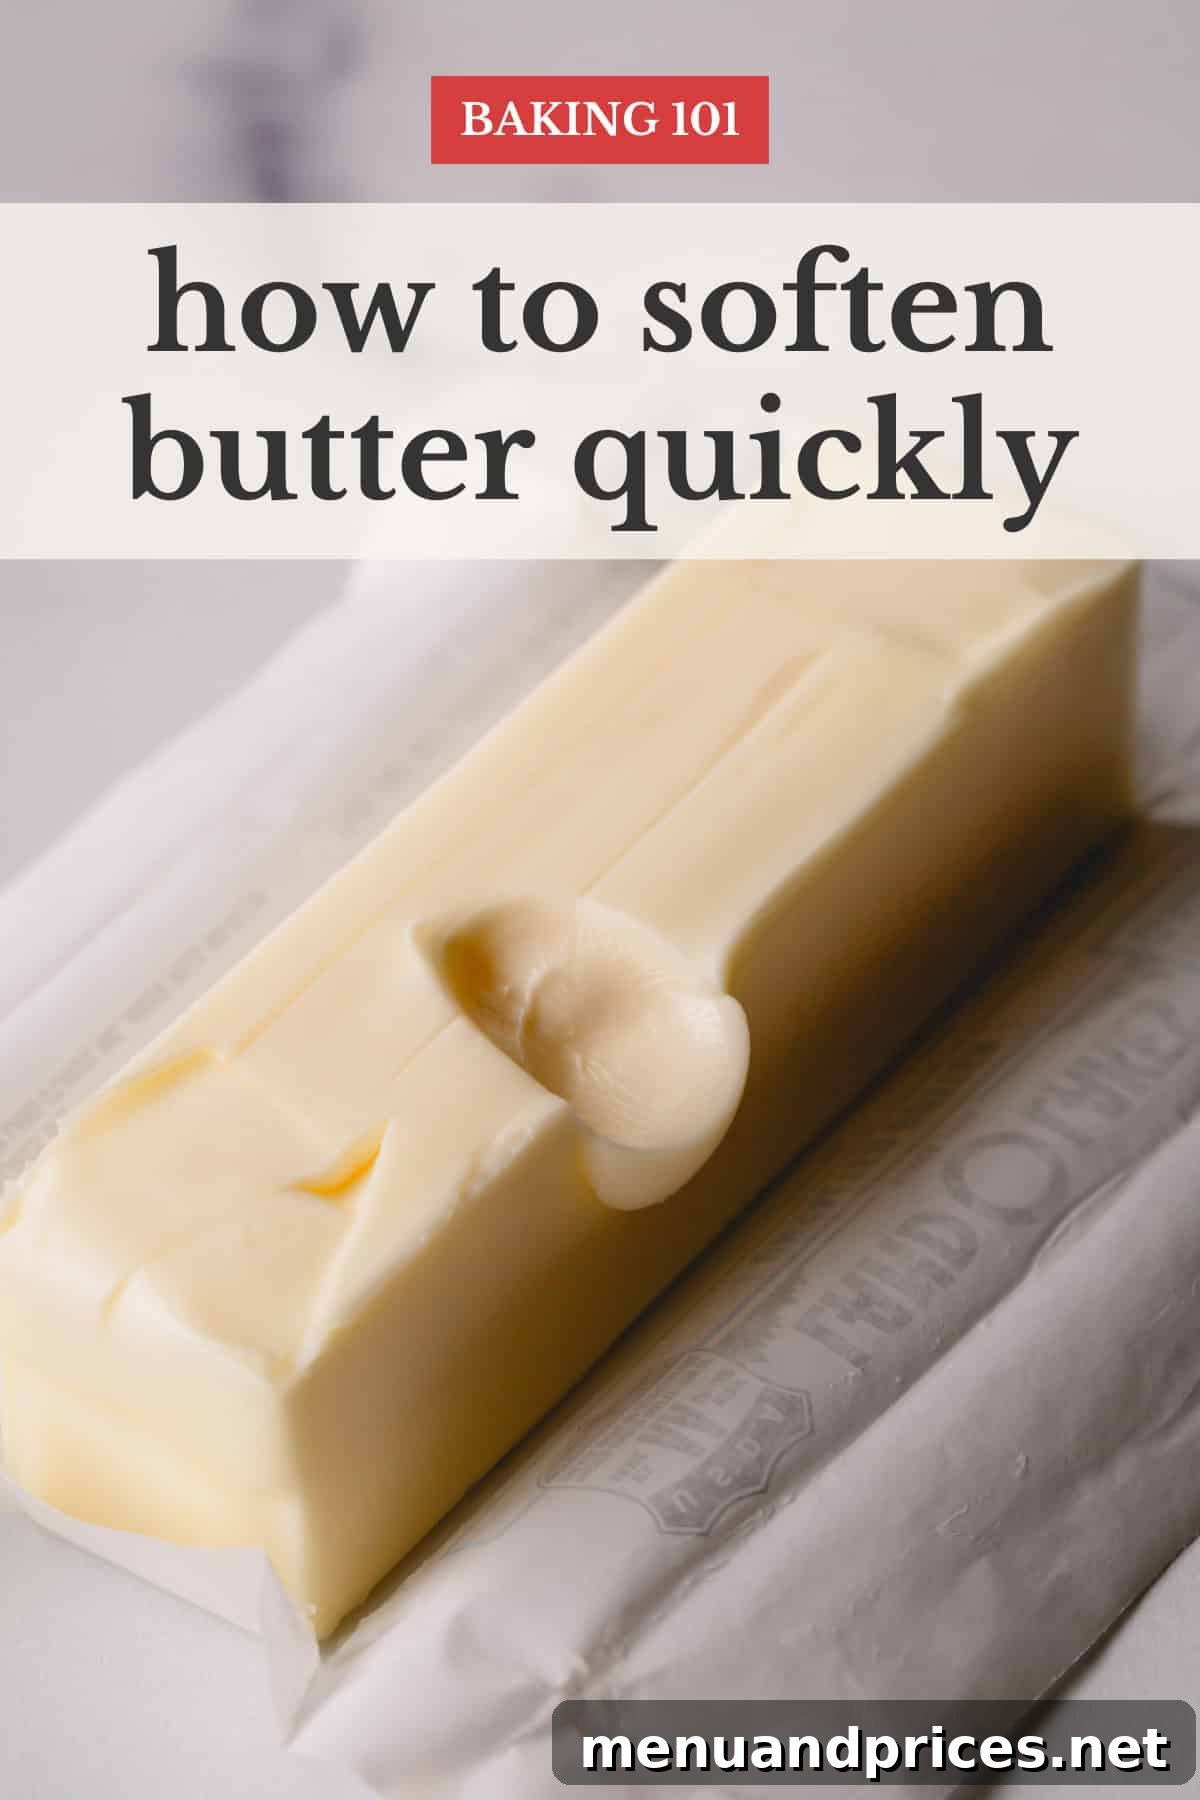
The Ultimate Guide to Perfectly Room Temperature Butter for Baking Success
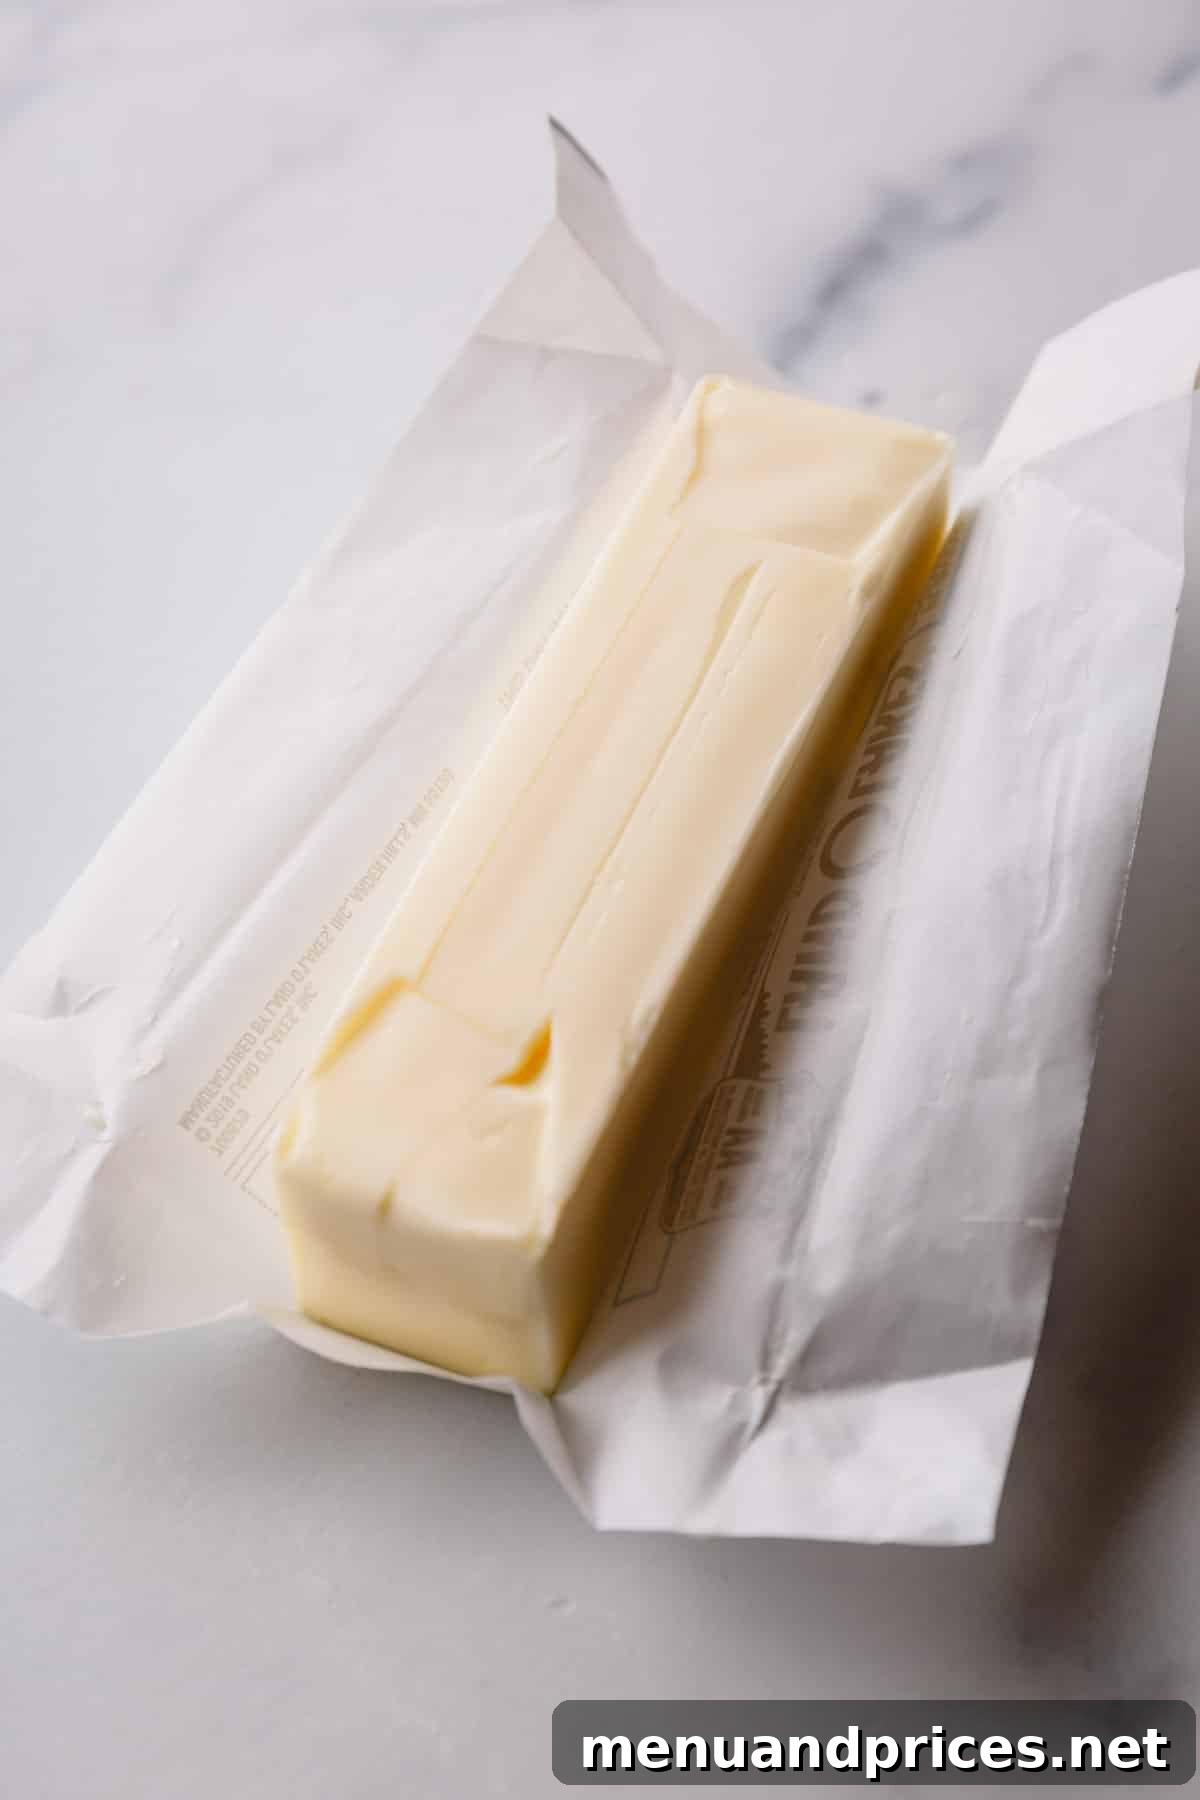
In the intricate world of baking, mastering the art of ingredient preparation is paramount. Among these critical steps, bringing butter to the ideal “room temperature” stands out as a non-negotiable requirement for countless recipes. This seemingly simple instruction holds the key to unlocking superior textures in everything from light and airy cakes to perfectly chewy cookies and flaky pastries. Far from a mere suggestion, using butter at the correct temperature is a foundational element that ensures your baked goods achieve their full potential.
Often, the greatest challenge for aspiring and experienced home bakers alike is the waiting game. Recipes typically call for butter to be taken out of the refrigerator 1-2 hours before baking. This timeframe, however, is a mere estimate, heavily influenced by your kitchen’s ambient temperature, the size of the butter stick, and even its initial chill. In a typical 70°F (21°C) kitchen, a standard stick of butter might indeed take about an hour to reach optimal softness. But what happens when baking inspiration strikes unexpectedly, or when you simply forget this crucial prep step? The good news is, you don’t have to put your baking dreams on hold. We’re here to reveal a revolutionary, rapid method that can transform cold butter into perfectly pliable room-temperature butter in under 30 seconds!
Why Room Temperature Butter is Non-Negotiable for Baking Success
Before diving into softening techniques, it’s essential to understand the science behind why butter’s temperature matters so much. It’s not just about ease of mixing; it’s about enabling butter to perform its specific functions within your recipe to create the desired outcome.
The Science of Creaming: Trapping Air for Lightness
Many classic baking recipes, especially for cakes, cookies, and certain breads, begin with the “creaming method,” where butter and sugar are beaten together until light and fluffy. When butter is at the correct room temperature, its fat molecules are soft and flexible, yet still hold a stable structure. As you beat the butter with granular sugar, the sharp edges of the sugar crystals create tiny air pockets within the butter. These microscopic air bubbles are crucial; they expand during baking, providing lift and contributing to a light, tender crumb. Cold, hard butter is too rigid to trap air effectively, leading to dense and heavy results. Conversely, melted butter has completely broken fat molecules and cannot hold air at all, resulting in flat, greasy baked goods.
Ensuring Stable Emulsions and Smooth Batters
Beyond aeration, room temperature butter plays a vital role in forming a stable emulsion. As eggs and other liquid ingredients are added to the creamed butter and sugar, the softened butter helps to bind everything together into a smooth, cohesive batter. This emulsification ensures that fat, liquid, and sugar are evenly distributed throughout the mixture, preventing separation and creating a uniform texture in the final product. A well-emulsified batter bakes more consistently and results in a more desirable mouthfeel, free from greasiness or crumbly textures.
Achieving Even Mixing and Consistent Results
Picture trying to incorporate rock-hard butter into flour or sugar – it’s an exercise in frustration, often leading to uneven lumps and overworking the dough. Room temperature butter, however, blends effortlessly with other ingredients. This ease of mixing ensures that all components of your recipe are thoroughly combined, leading to a homogenous mixture. Consistent mixing directly translates into consistent baking results, where every bite is uniformly delightful, and the recipe performs reliably each time you make it.
Understanding the Ideal Consistency: What is Room Temperature Butter?
It’s vital to differentiate “room temperature butter” from butter that is merely “softened” or, worse, partially melted. The perfect consistency is a precise sweet spot that impacts the outcome of your baking dramatically. The ideal temperature for butter in most baking applications typically ranges between 65-68°F (18-20°C). At this temperature, the butter is pliable and responsive enough to be creamed effectively, yet it still maintains its structure and feels cool to the touch. It should never appear shiny or greasy.
This nuanced distinction is paramount. Butter that is too soft – perhaps squishy, oily, or even slightly melted – will not incorporate air efficiently. In cookies, this often leads to excessive spreading, resulting in flat, thin discs instead of perfectly shaped rounds. For cakes and muffins, overly soft butter can cause the batter to become too loose, leading to a dense, heavy crumb that lacks the desired lift and tenderness. Conversely, butter that is too cold will resist blending, creating a lumpy batter and hindering air incorporation. Therefore, learning to recognize the signs of truly room temperature butter is a skill that will profoundly improve your baking precision and results.
Traditional Methods for Achieving Room Temperature Butter
While our rapid microwave technique offers unparalleled speed, it’s always beneficial to be familiar with the more conventional methods for softening butter. These approaches are often preferred when you have sufficient time for preparation, as they gently bring the butter to temperature without any risk of accidental melting.
The Classic Countertop Method
The simplest and most hands-off method is to simply leave your wrapped stick of butter on the kitchen counter. A typical 4-ounce (115g) stick generally needs about 1-2 hours to reach the ideal room temperature. However, this timeframe is highly variable. In a cooler kitchen (below 65°F), it could take up to 3 hours, while on a warm day, butter might soften in less than an hour. The key here is patience and periodic checking to ensure it doesn’t become too soft. Remove it from its packaging only when you’re ready to use it, to protect it from absorbing refrigerator odors or becoming too exposed to air.
Accelerating with Smaller Pieces
If you’re a bit short on the full 1-2 hours but still have some time, cutting your cold butter into smaller pieces is an effective strategy. By dicing a stick of butter into half-inch cubes or thin slices, you significantly increase its surface area exposed to the ambient air. This allows the butter to absorb heat more quickly and uniformly, potentially cutting the softening time down to 30-60 minutes, depending on the piece size and room temperature. This method is particularly useful if your recipe calls for butter to be incorporated into flour for a pastry, as the smaller pieces will soften evenly.
The Gentle Warm Water Bath (Use with Extreme Caution)
This method can be fast, but it requires careful attention. Place your fully wrapped stick of butter into a bowl of lukewarm (not hot!) water. The water should be barely warm to the touch, resembling bathwater. Hot water will instantly melt the butter, creating a greasy mess. Ensure the butter is completely sealed in its wrapper to prevent water from seeping in. This method can soften butter in about 10-15 minutes, but continuous monitoring is critical to prevent unwanted melting, especially at the edges.
The Rolling Pin Flattening Technique
For recipes where butter doesn’t need to be creamed for aeration but rather flattened or integrated (like some cookie doughs, or for cutting into flour for a flaky crust), a rolling pin can offer an immediate solution. Place the cold butter between two sheets of parchment paper or plastic wrap. Gently pound it with a rolling pin to flatten it into a thin sheet. This physical action softens the butter almost instantly due to the applied pressure and increased surface area. While it won’t achieve the same fluffy texture as properly creamed butter, it’s excellent for quick incorporation.
Grating Cold Butter for Instant Softness
An ingenious trick for very rapid softening is to grate your cold butter using a standard box grater. The resulting small shreds of butter have a vast surface area, allowing them to warm up to room temperature almost instantaneously upon contact with the air. This method is exceptionally useful for recipes where butter is “cut into” flour, such as biscuits, scones, or pie crusts, creating tiny pockets of butter that yield incredibly flaky results. It can also be a quick fix for creaming if you allow the grated butter a minute or two to warm up fully.
The Quickest Way to Soften Butter: Microwave Magic in 30 Seconds!
When time is of the essence or when you’ve simply forgotten to plan ahead, the microwave becomes your best friend in the kitchen. This ingenious method allows you to achieve perfectly room-temperature butter in a mere 30 seconds. However, this power comes with a caveat: precision and caution are paramount. The goal is to soften the butter evenly without melting any part of it, which can easily happen if not done correctly. Overdoing it in the microwave is the fastest way to ruin your butter for baking, so careful execution is key.
Before you even think about placing your butter in the microwave, you must determine its wattage. Microwave ovens vary significantly in power, and what works in a 700-Watt model will be drastically different from a 1200-Watt model. A typical residential microwave often operates at around 1000 Watts. You can usually locate this crucial information on a sticker found on the side, back, or inside the door frame of your appliance. Knowing your microwave’s specific power rating allows you to adjust the settings precisely, ensuring optimal and controlled softening results every single time.
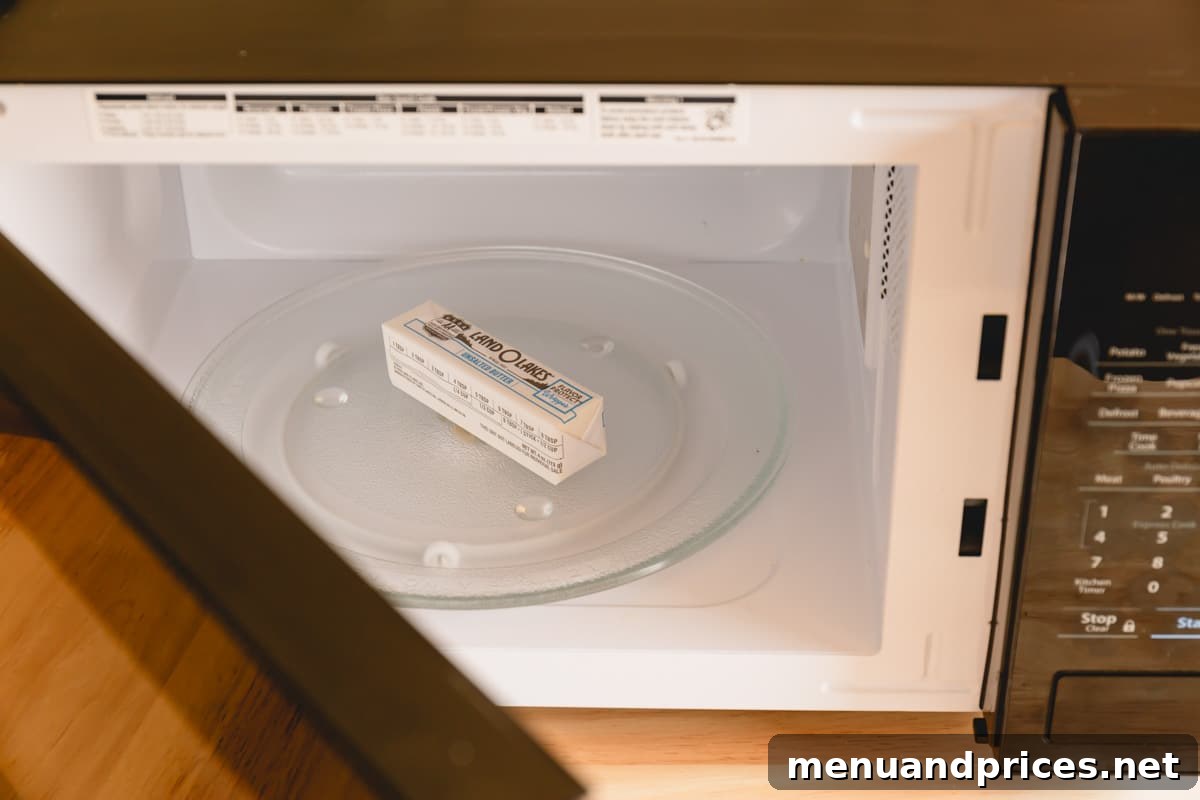
- Prepare and Position the Butter: Keep the stick of butter in its original wrapper. This wrapper provides a subtle insulating layer that helps to shield the butter from direct microwave energy, reducing the risk of localized melting. Place the butter stick seam-side down in the absolute center of your microwave plate.
- First Controlled Microwave Burst: Set your microwave to a low power setting, ideally around 40% power. For a standard 1000-Watt microwave, this means it will operate at 400 Watts. Microwave the butter for precisely 10 seconds. The combination of low power and short bursts is the secret to achieving even softening without creating liquid pools in the center or melted edges.
- Flip and Second Controlled Burst: After the first 10-second interval, carefully open the microwave door and flip the butter stick over to its opposite side. Return it to the center of the plate and microwave for another 10 seconds at 40% power. Flipping ensures that both sides receive even microwave energy, preventing one side from melting while the other remains cold.
- Assess and Fine-Tune (If Needed): After a total of 20 seconds, remove the butter and perform the “finger test” (described in the next section) to check its consistency. If the butter is still a bit too firm, return it to the microwave and continue with additional 5-second bursts at 20-30% power, flipping the butter between each burst. Always err on the side of caution; it’s far easier to add a few more seconds than to rescue melted butter.
With a little practice and mindful attention to your microwave’s settings, you’ll soon become an expert at achieving perfectly room-temperature butter with remarkable speed and consistency, saving you precious time and ensuring baking success.
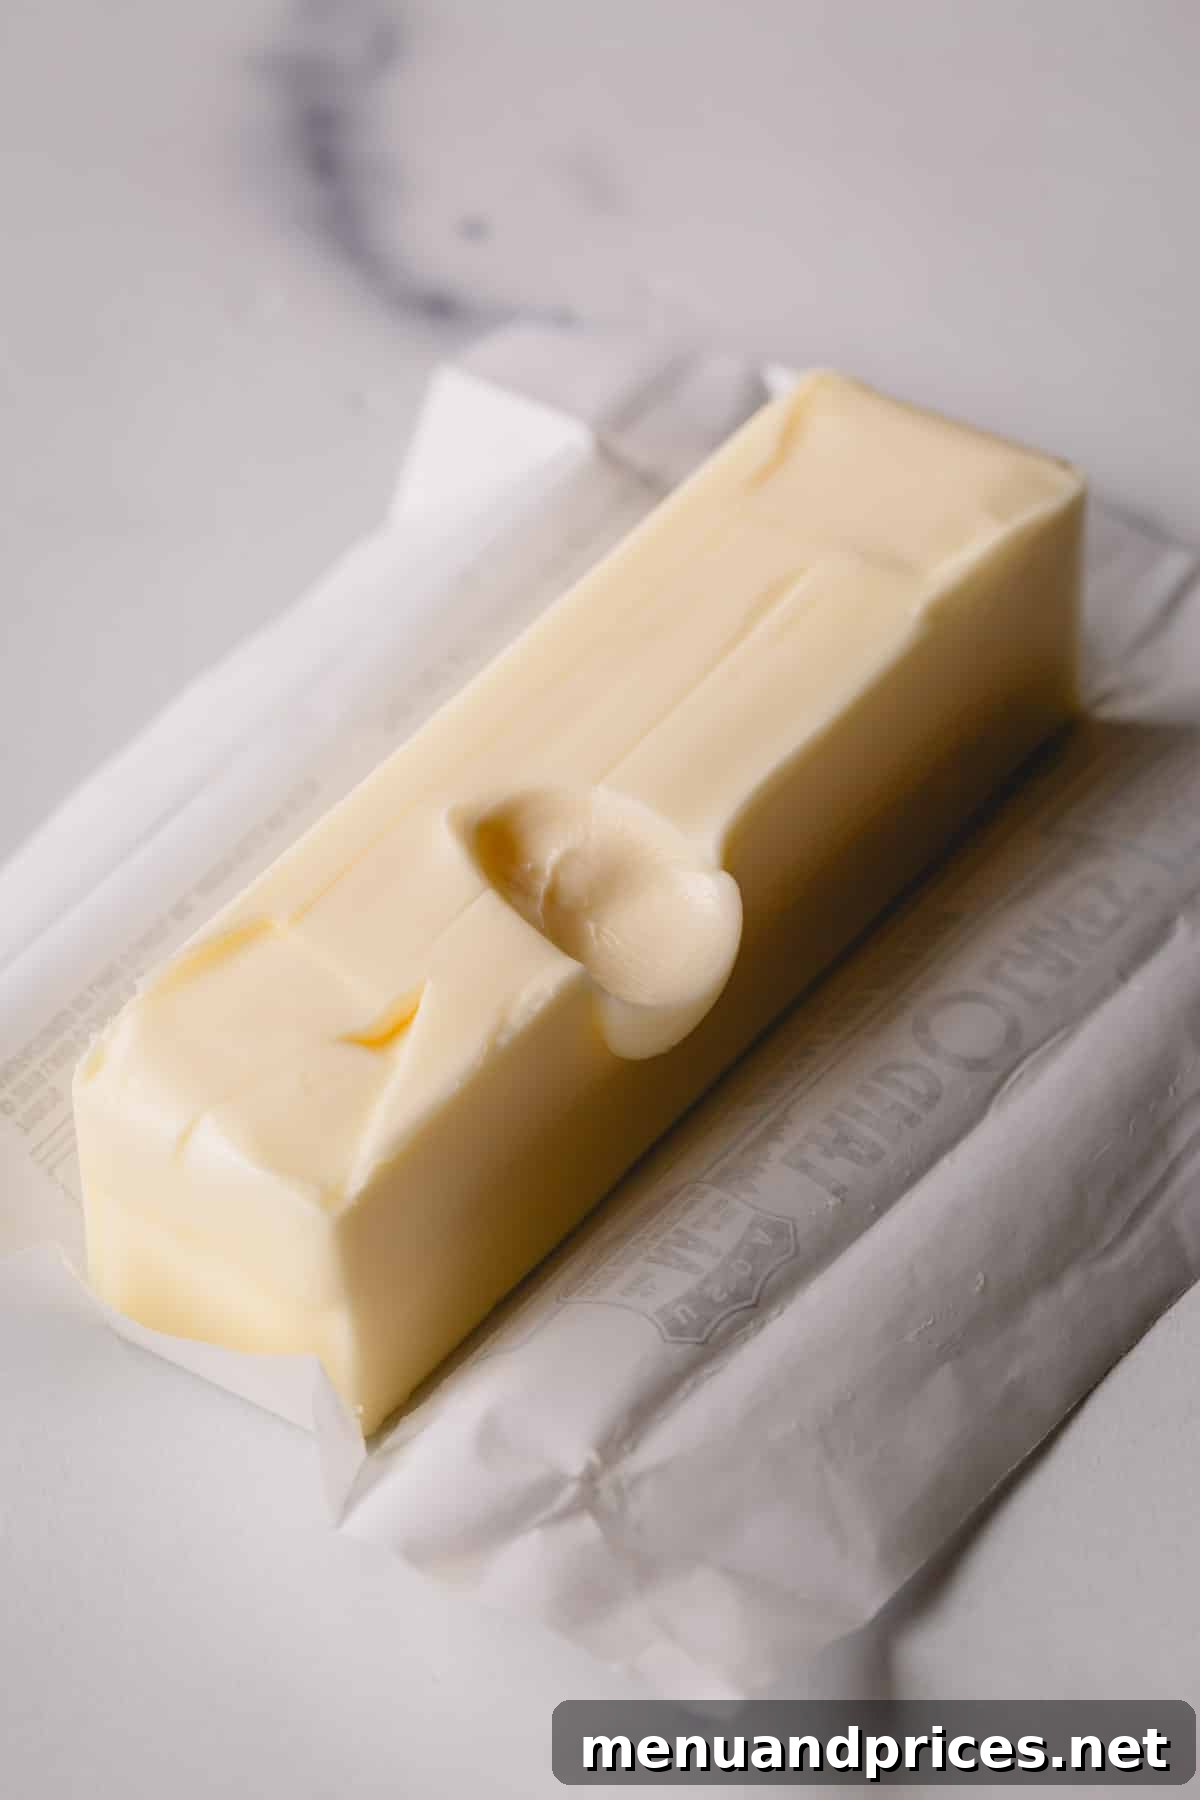
3 Definitive Signs of Perfectly Room Temperature Butter
Distinguishing perfectly room-temperature butter from merely soft or, worse, melted butter is a critical skill for any baker. The right consistency ensures your baked goods achieve the desired texture, rise, and overall quality, whether you’re aiming for no-spread sugar cookies with crisp edges or fluffy and tender vanilla cupcakes. Here are the three definitive signs:
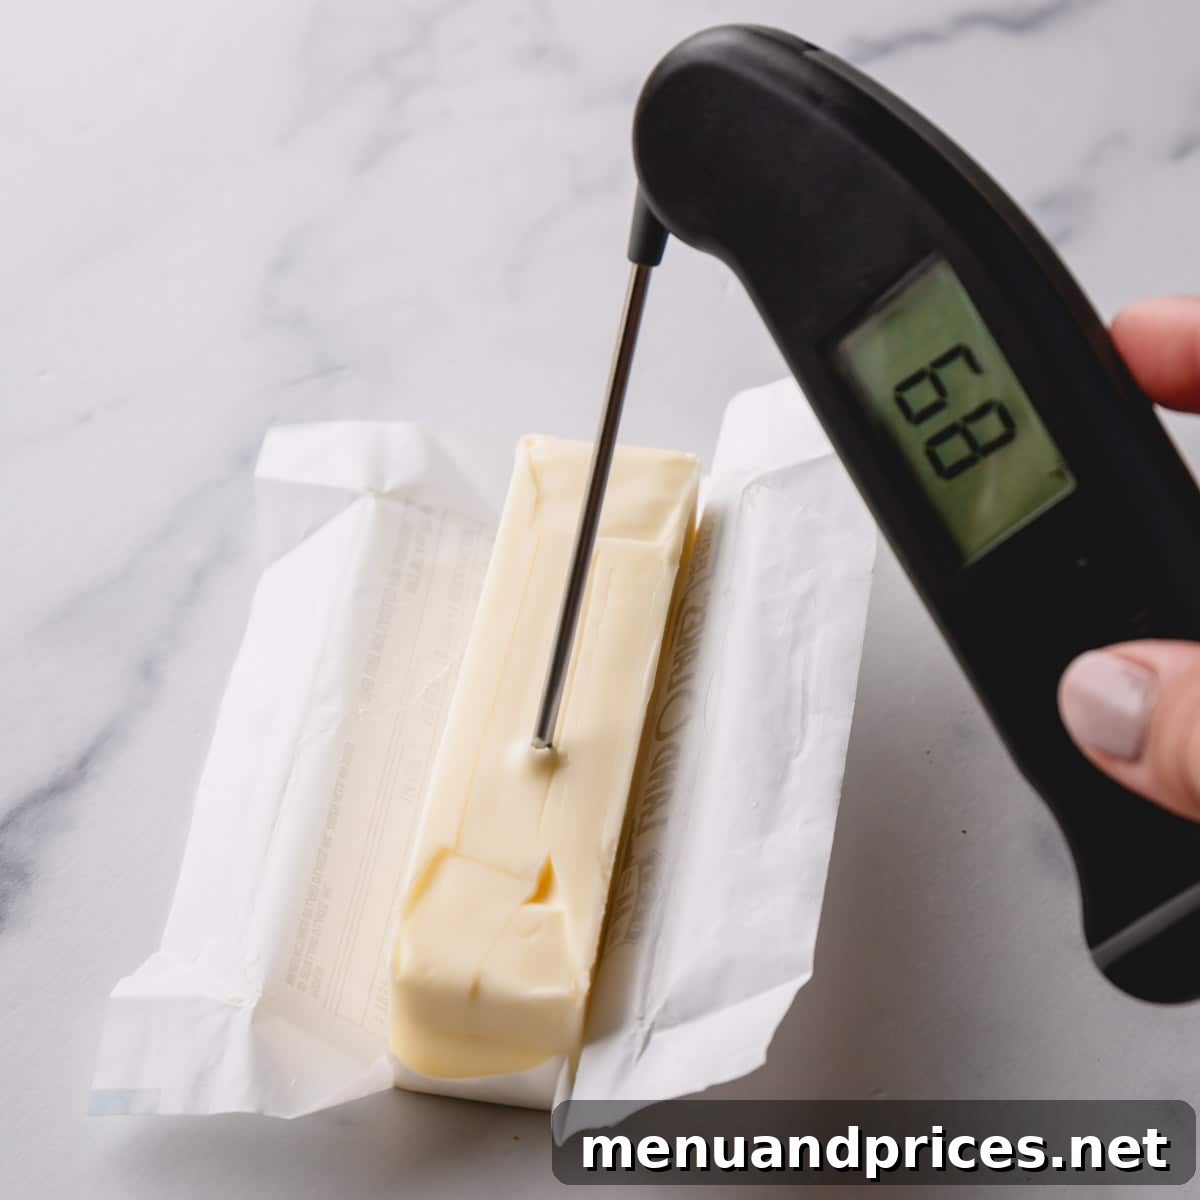
- It’s Cool to the Touch: Despite the name “room temperature,” ideal baking butter should still feel cool, rather than warm or greasy, against your skin. It should not feel clammy or slippery. The most reliable way to confirm this is with an instant-read thermometer; the internal temperature should register consistently between 65-68°F (18-20°C). If it feels genuinely warm, it’s likely too soft, and you risk a flat, dense, or greasy bake.
- It Dents with Slight Resistance (The Finger Test): This is arguably the most common and indispensable test. Gently press your finger into the stick of butter. It should leave a clear indentation without your finger sinking through easily or creating a mushy spot. There should be a subtle, distinct resistance. If your finger plunges deep into the butter with little to no effort, it indicates the butter is too soft. Overly soft butter will not incorporate enough air during the creaming process, leading to heavy cakes, cookies that spread too much, and a generally compromised texture.
- It Shouldn’t Be Shiny or Greasy: Perfectly room-temperature butter retains its dull, opaque appearance. Any sign of shininess, a glossy sheen, or visible pools of oil on the surface is a telltale sign that the butter has become too warm and has started to melt. Even a small amount of melting can disrupt the delicate fat structure required for proper aeration and emulsification. If you observe any of these characteristics, it’s advisable to chill the butter briefly in the refrigerator until it firms up slightly and loses its sheen before proceeding with your recipe.
By diligently observing these three signs, you’ll consistently achieve optimal butter consistency, setting the stage for consistently superior baking results and truly delicious creations every time.
More Essential Butter Tips for Baking Excellence
Mastering butter temperature is just one facet of understanding this incredibly versatile ingredient. A deeper knowledge of butter’s various forms and applications can truly elevate your baking prowess and open up a world of culinary possibilities. Here are a few more essential tips to consider for achieving baking excellence:
- Butter 101: Delving Deeper: Go beyond the basics and explore the fascinating world of butter varieties. Understand the fundamental differences between American and European butters, specifically their fat content and moisture levels, and how these impact your baking. Learn when to opt for salted versus unsalted butter, and the implications each has on flavor control in your recipes.
- Knowing When to Use Cold Butter: While room temperature butter is crucial for many applications, it’s important to remember that not all recipes call for it. For dishes like flaky pie crusts, light and airy biscuits, or tender scones, very cold butter (sometimes even frozen and grated) is essential. The cold butter creates steam pockets during baking, resulting in those desirable distinct, flaky layers. Understanding the specific role butter plays in different pastries is a hallmark of an advanced baker.
- Mastering the Art of Brown Butter: Discover a simple yet transformative technique: browning butter. By gently cooking butter until the milk solids caramelize, you unlock a rich, nutty, and deeply aromatic flavor profile. Brown butter adds incredible complexity and depth to a wide array of recipes, from cookies and cakes to glazes, sauces, and savory dishes, elevating ordinary preparations to extraordinary culinary experiences.
- Optimal Butter Storage: To maintain your butter’s freshness and prevent it from absorbing undesirable odors from your refrigerator, always store it in its original, airtight wrapper. Ideally, keep it in the butter compartment of your fridge, which is designed to keep it at a consistent, slightly warmer temperature than the main shelves. For extended storage, butter freezes exceptionally well and can be kept for up to six months without significant loss of quality.
By continuously expanding your knowledge of butter’s properties and optimal uses, you’ll gain a deeper appreciation for its versatility and profound impact on every baking endeavor, ensuring consistently delicious and impressive results.
How to Soften Butter (in 30 seconds)
Shinee Davaakhuu
Discover a quick and reliable method to bring butter to perfect room temperature in less than 30 seconds, a crucial step for achieving baking success.
1 min
Comment
Print Recipe
Ingredients
- 1 stick (115 g) cold butter Note 1
Equipment
-
Microwave
Instructions
-
Before starting, find your microwave’s wattage. Most are around 1000 Watts. This information is typically located on the side, back, or inside the microwave door frame.
-
Place the cold stick of butter, still in its wrapper and with the seam-side down, in the center of your microwave.
-
Set your microwave to 40% power (for a 1000-Watt microwave) and microwave for 10 seconds.
-
Carefully flip the butter stick over to its opposite side. Microwave again for another 10 seconds at 40% power. Check for desired softness; if still too firm, repeat in 5-second bursts at 20-30% power, flipping each time.
⭐️ Did you make this recipe?
Leave a review and let us know how you liked it!
Tips & Notes
Note 1: This method is designed for cold butter taken directly from the refrigerator. If your butter is frozen, it will require a significantly longer time to soften. Always use low power and short bursts to prevent melting.
Did you make this?
Leave a rating and your feedback. Thank you!