

The Ultimate No-Chill Christmas Sugar Cookies Recipe: Soft, Easy & Perfect for Decorating
Embrace the holiday spirit with our ultimate Christmas sugar cookies recipe, designed for maximum festive fun with minimal fuss! This tried-and-true recipe delivers wonderfully soft and tender cookies in just one hour, leaving you ample time for the most enjoyable part: decorating with vibrant royal icing and whimsical sprinkles. The best part? There’s no need to chill the dough, and these cookies bake up perfectly flat without puffing, creating an ideal canvas for your artistic endeavors. Get ready to bake, decorate, and spread some delicious cheer!

Pin this recipe now to save it for later!
Pin It
Why You’ll Love This Foolproof Christmas Sugar Cookie Recipe
Prepare to make these delightful Christmas sugar cookies a staple in your annual holiday baking tradition! This meticulously crafted recipe guarantees thin, crisp-edged cookies with an incredibly rich, buttery flavor, consistently delivering perfect results every single time. They are truly ideal for a festive Christmas cookie exchange or to leave out with a glass of milk for Santa on Christmas Eve, spreading joy and deliciousness throughout the holiday season.
- Irresistible Flavor – Infused with a delicate hint of pure vanilla and a touch of almond, these cookies offer a subtly sweet and complex flavor profile. This balance means they pair perfectly with as much vibrant, sugary royal icing as your heart desires, allowing the cookie’s inherent deliciousness to shine through without being overly sweet on its own.
- Beginner-Friendly & Foolproof – Whether you’re a novice baker or a seasoned pro, this recipe is designed for success. By following our clear, easy-to-understand step-by-step instructions, you are guaranteed to achieve beautifully baked cookies. Be sure to read through our expert tips before you begin for an even smoother baking experience!
- Perfect for Family Fun – Baking these cookies offers a wonderful opportunity for family bonding. Involve your children in every step of the process – from carefully measuring and mixing ingredients, to excitedly rolling out the dough and cutting out festive shapes, and finally, unleashing their creativity during the decorating phase. It’s a magical way to create cherished holiday memories together!
- No Chilling Required! – One of the greatest advantages of this recipe is that chilling the dough is entirely optional. This means you can mix, roll, cut, bake, and decorate all on the same day, significantly speeding up your holiday baking process without compromising on quality or taste.
This recipe transforms holiday baking into an effortless and enjoyable activity, ensuring a batch of perfect cookies without the stress!
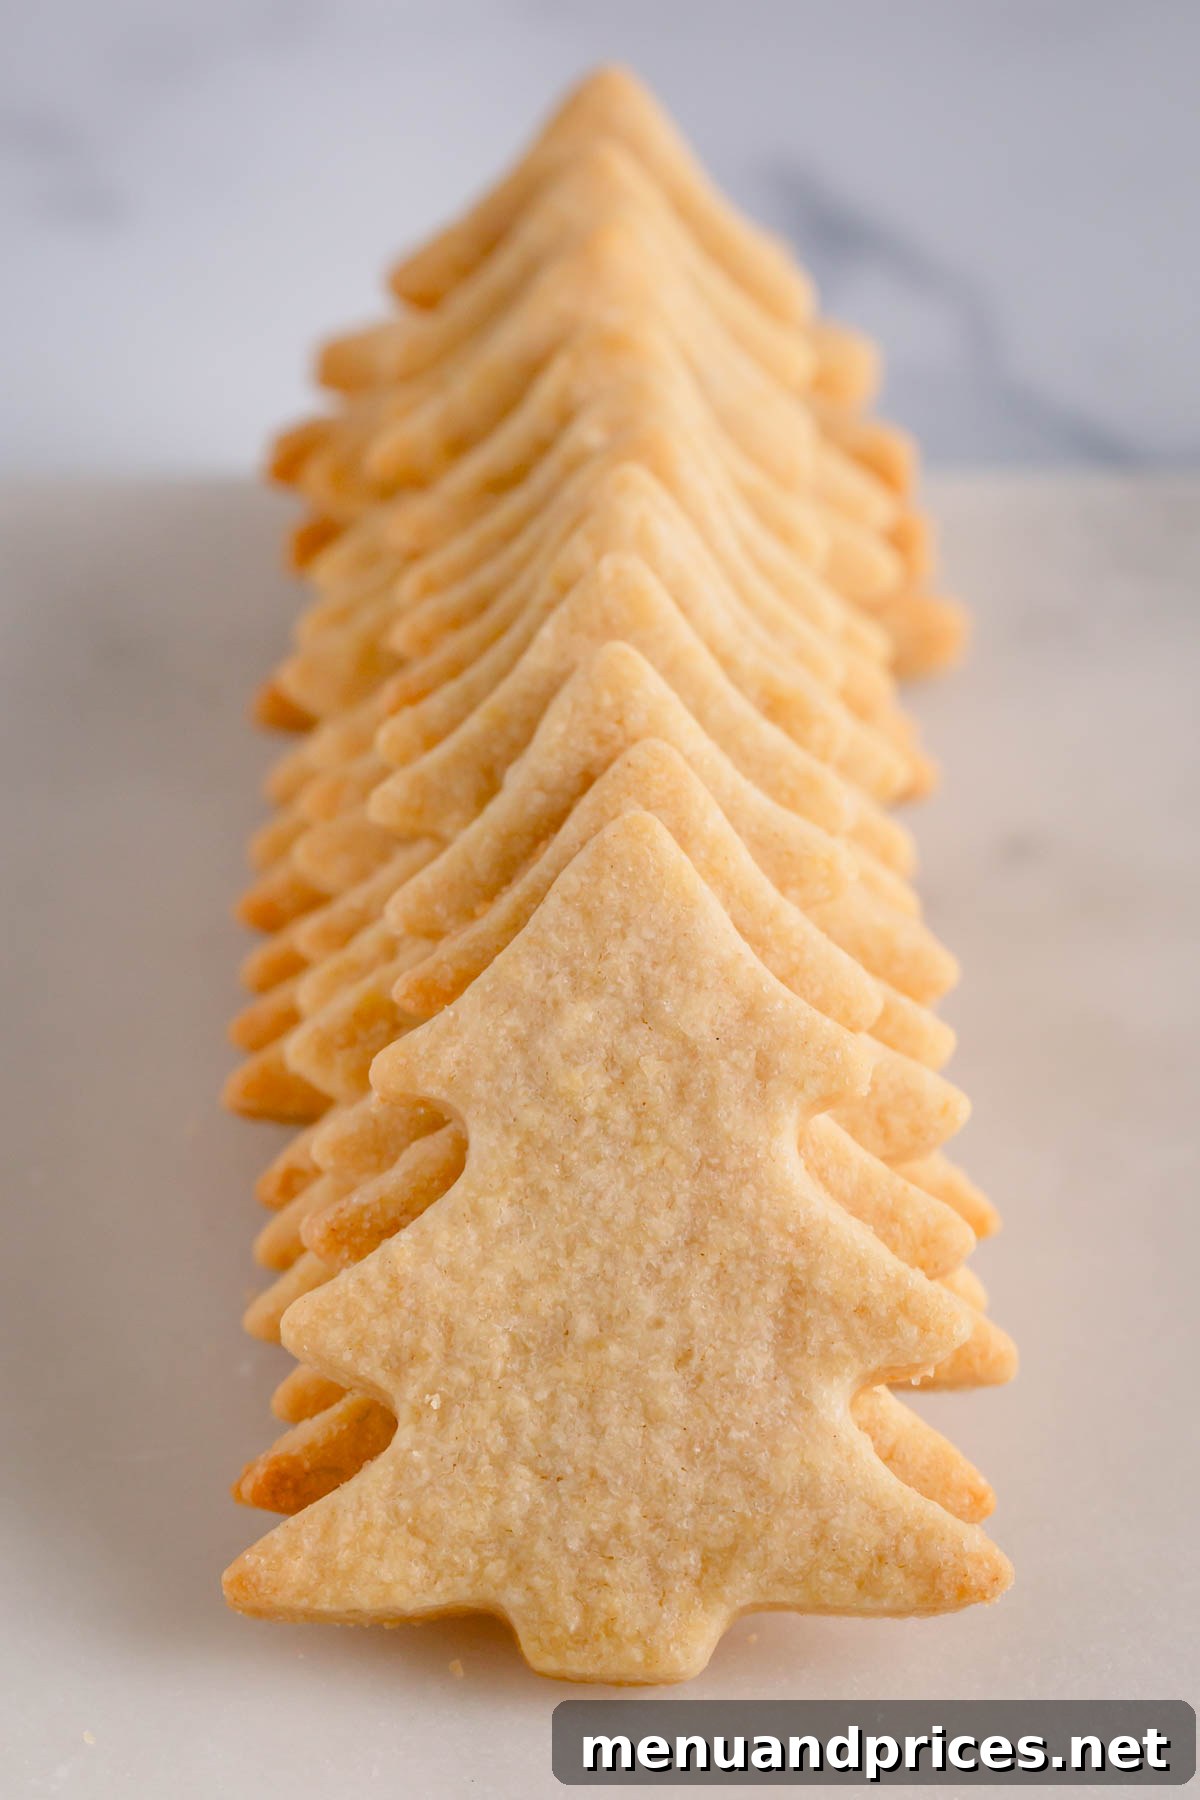
Key Ingredient Notes: Understanding Their Role in Perfect Sugar Cookies
Every ingredient in this recipe plays a vital role in achieving the perfect soft, tender, and flat Christmas sugar cookies. Understanding their purpose will help you bake with confidence and achieve consistent results.
For the Cookies: Building the Foundation of Flavor and Texture
- All-Purpose Flour – You’ll need three cups, and precise measurement is crucial for the ideal cookie texture. I highly recommend measuring your flour using the spoon and level method or, even better, a kitchen scale (375g). A scale offers unparalleled accuracy, preventing dense or dry cookies.
- Granulated Sugar – Also commonly known as white sugar or table sugar, granulated sugar is essential for both sweetness and contributing to the moist, tender texture of these Christmas sugar cookies. It helps the cookies spread slightly and achieve that desirable crisp edge.
- Brown Sugar – For best results, pack the brown sugar tightly into your measuring cup before adding it to the mixture. I prefer using light brown sugar as it imparts a subtle caramel note and a lovely softness without making the cookies too dark. Dark brown sugar can be used for a deeper molasses flavor and color.
- Cornstarch – This humble ingredient is the secret weapon for incredibly soft cookies! Cornstarch inhibits gluten development in the flour, resulting in a more tender crumb that resists becoming tough or overly crispy.
- Baking Powder – When fresh and active, baking powder provides a delicate lift to the cookies, creating a light and airy texture. Crucially, it helps the cookies maintain their shape and prevents them from puffing up excessively, ensuring a perfectly flat surface for decorating.
- Kosher Salt – Salt is a flavor enhancer, balancing the sweetness and bringing out the rich buttery notes of the cookies. While I prefer Diamond Crystal kosher salt for its fine texture, any brand of coarse kosher salt you typically use will work perfectly.
- Unsalted Butter – Room temperature butter is non-negotiable for this recipe. Butter around 67°F (19°C) will yield slightly when gently pressed with your finger. This allows it to incorporate smoothly into the dry ingredients, ensuring an even distribution of fat and a tender cookie.
- Egg – Just like the butter, ensure your egg is at room temperature. This helps it emulsify better with the other ingredients, creating a cohesive dough. Simply leave it on your kitchen counter for about 30 minutes before you start baking.
- Extracts – A generous amount of pure vanilla extract (consider making your own DIY vanilla extract!) and a touch of almond extract are critical for these cookies’ nostalgic flavor. While the vanilla flavor is prominent, the almond extract subtly enhances the overall taste profile, adding a complexity that you’ll notice more by its absence if you omit it.
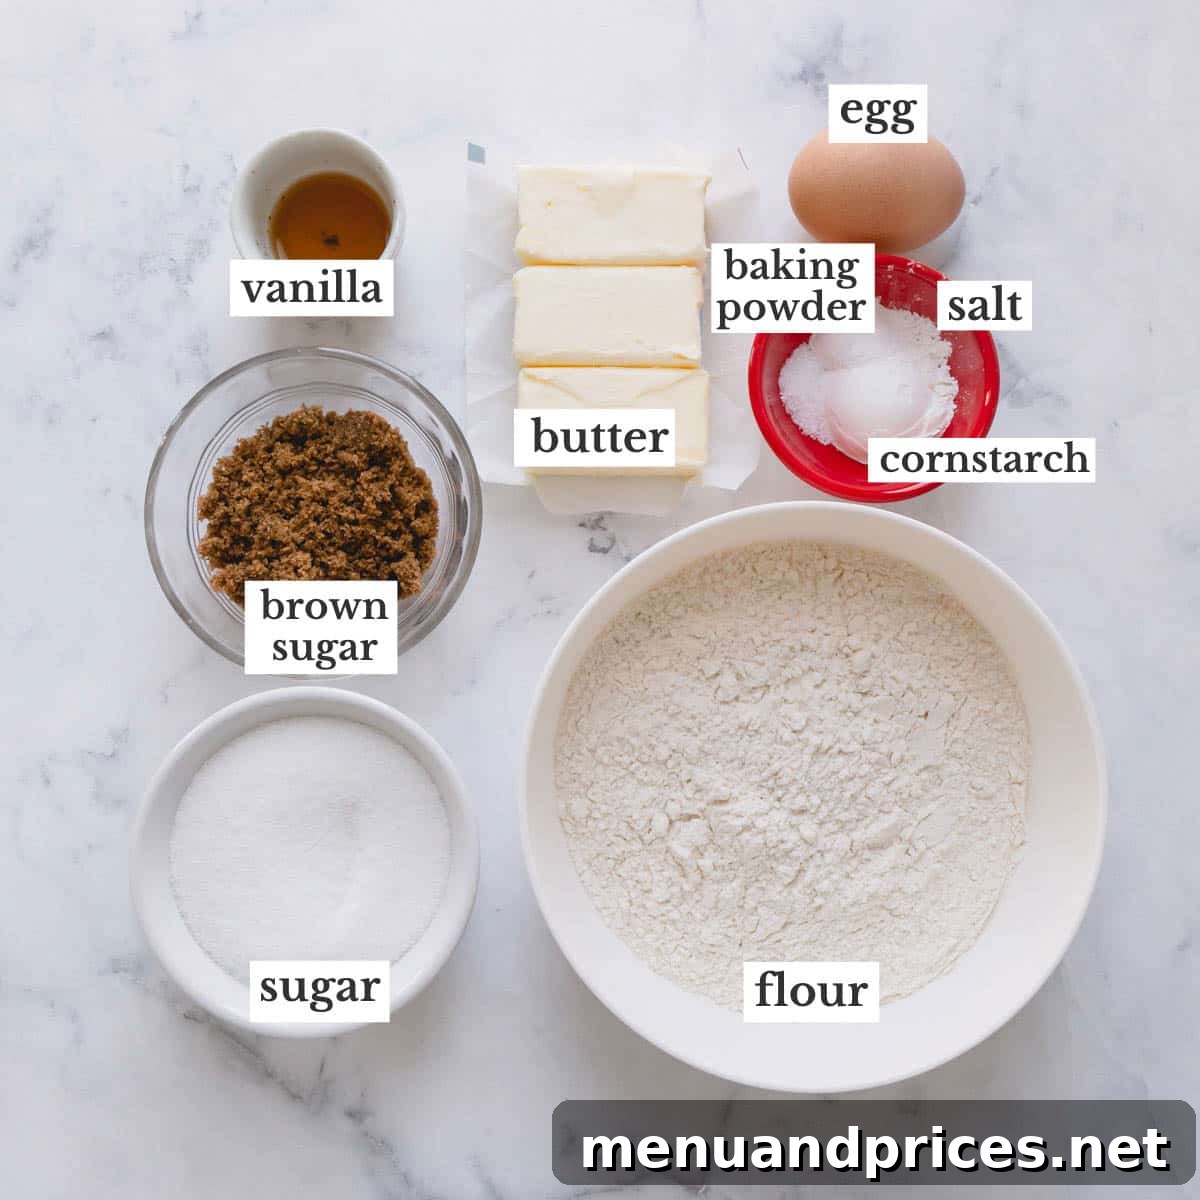
For Decorating: The Fun Part!
Once your cookies are baked and cooled, it’s time to unleash your creativity with these festive decorating essentials:
- Royal Icing – A batch of our easy-to-make royal icing is perfect for intricate designs. Dye it into a variety of festive Christmas colors to bring your cookies to life.
- Fun Toppings – Elevate your decorated cookies with a dazzling array of toppings. Use homemade colored sugar in traditional holiday hues and an assortment of holiday-themed sprinkles for extra sparkle and texture.
How to Make These Festive Christmas Sugar Cookies: Step-by-Step Guide
Follow these simple instructions to create the perfect batch of Christmas sugar cookies. The process is straightforward, ensuring delightful results every time.
1. Prepare the Dough: The Reverse-Creaming Method
This recipe utilizes the reverse-creaming method, which is key to achieving flat, tender cookies that hold their shape beautifully for decoration. Unlike traditional methods, sugar is first combined with dry ingredients, then butter is slowly incorporated.
- Combine Dry Ingredients: In a large mixing bowl fitted with a paddle attachment, combine the all-purpose flour, granulated sugar, packed brown sugar, baking powder, cornstarch, and kosher salt. Mix on low speed until all ingredients are thoroughly combined and evenly distributed.
- Add Butter: With the mixer still on low, gradually add the room-temperature unsalted butter, a few pieces at a time. Continue mixing for 1-2 minutes until the flour mixture is evenly moistened and takes on the consistency of wet sand. The goal is to coat the flour particles with fat before liquid is added, which helps inhibit gluten development and results in a softer cookie.
- Incorporate Wet Ingredients: Next, add the room-temperature large egg, pure vanilla extract, and almond extract. Mix until these wet ingredients are just combined into the dough, typically about 30 seconds. At this stage, the dough may still appear crumbly, but it should easily come together and hold its shape when squeezed firmly with your hands.
- Divide and Knead: Carefully divide the crumbly dough into two equal portions. Gently knead each portion into a smooth ball. Avoid overworking the dough, as this can develop too much gluten and lead to tough cookies.
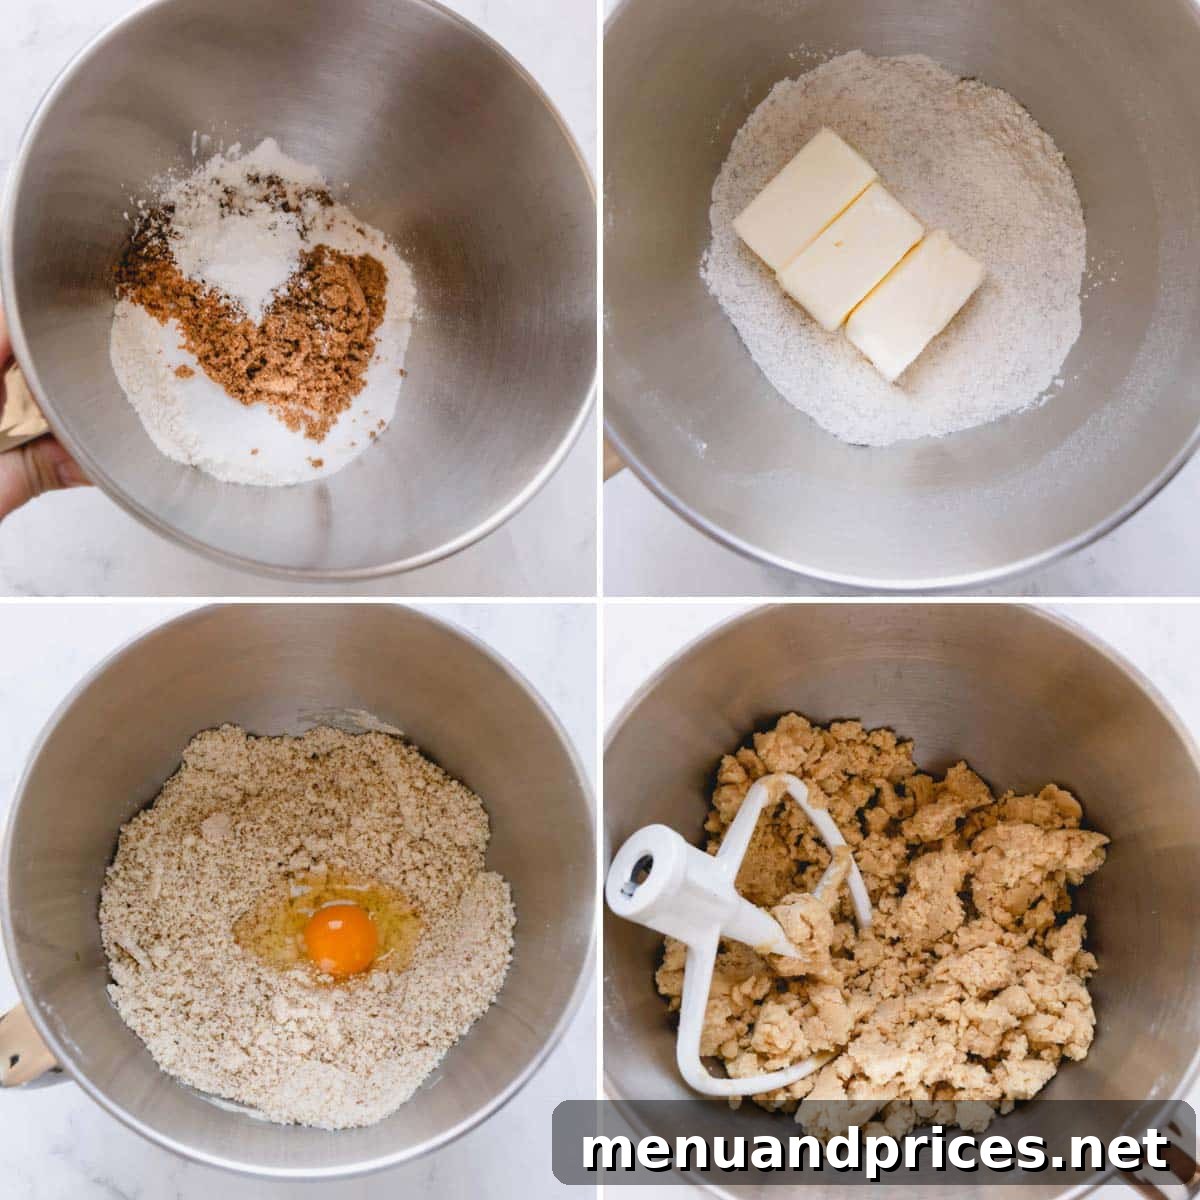
Prepare the Dough in Advance: Convenience Tip
If you’re not ready to shape and bake your cookies immediately, this dough is excellent for making ahead. Simply place the dough balls into separate plastic ziplock bags or wrap them tightly in plastic wrap, then refrigerate for up to 3 days. For longer storage, you can freeze the dough for up to 3 months. Thaw overnight in the refrigerator before use.
2. Shape and Bake the Cookies for Perfection
Before you begin shaping, preheat your oven to 350°F (175°C) and line 2-3 baking sheets with parchment paper or silicone baking mats. This ensures even baking and easy removal.
- Roll the Dough Evenly: Place one dough ball onto a lightly floured silicone mat or a piece of parchment paper. Using an adjustable rolling pin (a true game-changer for consistency!), roll the dough into an even ¼-inch thick disk. Uniform thickness is crucial for cookies that bake evenly.
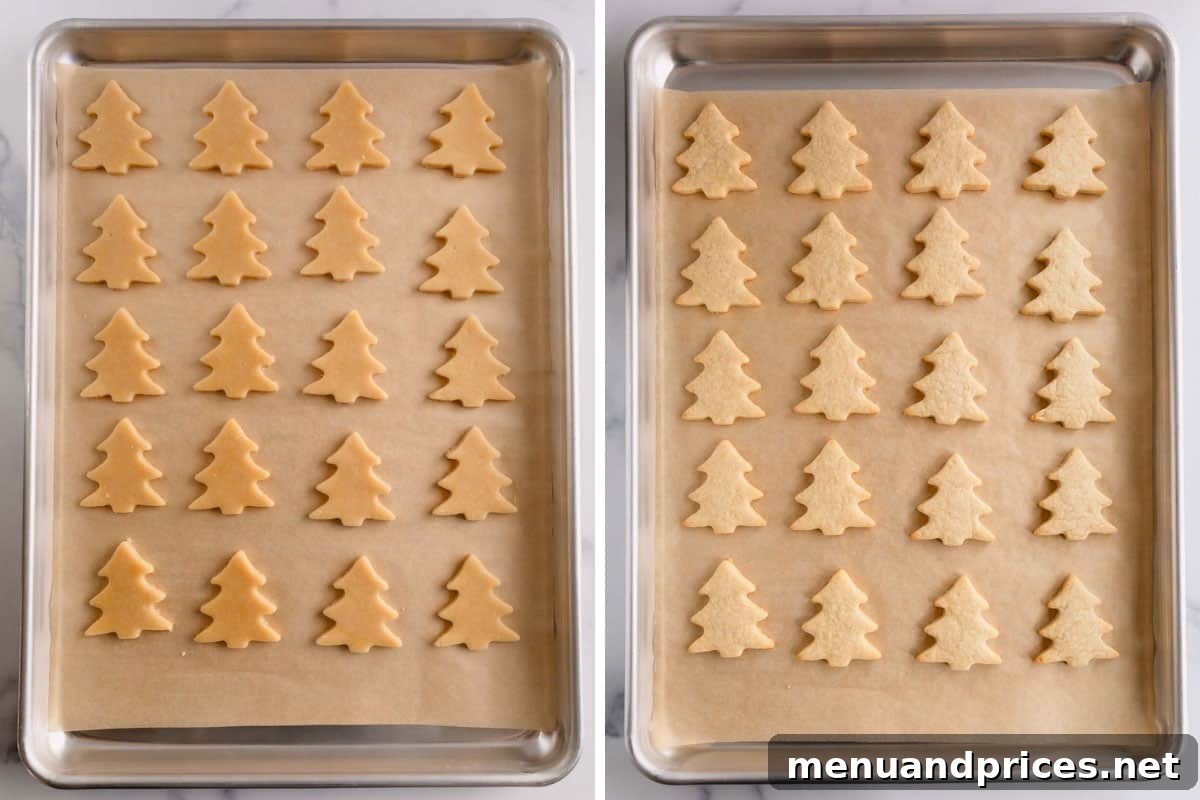
- Cut Festive Shapes: This is where the holiday fun truly begins! Using your favorite Christmas cookie cutters (think candy canes, trees, stars, or snowflakes), cut out your cookie shapes. Carefully arrange them on the prepared baking sheets, leaving about an inch of space between each cookie to allow for slight spreading.
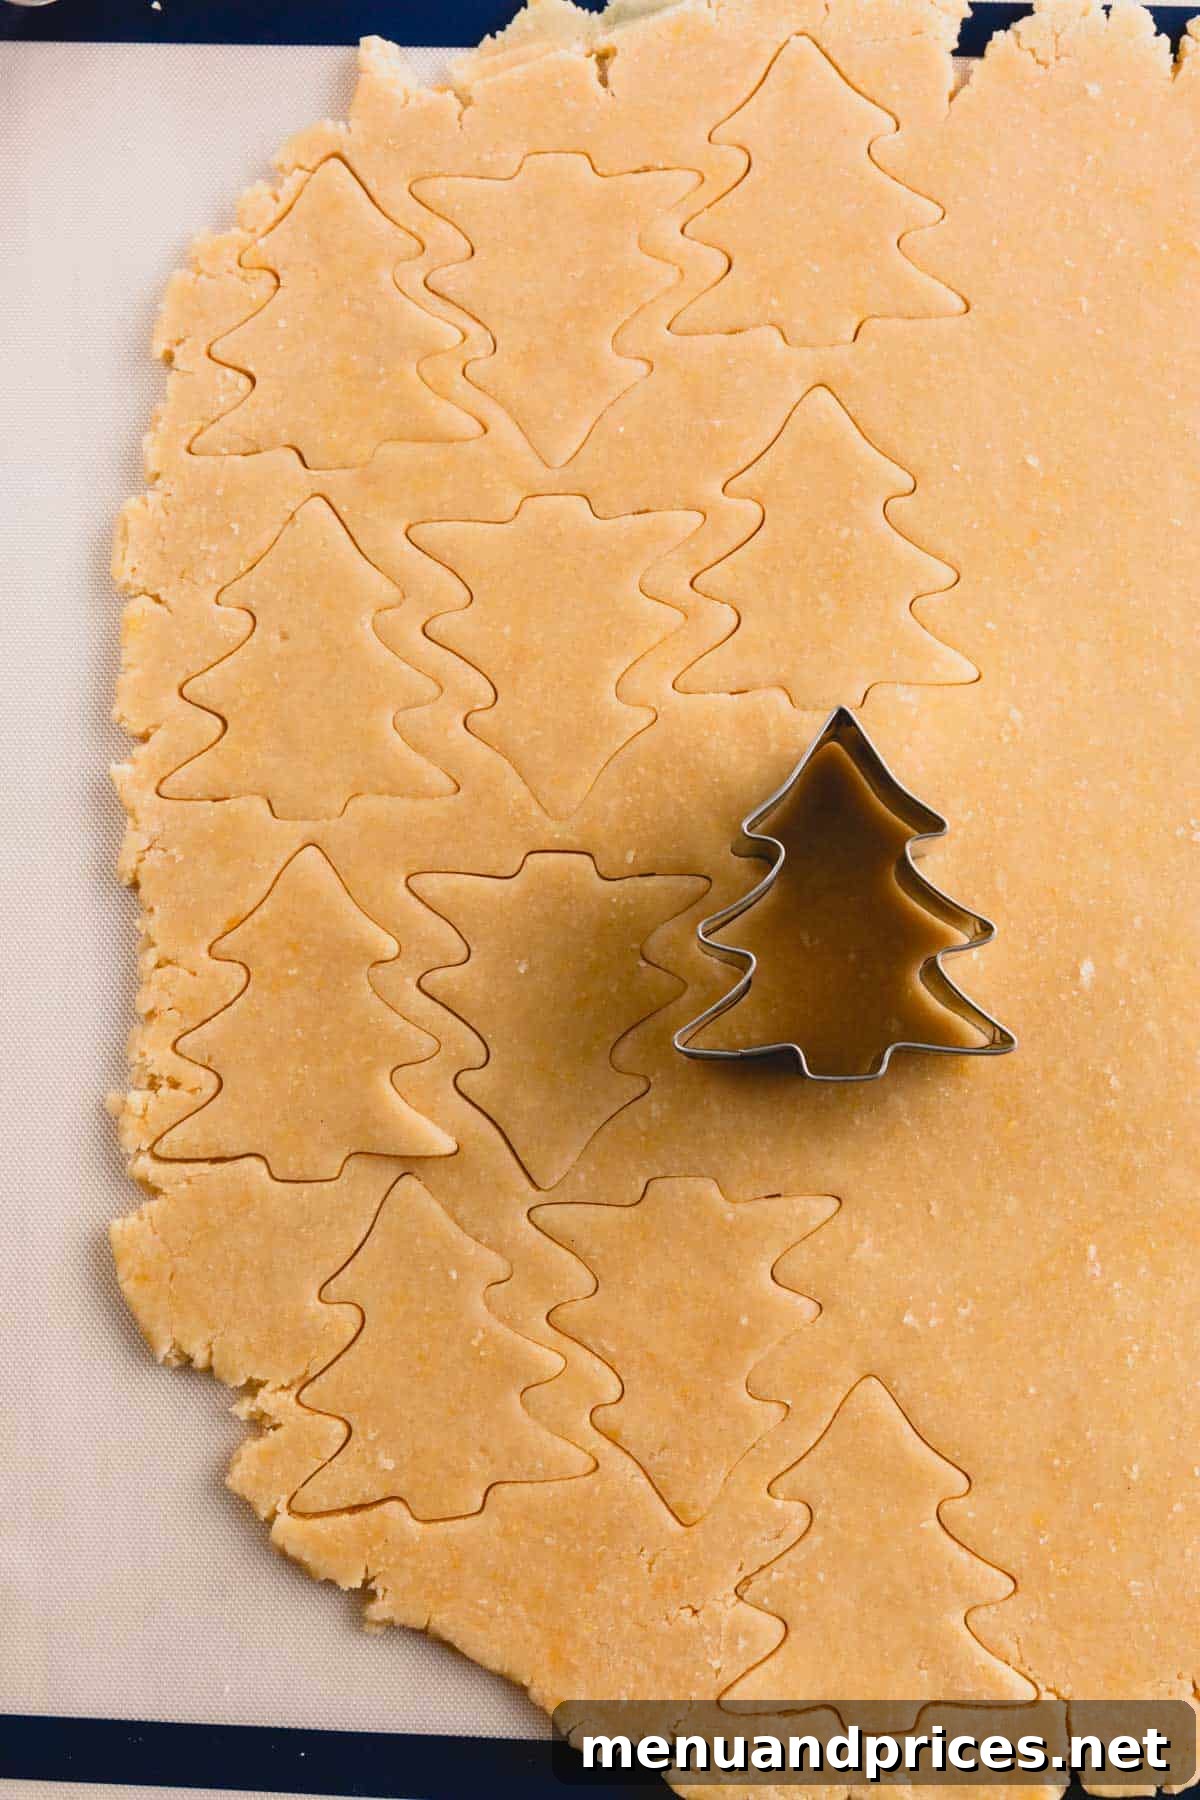
- Re-roll Scraps: Gather any dough scraps, gently press them back together, and re-roll the dough to cut out additional cookies. Continue this process until all the dough is used. Try not to overwork the dough during re-rolling to maintain tenderness.
- Bake to Golden Perfection: Bake the cookies for approximately 10-13 minutes, or until the edges begin to turn a light golden color. The centers should still look slightly soft. Baking times can vary depending on your oven, so keep a close eye on them.
- Cool Completely: Once baked, allow the cookies to cool on the baking sheet for about five minutes. This helps them firm up before you move them. Then, carefully transfer them to a wire cooling rack to cool completely. Cookies must be entirely cool before decorating to prevent the icing from melting or running.
3. Decorate the Cookies: Your Artistic Touch
Now for the most creative and fun part! Decorating allows you to personalize each cookie with festive designs.
- Prepare Royal Icing: Begin by preparing a batch of our simple 4-ingredient royal icing recipe. Achieving the right consistency is key for beautiful decorations.
- Color the Icing: Divide the prepared royal icing into 3-4 separate bowls. Use gel food coloring to dye the icing into traditional holiday colors like vibrant red, cheerful green, and serene blue. Remember to reserve one bowl of icing in its natural white color for contrast and detail work.
- Pipe and Decorate: Transfer each colored icing into tipless piping bags. Now, let your imagination soar! Get creative and decorate your Christmas sugar cookies with intricate patterns, simple outlines, or full floods of color.
How to Decorate with Royal Icing: A Mini-Guide for Flawless Cookies
Achieving beautifully decorated cookies with royal icing is simpler than you might think. Follow these essential icing tips for a flawless, professional-looking finish:
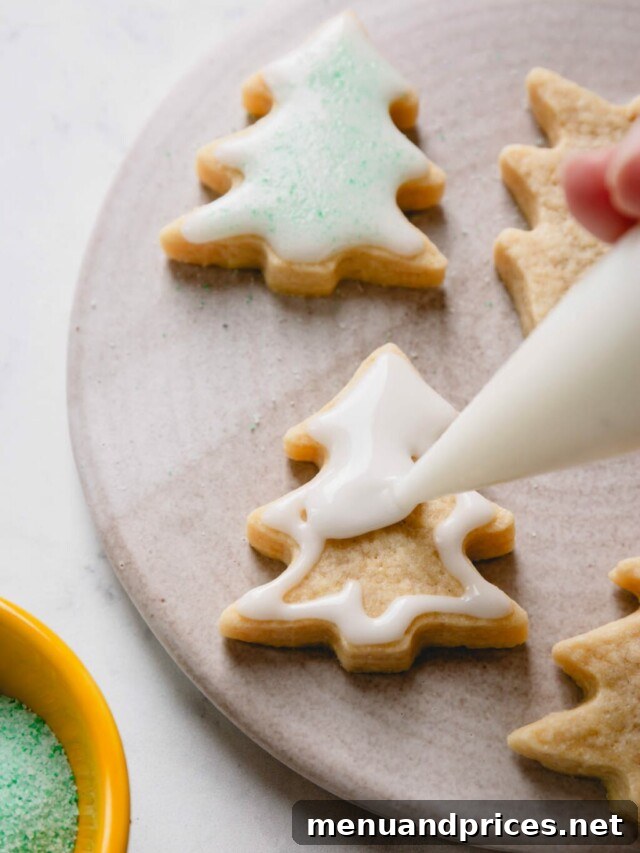
- Outline the Cookies: Using a slightly thicker consistency of royal icing (known as “outline consistency”), carefully pipe a border around the perimeter of each cookie. This creates a dam that will hold in the “flood” icing.
- Flood the Cookies: Once the outline has set for a few minutes, switch to a thinner “flood consistency” royal icing. Generously fill the outlined area with the flood icing. Use a scribe tool or a toothpick to gently spread the icing to the edges and pop any air bubbles, ensuring an even and smooth surface.
- Add Colored Sugar and Sprinkles: For extra sparkle and festive flair, immediately sprinkle colored sugar, edible glitter, or holiday-themed sprinkles onto the wet flood icing. This ensures they adhere beautifully to the cookie.
- Allow to Fully Set: Patience is a virtue when it comes to royal icing! Allow the icing to fully set and harden before stacking the cookies in storage containers. Depending on humidity levels, this crucial drying process can take anywhere from 12 to 48 hours. Stacking cookies too soon will smudge your beautiful designs.
Expert Tips for Sugar Cookie Success: Achieve Bakery-Quality Results
Elevate your Christmas sugar cookie game with these invaluable tips, ensuring your cookies are not just delicious but also perfectly presented for the holidays.
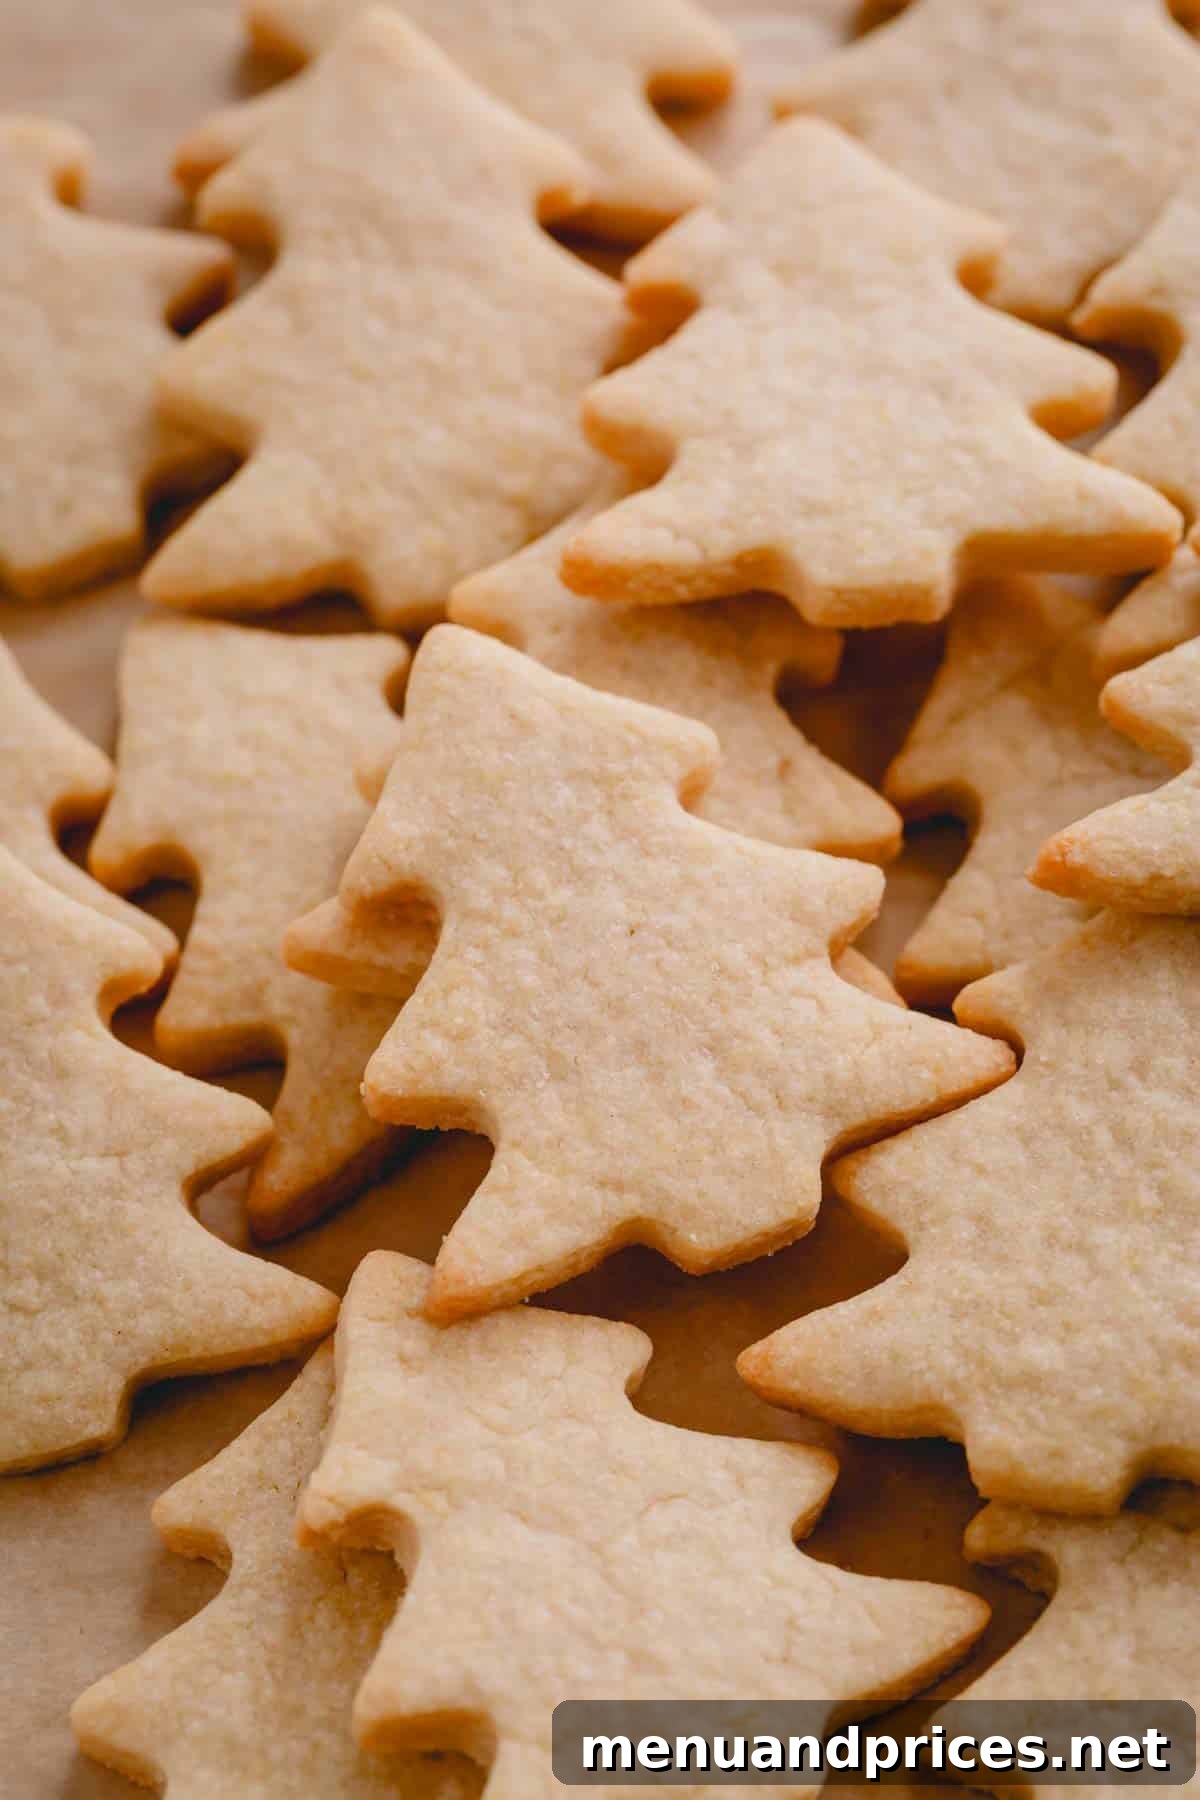
- Embrace the Reverse-Creaming Method: This technique is a game-changer for sugar cookies! Most conventional sugar cookie recipes begin by creaming butter and sugar together, then adding dry ingredients. However, the reverse-creaming method involves combining sugar with the dry ingredients first, then cutting in the butter. This unique approach coats the flour in fat, inhibiting excessive gluten development. The result? Perfectly flat cookies that don’t puff up in the oven, providing an impeccably smooth surface ideal for intricate icing designs, along with an irresistibly tender crumb.
- Avoid Refrigerating Cut-Out Cookies: Once you’ve cut out your beautiful cookie shapes, resist the urge to refrigerate them before baking. Chilling raw, cut-out cookies can dry them out, potentially leading to a tougher texture. This also applies to decorated cookies; condensation from the fridge can cause moisture issues and ruin your meticulously applied icing designs. Bake them fresh or store dough balls if prepping ahead.
- Properly Fill Your Piping Bags: To prevent messy spills and ensure a smooth decorating experience, never overfill your piping bags. Fill the bag approximately two-thirds of the way to the top. This leaves enough room to twist the top securely and apply pressure comfortably without icing oozing out.
- Keep Cookies Soft with a Marshmallow Trick: Want to keep your sugar cookies wonderfully soft for days, whether decorated or plain? Here’s a clever trick: spread a thin layer of mini marshmallows on the bottom of an airtight storage container. Place a wire cooling rack directly on top of the marshmallows. Arrange your cooled cookies on the wire rack, then seal the container with a lid. The marshmallows release just enough moisture to keep the cookies perfectly tender, without making them sticky. Store at room temperature on the counter.
Make-Ahead Tips: For Stress-Free Holiday Baking
Planning ahead is the key to an enjoyable and stress-free cookie decorating day. By prepping your dough and icing in advance, you can jump straight into the fun part: shaping and decorating!
- Cookie Dough Preparation: You can prepare the cookie dough up to 3 days in advance and store it tightly wrapped in plastic in the refrigerator. For longer storage, the dough freezes beautifully for up to 3 months. If using frozen dough, thaw it overnight in the refrigerator. Before rolling and shaping, allow chilled dough (from fridge or thawed) to come to room temperature for 15-30 minutes; this makes it much easier to work with.
- Royal Icing Preparation: Royal icing is also excellent for making ahead. You can prepare it up to 2 weeks in advance and store it in an airtight container at room temperature (if made with meringue powder or paste) or in the refrigerator (if made with egg whites). For even longer storage, royal icing can be frozen for up to 2 months. Always allow the icing to warm to room temperature and stir thoroughly before using it to decorate the cookies, adding a tiny bit of water if needed to restore consistency.

Storing Tips: Keep Your Christmas Cookies Fresh and Beautiful
Proper storage is essential to maintain the freshness and beauty of your homemade Christmas sugar cookies. Follow these guidelines for both short-term and long-term storage:
- Room Temperature Storage: Once your Christmas sugar cookies are fully cooled (and royal icing is completely set, which can take 12-48 hours), they can be stored on the counter at room temperature for up to 1 week. For best results, stack the cookies in an airtight container with a piece of parchment paper placed between each layer to prevent sticking and preserve your decorations.
- Freezer Storage: For extended freshness, transfer your leftover cookies to a freezer-safe airtight container. Undecorated cookies can be frozen for up to 3 months. Decorated cookies, carefully layered with parchment paper, will maintain their quality in the freezer for up to 1 month.
- Thawing Frozen Cookies: To thaw frozen cookies, simply place them on the counter at room temperature for 8-12 hours. It’s crucial to keep the lid of the container closed during the entire thawing process. This prevents condensation from forming on the cookies, which can otherwise cause the royal icing colors to bleed or run, ruining your beautiful designs.
Christmas Sugar Cookies Recipe FAQs: Your Questions Answered
How far in advance can I make Christmas sugar cookies?
You can bake these festive sugar cookies up to 3 months before Christmas! Undecorated cookies will stay wonderfully fresh in the freezer for up to 3 months. If you plan to decorate them, the decorated cookies will last for 1 month in the freezer. Freshly baked cookies stored at room temperature can be kept for up to 1 week, though they are often enjoyed long before that!
How long do sugar cookies last with royal icing?
Royal icing itself has a very good shelf life at room temperature, often lasting up to 2 weeks. Therefore, applying royal icing will not significantly affect the overall storage time of the sugar cookies. The cookies will still last for up to 1 week when stored at room temperature in an airtight container.
What are the most popular Christmas cookie shapes?
The most beloved and common Christmas cookie shapes that evoke holiday cheer include classic candy canes, elegant stars, charming gingerbread figures, delicate snowflakes, and traditional Christmas trees. These shapes provide endless possibilities for creative decoration.
Can I use different extracts in this sugar cookie recipe?
Absolutely! While vanilla and almond extract create a classic flavor profile, feel free to experiment. You could try peppermint extract for a minty twist, lemon extract for a bright citrus note, or even a touch of rum or brandy extract for a more sophisticated flavor. Just be mindful that stronger extracts might require a smaller quantity.
Why do my sugar cookies spread too much?
Excessive spreading can be caused by several factors. Over-softened butter, incorrect flour measurement (too little flour or too much sugar), warm dough, or an oven that isn’t preheated properly can all contribute to spreading. Our recipe uses the reverse-creaming method and precise ingredient ratios to minimize spreading. Ensure your butter is at room temperature (not melted) and measure flour accurately, ideally with a kitchen scale.
More Festive Christmas Cookie Recipes to Explore
If you’re still craving more holiday baking inspiration, these other delightful Christmas cookie recipes are sure to bring joy to your kitchen:
- Almond Spritz Cookies – Delicate, buttery, and perfect for pressing into intricate shapes.
- Ultimate Butter Cookie Dough – A versatile dough that can be used for countless cookie variations.
- Classic Pecan Sandies – Crumbly, nutty, and wonderfully rich shortbread-style cookies.
- Russian Tea Cakes (Snowball Cookies) – Melt-in-your-mouth cookies dusted with powdered sugar, resembling little snowballs.

Christmas Sugar Cookies
By Shinee Davaakhuu
These nostalgic Christmas sugar cookies are made in just one hour, leaving you plenty of time to decorate with icing and sprinkles. They stay soft and tender without puffing up and don’t need to be chilled!
Comment
Print Recipe
Ingredients
For Sugar Cookies:
- 3 cups (375g) all-purpose flour
- ½ cup (100g) granulated sugar
- ¼ cup (50g) packed brown sugar Note 1
- ½ teaspoon baking powder
- 1 tablespoon cornstarch
- ¼ teaspoon coarse kosher salt
- 1 ½ sticks (170g) unsalted butter, at room temperature
- 1 large egg, at room temperature
- 2 teaspoons pure vanilla extract
- ¼ teaspoon almond extract (optional, Note 3)
For Decorating:
- 1 batch of royal icing
- Sprinkles and colored sugar
Equipment
- 1 stand mixer fitted with a paddle attachment
- Christmas cookie cutters
- 1 adjustable rolling pin
- 1 tipless piping bag (or several)
- Baking sheets and parchment paper/silicone mats
- Wire cooling rack
Instructions
TO PREPARE THE DOUGH:
- In a mixing bowl with a paddle attachment, combine flour, granulated sugar, brown sugar, baking powder, cornstarch, and salt. Mix on low speed until well combined.
- Add the room-temperature butter and mix on low speed for 1-2 minutes until the mixture is evenly moistened and resembles wet sand.
- Add the egg, vanilla extract, and almond extract. Mix until just combined, about 30 seconds. The dough will still be crumbly but should stick together when squeezed.
- Divide the dough into 2 equal parts. Gently knead each part into a smooth ball.
- You can proceed to shaping and baking immediately. Alternatively, wrap the dough tightly in plastic bags and refrigerate for up to 3 days, or freeze for up to 3 months.
TO SHAPE AND BAKE COOKIES:
- Preheat your oven to 350°F (175°C). Line 2-3 baking sheets with parchment paper or silicone mats.
- Place each dough ball on a silicone mat and roll it out into a ¼-inch thick disc. (TIP: An adjustable rolling pin helps achieve an even thickness.)
- Using Christmas cookie cutters, cut out the cookie shapes and arrange them on the prepared baking sheets, leaving some space between each.
- Gather the dough scraps, gently re-roll, and cut out more cookies until all the dough is used.
- Bake the cookies for 10-13 minutes, or until the edges begin to turn a light golden color.
- Cool the cookies on the baking sheet for 5 minutes, then transfer them onto a wire cooling rack to cool completely before decorating.
TO DECORATE THE COOKIES:
- Prepare the royal icing. Divide it into 3-4 bowls and dye into desired festive colors (e.g., red, blue, green), ensuring to keep some white icing.
- Place each colored royal icing into tipless piping bags and get creative decorating your cooled cookies with sprinkles and colored sugar.
⭐️ Did you make this recipe?
Please leave a review and let us know how you liked it!
Tips & Notes
Note 1: Brown sugar adds a lovely subtle flavor and ensures a tender, soft texture in the cookies. Both light and dark brown sugars work, but I prefer light brown sugar as it results in a lighter-colored cookie. Dark brown sugar will give a deeper molasses flavor and a darker hue.
Note 3: While the almond extract’s specific flavor might be subtle in the final cookie, it plays a crucial role in rounding out the overall flavor profile, making these sugar cookies exceptionally irresistible and giving them a special depth that pure vanilla alone can’t achieve.
Make Ahead Tips:
- Prepare the cookie dough up to 3 days in advance and store it tightly wrapped in plastic in the refrigerator. For longer storage, freeze the dough for up to 3 months.
- Thaw frozen cookie dough overnight in the refrigerator. Before rolling and baking, let chilled dough come to room temperature for 15-30 minutes to make it easier to handle.
- Royal icing can be made up to 2 weeks in advance and stored at room temperature (if made with meringue powder/paste) or refrigerated (if made with egg whites). Allow it to warm to room temperature before decorating.
Storing Tips:
- Once completely cooled and decorated (and icing fully set), store leftover cookies in an airtight container at room temperature for up to 1 week. Place parchment paper between layers to prevent sticking.
- Freeze decorated cookies for up to 1 month, or undecorated cookies for up to 3 months, in a freezer-safe container.
- To thaw frozen cookies, place them on the counter for 8-12 hours, keeping the lid closed to prevent condensation and color bleeding.
Nutrition (per serving)
Servings: 1 cookie
Calories: 110 kcal
Carbohydrates: 21g
Protein: 1g
Fat: 2g
Sugar: 12g
Sodium: 48mg
Course: Dessert
Cuisine: American

Did you make this? Leave a rating and your feedback. Thank you!