

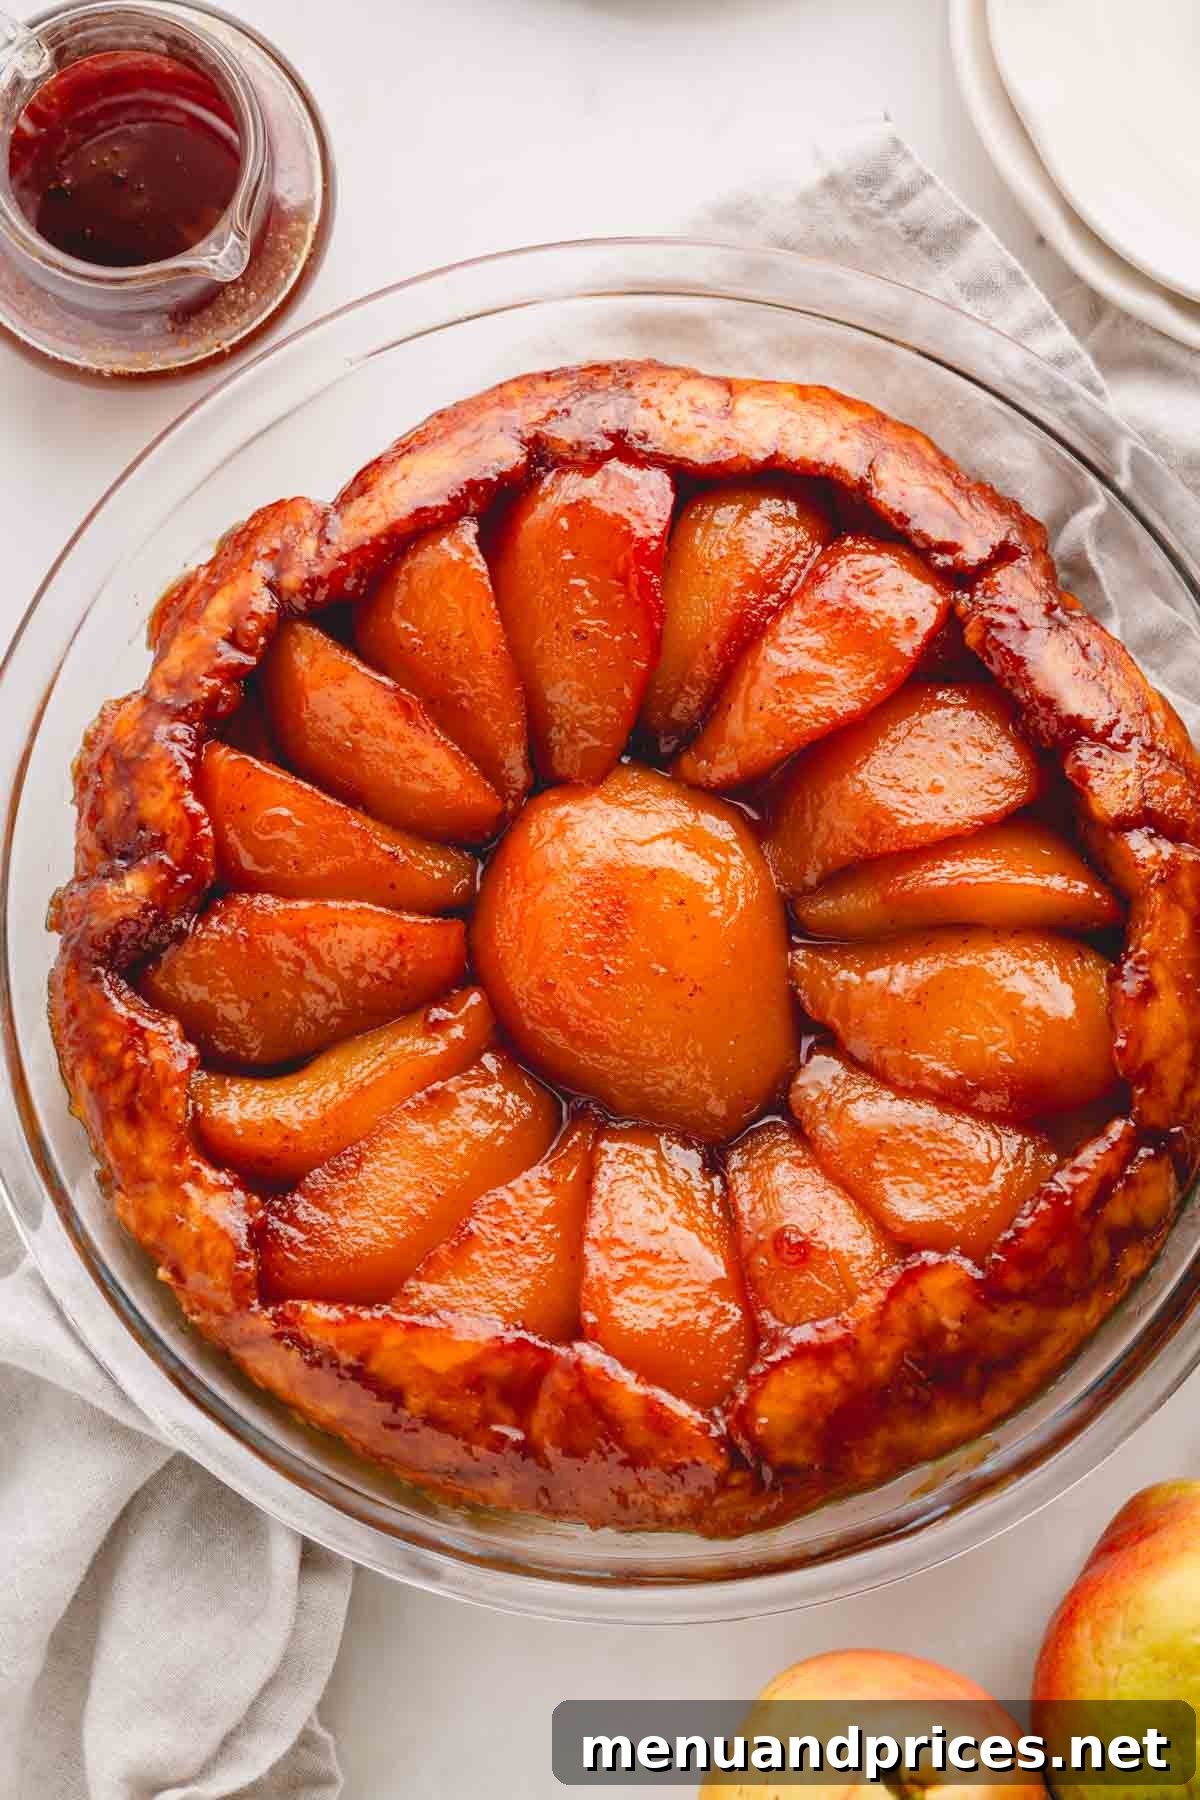
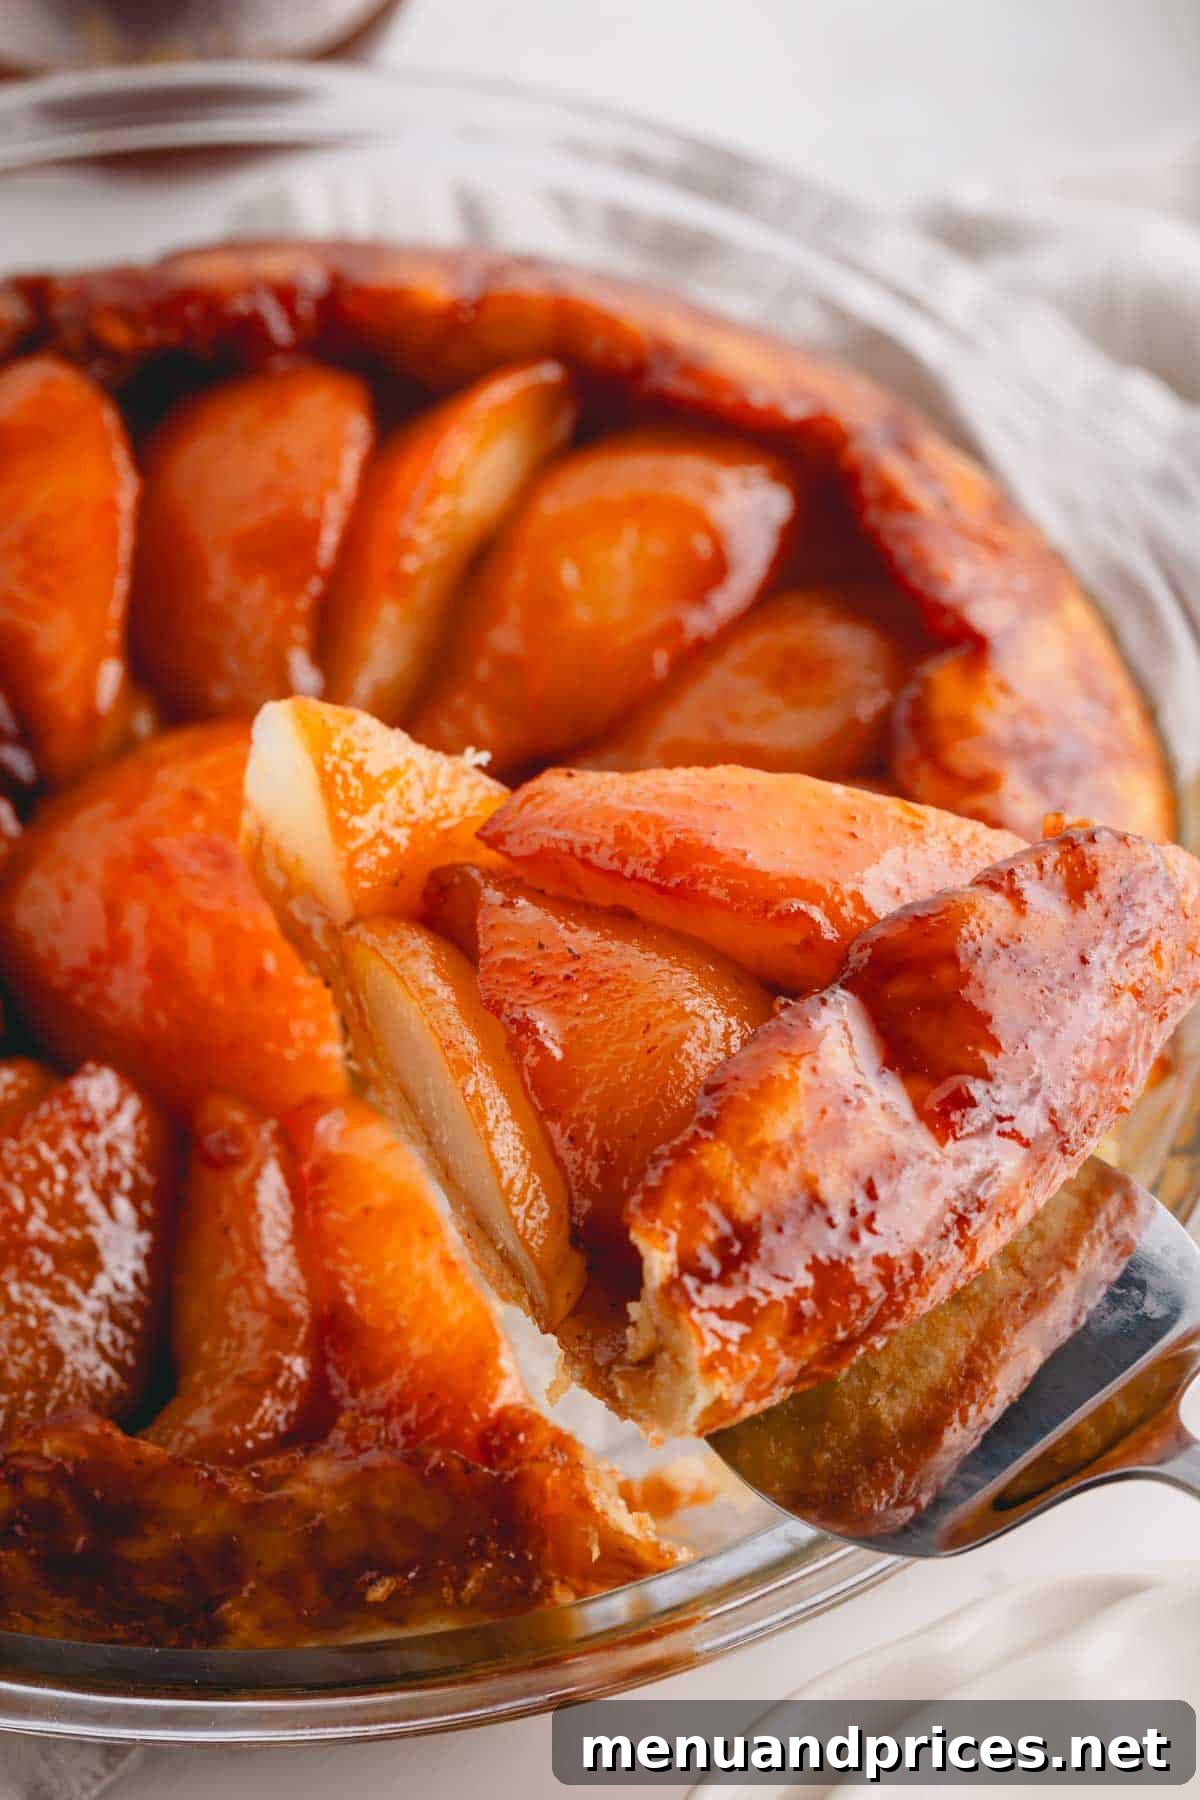
Experience the sheer delight of a truly remarkable dessert with this rustic yet elegant Pear Tarte Tatin, also lovingly known as French Pear Pie. This recipe masterfully combines the impressive artistry of a gourmet pastry with a surprising ease of preparation, making it an ideal choice for any home baker. Imagine ripe, succulent pears, slowly caramelized to golden perfection, nestled beneath a flaky, buttery crust. The result is a stunning, crowd-pleasing dessert that’s not only visually captivating but also bursts with an exquisite balance of sweet and tart flavors. It’s especially perfect for holiday gatherings or any occasion that calls for a touch of French sophistication and warmth.
Pin this now to find it later
Pin It
Why You’ll Fall in Love with This Pear Tarte Tatin
This exquisite pear tarte tatin is more than just a dessert; it’s an experience. With its naturally elegant appearance and delightful fruity notes, it’s the ideal after-dinner treat that promises to impress. Here’s why this French pear pie recipe consistently earns rave reviews and becomes an instant favorite:
- Effortlessly Impressive: Don’t let its sophisticated presentation fool you. This recipe truly looks gourmet, yet it comes together with surprisingly simple steps. With a minimal prep time of just about 10 minutes, you can create a dessert that appears to have taken hours of meticulous effort.
- A Symphony of Unique Flavors: While apple tarte tatin is a classic, this pear rendition offers a distinctively delicate and aromatic sweetness. The tender, caramelized pears, infused with warming spices, create a unique flavor profile that is both comforting and refreshing. It’s a wonderful change of pace that beautifully suits any season.
- Perfect for Planning Ahead: Hosting a dinner party or simply want to enjoy a slice later? This tarte tatin is incredibly forgiving. It holds its freshness beautifully in the refrigerator for several days, allowing you to prepare it in advance or savor the delicious leftovers.
- Guaranteed to Wow Your Guests: Using basic kitchen equipment and requiring just over an hour of your time from start to finish, you can easily whip up this inverted French pear pie. Its golden crust, shimmering caramelized pears, and captivating aroma are sure to leave a lasting impression on anyone lucky enough to try a slice.
From its simple preparation to its unforgettable taste, this pear tarte tatin is a testament to the fact that some of the best desserts are also the most straightforward to make. It’s the perfect blend of rustic charm and refined elegance, ready to become a cherished addition to your recipe collection.
Essential Ingredients for Your Pear Tarte Tatin
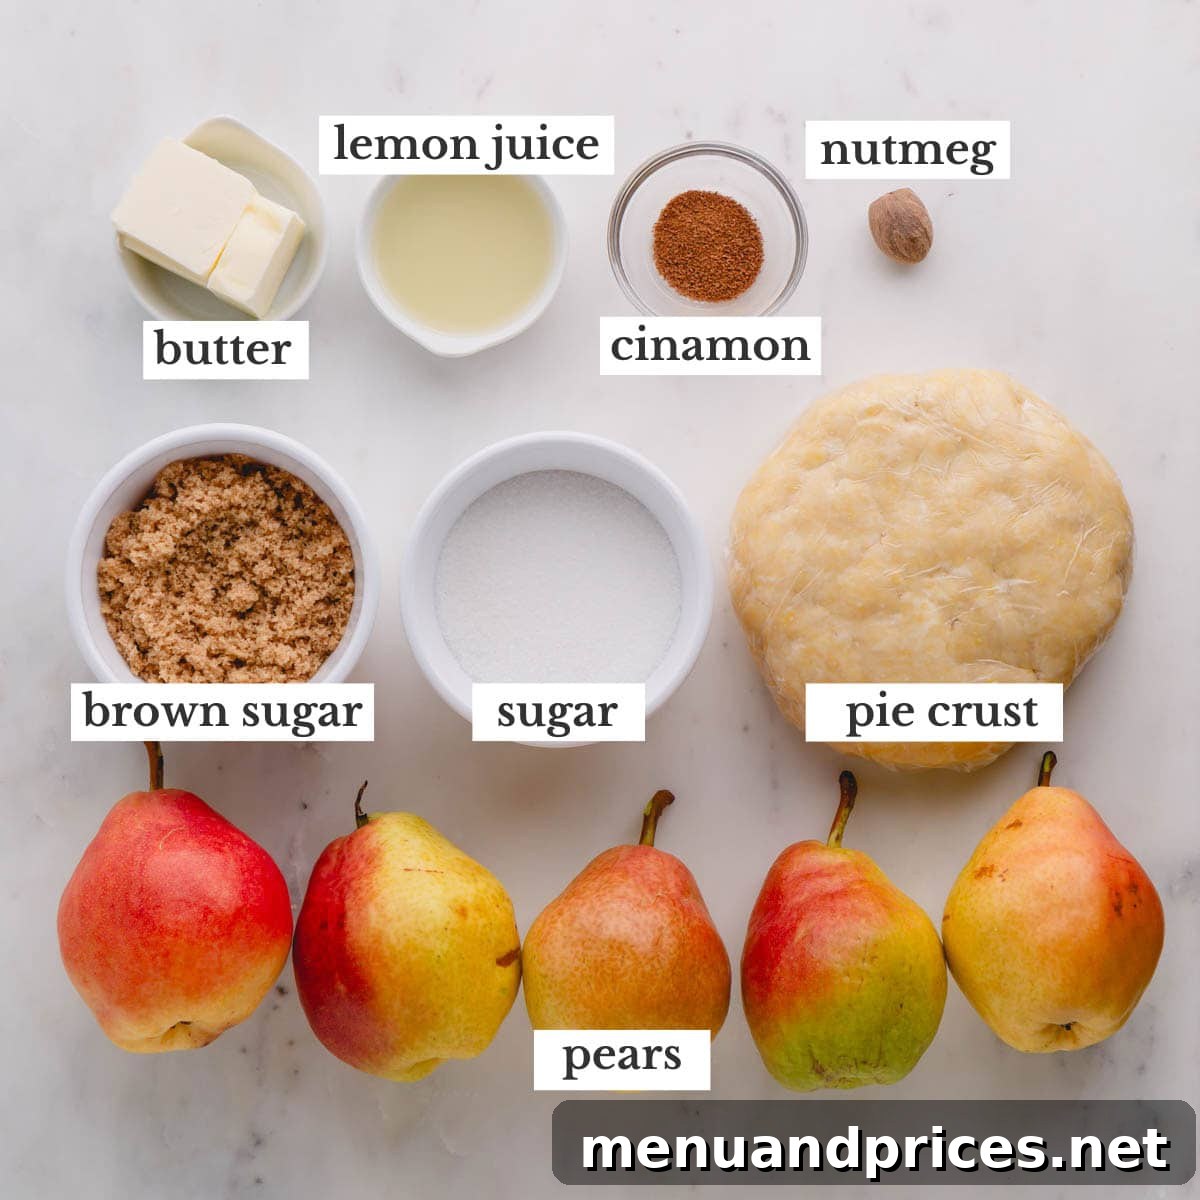
Crafting the perfect pear tarte tatin begins with selecting high-quality ingredients. Each component plays a crucial role in achieving the rich flavors and delightful textures that make this dessert so special. Here’s what you’ll need and some key notes for each:
- Pears: The star of our show! For this recipe, firm, ripe pear varieties like Bosc, Bartlett, or Anjou are ideal. They hold their shape beautifully during cooking and offer a delicate sweetness. Avoid pears that are overly soft or mushy, as they can break down too much during caramelization and baking, resulting in a less appealing texture.
- Lemon Juice: A splash of fresh lemon juice is essential. It serves a practical purpose by preventing the peeled and sliced pears from browning due to oxidation, preserving their beautiful light color. Furthermore, it adds a subtle brightness that balances the sweetness of the caramel, enhancing the overall flavor profile of the dessert.
- Butter: Unsalted butter is my preferred choice for caramelizing the pears. It allows for better control over the salt content in the final dish. However, if salted butter is all you have on hand, it will certainly work; just be mindful of any additional salt you might add elsewhere. Butter is key for creating that rich, glossy caramel.
- Sugar: A harmonious blend of white granulated sugar and light brown sugar is used to create the luscious caramel. Granulated sugar provides a clean sweetness and helps achieve a crystal-clear caramel base, while light brown sugar introduces a deeper, more molasses-like flavor and a wonderfully chewy texture to the caramelized pears. This combination yields a complex, irresistible sweetness.
- Spices: Ground cinnamon and nutmeg are the warming spices that elevate this tarte tatin to another level. They complement the natural sweetness of the pears, adding depth and a comforting aroma. For the freshest and most vibrant flavor, I highly recommend grating a whole nutmeg yourself, as its flavor diminishes quickly once pre-ground.
- Pie Crust: The foundation of any great pie! You can opt for a high-quality store-bought pie crust for convenience, or for an truly exceptional tarte tatin, consider making a homemade all-butter flaky pie crust. A good crust provides the perfect contrast to the soft, sweet pears.
Step-by-Step Guide: How to Make Pear Tarte Tatin
Creating this stunning French pear pie is a straightforward process that yields incredibly rewarding results. Follow these detailed steps to achieve a perfect, caramelized masterpiece.
Before you begin, preheat your oven to 400°F (200°C). This ensures your oven is at the optimal temperature for baking the crust to golden perfection.
1. Prepare the Pears for Perfection
- Begin by carefully peeling each pear to remove the skin. Then, core them, making sure to remove all seeds and the fibrous core.
- Next, cut the majority of the pears into uniform quarters. For an aesthetically pleasing presentation in the center of your pie, it’s best to leave one pear halved.
- Once peeled and cut, drizzle the pears generously with fresh lemon juice. This simple step is crucial to prevent them from browning and to maintain their appealing color throughout the cooking process.
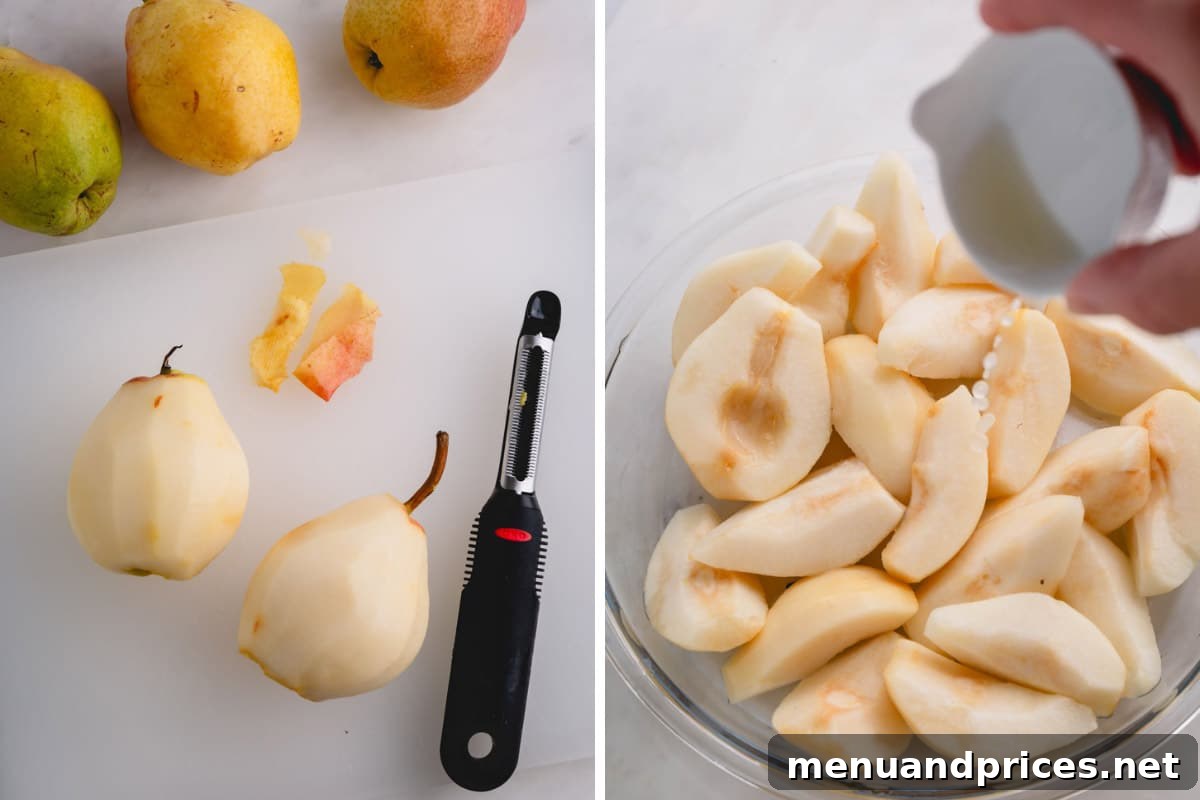
2. Create the Rich Caramel and Cook the Pears
- In an oven-safe 10-inch skillet (a cast iron pan works wonderfully here), melt the butter over medium heat. Allow it to melt completely and become fragrant.
- Once the butter is melted, add both the granulated and light brown sugars to the skillet. Cook this mixture, stirring occasionally, until it begins to bubble gently and transforms into a beautiful, slightly brown, syrupy caramel. This usually takes about 3-5 minutes.
- Carefully place the reserved pear half in the very middle of the pan, cut-side up. Then, arrange the pear quarters snugly around the central half, also cut-side up. This arrangement creates a stunning visual pattern when the pie is inverted.
- Cook the pears, uncovered, in the bubbling caramel. Continue cooking until the butter-sugar mixture has thickened, turned a deep, rich brown color, and beautifully coats the pears. This caramelization process typically takes around 15-20 minutes, deepening the flavor and softening the fruit.
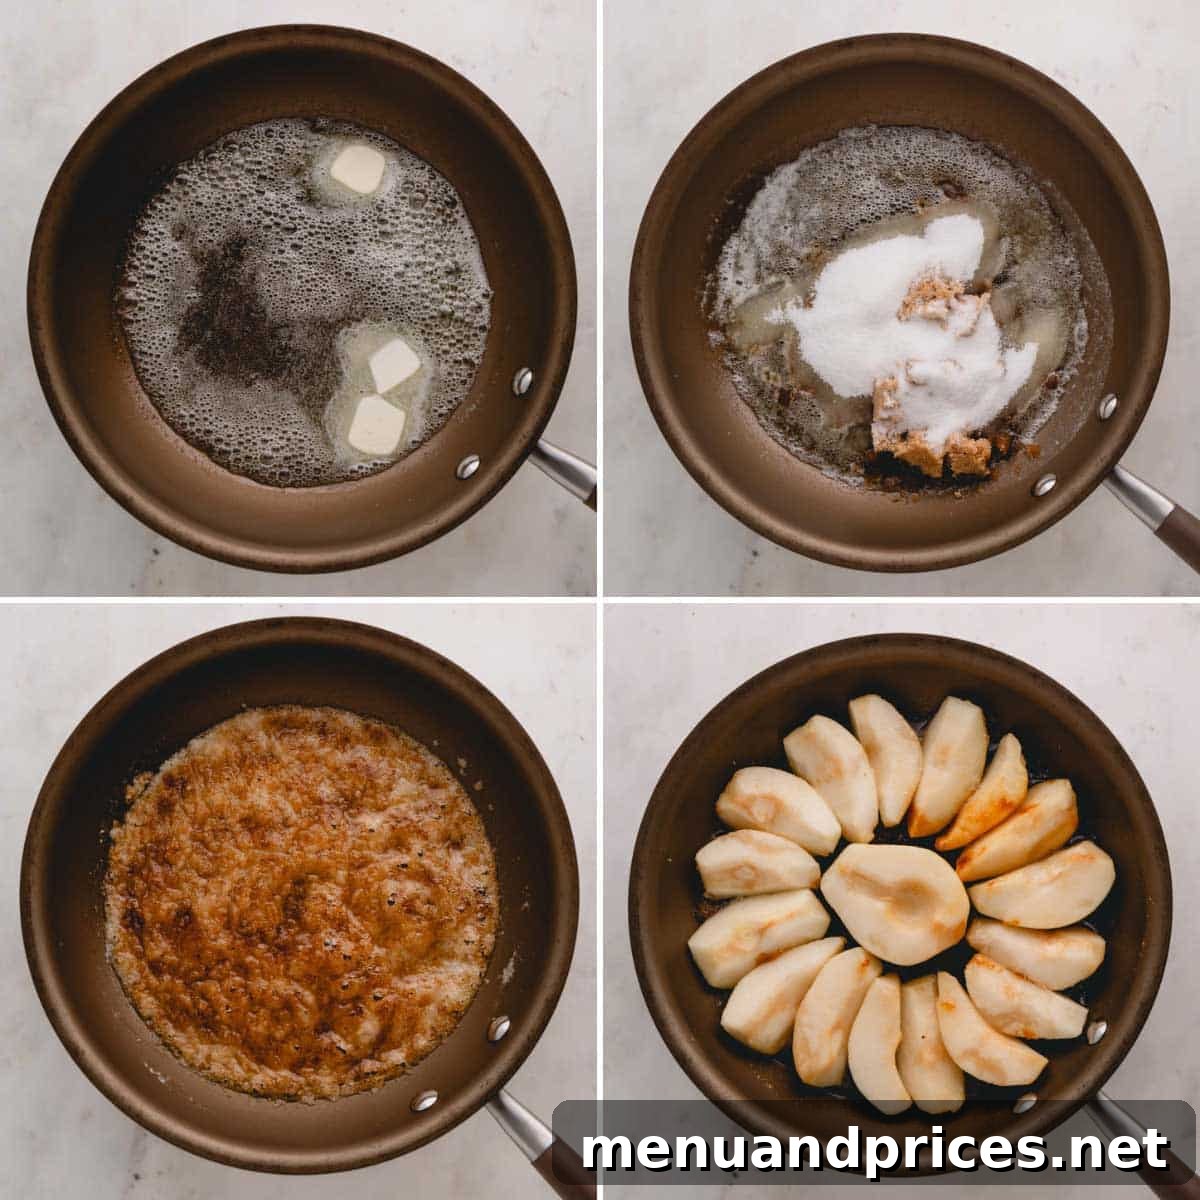
3. Top with Pie Crust and Bake to Golden Perfection
- While the pears are caramelizing, roll your pie dough into a 10-inch circle on a lightly floured surface. Ensure it’s slightly larger than your skillet to allow for tucking the edges.
- Once the pears are deeply caramelized, sprinkle the ground cinnamon and nutmeg evenly over them. The heat from the pan will release their aromatic oils.
- Immediately remove the skillet from the stove and place it on a baking sheet. The baking sheet will catch any drips and make transferring easier.
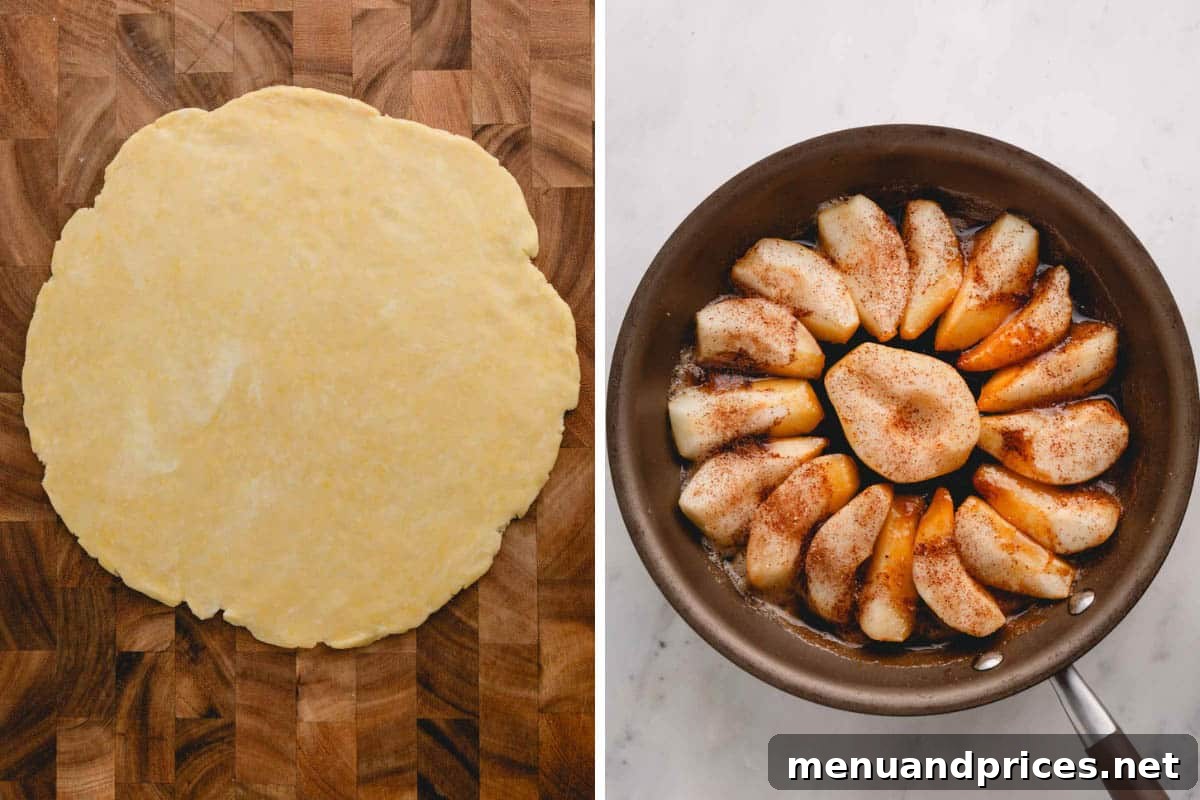
- Carefully cover the cooked pears with the rolled-out pie dough, centering it over the fruit. Gently tuck the edges of the dough down around the pears and into the sides of the skillet. This creates a secure seal and forms the beautiful crust.
- Bake the tarte tatin in the preheated oven for about 30 minutes, or until the crust is beautifully golden brown, puffed, and wonderfully crispy. Keep an eye on it to prevent over-browning.
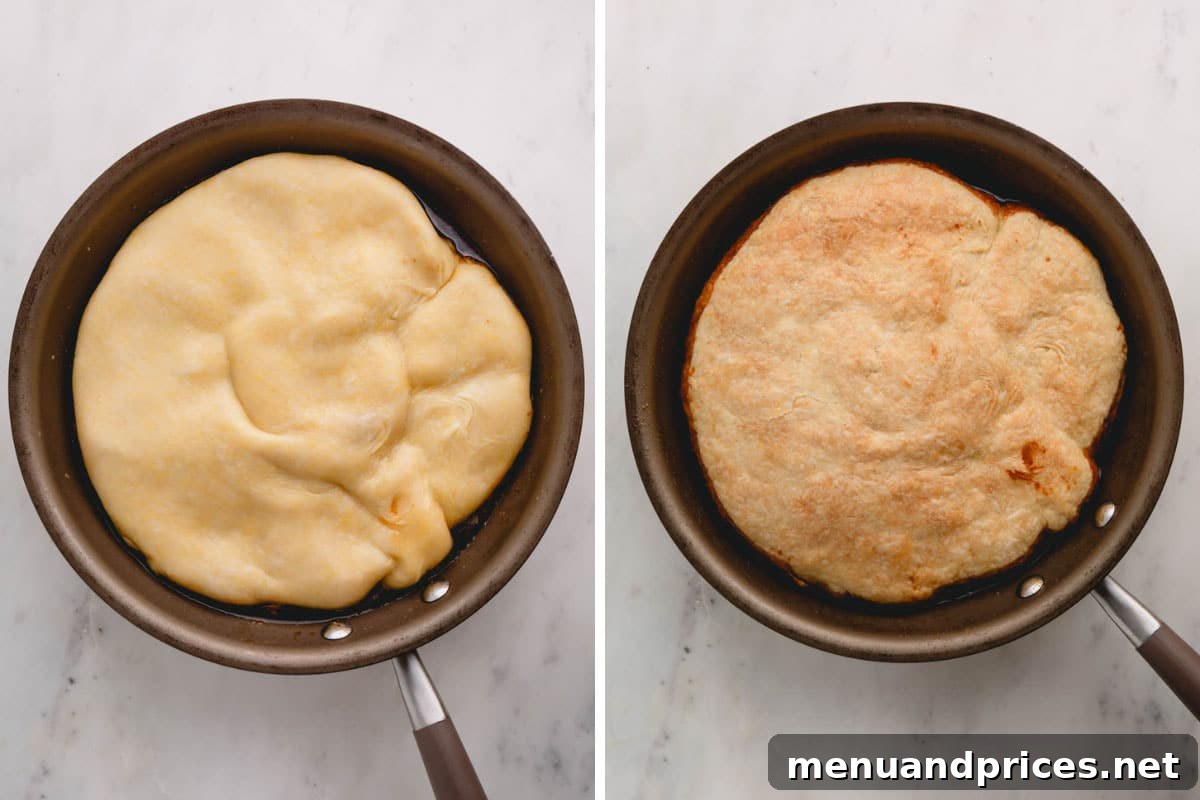
4. The Grand Finale: Inverting Your Masterpiece
- This step requires speed and caution! As soon as the tarte tatin comes out of the oven, immediately cover the skillet with a tight-fitting lid or a large plate. Carefully tilt the skillet slightly to pour any excess pear syrup into a small, heat-proof bowl. This syrup is liquid gold and can be used for serving! Be extremely careful to prevent any burns.
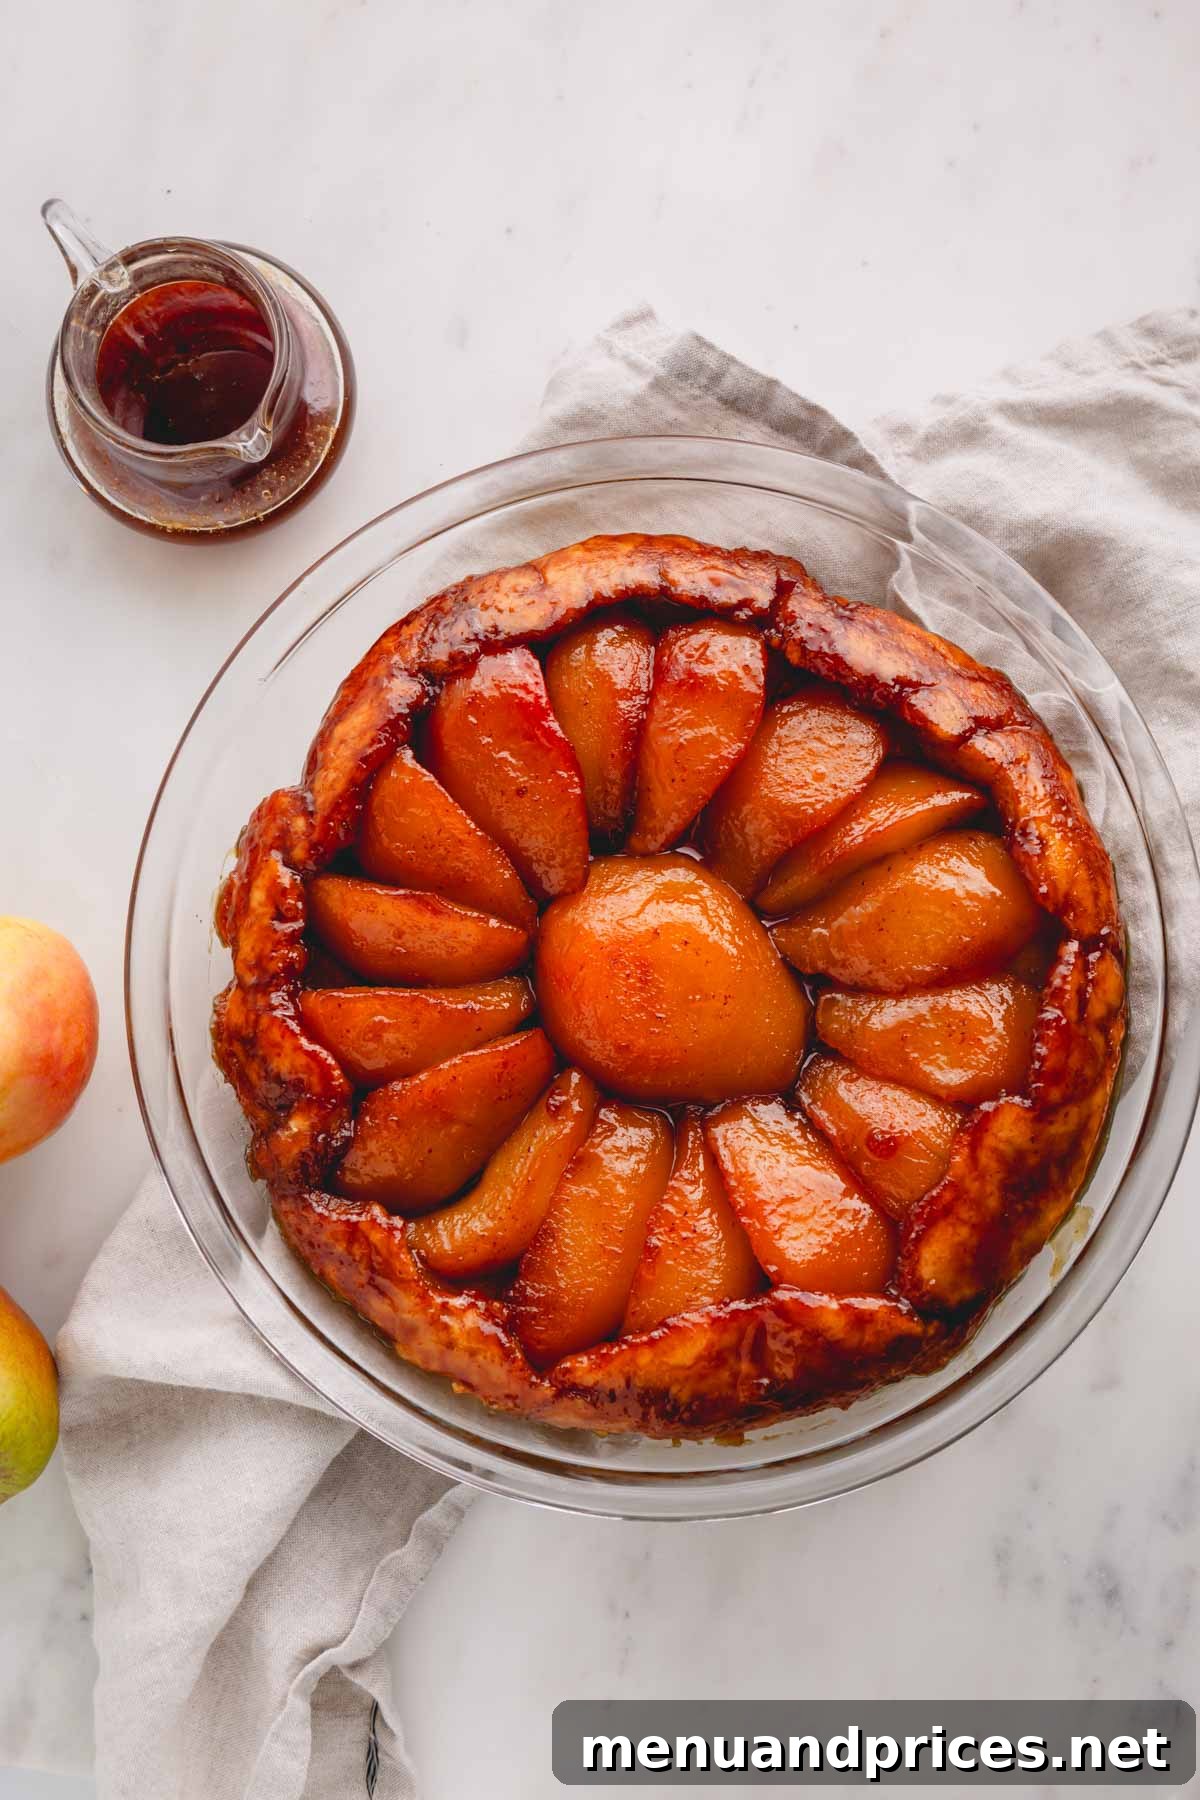
- Next, choose a serving dish. Place a 9-inch pie plate or a large, sturdy serving platter directly over the skillet. With a confident and swift motion, and wearing oven mitts for protection, flip the pie over so the tarte tatin lands crust-side down on your serving plate, revealing the stunning caramelized pears.
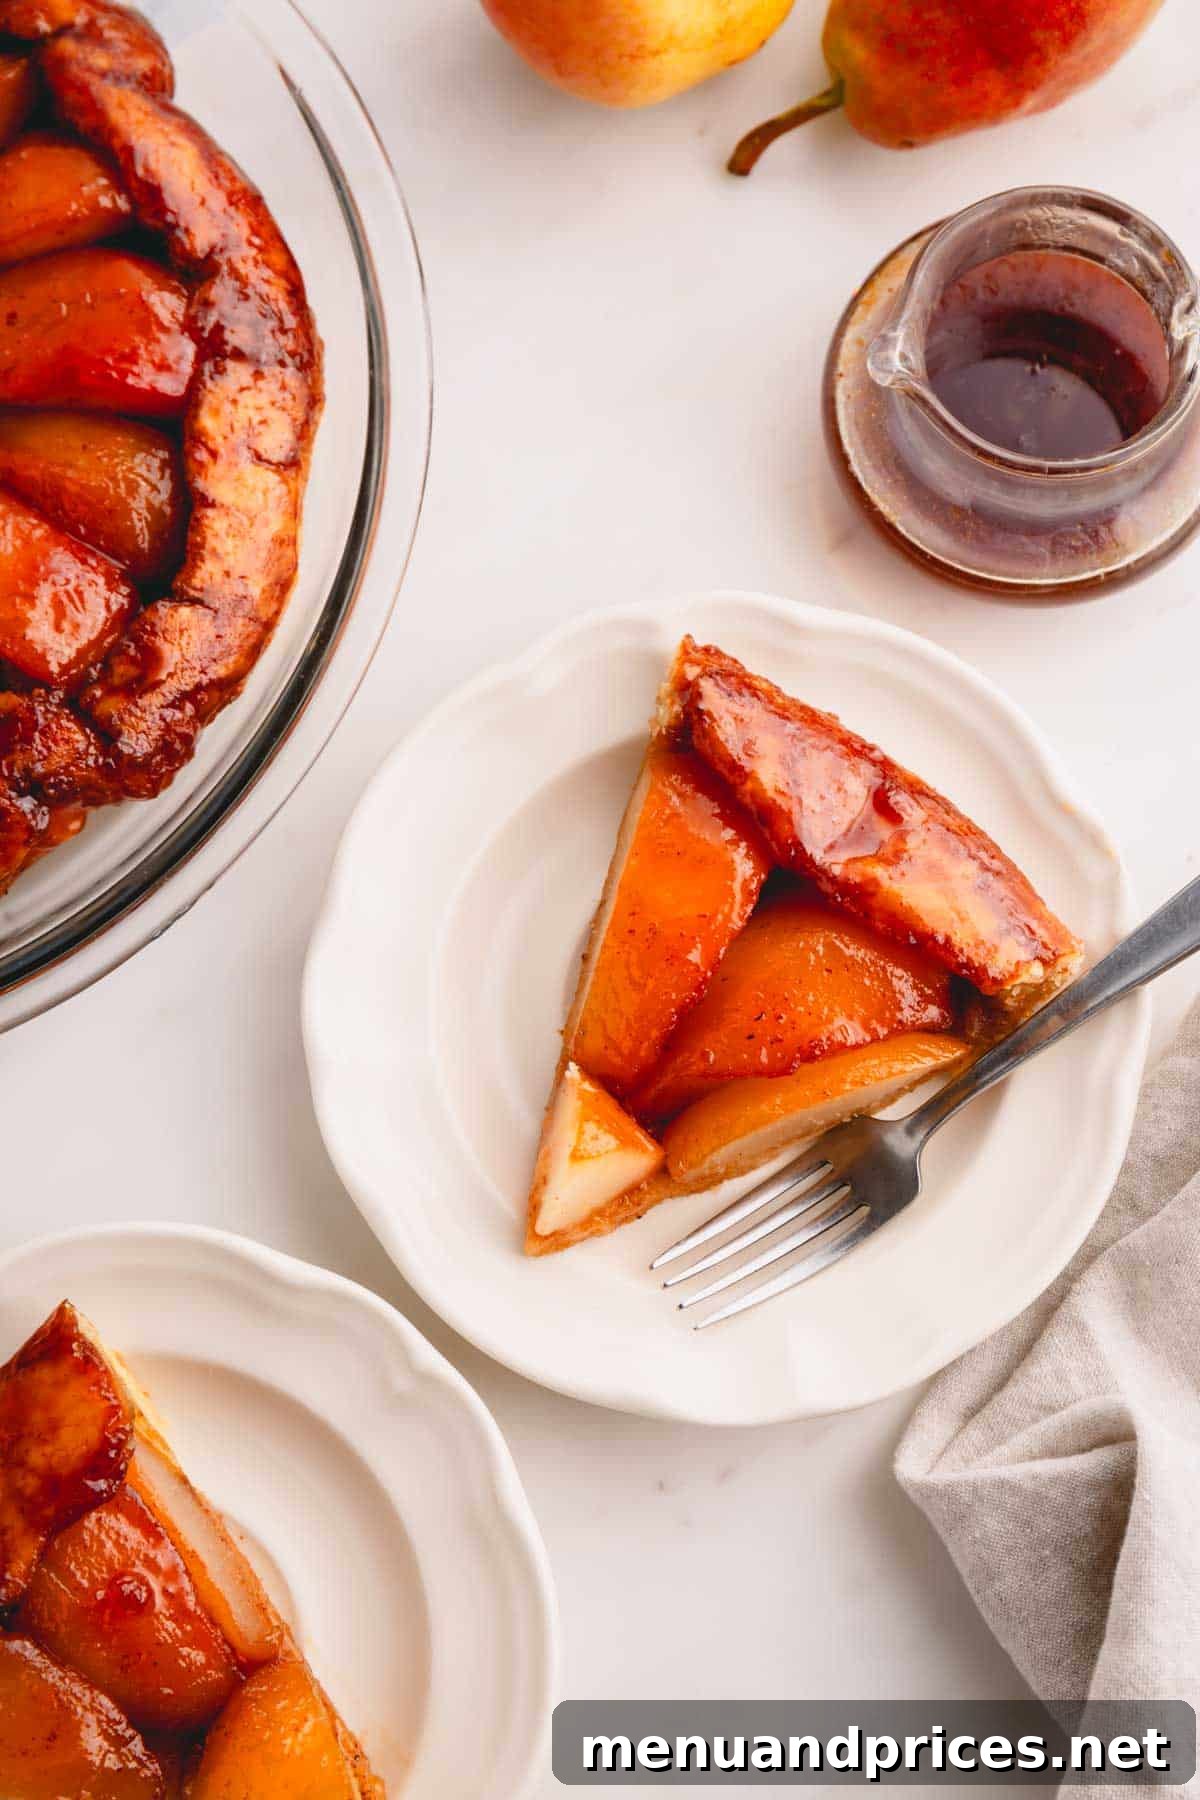
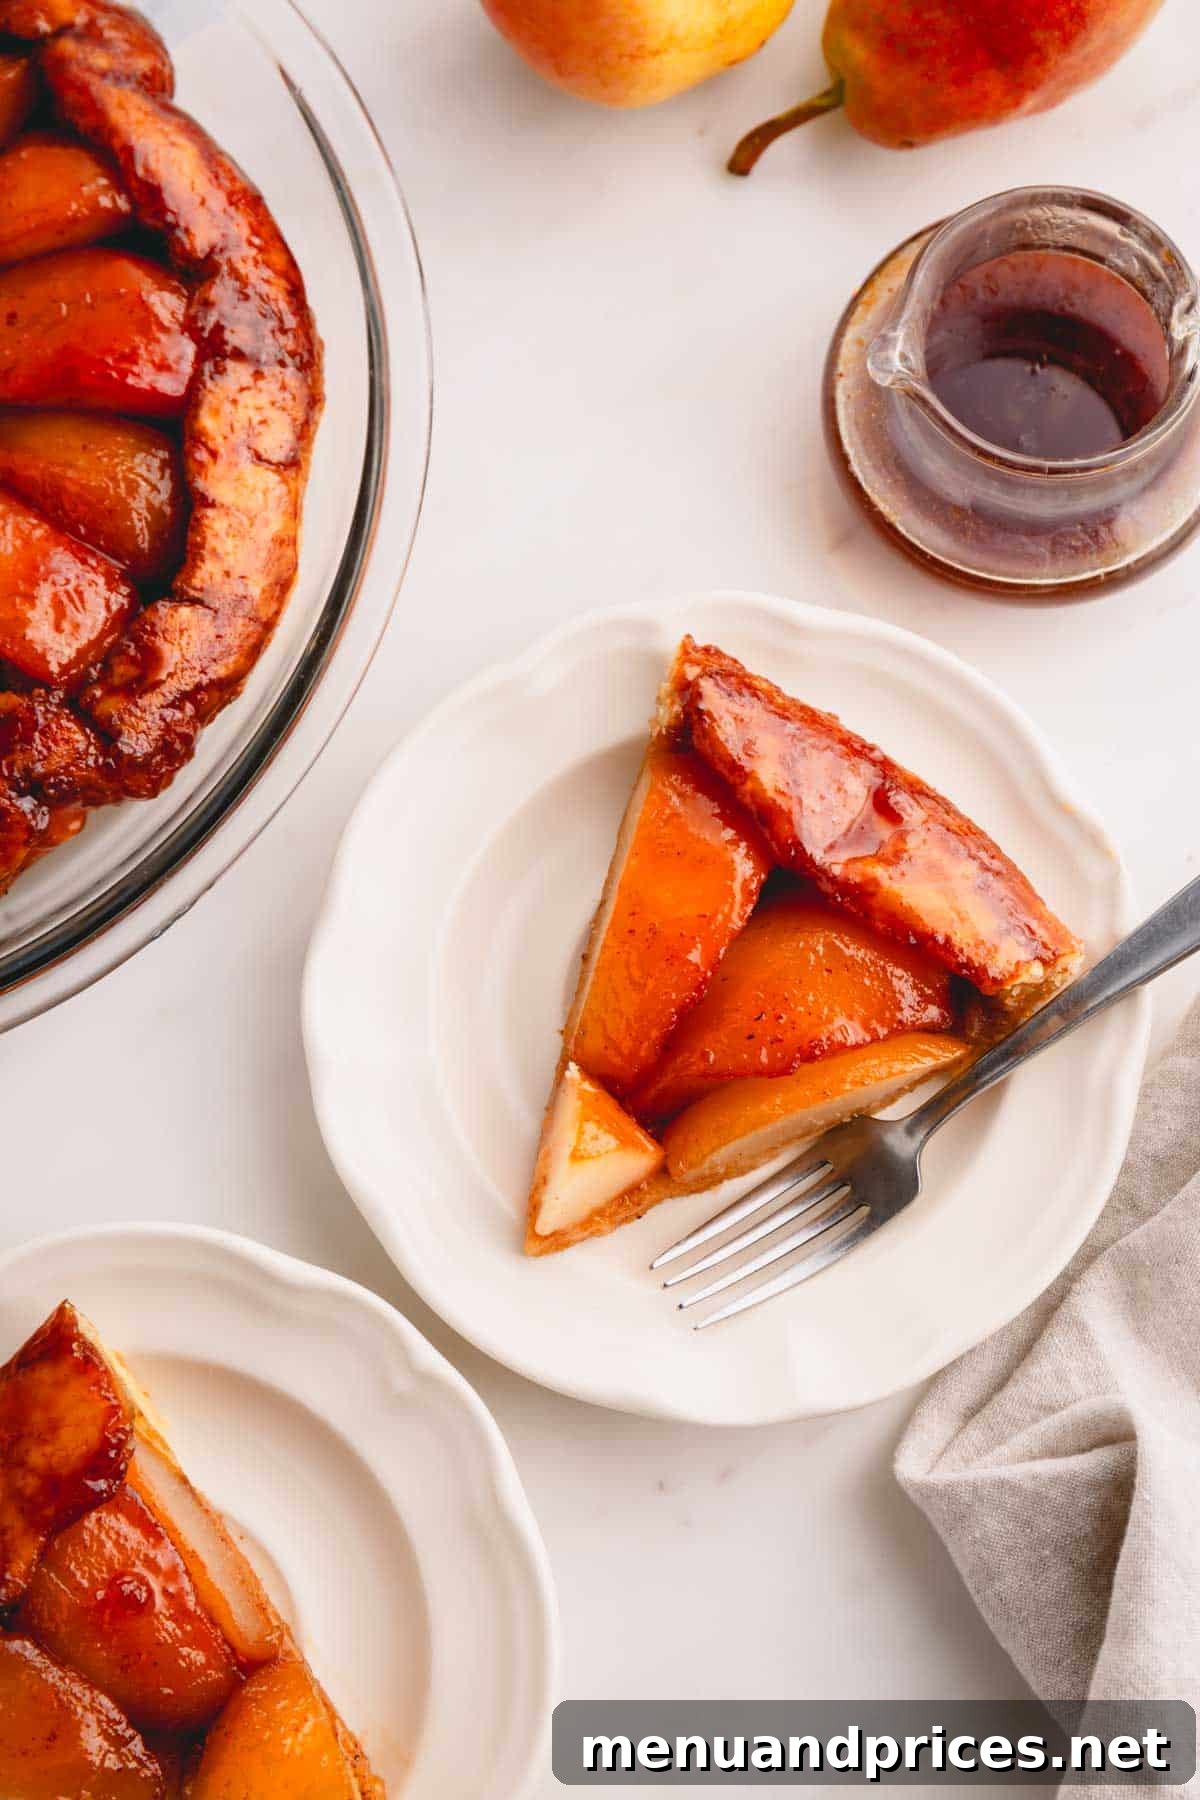
- Allow your magnificent French pear pie to cool to room temperature before slicing and serving. This resting period allows the caramel to set and the flavors to meld beautifully. If desired, enhance the experience by serving warm or at room temperature with a dollop of homemade whipped cream or a scoop of creamy vanilla bean ice cream, drizzled with the reserved pear syrup.
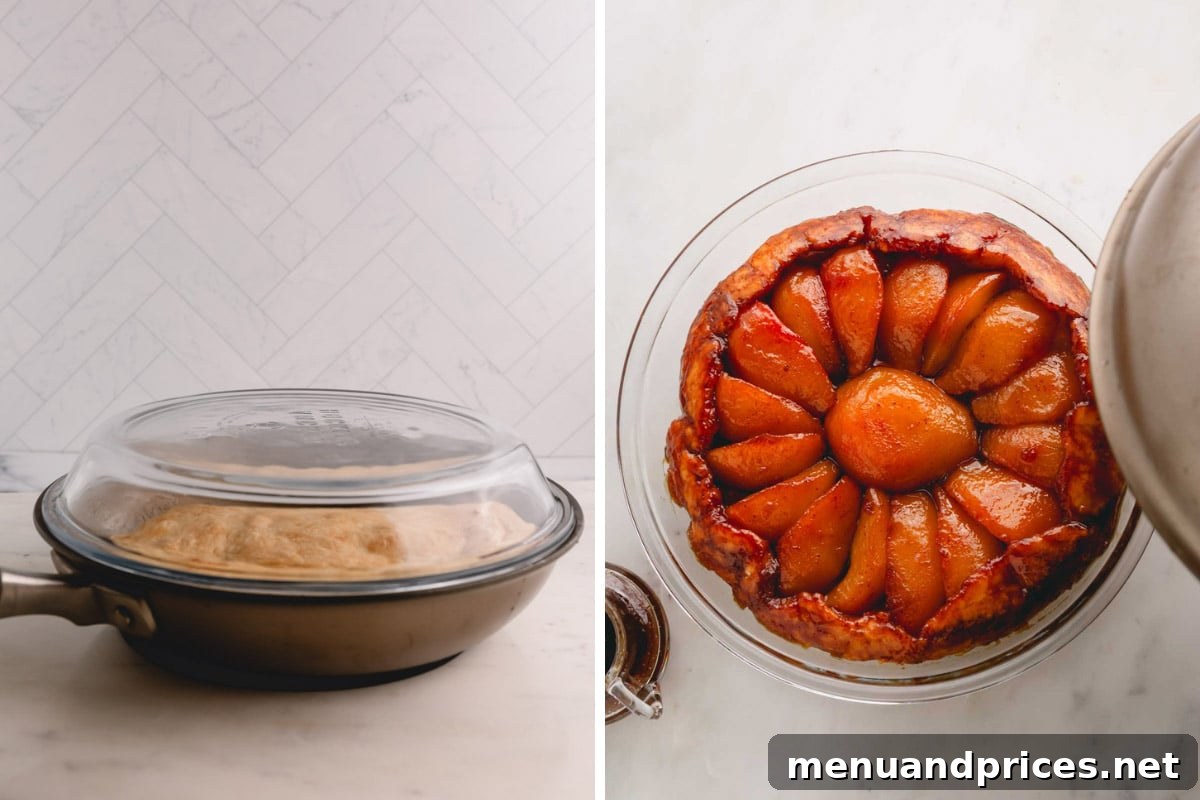
Important Safety Tip: Flip Carefully!
When you perform the crucial inversion, always wear thick oven mitts to protect your hands and wrists. Make sure to flip the skillet AWAY from your body to prevent any hot caramel from splashing and causing burns. Safety first!
Expert Tips for a Flawless Pear Tarte Tatin
Achieving tarte tatin perfection is easier than you think, especially with these insider tips:
- Choose the Right Pears: As mentioned, firm pears are paramount. They need to be ripe enough to be sweet and flavorful, but not so soft that they turn into a watery puree during cooking. A pear that gives slightly when gently squeezed but still feels sturdy is ideal.
- Invest in the Right Pan: A good quality oven-safe skillet, preferably cast iron, is non-negotiable. Its ability to retain and distribute heat evenly is crucial for perfect caramelization on the stovetop, and its oven-safe nature allows for a seamless transfer from stovetop to oven without changing pans.
- Don’t Overcook the Caramelized Pears: While you want a rich, deep brown caramel, remember that the pears will continue to cook and soften in the oven. Remove them from the stovetop heat as soon as the caramel reaches that beautiful deep amber hue and coats the pears. Overcooking here can lead to burnt caramel and mushy fruit.
- Patience with the Flip: The inversion is the most dramatic part! Do it swiftly and confidently, but always with oven mitts and away from your body. Any hesitation can cause the fruit to shift or stick.
- Let It Cool: Resist the urge to cut into your tarte tatin immediately. Allowing it to cool to room temperature gives the molten caramel a chance to set and thicken, ensuring the pears and crust remain beautifully cohesive. If you cut it too soon, the caramel will be runny, and the tarte may fall apart.
- Uniform Pear Slices: Aim for consistent pear quarter sizes. This ensures even cooking and a symmetrical, attractive presentation once inverted.
Smart Make-Ahead and Storage Strategies
This pear tarte tatin is wonderfully forgiving when it comes to preparation and storage, making it an excellent choice for entertaining during busy holidays and special occasions.
- Freezing the Cooked Tarte Tatin: For ultimate convenience, you can easily store a cooked and completely cooled pear tarte tatin in the freezer for up to 2-3 months. To freeze, first wrap it tightly in several layers of plastic wrap, followed by a layer of aluminum foil to prevent freezer burn. When you’re ready to enjoy, thaw the pie overnight in the refrigerator. Once thawed, allow it to come to room temperature for the best texture and flavor before serving. You can also gently rewarm it in a low oven (around 250°F / 120°C) for 10-15 minutes if you prefer it warm.
- Preparing Pie Dough in Advance: If you’re opting for a homemade crust, you can prepare the pie dough up to 3 days ahead of time. Simply wrap the disk of dough tightly in plastic wrap and store it in the refrigerator. Before using, remember to bring the dough to room temperature for about 20-30 minutes to make it easier to roll out without cracking. Then, proceed with assembling and baking the tarte tatin as usual. This simple step can save significant time on the day of serving.
Keeping Your Pear Tarte Tatin Fresh
Should you be fortunate enough to have any leftovers of this delicious French pear pie, proper storage ensures it remains just as delightful as the first slice. Simply cover any remaining tarte tatin tightly with plastic wrap or aluminum foil, and store it in the refrigerator for 3-4 days.
For the best eating experience, allow the pie to come to room temperature for about 30 minutes before serving. If you prefer a warm slice, a quick zap in the microwave for a few seconds will gently take the chill out, making it taste as fresh and inviting as if it just came out of the oven.

Frequently Asked Questions About Pear Tarte Tatin
For this tarte, the best pears are those that are ripe but still firm. Bosc, Bartlett, or Anjou varieties are excellent choices as they hold their shape well during the caramelization and baking process, preventing them from becoming mushy. Avoid overly soft pears.
Absolutely! Tarte tatin is wonderfully versatile. You can certainly substitute pears with other fruits such as firm baking apples (like Granny Smith or Honeycrisp), quince, plums, or even peaches. A delightful option is to use a mixture of fruits for a truly unique taste and texture.
Yes, I highly recommend peeling the pears before cooking for a smoother texture and more refined eating experience. The pear skins can become tough and chewy once cooked, detracting from the otherwise tender fruit.
This can happen if the sugar isn’t fully dissolved or if you stir it too much. If it starts to seize, try adding a tablespoon or two of hot water and gently stirring over low heat until it smooths out. Preventing it is easier: avoid stirring the sugar too much once it’s dissolving, and ensure your pan is clean.
Yes, you can adapt this recipe to be gluten-free by using a high-quality gluten-free pie crust. Ensure all other ingredients, like butter and sugars, are naturally gluten-free. The caramel and pear filling itself is naturally gluten-free.
Explore More Delicious Pie Recipes:
- Homemade Banana Cream Pie
- Pumpkin Mousse Pie
- The Best Pecan Pie
- Lemon Meringue Pie Recipe

5 from 4 votes
Pear Tarte Tatin (Rustic French Pear Pie)
Shinee Davaakhuu
10 minutes
1 hour
1 hour 10 minutes
8 servings
Comment
Print Recipe
Ingredients
-
4-5
ripe firm pears
(Bosc, Bartlett, or Anjou recommended) -
Juice of one lemon
(or produce protector) -
3 tablespoons
(42 g) unsalted butter -
1/3 cup
(65 g) granulated sugar -
1/3 cup
(65 g) light brown sugar - ½ teaspoon ground cinnamon
- ¼ teaspoon ground nutmeg
- 1 pie dough (store-bought or homemade)
Instructions
-
Preheat the oven to 400°F (200°C).
-
Peel and core the pears. Cut most pears into quarters, but reserve one pear half for the center. Drizzle pears with lemon juice (or produce protector) to prevent browning.
-
In an oven-safe 10-inch skillet (such as cast iron), melt the butter over medium heat.
-
Add the granulated and brown sugars to the melted butter. Cook, stirring occasionally, until the mixture bubbles and turns a light brown, syrupy caramel.
-
Carefully place the reserved pear half in the middle of the pan, cut-side up. Arrange the pear quarters snugly around the half pear, also cut-side up.
-
Cook the pears uncovered in the caramel for 15-20 minutes, until the butter mixture is caramelized to a deep brown color and coats the pears.
-
Roll your pie dough into a 10-inch circle on a lightly floured surface.
-
Sprinkle the ground cinnamon and ground nutmeg evenly over the caramelized pears.
-
Remove the skillet from the heat and place it on a baking sheet to catch any drips.
-
Gently cover the pears with the rolled pie crust. Tuck in the edges of the crust around the pears and into the sides of the skillet, using a spatula if needed.
-
Bake for 30 minutes, or until the pie crust is beautifully golden brown and crisp.
-
Immediately after baking, cover the pie with a lid or a large plate. Very carefully tilt the skillet slightly to pour any excess pear syrup into a small, heat-proof bowl. Be extremely cautious not to burn yourself.
-
Place a 9-inch pie dish or serving platter over the skillet. Wearing oven mitts, quickly and confidently flip the pie over AWAY from yourself, so the tarte tatin lands crust-side down on your serving plate.
-
Allow the tarte tatin to cool to room temperature before serving. If desired, serve with homemade whipped cream, vanilla ice cream, and a drizzle of the reserved pear syrup.
⭐️ Did you make this recipe?
Please leave a review and let us know how you liked it!
Tips & Notes
Storing Tips:
– Store any leftovers wrapped with plastic wrap or aluminum foil in the refrigerator for up to 3-4 days. Allow to come to room temperature before serving or gently warm in the microwave.
– To freeze, wrap the cooled tarte tatin tightly in plastic wrap and then aluminum foil. Store in the freezer for up to 2-3 months. Thaw overnight in the fridge and bring to room temperature before serving.
Nutrition
1 serving
253kcal
41g
2g
10g
26g
91mg
Dessert
French

Did you make this?
Leave a rating and your feedback. Thank you!
This delightful recipe was originally published on January 10th, 2014, and has been updated for clarity and enhanced instructions.