
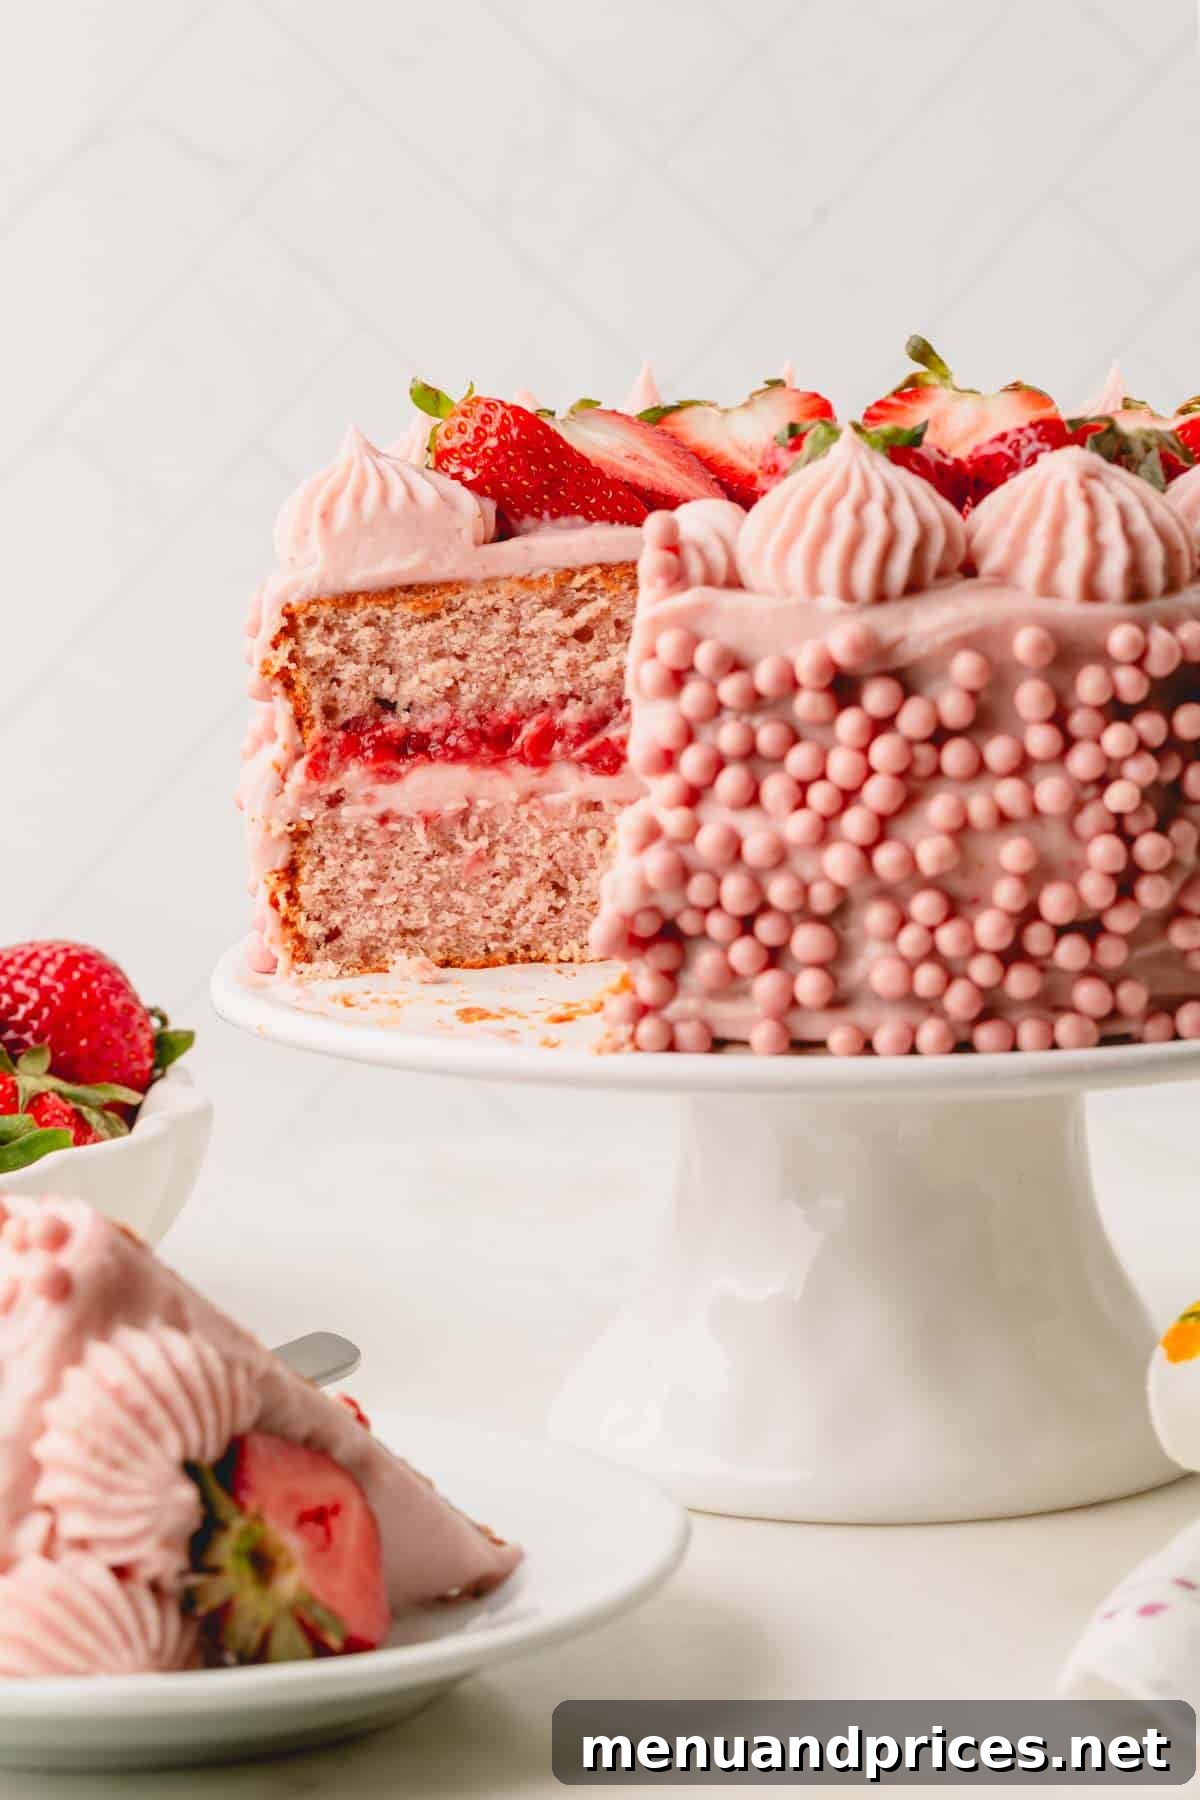
The Ultimate Homemade Strawberry Cake: Bursting with Natural Flavor
Prepare to be enchanted by this extraordinary homemade strawberry cake recipe! It’s an absolute game-changer, delivering an intense, vibrant strawberry flavor that tastes incredibly fresh and authentic. The secret? We harness the power of freeze-dried strawberries, not only to infuse every bite with fruity goodness but also to achieve a naturally stunning pink color, completely eliminating the need for artificial food coloring.
This isn’t just another strawberry cake; it’s a celebration of natural ingredients and superior baking techniques. Forget bland, artificially flavored cakes; this recipe promises a truly memorable dessert experience.
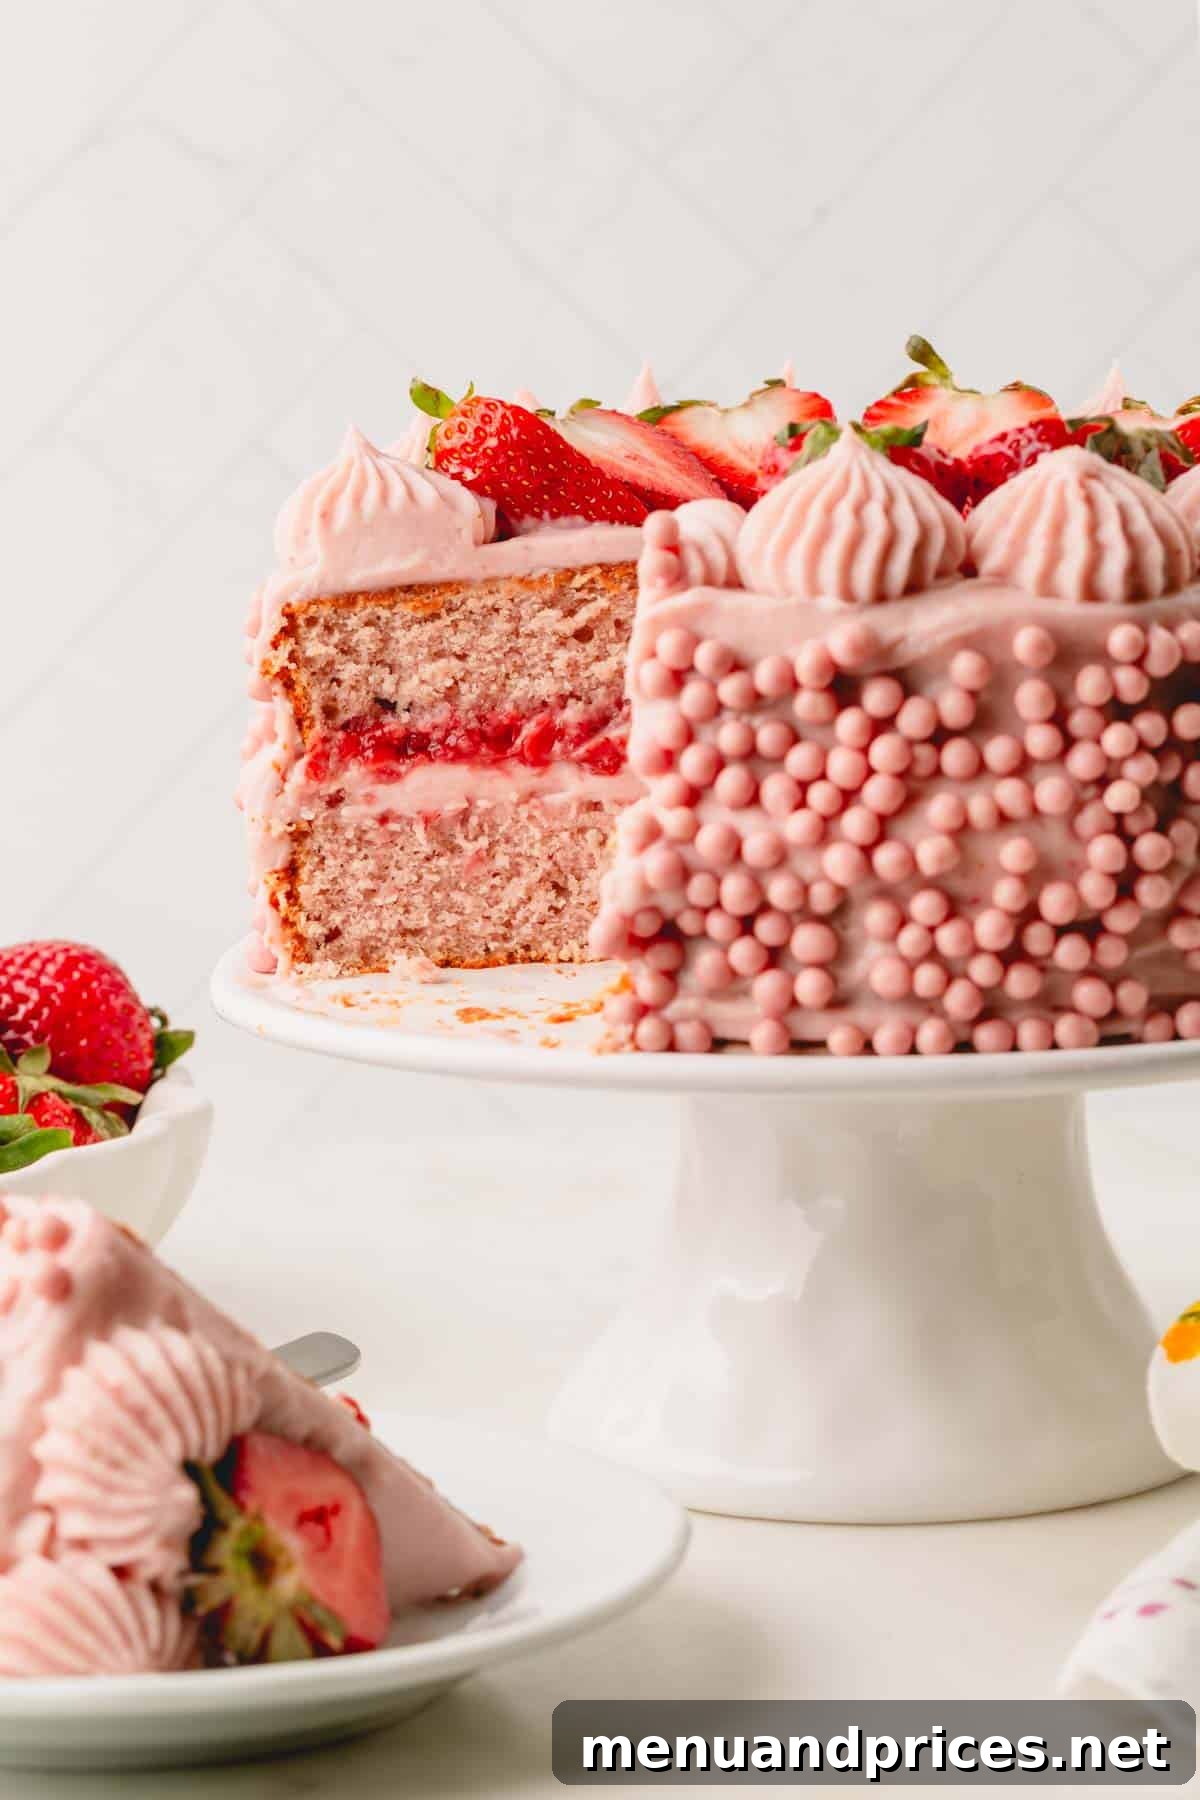
My culinary journey with this homemade strawberry cake began with a simple yet ambitious goal: to craft a recipe that was not only incredibly delicious but also quick and straightforward enough to bake on a whim. I wanted to achieve that coveted bakery-quality taste and texture without any unnecessary complexities or the need for fresh strawberries or strawberry sauce directly in the batter.
Rather than starting from scratch, I wisely built upon a proven foundation: my beloved classic white cake recipe. This reader-favorite base is renowned for its impeccable texture—tender, moist, and wonderfully consistent—making it the ideal canvas for our strawberry masterpiece.
This recipe has undergone extensive testing and retesting to guarantee flawless results every single time. I’m excited to share all my insider tips, tricks, and detailed instructions to ensure your homemade strawberry cake turns out just as perfectly in your kitchen. By the time you’ve finished baking and assembling, you’ll not only have an incredible dessert but also the confidence to tackle any baking challenge, feeling ready to open your very own bakery!
Why This Homemade Strawberry Cake Will Be Your New Favorite
Forget artificial flavors and neon pink dyes! We’re diving into the art of making the most fabulous, naturally flavored strawberry cake from scratch. Here’s why this recipe stands head and shoulders above the rest:
- Authentic Strawberry Flavor, Not Artificial: This cake is a true strawberry lover’s dream, bursting with genuine fruitiness. The secret lies in using freeze-dried strawberries in the cake batter and the frosting, complemented by a luscious homemade strawberry sauce filling. This trifecta ensures an unparalleled, natural strawberry experience.
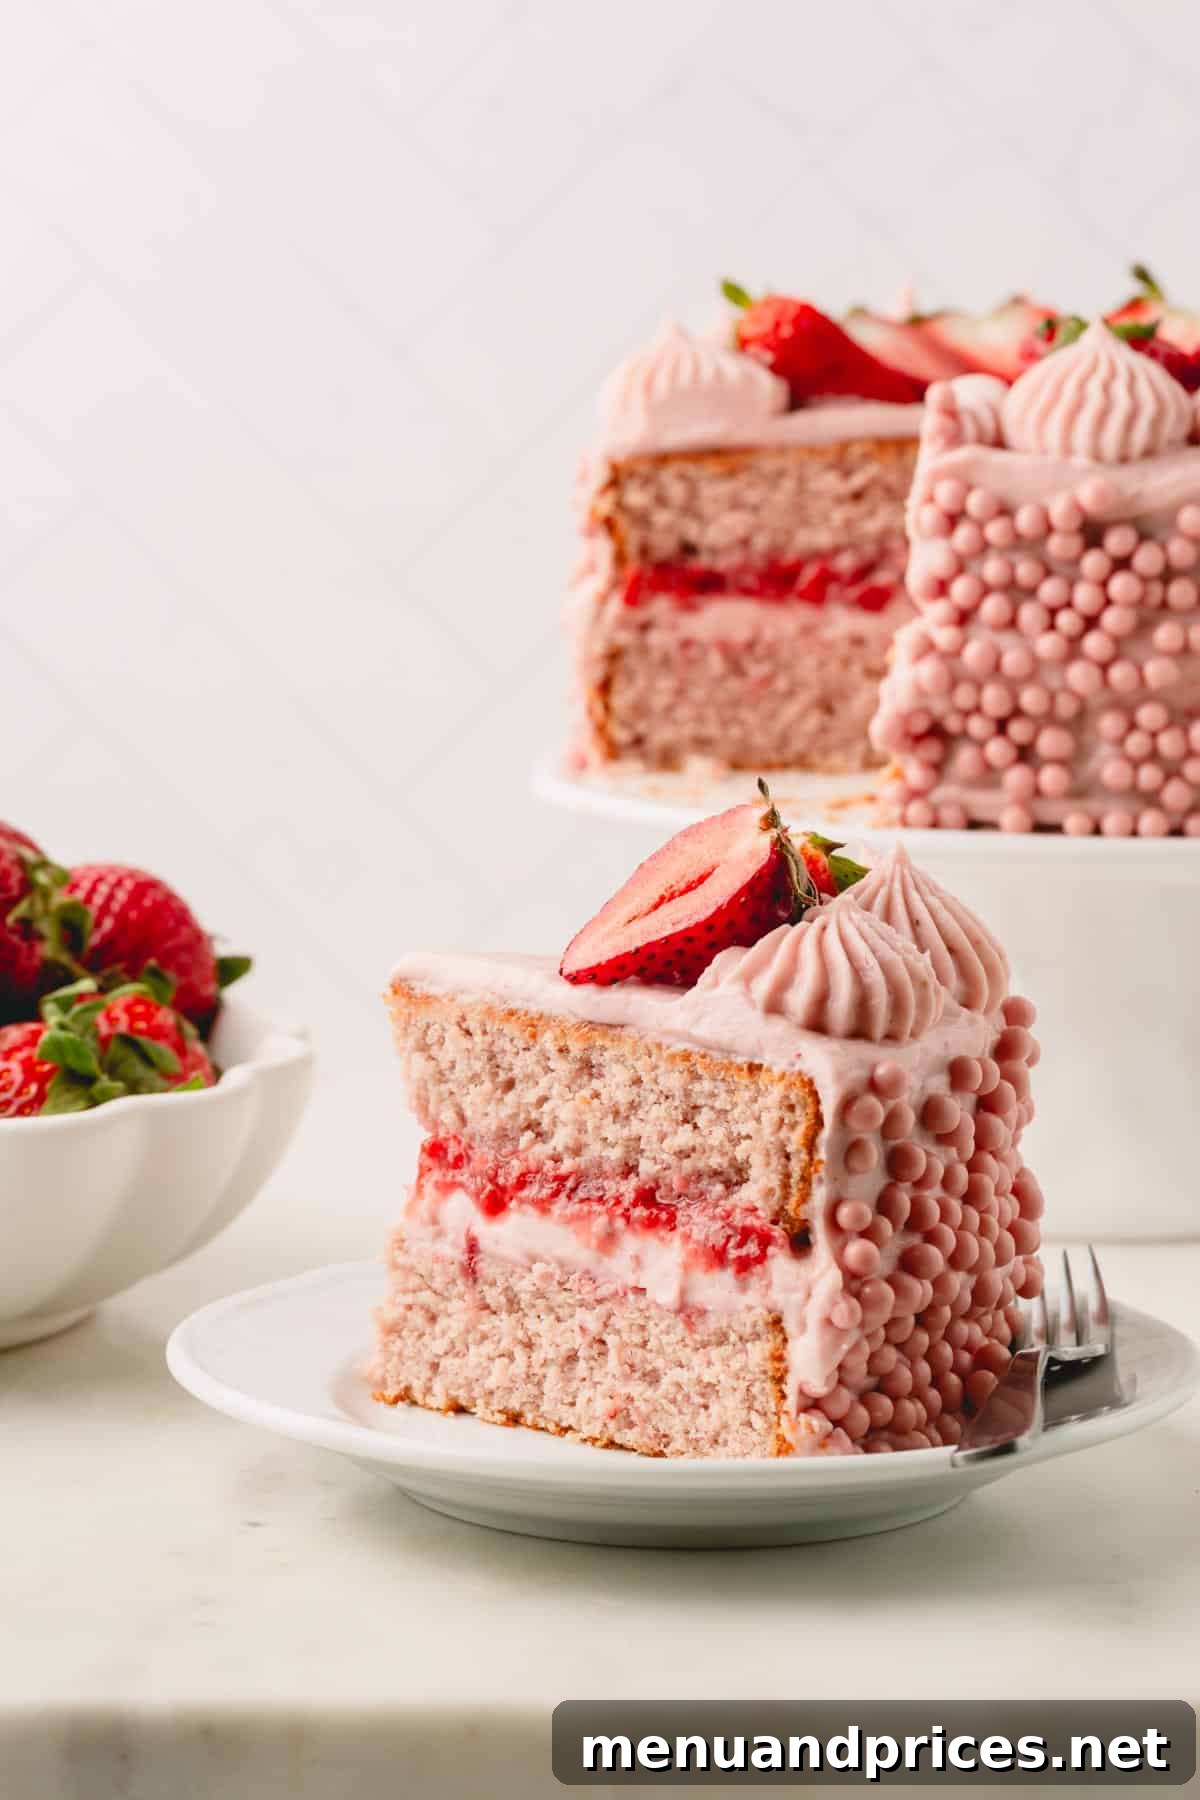
- Incredibly Moist and Delicate Texture: Prepare for a cake that is exceptionally moist, tender, and light, featuring a fine, even crumb that melts in your mouth. The careful balance of ingredients, including sour cream and cake flour, creates a texture that is both sturdy for layering and delightfully soft.
- Naturally Vibrant Pink Color – No Food Coloring Needed! Most strawberry cakes achieve their bright pink hue through artificial food dyes. However, with this recipe, the beautiful, inviting pink color comes purely from the concentrated pigments of freeze-dried strawberries. This means a healthier, more natural dessert that’s just as visually appealing. If you prefer a bolder pink, a tiny drop of gel food coloring can be added, but it’s entirely optional.
- Elegance Made Effortless: Despite its impressive appearance and gourmet taste, this recipe is designed to be accessible. From ingredient prep to assembly, each step is straightforward, allowing even novice bakers to achieve stunning results.
- Perfect for Any Occasion: Whether it’s a special birthday, a celebratory gathering, or simply a weekend treat, this strawberry cake is guaranteed to impress. Its fresh flavor and beautiful presentation make it a showstopper for any event.
Pin this now to find it later!
Pin It
Unveiling the Key Ingredients for a Perfect Strawberry Cake
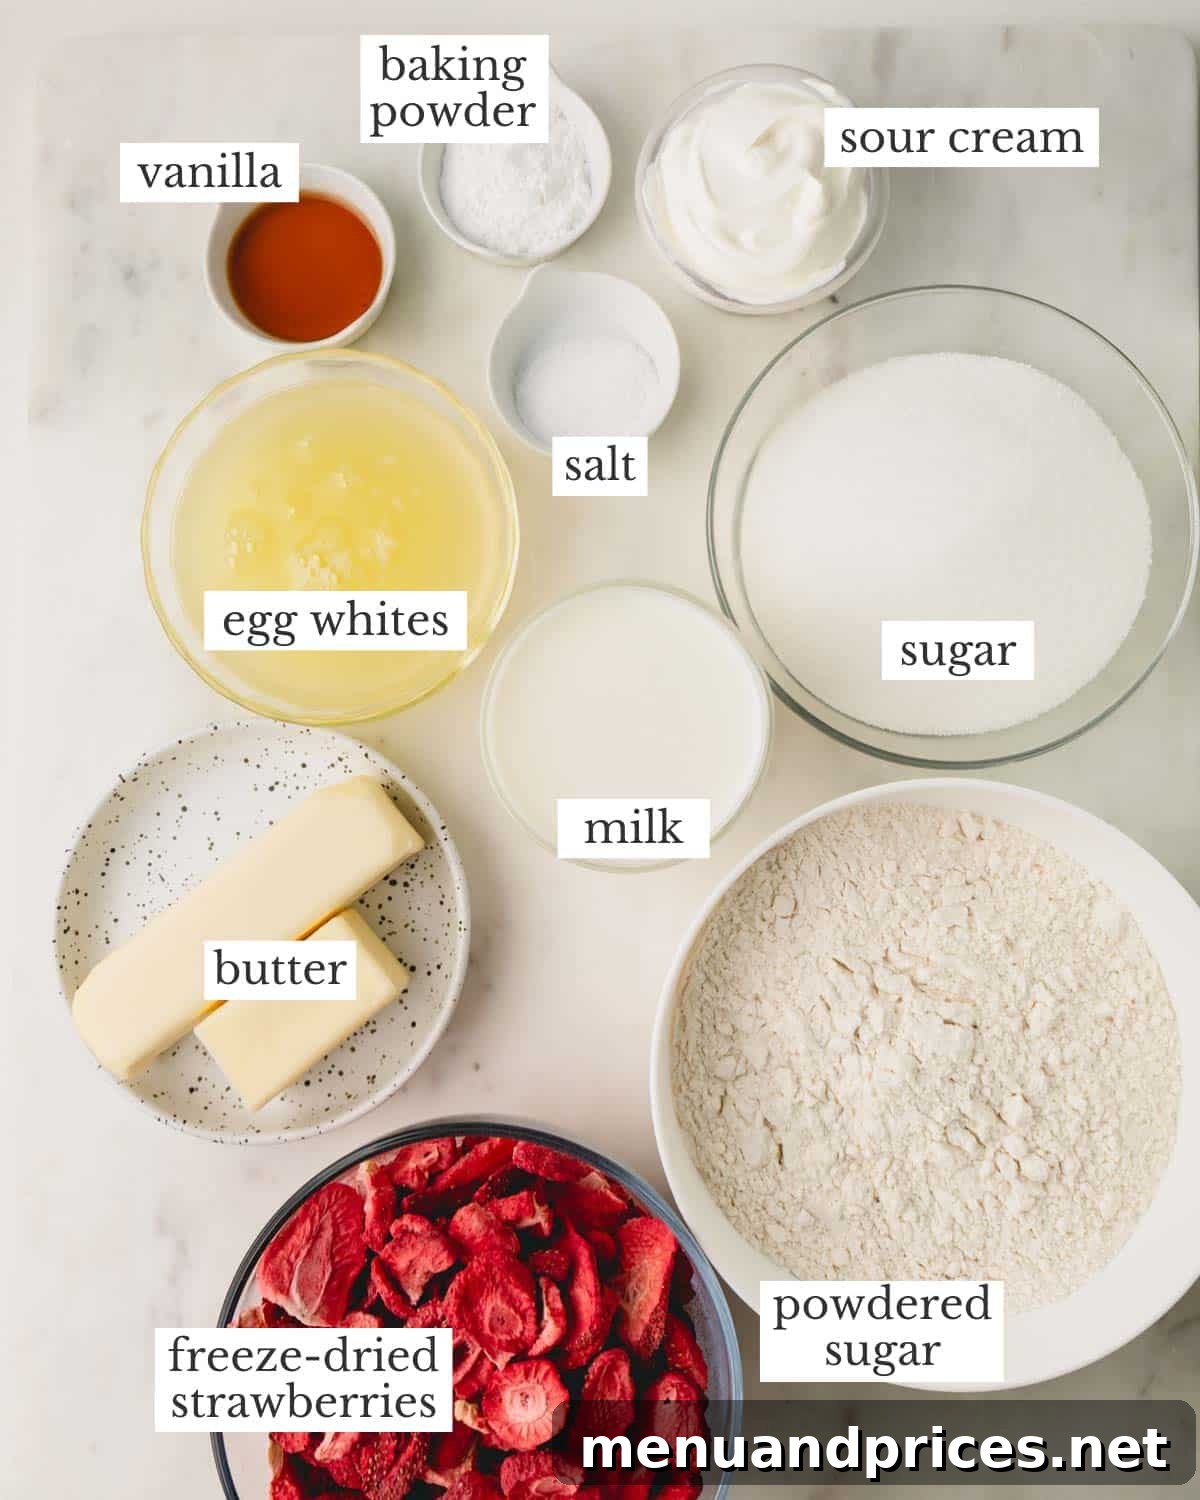
Every exceptional cake starts with high-quality ingredients. Here’s a closer look at what you’ll need and why each component is crucial for achieving the best possible results:
- Strawberry Sauce – While store-bought options are available, crafting your own strawberry sauce elevates this cake to new heights. It’s surprisingly simple, requiring only fresh or frozen strawberries, granulated sugar, water, cornstarch, and a splash of lemon juice. This vibrant, fruity filling can be prepared a few days in advance, saving you time on baking day. It adds a burst of fresh flavor and luscious texture between the cake layers.
- Freeze-Dried Strawberries – This is our secret weapon! Freeze-dried strawberries are intensely flavored, providing a concentrated burst of strawberry goodness without adding excess moisture to the batter, which can make cakes soggy. They also naturally tint the cake a beautiful pink hue, making artificial food dyes unnecessary. Ensure you crush them into a fine powder for even distribution.
- Milk – Milk plays a vital role in binding the ingredients together and providing essential moisture, contributing to the cake’s tender crumb. For the richest flavor and most luxurious texture, whole milk is recommended. However, feel free to use any type of milk you have on hand, whether dairy or a non-dairy alternative, as long as it’s at room temperature for optimal blending.
- Sour Cream – Through extensive testing, I’ve found that sour cream is superior to buttermilk or oil in creating the desired tight, even crumb and incredibly moist texture for this cake. Its slight tang also complements the sweetness of the strawberries beautifully, adding depth to the flavor profile.
- Pure Vanilla Extract – A high-quality vanilla extract is indispensable for enhancing the overall sweetness of the cake and adding a layer of sophisticated depth. I often use my homemade vanilla extract, but a good store-bought pure vanilla will work perfectly. Always opt for pure vanilla over imitation for the best flavor.
- Cake Flour – This ingredient is a true game-changer! Cake flour has a lower protein content and finer texture than all-purpose flour, resulting in an incredibly soft, tender cake with a delicate, fine crumb. It’s crucial for achieving that signature bakery-style lightness. I strongly advise against substituting with all-purpose flour, as it will lead to a denser, coarser cake. When making DIY cake flour, ensure you use bleached all-purpose flour for the best texture and color.
- Unsalted Butter – Using unsalted butter in baking allows for precise control over the salt content in your final product. This ensures the flavors are perfectly balanced. If you must use salted butter, remember to omit any additional salt listed in the recipe to prevent an overly salty cake. Ensure it’s softened to room temperature for proper creaming.
- Large Egg Whites – Egg whites provide essential structure and lift to the cake, contributing to its light and airy texture without adding the richness or color of yolks. Six large egg whites can be substituted with ¾ cup of carton egg whites if preferred.
- Strawberry Cream Cheese Frosting – This homemade frosting is the perfect crowning glory for our strawberry cake. It’s made with freeze-dried strawberries (again, for natural flavor and color), softened cream cheese, unsalted butter, powdered sugar, a pinch of coarse kosher salt, and heavy whipping cream. It’s surprisingly easy to prepare and yields a luscious, tangy-sweet frosting that complements the cake layers beautifully.
Pro Tip: How to Soften Butter Quickly and Perfectly
The ideal way to soften butter is to let it rest at room temperature for approximately two hours. However, if you’re short on time, here’s a clever trick to achieve perfectly soft, yet not melted, butter:
- Fill a tall drinking glass with hot tap water and let it sit for a few minutes to heat up thoroughly.
- Carefully pour out the hot water, then immediately invert the warm glass over your stick of butter on a plate.
- After about 5 minutes, you’ll uncover butter that is perfectly soft and ready to be incorporated into your cake batter!
Crafting Your Own Cake Flour: A Handy Substitute
While I wholeheartedly recommend purchasing pre-made cake flour for its consistent results, you can easily create a homemade substitute in a pinch. This DIY method uses bleached all-purpose flour, which is key for maintaining the desired delicate texture and beautiful pink hue of the cake.
For every 1 cup of DIY Cake Flour needed:
- Measure 1 cup (125g) of bleached all-purpose flour into a bowl.
- Carefully remove 2 tablespoons (15g) of the flour.
- Add 2 tablespoons (16g) of cornstarch to the remaining flour.
- Whisk the mixture thoroughly to ensure the cornstarch is evenly distributed throughout the flour. This blend will mimic the properties of commercial cake flour.
Step-by-Step Guide: How to Bake the Ultimate Strawberry Cake
This exquisite strawberry cake is a symphony of flavors and textures, composed of three harmonious elements: the moist strawberry cake layers, the vibrant strawberry sauce filling, and the luxurious creamy strawberry cream cheese frosting. For the best baking experience, I recommend preparing the strawberry sauce in advance, as it requires adequate chilling time.
Phase 1: Preparing Your Strawberry Elements – The Sauce
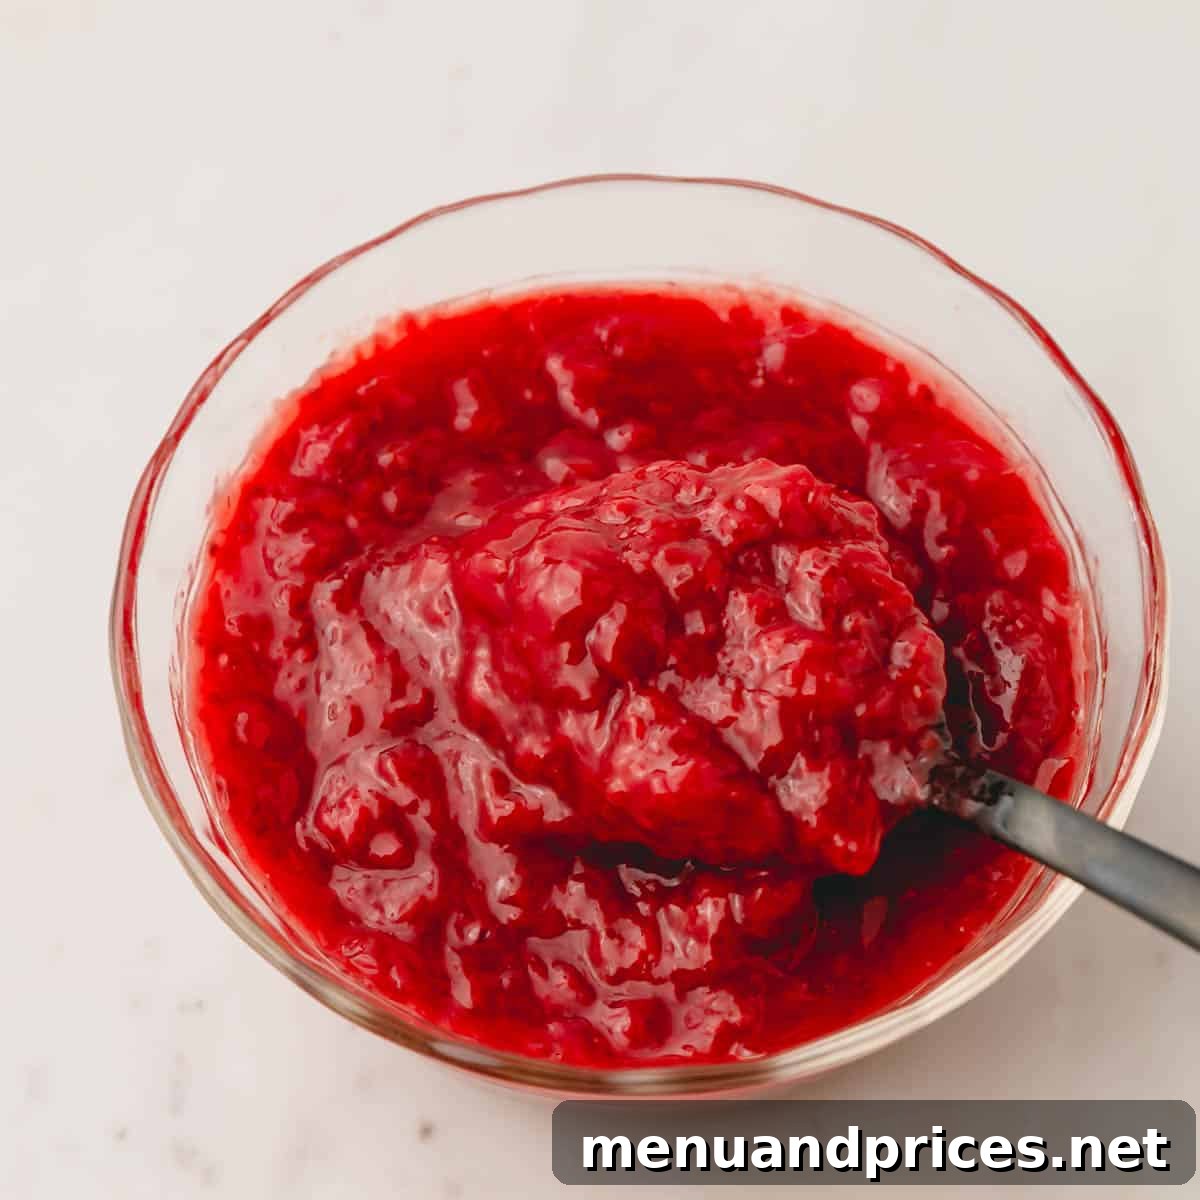
Begin by making the luscious homemade strawberry sauce that will serve as our delectable cake filling. Follow the detailed instructions on my dedicated strawberry sauce recipe page. Once prepared, allow the sauce to chill thoroughly in the refrigerator for at least an hour. This cooling period is crucial for the sauce to thicken and set properly, ensuring it holds its shape within the cake layers. You will only need approximately ½ cup of sauce for the filling, so you may consider halving the sauce recipe if you wish to avoid excess.
Phase 2: Mixing and Baking the Perfect Strawberry Cake Layers
Let’s get ready to bake! Preheat your oven to a steady 350°F (177°C). Prepare two 8-inch round cake pans by lining the bottoms with parchment paper. This simple step prevents sticking and makes removal much easier. Lightly spray the pans with cooking spray to ensure your cake layers release effortlessly.
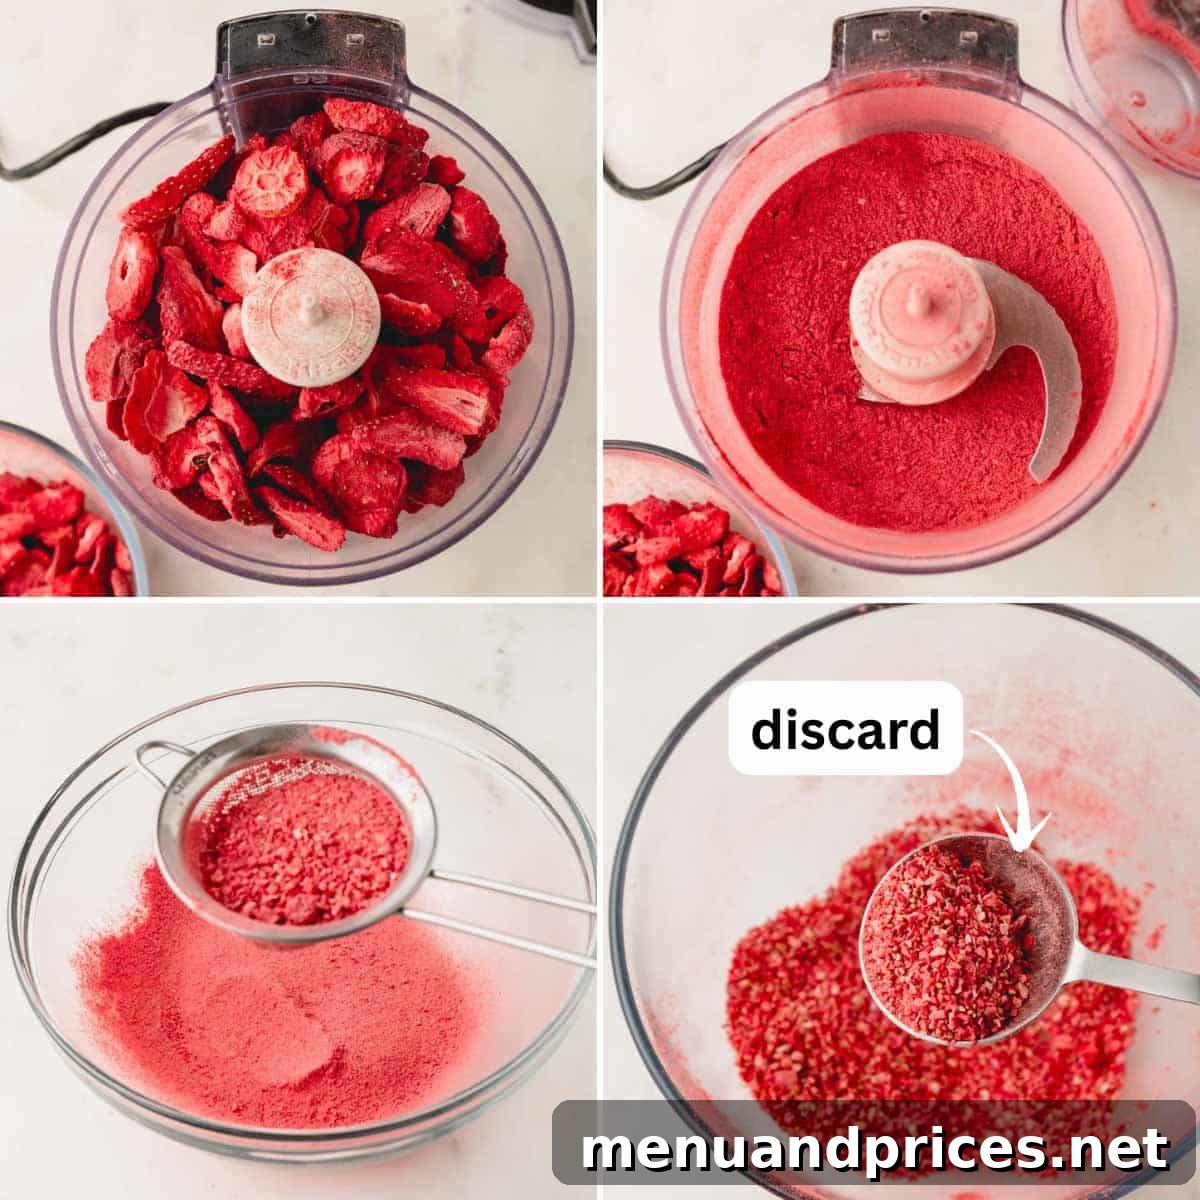
- Transforming Freeze-Dried Strawberries: The first crucial step for the cake batter is to crush your freeze-dried strawberries into a very fine powder. You can achieve this using a powerful blender, food processor, or even by placing them in a Ziploc bag and crushing them with a rolling pin. After crushing, it’s essential to sift the powder through a fine-mesh sieve. This removes any larger bits or seeds, ensuring a smooth, uniform texture and even color distribution in your cake. You’ll need approximately 65 grams of fine strawberry powder.
Time-Saving Tip: Pre-Made Strawberry Powder
If you’re looking to save a step, you can bypass the crushing and sifting process entirely by using pre-made freeze-dried strawberry powder. You will need 65g of this powder for the cake batter.
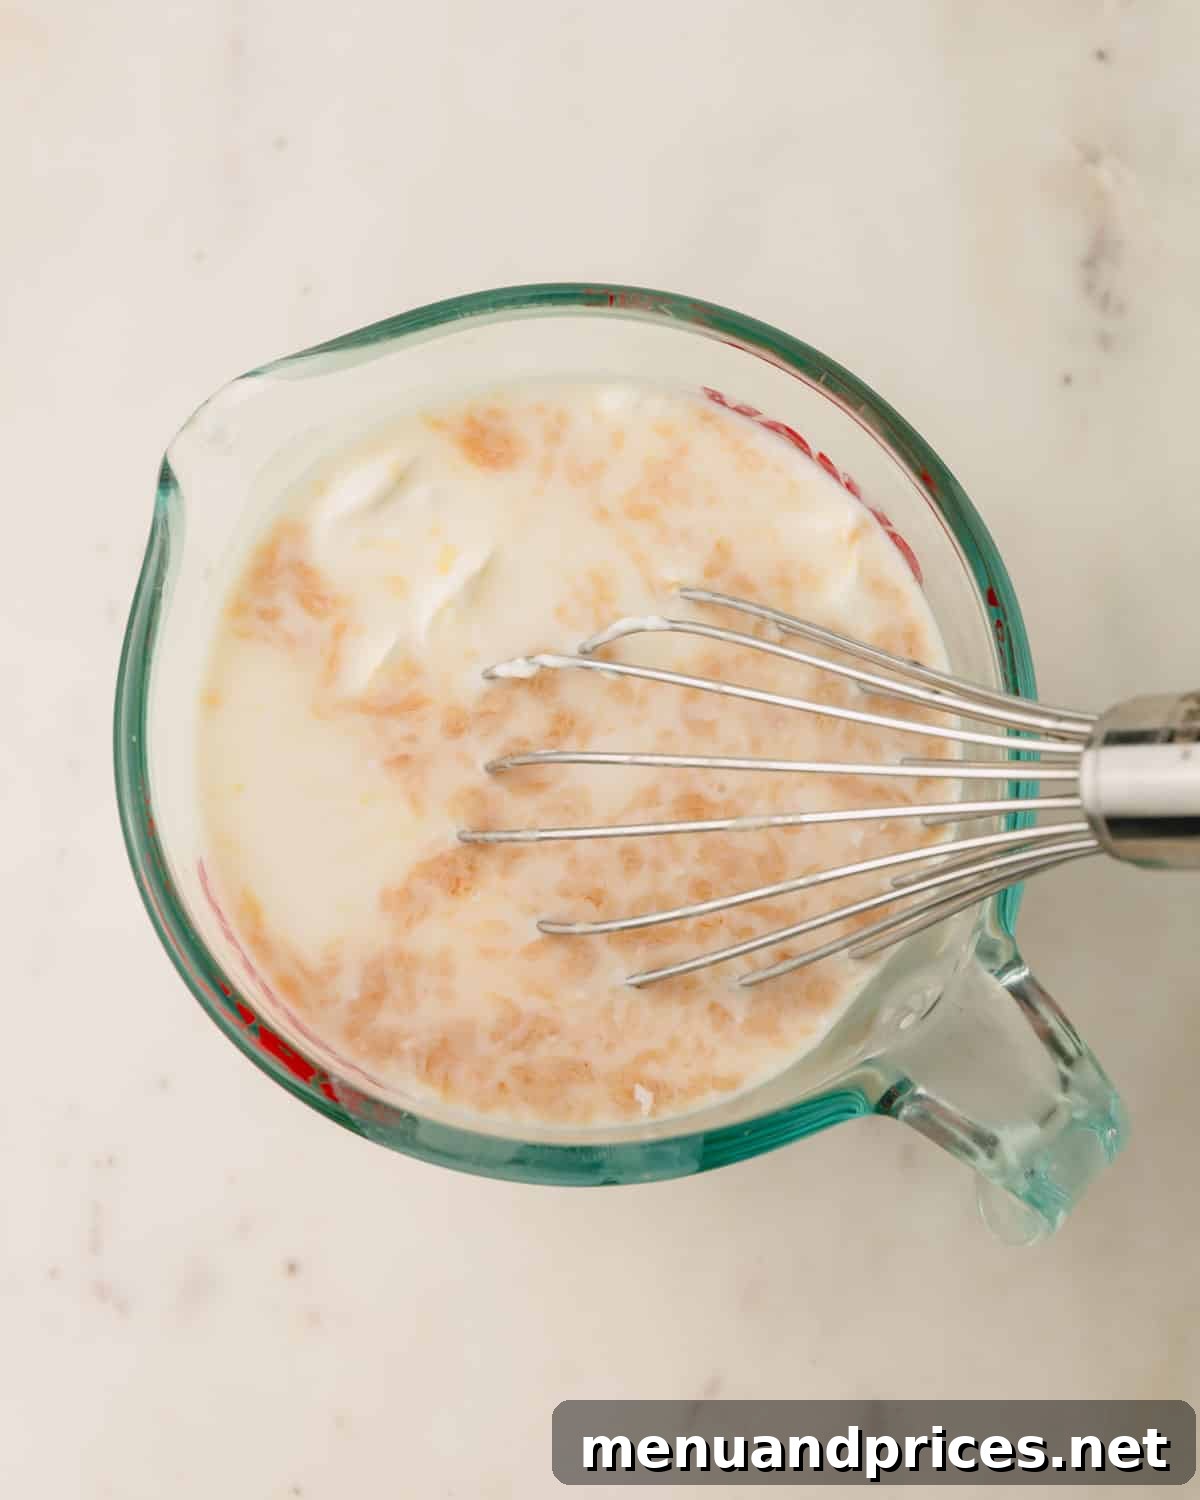
- Prepare the Wet Ingredients: In a medium bowl or a 4-cup liquid measuring cup, whisk together the milk, sour cream, and pure vanilla extract until thoroughly combined. Set this mixture aside. Ensure all these ingredients are at room temperature for the best emulsification with the butter and dry ingredients.
- Combine Dry Ingredients: In the bowl of a stand mixer fitted with the paddle attachment, combine the sifted strawberry powder, cake flour, granulated sugar, baking powder, and coarse kosher salt. Mix on low speed for about 30 seconds to ensure all dry ingredients are evenly distributed.
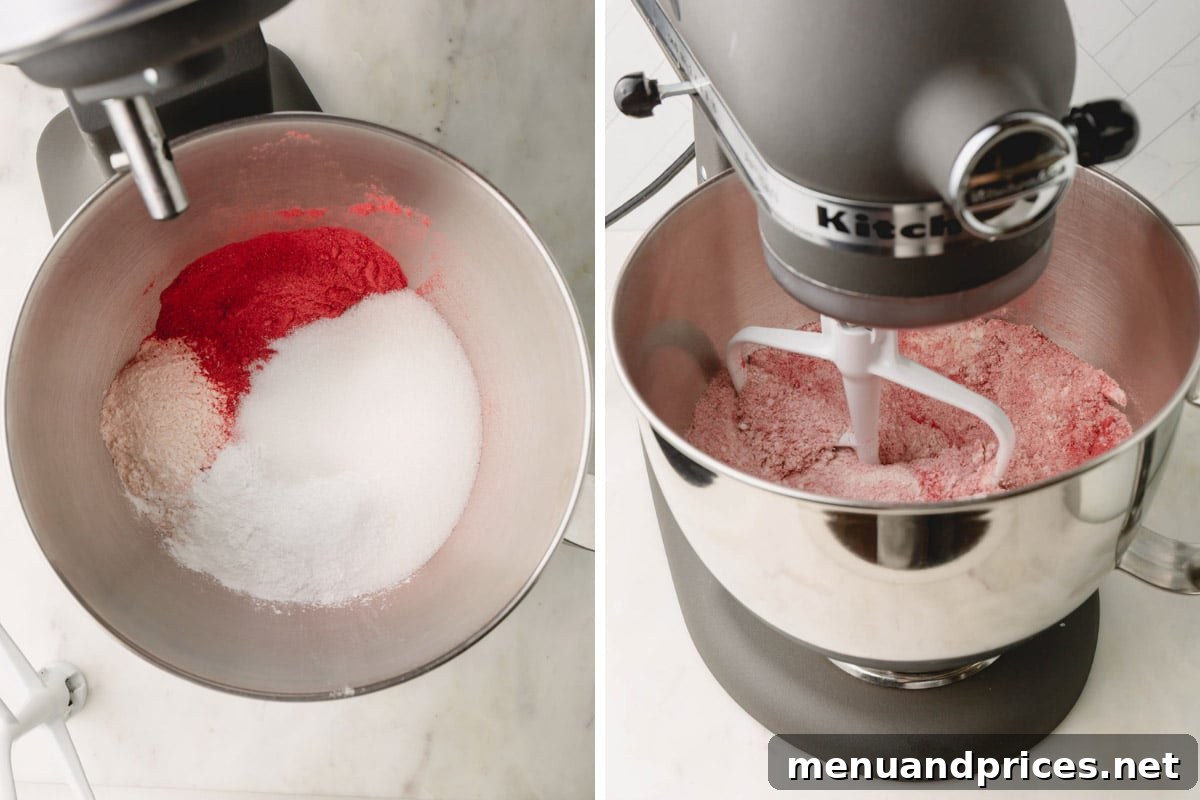
- Incorporate the Butter: Add the softened unsalted butter to the dry ingredients. Mix on low speed until the mixture resembles coarse sand and no dry streaks of flour remain. This process, often called the reverse creaming method, takes about 3 minutes and helps create an incredibly tender cake crumb.
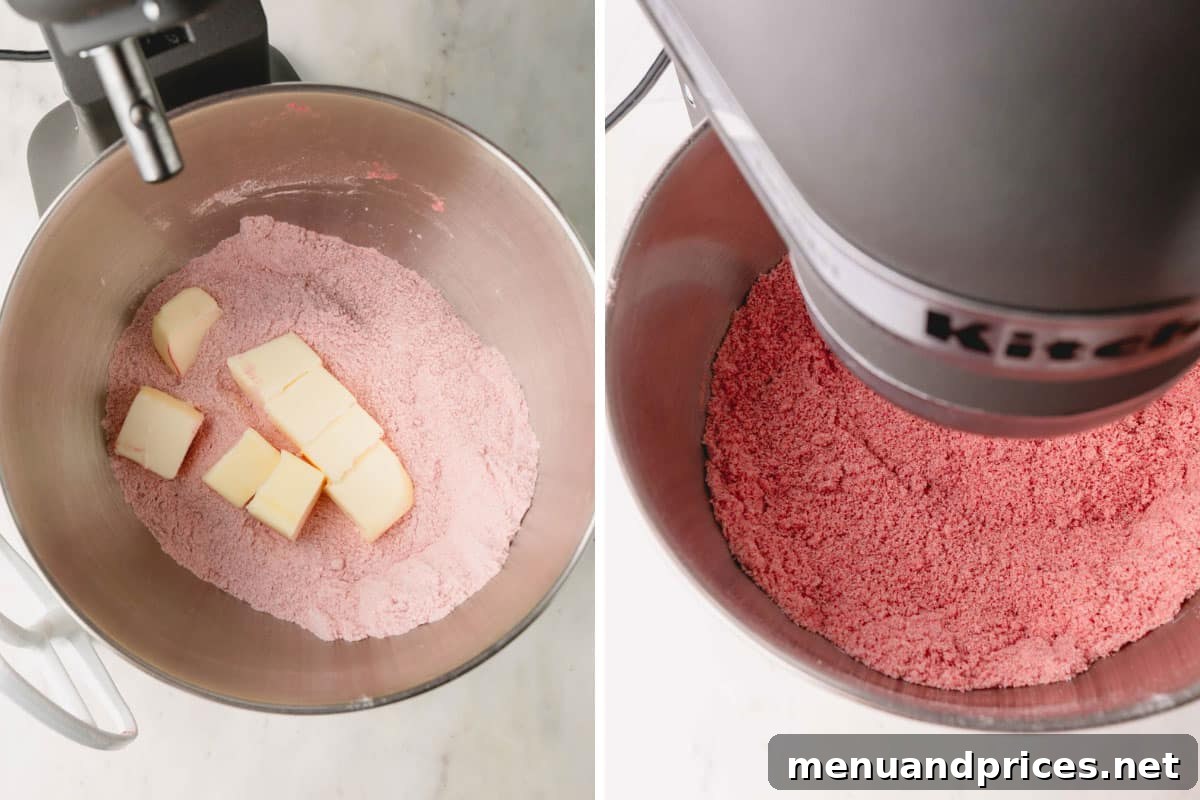
- Add Egg Whites: With the mixer on medium speed, gradually add the large egg whites, mixing until just combined and the batter starts to come together. This usually takes about 1 minute. Avoid overmixing at this stage.
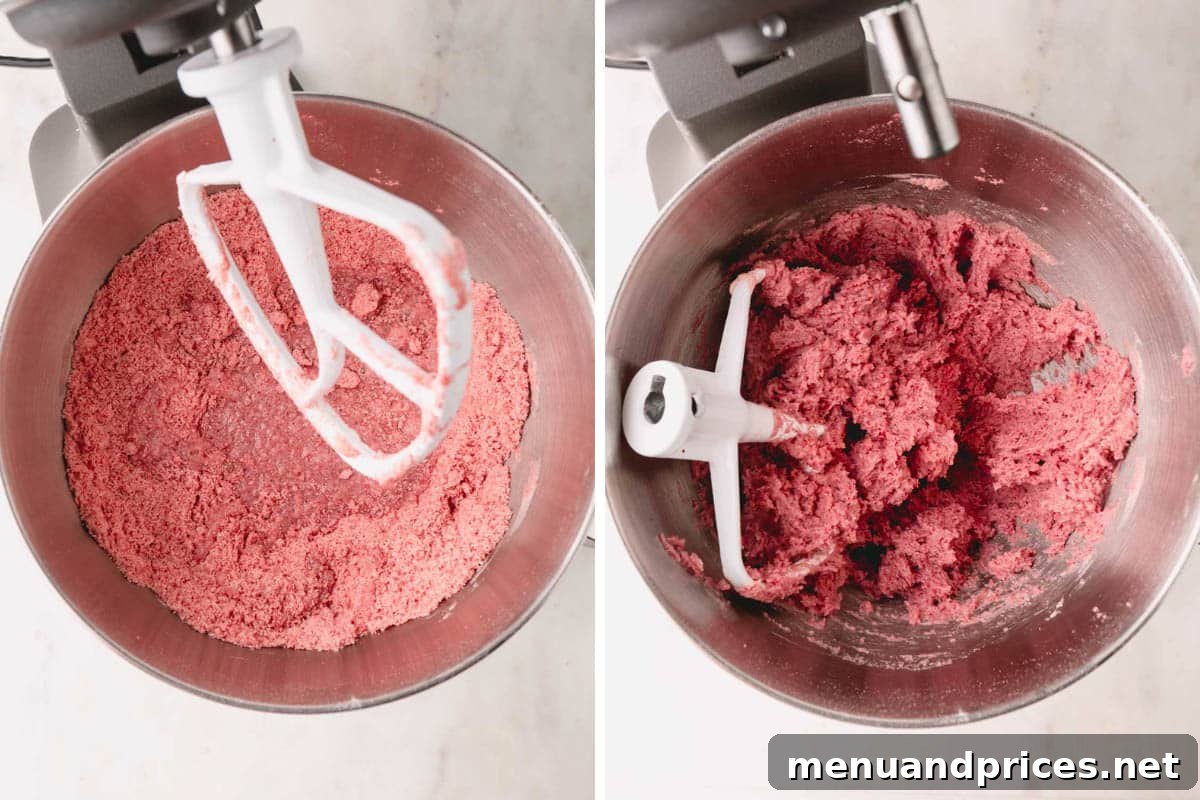
- Introduce the Milk Mixture: Pour half of the prepared milk mixture into the batter and beat on medium speed for approximately 1 ½ minutes until well combined. Then, add the remaining milk mixture and continue to beat for another minute. As you mix, remember to stop and scrape down the sides and bottom of the bowl with a spatula to ensure all ingredients are thoroughly incorporated, preventing any dry spots.
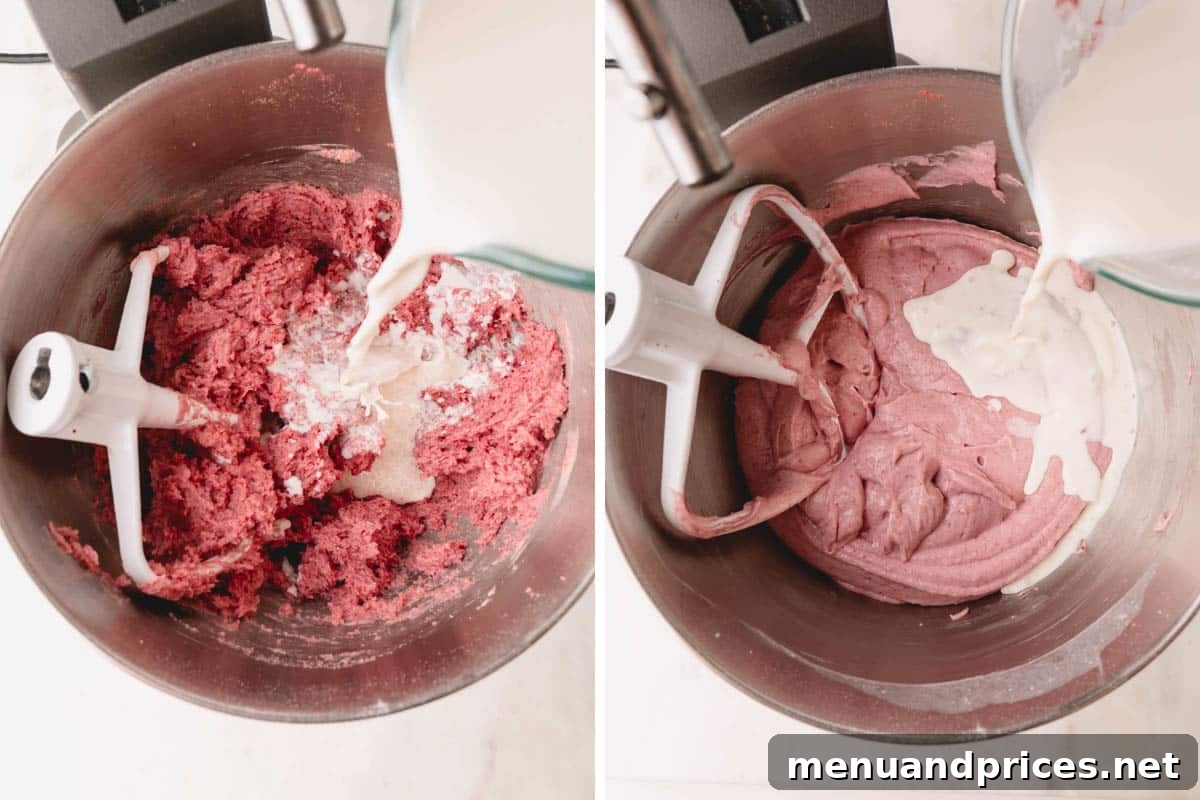
- Fill Pans and Bake: Divide the silky smooth batter evenly between the two prepared baking pans. Use an offset spatula to gently spread the batter out to the edges, ensuring a level surface for even baking.
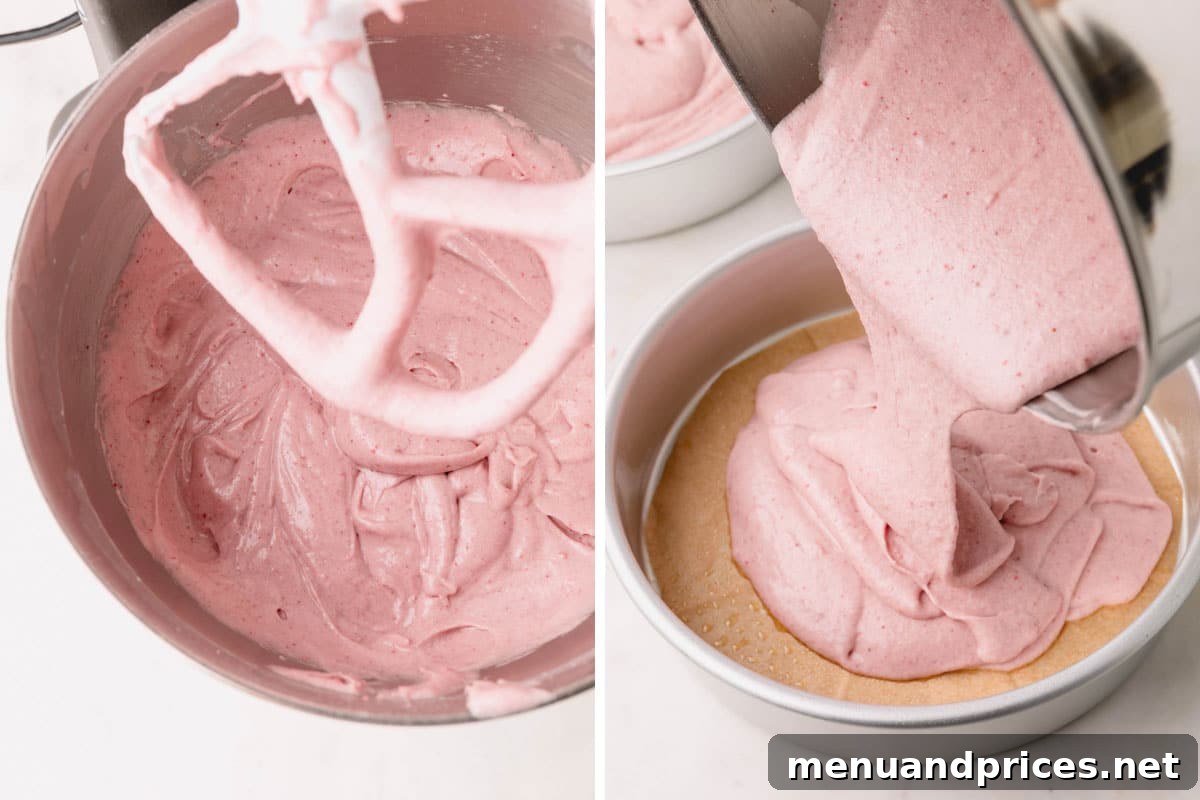
Expert Tip for Even Cake Layers
For truly professional-looking, consistently even cake layers, I highly recommend weighing your batter. After mixing, place each prepared cake pan on a kitchen scale and pour approximately half of the total batter into each. For instance, if your total batter weighs 1,421 grams, aim for about 710 grams in each pan. This simple step makes a significant difference in the final presentation.
- Bake and Cool: Bake the cake layers for 23-28 minutes, or until they are lightly golden around the edges and a toothpick inserted into the center comes out clean or with only a few moist crumbs attached. Avoid over-baking, as this can lead to a dry cake. Once baked, allow the cakes to rest in their pans for a few minutes. Then, carefully invert them onto a wire rack to cool completely. Cooling completely is essential before frosting to prevent the frosting from melting.
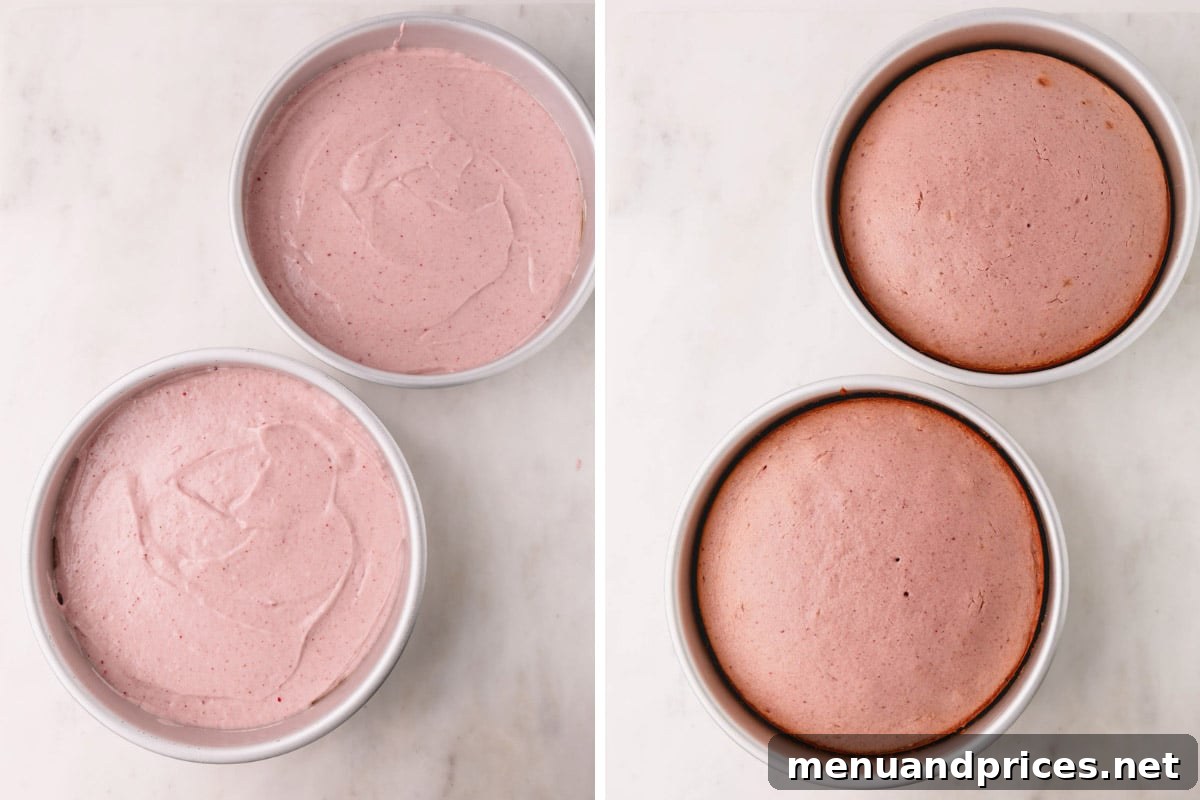
Easy Cake Release
If you find your cakes are a bit stubborn, gently run a thin knife around the edges of the cake pan before inverting them. This will help loosen any stuck bits and ensure a clean release onto the wire rack.
Phase 3: Whipping Up the Dreamy Strawberry Cream Cheese Frosting
While your cake layers are cooling completely, it’s the perfect time to prepare the exquisite strawberry cream cheese frosting. This frosting is the ideal companion to the moist cake layers, offering a delightful tang and creamy sweetness. Once made, transfer the frosting into a piping bag fitted with your desired tip (a large round tip like Wilton 2A works wonderfully for filling and coating).
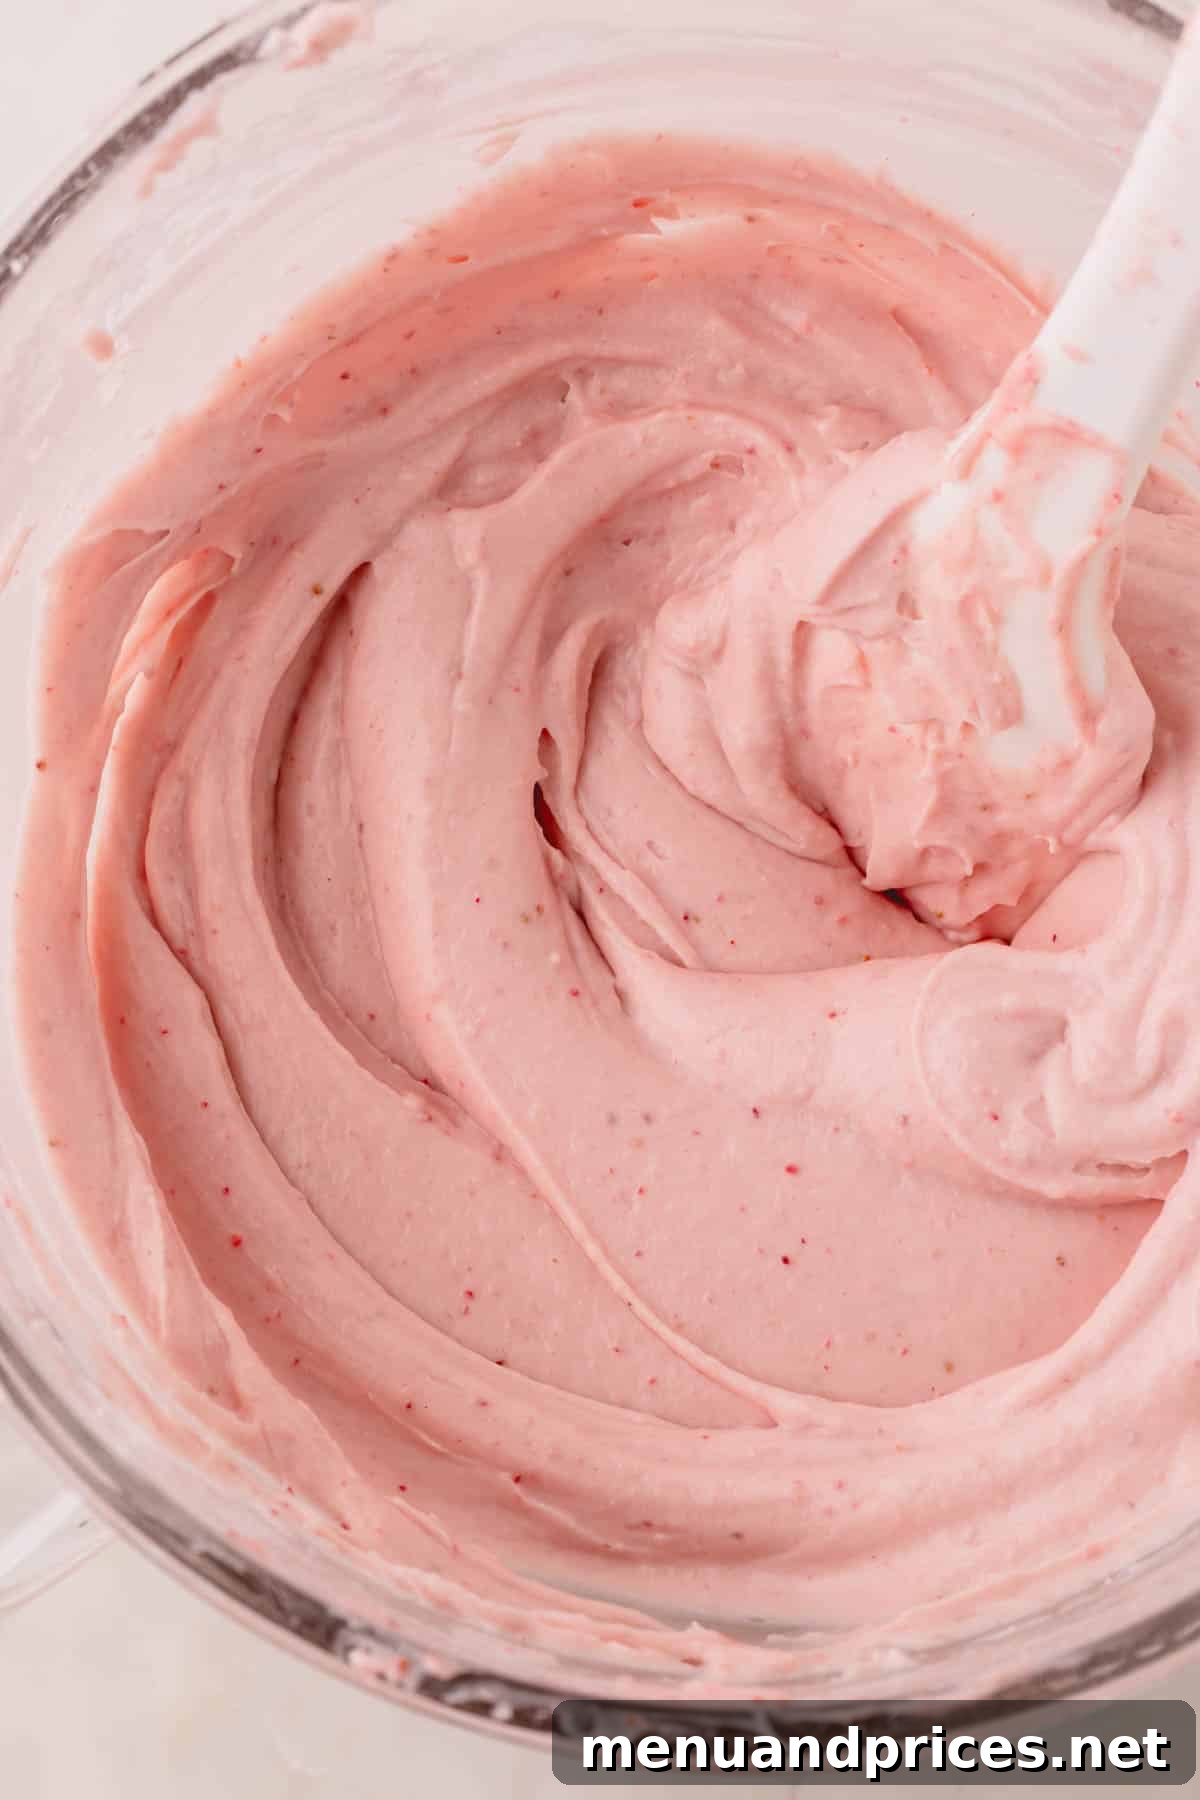
Phase 4: Assembling Your Masterpiece Strawberry Cake
Now comes the exciting part – bringing all the components together to create your stunning strawberry cake!
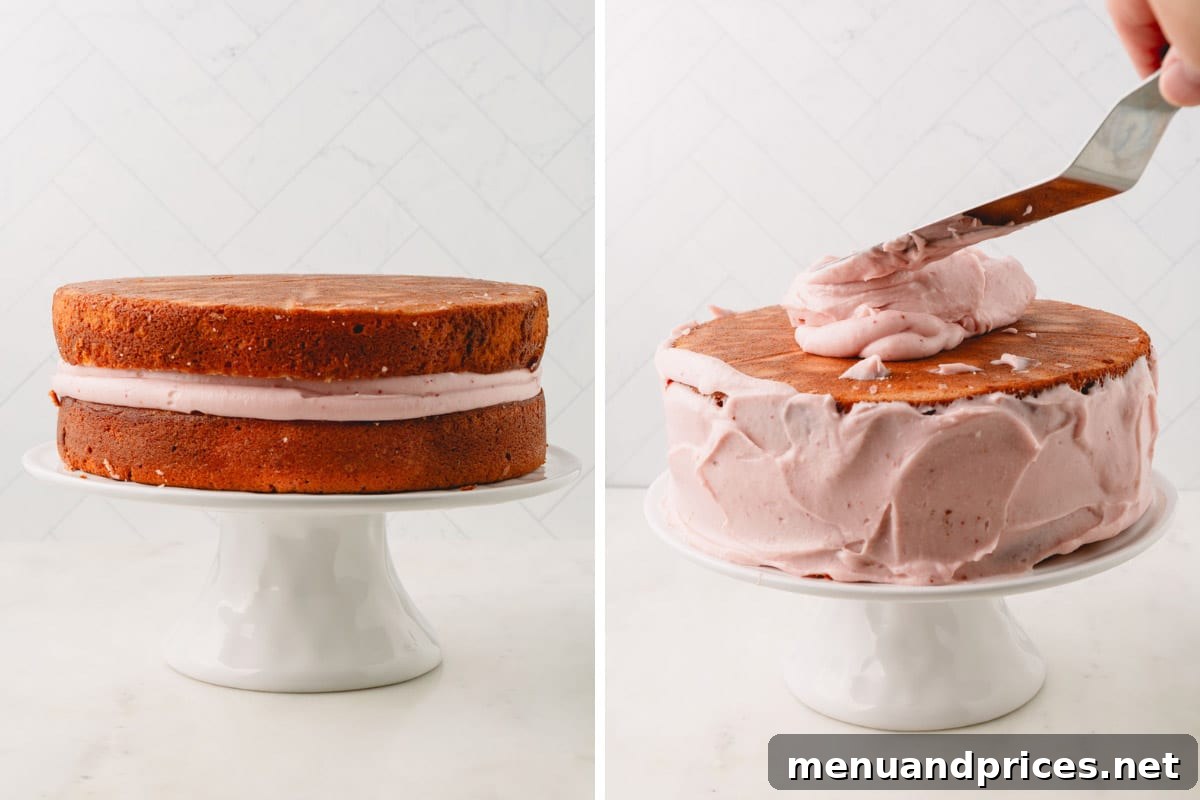
- Level the Cake Layers: Using a long, serrated knife, carefully level the tops of your cooled cake layers. This creates flat surfaces that stack neatly, ensuring a professional-looking cake.
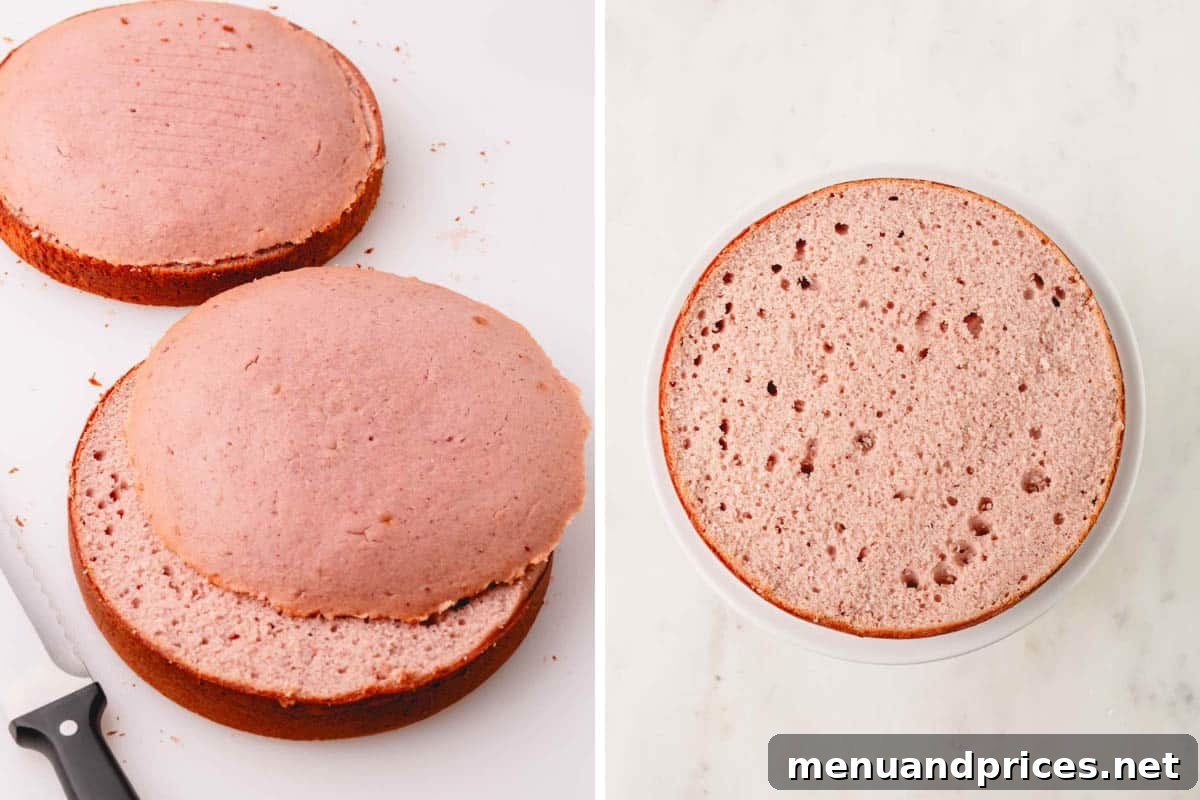
- First Layer & Filling: Place your first cake layer onto your chosen serving platter. For a clean presentation, I like to arrange 3-4 strips of parchment paper or wax paper slightly overlapping the edges of the platter before placing the cake. This catches any excess frosting and can be easily pulled away once the cake is decorated. Pipe a generous layer of strawberry cream cheese frosting over the cake and smooth it evenly with an offset spatula. Then, pipe a sturdy border of frosting around the very edge of the cake layer. This creates a “dam” to hold in the luscious strawberry sauce. Spoon about ½ cup of the chilled strawberry sauce into the center of the frosting border and gently spread it evenly.
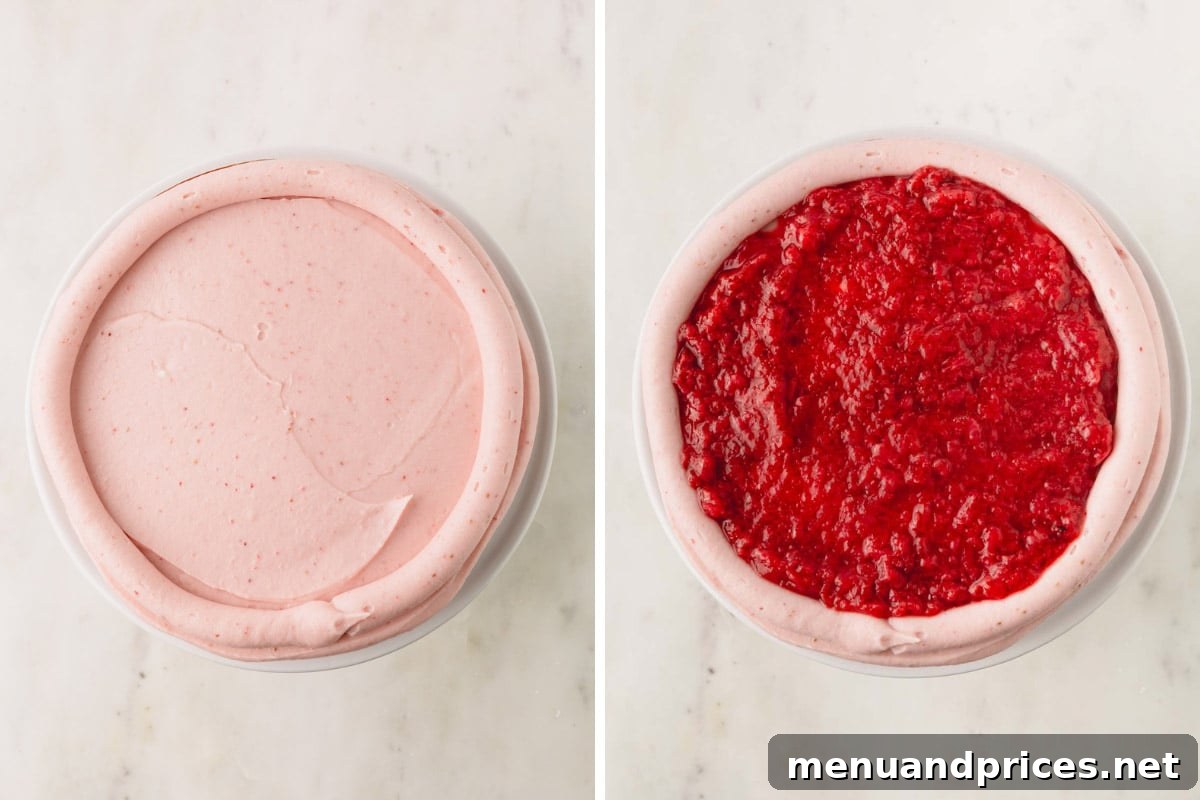
- Second Layer & Crumb Coat: Carefully place the second cake layer on top of the first, flipping it upside down. This uses the perfectly flat bottom of the cake as the top, ensuring a smooth and level surface for frosting. Now, apply a thin layer of the remaining frosting all over the entire cake (top and sides). This is called a “crumb coat,” which seals in any loose crumbs and creates a pristine base for your final frosting layer. Chill the cake in the refrigerator for 15-20 minutes to set the crumb coat.
- Final Frosting Layer: Once the crumb coat is set, apply the rest of the strawberry cream cheese frosting generously over the entire cake. Use your offset spatula to smooth the frosting to your desired finish – whether perfectly smooth, rustic, or textured.
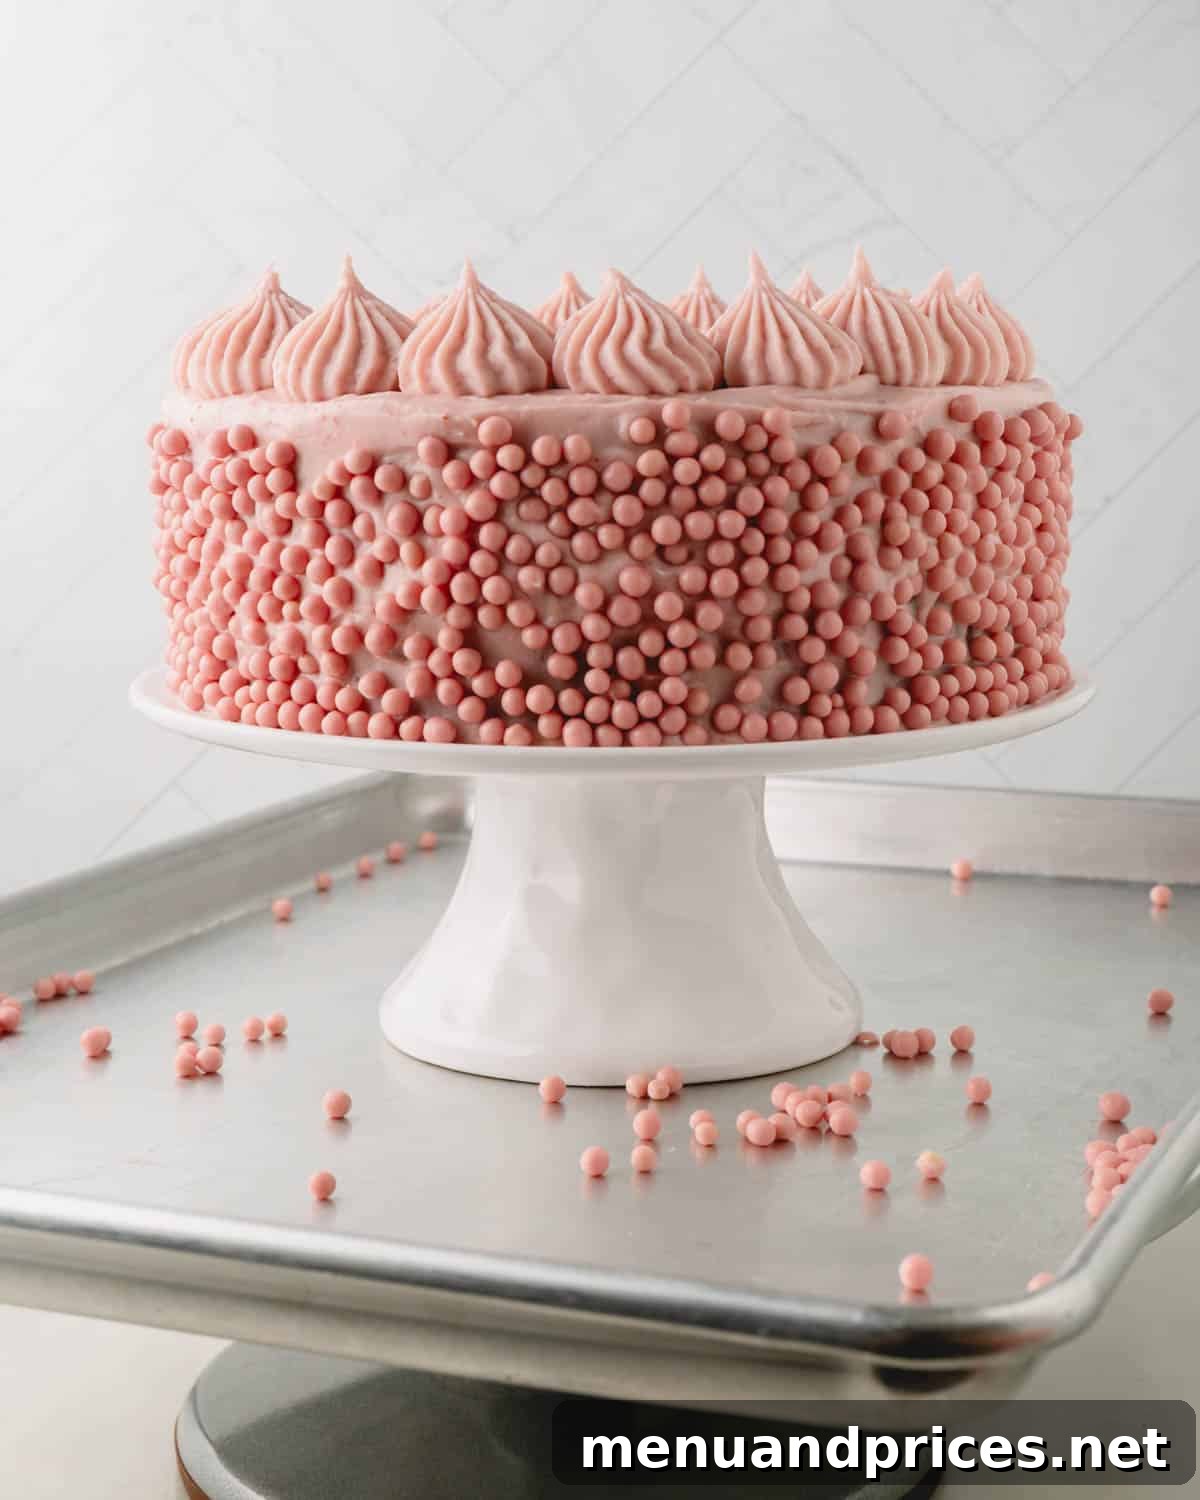
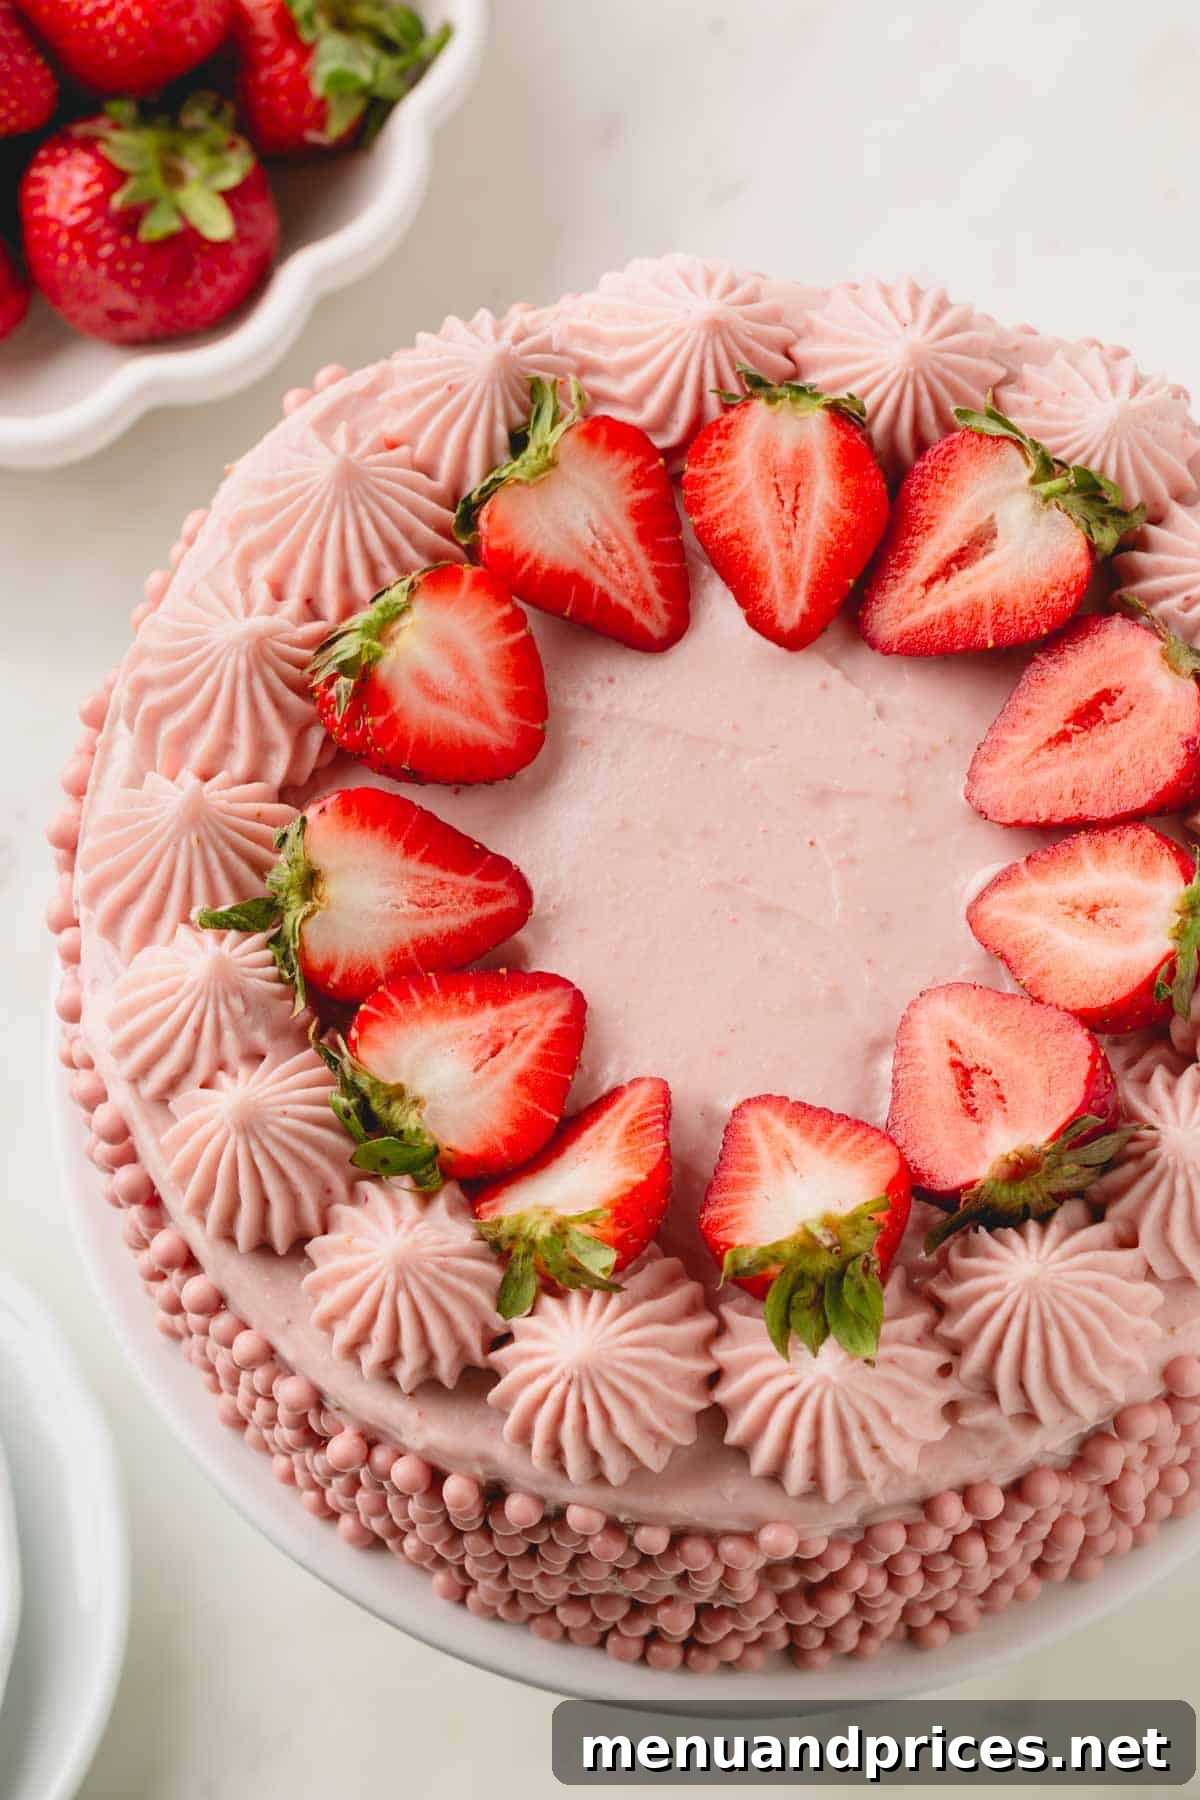
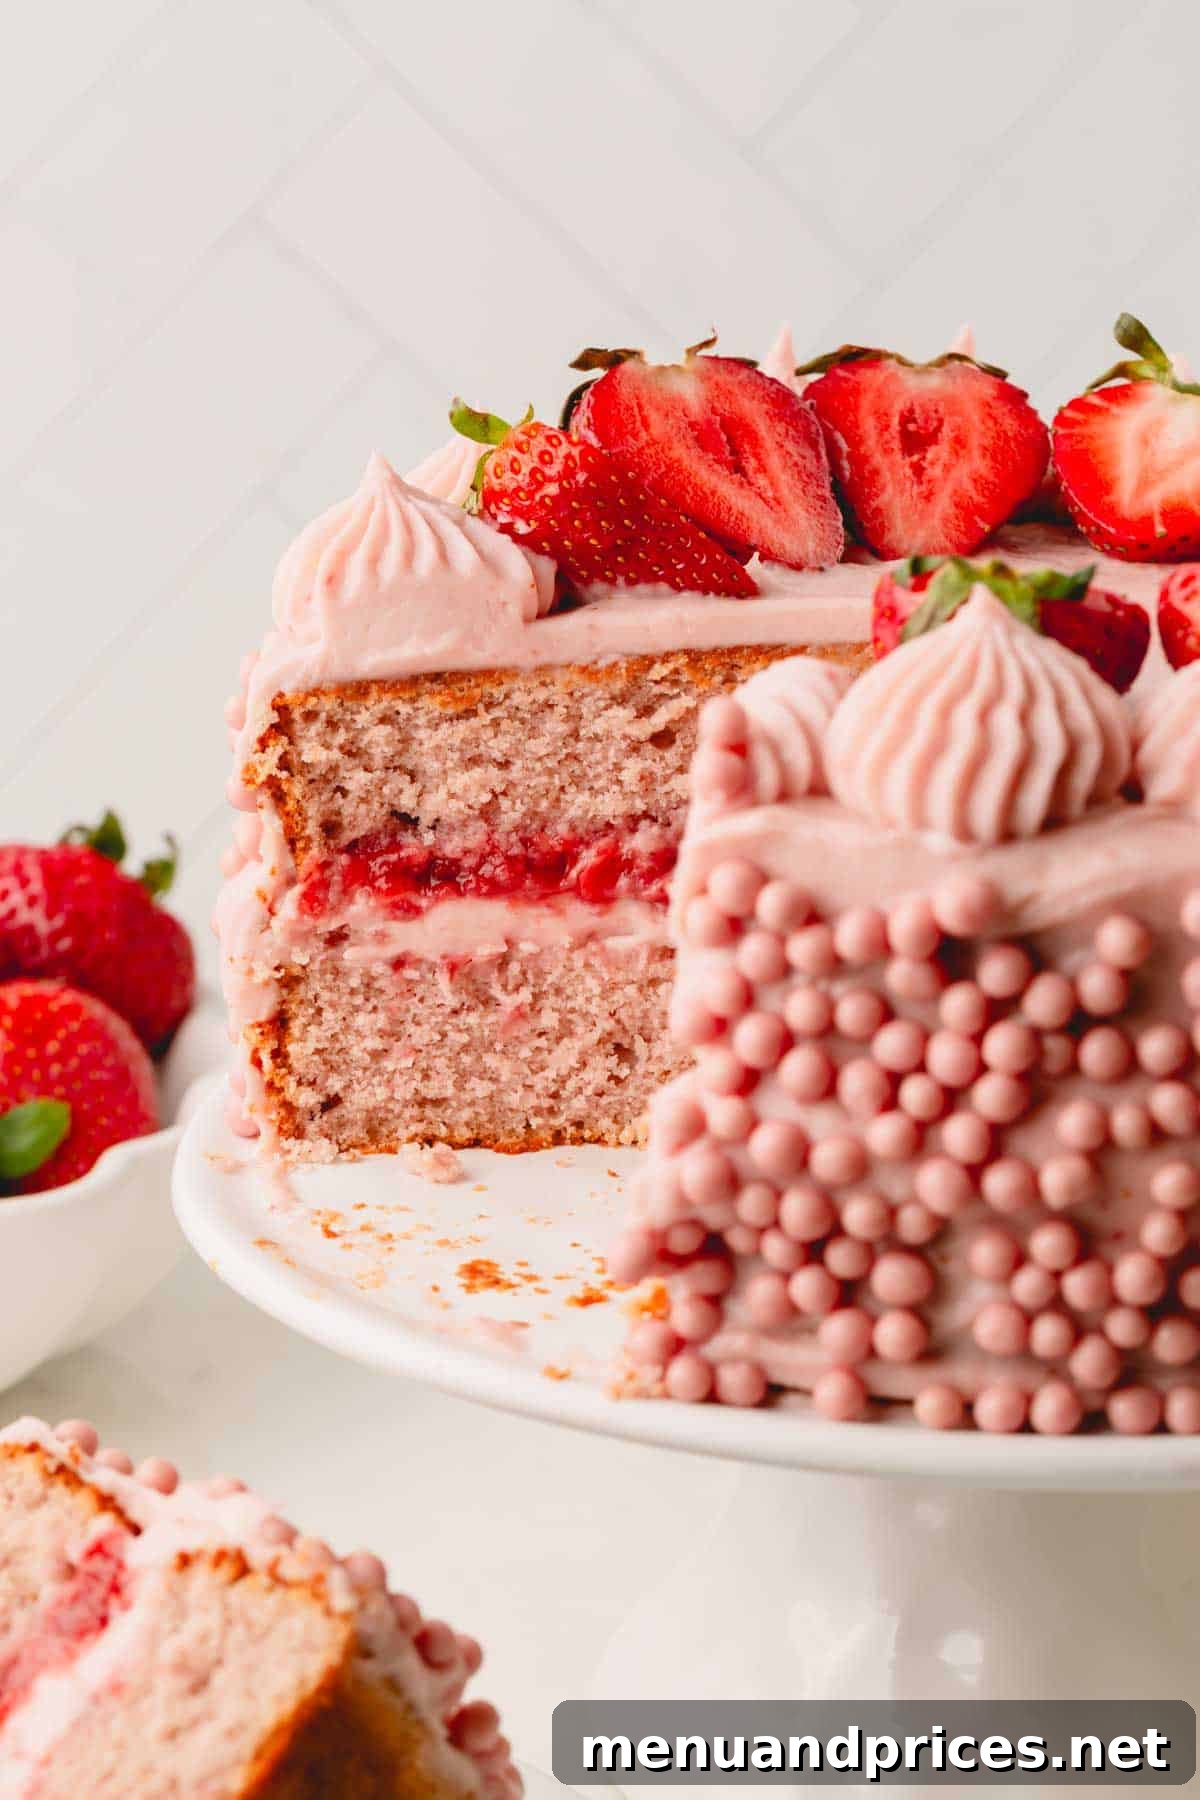
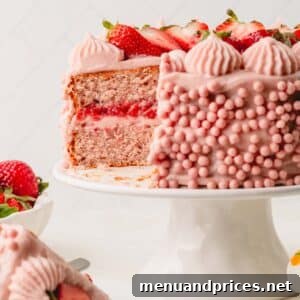
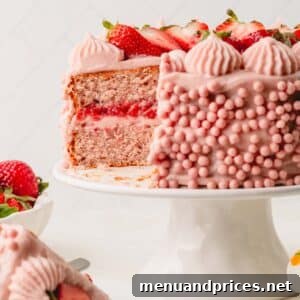
- Decorate with Flair: Now for the artistic touch! Decorate your cake as desired. I love piping the remaining frosting in elegant rosettes or borders around the edges, then garnishing with fresh strawberry slices and delightful strawberry pearl crisps for added texture and visual appeal. Let your creativity shine!
Essential Tip: Frosting Cooled Cakes
This is paramount: never frost a warm cake! The heat will cause your frosting to melt and slide right off, creating a messy situation. For the easiest and most successful frosting experience, ensure your cake layers are completely cooled – ideally chilled in the refrigerator for an hour or even made 1-2 days in advance. Chilled cakes are much sturdier, easier to handle, and less prone to crumbling, making for a cleaner, smoother frosting application.
Visual Guide: How to Assemble the Ultimate Strawberry Cake
Mastering Your Strawberry Cake: Pro Tips for Perfection
Achieving a bakery-worthy strawberry cake is within your grasp! Follow these expert tips to ensure every aspect of your cake is nothing short of perfect:
- Plan Ahead with Strawberry Sauce: Always make your strawberry sauce first, as it requires ample time to chill and thicken properly. You can even prepare it up to 3 days in advance and store it in the refrigerator.
- Sift Your Freeze-Dried Strawberries: While it’s an extra step, sifting the crushed freeze-dried strawberries is highly recommended. This removes any stubborn seeds or larger bits, ensuring a perfectly smooth texture and uniform color throughout your cake batter and frosting. Alternatively, opt for pre-made freeze-dried strawberry powder for convenience.
- Invest in Quality Cake Flour: Bleached cake flour is the cornerstone of this cake’s delicate, tender crumbs and its beautiful, muted pink color. While DIY options exist, for truly superior results, purchasing store-bought cake flour is your best bet. If making your own, ensure it’s bleached all-purpose flour.
- Accurate Flour Measurement is Key: Flour is a critical ingredient, and proper measurement prevents a dense or dry cake. Use the spoon and level method: use a spoon to scoop flour into your measuring cup until it overflows, then level it off with the back of a straight edge (like a butter knife). For ultimate precision, weigh your flour using a kitchen scale.
- Avoid Over-Baking: Over-baking is the quickest way to end up with a dry, crumbly cake. Begin checking for doneness a few minutes before the recipe’s minimum bake time. Insert a toothpick into the center of the cake; it should come out clean or with just a few moist crumbs, but no wet batter.
- Trim for a Pristine Finish: For a truly professional and pristine homemade strawberry cake, consider trimming off any slightly browned edges and leveling both the top and bottom of your cooled cake layers with a serrated knife before frosting. This creates perfectly flat surfaces for stacking and decorating.
- Always Frost a Cold Cake: This cannot be stressed enough – never frost a warm cake! Warmth will cause your carefully prepared frosting to melt into a runny mess. Ensure your cake layers are completely cooled, and ideally chilled, before you begin frosting.
- Choose the Right Cake Pans: Eight-inch round cake pans are ideal for this recipe, yielding two perfectly sized layers. If you opt for smaller pans, be aware that you’ll likely need to increase the baking time and monitor for doneness.
- Bake Layers in Advance: Cake layers can be baked up to a month ahead of time. Once completely cooled, wrap each layer tightly in plastic wrap, then place them in a freezer bag. They can be refrigerated for a few days or frozen for up to 30 days. Thaw in the refrigerator before assembling.
Plan Ahead: Make-Ahead & Storage Solutions for Your Strawberry Cake
One of the beauties of this recipe is its flexibility for advance preparation. Planning ahead can make baking day much more relaxed and enjoyable. Here’s how you can prepare and store components:
- Strawberry Sauce Storage: Your homemade strawberry sauce can be stored in an airtight container in the refrigerator for up to 7 days. For longer storage, freeze it for up to 3 months. Remember to thaw frozen sauce in the refrigerator before you plan to use it.
- Homemade Strawberry Cream Cheese Frosting Storage: The luscious cream cheese frosting can also be made in advance. Store it in an airtight container in the refrigerator for up to 3 days, or freeze it for up to 3 months. If frozen, thaw the frosting in the fridge, then re-whip it with a mixer for a few minutes to restore its fluffy texture before using.
- Cake Layers are Better Chilled: Cakes are often easiest to handle and frost when they are completely cooled or even slightly chilled in the refrigerator. This makes the layers sturdier and less prone to crumbling.
- Storing Unfrosted Cake Layers: Once your cake layers have cooled completely, wrap each layer tightly and individually in plastic wrap. Then, place the wrapped layers in a large freezer bag.
- Storage for Wrapped Cake Layers: These wrapped cake layers can be stored at room temperature for up to 1 day. For longer preservation, freeze them for up to 1 month. Thaw in the refrigerator overnight before assembling.
Storing Your Frosted Strawberry Cake
Once assembled and frosted, proper storage ensures your delicious strawberry cake stays fresh and flavorful for as long as possible:
- Refrigeration: Store your frosted strawberry cake in the refrigerator for up to 5 days. It’s best to cover the cake with an airtight cake container or dome to prevent it from drying out or absorbing other odors from the fridge.
- Freezing Frosted Cakes: Frosted cakes freeze exceptionally well! To freeze, wrap the entire cake tightly first in plastic wrap, ensuring no air pockets, and then follow with a layer of aluminum foil for extra protection. Frozen frosted cake can be stored for up to 3 months. Thaw overnight in the refrigerator before serving.
Frequently Asked Questions About Strawberry Cake
While it might seem intuitive, I generally don’t recommend incorporating fresh strawberries directly into this particular cake batter. Fresh fruit contains a lot of moisture, which can lead to a soggy cake that doesn’t bake evenly or hold its structure well. For this recipe, we rely on the concentrated flavor of freeze-dried strawberries in the batter. Save those beautiful fresh berries for decorating the top of the cake or for making the delicious strawberry sauce filling!
Absolutely! While our homemade strawberry cream cheese frosting is a divine match, feel free to get creative with your frosting choice. You can certainly use a store-bought frosting for convenience, or whip up another homemade favorite. Some fantastic alternatives that pair beautifully with strawberry include: classic plain cream cheese frosting, elegant vanilla Swiss meringue buttercream, versatile American buttercream, or a zesty lemon cream cheese frosting for a lovely citrus counterpoint.
Freeze-dried strawberries offer several key advantages. First, their flavor is incredibly concentrated, delivering a powerful strawberry punch without adding excess water to the cake batter, which can compromise texture. Second, they contribute a beautiful, natural pink color to the cake and frosting, eliminating the need for artificial food dyes. Fresh or frozen berries tend to release too much moisture during baking, making the cake dense and potentially sinking to the bottom.
Yes, this recipe is wonderfully adaptable for cupcakes! Simply line muffin tins with cupcake liners. Fill each liner approximately two-thirds full with batter. Bake for 20-22 minutes, or until a toothpick inserted into the center comes out clean. This recipe typically yields around 33 delicious strawberry cupcakes, perfect for individual servings.
Explore More Delicious Cake Recipes
If you loved this strawberry cake, you’ll surely enjoy these other delectable cake creations from my kitchen:
- Classic Sponge Cake
- The Best Simple Chocolate Cake
- Homemade Angel Food Cake with Strawberry Sauce
- Classic Yellow Cake
Homemade Strawberry Cake
Shinee Davaakhuu
35 minutes
38 minutes
2 hours
4 hours
12 servings
One 8-inch two-layer cake
Comment
Print Recipe
Ingredients
For the Luscious Strawberry Sauce:
-
8 oz
(225 g)
strawberries
fresh or frozen -
2 tablespoons
(25 g)
granulated sugar -
½ cup
(60 ml)
water
if using frozen strawberries, use ¼ cup water -
½ tablespoon
(4 g)
cornstarch -
½ tablespoon
(7 g)
lemon juice
For the Irresistible Strawberry Cake:
-
80 g
freeze-dried strawberries
for powder, refer to Note 2 -
1 cup
(240 ml)
milk
at room temperature -
½ cup
(120 g)
sour cream
at room temperature -
2 teaspoons
pure vanilla extract -
2 ½ cups
(320 g)
bleached cake flour
refer to Note 3 for substitution info -
1 ½ cups
(300 g)
granulated sugar -
4 teaspoons
baking powder -
1 teaspoon
coarse kosher salt -
1 ½ sticks
(170 g)
unsalted butter
softened -
6
(210 g)
large egg whites
at room temperature, refer to Note 4
For the Creamy Strawberry Cream Cheese Frosting:
-
30 g
freeze-dried strawberries -
15 oz
(450 g)
cream cheese
softened, refer to Note 5 -
1 stick
(113 g)
unsalted butter
at room temperature -
4 cups
(520 g)
powdered sugar -
1/8 teaspoon
coarse kosher salt -
1 cup
(240 ml)
heavy whipping cream
cold
For Decorating (Optional):
-
Strawberry pearls -
Fresh strawberries
Instructions
To make the Strawberry Sauce:
-
In a medium saucepan, combine the fresh or frozen strawberries, granulated sugar, and water.
-
Bring the mixture to a rolling boil over medium-high heat, stirring frequently to prevent sticking.
-
Meanwhile, in a small separate bowl, whisk together the cornstarch and lemon juice until you have a smooth slurry. This will be used to thicken the sauce.
-
Once the strawberries are boiling, slowly pour the cornstarch mixture into the saucepan while continuously stirring. This ensures even thickening.
-
Reduce the heat to medium-low and continue to cook for about 10 minutes, stirring occasionally. For a smoother consistency, smash the berries with a fork or potato masher as they cook. The sauce will thicken as it simmers.
-
Remove from heat and let the sauce cool slightly, then transfer it to an airtight container. Chill the sauce, covered, in the refrigerator for at least 1 hour before using. It can be stored for up to 1 week. You won’t use all the sauce for the cake filling; the remainder is delicious over pancakes, waffles, or ice cream!
To make the Strawberry Cake Layers:
-
Preheat your oven to 350°F (177°C).
-
Prepare two 8-inch round cake pans by lining the bottom of each with a circle of parchment paper. Then, generously spray the pans with cooking spray to ensure the cakes release cleanly after baking.
-
Crush the freeze-dried strawberries into a very fine powder using a blender, food processor, or a rolling pin. For the smoothest texture and even color, sift the resulting powder through a fine-mesh sieve, discarding any larger pieces or seeds. You should end up with approximately 65g of fine strawberry powder.
-
In a medium bowl or a 4-cup measuring cup, whisk together the room temperature milk, sour cream, and pure vanilla extract until well combined. Set aside.
-
In the bowl of a stand mixer fitted with the paddle attachment, combine the powdered freeze-dried strawberries, bleached cake flour, granulated sugar, baking powder, and coarse kosher salt. Mix on low speed for 30 seconds to ensure dry ingredients are evenly distributed.
-
Add the softened unsalted butter to the dry ingredients. Continue to mix on low speed for about 3 minutes, or until the mixture resembles coarse crumbs and no dry streaks of flour are visible.
-
Increase mixer speed to medium and add the egg whites, mixing until just combined, about 1 minute. Scrape down the sides of the bowl.
-
Pour half of the milk mixture into the batter and beat on medium speed for 1 ½ minutes until smooth and fully incorporated.
-
Then, add the remaining milk mixture and continue to beat for another minute, stopping halfway to scrape down the sides of the bowl with a rubber spatula. Ensure the batter is light and fluffy.
-
Divide the batter evenly into the two prepared baking pans and smooth the tops with an offset spatula. Bake for 23-28 minutes, or until the cake layers are lightly golden and a toothpick inserted into the center comes out clean or with only a few moist crumbs.
-
Allow the cakes to cool in their pans for 3 minutes. If necessary, gently loosen the edges with a knife. Invert the cakes onto a wire rack to cool completely. (At this stage, cooled cake layers can be wrapped tightly and stored at room temperature for up to 1 day or frozen for up to 1 month.)
To make the Strawberry Cream Cheese Frosting:
-
Pulse the 30g of freeze-dried strawberries in a small food processor until they form a fine powder. Alternatively, crush them with a rolling pin until powdery.
-
Sift the strawberry powder through a fine-mesh sieve to remove any remaining seeds or large pieces, ensuring a smooth frosting.
-
In the bowl of a stand mixer with a paddle attachment, beat the softened cream cheese and butter on medium-high speed until the mixture is fluffy and smooth, about 1 minute.
-
Add the powdered sugar, sifted strawberry powder, and coarse kosher salt. Begin beating on low speed until most of the dry ingredients are incorporated, about 1 minute.
-
Pour in the cold heavy whipping cream and mix on low speed until it’s mostly incorporated. Then, increase the speed to medium-high and continue beating for about 3 minutes until the frosting is light, smooth, and fluffy.
-
Transfer the finished frosting into a piping bag fitted with your preferred round tip (a Wilton 2A round piping tip is excellent for this).
To Assemble the Cake:
-
Use a serrated knife to carefully cut and level the tops of your cooled cake layers, creating flat, even surfaces. (TIP: Cake layers are much easier to handle, level, and frost when they are completely cooled or even chilled in the refrigerator.)
-
Place your first leveled cake layer onto your chosen serving platter. (TIP: For a clean presentation, place 3-4 strips of parchment or wax paper slightly overlapping the edges of the platter before setting the cake down. These can be removed once frosting is complete.)
-
Pipe a generous layer of strawberry cream cheese frosting over the first cake layer and smooth it evenly with an offset spatula. Then, pipe a sturdy border of frosting around the very edges of the cake layer to create a “dam.”
-
Spoon about ½ cup of the chilled strawberry sauce into the center of the piped frosting border and gently spread it evenly within the dam.
-
Carefully place the second cake layer on top, flipping it upside down so that the flat bottom of the cake becomes the top surface. This creates a perfectly flat canvas for your final frosting.
-
Apply a thin “crumb coat” of the remaining frosting over the entire cake (top and sides) to trap any loose crumbs. Chill the cake in the refrigerator for 15-20 minutes to set the crumb coat. Then, apply the rest of the frosting, coating the entire cake smoothly with an offset spatula.
-
Decorate the cake as desired to make it truly your own! For a beautiful finish, I often pipe the remaining frosting around the top edges, arrange fresh sliced strawberries, and cover the sides with delicate strawberry pearl crisps for an extra touch of elegance and texture.
⭐️ Did you make this recipe?
Please leave a review and let us know how you liked it!
Tips & Notes
Note 2: You’ll need approximately 65g of sifted strawberry powder for the cake batter. To simplify the process of crushing and sifting, you can purchase pre-made freeze-dried strawberry powder.
Note 3: I strongly advise against substituting bleached cake flour with all-purpose flour. Using all-purpose flour will result in a denser, coarser cake texture and a less vibrant, more muted pink color.
Note 4: For convenience, you can substitute the 6 large egg whites with approximately ¾ cup of carton egg whites.
Note 5: For the best, creamiest frosting results, always use full-fat, brick-style cream cheese. Avoid using cream cheese from a tub, as it often has a higher water content and won’t yield the desired consistency.
Storing Tips for Frosted Cake:
– Store your frosted strawberry cake at room temperature for 1-2 days, or in the refrigerator for up to 5 days. Always cover the cake with an airtight cake container or loosely wrap it in foil to keep it fresh.
– Frosted cakes also freeze very well! Wrap the entire cake tightly first in plastic wrap, then follow with a layer of aluminum foil. Freeze for up to 3 months. Thaw in the refrigerator before serving.
Cupcake Conversion: This recipe works beautifully for cupcakes. Simply fill cupcake liners two-thirds full with batter and bake for 20-22 minutes. You can expect to yield about 33 delicious strawberry cupcakes.
Nutrition
1 serving
606kcal
70g
7g
34g
45g
580mg
Dessert
American
Did you make this?Leave a rating and your feedback. Thank you!