
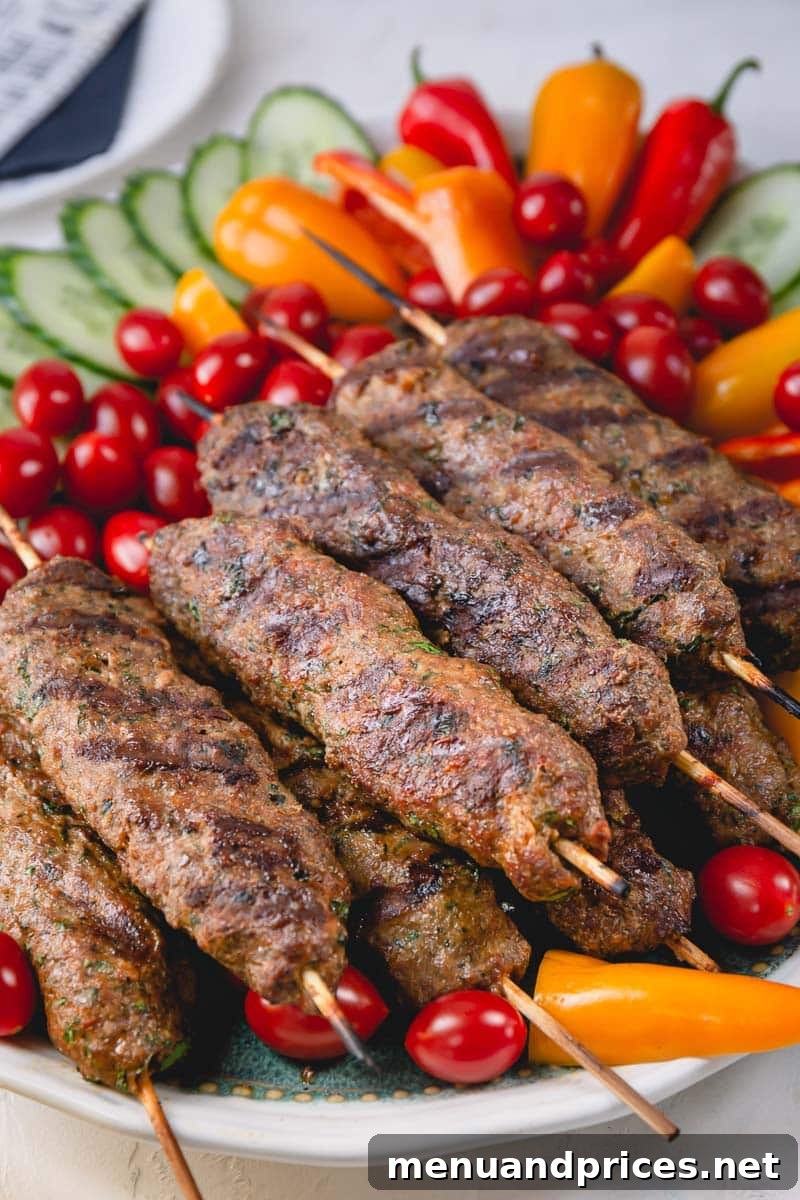
Mastering the Art of Urfa Kebabs: A Juicy & Flavorful Turkish Delight for Everyone
Embark on a culinary journey to Turkey right from your backyard with these incredibly juicy and flavorful Urfa Kebabs. Unlike their fiery cousin, the Adana Kebab, Urfa Kebabs are renowned for their mild spice profile, making them a perfect, family-friendly grilling sensation that even the little ones will adore. Prepare to impress your guests and elevate your barbecue game!
My fascination with Turkish cuisine, especially its diverse range of kebabs, began long ago. The iconic Döner Kebab always held a special allure, sparking a dream to someday visit Turkey and experience the authentic flavors firsthand. The rich history and vibrant culinary traditions of the region are truly captivating.
It was during a casual scroll through Instagram last summer that I stumbled upon a truly irresistible plate of food – succulent kebabs calling my name. Intrigued by their mouth-watering appearance, I reached out for the recipe. Thankfully, the talented Joanna Tahar graciously shared her secret to these delectable Urfa Kebabs.
Since then, this recipe has become a staple in our household, prepared countless times. It’s always a resounding success! What’s truly remarkable is how much my young boys, aged four and two, absolutely light up at the sight of these kebabs. Their enthusiasm is the ultimate testament to this recipe’s universal appeal.
This Urfa Kebab recipe is more than just a meal; it’s your definitive guide to becoming the undisputed star of your next backyard barbecue!
What Exactly is an Urfa Kebab? Understanding This Turkish Delicacy
Before we dive into the delicious details of preparation, let’s explore the rich background of this beloved Turkish dish. Turkish cuisine boasts a magnificent array of kebabs, among the most popular are two very similar yet distinct varieties: Urfa Kebab and Adana Kebab.
Both kebabs proudly carry the names of their respective cities of origin: Urfa (officially known as Şanlıurfa), a city in southeastern Turkey celebrated for its profound historical and cultural heritage, and Adana, a major city in south-central Turkey renowned for its vibrant culinary scene. While their preparation methods share many similarities, the defining characteristic that sets them apart is their spice level.
Adana Kebabs are famous for their bold, piquant flavor, achieved through a generous addition of red pepper flakes and other hot spices. They deliver a satisfying heat that adventurous palates often seek. In contrast, Urfa Kebabs offer a milder, more nuanced flavor profile. They focus on the inherent taste of the high-quality meat, complemented by aromatic herbs and warm, earthy spices, rather than relying on chili heat. This makes Urfa Kebabs incredibly delicious and accessible to a wider audience, including children and those sensitive to spicy food, without sacrificing any of the deep, satisfying Turkish flavor.
Essential Ingredients for Authentic Urfa Kebabs: Simple & Flavorful
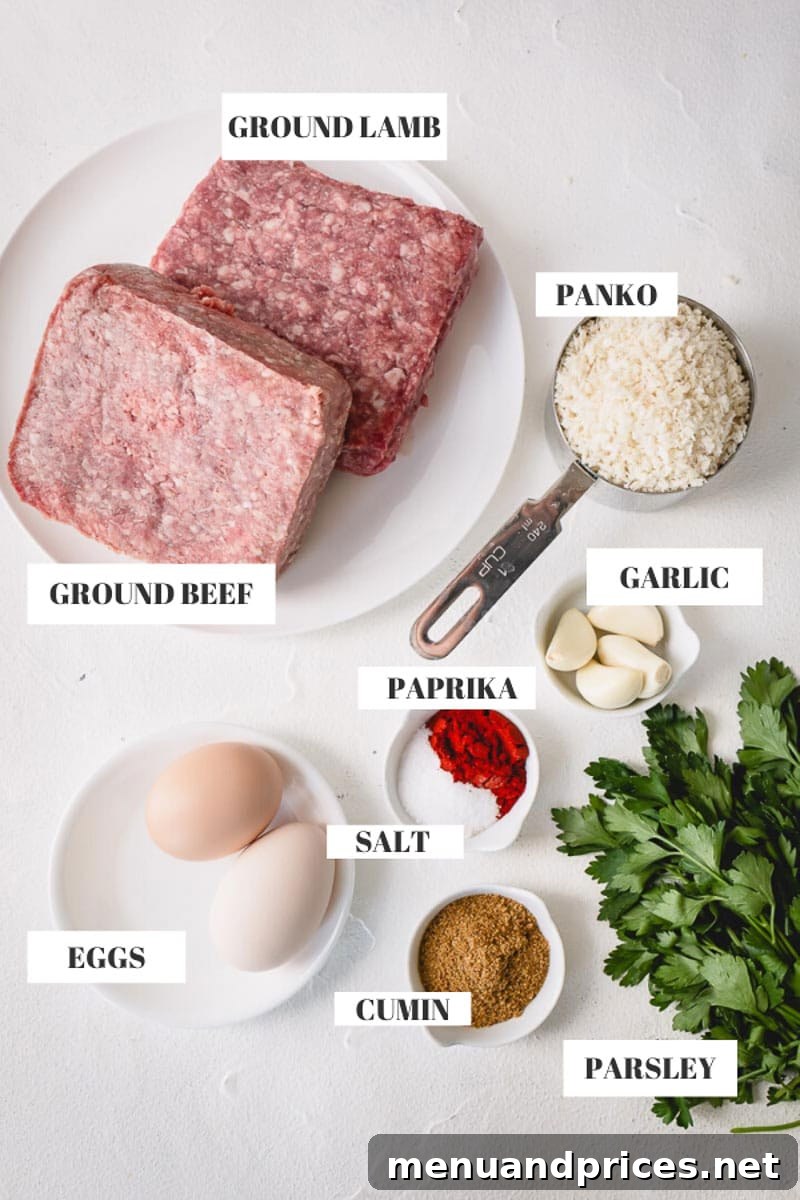
One of the most appealing aspects of this Urfa Kebab recipe is its simplicity. You’ll be surprised to find that you only need a handful of readily available ingredients, most of which you likely already have in your pantry or refrigerator. There’s no need for exotic or hard-to-find spices to create this culinary masterpiece.
- Meat: The Heart of the Kebab
Traditionally, authentic Urfa Kebab is crafted from a precise blend of minced beef and lamb, often prepared with a specialized long knife called a “zırh” on a large chopping board. This unique mincing process creates a distinct texture. For home cooks, however, high-quality ground beef, ground lamb, or a combination of both works perfectly. My personal favorite, and highly recommended for the best flavor and juiciness, is a blend of both beef and lamb. Aim for an 80% lean, 20% fat ratio. This fat content is crucial for keeping the kebabs moist, tender, and intensely flavorful as they cook on the grill. Without adequate fat, your kebabs can turn out dry and less appealing.
- Panko Breadcrumbs: The Binding Secret
While Joanna’s original recipe suggested using sliced bread to make fresh breadcrumbs, I often opt for the convenient and equally effective Panko breadcrumbs. Panko, a type of Japanese breadcrumb, is known for its light, airy, and flaky texture, which helps bind the meat mixture without making it dense. It also aids in moisture retention, contributing to the kebab’s juicy consistency. If you prefer, you can certainly make your own breadcrumbs from day-old bread, but Panko offers a fantastic shortcut with excellent results, similar to how I use it in my favorite meatball recipe.
- Eggs: The Essential Binder
Eggs play a vital role in this recipe by acting as a natural binding agent. They help to hold the meat mixture together, preventing the kebabs from crumbling or falling off the skewers during grilling. This ensures your kebabs maintain their perfect shape and texture, providing a satisfying bite every time.
- Onion and Garlic: Aromatic Foundation
For a truly robust flavor base, I recommend using yellow or white onions, finely grated or minced. These add a subtle sweetness and depth to the meat. Freshly grated or pressed garlic is absolutely essential; its pungent, aromatic notes are indispensable for the authentic Turkish taste. While my family typically omits onion due to dietary preferences, it’s a traditional ingredient that significantly enhances the kebab’s profile. Don’t worry if you don’t see it in the photos – its absence is purely personal choice, not a flaw in the recipe!
- Fresh Herbs: Brightness and Character
The generous inclusion of fresh herbs is what truly elevates these kebabs, infusing them with vibrant flavor and aromatic character. We’ll be using a good amount of fresh flat-leaf parsley and dill. Parsley offers a fresh, clean counterpoint to the rich meat, while dill contributes a distinctive, slightly anisy and herbaceous note that is wonderfully complementary. If fresh dill is unavailable, you can substitute with dried dill, but remember that dried herbs are far more potent, so use approximately one-third of the amount specified for fresh herbs (e.g., if the recipe calls for ½ cup fresh, use about 2-3 tablespoons dried).
- Spices: Warmth Without the Heat
Forget about searching for exotic, hard-to-find spices. This recipe keeps it beautifully simple with just two core spices: ground cumin and smoked paprika. Cumin provides a warm, earthy, and slightly pungent flavor that is quintessential to Middle Eastern and Turkish cuisine. Smoked paprika adds a delightful depth of flavor and a subtle smoky aroma, enhancing the grilling experience without any heat. The absence of chili-based spices means these Urfa Kebabs are wonderfully mild, allowing you to confidently serve them to even the youngest members of your family, knowing they’ll enjoy every bite without any unexpected fiery surprises.
Step-by-Step Guide: Crafting Your Perfect Urfa Kebabs
Creating these delightful Urfa Kebabs is a straightforward process, but a little planning goes a long way in ensuring the best results. The key to success lies in a crucial chilling step that enhances both the texture and flavor of your kebabs.
I highly recommend preparing the meat mixture in advance and allowing it to chill in the refrigerator for at least one hour, or even overnight. This step serves two important purposes:
- Improved Handling and Shaping: Chilling allows the fat in the meat to firm up, making the mixture much easier to handle and shape around the skewers. A cold mixture is less sticky and holds its form better, preventing frustration during assembly.
- Enhanced Flavor Development: The resting period gives all the wonderful flavors from the spices, herbs, onion, and garlic ample time to meld and infuse deeply into the meat. This results in a more cohesive and intensely flavorful kebab.
Now, let’s get to the preparation:
- Step 1: Prepare the Meat Mixture. In a large mixing bowl, combine all your ingredients: ground beef and/or lamb, Panko breadcrumbs, eggs, ground cumin, smoked paprika, grated onion (if using), grated garlic, minced fresh parsley, minced fresh dill, salt, and black pepper. Using your hands, knead the mixture thoroughly until it is completely combined, smooth, and slightly sticky. This kneading process is vital for developing the right texture in your kebabs. Cover the bowl tightly with plastic wrap and refrigerate for a minimum of 1 hour, or ideally, overnight for maximum flavor.
- Step 2: Shape the Kebabs onto Skewers. Once the meat mixture is adequately chilled, prepare your skewers (if using wooden, ensure they’ve been soaked). Keep a small bowl of cold water nearby. Dip your hands into the cold water to moisten them – this clever trick prevents the meat mixture from sticking to your hands, making the shaping process much smoother. Take approximately ½ cup of the meat mixture and firmly press and mold it evenly around a skewer, shaping it into a flattened log or oval. Ensure the meat adheres securely to the skewer to prevent it from falling off during grilling. Repeat with the remaining mixture.
PRO TIP: Always keep your hands moist while shaping the kebabs. This prevents sticking and helps you achieve a smooth, uniform shape. If the mixture feels too wet after chilling, you can add another tablespoon or two of Panko breadcrumbs to adjust the consistency. Conversely, if it feels too dry and crumbly, add a tiny bit of water or an extra egg yolk.
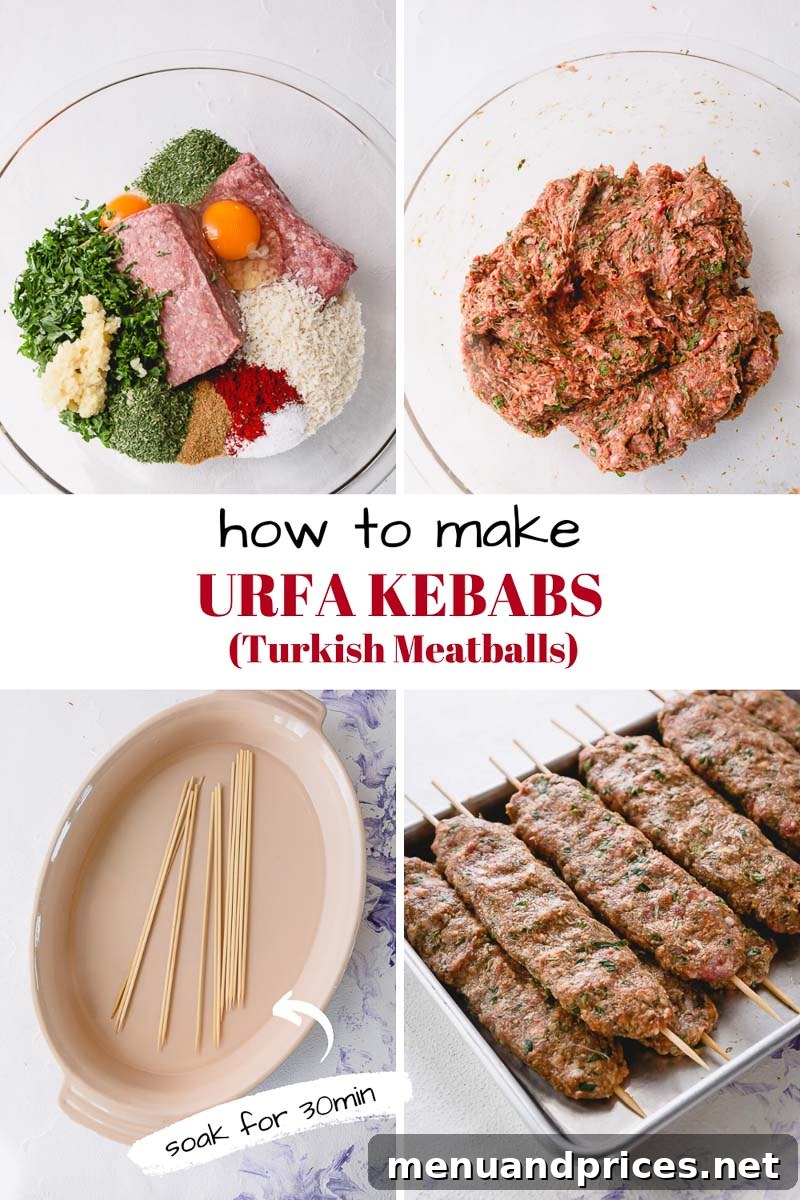
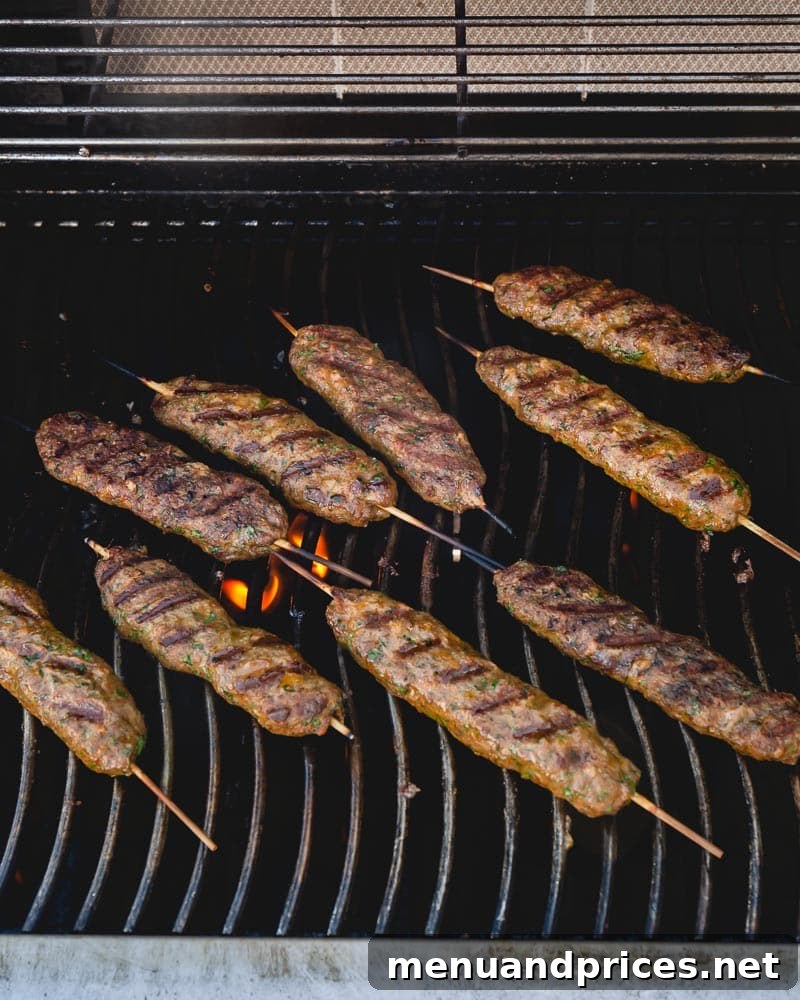
- Step 3: Preheat and Prepare Your Grill. Preheat your grill to high heat. While it’s heating, clean the grill grates thoroughly with a wire brush. Once clean, lightly oil the grates by dipping a paper towel in vegetable oil (using tongs for safety) and carefully rubbing it over the hot grates. This prevents the kebabs from sticking and ensures beautiful grill marks.
- Step 4: Grill to Perfection. Carefully place the shaped kebabs onto the hot, oiled grill grates. Cook for a total of 8-10 minutes, flipping them gently halfway through to ensure even cooking and browning on all sides. The internal temperature of the kebabs should reach 160°F (71°C) for beef/lamb. They should develop a lovely caramelized exterior while remaining wonderfully juicy inside.
Wooden Skewers vs. Metal Skewers: Which is Best for Your Kebabs?
When it comes to grilling kebabs, the choice of skewers can impact your experience. While both wooden and metal skewers get the job done, there are distinct advantages to each.
If you only occasionally make skewer-based dishes, disposable wooden skewers might seem more convenient. However, for regular grillers and kebab enthusiasts, I strongly advocate for investing in high-quality metal skewers. Here’s a breakdown of why they’re often the superior choice:
- Reusable and Sustainable: Metal skewers are designed for repeated use, making them an environmentally friendly and cost-effective option in the long run. You’ll never find yourself running out of skewers mid-prep again!
- No Soaking Required: Wooden skewers must be soaked in water for at least 30 minutes before grilling to prevent them from catching fire. Metal skewers eliminate this extra step, saving you precious preparation time.
- Durability and Longevity: A good set of metal skewers is a one-time investment that, with proper care, will last you a lifetime. They are robust and can withstand high grilling temperatures without warping or breaking.
- Better Heat Conduction: Metal skewers conduct heat into the center of the kebab, helping to cook the meat more evenly from the inside out, reducing cooking time and ensuring a thoroughly cooked, juicy result.
- Easier Flipping: Many metal skewers are flat or have a twisted design, which prevents the meat from spinning freely when you try to flip them on the grill. This allows for more precise and easier turning.
Perfect Pairings: What to Serve with Your Delicious Urfa Kebabs
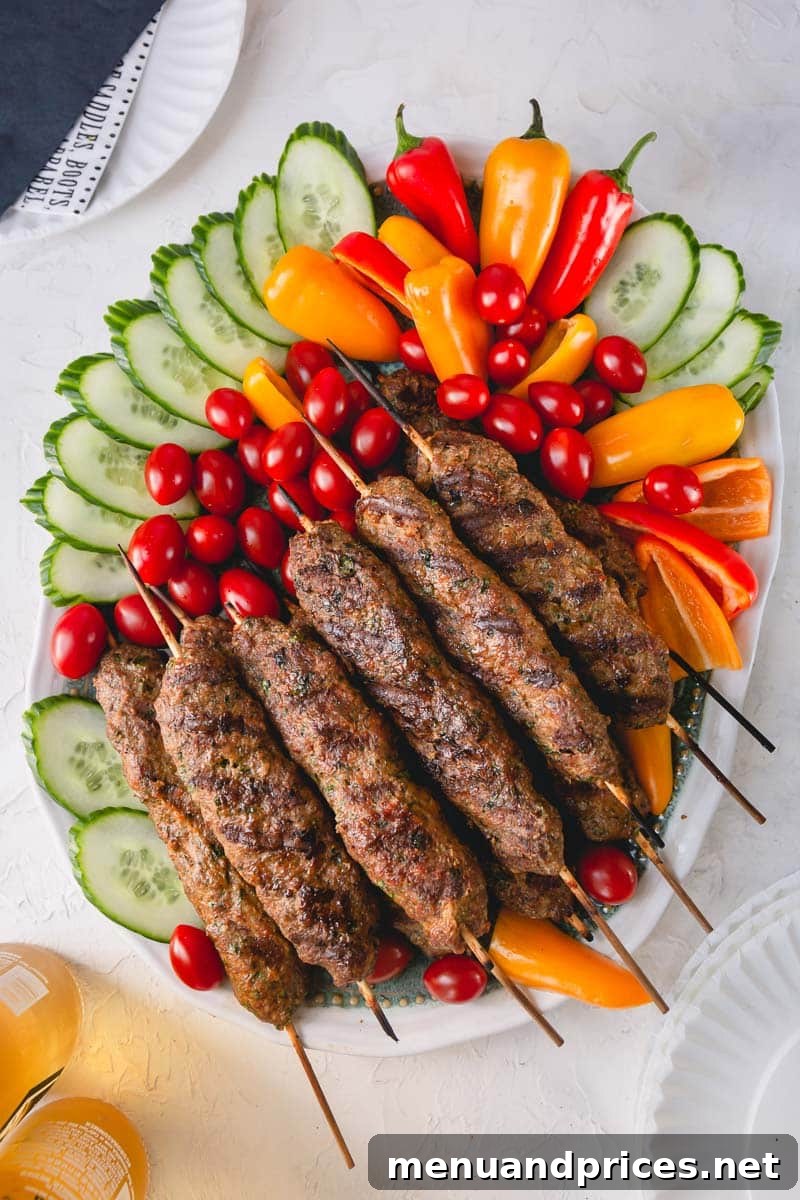
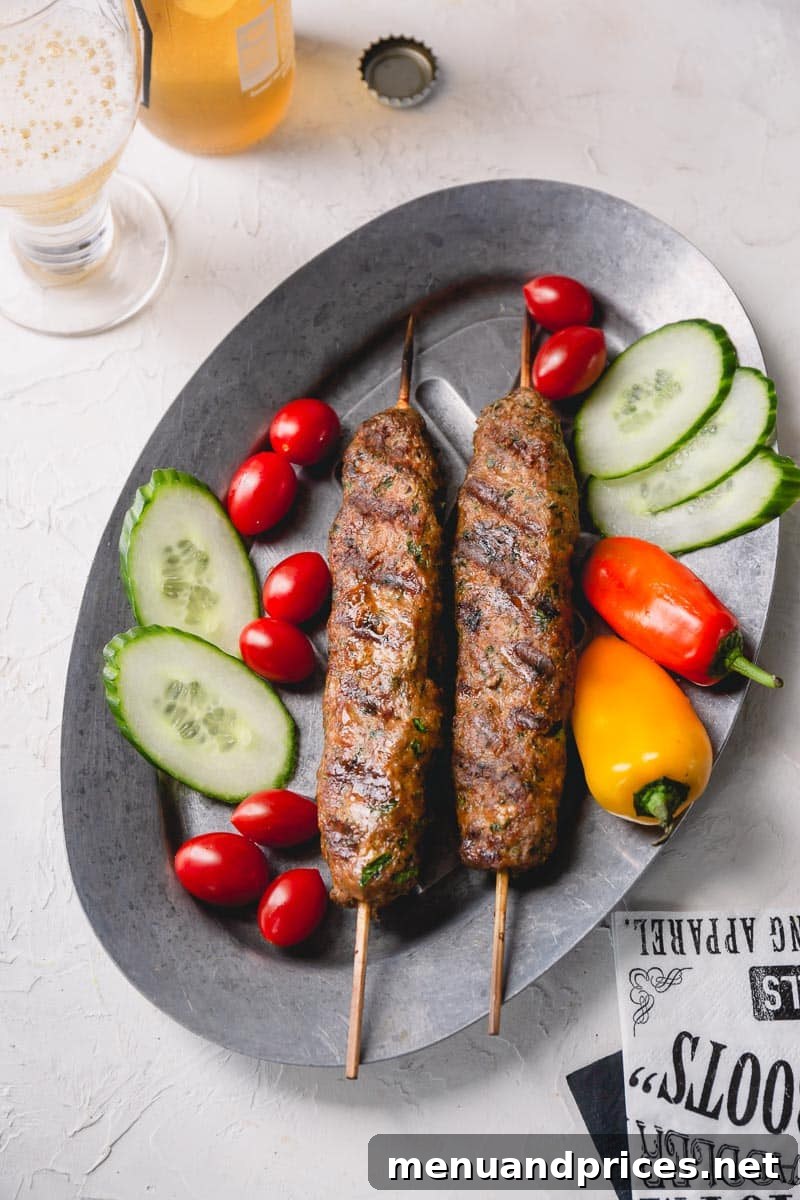
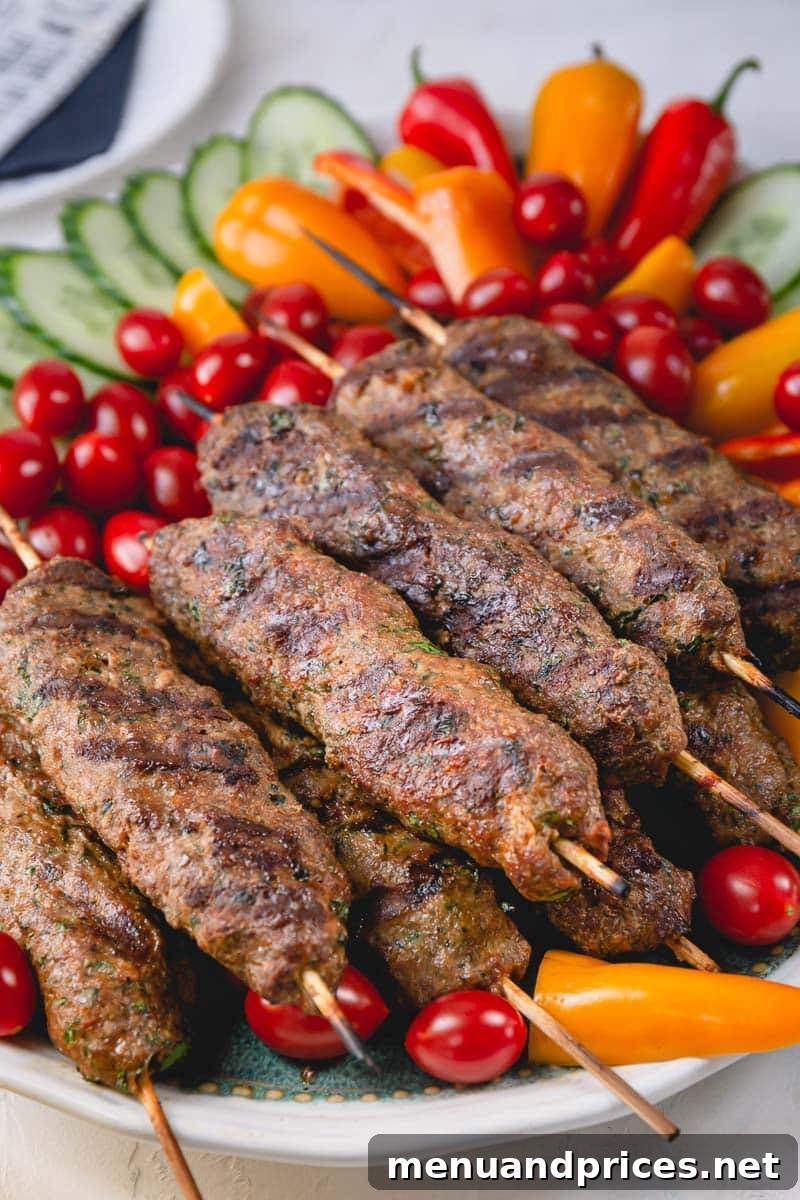
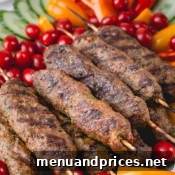
Urfa Kebabs are a meal in themselves, but they truly shine when accompanied by fresh, vibrant side dishes that complement their rich flavors. Joanna shared that in Turkey, these kebabs are often served simply with fresh cucumbers and tomatoes, along with grilled sweet peppers – a classic and refreshing combination.
However, the beauty of homemade kebabs is the freedom to customize your meal. Here are some fantastic suggestions to elevate your Urfa Kebab experience:
- Fresh Salads: A crisp salad is an ideal counterpoint to the savory kebabs.
- Creamy Cucumber Tomato Salad: A cooling, creamy salad can perfectly balance the richness of the meat.
- Cucumber Mango Salad: For a touch of sweet and tangy freshness.
- Cucumber Edamame Salad: A vibrant and protein-rich option.
- Shepherd’s Salad (Çoban Salata): A traditional Turkish salad with finely diced tomatoes, cucumbers, bell peppers, and onions, dressed with olive oil and lemon juice, offers authentic flavor.
- Rice or Bulgur Pilaf: A bed of fluffy rice or a hearty bulgur pilaf is excellent for soaking up all the delicious juices.
- Butter Rice (Tereyağlı Pilav): Simple, buttery rice is a staple.
- Bulgur Pilaf: A nutty, chewy grain dish that adds substance.
- Flatbreads: Warm pita bread, lavash, or even homemade flatbreads are perfect for wrapping your kebabs or scooping up sides.
- Yogurt-Based Sauces: A cooling dip can wonderfully complement the grilled meat.
- Cacık: A refreshing Turkish yogurt and cucumber dip, similar to Greek tzatziki, with garlic and mint.
- Plain Yogurt: A simple dollop of thick, plain yogurt provides a lovely tang.
- Grilled Vegetables: Besides sweet peppers, consider grilling other vegetables like zucchini, eggplant, cherry tomatoes, or onions alongside your kebabs for a complete meal.
We sincerely hope this detailed guide inspires you to try your hand at making these incredible Urfa Kebabs soon. They are a testament to the fact that incredibly flavorful dishes don’t need to be overly complicated or spicy to be utterly delicious. If you do give this recipe a whirl, please come back and share your experience and how much you enjoyed them!
Frequently Asked Questions About Urfa Kebabs
What is the main difference between Urfa Kebab and Adana Kebab?
The primary distinction lies in their spice level. Adana Kebab is famously spicy, prepared with a generous amount of hot red pepper flakes (pul biber). Urfa Kebab, on the other hand, is mild and relies on a blend of aromatic herbs and warm spices like cumin and smoked paprika for its rich flavor, without any added heat.
Can I use only ground beef or only ground lamb for Urfa Kebabs?
While a combination of beef and lamb (ideally 80% lean, 20% fat for both) is traditionally preferred for the best flavor and texture, you can certainly use all ground beef or all ground lamb. Just ensure the meat has a good fat content (around 20%) to keep the kebabs juicy and prevent them from drying out during cooking.
Is it necessary to chill the meat mixture?
Yes, chilling the meat mixture for at least 1 hour (or up to overnight) is highly recommended. It allows the flavors to meld beautifully and causes the fat in the meat to firm up, making the mixture much easier to handle and shape securely onto skewers. This prevents the kebabs from falling apart on the grill.
What if I don’t have a grill? Can I still make Urfa Kebabs?
Absolutely! While grilling imparts a wonderful smoky flavor, you can also cook Urfa Kebabs in a few other ways:
- Oven: Preheat your oven to 400°F (200°C). Place the skewers on a wire rack over a baking sheet and bake for 15-20 minutes, flipping halfway, until cooked through and nicely browned.
- Broiler: Place skewers on a foil-lined baking sheet and broil for 4-5 minutes per side, watching closely to prevent burning.
- Pan-frying: For smaller batches or if you don’t want to use skewers, you can shape the mixture into small patties and pan-fry them in a little oil until cooked through.
Urfa Kebabs
Shinee Davaakhuu
20 mins
10 mins
1 hr 30 mins
10 skewers
Comment
Print Recipe
Ingredients
- 1 lb (450g) ground beef (80% lean, 20% fat) (Note 1)
- 1 lb (450g) ground lamb (80% lean, 20% fat)
- 1 cup Panko breadcrumbs (Note 2)
- 2 small eggs
- 4 teaspoons ground cumin
- 4 teaspoons smoked paprika
- 1 small onion, grated (Note 3)
- 4-6 garlic cloves, grated or pressed
- 1 bunch fresh flat-leaf parsley, minced
- ½ cup minced fresh dill (Note 4)
- 2 teaspoons salt
- 1 teaspoon black pepper
Instructions
-
To prepare skewers: If using wooden kebab sticks, soak them in water for at least 30 minutes to prevent burning on the grill. This step can be skipped if you are using metal skewers.
-
To make the kebab mixture: In a large bowl, combine all the listed ingredients. Knead thoroughly with your hands until the mixture is well combined and smooth. Cover the bowl and refrigerate for at least 1 hour. This chilling time allows the flavors to develop and the mixture to firm up, making it easier to handle. TIP: After chilling, you can test the seasoning by frying a small amount in a pan and adjusting salt/pepper to your taste before shaping all the kebabs.
-
Check consistency: The kebab mixture should be neither too dry nor too wet. After refrigeration, check its consistency. If it feels too wet and difficult to handle, add a tablespoon or two of extra Panko breadcrumbs. If it’s too dry, a tiny bit of water can help.
-
To shape the kebabs: Keep a bowl of cold water nearby to moisten your hands. Dipping your hands in water prevents the meat mixture from sticking as you shape.
-
With moist hands, take approximately ½ cup of the meat mixture. Firmly press and shape it around each skewer into a flat, elongated log shape. Ensure the meat is securely fastened to the skewer.
-
Arrange the shaped meat skewers on a baking sheet. For best results, refrigerate them for another 15 minutes before grilling. This helps them hold their shape even better.
-
Preheat grill: Meanwhile, preheat a gas grill to high heat. Thoroughly clean the grill grates with a brush, then carefully oil them using a paper towel dipped in vegetable oil (held with tongs).
-
Grill the kebabs: Once the grill is hot, carefully place the meat skewers on the grates. Cover the grill and cook for about 4 minutes. Flip the skewers gently and continue to cook for another 4-5 minutes, or until the kebabs are cooked through and have a beautiful browned exterior. The internal temperature should reach 160°F (71°C).
-
Serve: Serve your delicious Urfa Kebabs immediately with fresh tomatoes, crisp cucumbers, and grilled sweet peppers for an authentic experience.
⭐️ Did you make this recipe?
Please leave a review and let us know how you liked it!
Tips & Notes
Note 2: Breadcrumbs. While Panko breadcrumbs provide a great texture and are convenient, you can also use a few slices of fresh bread (pulsed into crumbs) if you prefer to make your own.
Note 3: Onion Inclusion. Our family typically omits onion due to personal preference, which is why it might not be visible in the step-by-step pictures. However, for a more traditional flavor profile, we recommend including the grated small onion as specified in the ingredients list. It adds a subtle sweetness and depth.
Note 4: Fresh vs. Dried Dill. If fresh dill is unavailable, you can substitute it with dried dill. As dried herbs are significantly more potent than fresh, use approximately ¼ cup of dried dill for the ½ cup of fresh dill specified in the recipe. Adjust to taste.
Nutrition
Did you make this?
Leave a rating and your feedback. Thank you!