
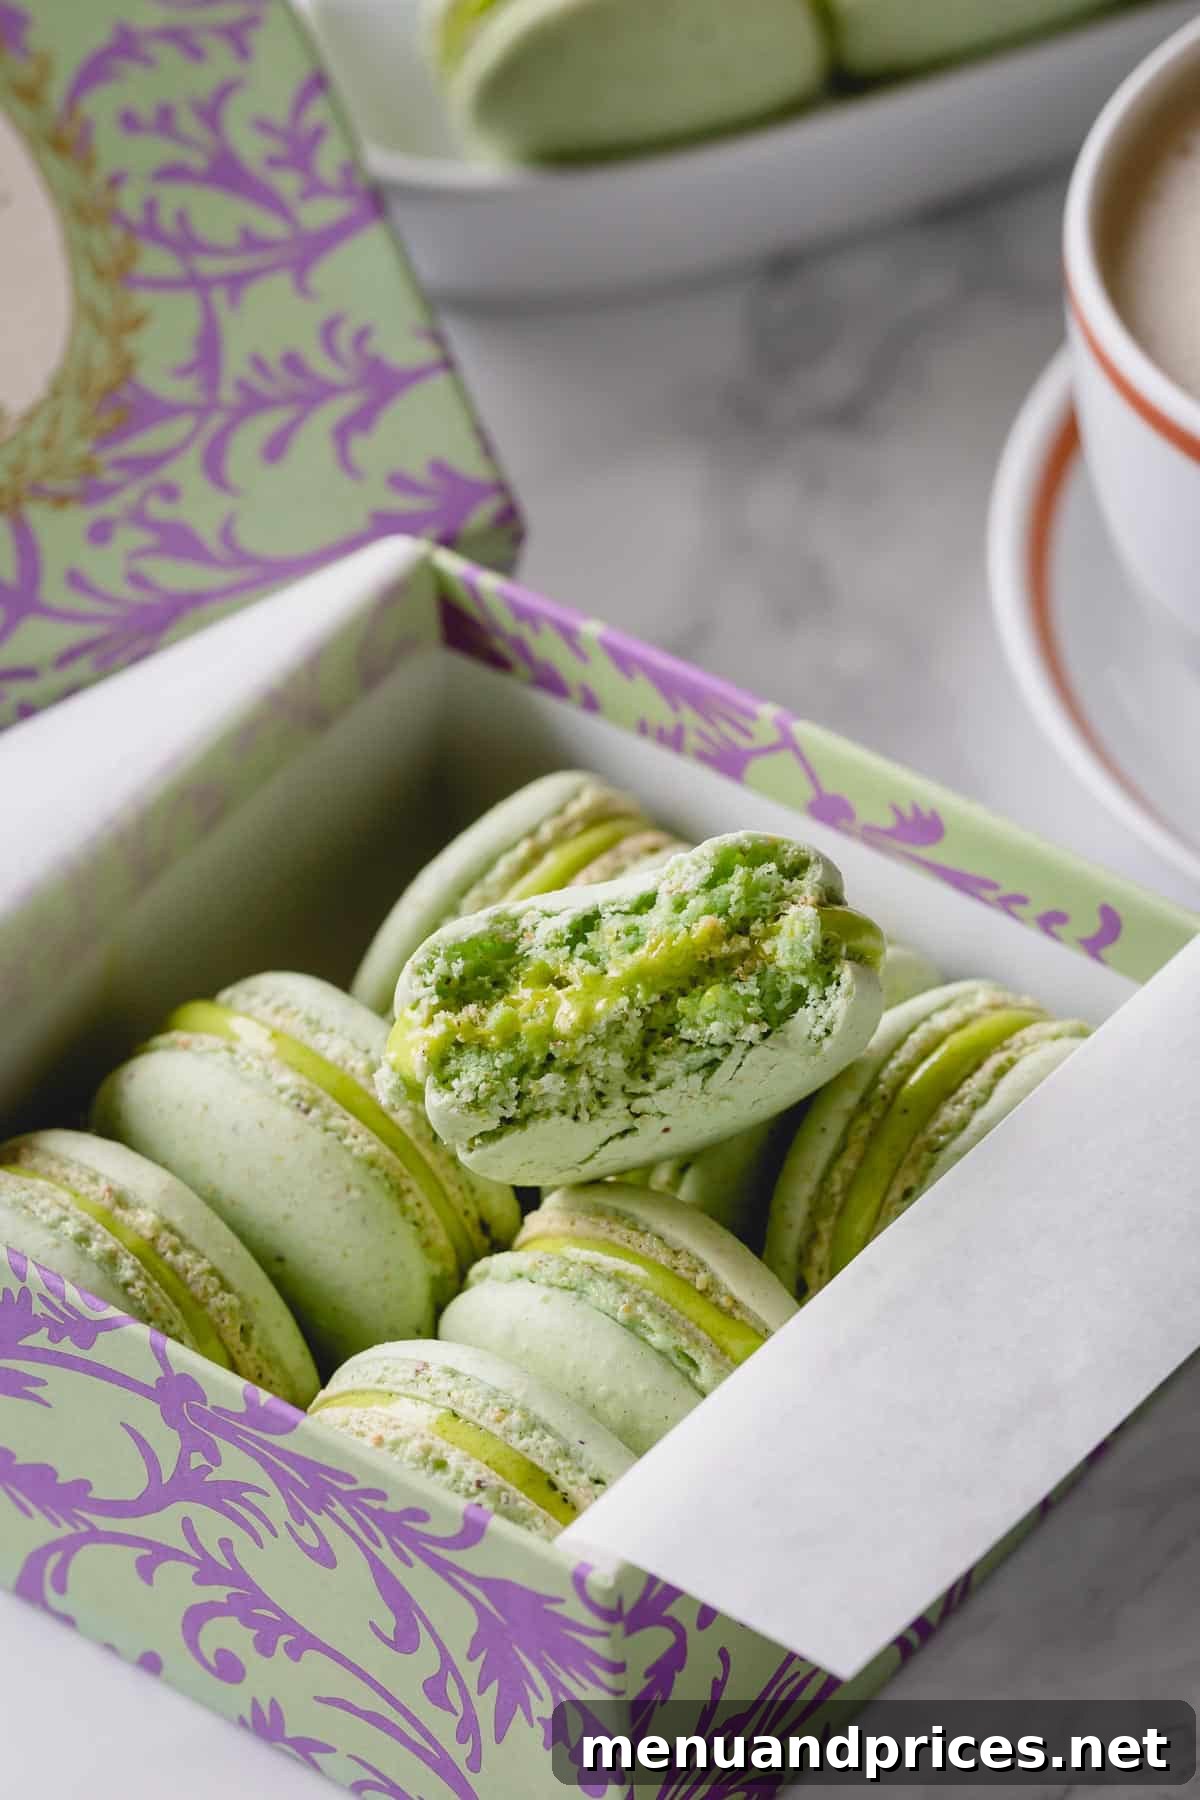
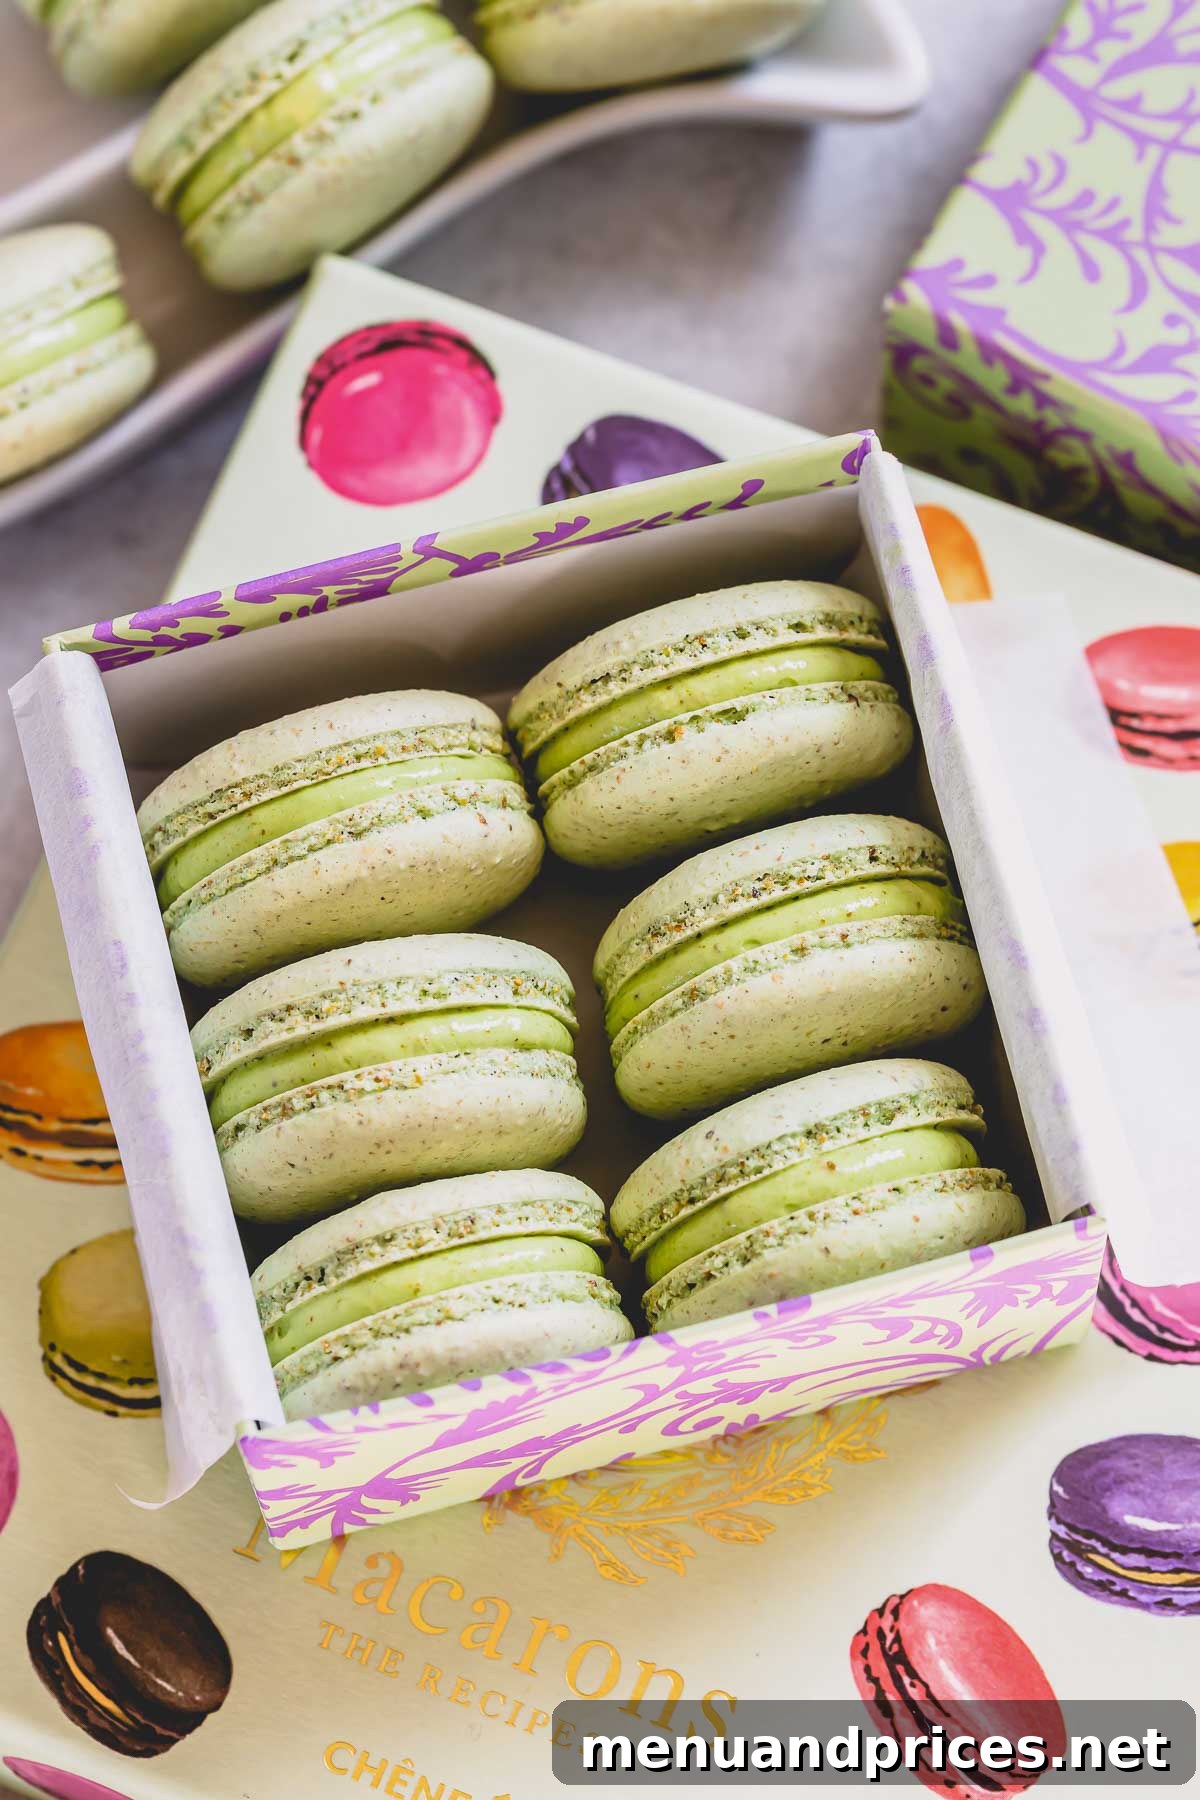
Indulge in the exquisite taste of classic pistachio macarons, perfected with an authentic Ladurée-inspired pistachio cream filling. This comprehensive guide provides step-by-step instructions, insightful tips, and a video tutorial to help you create these delicate French confections right in your own kitchen. Prepare to be amazed by the rich, unmistakable pistachio flavor in every bite!
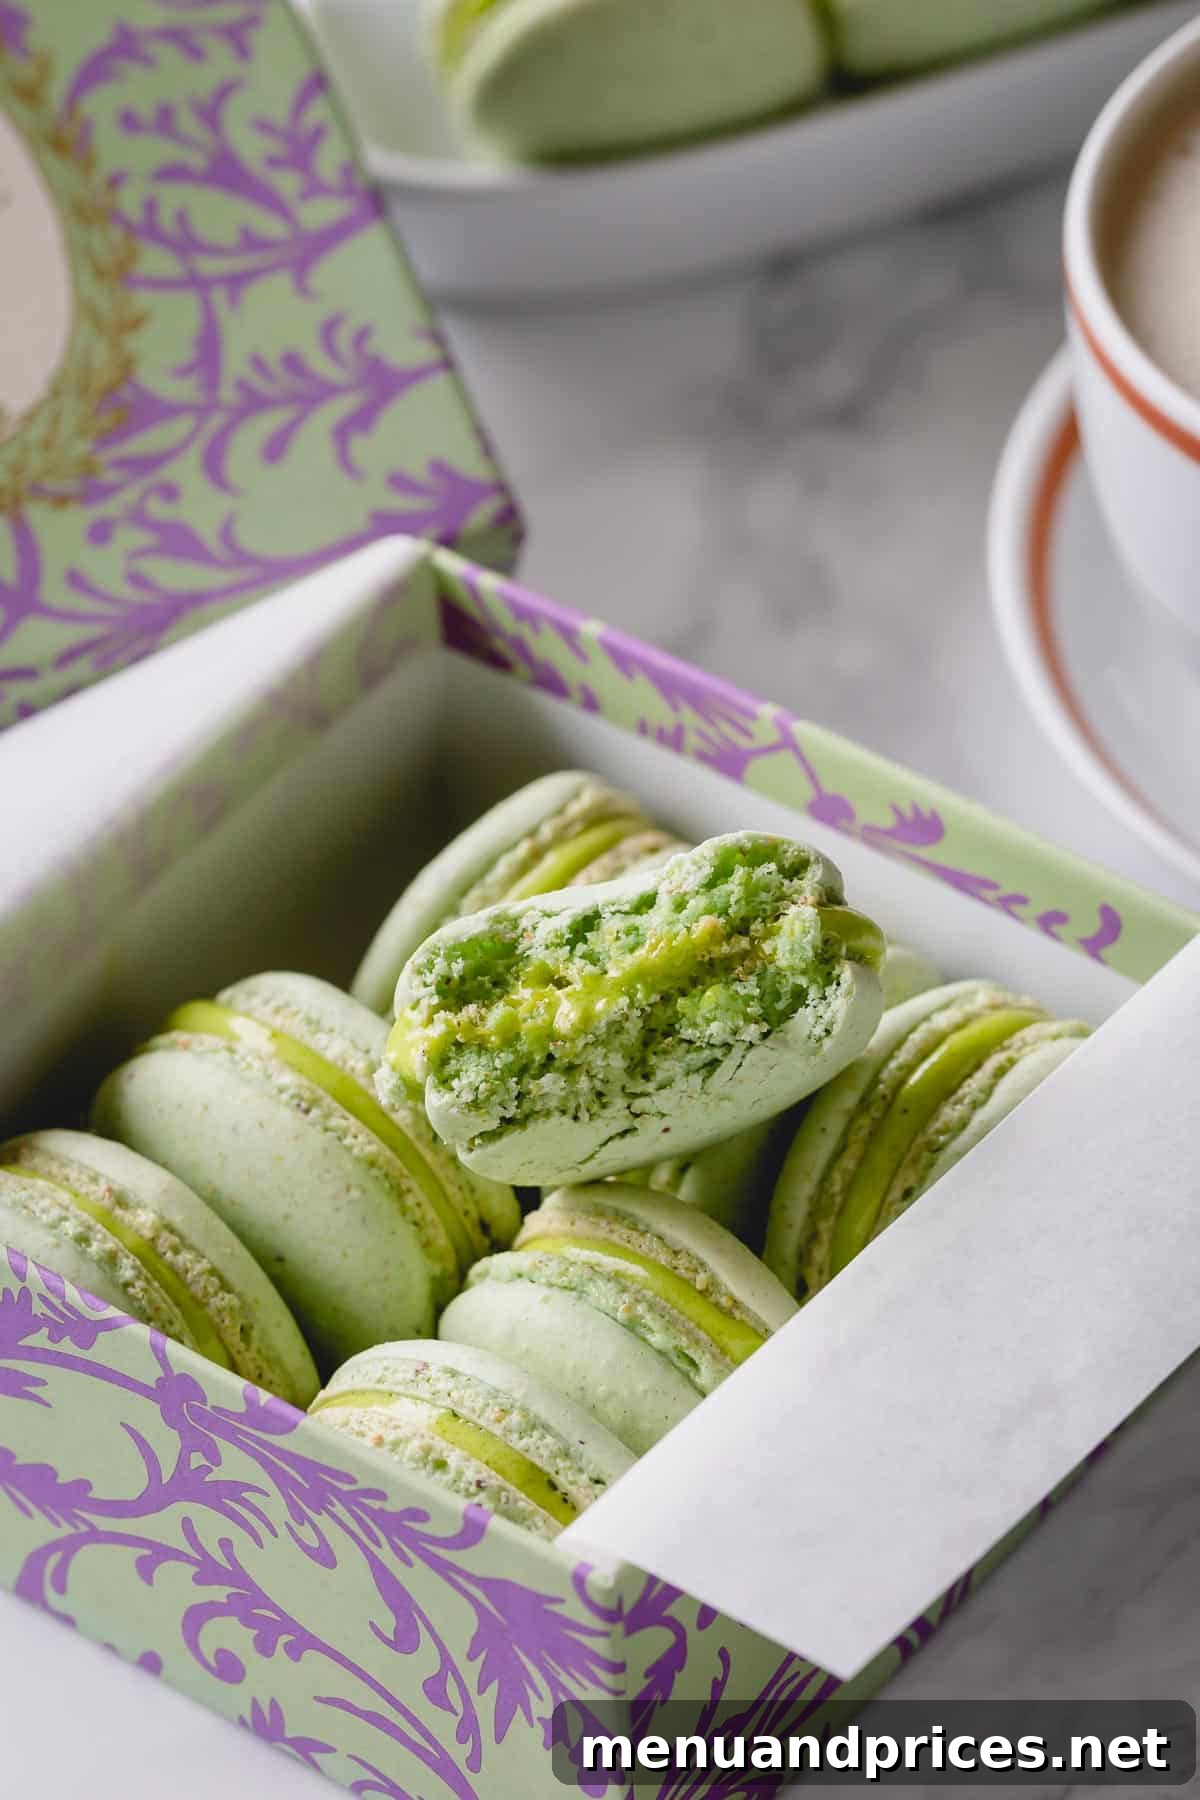
Pin this now to find it later
Pin It
Recreating Ladurée’s Iconic Pistachio Macarons at Home
My journey into the world of truly exceptional macarons began a few years ago during a dream trip to Paris with my husband. The highlight of that culinary adventure was undoubtedly stepping into the legendary Ladurée shop on Champs-Élysées. Despite the bustling lines, I was utterly captivated by the dazzling display of their exquisite desserts and sweet treats. Among the many flavors I sampled, the pistachio macarons left an indelible mark – they were nothing short of pure heaven.
Upon returning home, still buzzing from the Parisian culinary experience, I immediately turned to my trusty Ladurée Macarons book. My mission: to find and recreate that sublime pistachio macaron recipe. And there it was, on page 40, waiting to be brought to life in my own kitchen! This recipe is a homage to that unforgettable taste, allowing you to experience the magic of Ladurée’s pistachio macarons without booking a flight to Paris.
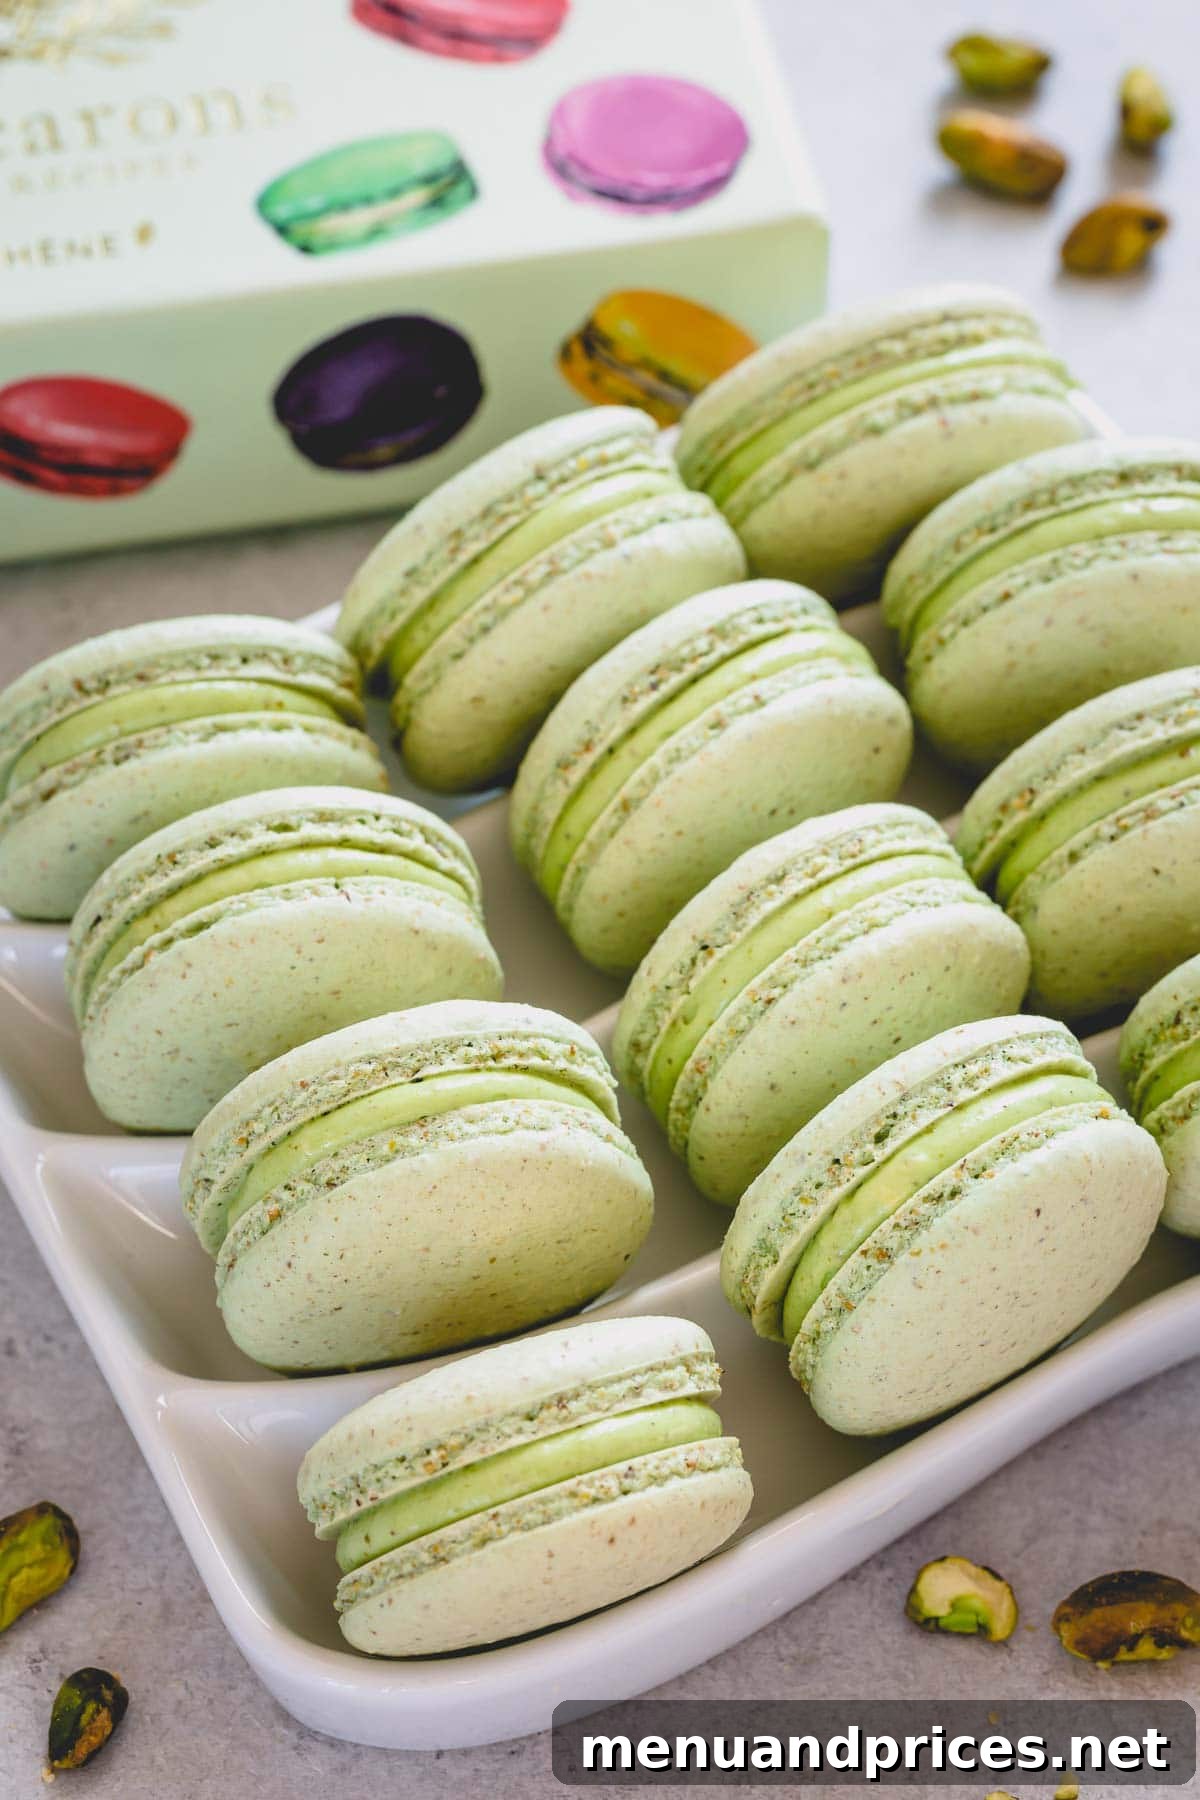
Why You’ll Adore This Pistachio Macaron Recipe:
For any true pistachio enthusiast, these delicate pistachio macarons are an absolute dream come true. Here’s why this recipe will become your new favorite:
- Unforgettable Pistachio Flavor: Every single bite delivers an intense, authentic pistachio taste, derived from both pistachio flour in the shells and pure pistachio paste in the filling. It’s a sensory experience that truly celebrates this unique nut.
- Luxuriously Smooth Pistachio Cream Filling: The heart of these macarons is their silky, delicate pistachio cream filling. Inspired by Ladurée’s own recipe, it strikes the perfect balance of sweetness and nutty richness, complementing the crisp shells beautifully.
- Beginner-Friendly with Expert Guidance: While macarons can seem intimidating, my super detailed and easy-to-follow instructions, complete with step-by-step photos and a comprehensive video tutorial, will confidently guide you through every stage of the process. You’ll learn the crucial techniques, from achieving the perfect meringue to mastering the macaronage, ensuring your success.
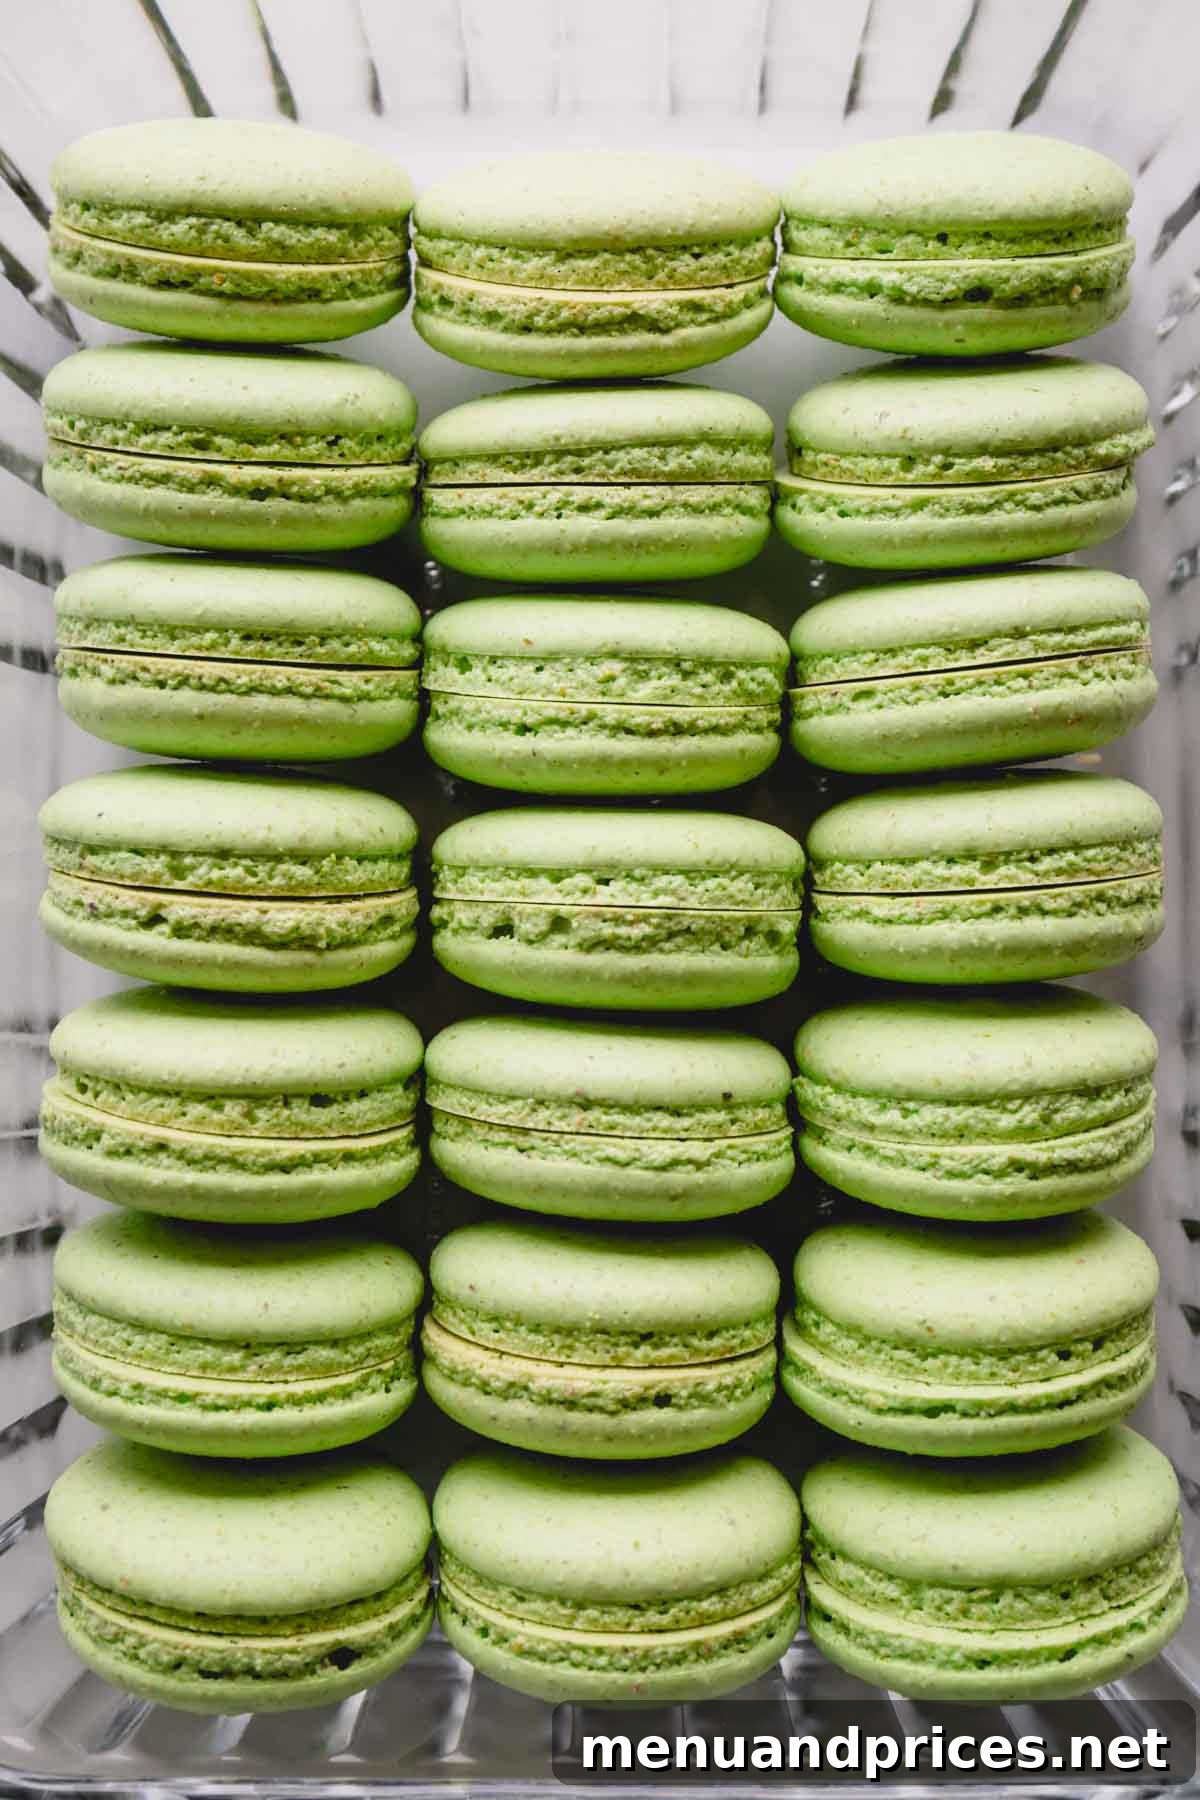
- Achieve Bakery-Quality Results: By following these precise steps and tips, you’ll be able to create gorgeous pistachio macarons with smooth tops and characteristic “feet” – just like those from a high-end patisserie.
Essential Ingredients for Perfect Pistachio Macarons
Success in macaron making hinges on the quality and preparation of your ingredients. Here are some crucial notes on what you’ll need for these pistachio delights:
- Almond Flour: Always opt for superfine almond flour. Its fine texture is absolutely essential for achieving those coveted smooth, blemish-free macaron tops. Coarsely ground almond flour will result in bumpy shells. Remember to weigh your dry ingredients meticulously before sifting.
- Pistachio Flour: This is where the intense pistachio flavor truly begins in the shells. While you can purchase it, making homemade pistachio flour is incredibly rewarding and ensures freshness. I have a dedicated tutorial on how to make homemade pistachio flour. In essence, you’ll blanch raw pistachios, remove their brown skins for a vibrant green color, lightly roast them, and then pulse them into a fine flour using a food processor.
- Powdered Sugar: For the best texture in your macaron shells, I strongly recommend using store-bought powdered sugar over homemade. Commercial powdered sugar typically contains a small amount of cornstarch, which acts as an anti-caking agent and significantly aids in achieving the desired delicate, chewy texture of the cookies.
- Granulated Sugar: When making the meringue, superfine sugar (also known as caster sugar) is your best friend. Its smaller crystals dissolve much quicker into the egg whites, leading to a more stable and glossy meringue – a non-negotiable for perfect macaron feet.
- Cream of Tartar: This ingredient is technically optional but highly recommended, especially for macaron novices. Cream of tartar acts as a stabilizer for egg whites, helping them whip up faster, reach stiff peaks more reliably, and create a sturdier meringue. Think of it as an extra layer of insurance for your delicate shells.
- Pistachio Paste: This is the secret to the profound pistachio flavor in your filling. There’s no need to splurge on expensive, often inconsistent store-bought brands, many of which contain added sugars or other nuts. I encourage you to try my video tutorial on how to make homemade pure pistachio paste. If you do purchase it, carefully check the ingredient list for 100% pure pistachios with no added fillers or sugars.
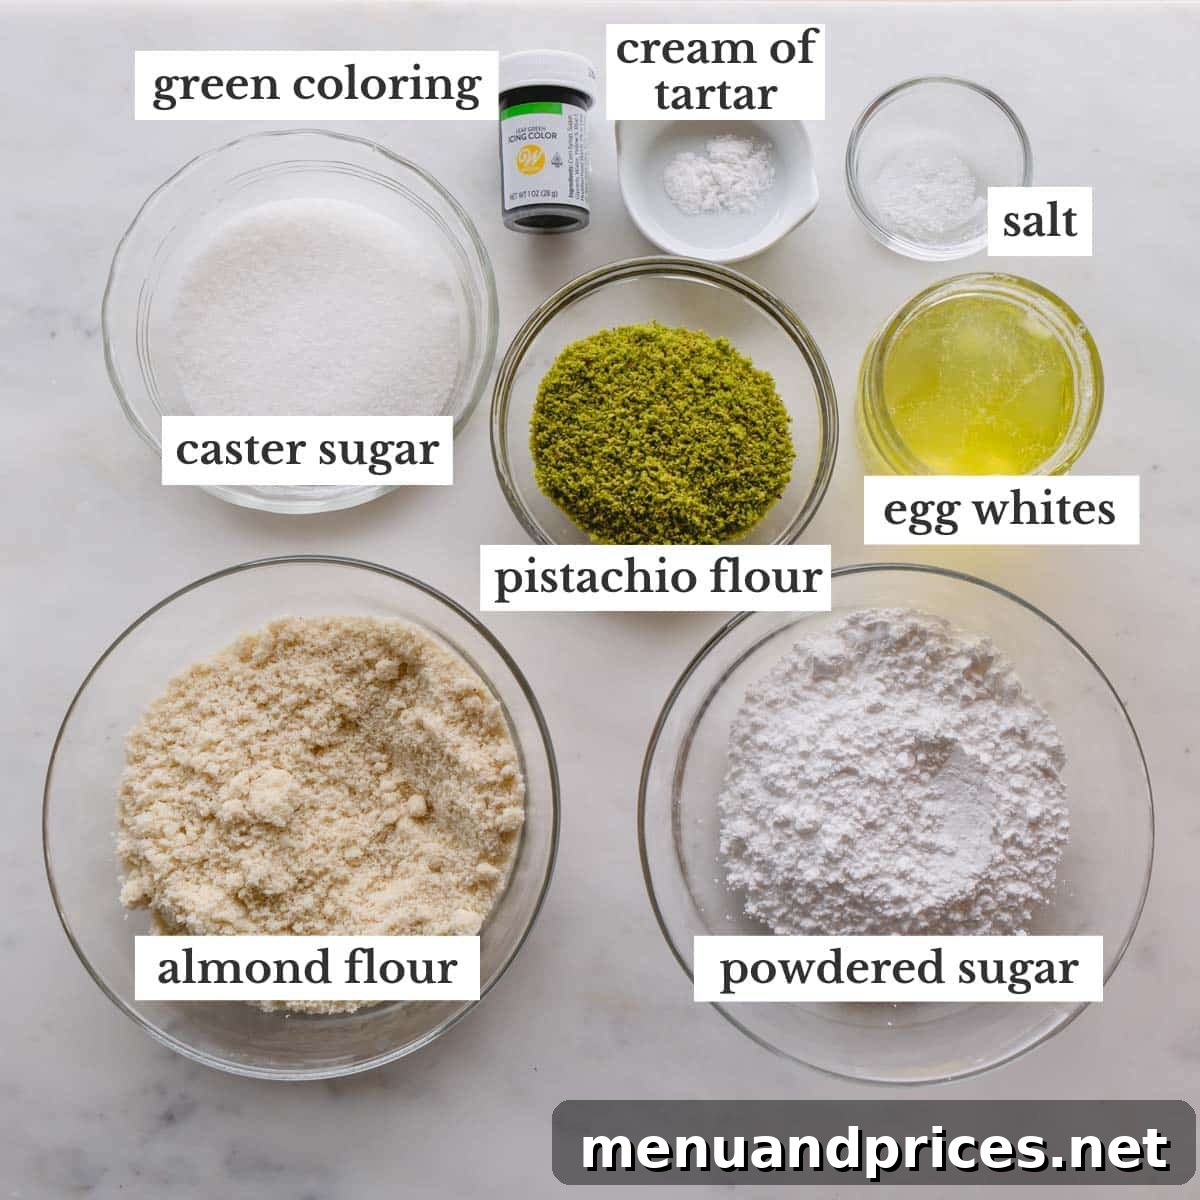
Crafting Your Own Pistachio Macarons: A Step-by-Step Journey
Creating these beautiful pistachio macarons follows the same fundamental French meringue method as my classic French macarons. Precision and patience are key, but with these detailed steps, you’ll master the process.
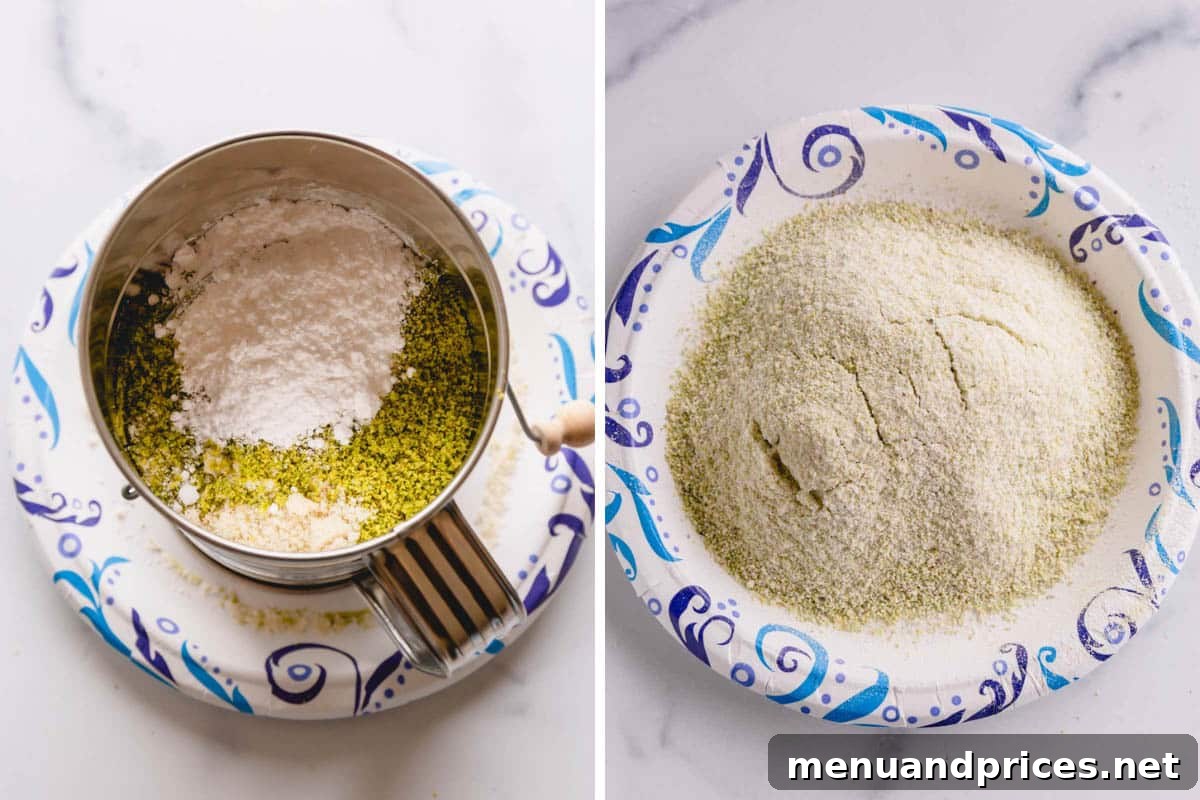
1. Prepare and Sift Dry Ingredients
The foundation of smooth macaron shells lies in perfectly sifted dry ingredients. This step cannot be rushed or overlooked.
- Combine the pre-weighed almond flour, pistachio flour, and powdered sugar in a bowl. Sift this mixture not once, but three times. This ensures any larger lumps are removed and the flours are thoroughly aerated and combined, contributing to a smooth batter and ultimately, smooth macaron tops. Discard any stubborn chunky bits left in the sieve after sifting.
2. Master the French Meringue
The meringue provides the essential structure for your macaron shells. A stable, properly whipped meringue is non-negotiable.
- In a meticulously clean large mixing bowl (free of any grease!), combine the room-temperature egg whites, fine granulated sugar, a pinch of salt, and the optional (but recommended) cream of tartar.
- Begin beating the egg whites on a consistent medium speed. Continue whipping until they transform into soft peaks – meaning when you lift the whisk, the peaks gently curl over. (On a KitchenAid stand mixer, a setting of speed 4 usually works well.)
- Once soft peaks are achieved, add a small amount of green gel food coloring. This is the ideal time to incorporate it for even color distribution without compromising meringue stability.
- Continue whipping the meringue on medium speed. Observe closely as the meringue gains volume and stiffness. You’re looking for stiff peaks: when the whisk is lifted, the meringue should hold a sharp, upright point.
Visual Cues for Perfect Meringue: Your meringue should be incredibly thick and ball up securely inside the whisk. When you lift the whisk, the meringue should form distinct, pointy ends and showcase sharp, defined ribs on its surface. This indicates proper aeration and stability.
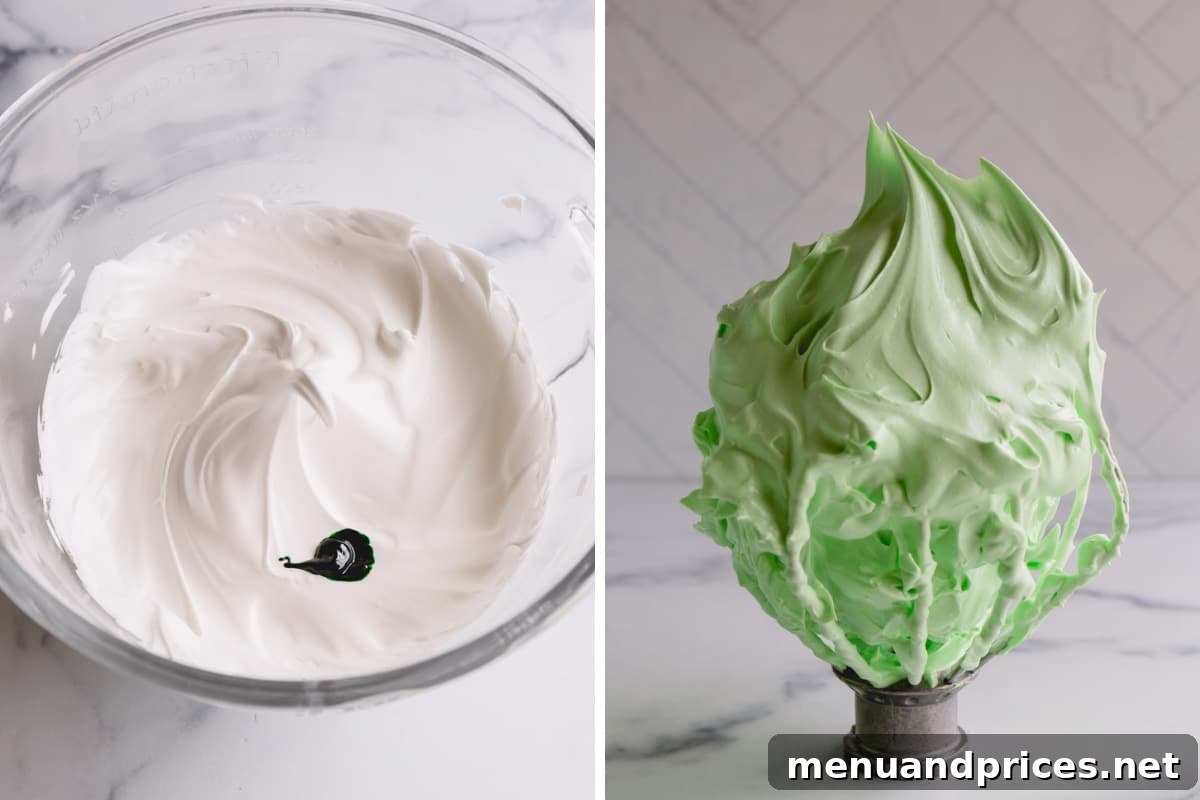
2023 Update on Meringue Technique: Over the last year, I’ve refined my French meringue approach. Instead of gradually adding sugar to lightly whipped egg whites, I now combine all the egg whites, sugar, salt, and cream of tartar at the very beginning. I’ve found this method consistently yields a more robust and stable meringue, which is ideal for achieving perfect macaron shells.
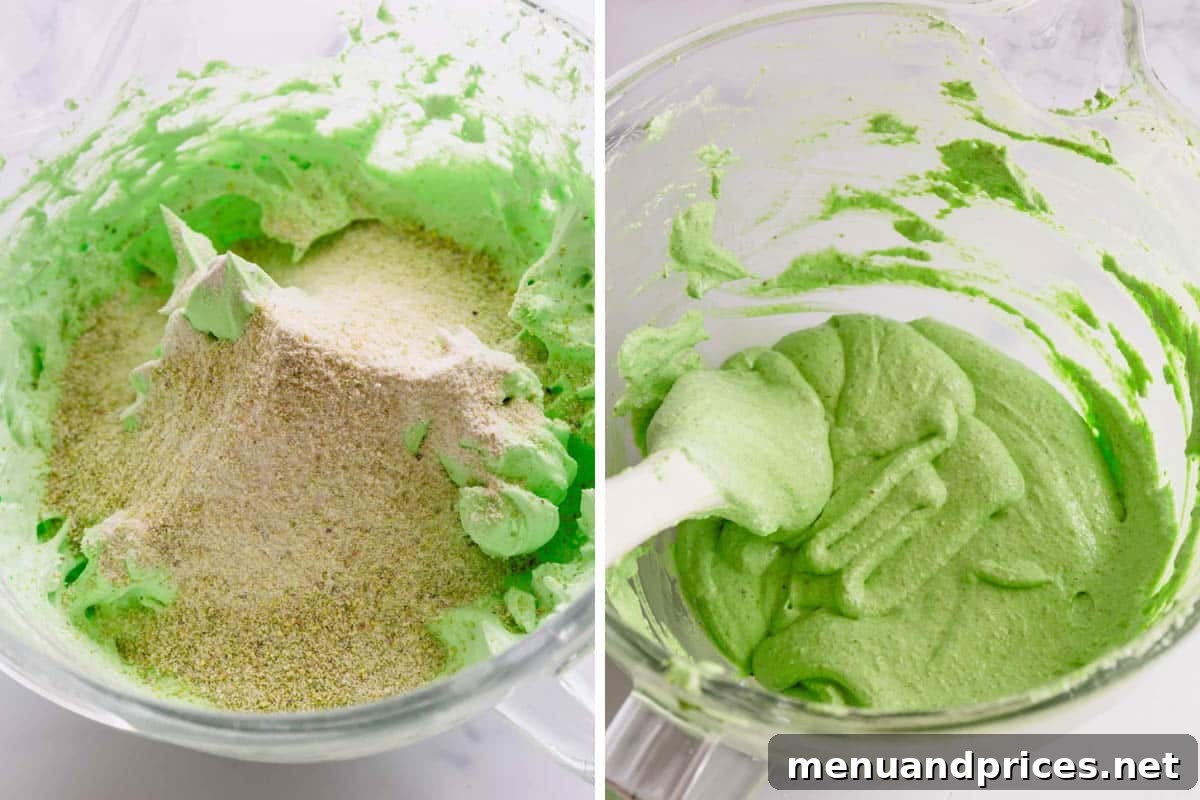
3. Master the Macaronage (Macaron Batter)
Macaronage is arguably the most critical step, determining the texture and appearance of your shells. The goal is a lava-like consistency.
- Gently add the triple-sifted dry ingredients into your stiff meringue. Using a silicone spatula, begin folding the batter. The motion should be a combination of scraping down the sides of the bowl, folding it over the top, and pressing down to release air. Continue folding until the batter reaches a “lava-like” consistency – it should flow slowly and continuously off your spatula, forming a ribbon. For the best visual understanding, I highly recommend watching my real-time Macaronage video, as it perfectly demonstrates the ideal flow.
- A common test is the “figure eight” test: you should be able to lift your spatula and drizzle a continuous figure eight with the batter before it breaks. If it’s too thick, fold a few more times. If it’s too runny, you’ve overmixed. Overmixing leads to flat, footless macarons, while undermixing can result in hollow, cracked shells.
4. Pipe the Macaron Shells
Consistent piping is key for uniform, beautiful macarons.
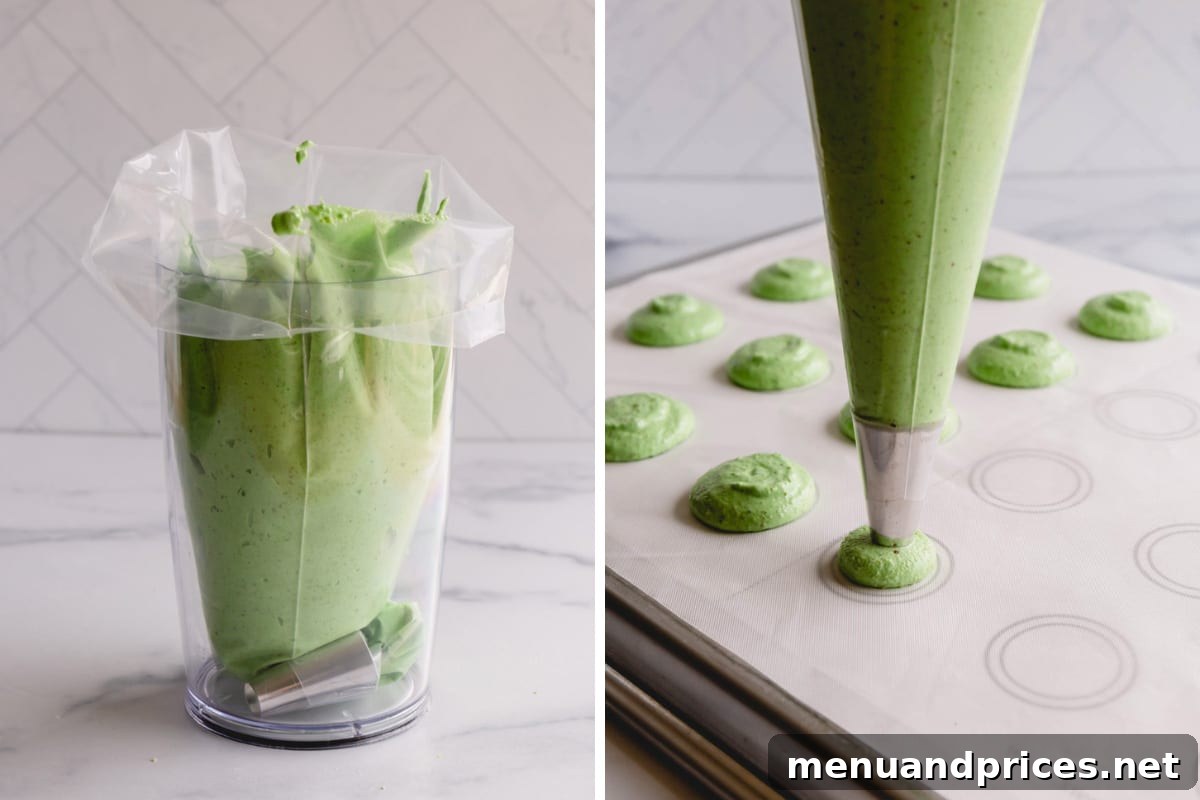
- Transfer your perfectly macaronaged batter into a pastry bag fitted with a round piping tip (a Wilton 2A tip is excellent for 1.5-inch shells).
- Line two baking sheets with parchment paper, Teflon sheets, or silicone mats. I highly recommend using a macaron template placed under your parchment paper for consistent sizing.
- Hold the piping bag vertically (at a 90-degree angle) directly above your baking sheet and pipe 1.5-inch rounds, leaving about an inch of space between each. Aim for quick, confident piping.
- Once piped, gently but firmly tap the baking sheet against your counter (or use your hand to tap from the bottom) a few times. This crucial step helps release any trapped air bubbles within the shells, which can cause cracking during baking, and encourages the batter to spread slightly for smooth, flat tops. For any stubborn bubbles, use a toothpick to gently pop them.
WATCH MY PIPING TECHNIQUE VIDEO FOR VISUAL GUIDANCE
Exclusive Free Macaron Template!
To ensure perfect, uniform sizes for your macarons, I’ve created a custom template designed specifically for this recipe. It’s incredibly easy to use! Subscribe to my e-mail list and download this essential macaron template for FREE.
5. Rest and Bake for Flawless Finish
Patience during the resting phase and precise oven temperature are vital for achieving the characteristic “feet” on your macarons.
- Preheat your oven: Set your oven to 300°F (150°C) and allow it to preheat for at least 30 minutes. Consistent temperature is crucial. I highly recommend using an oven thermometer to verify the internal temperature, as oven thermostats can be inaccurate.
- Resting the shells: Let the piped macaron shells rest on the counter for approximately 15 minutes before baking. During this time, a “skin” will form on the surface. This skin helps prevent cracking and encourages the development of the ruffled “feet” at the base of the shells during baking.
- Baking: Bake one baking sheet at a time for 15-18 minutes. For macarons, I do not recommend using convection settings; a standard top and bottom heat setting works best. If you notice your macarons browning too quickly, you can place an empty baking sheet on the rack above to act as a heat shield.
How to Check for Macaron Doneness
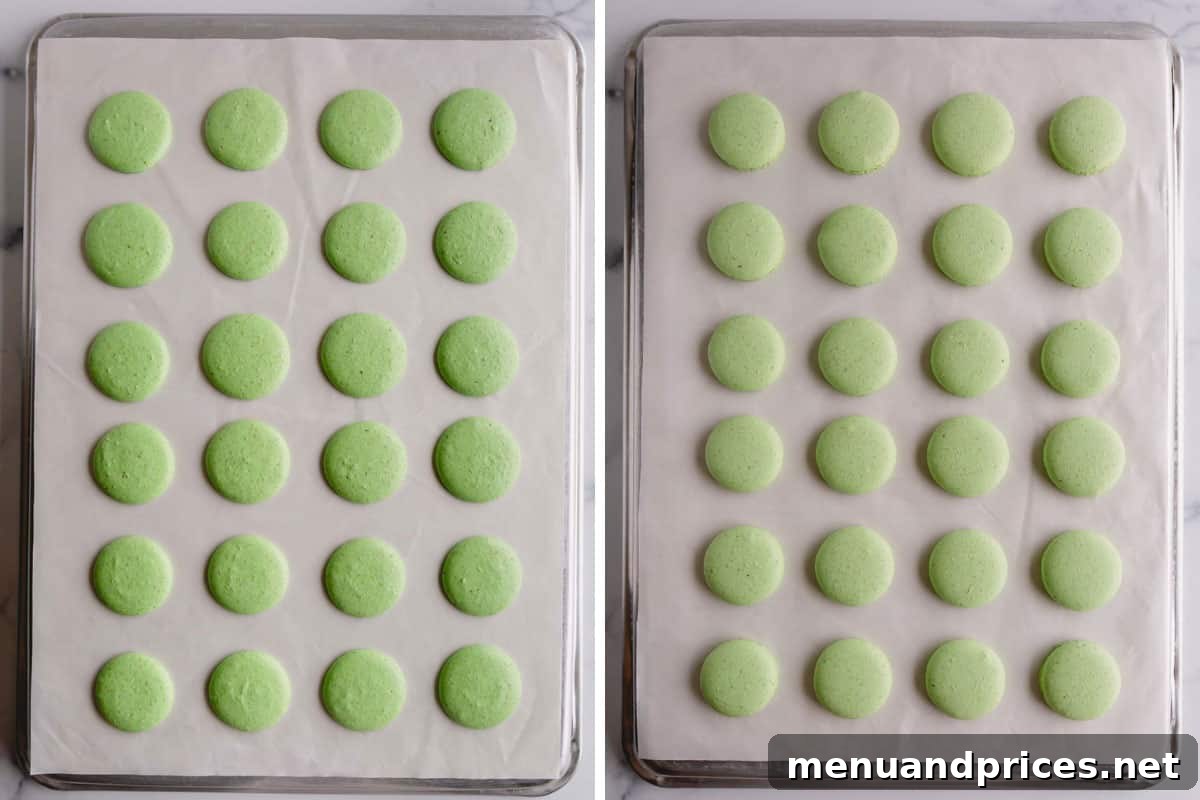
Determining when your macarons are perfectly baked is a skill that comes with practice. To test, gently touch the side of a macaron shell and try to wiggle it. If it slides or wobbles on its “feet,” it needs another minute or two in the oven. Properly baked macarons will feel firm to the touch, and the base should not move when gently nudged. Remember, it’s always better to slightly over-bake macarons than to under-bake them, as underbaked shells will stick to the baking mat and be difficult to remove without damage.
6. Prepare Ladurée’s Exquisite Pistachio Crème Filling
The filling is the soul of the macaron, and this Ladurée-inspired pistachio crème is truly special.
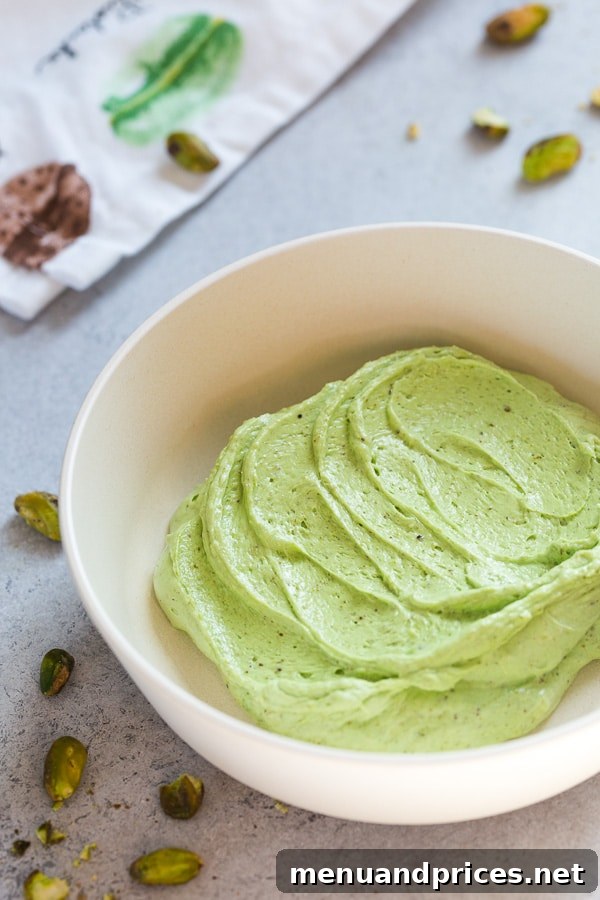
This rich and silky filling demands attention to detail. I’ve created a separate, comprehensive post dedicated to my pistachio cream filling recipe, complete with its own step-by-step photos, extensive tips for success, and a detailed troubleshooting guide for common issues. Following that guide will ensure you achieve the perfect creamy, thick consistency.
Alternatively, if you’re looking for a simpler, quicker option, you might consider my easy pistachio buttercream recipe. While delicious, it offers a different texture and flavor profile compared to the more sophisticated crème filling.
7. Assemble Your Pistachio Macarons
Bringing together the delicate shells and the rich filling is a satisfying final step.
- Allow your macaron shells to cool completely on the baking surface before attempting to remove them. If they resist, they might be slightly underbaked or simply need more time to cool and firm up. Patience is key here to prevent breakage.
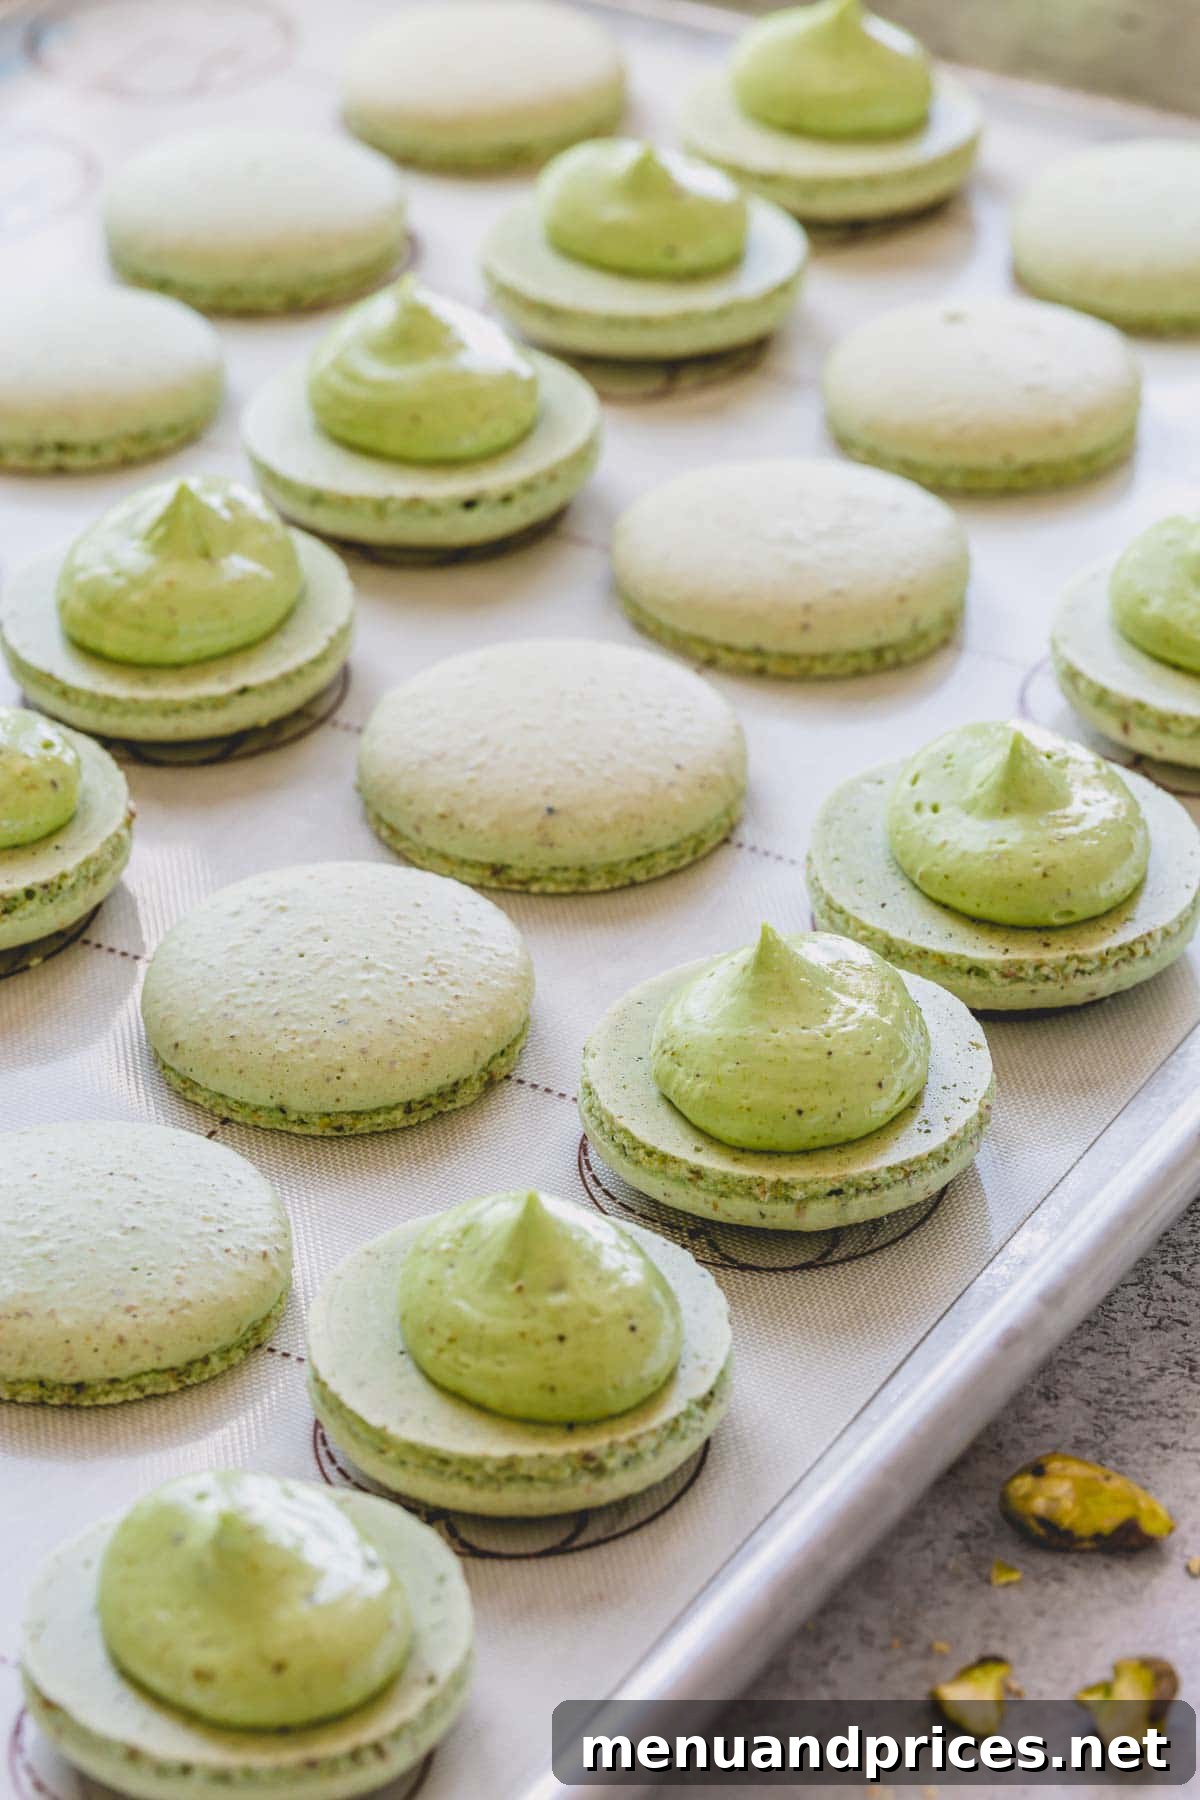
- Carefully pair the cooled macaron shells by size. This ensures a neat and aesthetically pleasing finished product. Arrange them on a baking sheet or wire rack, with one half of each pair flipped upside down, ready for the filling.
- Using a piping bag fitted with a round tip, pipe a generous dollop of your pistachio cream filling onto the flat side of the bottom shells.
- Gently place the top shell over the filling, pressing lightly until the filling spreads elegantly to the edges, creating a perfect sandwich.
8. Mature Your Macarons for Optimal Flavor and Texture
The maturation process is what truly transforms freshly assembled macarons into their legendary chewy, flavorful state. Do not skip this step!
- Place the filled macarons in an airtight container and refrigerate them for a minimum of 8 hours, though 24 hours is highly recommended for the best results. This crucial process, known as maturing or “aging,” allows the moisture from the filling to subtly soften the macaron shells, creating that signature tender-chewy interior and infusing them with the delicious pistachio flavor.
- Before serving, remember to bring the matured macarons to room temperature. This usually takes about 30 minutes on the counter. Enjoying them at room temperature enhances their delicate texture and allows the complex flavors to truly shine.
Encountering common macaron issues? Don’t fret! Explore my detailed Macaron Troubleshooting Guide for expert tips and tricks to identify, fix, or prevent typical macaron challenges, ensuring your next batch is a success!
Macaron Storage Tips: Keeping Them Fresh
Proper storage is essential to maintain the delicate texture and flavor of your homemade pistachio macarons, whether filled or unfilled.
Unfilled Macaron Shells:
- Room Temperature: Store cooled, unfilled macaron shells in an airtight container at room temperature for up to 5 days. Ensure they are completely cool before storing to prevent condensation.
- Freezing: For longer storage, freeze unfilled shells in an airtight container for up to 3 months. Thaw at room temperature for about 15-30 minutes before filling.
Filled Macarons:
- Refrigeration: Once filled and matured, refrigerate the macarons in an airtight container for up to 5 days. The shelf life can vary slightly depending on the specific filling used.
- Freezing: You can freeze assembled macarons (after they’ve matured in the fridge for at least 24 hours) in an airtight container for up to 1 month. To thaw, simply transfer the frozen macarons to the refrigerator and allow them to thaw slowly for at least 1 hour, or preferably overnight. Bring to room temperature for 30 minutes before serving.
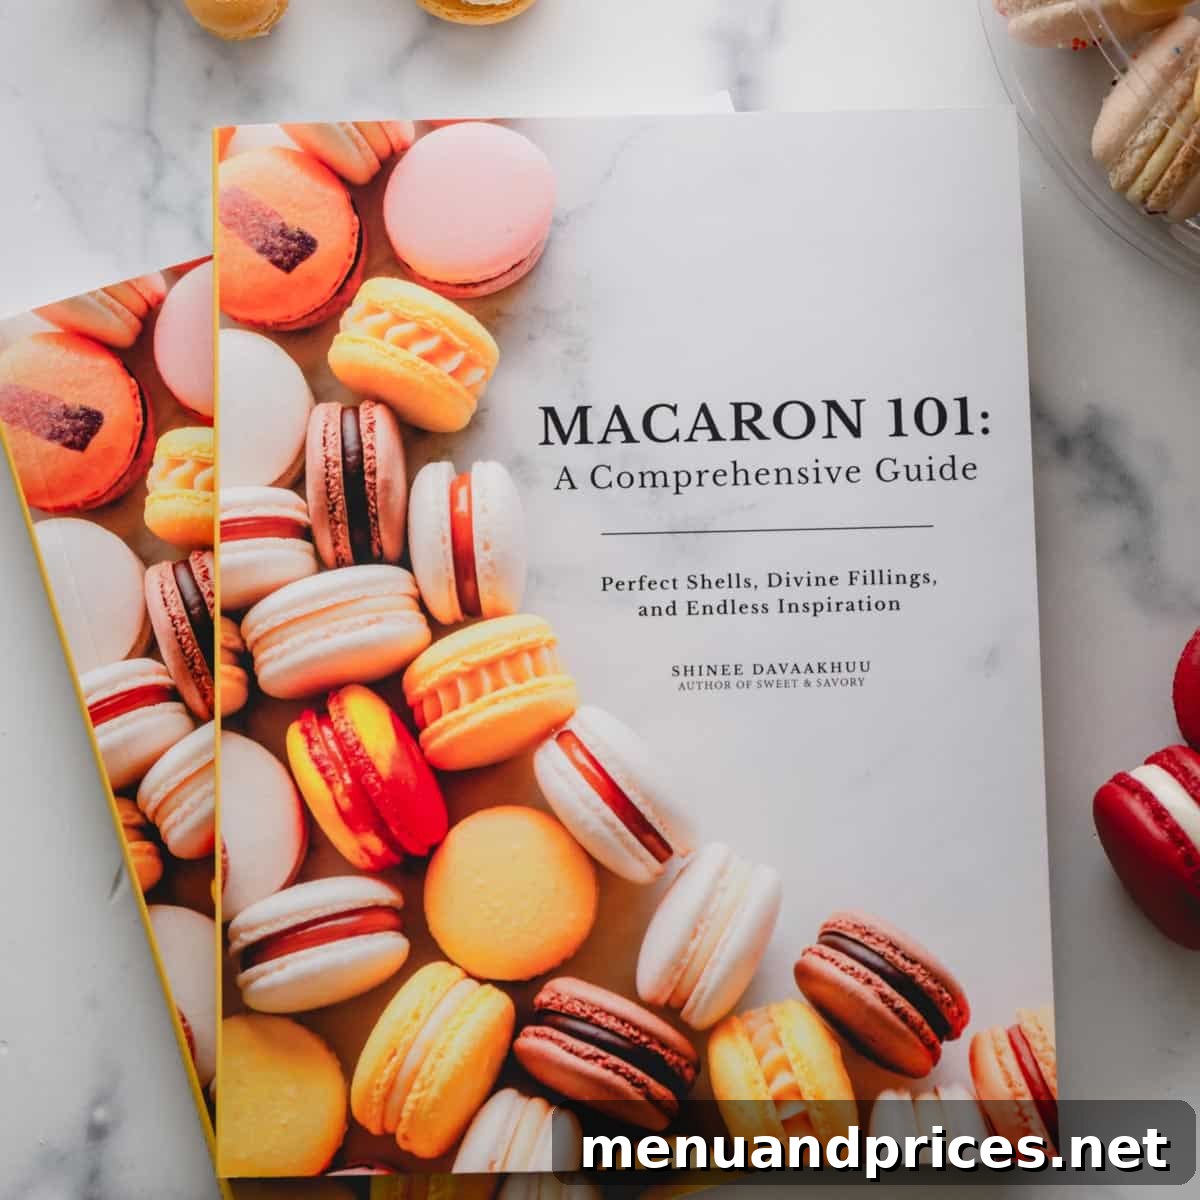
Macaron 101: Your Comprehensive Guide to Success
Ready to elevate your macaron-making skills? Master the intricate art of French macarons and unlock the secrets to creating your own signature flavors with my comprehensive cookbook!
I sincerely hope you enjoy creating and savoring your very own authentic pistachio macarons soon. There’s immense satisfaction in bringing a taste of Parisian luxury into your home. If you try this recipe, please take a moment to leave a review below and share your experience. Your feedback is greatly appreciated!
Watch the Full Video Tutorial

Pistachio Macarons
Comment
Print Recipe
Ingredients
For Pistachio Macaron Shells:
-
60 g fine almond flour Note 1
-
40 g fine pistachio flour Note 2
-
65 g powdered sugar Note 3
-
70 g egg whites at room temperature
-
75 g fine granulated sugar Note 4
-
¼ teaspoon cream of tartar Note 5
-
¼ teaspoon coarse kosher salt
-
1/8 teaspoon green gel food coloring I used Wilton Kelly green
For Ladurée Pistachio Creme Filling:
-
65 g granulated sugar
-
2 tablespoons water
-
2 egg yolks
-
55 g unsalted butter at room temperature
-
20 g pure pistachio paste Note 6
Instructions
To make pistachio macaron shells:
-
Preheat your oven to 300°F (150°C). Prepare 2 baking sheets by lining them with parchment paper, a Teflon sheet, or a silicone mat.
-
To prepare the dry ingredients, sift together almond flour, pistachio flour, and powdered sugar twice. (TIP: If you have up to 1 tablespoon of chunky dry ingredients left in the sifter, you don’t have to replace it. Simply discard those chunky bits.)
-
To make the meringue, in a scrupulously clean mixing bowl with a whisk attachment, combine egg whites, granulated sugar, cream of tartar, and salt. Beat the mixture on medium speed until soft peaks form. (On my KitchenAid stand mixer, I use speed 4. It can take 30-40 minutes to whip the meringue, but this patience is well worth it for beautiful, full shells.)
-
When the meringue reaches soft peaks, add a drop of green gel food coloring. (I’ve found Wilton Leaf Green or Americolor Green to work beautifully.)
-
Continue beating the egg whites on the same medium-low speed until stiff peaks form. Visual cues: The meringue should ball up inside the whisk, and when you lift the whisk, it should hold a firm, pointy end with sharp, distinct ribs.
-
To make the batter (macaronage), sift the dry ingredients once more directly into the meringue. Using a silicone spatula, gently fold the dry ingredients into the meringue until fully incorporated and no dry streaks remain. Then, continue to fold the batter until it achieves a “lava-like” consistency – it should be fluid enough to draw a continuous figure eight without breaking.
-
To test the batter, take a small amount of batter and drop it back into the bowl. If the small peaks dissolve into the batter on its own within about 10 seconds, the batter is ready. If not, fold it a couple more times and test again. Be careful not to over-fold the batter, as this is a common pitfall. (TIP: French macaron making is a technique-driven art. Macaronage is one of the most crucial steps. I suggest counting your folds; typically, it takes about 50 folds to reach the proper consistency. After 50 folds, start testing the batter, and continue testing after every couple of additional folds. Watch my real-time macaronage video for the best visual guidance.)
-
To pipe macaron shells, transfer the macaron batter into a pastry bag fitted with a round tip. (I successfully use a Wilton 2A tip for consistent 1.5-inch shells.)
-
Hold the pastry bag straight at a 90° angle, approximately ½ inch above the baking sheet, and pipe uniform 1.5-inch rounds, spacing them about an inch apart. (TIP: I’ve created a perfect macaron template for you. Simply place it under your parchment paper and pipe the batter to fill the inner circles for consistent sizing.)
-
Firmly tap the baking sheets on the counter (or gently tap the bottom with your hand) a few times to release any trapped air bubbles. This critical step helps create smooth tops and prevents cracks. If you notice any large, persistent air bubbles, use a toothpick to gently burst them.
-
Allow the piped macarons to rest on the counter for 15 minutes before baking. This resting period allows a slight “skin” to form, which is crucial for achieving those desirable ruffled “feet.”
-
To bake, work with one baking sheet at a time. Place one tray of macarons on the middle rack of your preheated oven. (TIP: To prevent excessive browning on top, you can place an empty baking sheet on the top rack to act as a heat shield.) Bake for approximately 15-18 minutes. Larger macarons may require a slightly longer baking time.
-
To test for doneness, gently touch one macaron and try to move it. If it slides or wobbles on its base, continue baking for another minute or so. Properly cooked macarons should feel firm to the touch, and the base should not shift. (TIP: It’s always safer to slightly over-bake macarons than to under-bake them; underbaked shells will stick and break easily.)
-
Allow the macarons to cool completely on their baking mats before attempting to peel them off. Rushing this step can lead to damaged shells.
To make Ladurée pistachio crème filling:
-
In a small saucepan, combine the granulated sugar and water. Bring the mixture to a boil over medium heat, stirring constantly until the sugar is fully dissolved. Continue to cook, without stirring, until the syrup reaches 250°F (120°C) on a candy thermometer, which usually takes about 5 minutes.
-
Simultaneously, in a separate mixing bowl fitted with a whisk attachment, begin beating the egg yolks. Whip them until they double in size and become pale yellow in color, approximately 2 minutes.
-
With the mixer running on low speed, slowly and carefully pour the hot sugar syrup into the egg yolks. Aim to pour the syrup down the side of the bowl, rather than directly onto the whisk, to prevent splattering and ensure even incorporation.
-
Increase the mixer speed to medium-high and continue beating the mixture. Beat until it cools down to approximately 104°F (40°C). The mixture will become smooth, glossy, and noticeably lighter in color.
-
Gradually add the room temperature unsalted butter, followed by the pure pistachio paste. If desired, you can add a touch of green food coloring to enhance the visual appeal. Continue to beat the cream until it is beautifully nice and smooth. Once ready, transfer the pistachio cream into a pastry bag fitted with a round tip.
To assemble macarons:
-
Once completely cooled, carefully pair the macaron shells by size. Arrange them on a wire rack or baking sheet, ensuring the bottom shells are placed upside down.
-
Pipe a dollop of your prepared pistachio cream filling onto the flat side of each bottom shell.
-
Gently place the corresponding top shell over the filling and press lightly so the filling spreads evenly to the edges of the shells.
-
Store the filled macarons in an airtight container in the refrigerator for at least 24 hours to mature. This crucial step allows the filling to soften the shells and fully infuse them with flavor.
-
To serve, remove the macarons from the fridge and allow them to come to room temperature for about 30 minutes before enjoying. This enhances their delicate texture and flavor.
⭐️ Did you make this recipe?
Please leave a review and let us know how you liked it!
Video
Tips & Notes
Note 2: Homemade pistachio flour provides a superior, fresher flavor. To make pistachio flour, blanch approximately 80g of raw pistachios, remove their skins, and then pulse them in a food processor until finely ground. Sift the pulsed pistachios to separate the fine flour, and re-pulse any larger pieces to maximize yield.
Note 3: Avoid making your own powdered sugar for macarons. Commercial powdered sugar contains cornstarch, which is crucial for achieving the proper delicate and slightly chewy texture in macaron shells.
Note 4: Fine granulated sugar (or caster sugar/baker’s sugar) is essential for the meringue as its smaller crystals dissolve quickly, resulting in a stable and glossy meringue.
Note 5: Cream of tartar is an optional but highly recommended stabilizer. It assists egg whites in reaching and holding stiff peaks, contributing to a sturdier meringue and reducing the risk of macaron mishaps.
Note 6: For an in-depth guide on creating the most flavorful homemade pistachio paste, refer to my full tutorial.
GOT MACARON TROUBLE? Don’t despair! My comprehensive macaron troubleshooting guide is here to help you diagnose and overcome common issues.
STORING INSTRUCTIONS:
Store filled macarons in an airtight container in the fridge for up to 5 days. You can also freeze filled and matured macarons for up to 3 months. To thaw, transfer them to the fridge for at least 1 hour before bringing to room temperature.
Nutrition

Did you make this?Leave a rating and your feedback. Thank you!
This recipe was originally published on March 6th, 2015.