
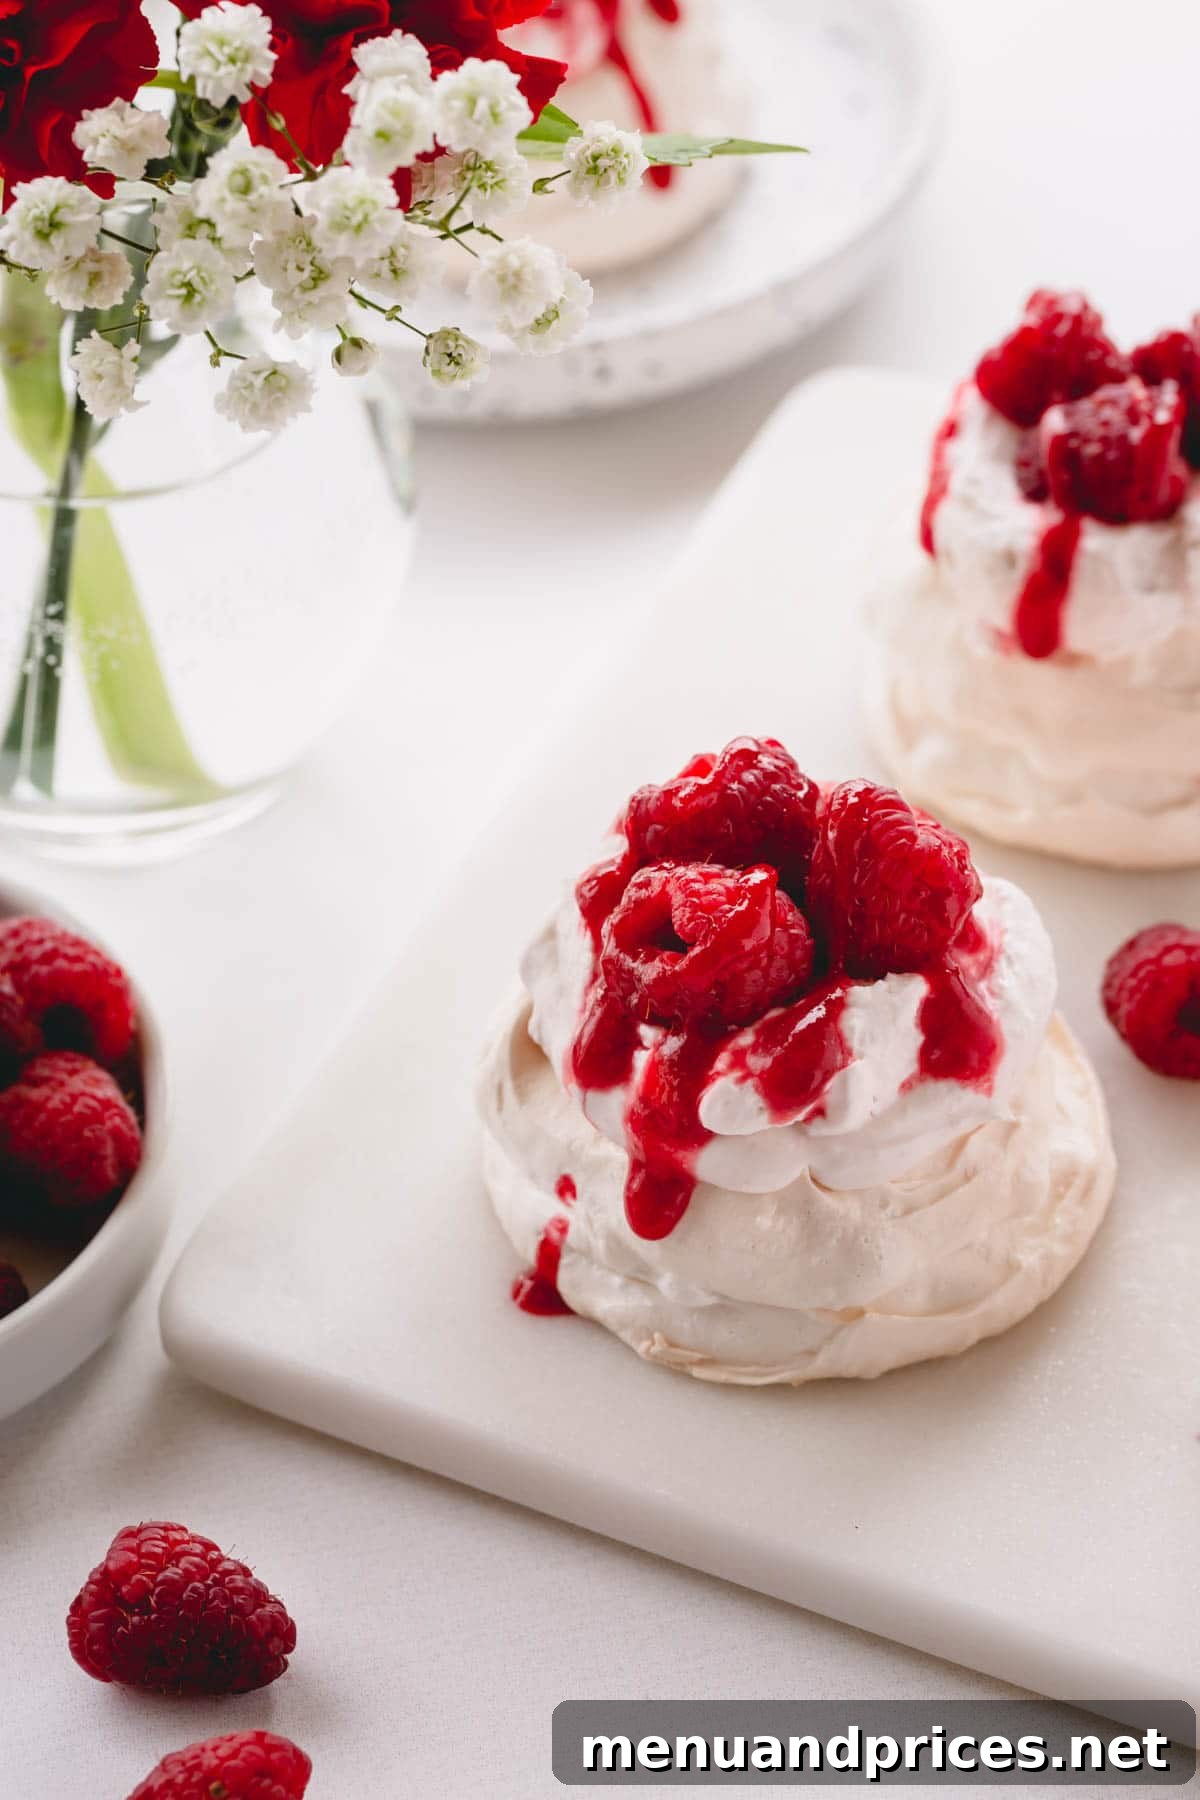
Prepare to be enchanted by these delightful Raspberry Mini Pavlovas, a dessert that is as effortlessly impressive as it is delicate. These individual treats are incredibly easy to make, making them an ideal choice for summer picnics, elegant gatherings, or simply a spontaneous indulgence. With their surprising combination of textures – a crisp outer shell giving way to a soft, marshmallowy center – they promise an unforgettable culinary experience that will have everyone coming back for more.
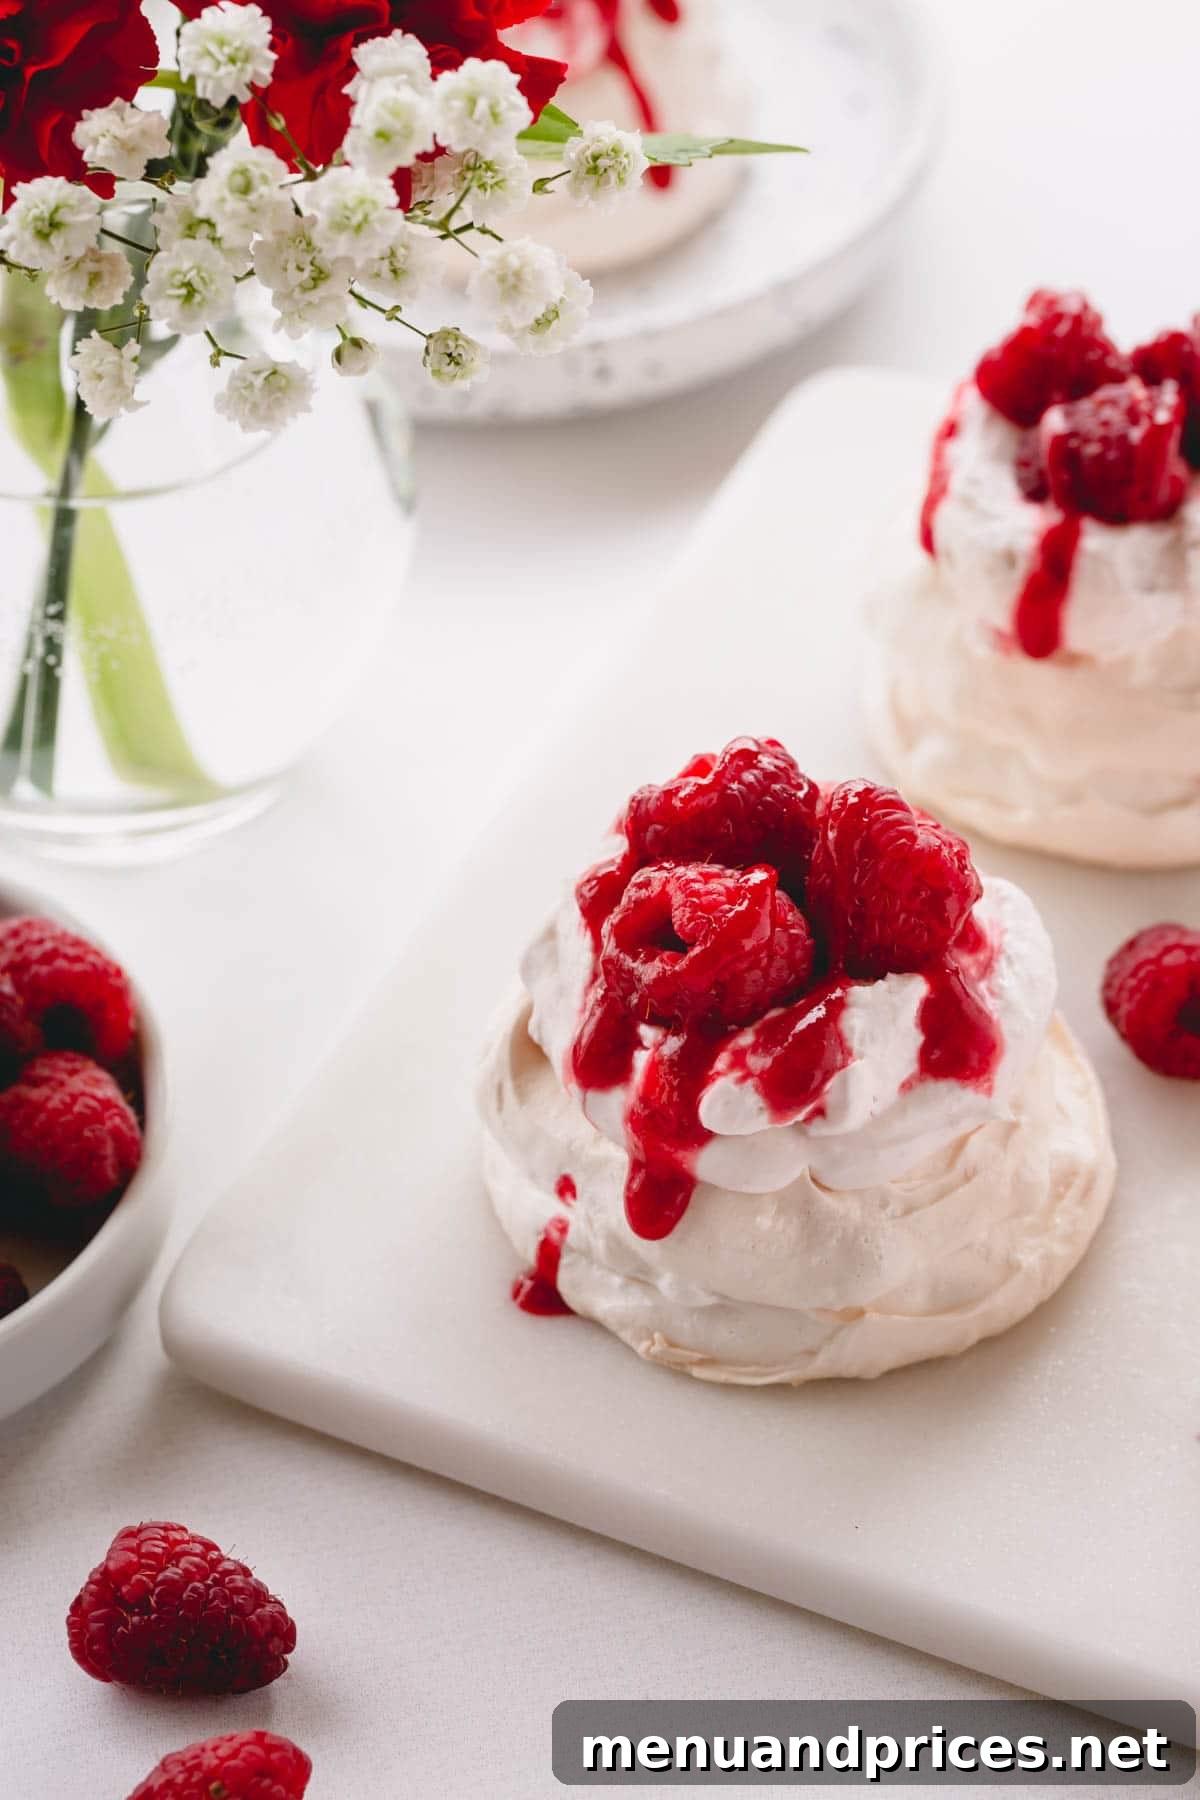
Why These Raspberry Mini Pavlovas Are a Must-Try
Mini pavlovas are a true masterpiece of dessert artistry, presenting an exquisite and delicate appearance that instantly elevates any table. These charming, meringue-based desserts boast a unique textural profile: a delightfully crispy crust that encases a wonderfully soft, marshmallow-like interior. You’ll find countless reasons to fall in love with these individual desserts:
- Elegance in Every Bite: Their delicate and beautiful presentation makes them perfect for any occasion, from casual garden parties to formal dinner settings. They offer a sophisticated touch without demanding hours in the kitchen.
- A Symphony of Textures: The captivating contrast between the crunchy exterior and the chewy, tender interior is absolutely enticing. This delightful duality, combined with the creamy topping and fresh fruit, creates a truly dynamic eating experience.
- Surprisingly Simple to Master: Despite their gourmet appearance, mini pavlovas are remarkably easy to create. This step-by-step tutorial will guide you through the process, ensuring perfect results even for novice bakers.
Follow our comprehensive guide to craft your own individual pavlovas, beautifully topped with raspberry whipped cream and fresh berries. If raspberries aren’t your only passion, you might also adore our strawberry mini pavlovas for another delightful variation!
Essential Ingredients for Perfect Pavlovas
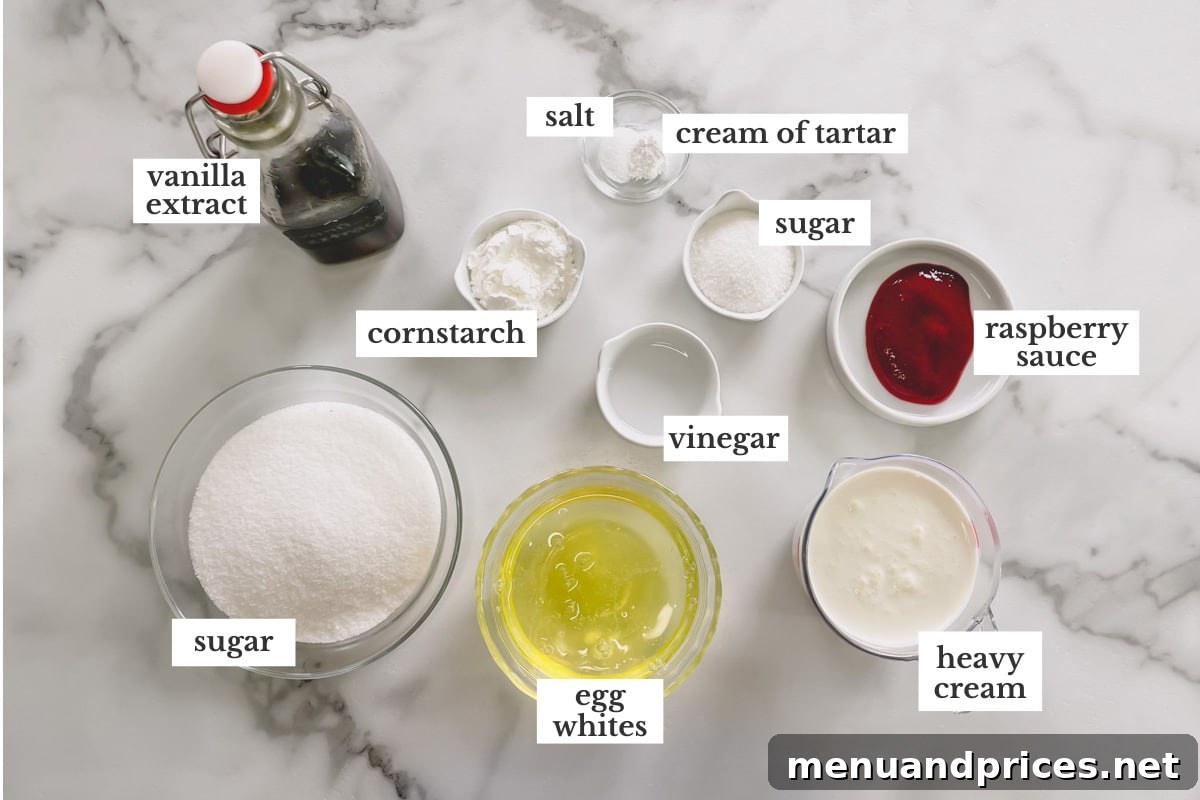
Crafting the Meringue Base: Key Components
The foundation of any great pavlova is a perfectly formed meringue. Each ingredient plays a crucial role in achieving that coveted crispy-on-the-outside, soft-on-the-inside texture:
- Sugar: Far more than just a sweetener, sugar is integral to the structure of the meringue. It dissolves into the protein film of the egg whites, forming a protective barrier that prevents the meringue from drying out too quickly and gives it stability. For the best results and quickest dissolution, we highly recommend using super-fine sugar (also known as caster sugar), if available.
- Cornstarch: A small but mighty addition, cornstarch acts as an insurance policy for your meringue. It absorbs any excess moisture, helping to prevent the dreaded “weeping” that can sometimes occur, especially in humid conditions. This ensures a beautifully dry and crisp exterior.
- Egg Whites: The heart and soul of meringue, properly whipped egg whites form the airy, voluminous base. As you whip them, air is incorporated, creating countless tiny bubbles that expand and become stable. The longer you whip, the stiffer and more stable your meringue will be, leading to those gorgeous stiff peaks. Remember, perfectly separated egg whites, free from any yolk, are paramount!
- Cream of Tartar: This acidic ingredient is a meringue’s best friend. Cream of tartar encourages the egg whites to whip up faster and achieve greater volume, while also stabilizing the foam and preventing it from collapsing once whipped.
- Salt: Just a pinch of salt can make a world of difference. It subtly enhances the sweetness of the sugar and balances the overall flavor profile of the pavlova, bringing out the best in the other ingredients.
- Vanilla Extract: Pure vanilla extract infuses the meringue with a sweet, aromatic vanilla flavor, adding depth and warmth that beautifully complements the tartness of the raspberries.
- Vinegar: White distilled vinegar is the secret weapon for achieving that signature pillowy-soft, marshmallowy center. The acid helps to tenderize the meringue’s interior, creating the delightful contrast we seek.
Luscious Toppings: The Flavor Boosters
No pavlova is complete without a rich and flavorful topping. Our raspberry filling provides the perfect balance to the sweet meringue:
- Heavy Cream: Cold heavy whipping cream is the essential base for a light, airy, and fluffy whipped cream. As it’s whipped, it traps air, transforming into a cloud-like topping that melts in your mouth.
- Seedless Raspberry Sauce (or Jam): This vibrant component adds a burst of fruity flavor and a beautiful color. Whether you opt for a homemade sauce or a good quality jam, ensure it’s seedless for that luxuriously silky-smooth texture. Homemade options like our easy raspberry sauce are highly recommended for the freshest taste.
- Granulated Sugar (for filling): A small amount of sugar sweetens the whipped cream and enhances the natural flavor of the raspberries, balancing the tartness.
Step-by-Step Guide to Crafting Raspberry Mini Pavlovas
Creating individual pavlovas is a rewarding and surprisingly straightforward process. Let’s walk through each important step together to ensure your success.
Mastering the Meringue Base
Before you begin, ensure all your mixing tools are immaculately clean. Any trace of fat, grease, or egg yolk can prevent egg whites from whipping properly into a fluffy meringue. When separating eggs, do so carefully, perhaps one at a time into a separate small bowl, to avoid contaminating the whole batch if a yolk breaks.
- Preparation: Preheat your oven to 350°F (177°C). Line two baking sheets with parchment paper or silicone mats. In a separate small bowl, whisk together the granulated sugar and cornstarch, then set aside.
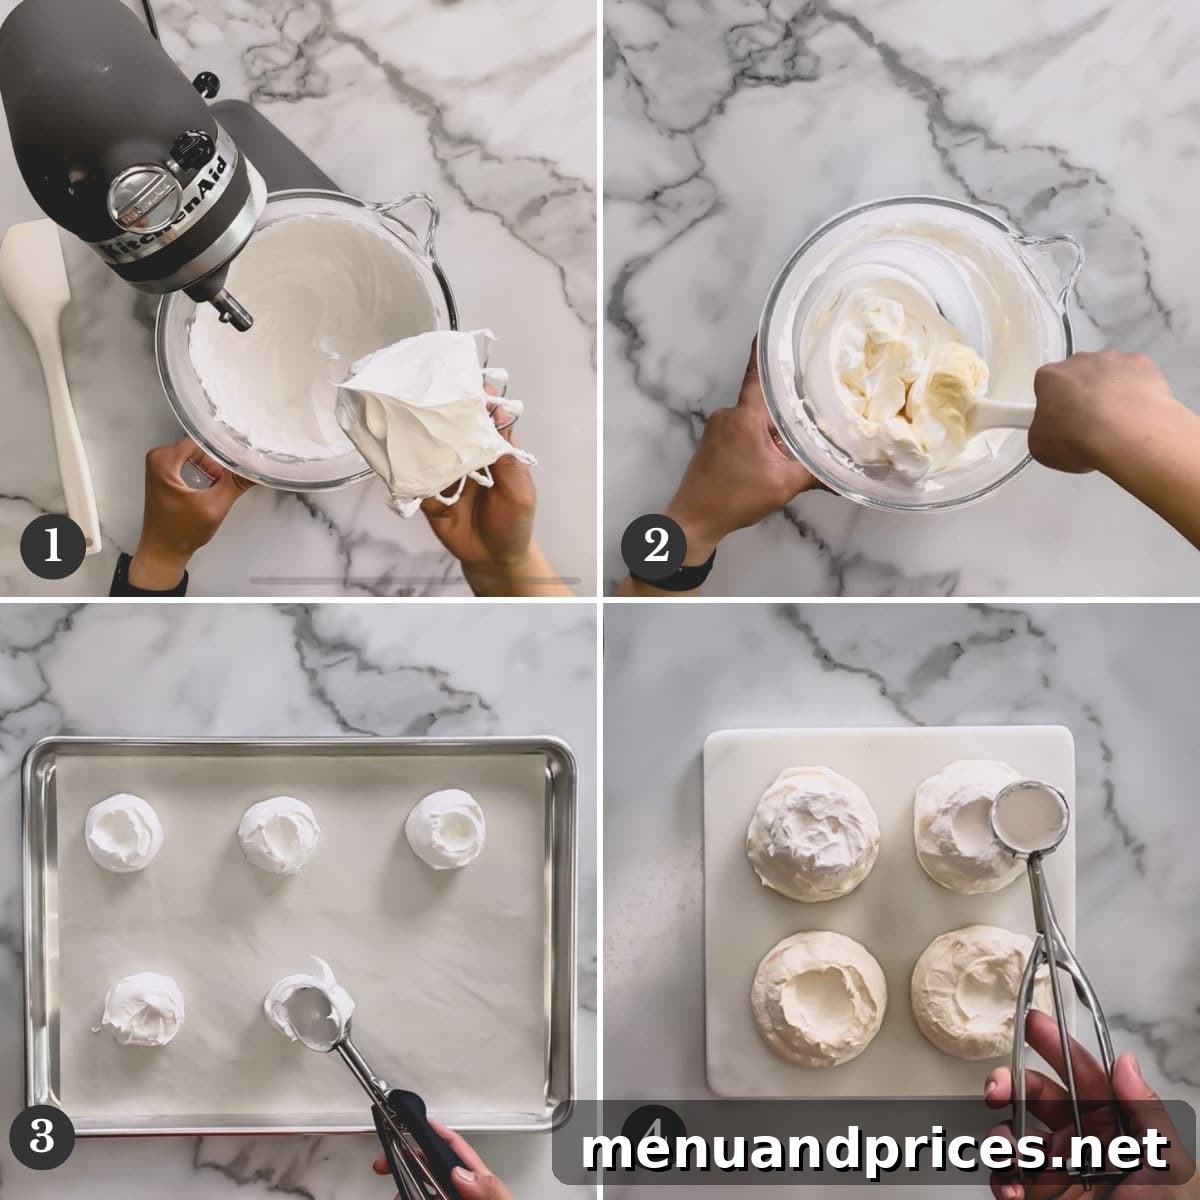
- Whip Egg Whites to Frothy: In a large, impeccably clean mixing bowl (preferably a stand mixer with a whisk attachment, or using a handheld electric mixer), begin beating the room-temperature egg whites on medium speed until they become frothy and bubbly.
- Add Stabilizers: Stir in the cream of tartar and salt. Continue beating the egg whites on medium-high speed.
- Gradually Incorporate Sugar: With the mixer still running, slowly add the sugar-cornstarch mixture, one tablespoon at a time. This gradual addition is crucial for the sugar to dissolve properly and create a stable meringue.
- Achieve Stiff, Glossy Peaks: Increase the mixer speed to high and continue beating the egg whites until stiff, glossy peaks form. When you lift the whisk, the peaks should stand straight up without drooping, and the mixture should appear smooth and shiny.
- Fold in Flavor: Gently fold in the vanilla extract and white distilled vinegar using a large silicone spatula until they are just combined. Be careful not to deflate the meringue.
- Form the Pavlovas: Divide the meringue mixture into 12 even rounds onto your prepared baking sheets. For uniform pavlovas, a large cookie scoop works wonderfully (about two scoops per pavlova). Use the back of a small spoon to create a shallow well or indentation on top of each meringue, which will later hold your delicious filling.
- Bake and Cool Slowly: Reduce the oven temperature to 300°F (150°C) and bake the pavlovas for 30 minutes. After 30 minutes, turn off the oven, but leave the pavlovas inside with the oven door ajar (propped open slightly) for at least an hour, or until completely cool. This slow cooling process is vital for preventing cracks and achieving that perfectly crispy exterior. The meringues may slightly collapse, which is normal.
Expert Tip
Always use a squeaky-clean mixing bowl and whisk! Any residual fat, even a tiny bit, can contaminate the egg whites and prevent them from whipping into the desired stiff peaks, leading to a flat or runny meringue.
Preparing the Raspberry Whipped Cream Filling
This light and fruity whipped cream complements the pavlova shells beautifully. Ensure your cream is very cold for optimal whipping results.
- Whip Heavy Cream: In a chilled mixing bowl, beat the cold heavy cream on medium speed until stiff peaks form. The cream should be thick and hold its shape when the whisk is lifted.
- Add Raspberry & Sweetener: Gently fold in the seedless raspberry sauce (or jelly) and granulated sugar. Continue to beat on medium speed until all ingredients are well combined and the cream is light pink and smooth. Be careful not to over-whip, as this can lead to butter formation.
Pro Tip
Chilling your heavy cream, mixing bowl, and even the whisk attachment before whipping will significantly improve your chances of achieving perfectly stiff peaks. Warm cream simply won’t whip properly, so embrace the chill!
Assembling Your Exquisite Mini Pavlovas
The final step brings all the delicious components together for a truly show-stopping dessert. Timing is key for maximum crispness!
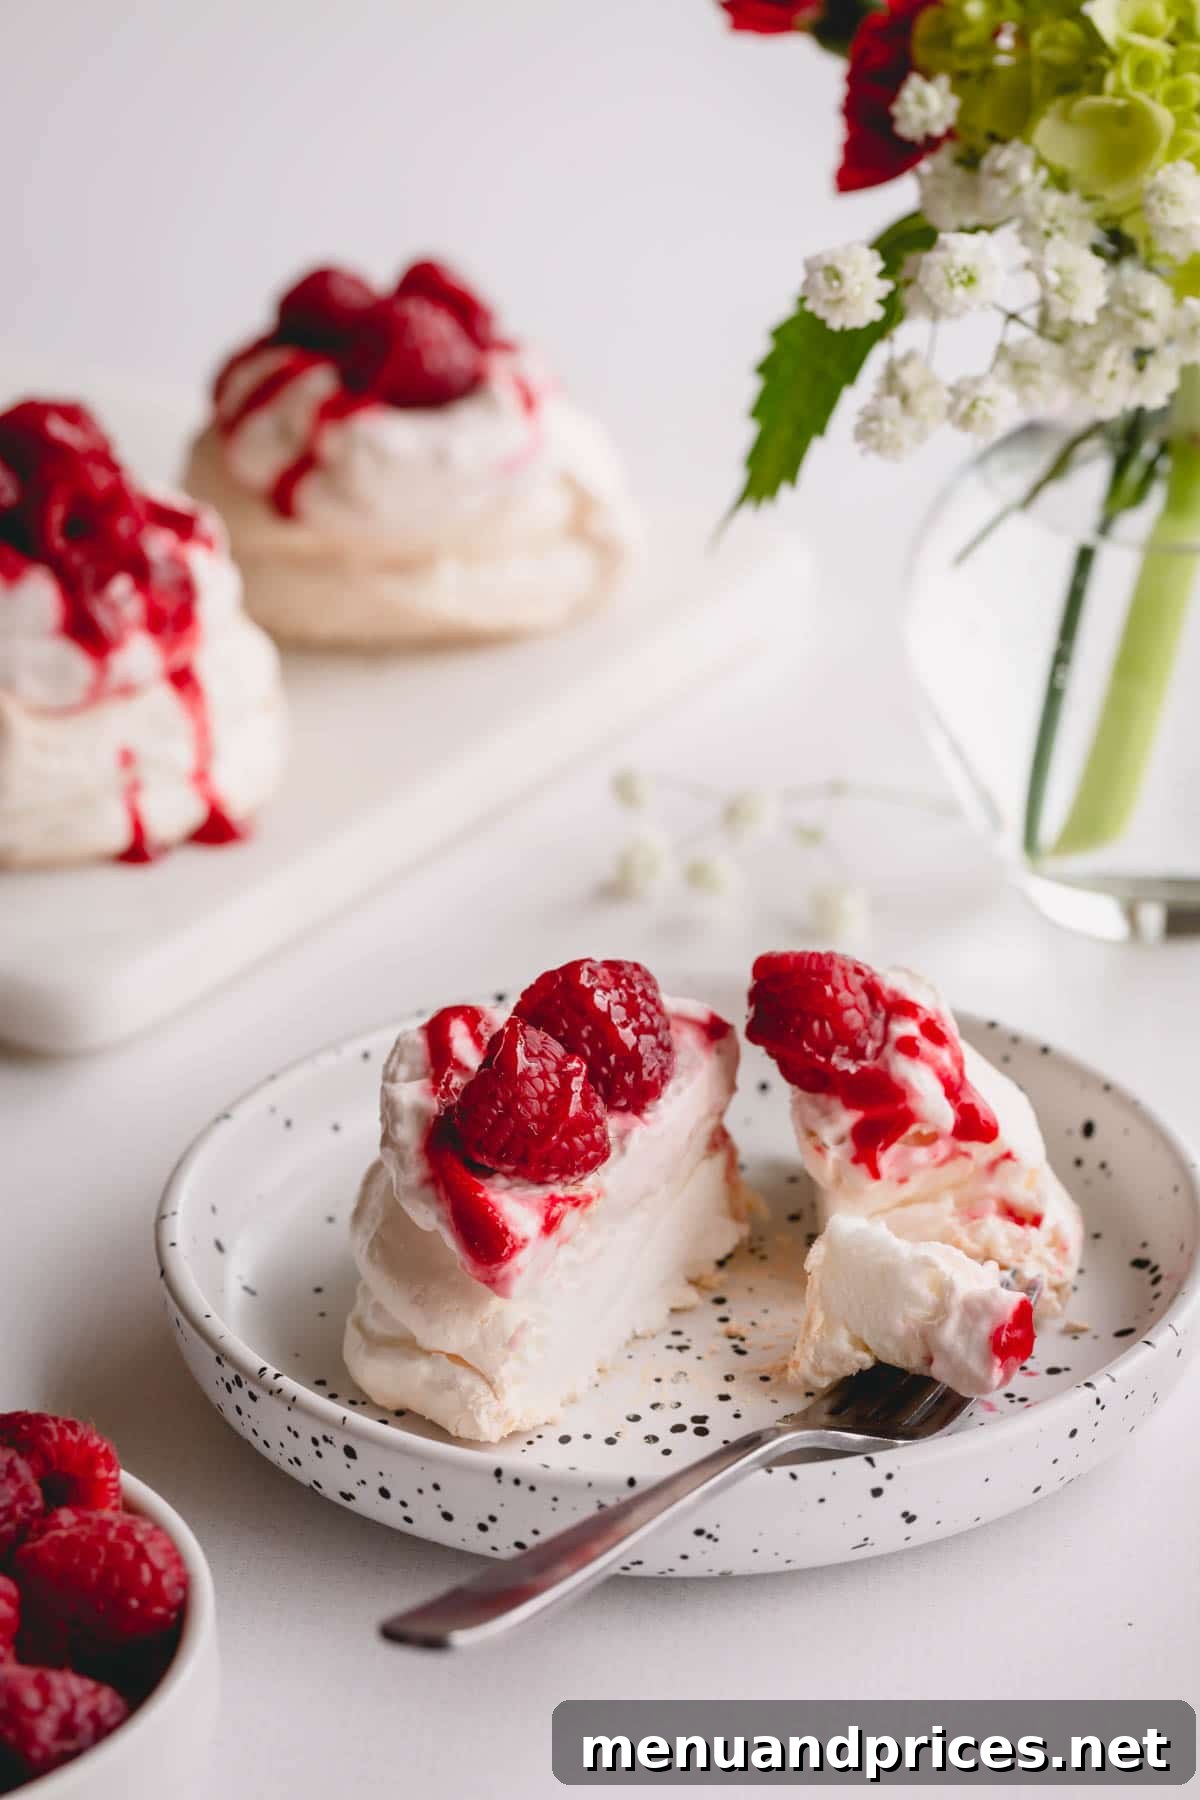
- Fill the Shells: Just before serving, spoon a generous tablespoon or two of the raspberry whipped cream filling into the shallow well of each cooled pavlova shell.
- Garnish and Serve: Top each pavlova with a handful of fresh raspberries and, if desired, drizzle with a little extra seedless raspberry sauce. Serve and enjoy immediately to experience the ultimate textural and flavor contrast!
Serving Suggestion
Pavlovas are best enjoyed immediately after assembly. The longer they sit with the moist filling on top, the more the meringue will absorb moisture and begin to soften, losing its signature crispy texture. Freshness is paramount!
Essential Tips for Pavlova Perfection
Achieving truly exceptional mini pavlovas requires attention to a few key details. Keep these expert tips in mind for consistently perfect results:
- Spotless Egg Whites are Crucial: The absolute tiniest speck of egg yolk or fat can completely ruin your meringue, preventing the whites from whipping into stiff peaks. Separate your eggs carefully, ideally one at a time into a small bowl first, so that if a yolk breaks, you only lose one egg white, not the whole batch.
- Room Temperature Egg Whites: While it’s easier to separate egg whites when they are cold (fresh out of the fridge), they whip up much faster, achieve greater volume, and form a more stable meringue when they are at room temperature. Separate them cold, then let them sit on the counter for 30 minutes to an hour before whipping.
- Invest in an Electric Mixer: Whipping egg whites to the desired stiffness by hand is a marathon task. An electric mixer, whether a stand mixer or a powerful hand mixer, is essential for efficiency and consistent results.
- Prevent Sticking with Parchment: Always line your baking sheets with parchment paper or silicone mats. This ensures your delicate baked meringues won’t stick and can be easily removed without breaking.
- Uniformity for Even Baking: Whether you prefer to pipe your meringue for an artistic flourish or scoop it for simplicity, aim for consistent sizes. Using a large cookie scoop is an excellent way to ensure uniform pavlovas that bake evenly.
- Give Them Space: Meringues do spread slightly during baking. Provide ample space between each mini pavlova on the baking sheet to prevent them from merging. Using two separate sheet pans for a dozen pavlovas is often ideal.
- Slow and Gentle Cooling: This is arguably the most critical step for achieving a truly crispy exterior. After baking, turn off the oven but leave the pavlovas inside with the door slightly ajar. Allow them to cool down slowly and gradually within the oven for at least an hour, or even overnight. Rushing this step can lead to cracked or chewy meringues.
Smart Make-Ahead Strategies
While fresh assembly is best, several components of this delightful dessert can be prepared in advance, saving you time and stress on the day of serving:
- Meringue Base: The pavlova meringue shells are wonderfully stable and can be baked up to 1-2 days in advance. Once completely cooled, store them in a dry, airtight container at room temperature. A cool oven can also serve as an excellent, dry storage spot. If they lose a bit of crispness, a quick 10-15 minute bake at 350°F (177°C) and then slow cooling in the turned-off oven can revive them.
- Raspberry Whipped Cream: The raspberry whipped cream can also be prepared a day ahead. Store it in a sealed container, tucked away at the back of your refrigerator where it’s coldest. Give it a gentle whisk just before serving to restore its fluffy texture.
- Assembly Timing: For the ultimate textural experience, it is always best to assemble the full dessert right before serving. This preserves the crispness of the meringue and the freshness of the whipped cream and fruit.
Storing Leftover Pavlovas
- Once the small pavlovas are assembled with the whipped cream and fresh fruit, they are best enjoyed immediately. The moisture from the whipped cream will gradually soften the delicate meringue as it sits. If you have leftovers, they can be refrigerated in an airtight container for up to a day, but expect a softer texture.
Frequently Asked Questions About Pavlova
Mini pavlovas are typically served individually, garnished with generous dollops of homemade whipped cream, fresh berries, fruit curds, or sauces. The individual portions make them an elegant choice for any gathering. To eat, simply use a fork to break into the crispy shell and scoop up the soft meringue, creamy topping, and fruit. Enjoy the delightful blend of textures and flavors in every bite!
While both pavlova and classic meringue are made primarily from whipped egg whites and sugar, their textures are distinctly different. Pavlova is essentially a meringue-based cake, characterized by a crispy exterior shell that gives way to a soft, chewy, marshmallowy center. In contrast, baked meringues (like meringue cookies) are typically baked longer at a lower temperature until they are crisp and dry all the way through, dissolving instantly in your mouth.
While cream of tartar is highly recommended for its stabilizing properties, you can substitute it with other acids. A teaspoon of white distilled vinegar or fresh lemon juice can achieve a similar effect, helping to stabilize the egg whites and promote stiff peaks. Just be sure to use a small amount to avoid imparting too much flavor.
Cracking or collapsing is a common concern with pavlovas. This often happens due to a sudden change in temperature. The most effective way to prevent this is by cooling the pavlovas slowly inside the turned-off oven with the door slightly ajar. Other factors can include under-whipped egg whites, too much or too little sugar, or excessive handling of the meringue mixture.
Delicious Pavlova Variations
While raspberry mini pavlovas are a classic for a reason, the beauty of this dessert lies in its versatility. Feel free to get creative with your toppings and flavors:
- Seasonal Fruits: Beyond raspberries, consider other fresh berries like strawberries, blueberries, or blackberries. Tropical fruits such as sliced kiwi, passion fruit, or mango also make fantastic toppings, especially when paired with a hint of lime zest.
- Chocolate Indulgence: For chocolate lovers, a drizzle of melted dark chocolate over the whipped cream, or even a sprinkle of cocoa powder in the meringue itself, can transform these into a decadent treat. Add chocolate shavings for an elegant finish.
- Citrus Burst: Infuse your whipped cream with lemon zest or orange blossom water, and top with segments of citrus fruit for a bright, refreshing twist. A lemon curd base instead of raspberry sauce is another excellent option.
- Nutty Crunch: A sprinkle of toasted slivered almonds, pistachios, or pecans can add an extra layer of texture and a nutty flavor that beautifully complements the sweet meringue.
- Different Sauces: Experiment with other fruit sauces like strawberry coulis, blueberry compote, or even a salted caramel drizzle for a more indulgent flavor profile.
Watch the Magic Happen!
Raspberry Mini Pavlova
Shinee Davaakhuu
30 mins
30 mins
2 hrs
12 servings
Comment
Print Recipe
Ingredients
For the base:
- 1 cup (200 g) granulated sugar Note 1
- 2 tablespoons (16 g) cornstarch
- 4 large (140 g) egg whites Note 2
- ¼ teaspoon cream of tartar
- ¼ teaspoon salt
- ½ teaspoon pure vanilla extract
- 1 teaspoon white distilled vinegar
For the filling:
- 1 cup (240 ml) heavy whipping cream cold
- ¼ cup seedless raspberry sauce Note 3
- 2 tablespoons (30 g) granulated sugar
For garnish:
- 1 cup fresh raspberries for topping
- ¼ cup seedless raspberry sauce (for drizzling)
Instructions
To make Pavlova base:
-
Preheat the oven to 350°F (177°C). Line 2 baking sheets with parchment paper, or silicone mats.
-
In a small bowl, whisk together sugar and cornstarch. Set aside.
-
In a large clean mixing bowl with a whisk attachment, or using a handheld electric mixer, beat the egg whites until frothy.
-
Stir in cream of tartar and salt and continue to beat on medium-high speed.
-
Add sugar/cornstarch mixture one tablespoon at a time, while the mixer is running on medium-high speed. Increase the speed to high and continue to beat the egg whites until hard, glossy peaks form.
-
Add vanilla extract and vinegar and gently fold the mixture with a large silicone spatula.
-
Divide the meringue into 12 rounds on the prepared baking sheets. (TIP: Use a large cookie scoop for this step. 2 scoops per Pavlova for uniform size.) Make a shallow well on top of each meringue round.
-
Reduce the oven temperature to 300°F (150°C) and bake the Pavlovas for 30 minutes.
-
Turn the oven off and let them cool for at least an hour with the oven door ajar. Store cooled mini Pavlovas in an airtight container at room temperature, or in the cooled oven, until ready to assemble.
To make the whipped cream:
-
Beat the cold heavy cream on medium speed until stiff peaks form.
-
Add raspberry sauce and sugar and continue to beat on medium speed until well combined. (TIP: Keep a close eye on it. Don’t over-whip the cream, or it will start to turn into butter.)
To assemble:
-
Right before serving, spread about 1.5 tablespoons of the whipped cream filling on each pavlova.
-
Top with fresh raspberries and drizzle with extra raspberry sauce, if desired. Serve immediately.
⭐️ Did you make this recipe?
Please leave a review and let us know how you liked it!
Video
Tips & Notes
Note 2: It is critical that the egg whites are free of any fat or egg yolk. If any egg yolk accidentally falls into the egg whites, you will need to discard them and start over with fresh egg whites. Carton egg whites can also be used for this recipe (you’ll need about 130g), but ensure the label confirms they are suitable for meringue and haven’t been treated with anti-foaming agents.
Note 3: We love using our homemade raspberry sauce recipe for the best flavor. However, you may substitute it with a good quality seedless raspberry jelly for convenience.
Storing Tips:
– Pavlova bases can be baked a day or two in advance. Store them in a dry, cool area within an airtight container, or simply leave them in the cooled oven.
– If the baked pavlova shells have lost some of their crispness, you can try reheating them for 10-15 minutes at 350°F (177°C), then allowing them to cool completely in the turned-off oven. This often helps restore their crunch.
– The whipped cream filling can also be made a day in advance. Cover and refrigerate it until you’re ready to use. Give it a quick whisk before piping or spooning onto the pavlovas.
– Once the individual pavlovas are assembled with the filling and fruit, it’s best to enjoy them immediately. The moisture from the whipped cream and fresh fruit will quickly begin to soften the delicate meringue.
Nutrition
159 kcal
23 g
2 g
7 g
15 g
74 mg
Dessert
Australian / New Zealand
Did you make this?
Leave a rating and your feedback. Thank you!
We hope this comprehensive guide inspires you to create your own batch of stunning Raspberry Mini Pavlovas. Their delicate charm, exquisite textures, and vibrant flavors make them an unforgettable dessert that’s perfect for any occasion. Enjoy the process of baking and the joy of sharing these delightful treats!