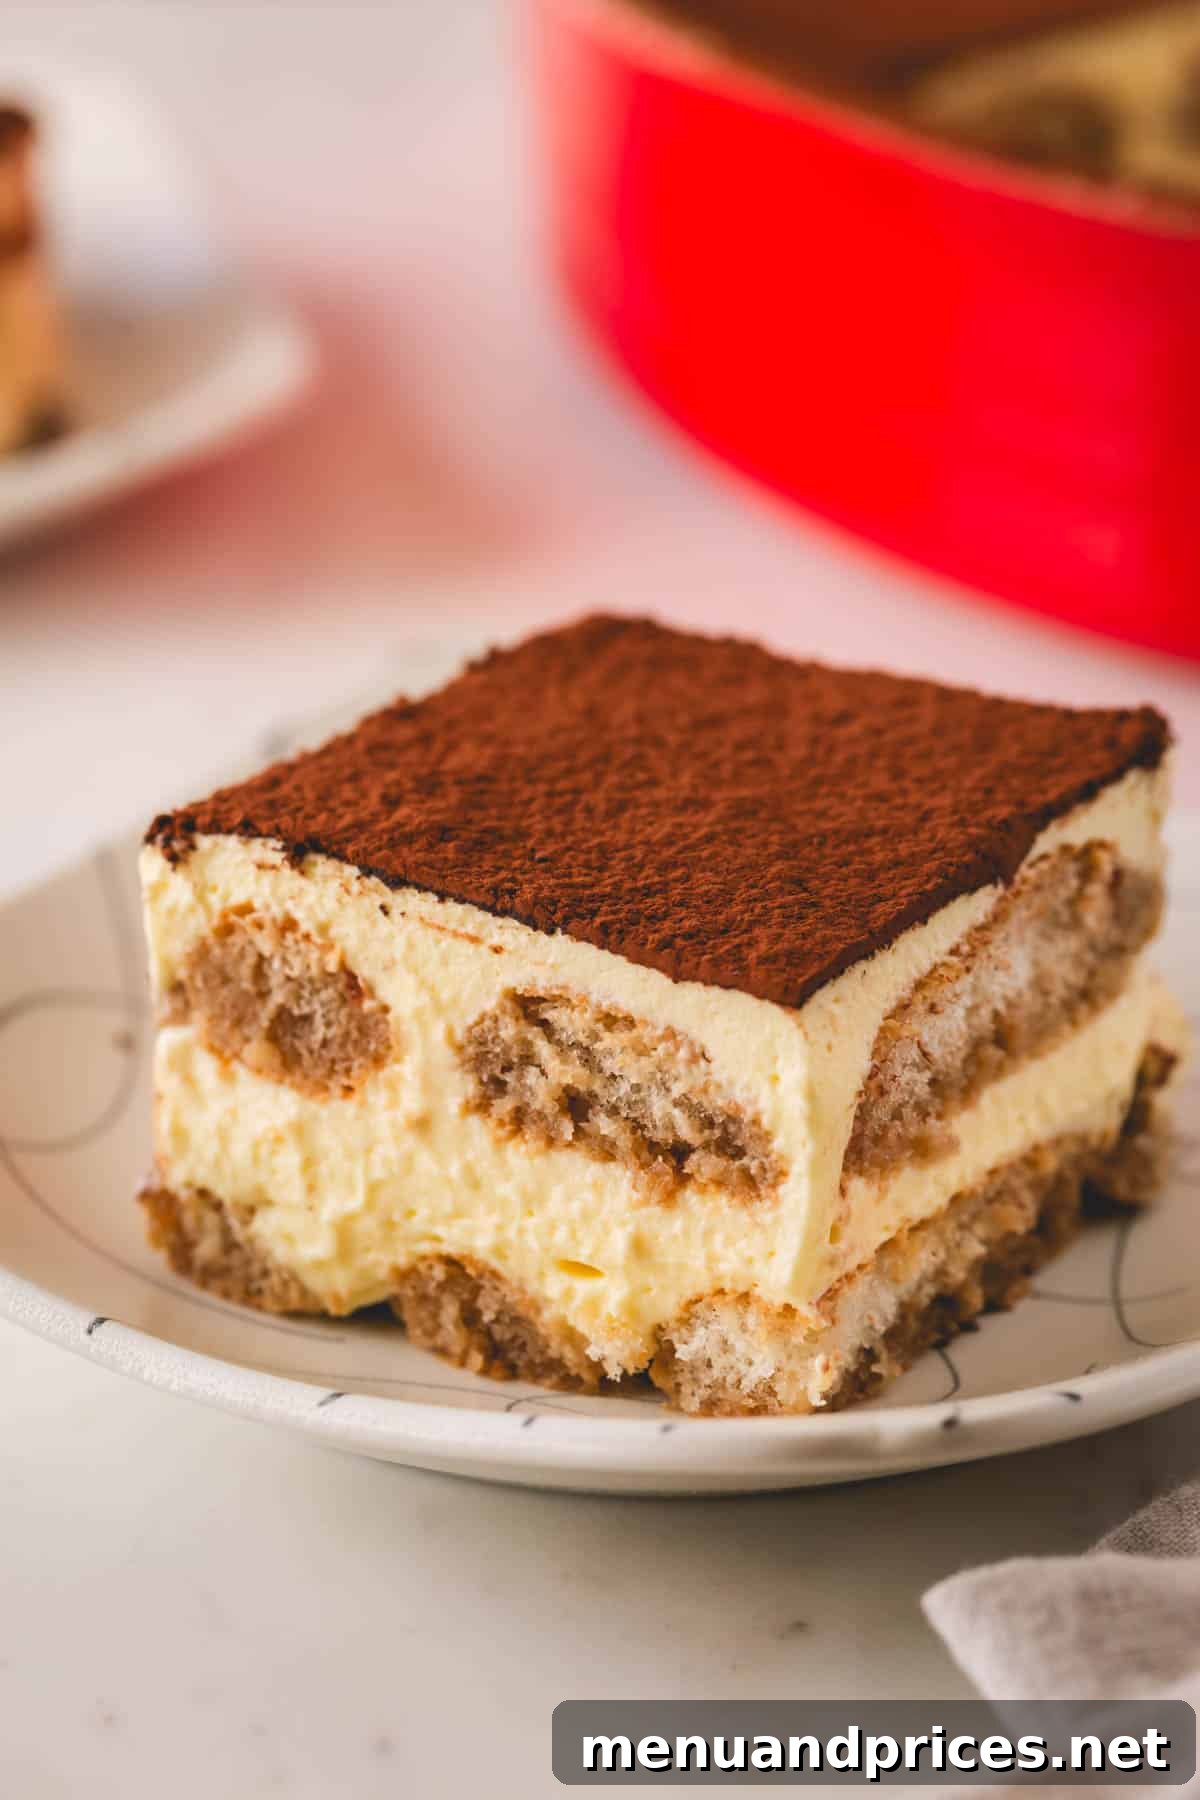
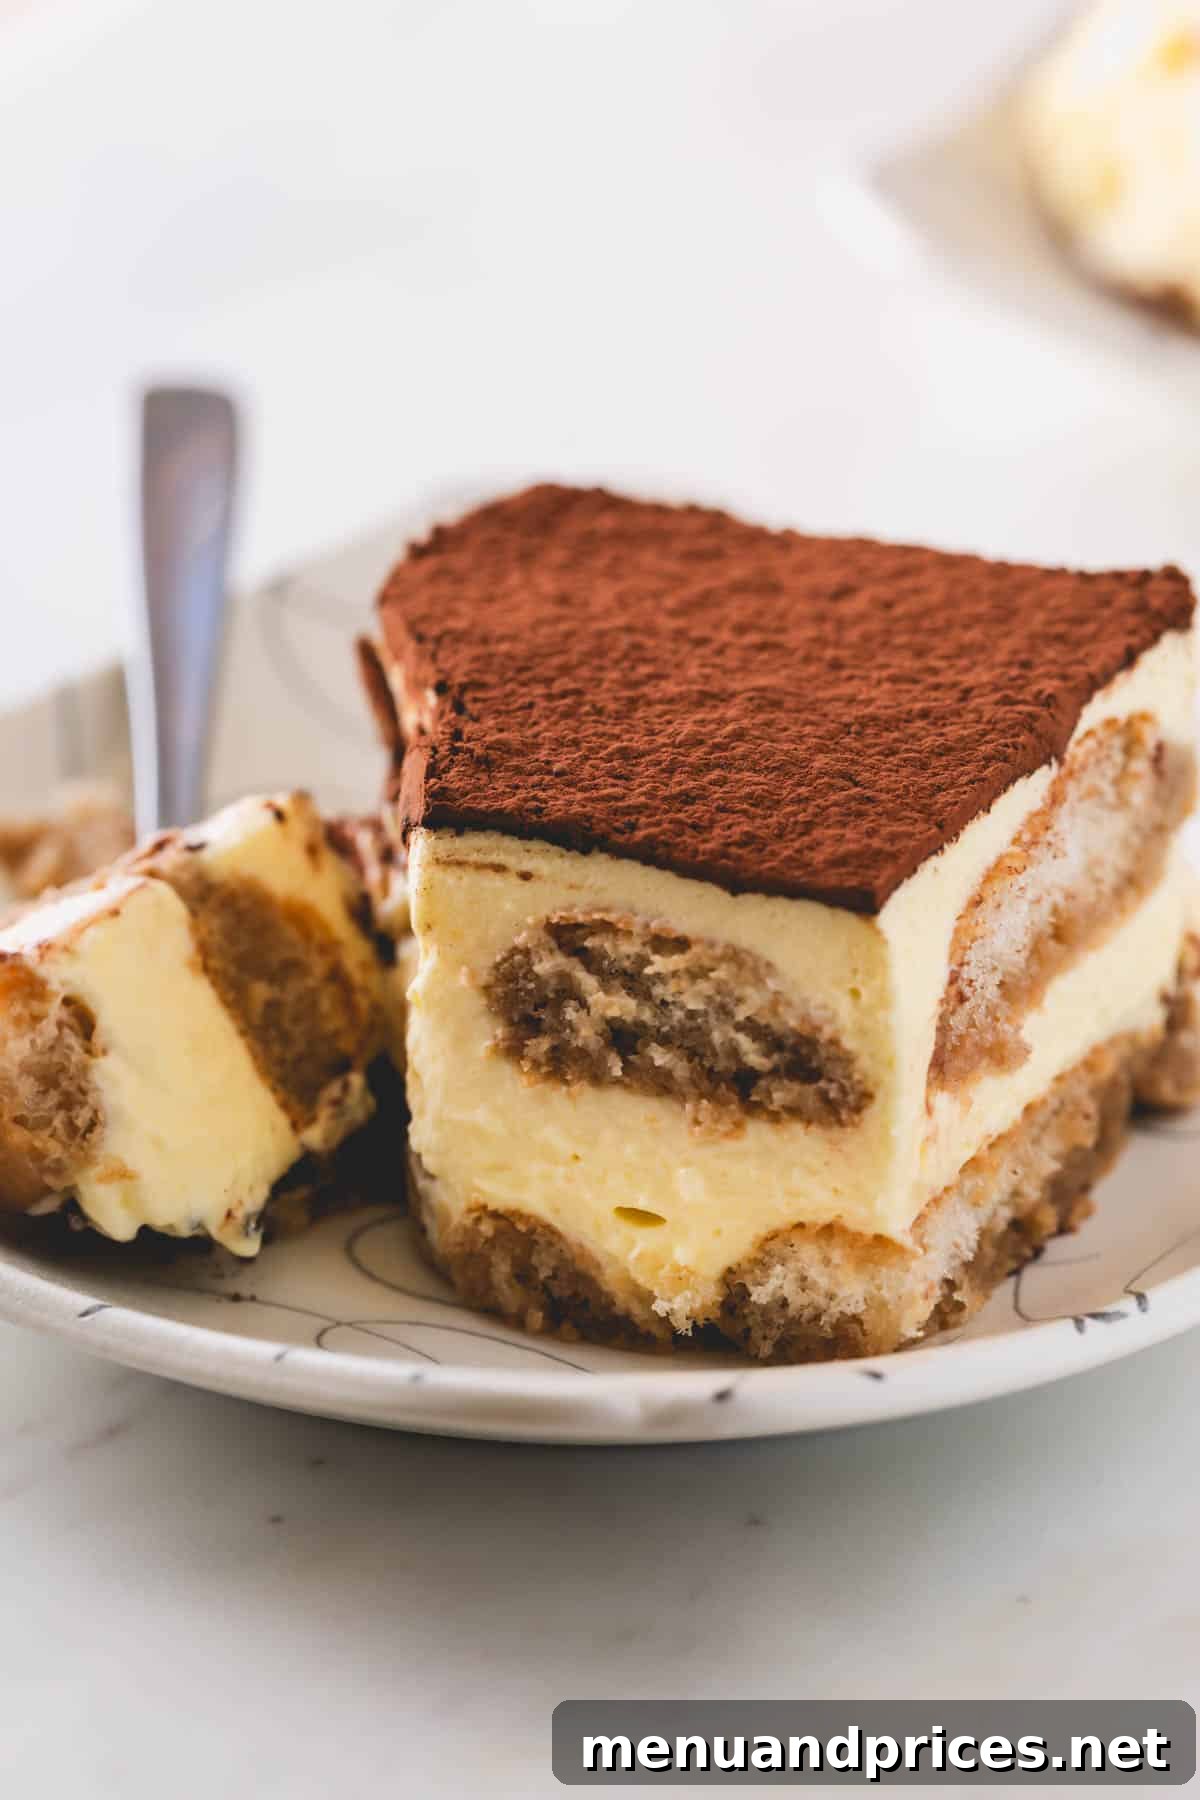
Embark on a delightful culinary journey with our ultimate guide to crafting the most exquisite **classic tiramisu**. This iconic Italian dessert, celebrated worldwide for its irresistible layers and rich flavors, is surprisingly simple to create right in your own kitchen. Imagine tender, coffee-soaked ladyfingers embracing a sweet, velvety mascarpone cream, all crowned with a generous dusting of rich cocoa powder. The best part? This decadent dessert requires absolutely **no baking**, making it a perfect project for home chefs of all skill levels. Get ready to impress your family and friends with a dessert that truly translates to “pick me up” – both in name and in spirit!
Pin this now to find it later
Pin It
Why You’ll Fall in Love with This Tiramisu Recipe
Creating **authentic tiramisu** at home is not just a cooking task; it’s an experience that rewards you with an incredibly rich, sophisticated dessert. This particular recipe stands out for several compelling reasons, making it a must-try for both novice and experienced dessert enthusiasts:
- Unforgettable Flavor Profile – Prepare your taste buds for a symphony of flavors. The profound bitterness of freshly brewed espresso perfectly complements the rich sweetness of the mascarpone cream. A subtle hint of Amaretto liqueur adds a layer of sophisticated almond warmth, creating a truly harmonious and intensely satisfying taste that lingers delightfully on the palate. It’s a balance of strong coffee, delicate sweetness, and a touch of boozy elegance.
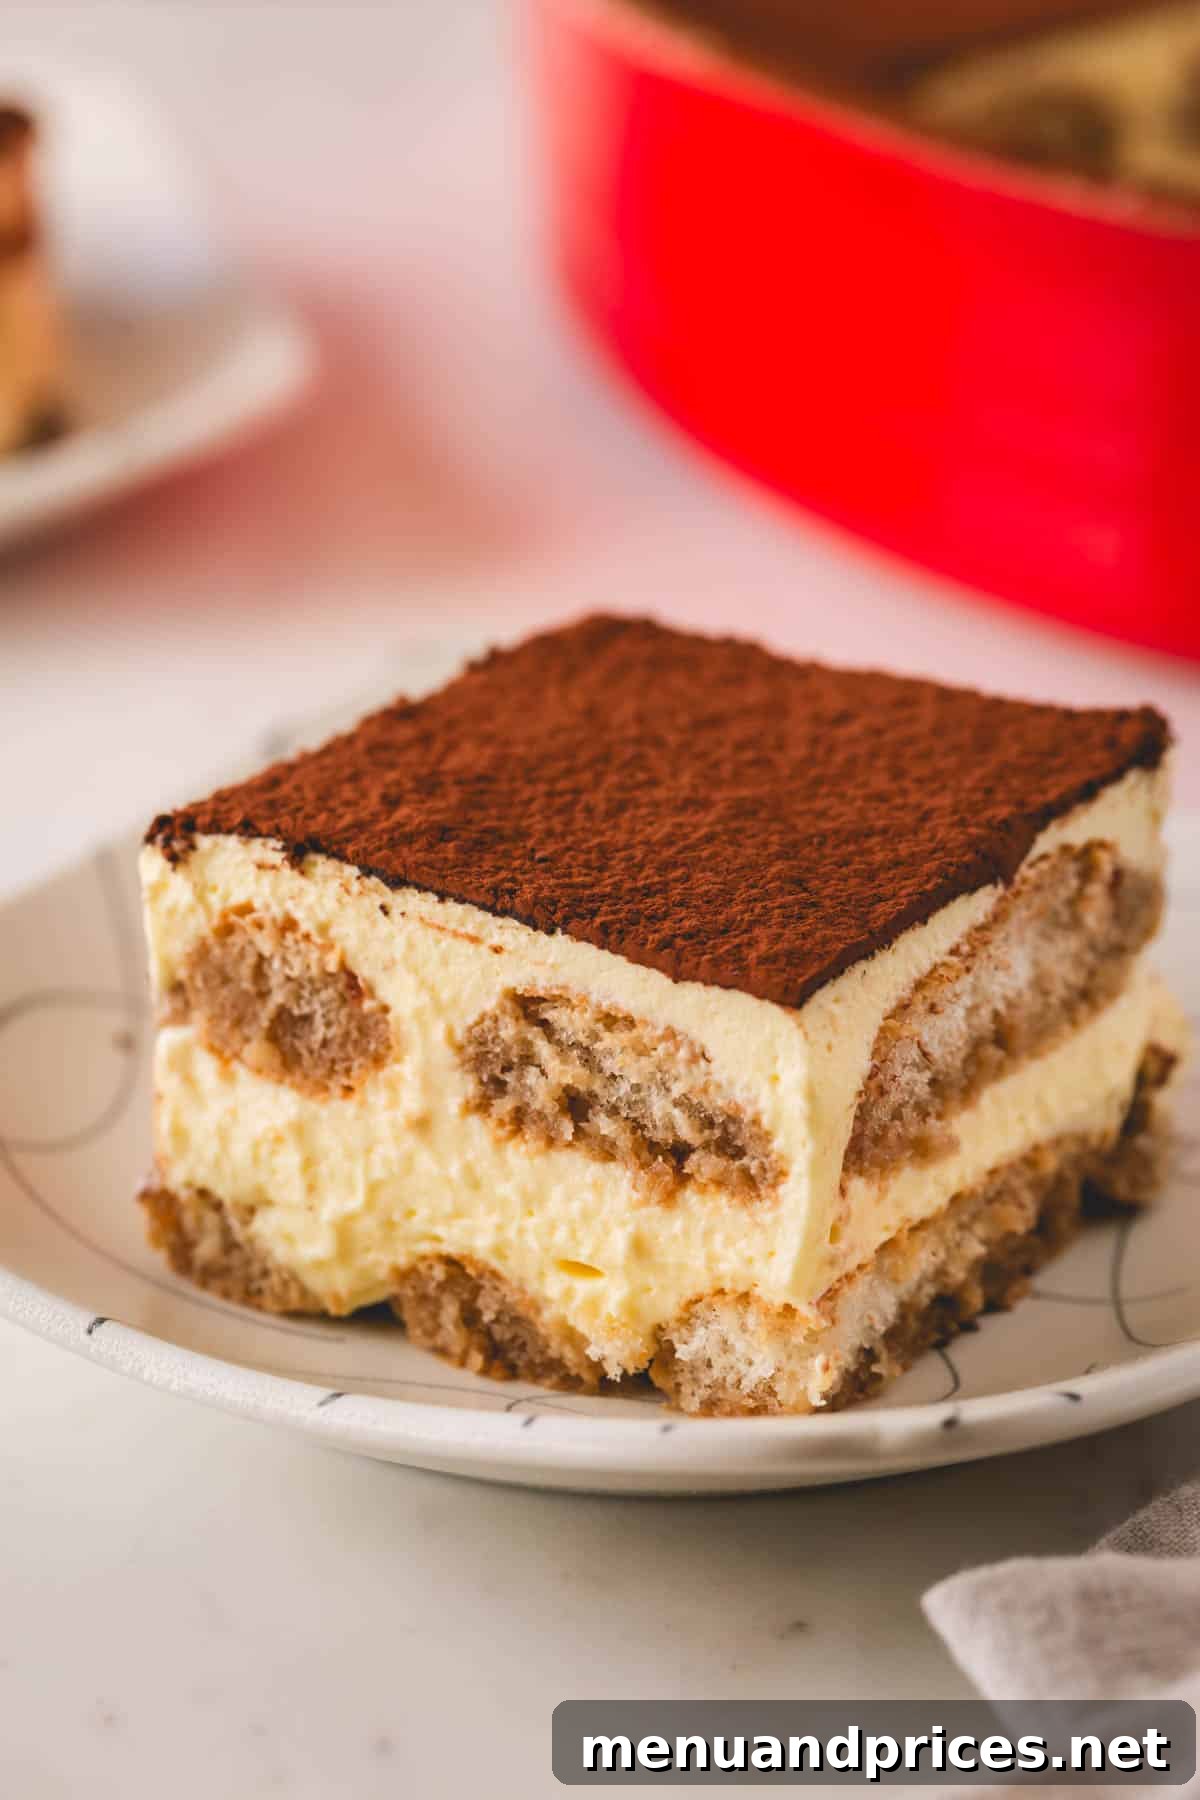
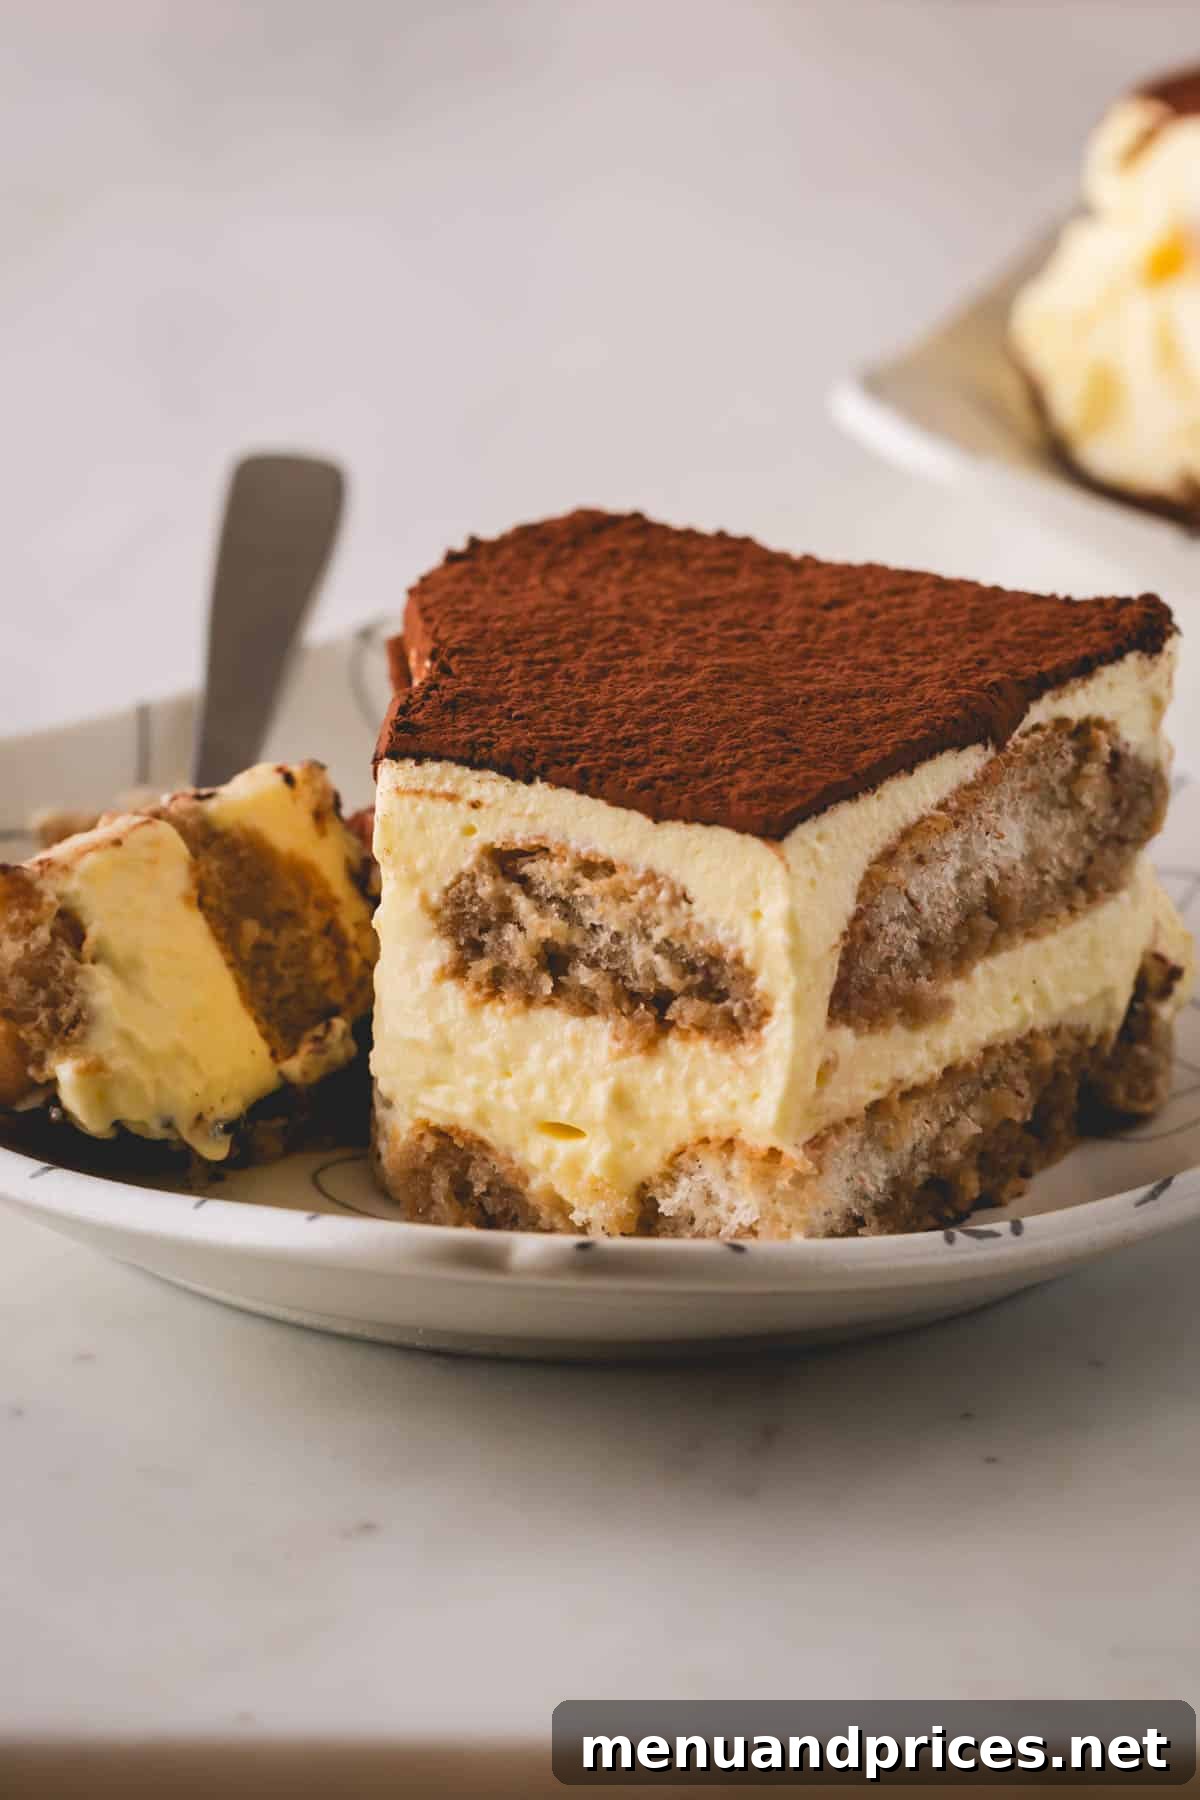
- Luxurious Melt-in-Your-Mouth Texture – Experience the captivating interplay of textures that defines **classic tiramisu**. Each bite offers the soft, yielding sponge of the espresso and liqueur-soaked ladyfingers, beautifully contrasted with the incredibly smooth, airy, and velvety mascarpone filling. This dual texture creates a truly luxurious mouthfeel that is both comforting and exhilarating, promising a dessert that literally melts away, leaving you craving more.
- Effortless No-Bake Preparation – Forget about heating up your kitchen! This **no-bake tiramisu recipe** simplifies the dessert-making process significantly. With no oven time required, you can assemble this dreamy Italian delight in under an hour, then simply let your refrigerator do the rest of the work. It’s the perfect make-ahead dessert, allowing flavors to meld and intensify overnight, ensuring a stress-free and spectacular treat.
- Time-Honored Traditional Approach – While many recipes opt for shortcuts, our **authentic tiramisu** adheres to the traditional method, incorporating egg yolks tempered with hot sugar syrup. This classic technique is crucial for achieving that distinct, rich custard-like texture and superior stability in the mascarpone filling, elevating the flavor and ensuring an unparalleled quality that stays true to its Italian roots.
Due to the delightful combination of caffeine from the espresso and a touch of alcohol, this **homemade tiramisu** is often best enjoyed as an adults-only treat. This makes it an absolutely perfect dessert for a romantic Valentine’s Day dinner, an elegant date night at home, or any special occasion where a touch of grown-up indulgence is desired. Its sophisticated charm makes it a fantastic finale to a gourmet meal.
If you’re seeking a dessert that the whole family can enjoy without the alcohol, explore my other inspired creations. You might love my Tiramisu Layer Cake or perhaps the whimsical Tiramisu Eclairs. Both draw inspiration from the magic of **classic tiramisu** but offer unique twists suitable for all ages!
What Exactly is Tiramisu? A Glimpse into its Italian Heritage
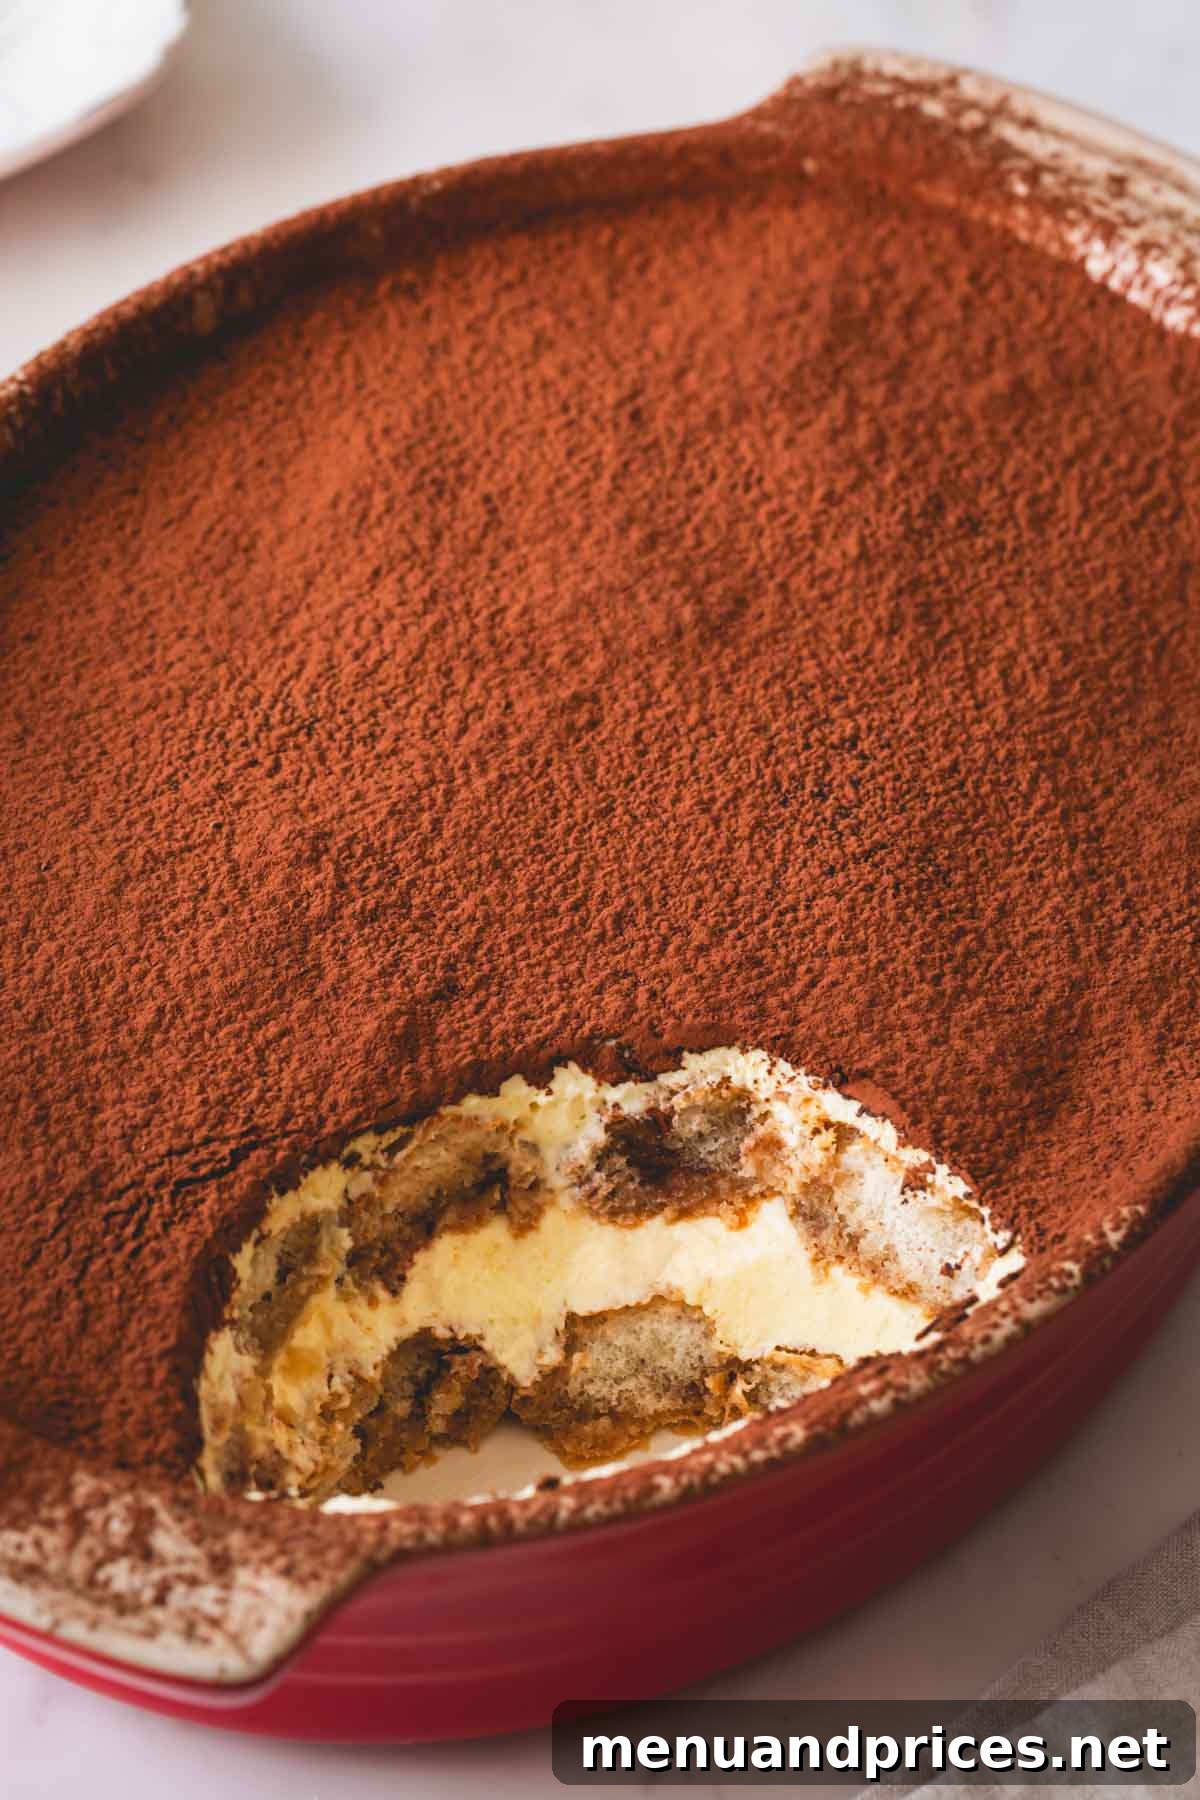
At its heart, **tiramisu** is a quintessential Italian layered dessert, a masterpiece of culinary simplicity and rich flavors. Traditionally, it’s crafted from a symphony of coffee-infused ladyfingers, a luxurious cream made from mascarpone cheese, eggs, and sugar, often enhanced with a chosen liqueur. While its exact origins are debated, with various regions of Italy laying claim, the common consensus places its birth somewhere in the mid-20th century in northeastern Italy.
The name “Tiramisu” itself offers a charming clue to its essence: it literally translates to “pick me up” or “cheer me up” in Italian. This evocative name is widely believed to refer to the uplifting boost provided by the dessert’s delightful combination of coffee (caffeine!) and the rich, invigorating properties of sugar and, traditionally, a splash of spirits. It’s more than just a dessert; it’s a moment of pure comfort and exhilaration in every spoon. Over the decades, tiramisu has transcended its Italian roots to become one of the most beloved and recognized desserts globally, a testament to its perfectly balanced flavors and textures.
Mastering Your Tiramisu: Essential Ingredient Insights
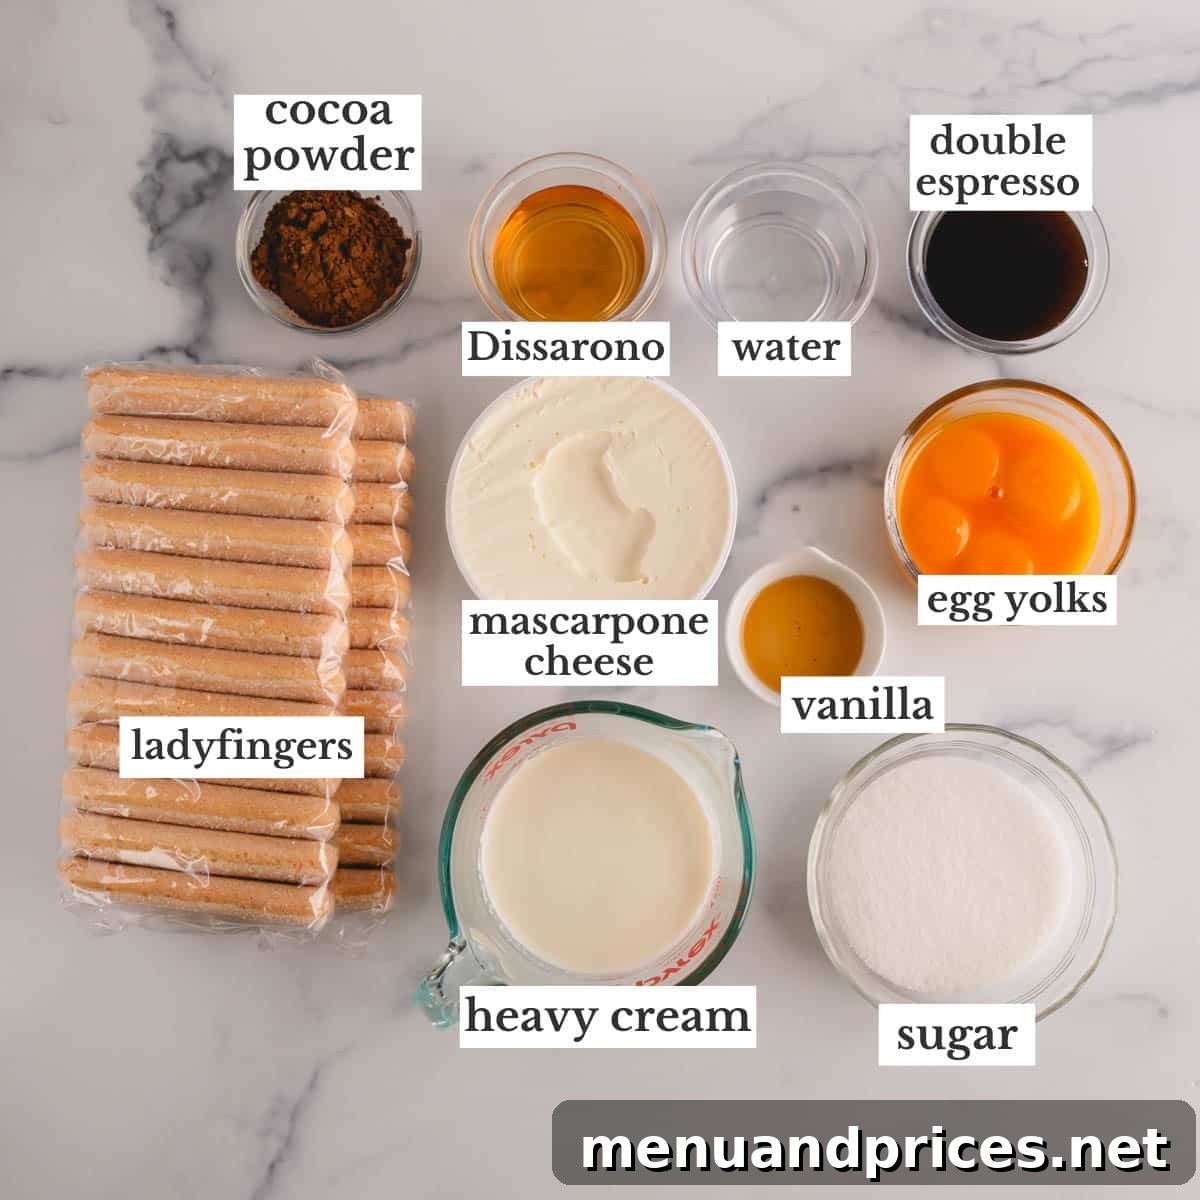
The secret to an exceptional **homemade tiramisu** lies in selecting high-quality ingredients and understanding their individual roles. Here’s a closer look at the stars of this Italian show:
- Freshly Brewed Espresso – This is the soul of your **tiramisu**. We highly recommend using freshly brewed espresso for its intense, complex flavor that truly defines the dessert. The robust, slightly bitter notes are essential to balance the sweetness of the mascarpone. If you don’t have an espresso machine, consider purchasing a few shots from your local coffee shop. As an alternative, you can substitute with 2 teaspoons of instant espresso powder dissolved in 2 ounces of hot water per double shot. Be mindful that instant espresso can have a more concentrated and sometimes sharper flavor, so adjust to your preference. Avoid using regular drip coffee, as it’s typically too weak and won’t impart the characteristic depth of flavor.
- Amaretto Liqueur – A sweet, almond-flavored Italian liqueur, Amaretto is a classic choice for **tiramisu**, beautifully complementing the coffee and mascarpone. Its distinct aroma and taste add a sophisticated warmth and complexity. Disaronno is a well-known and excellent brand of Amaretto. If Amaretto isn’t your preference, other popular options include Marsala wine (the most traditional choice for some purists), dark rum, brandy, or even Kahlúa for a more pronounced coffee kick. For an alcohol-free version, simply omit the liqueur or use a non-alcoholic almond extract mixed with a little water or coffee syrup.
- Egg Yolks – In this traditional **tiramisu recipe**, egg yolks are crucial. They provide the mascarpone filling with its signature rich, custard-like texture and contribute significantly to its structural integrity, ensuring your layers hold beautifully. Using tempered egg yolks, as outlined in this recipe, is a safe and traditional method, eliminating the need for raw eggs while preserving their beneficial qualities.
- Mascarpone Cheese – This is the creamy heart of **tiramisu**. Mascarpone is a luxurious, soft Italian cheese with an incredibly rich, buttery taste and a smooth, velvety texture. It boasts a higher fat content than regular cream cheese, which is key to its opulent mouthfeel and delicate sweetness. Do not substitute with regular cream cheese if you can help it, as cream cheese has a tangier, firmer profile that will significantly alter the authentic flavor and texture of your tiramisu. Ensure your mascarpone is cold when you begin to prevent curdling.
- Heavy Cream – Whipped heavy cream is folded into the mascarpone mixture to lighten it, infusing the filling with an airy, delicate texture. This aeration is vital for creating that cloud-like consistency that makes **tiramisu** so heavenly. Always use cold heavy cream, as it whips up much more easily and holds its peaks better.
- Ladyfingers (Savoiardi) – Also known as savoiardi, these dry, light, and somewhat crisp sponge cookies are the perfect vehicle for soaking up the espresso and Amaretto mixture. Their porous nature allows them to absorb moisture without becoming overly soggy, providing a delightful textural contrast. While some home cooks use sponge cake, genuine **classic tiramisu** relies on ladyfingers for their authentic flavor and ideal absorption qualities.
- Cocoa Powder – A generous dusting of unsweetened cocoa powder is the finishing touch, adding a final layer of subtle chocolate bitterness and a beautiful visual appeal. You can use either natural or Dutch-processed cocoa powder; natural cocoa offers a slightly fruitier, sharper chocolate note, while Dutch-processed is smoother and darker.
Crafting Your Masterpiece: A Step-by-Step Guide to Traditional Tiramisu
1. Prepare the Espresso Mixture
- Combine the freshly brewed espresso, hot water, and Amaretto liqueur in a medium-sized mixing bowl. It’s important to choose a bowl wide enough to comfortably dip your ladyfingers, ensuring even saturation. Stir well to fully incorporate the flavors. This mixture is the crucial liquid bath that will infuse your ladyfingers with that iconic coffee and almond flavor. Ensure the mixture is warm, not scorching hot, to prevent the ladyfingers from disintegrating upon contact.
2. Create the Velvety Mascarpone Filling
This is the heart of your **tiramisu**, where richness meets airy perfection.
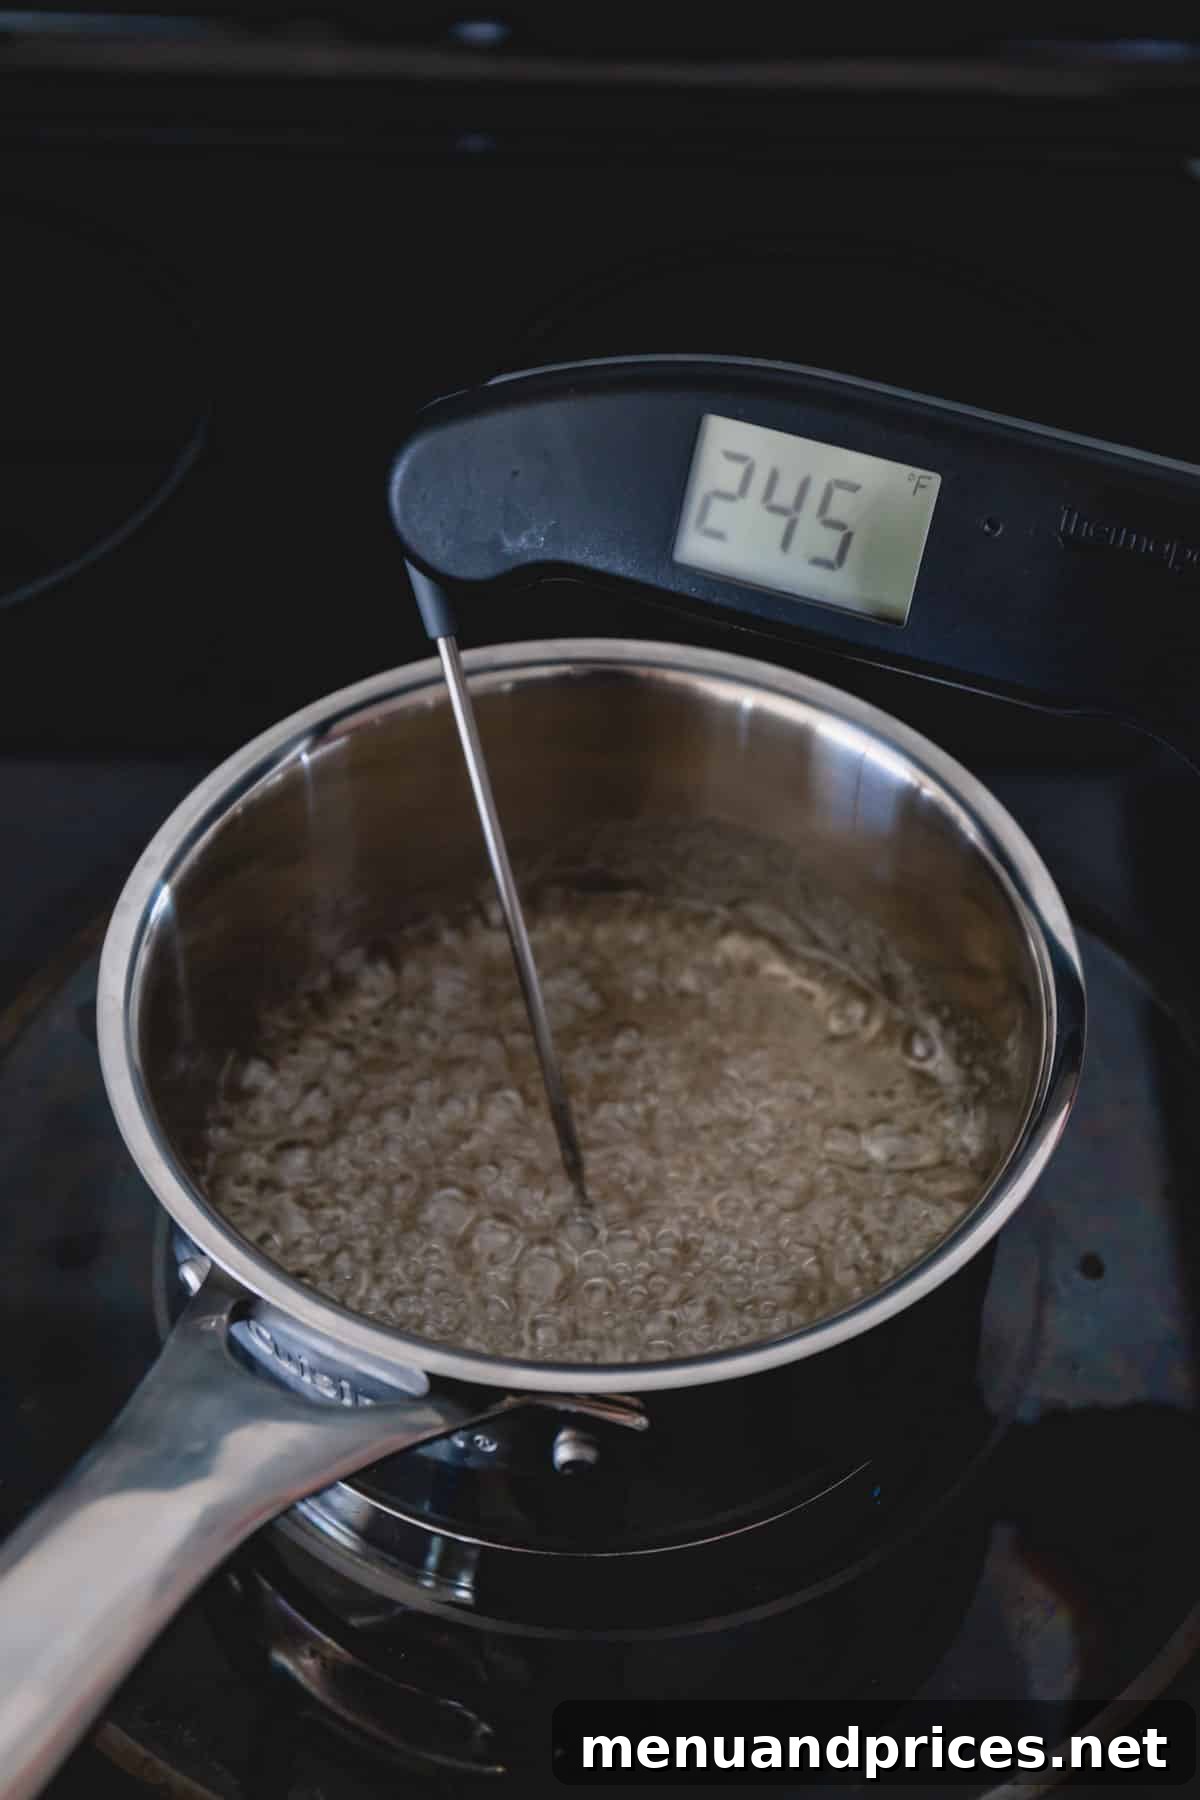
- Combine the granulated sugar and 2 tablespoons of water in a small, heavy-bottomed saucepan. Place it over medium heat.
- Bring the mixture to a boil, stirring occasionally until the sugar dissolves. Continue to cook, without stirring, for approximately 8 minutes, or until the sugar syrup reaches a precise temperature of 244°F (118°C) on a candy thermometer. This process creates a hot sugar syrup essential for tempering the egg yolks safely and achieving a stable, luscious filling.
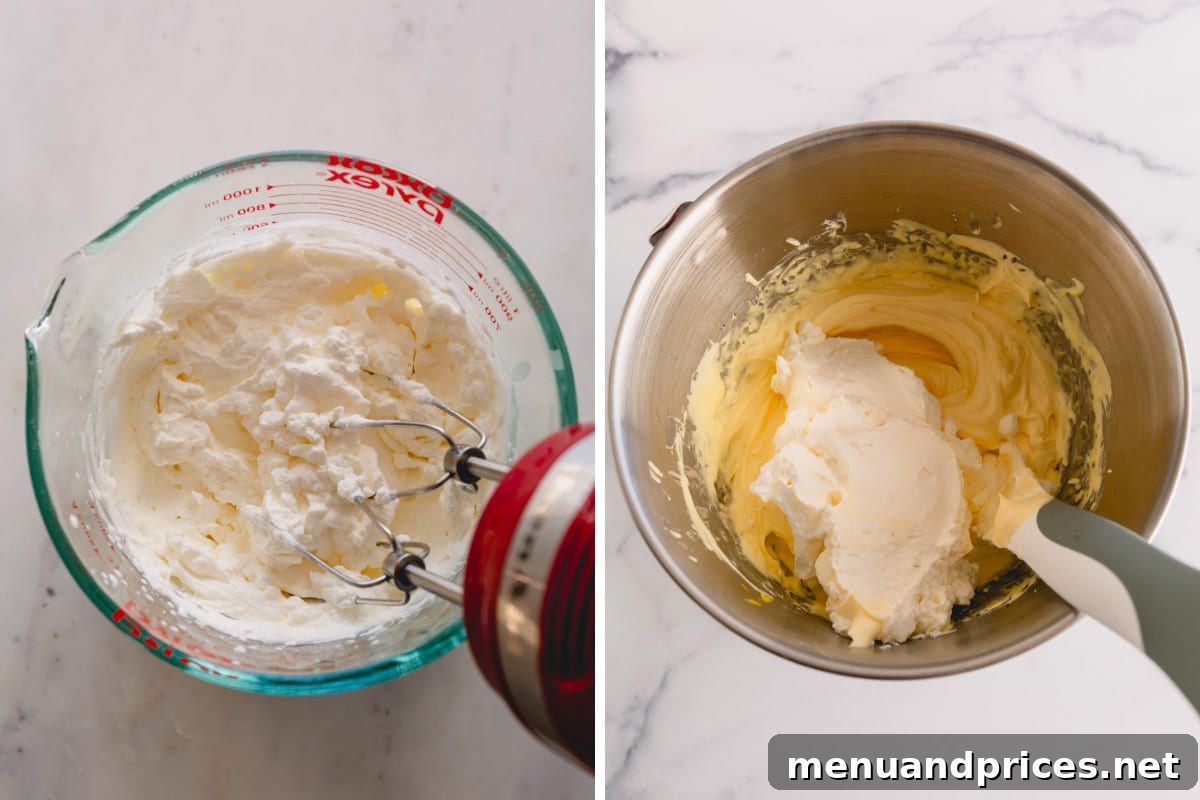
- In the bowl of an electric stand mixer fitted with the whisk attachment, add the egg yolks. Beat the yolks on medium-high speed until they transform into a pale yellow color and become light and fluffy, usually taking about 5 minutes. This aeration is key to the filling’s texture.
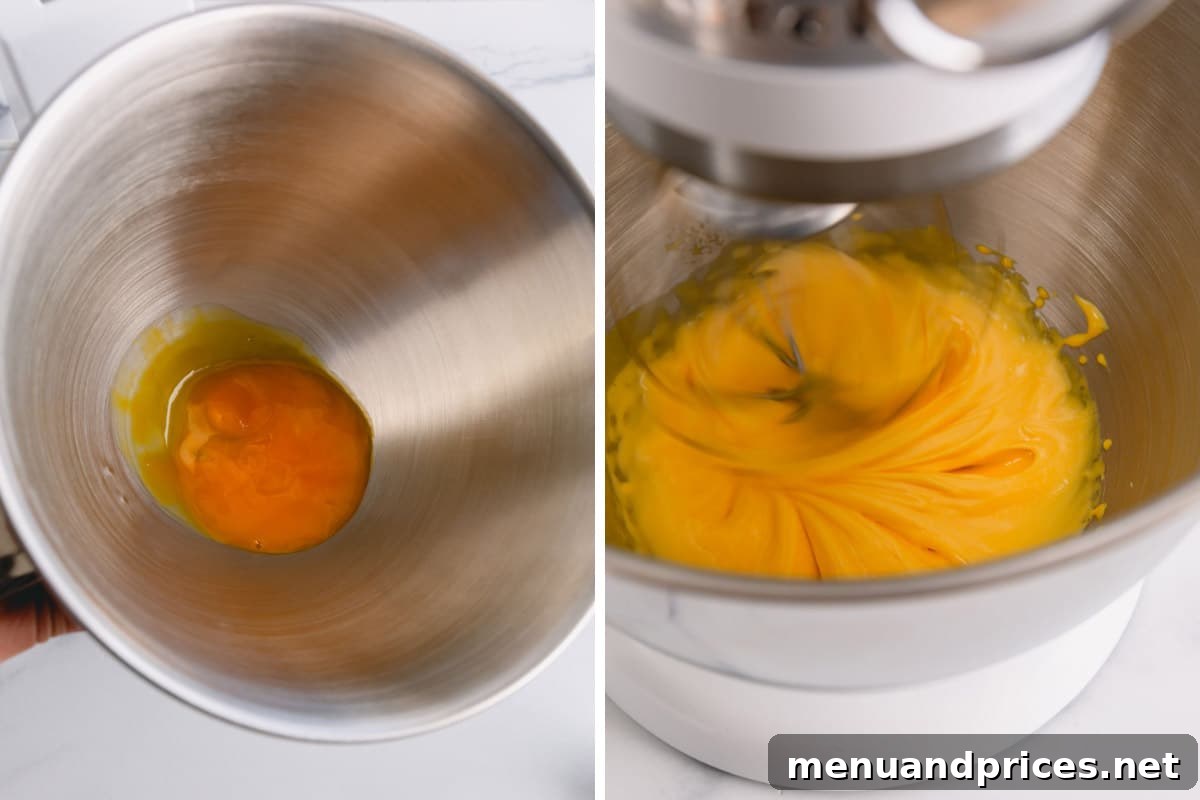
- With the mixer still running on low speed, slowly and carefully pour the hot sugar syrup into the beaten egg yolks in a thin, steady stream. This tempering process gently cooks the yolks, making them safe to consume while creating a stable emulsion. Be careful not to pour directly onto the whisk, as it might splatter.
- Once all the syrup is added, increase the mixer speed to medium-high and beat for another 4 minutes. The mixture will cool down and become even thicker and paler.
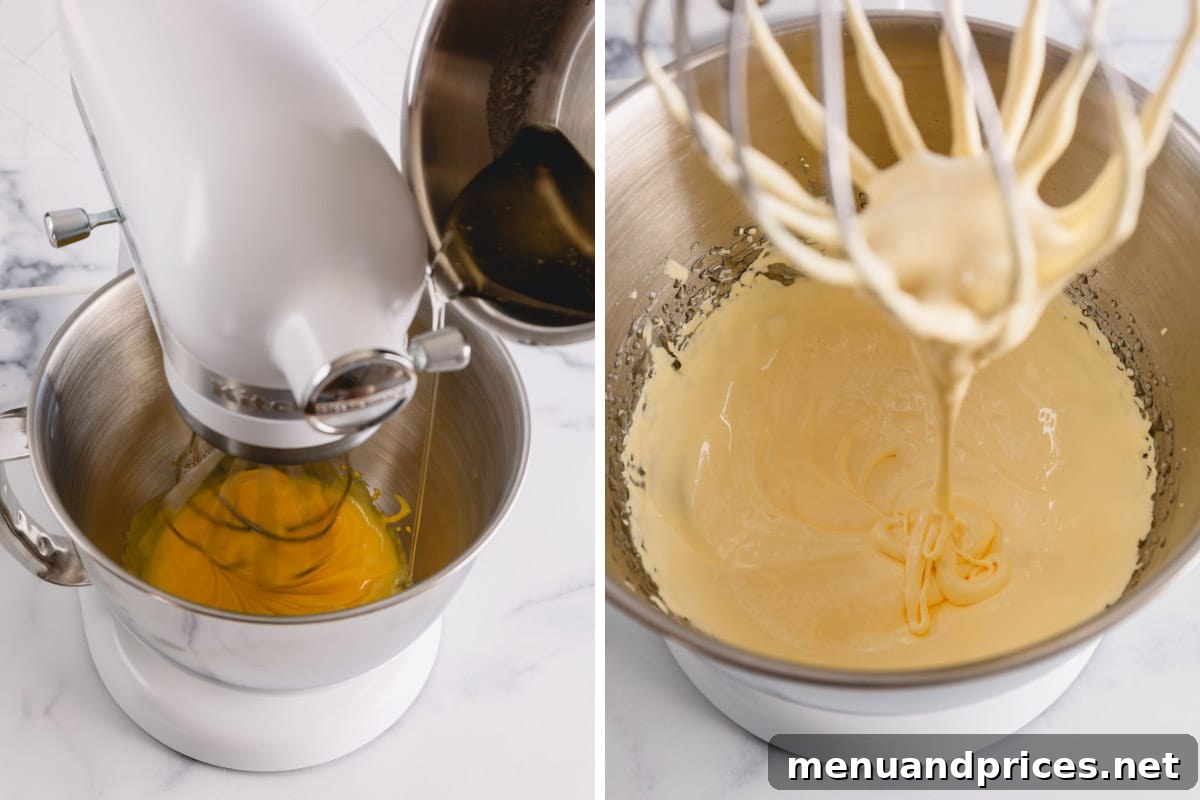
- Add the cold mascarpone cheese and pure vanilla extract to the yolk mixture. Whip on low speed just until combined and smooth, about 30 seconds.
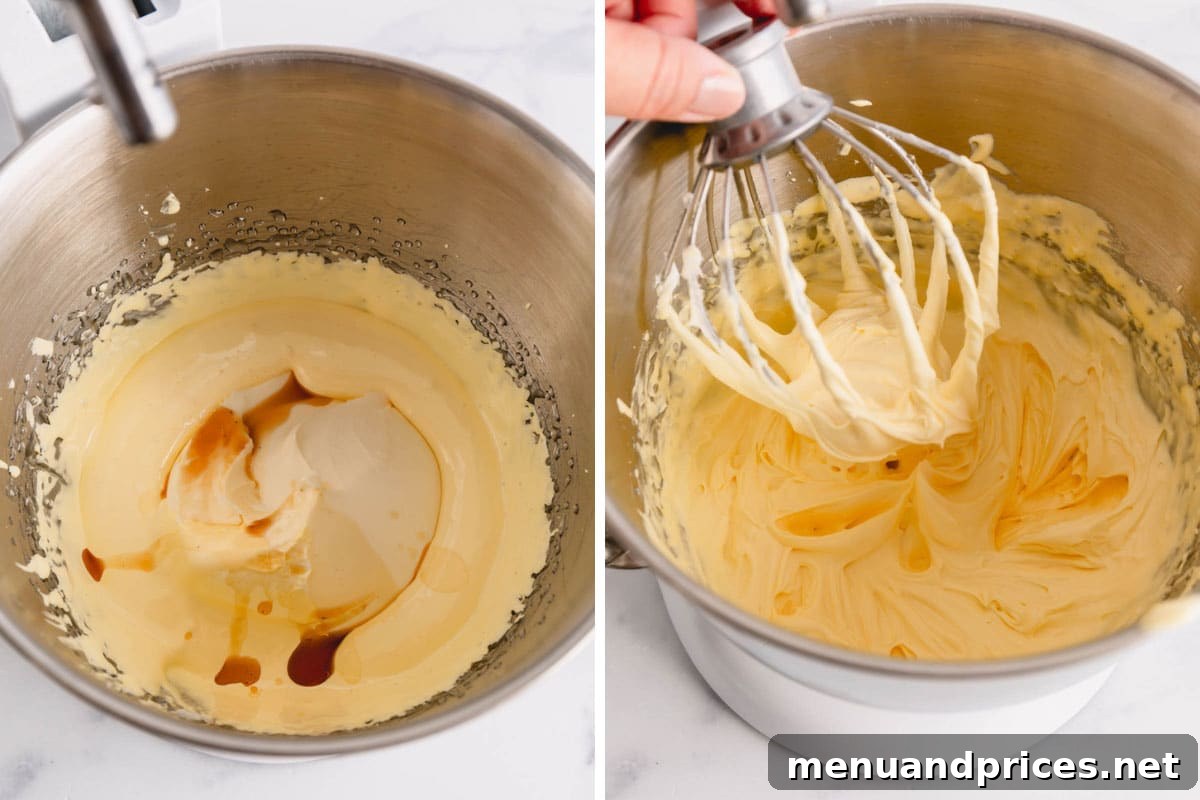
A Critical Tip: Avoid Overwhipping!
When incorporating the mascarpone, be extremely cautious not to overmix. Whip it just until it achieves a smooth, unified, and fluffy consistency. Continuing to whip for too long can cause mascarpone cheese, which is a delicate fresh cheese, to curdle and separate, resulting in a grainy texture and an unappealing taste. Stop the mixer as soon as it’s fully combined and looks uniform.
- In a separate, clean mixing bowl, pour the very cold heavy cream. Using the whisk attachment, whip the cream on medium-high speed until stiff peaks form. The cream should be thick and hold its shape.
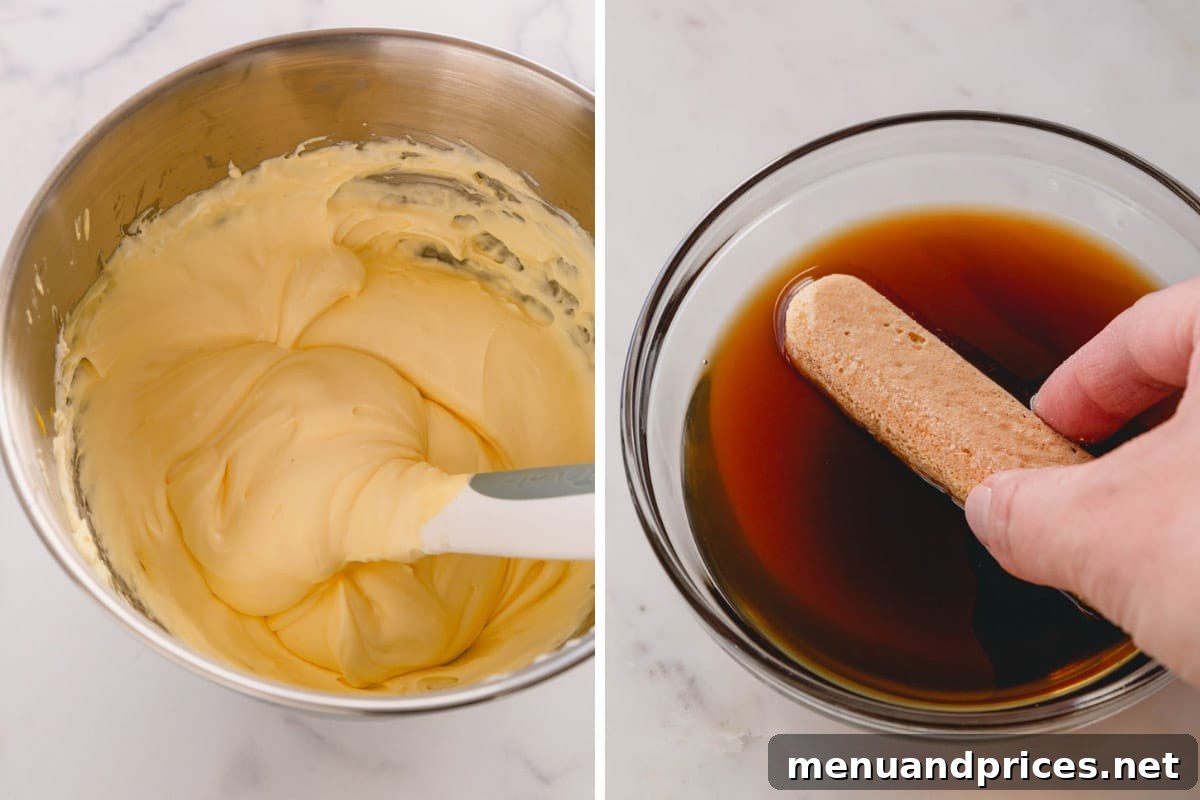
- With a rubber spatula, gently fold the whipped cream into the mascarpone mixture. Use a light hand and fold just until no streaks of white cream remain. Over-folding can deflate the cream and make your filling less airy. This step ensures the characteristic light and delicate texture of the **tiramisu** filling.
3. Assemble Your Layers of Delight
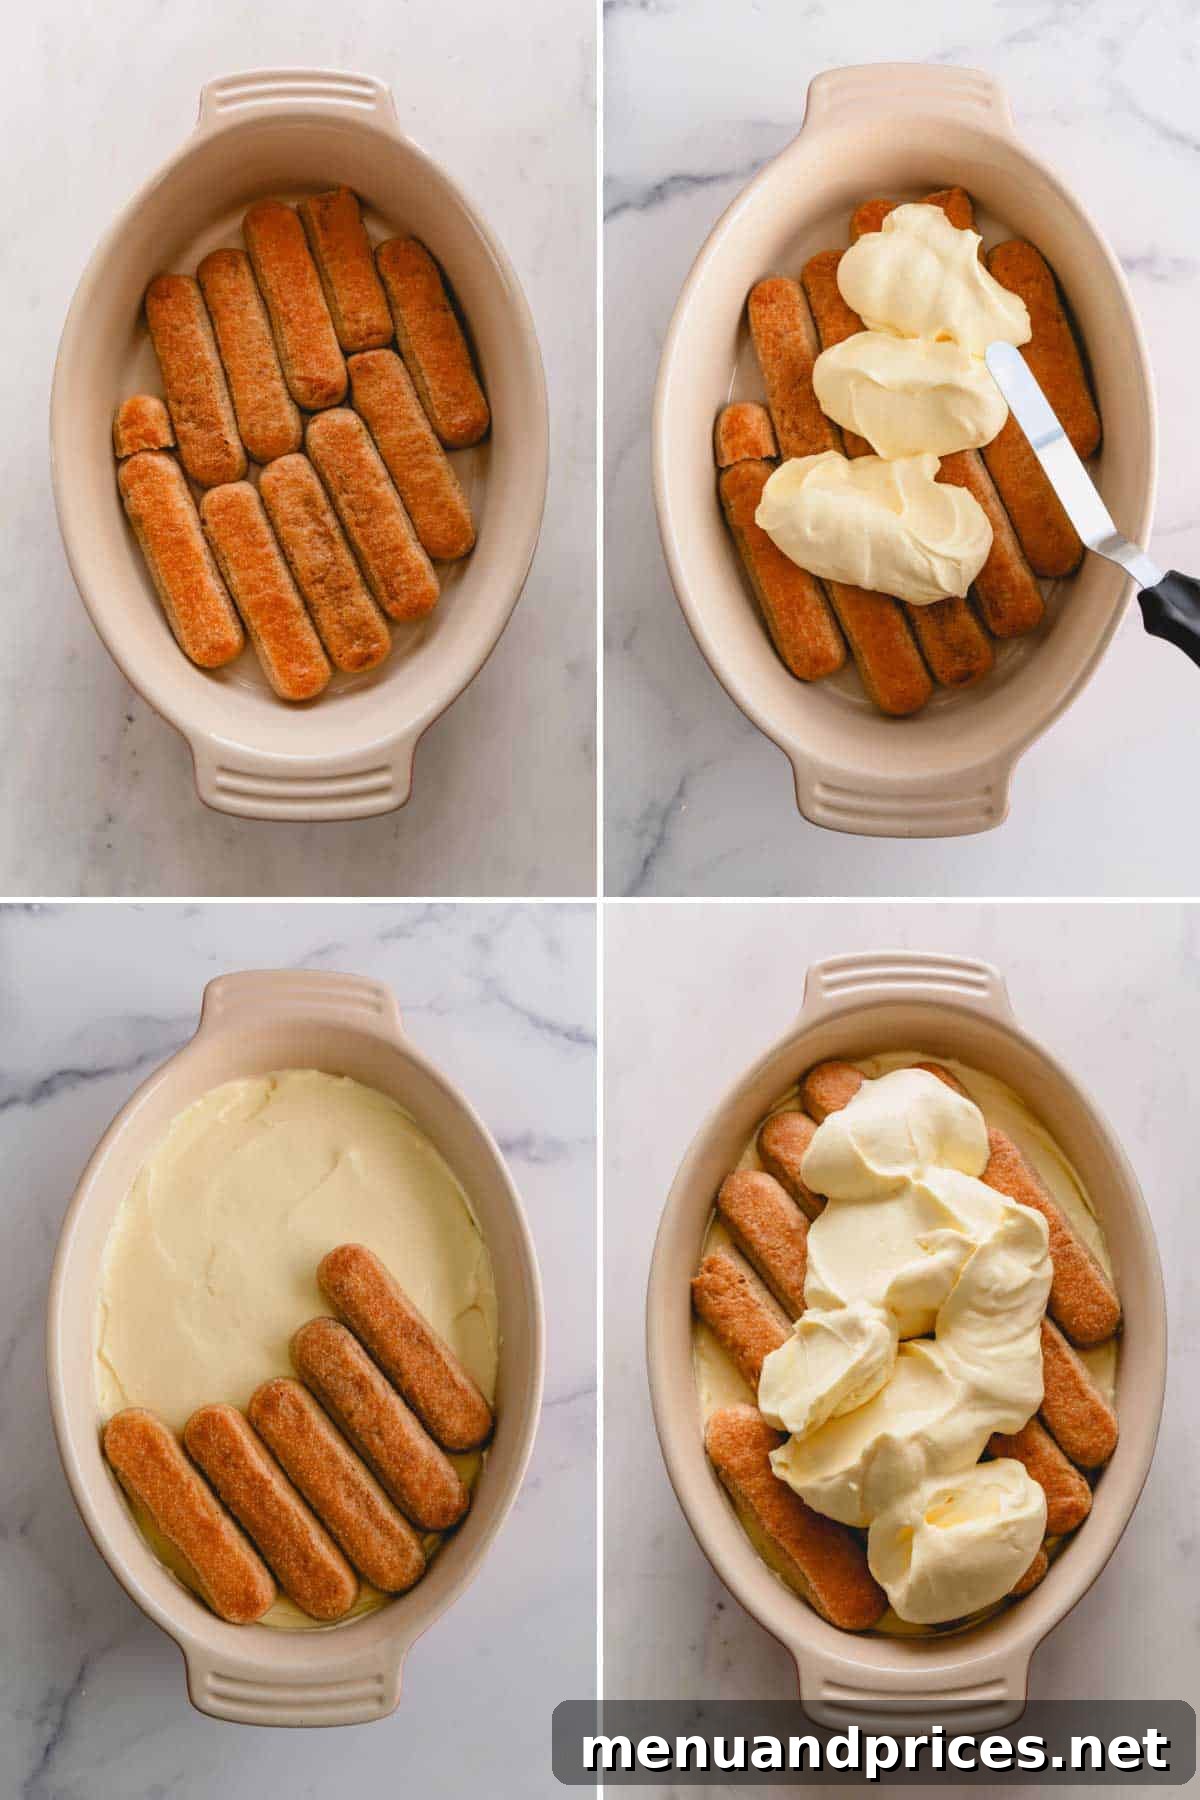
- Prepare an 8×8-inch baking dish (or a similarly sized rectangular dish). Quickly dip 10-11 ladyfingers, one at a time, into the espresso mixture. Each ladyfinger should be submerged for only 2-3 seconds per side – just long enough to soak up the liquid without becoming soggy.
- Carefully arrange these soaked ladyfingers in a single, even layer at the bottom of your prepared baking dish. If needed, you can break some ladyfingers to fill any gaps, ensuring a solid base.
- Spread half of the prepared mascarpone filling evenly over the first layer of soaked ladyfingers. Use an offset spatula or the back of a spoon to create a smooth, consistent layer.
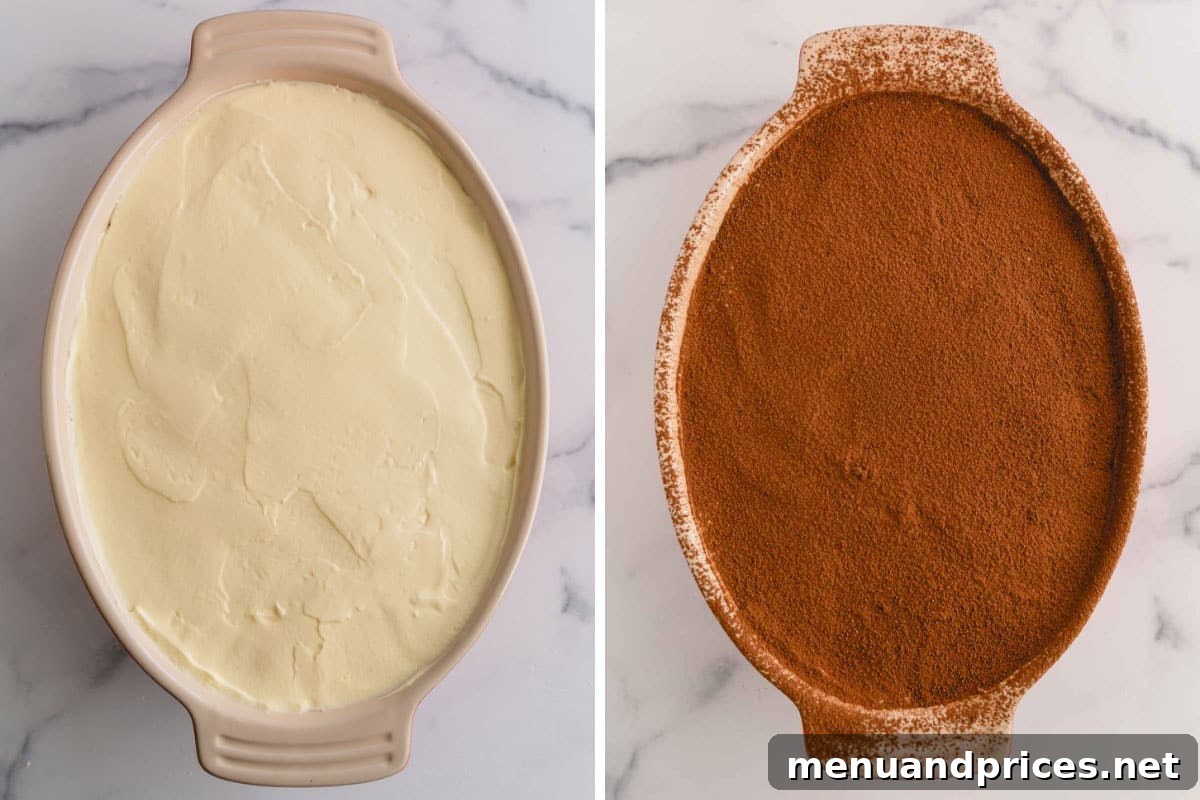
- Repeat the layering process one more time: dip the remaining 10-11 ladyfingers in the espresso mixture (again, quick dips!) and arrange them as the second layer. Then, gently spread the remaining half of the mascarpone filling over these ladyfingers, smoothing the top surface beautifully.
- For the final flourish, dust a generous amount of unsweetened cocoa powder over the entire top surface of the assembled cake. You can use a fine-mesh sieve for an even, elegant coating. This adds a crucial touch of bitterness and a beautiful visual contrast.
- Once dusted, cover the dish tightly with plastic wrap and refrigerate it overnight (or for at least 8 hours) before serving. This crucial chilling period allows the flavors to meld beautifully and the layers to set perfectly, resulting in an optimal texture and taste. Enjoy your perfectly crafted **homemade tiramisu**!
Unlock Tiramisu Perfection: Expert Tips for Success
Achieving a truly exceptional **classic tiramisu** is within reach with these essential tips:
- The Ladyfinger Dunk: Speed is Key! – This is perhaps the most critical step. When dipping the ladyfingers into the espresso and Amaretto mixture, be incredibly swift. A quick 2-3 second dip per side is usually sufficient. You want them to be thoroughly coated and flavored but not so saturated that they become soggy and fall apart. Over-soaked ladyfingers will result in a mushy, unappealing texture, while under-soaked ones will be too dry.
- Espresso: The Uncompromisable Foundation – For that signature strong coffee flavor that defines **authentic tiramisu**, do not use regular drip coffee. Only freshly brewed espresso or high-quality instant espresso powder (mixed as directed) will provide the necessary intensity. If you don’t have an espresso machine, a trip to your local coffee shop for a few shots is a small investment that makes a huge difference in flavor.
- Chill Your Heavy Cream – The colder your heavy cream, the more easily and effectively it will whip up into stiff peaks. Keep it in the refrigerator until the very moment you’re ready to whip it. A cold bowl and whisk attachment can also help speed up the process.
- The Magic of Overnight Chilling – Patience is a virtue when it comes to **tiramisu**. While it’s tempting to dive in sooner, allowing the cake to chill overnight (at least 8 hours, but ideally 12-24) is non-negotiable. This extended refrigeration period allows the distinct layers to fully set, the flavors to thoroughly meld and deepen, and the textures to reach their optimal creamy, yet structured, perfection.
- Precision with Syrup Temperature – When making the sugar syrup for tempering the egg yolks, using a reliable candy thermometer is highly recommended. Reaching exactly 244°F (118°C) ensures the syrup is hot enough to safely cook the yolks and create a stable base for your cream, contributing to both safety and texture.
- Scrape Down the Bowl – During the whipping stages, especially with the egg yolks and mascarpone, periodically stop your mixer and scrape down the sides and bottom of the bowl with a rubber spatula. This ensures all ingredients are thoroughly incorporated and prevents unmixed pockets.
- Gentle Folding Technique – When combining the whipped cream with the mascarpone mixture, use a gentle folding motion. This preserves the air incorporated into the heavy cream, keeping your final filling light and airy rather than dense.
Smart Make-Ahead Strategies for Effortless Entertaining
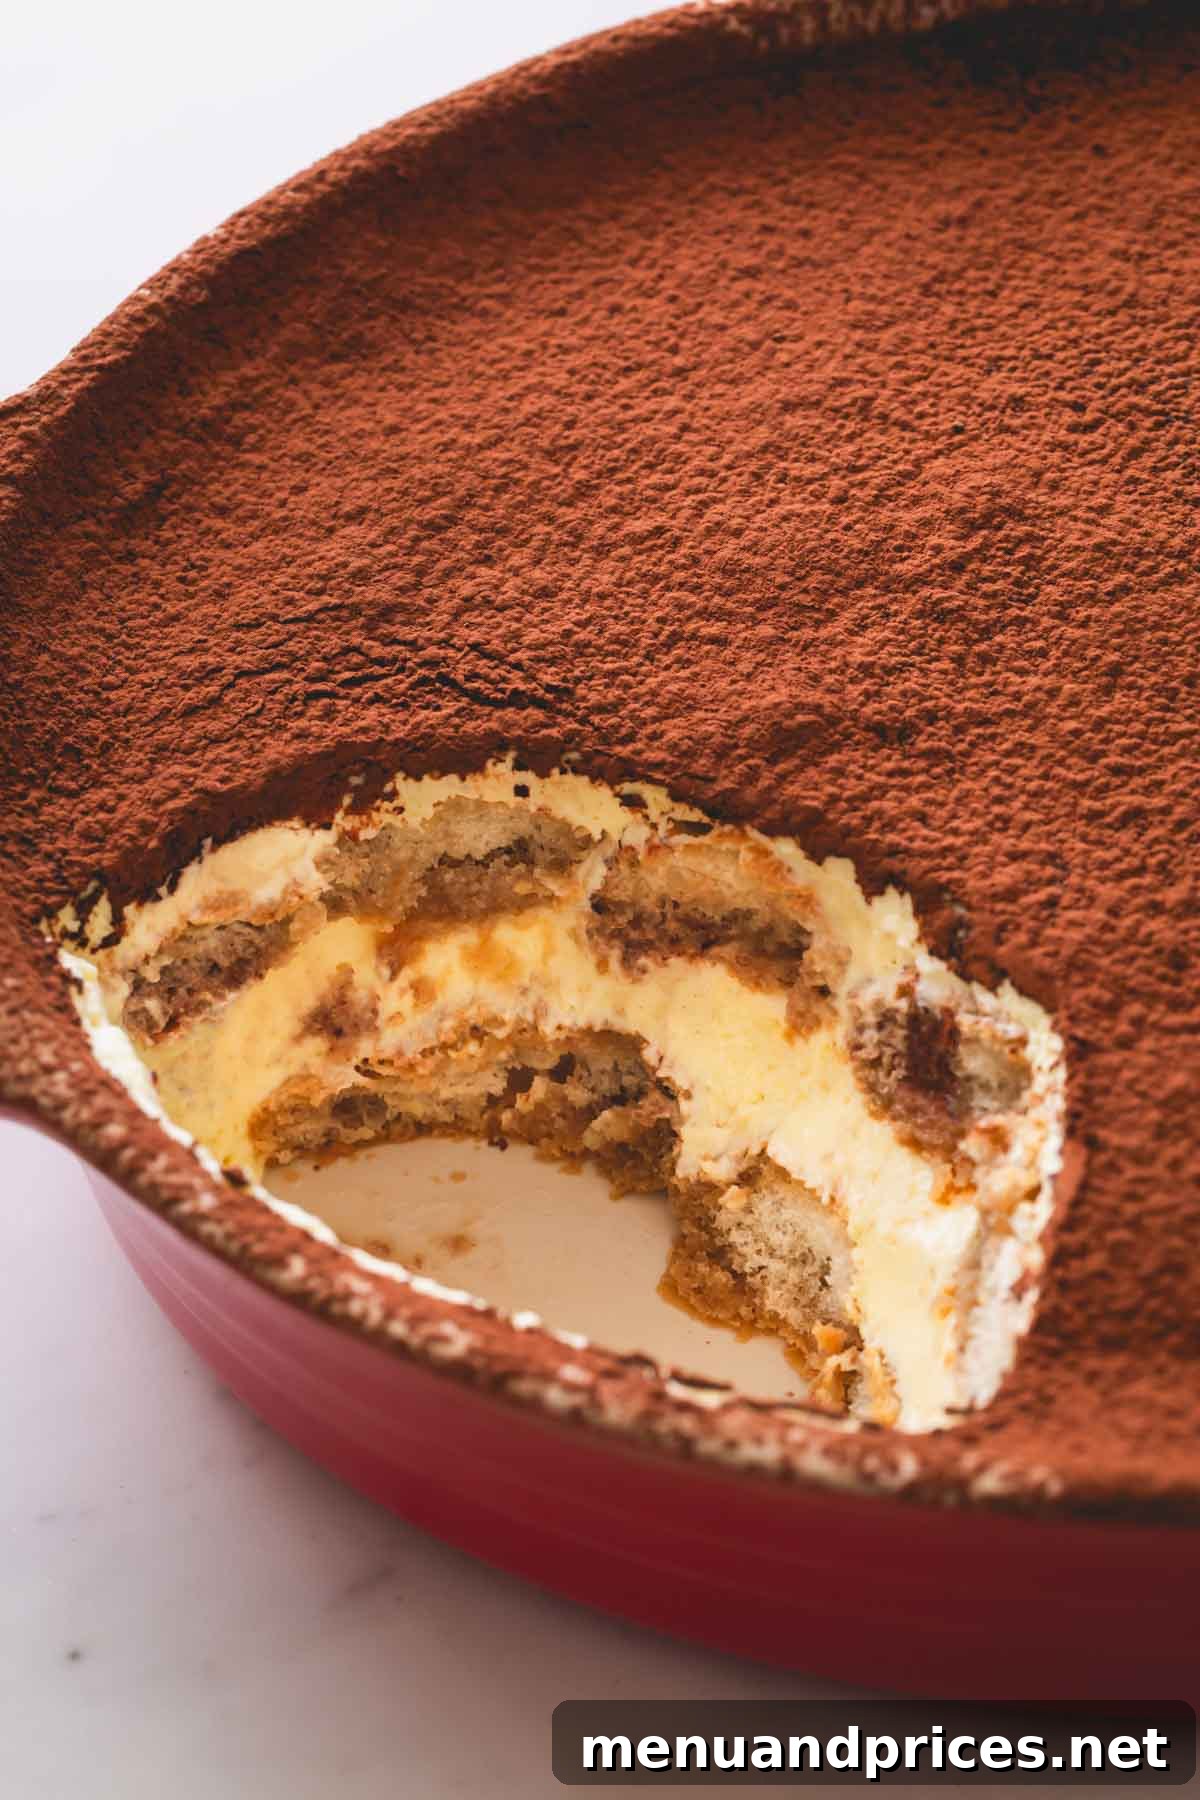
One of the many charms of **classic tiramisu recipes** is their inherent make-ahead nature, which actually enhances their flavor and texture. This dessert thrives with time! For optimal results, plan on assembling your tiramisu at least 12-24 hours before you intend to serve it. This extended chilling period in the refrigerator is absolutely crucial, allowing the various components to marry their flavors and the mascarpone cream to set to its ideal, sliceable consistency. The ladyfingers fully soften and absorb the coffee and liqueur, and the overall taste deepens, creating a much more harmonious and enjoyable dessert on day two than on day one. Prepare it the evening before your event, and you’ll have a perfectly delicious, stress-free dessert ready to go!
Preserving Your Tiramisu: Storage and Freezing Advice
To ensure your **homemade tiramisu** remains fresh and delightful for as long as possible, follow these storage guidelines:
- Refrigeration: Any leftover tiramisu should be stored in an airtight, covered dish in the refrigerator. When properly stored, it will maintain its exquisite taste and texture for 4-5 days. Ensure it’s well-covered to prevent it from absorbing any odors from other foods in your fridge.
- Freezer-Friendly Option: Yes, assembled tiramisu is surprisingly freezer-friendly! If you’re making a batch far in advance or simply want to save some for a rainy day, prepare the tiramisu in a freezer-safe container. Importantly, **do not add the final dusting of cocoa powder before freezing.** Cover the cake tightly with plastic wrap and then with a layer of aluminum foil to prevent freezer burn. It can be frozen for up to 3 months.
- Thawing Frozen Tiramisu: When you’re ready to enjoy your frozen **tiramisu**, transfer the covered dish to the refrigerator and let it thaw slowly overnight. Once fully thawed, you can then add the generous dusting of cocoa powder right before serving to give it that fresh, authentic finish.
Your Tiramisu Questions Answered: FAQs
The distinctions between Italian and American tiramisu often stem from traditional ingredients and preparation methods. **Authentic Italian tiramisu** typically utilizes raw egg yolks (though increasingly, recipes, like ours, opt for tempered yolks for safety) and Marsala wine, which imparts a unique, complex flavor. American versions, however, commonly omit raw eggs entirely or use pasteurized eggs, and often experiment with a wider range of liqueurs such as Amaretto, rum, brandy, or coffee liqueurs, adapting to regional preferences and safety concerns.
Yes, most **classic tiramisu recipes**, including this one, traditionally incorporate alcohol. The dipping mixture for the ladyfingers typically includes a blend of strong coffee (espresso) and a chosen liqueur, like Amaretto, Marsala, or rum. This addition is integral to achieving the authentic depth of flavor and characteristic aroma of the dessert. It’s important to understand that if the liquor or wine is not heated and cooked off during preparation (which is usually the case in a no-bake tiramisu), the final dessert will retain a slight alcohol content. If you prefer an alcohol-free version, you can simply omit the liqueur or substitute it with non-alcoholic extracts or syrups, maintaining the rich flavor profile.
Mascarpone cheese is truly what makes **tiramisu** unique, thanks to its distinct rich, creamy, and slightly sweet profile. While it can sometimes be challenging to find outside of specialty food stores, its unique qualities are hard to replicate exactly. Among potential substitutes, cream cheese is often mentioned, but it’s crucial to note that it will yield a different result. Cream cheese has a tangier flavor and a firmer texture compared to mascarpone’s buttery smoothness. While you can use it in a pinch, be prepared for your tiramisu to have a slightly different taste and texture. For the most **authentic tiramisu** experience, seeking out genuine mascarpone is highly recommended.
The key to preventing soggy ladyfingers is a quick dip. Submerge each ladyfinger for no more than 2-3 seconds per side. The porous nature of the cookies means they absorb liquid very rapidly. A common mistake is to let them soak too long. You want them just saturated enough to be flavorful and tender, but still hold their shape and provide a slight textural contrast to the cream. Trust the process, and err on the side of less soaking rather than more!
Yes, it is possible to make tiramisu without eggs, and many recipes exist for an egg-free version, often combining mascarpone with whipped cream and powdered sugar. However, traditional tiramisu, like this recipe, uses egg yolks for richness, color, and a more stable, custard-like texture in the filling. While an egg-free version can be delicious, it will have a slightly different flavor and a lighter, airier consistency compared to the classic preparation.
Explore More Decadent Dessert Recipes
If you’ve enjoyed mastering this **classic tiramisu**, you might love these other delightful dessert creations from our kitchen:
- Tiramisu Layer Cake – A stunning cake rendition of your favorite flavors.
- No-Bake Neapolitan Cheesecake – Three delightful flavors in one easy cheesecake.
- Chocolate Cake with Mocha Frosting – A rich and indulgent chocolate lover’s dream.
- No-Bake Chocolate Truffle Tart – Decadent, smooth, and incredibly easy.
Classic Tiramisu
Comment
Print Recipe
Ingredients
- 2 oz freshly brewed espresso 2 shots Note 1
- ¾ cup (175 ml) hot water
- ½ cup (120 ml) Amaretto liqueur Note 2
- ½ cup (100 g) granulated sugar
- 2 tablespoons (30 g) water
- 4 (72 g) egg yolks
- 8 oz (225 g) mascarpone cheese cold Note 3
- 1 teaspoon pure vanilla extract
- 1 cup (240 ml) heavy cream cold
- 20-22 ladyfingers
- 2 tablespoons unsweetened cocoa powder natural or Dutch-processed
Equipment
-
1 Stand Mixer with a Whisk Attachment
-
1 (8×8) Baking Dish
-
1 Candy Thermometer
Instructions
To prepare the espresso mixture:
-
In a medium bowl wide enough to accommodate ladyfingers, combine freshly brewed espresso, hot water, and Amaretto liqueur. Stir gently to combine.2 oz freshly brewed espresso, ¾ cup hot water, ½ cup Amaretto liqueur
To make the filling:
-
In a small saucepan, combine granulated sugar and 2 tablespoons of water. Bring the mixture to a rolling boil over medium heat, then cook without stirring until the syrup reaches precisely 244°F (118°C) on a candy thermometer, which typically takes about 8 minutes.½ cup granulated sugar, 2 tablespoons water
-
In the bowl of a stand mixer fitted with the whisk attachment, beat the 4 egg yolks on medium-high speed until they turn a pale yellow color and become light and fluffy, approximately 5 minutes.4 egg yolks
-
While the mixer is still running on low speed, slowly and carefully pour the hot sugar syrup into the beaten egg yolks in a thin, steady stream. Once all the syrup is added, increase the mixer speed to medium-high and continue to beat for another 4 minutes until the mixture cools and thickens.
-
Reduce the mixer speed to low. Add the cold mascarpone cheese and pure vanilla extract, then whip gently until just combined and smooth, about 30 seconds. Be careful not to overmix the mascarpone.8 oz mascarpone cheese, 1 teaspoon pure vanilla extract
-
In a separate, clean mixing bowl, pour the cold heavy cream. Whip on medium-high speed until stiff peaks form and the cream holds its shape.1 cup heavy cream
-
Gently fold the whipped cream into the mascarpone mixture using a rubber spatula until well combined and no streaks of white cream remain. Take care not to deflate the cream.
To assemble the cake:
-
Have your 8×8-inch baking dish (or equivalent) ready.
-
Quickly dip 10-11 ladyfingers, one at a time, into the espresso mixture for only 2-3 seconds per side. Arrange them in a single, even layer at the bottom of the prepared baking dish.20-22 ladyfingers
-
Spread half of the mascarpone filling evenly over the first layer of ladyfingers.
-
Repeat the layers one more time with the remaining ladyfingers (dipped) and the rest of the filling, smoothing the top surface.
-
Generously dust the entire top of the assembled tiramisu with unsweetened cocoa powder. Cover the dish tightly with plastic wrap and refrigerate overnight (or for at least 8 hours) to allow the flavors to meld and the dessert to set. Enjoy!2 tablespoons unsweetened cocoa powder
⭐️ Did you make this recipe?
Please leave a review and let us know how you liked it!
Tips & Notes
Note 2: Amaretto is a sweet and aromatic almond-flavored liqueur that complements the coffee and mascarpone flavors in tiramisu. You can also use Disaronno, which is a popular brand of amaretto liqueur.
Note 3: Cold mascarpone cheese will help preventing the filling from splitting. Mascarpone cheese is what makes tiramisu a tiramisu. While cream cheese might be a possible substitute, it has slightly sweeter and tangier flavor, which will affect the flavor of the final tiramisu.
Storing Tips:
– Store leftover tiramisu in a covered dish in the fridge for 4-5 days.
– Assembled tiramisu is freezer-friendly, too! Prepare the tiramisu in a freezer-safe container, and don’t add the layer of cocoa powder. Cover the cake, and freeze it for up to 3 months.
– Let the frozen cake thaw in the fridge overnight, and add the cocoa powder when you’re ready to serve.
Nutrition