

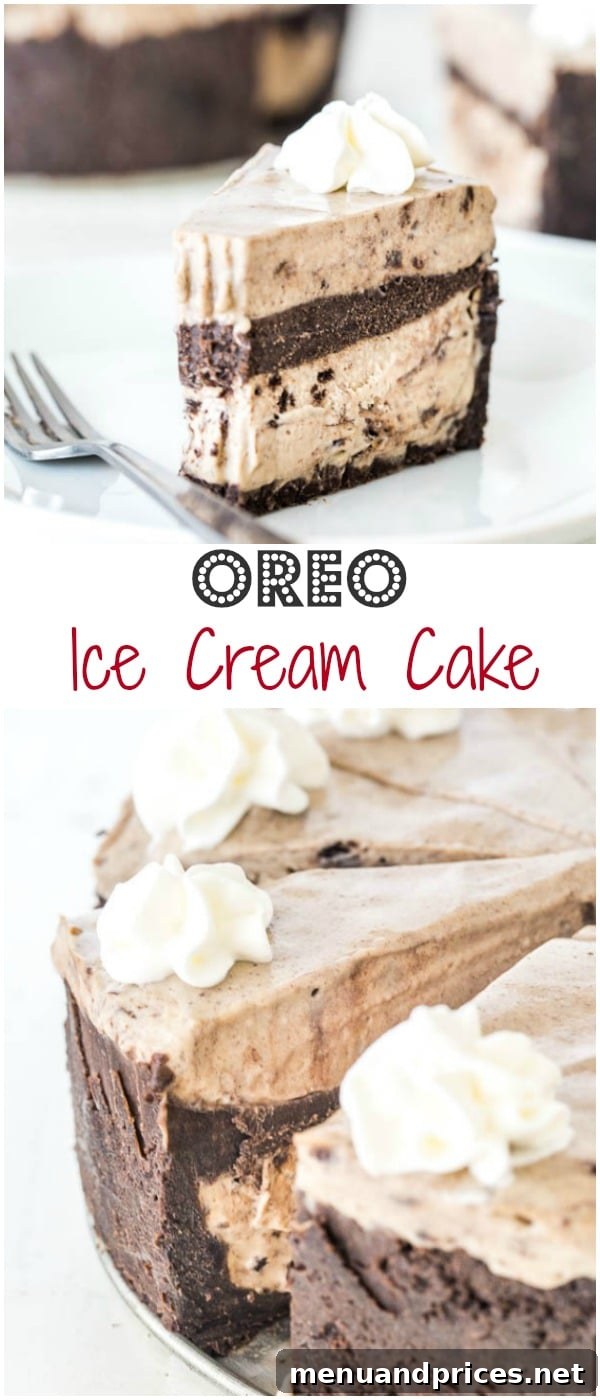
Ultimate No-Bake Oreo Ice Cream Cake: The Perfect Summer Treat
When the sun is shining brightly and the temperatures soar, the last thing anyone wants to do is turn on the oven. That’s where the magic of a no-bake dessert truly shines! Imagine a dessert so rich, so decadent, and so incredibly easy to make that it becomes your go-to for every summer celebration. Introducing the Ultimate No-Bake Oreo Ice Cream Cake — a masterpiece of flavor and texture that promises double the layers and double the goodness!
This isn’t just any ice cream cake; it’s a symphony of crumbly Oreo crust, smooth, creamy ice cream, and chunks of America’s favorite cookie in every bite. Whether you’re hosting a backyard barbecue, a birthday party, or simply craving a refreshing indulgence, this Oreo ice cream cake is a guaranteed crowd-pleaser. It’s effortless elegance packed with irresistible flavor, making it the ideal centerpiece for any gathering. Forget the stress of baking; this recipe brings pure joy with minimal fuss.
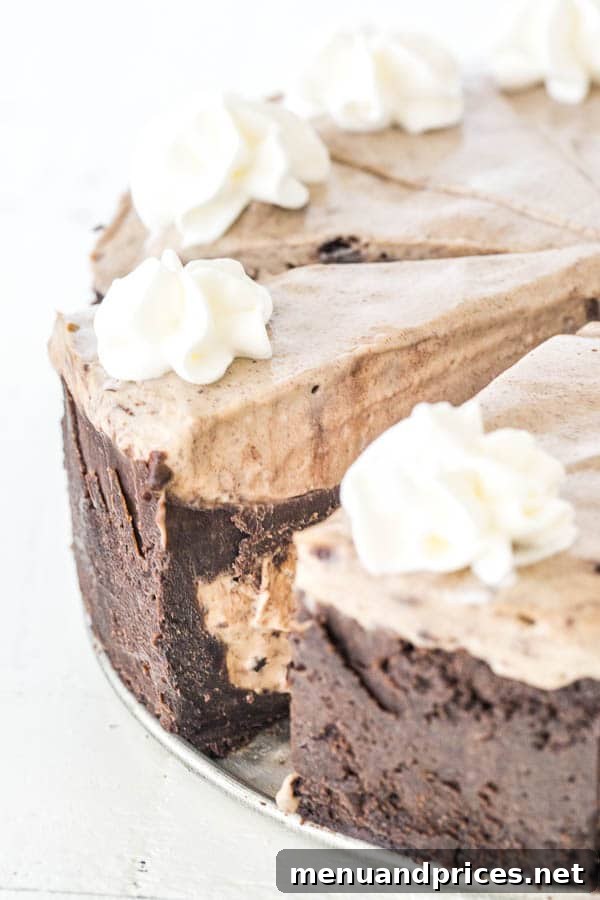
Why This No-Bake Oreo Ice Cream Cake Will Be Your New Favorite
Summer is synonymous with ease, fun, and delicious food that doesn’t demand hours in a hot kitchen. While I adore baking and often find myself cranking up the AC just to enjoy the process, there’s an undeniable allure to no-bake desserts. They offer a refreshing escape from the heat, delivering incredible flavor without the need for an oven. This Oreo ice cream cake perfectly embodies that spirit, offering a delightful treat that’s both simple to assemble and spectacular to behold.
What makes this particular no-bake dessert an absolute winner? Let’s count the reasons:
- The Irresistible Allure of Oreos: Let’s be honest, few cookies evoke as much joy as an Oreo. Their distinct chocolatey crunch and sweet cream filling are universally loved, forming the perfect foundation and texture contrast for this frozen dessert.
- The Ultimate Summer Chill: Ice cream is the quintessential summer treat. It cools you down, satisfies your sweet tooth, and brings a smile to everyone’s face. Combining it with Oreos creates an extraordinary dessert experience.
- Celebration Ready: Whether it’s a birthday, an anniversary, or just a beautiful sunny day, cake is a must-have for celebrations. This ice cream cake elevates any occasion, offering a festive and memorable dessert without any baking hassle.
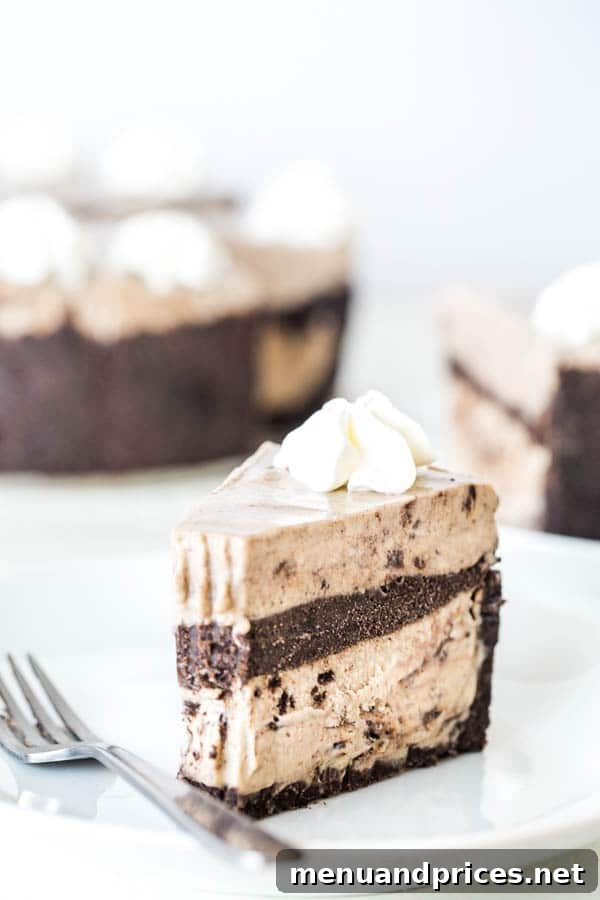
Diving Deep into the Layers: A Symphony of Sweetness and Crunch
This magnificent no-bake Oreo ice cream cake is constructed with layers designed for maximum impact and pure indulgence. We start with a rich, buttery Oreo crust that forms a sturdy and flavorful base. This isn’t just a single layer; we double down on the goodness with an additional layer of crust nestled within the ice cream. Between these delightful cookie layers, you’ll find uber-creamy Oreo ice cream — a velvety dream studded with crushed Oreo pieces. You can choose to use your favorite store-bought Oreo ice cream for ultimate convenience, or, for an extra touch of homemade magic, whip up your own homemade Oreo ice cream. There truly is no such thing as “too many Oreos” when it comes to this dessert!
Each spoonful delivers a perfect blend of creamy, crunchy, sweet, and cool. It’s a texture lover’s paradise and a flavor explosion that will leave everyone wanting more. While this treat is certainly not designed for a diet, every single calorie is undeniably worth it. The richness of this cake means that even a small slice goes a long way, making it an incredibly efficient and satisfying dessert for a crowd. It’s the perfect way to cap off a large meal, providing a sweet finish that feels special without being overly heavy. This dessert isn’t just food; it’s an experience.
Tips for Crafting Your Perfect Oreo Ice Cream Cake
Creating this no-bake marvel is straightforward, but a few tips can help ensure your Oreo Ice Cream Cake turns out absolutely perfect:
- Crust Consistency is Key: When making the Oreo crust, ensure the cookies are finely crushed. A food processor works best for this. The melted butter and cream cheese help bind the crumbs together for a firm, yet tender crust. Don’t skip the cream cheese; it adds a subtle tang and an extra layer of richness that truly elevates the crust.
- Chilling Time is Crucial: Patience is a virtue when making ice cream cakes. Ensure each layer of ice cream and crust is adequately frozen before adding the next. This prevents layers from merging and keeps the cake structurally sound. The final freeze overnight is highly recommended for the best results, allowing the cake to fully set and making for cleaner slices.
- Homemade vs. Store-Bought Ice Cream: If you’re opting for homemade ice cream, make sure it’s churned to a soft-serve consistency before layering. If using store-bought, let it soften at room temperature for about 15-20 minutes until it’s pliable enough to spread easily, but not completely melted.
- Springform Pan Essential: An 8-inch or 9-inch springform pan is your best friend for this recipe. It makes releasing the frozen cake incredibly easy, ensuring a beautiful presentation. Line the bottom with parchment paper for extra insurance against sticking.
- Serving Suggestion: For the cleanest slices, dip your knife in hot water and wipe it clean between each cut. This will glide through the frozen cake with ease.
Creative Variations and Topping Ideas
While the classic Oreo Ice Cream Cake is phenomenal on its own, don’t hesitate to get creative with variations and toppings to suit your taste or occasion:
- Flavor Twists: Experiment with different flavored Oreos! Golden Oreos, Mint Oreos, or even Peanut Butter Oreos can create exciting new flavor profiles. You could also swirl in caramel sauce, hot fudge, or peanut butter into the ice cream layers for added richness.
- Candy Mix-Ins: Fold in other crushed candies like M&M’s, Reese’s Peanut Butter Cups, or chopped candy bars into the ice cream for an extra burst of flavor and texture.
- Fruit Fusion: For a lighter, fresher touch, consider adding a layer of fresh berries (like strawberries or raspberries) between the ice cream layers. The tartness can wonderfully complement the sweetness of the Oreos.
- Decadent Drizzle: After slicing, drizzle individual servings with chocolate syrup, caramel sauce, or a berry coulis.
- Whipped Cream Wonderland: A generous topping of homemade whipped cream is a classic and visually appealing finish. You can pipe it decoratively for an extra fancy touch. Sprinkle with additional crushed Oreos or chocolate shavings for garnish.
Make Ahead and Storage Instructions
This no-bake Oreo Ice Cream Cake is the ultimate make-ahead dessert, perfect for stress-free entertaining. You can assemble the entire cake up to a week in advance. Simply ensure it’s tightly wrapped in plastic wrap and then aluminum foil to prevent freezer burn and absorb any odors from the freezer. Store it in the coldest part of your freezer.
When you’re ready to serve, transfer the cake from the freezer to the refrigerator about 15-20 minutes before slicing. This allows it to soften just slightly, making it easier to cut and ensuring a perfectly creamy texture. Any leftovers should be returned to the freezer immediately, well-wrapped, to maintain their quality.
Frequently Asked Questions (FAQs)
Here are some common questions about making this delightful Oreo Ice Cream Cake:
Q: Can I use a different type of cookie for the crust?
A: Absolutely! While Oreos are classic, you can substitute them with other sandwich cookies, Graham crackers, or even shortbread cookies. Adjust the amount of butter as needed to achieve the right consistency.
Q: Do I really need an ice cream maker for the homemade ice cream?
A: Yes, for the best results and creamiest texture, an ice cream maker is highly recommended. However, if you don’t have one, you can use a high-quality store-bought Oreo ice cream to simplify the recipe even further.
Q: My ice cream isn’t hardening. What went wrong?
A: Ensure your freezer is set to its coldest setting. Also, make sure the springform pan is sealed well and not allowing air to get in, which can affect freezing. The initial 30-minute freeze for the first layer is important to give it a head start, and the final 2-hour (or overnight) freeze is critical for a fully set cake.
Q: Can I make this in a regular cake pan?
A: A springform pan is ideal for easy removal and presentation. If using a regular cake pan, line it generously with plastic wrap, leaving an overhang on the sides. Once frozen, you can use the overhang to lift the cake out of the pan. It might not be as neat, but it will work!
Q: How many calories are in a slice?
A: Nutrition information can vary based on ingredients and portion sizes. Please refer to the detailed nutrition label provided in the recipe card for an estimate based on 12 servings.
Oreo Ice Cream Cake
Pin Recipe
Comment
Print Recipe
Ingredients
- 1 ½ cup 360ml heavy whipping cream
- ½ cup 120ml sweetened condensed milk, divided
- 1 teaspoon pure vanilla extract
- ¼ teaspoon salt
- 4 egg yolks
- 15 oz 430gr Oreo cookies
- ¼ cup 4 tablespoons unsalted butter, melted
- 2 tablespoons cream cheese softened
- Whipped cream for decoration optional
Instructions
-
To make the ice cream (if homemade), in a medium saucepan, combine ½ cup of heavy cream, half of the condensed milk, vanilla extract and salt. Bring this mixture to a gentle simmer over medium heat, stirring occasionally.
-
In a separate medium bowl, beat the egg yolks with the remaining condensed milk until the mixture becomes pale and slightly thickened.
-
To temper the egg yolk mixture, carefully pour about a cup of the hot cream mixture into the beaten egg yolks, whisking vigorously the entire time to prevent the eggs from scrambling. Then, pour this tempered egg mixture back into the simmering cream in the saucepan and continue to cook for 10-15 minutes, stirring continuously, until the custard thickens enough to coat the back of a spoon.
-
Pour the remaining cup of heavy cream into a clean medium bowl. Place a fine-mesh sieve over this bowl. Transfer the cooked custard mixture through the sieve into the heavy cream to remove any potential lumps. Cover the custard directly with plastic wrap, ensuring the plastic touches the surface to prevent a skin from forming. Cool completely in the refrigerator.
-
Once the custard is thoroughly cooled, pour it into your prepared ice cream maker and churn according to your specific ice cream maker’s manual until it reaches a soft-serve consistency.
-
While the ice cream is churning (or if using store-bought, during softening), prepare the crust. Carefully scrape off the white cream filling from the Oreo cookies.
-
Crush the Oreo cookie wafers into very fine crumbs. A food processor is excellent for this. Reserve approximately 4 tablespoons of these fine crumbs for later use in the ice cream.
-
In a bowl, combine the remaining Oreo crumbs with the melted unsalted butter and softened cream cheese. Mix until all ingredients are thoroughly combined and resemble wet sand.
-
Press down exactly half of the cookie mixture evenly into the bottom of an 8-inch springform pan. Use the back of a spoon or your fingers to create a firm, compact layer.
-
Once the homemade ice cream is almost done churning (or if store-bought, when it’s softened), gently fold in the reserved 4 tablespoons of cookie crumbs. This adds extra texture and Oreo flavor to the ice cream itself.
-
Pour half of the churned (or softened) Oreo ice cream evenly over the prepared bottom crust. Smooth the top with an offset spatula. Place the pan in the freezer for about 30 minutes, or until this ice cream layer is firm to the touch. Refrigerate the remaining ice cream during this time to keep it from melting.
-
Once the first ice cream layer is hardened, carefully press the remaining Oreo cookie mixture over the top of the frozen ice cream. Be gentle to avoid disturbing the ice cream layer below.
-
Then, pour the remaining refrigerated ice cream over the second cookie layer. Smooth the top surface evenly with an offset spatula.
-
Cover the entire cake tightly with plastic wrap and freeze for at least 2 hours, or ideally, overnight, before serving to ensure it is completely firm.
-
Before serving, carefully remove the sides of the springform pan. Optionally, top with fresh whipped cream and a sprinkle of extra crushed Oreos for a beautiful presentation. Slice and enjoy!
⭐️ Did you make this recipe?
We’d love to hear from you! Please consider leaving a review below and sharing how much you enjoyed it!
Nutrition

Conclusion: Your New Favorite No-Bake Indulgence
I genuinely hope you’ll give this incredible No-Bake Oreo Ice Cream Cake a try! It’s more than just a dessert; it’s a delightful experience that brings joy with every creamy, crunchy bite. Perfect for those sweltering summer days when firing up the oven is out of the question, or any time you need a stunning yet simple dessert for a gathering. Its decadent layers of buttery Oreo crust and rich Oreo ice cream make it undeniably irresistible.
This recipe proves that you don’t need complex techniques or endless hours in the kitchen to create something truly spectacular. With its straightforward instructions and crowd-pleasing flavors, it’s destined to become a staple in your summer recipe rotation. Whether you opt for the homemade ice cream experience or a convenient store-bought version, the result is pure bliss.
Thank you for reading, and happy no-baking! I’d love to hear how your cake turned out — please come back and leave a comment and rating once you’ve whipped up this delightful treat!
This post was originally published on July 30th, 2014, and has been updated for clarity, comprehensiveness, and enhanced SEO.