
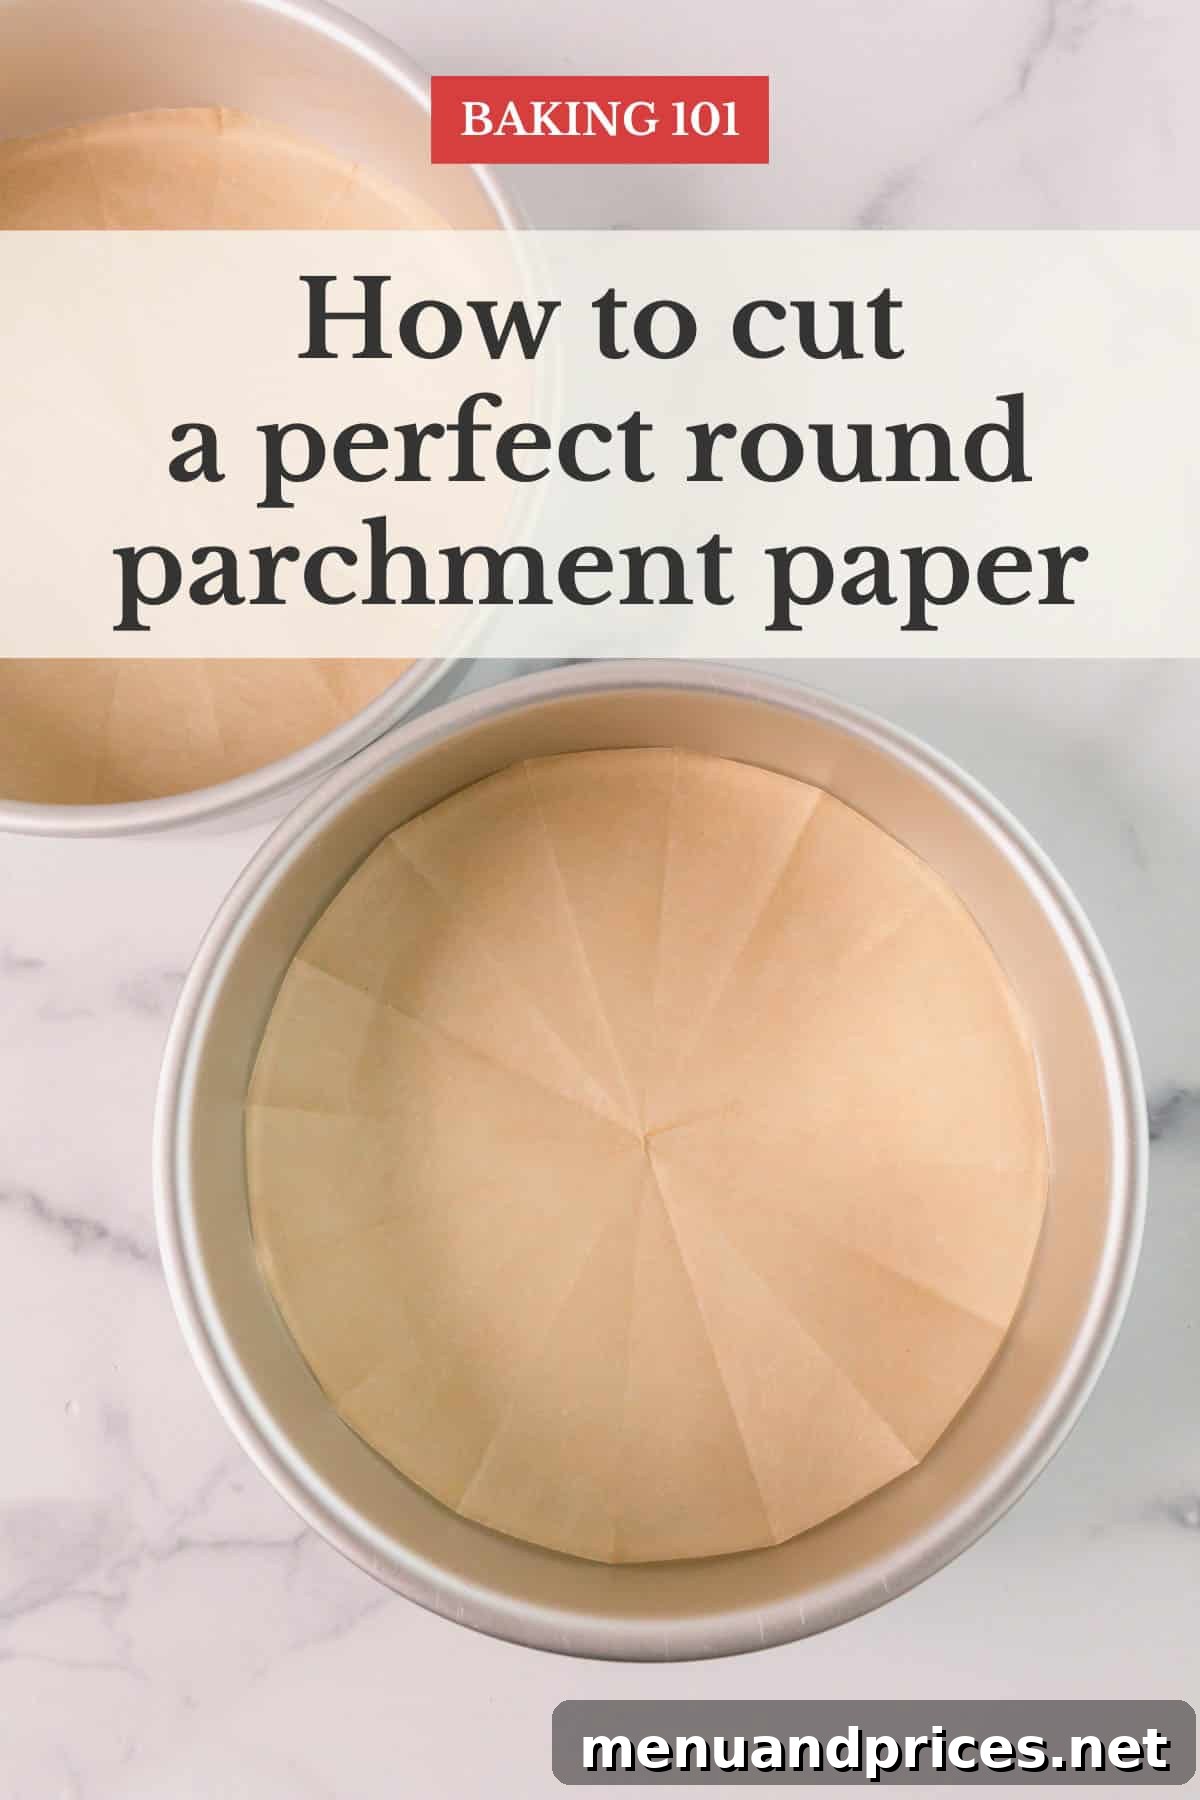
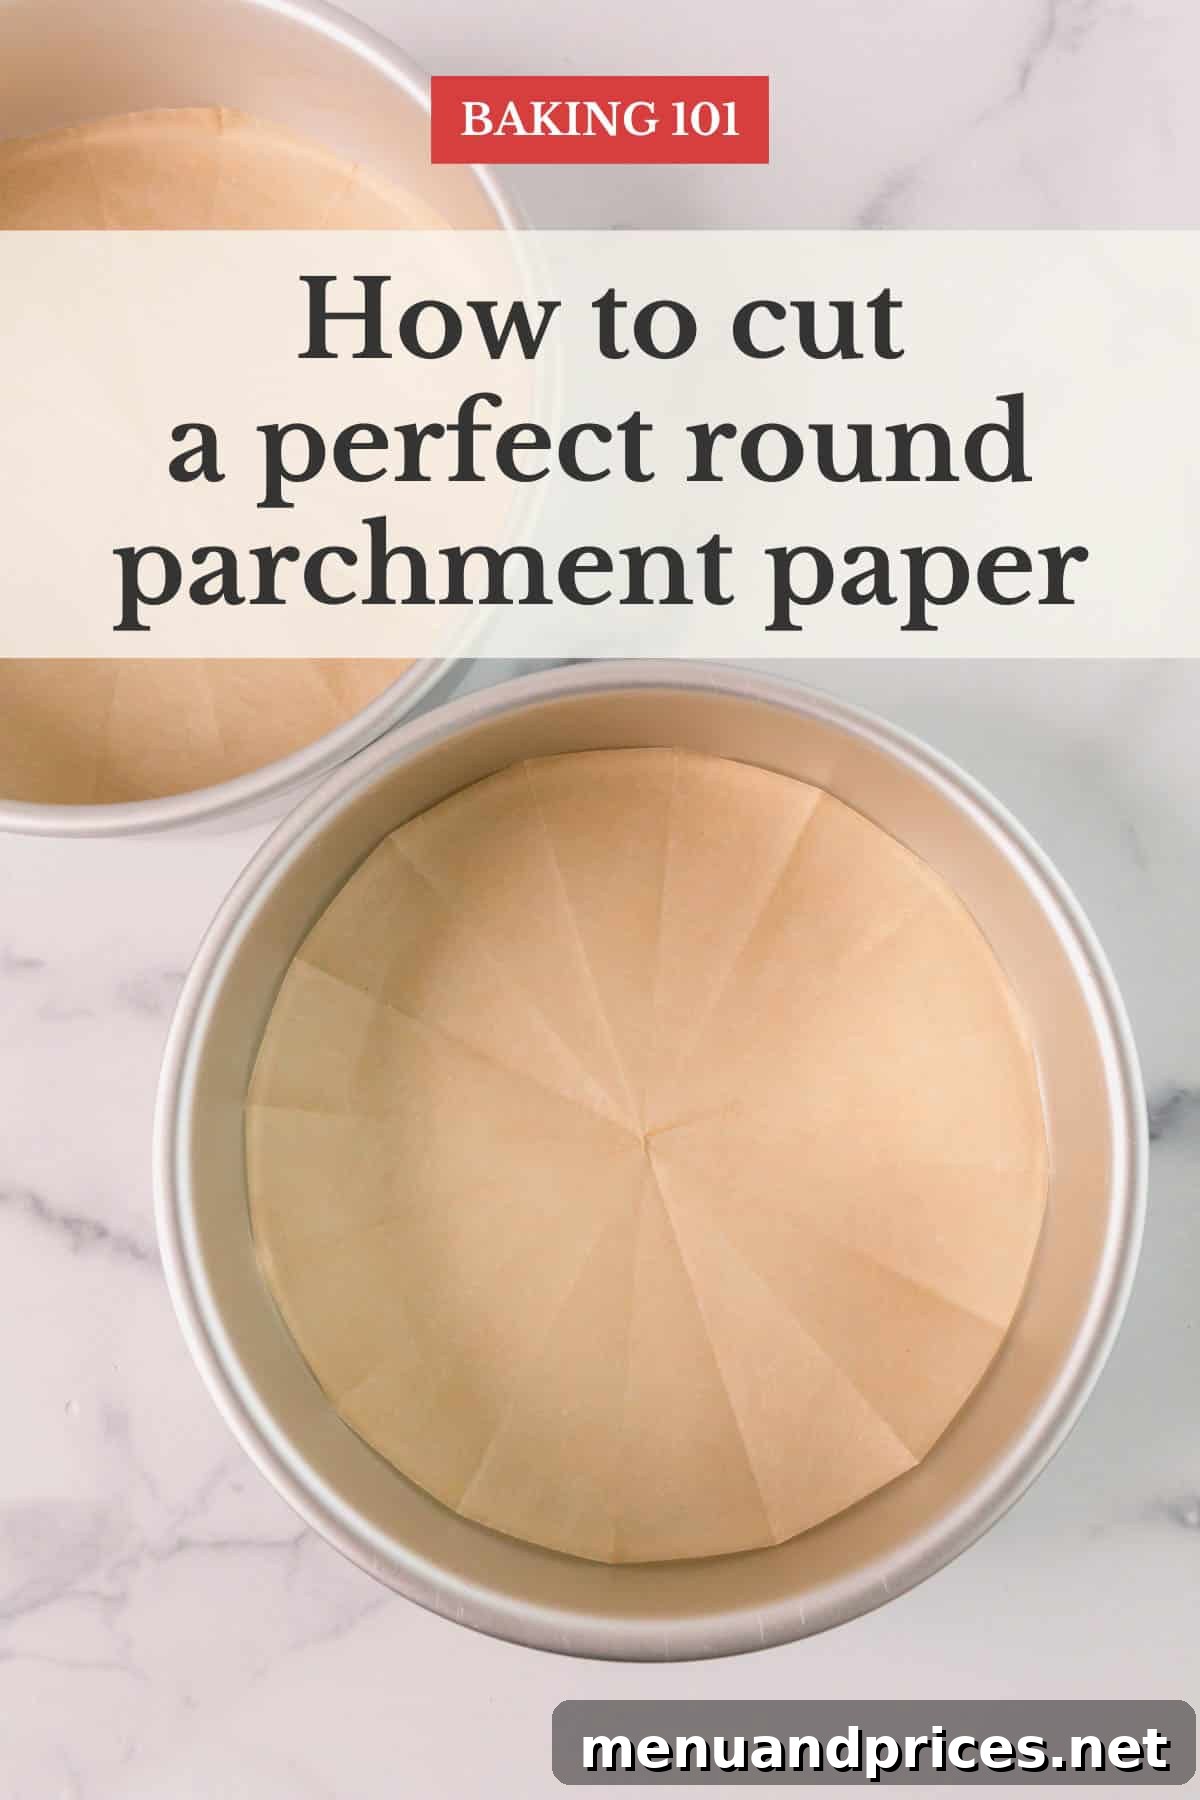
Baking a beautiful cake starts with preparation, and one of the most crucial steps is properly lining your cake pan. Nothing is more frustrating than a delicious cake sticking to the bottom of the pan, ruining its perfect shape and your hard work. This comprehensive guide introduces you to the simplest yet most effective technique for cutting parchment paper to fit any round cake pan flawlessly: the square-to-triangle method. Forget uneven edges, wasted paper, or struggling with tracing; this method will revolutionize your baking routine, ensuring every cake releases effortlessly.
Why Master This Parchment Cutting Technique?
While convenience often tempts us towards pre-cut parchment rounds, any avid baker with a collection of various cake pan sizes knows the struggle. Stocking different diameters can quickly become overwhelming, not to mention significantly pricier than purchasing a standard roll of parchment paper. Furthermore, relying on pre-cuts means you might not always have the right size on hand when inspiration strikes.
Another common approach involves tracing your cake pan onto the parchment sheet and then cutting it out. While seemingly straightforward, this method often leads to imperfections. Tracing around a pan typically results in a slightly larger circle, requiring additional fussy trimming to achieve a snug fit. This extra step adds unnecessary time and frustration to your baking process, defeating the purpose of preparation.
The square-to-triangle method, however, offers unparalleled precision, efficiency, and cost-effectiveness. Once you grasp the simple folding technique, it becomes second nature – a swift and elegant solution that saves you money, time, and the headache of imperfectly lined pans. This brilliant hack ensures a perfect fit every single time, guaranteeing your cakes come out pristine and ready for decoration.
The Benefits of Perfectly Lined Cake Pans
- Effortless Cake Release: The primary benefit is preventing your cake from sticking, allowing it to slide out of the pan with ease, preserving its structural integrity and beautiful crust.
- Even Baking: A smooth, even layer of parchment paper promotes more consistent heat distribution across the bottom of the cake, contributing to an evenly baked product.
- Simplified Cleanup: Parchment paper acts as a barrier, minimizing residue on your cake pan and making cleanup significantly quicker and easier.
- Versatility: This method works for any round cake pan size, from small six-inch pans to large twelve-inch pans, eliminating the need to buy specialized pre-cut liners.
- Cost-Effective: Utilizing a roll of parchment paper is far more economical in the long run than repeatedly purchasing pre-cut rounds, especially if you bake frequently.
- Professional Finish: A perfectly lined pan contributes to a professional-looking finished cake, free from tears or uneven edges caused by a poorly fitted liner.
Essential Tools for Perfect Parchment Rounds
You don’t need fancy gadgets to master this technique. Just a few basic kitchen tools are all it takes to achieve perfectly cut parchment paper for all your baking needs.
- Parchment Paper: A standard roll of good quality parchment paper is your main ingredient. Ensure your chosen sheet is large enough to cover the diameter of your cake pan. Both rectangular and square sheets will work, as you’ll be folding it down to a manageable size.
- Round Cake Pan: Any size of round cake pan will do. This method is incredibly adaptable, making it suitable for all your various baking endeavors, from towering layer cakes to delicate cheesecakes.
- Sharp Scissors: A good pair of sharp kitchen scissors is crucial for a clean, precise cut. Dull scissors can tear the paper, leading to jagged edges that won’t sit flat in your pan.
How to Cut Parchment Paper for a Round Cake Pan: The Square-to-Triangle Method
This foolproof method ensures a perfectly circular piece of parchment paper tailored to your specific pan. Follow these steps carefully, and you’ll be a pro in no time!
1. Fold the Parchment into a Precise Triangle
The key to this method lies in creating a series of accurate folds that will serve as guides for your final cut. Before you begin folding, ensure your initial piece of parchment is wide enough to cover the diameter of your cake pan when unfolded.
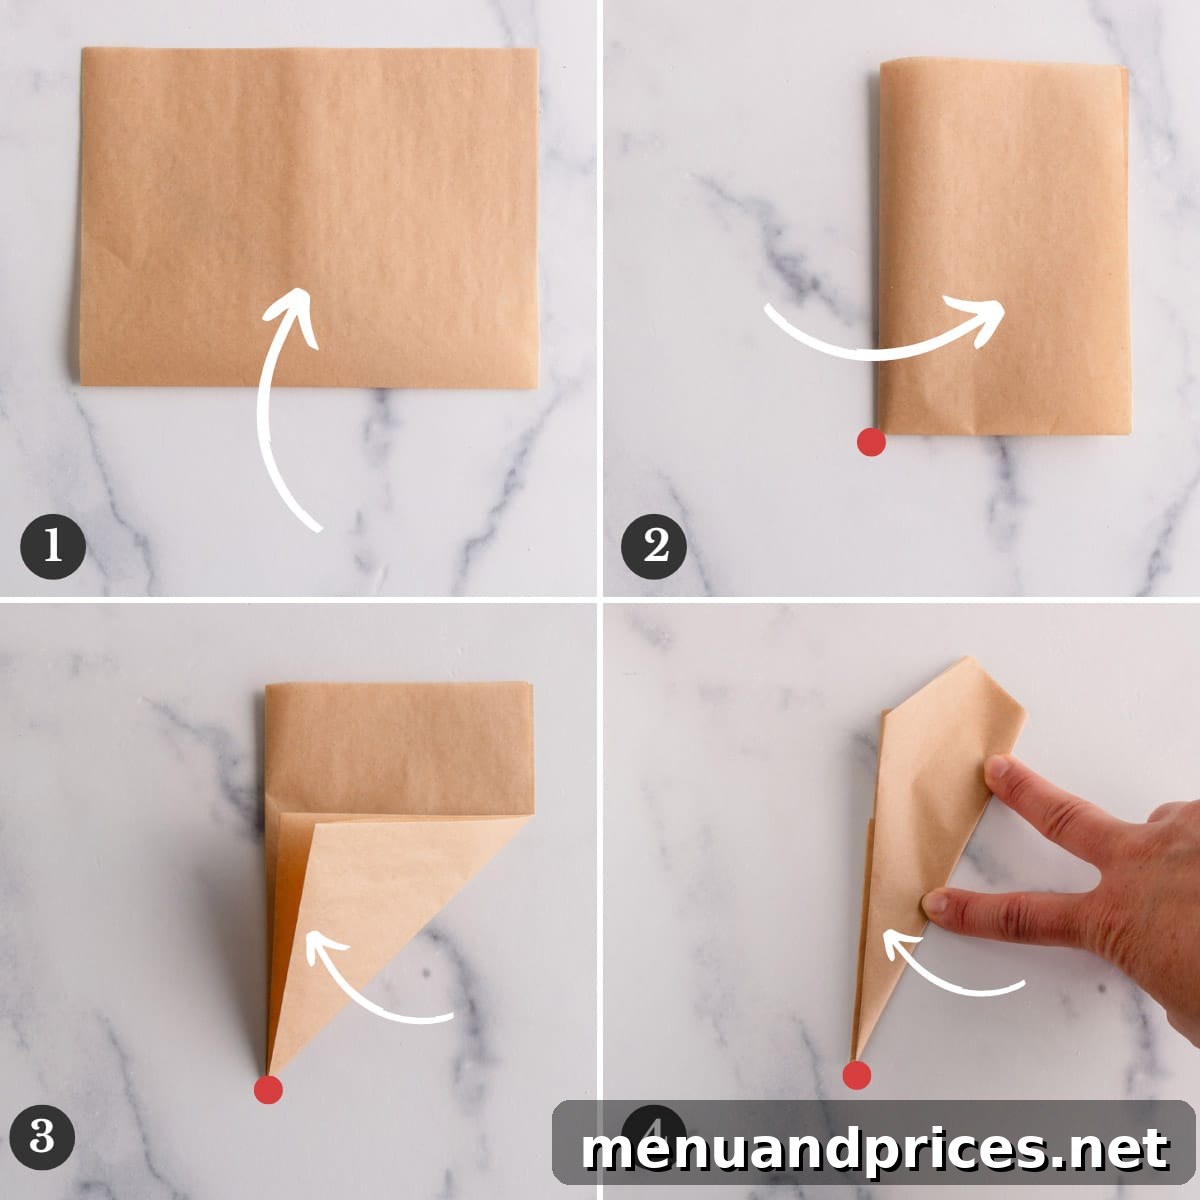
- Prepare Your Sheet: Lay a sheet of parchment paper flat on a clean, dry counter or work surface. Smooth out any wrinkles to ensure crisp folds.
- First Fold – Half: Take the bottom edge of the parchment sheet and carefully fold it upwards, aligning it perfectly with the top edge. Crease firmly. This creates your first central fold.
- Second Fold – Quarter: Now, take the left edge of this half-folded paper and fold it over to the right, aligning it precisely with the right creased edge. Press firmly to create a sharp crease. You should now have a piece of parchment that is one-quarter of its original size.
- Identify the Closed Corner: At this point, locate the corner where all the folded edges meet – this is your “closed corner.” It’s crucial to keep track of this specific corner, as it will become the exact center of your final parchment round. For clarity, position this closed corner at the bottom-left.
- Third Fold – First Triangle: From your quarter-folded paper, take the bottom-right corner and fold it upwards and to the left, aligning the bottom edge with the creased left edge. This will create your first triangular shape. Ensure the closed corner remains undisturbed at the very tip of your new triangle.
- Fourth Fold – Smaller Triangle: Repeat the triangular fold. Take the bottom-right corner of your current triangle and fold it upwards and to the left again, aligning it with the longest creased side. This will make your triangle even smaller and denser, further refining the central point and the outer edge. Again, meticulously ensure that the original closed corner stays precisely at the apex of this smaller triangle.
Pro Tip: Always Mind the Closed Corner!
Throughout the folding process, the most critical element is to always bring the creased or closed sides together and maintain the integrity of that single, singular closed corner. This corner, typically the thickest point of your folded triangle (often marked with a red dot in visual guides), represents the exact center of your future parchment round. It absolutely must NOT fold up or shift at any point. Its fixed position is what guarantees a perfectly circular cut.
2. Measure and Cut with Precision
With your parchment paper neatly folded into a multi-layered triangle, the next step is to accurately measure and make the single cut that will transform it into a perfect circle.
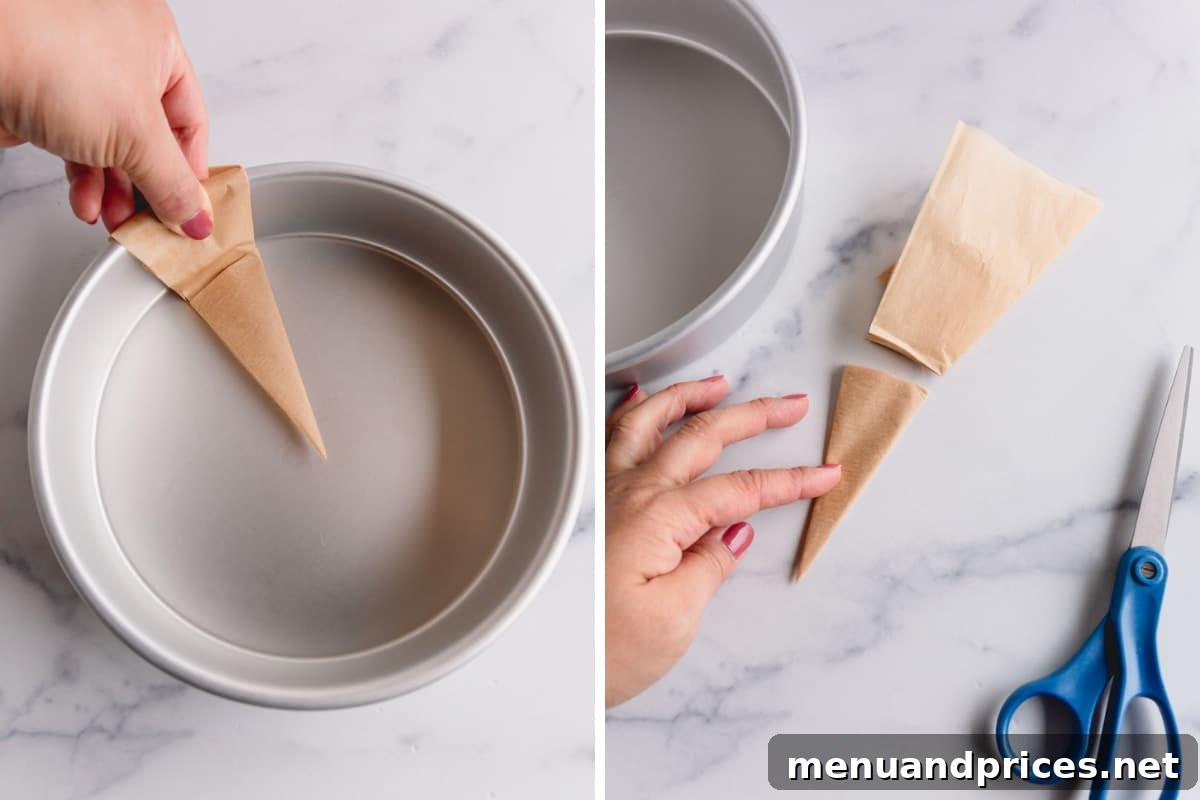
- Position for Measurement: Gently pick up your folded parchment triangle, holding it firmly by its closed corner. Place this closed corner precisely in the absolute center of the bottom of your round baking pan. Ensure the tip of the triangle is snug against the center point.
- Mark Your Cutting Line: While holding the closed corner in place, gently lay the rest of the parchment triangle across the radius of the pan. Observe where the outer edge of the pan’s bottom meets its side wall. This is your critical measurement point. Using your fingernail, or the blunt edge of your scissors, create a small crease or mark on the parchment paper precisely at this intersection. This mark indicates the exact radius of your pan.
- The Final Cut: Remove the parchment triangle from the pan. Using your sharp scissors, carefully cut along the creased line you just made. Aim for a smooth, clean cut; avoid jagged edges. This single cut will determine the circumference of your parchment round.
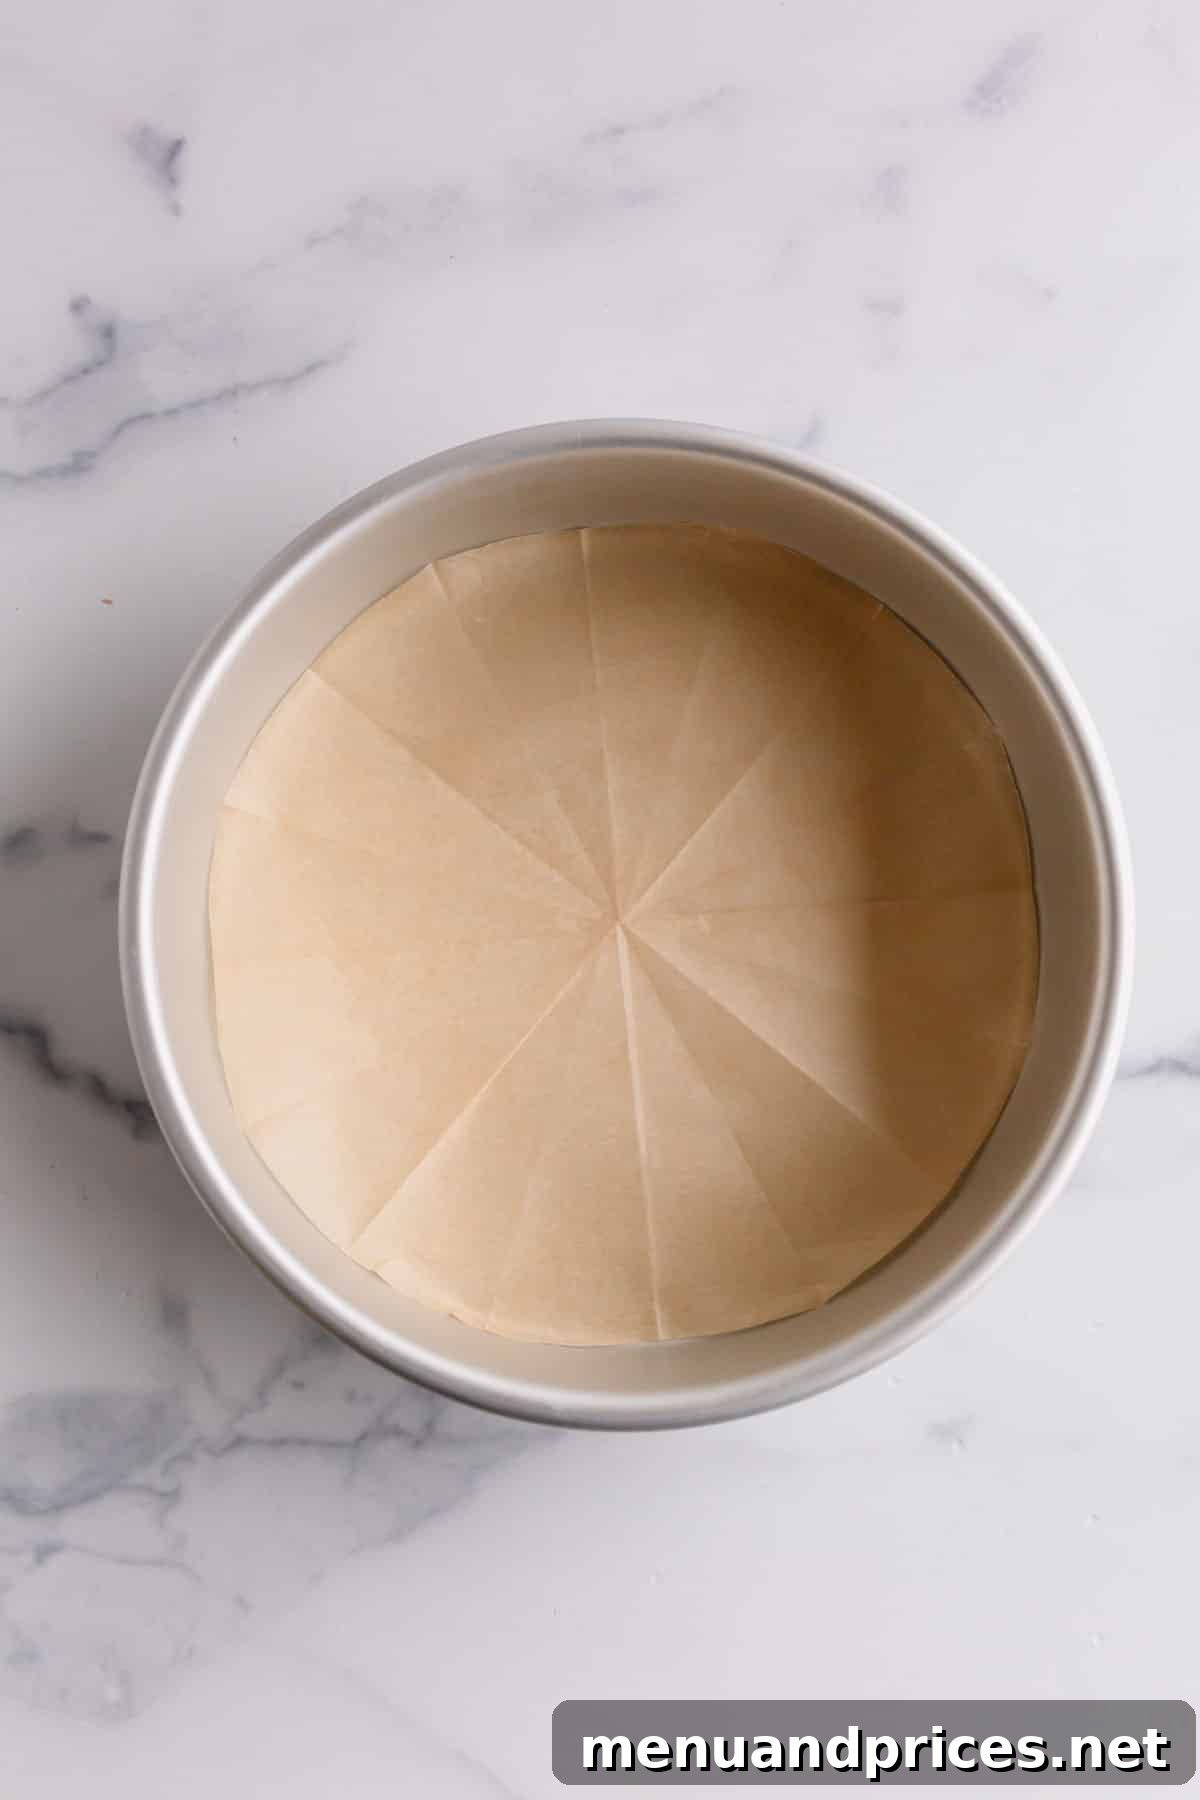
- Unfold and Admire: Gently unfold your parchment paper. You will be greeted with a perfectly circular piece of parchment, ready to line your cake pan with ultimate precision.
Expert Tip: Measure from the Inside!
For the most accurate fit, I highly recommend placing the folded parchment triangle *inside* the pan when measuring the radius. Attempting to measure by placing the triangle along the *outside* edge of the pan can often lead to a slightly larger parchment round, which will then bubble up or not sit flat in the pan. Measuring from the internal junction ensures your parchment fits snugly against the bottom surface, preventing any awkward overlaps.
Voila! Witness the magic as your perfectly cut parchment round effortlessly drops into place, nestling snugly against the bottom of your cake pan. No more struggling, no more trimming, just a pristine surface ready for your cake batter.
Troubleshooting and Additional Tips for Success
- What if the parchment is too small? If your initial piece of parchment paper isn’t wide enough, your final circle might be too small for the pan. Always start with a sheet that you can clearly see will extend beyond the pan’s diameter when unfolded.
- Uneven Cuts: If your circle isn’t perfectly round, it might be due to a dull pair of scissors or a shaky hand. Invest in sharp kitchen scissors and try to make one fluid cut along your marked line. Practice makes perfect!
- Keeping the Paper Flat: For very large pans, the paper can be unwieldy. A trick is to lightly dampen your countertop (don’t wet the paper!) to create a slight suction that helps keep the paper in place during folding.
- Multiple Pans? No Problem: If you’re baking multiple cakes of the same size, you can often fold several sheets of parchment paper together and cut them all at once, saving even more time.
- Storage: Once you’ve mastered this, you might consider cutting a few extra rounds for your most frequently used pan sizes and storing them flat in a kitchen drawer for quick access.
Elevate Your Baking Experience
Mastering the square-to-triangle method for cutting parchment paper is more than just a kitchen hack; it’s a fundamental skill that will significantly improve your baking confidence and results. Say goodbye to sticky situations, uneven cake bottoms, and the frustration of ill-fitting liners. Embrace this simple, precise technique, and enjoy the satisfaction of perfectly baked cakes that effortlessly release from their pans every single time. Happy baking!
My Favorite Cake Recipes to Try with Your Perfectly Lined Pans
Now that you’re equipped with the ultimate parchment paper cutting skill, it’s time to put it to good use! Here are some of my all-time favorite cake recipes that will shine even brighter with your perfectly lined pans:
- Classic White Cake Recipe: A timeless favorite, light, fluffy, and perfect for any celebration.
- Best Yellow Cake Recipe: Rich, tender, and incredibly moist – a true crowd-pleaser.
- Simple Chocolate Cake Recipe: Deeply chocolatey and wonderfully moist, perfect for chocoholics.
- Lemon Layer Cake: Bright, tangy, and refreshing, a burst of citrus in every bite.
- Black Forest Cake: A decadent classic combining chocolate, cherries, and cream.