

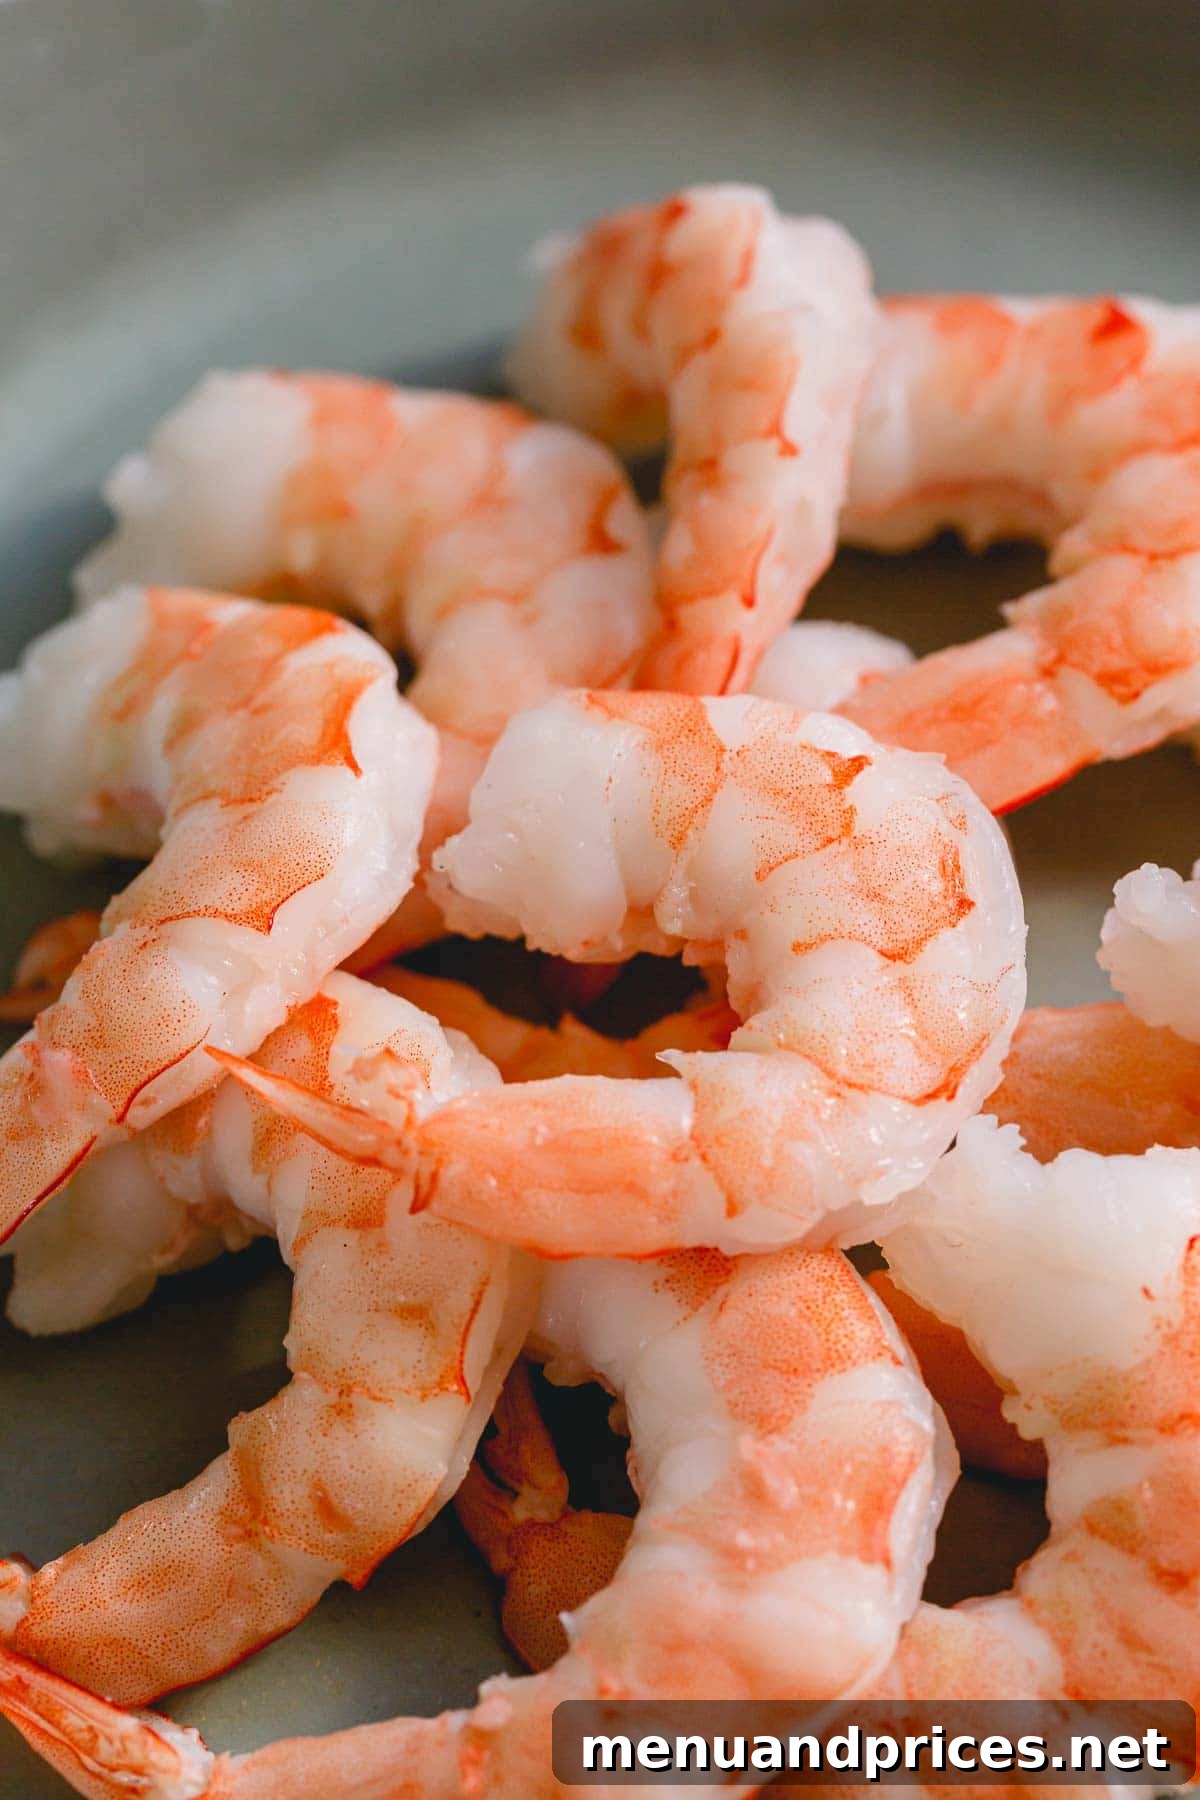
Unlock the secret to perfectly cooked shrimp in just minutes! Boiling shrimp is one of the most straightforward and fastest ways to prepare this versatile seafood, making it an ideal choice for a myriad of culinary creations. Whether you’re planning a classic shrimp cocktail, a vibrant shrimp salsa, elegant homemade sushi rolls, or simply looking for a quick and healthy protein boost, knowing how to properly boil shrimp is an invaluable kitchen skill. This guide will walk you through everything you need to achieve tender, flavorful shrimp every single time.
Pin this now to find it later
Pin It
Why Boiled Shrimp is Your New Go-To Protein
If you’ve ever pondered the art of boiling shrimp or questioned if frozen shrimp can be boiled successfully, prepare to be amazed. This method is not only incredibly simple but also yields perfectly cooked shrimp that are tender, juicy, and packed with flavor. Far from bland, our approach ensures your shrimp are a star ingredient in any dish. It’s a game-changer for quick meals and impressive appetizers alike!
Here’s why you’ll want to make this recipe a staple in your kitchen:
- Effortlessly Failproof: Say goodbye to rubbery, overcooked shrimp! We’ll guide you through each step, offering tried-and-true tips and tricks for boiling shrimp from fresh or frozen, ensuring flawless results every time.
- Bursting with Flavor: Forget tasteless seafood. With a carefully selected blend of simple ingredients, we transform plain boiling water into a fragrant poaching liquid that infuses your shrimp with a bright, savory, and subtly herbaceous essence. This isn’t just boiled shrimp; it’s a flavor experience.
- Incredibly Versatile: The possibilities are endless! Boiled shrimp serves as a fantastic base for countless dishes. From elegant shrimp cocktail to quick stir-fries, vibrant salads, and hearty pasta dishes, this preparation method makes them suitable for any meal. They’re a lean protein that adapts beautifully to any cuisine.
- Lightning Fast: This cooking method is astonishingly quick, taking less than 5 minutes for the actual boiling process. It’s perfect for busy weeknights when you need a nutritious meal on the table in a flash.
- Healthy & Lean: Shrimp is a low-calorie, high-protein food, making it an excellent choice for health-conscious diners. Boiling is a fantastic cooking method as it requires minimal added fats, keeping your meal light and wholesome.
Incorporate your perfectly boiled shrimp into your favorite recipes, or serve them alongside a fragrant bowl of vegetable fried rice for a homemade takeout-inspired feast ready in minutes. The ease and deliciousness will make this your new favorite way to prepare shrimp!
Essential Ingredients for Tender & Flavorful Boiled Shrimp
Achieving truly delicious boiled shrimp starts with selecting the right ingredients. While the method is simple, the quality and choice of your shrimp and aromatics will elevate your dish from good to unforgettable.
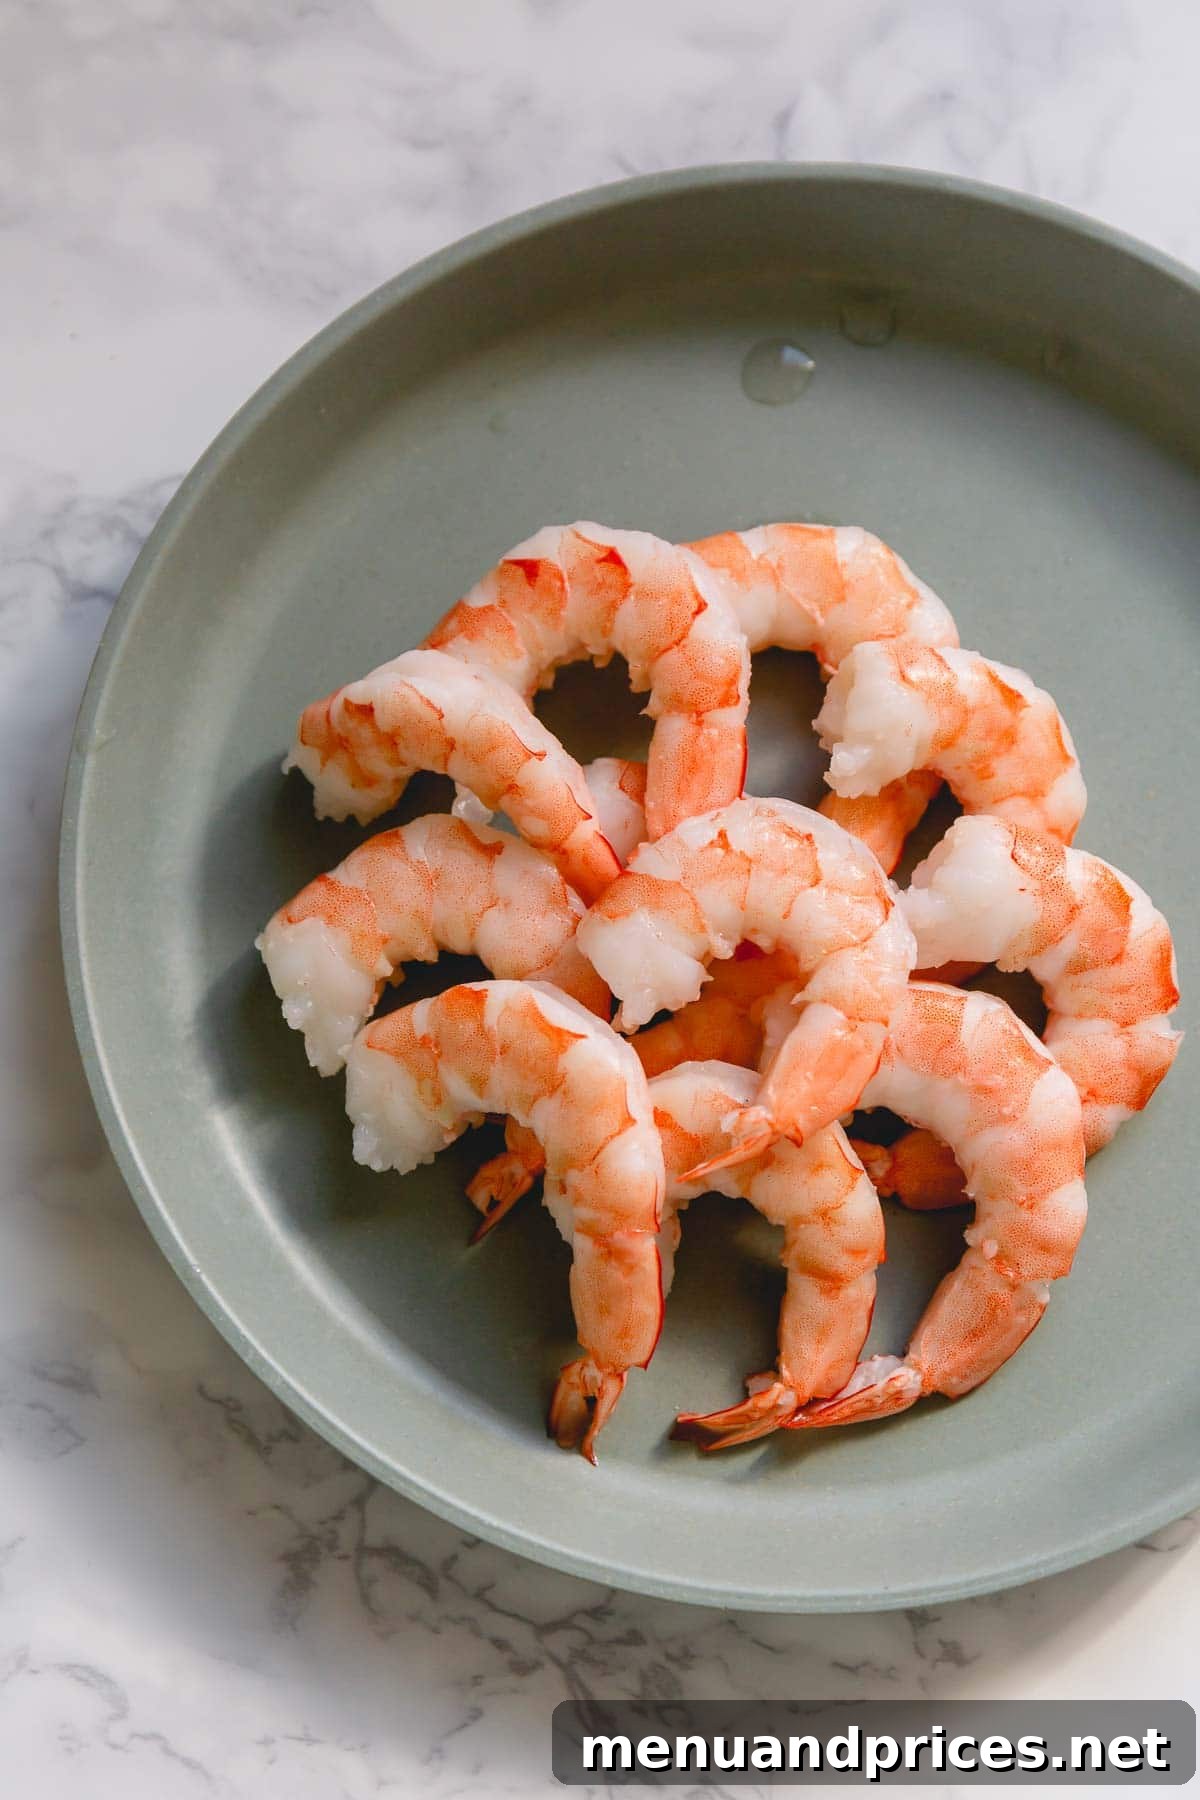
- Shrimp (1 pound): You’ll need raw extra-large shrimp, which can be either fresh or frozen. My personal preference is frozen EZ peel deveined shrimp, as they are incredibly convenient and minimize prep time. When selecting shrimp, look for firm texture and a clean, fresh, briny smell. Avoid any shrimp that appears mushy, slimy, or has an overly “fishy” odor, as these are signs of spoilage. If using frozen shrimp, remember to thaw them completely before boiling to ensure even cooking and prevent a tough texture.
- Kosher Salt: A generous amount of coarse kosher salt in the boiling water is crucial. It not only seasons the shrimp from the inside out but also mimics the ocean’s natural salinity, enhancing the shrimp’s inherent sweetness and creating a more vibrant flavor profile.
- Lemon Wedges (Optional but Recommended): Fresh lemon adds a bright, zesty, and refreshing citrus note to the poaching liquid. The acidity helps cut through any potential “fishiness” and contributes to an overall clean taste. You can add wedges to the water or serve them alongside the finished shrimp for a squeeze of fresh juice.
- Bay Leaves (Optional but Recommended): Bay leaves are an underrated aromatic for seafood. They impart a subtle, herbaceous, and slightly floral aroma to the poaching water, which translates into a delicate background flavor in the cooked shrimp.
- Black Peppercorns (Optional): Whole black peppercorns add a mild, earthy warmth and a touch of subtle spice to the boiling liquid. Their flavor is infused gently, creating a more complex depth without overpowering the shrimp.
- Additional Aromatics (Optional for Enhanced Flavor): Consider adding a few cloves of crushed garlic, a quartered onion, a stalk of celery, or a dash of Old Bay seasoning to your boiling water. These can further deepen the savory notes and create a more robust poaching broth for extra flavorful shrimp.
Understanding Shrimp Sizing
Shrimp are categorized by their count per pound, indicating their size. For a robust shrimp cocktail or dishes where shrimp is a focal point, I recommend jumbo or extra-large shrimp. Look for labels like “21/25,” meaning there are approximately 21 to 25 shrimp per pound. Smaller shrimp (e.g., 31/40 or 41/50) are excellent for salads, pasta dishes, or stir-fries where you want more shrimp pieces per serving.
Essential Kitchen Tools for Boiling Shrimp
While the process of boiling shrimp is simple, having the right tools on hand will make your preparation seamless and efficient:
- Large Stockpot (at least 4-6 quarts): Essential for providing enough water to boil the shrimp evenly without overcrowding.
- Colander: For quickly draining the shrimp after cooking.
- Large Bowl: To prepare the ice bath.
- Ice: Plenty of ice for the ice bath.
- Tongs or Slotted Spoon: For safely transferring the shrimp from the hot water to the ice bath.
- Measuring Spoons/Cups: For accurate ingredient measurements.
Preparation is Key: How to Quickly Thaw Frozen Shrimp
If you’re using frozen shrimp, proper thawing is a critical step that often gets overlooked. Boiling unthawed frozen shrimp will likely result in a tough, rubbery texture because the outer layers cook before the inside can fully thaw. But don’t fret if you forgot to plan ahead; you can thaw shrimp quickly and safely!
- Submerge in Cold Water: Place your frozen shrimp in a large bowl. Fill the bowl with cold tap water, ensuring the shrimp are fully submerged. It’s crucial to use cold water; warm or hot water will begin to cook the shrimp prematurely, affecting their texture.
- Change Water Periodically: Let the shrimp sit in the cold water for about 10-15 minutes. During this time, change the water a couple of times to keep it consistently cold. This helps speed up the thawing process while maintaining food safety.
- Ready to Use: After about 10-15 minutes, your shrimp should be completely thawed, flexible, and ready for peeling (if necessary) and cooking. Drain them thoroughly before proceeding.
How to Peel and Devein Shrimp for Optimal Texture
While some recipes call for cooking shrimp with the shell on for extra flavor, for this boiling method and most serving applications like shrimp cocktail, it’s best to peel and devein the shrimp before cooking. This ensures a cleaner eating experience and faster cooking.
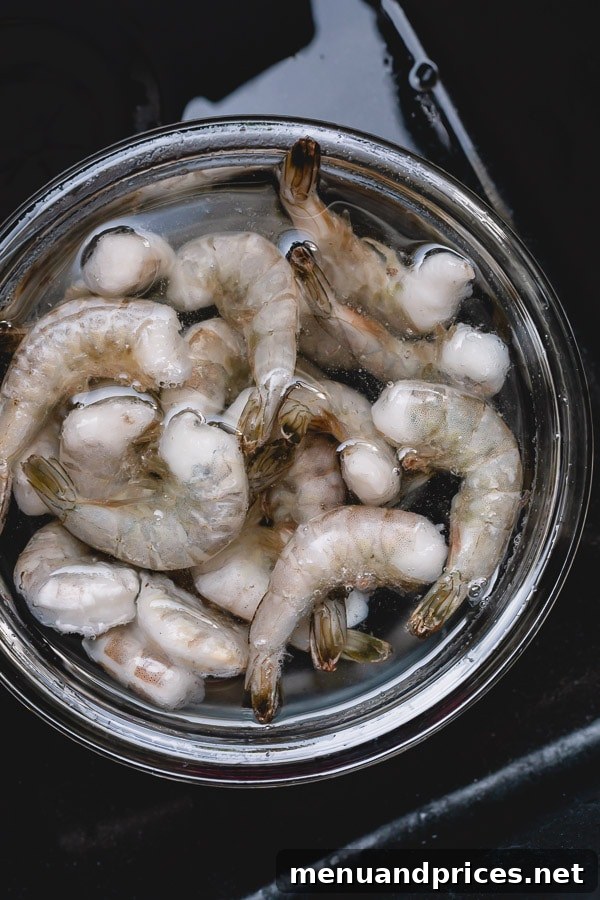
- Partial Thaw for Easy Peeling: If starting with frozen shrimp, I find it easiest to peel them when they are still semi-frozen. Thaw the shrimp in cold water for only about 5 minutes. At this point, they will be firm but pliable enough to peel easily.
- Peel the Shell: Hold the shrimp firmly with one hand. With the other, grasp the legs (which are on the inner curve of the shrimp) and peel back the shell starting from the head end. You can leave the tail on for presentation, especially for shrimp cocktail, or remove it entirely.
- Devein (if not already done): Most shrimp bought today are already deveined (EZ peel). If yours aren’t, make a shallow cut along the back (outer curve) of the shrimp with a small paring knife. You’ll expose a dark, sand-like vein. Gently pull it out with the tip of your knife or your fingers. Rinse the shrimp quickly if needed.
- Return to Cold Water: After peeling, place the cleaned shrimp back into a bowl of fresh cold water. By the time you’ve peeled all the shrimp, they will be fully thawed and perfectly chilled, ready for boiling. This also helps keep them firm.
Step-by-Step Guide: How to Boil Shrimp Perfectly Every Time
Boiling shrimp is a rapid process, so having all your ingredients and equipment ready is key. Follow these steps for perfectly cooked, tender, and flavorful shrimp:
- Prepare the Boiling Pot: Fill a large pot (at least 4-6 quarts) with about 2 quarts (2 liters) of water for every 1-2 pounds of shrimp. Add your chosen aromatics to the water – this includes coarse kosher salt, lemon wedges, bay leaves, black peppercorns, and any other spices like garlic, onion, or Old Bay seasoning.
- Bring to a Rolling Boil: Place the pot over high heat and bring the water to a rapid, rolling boil. Ensure the water is vigorously bubbling before adding the shrimp. This ensures the cooking temperature drops minimally when the shrimp are added, leading to more even cooking.
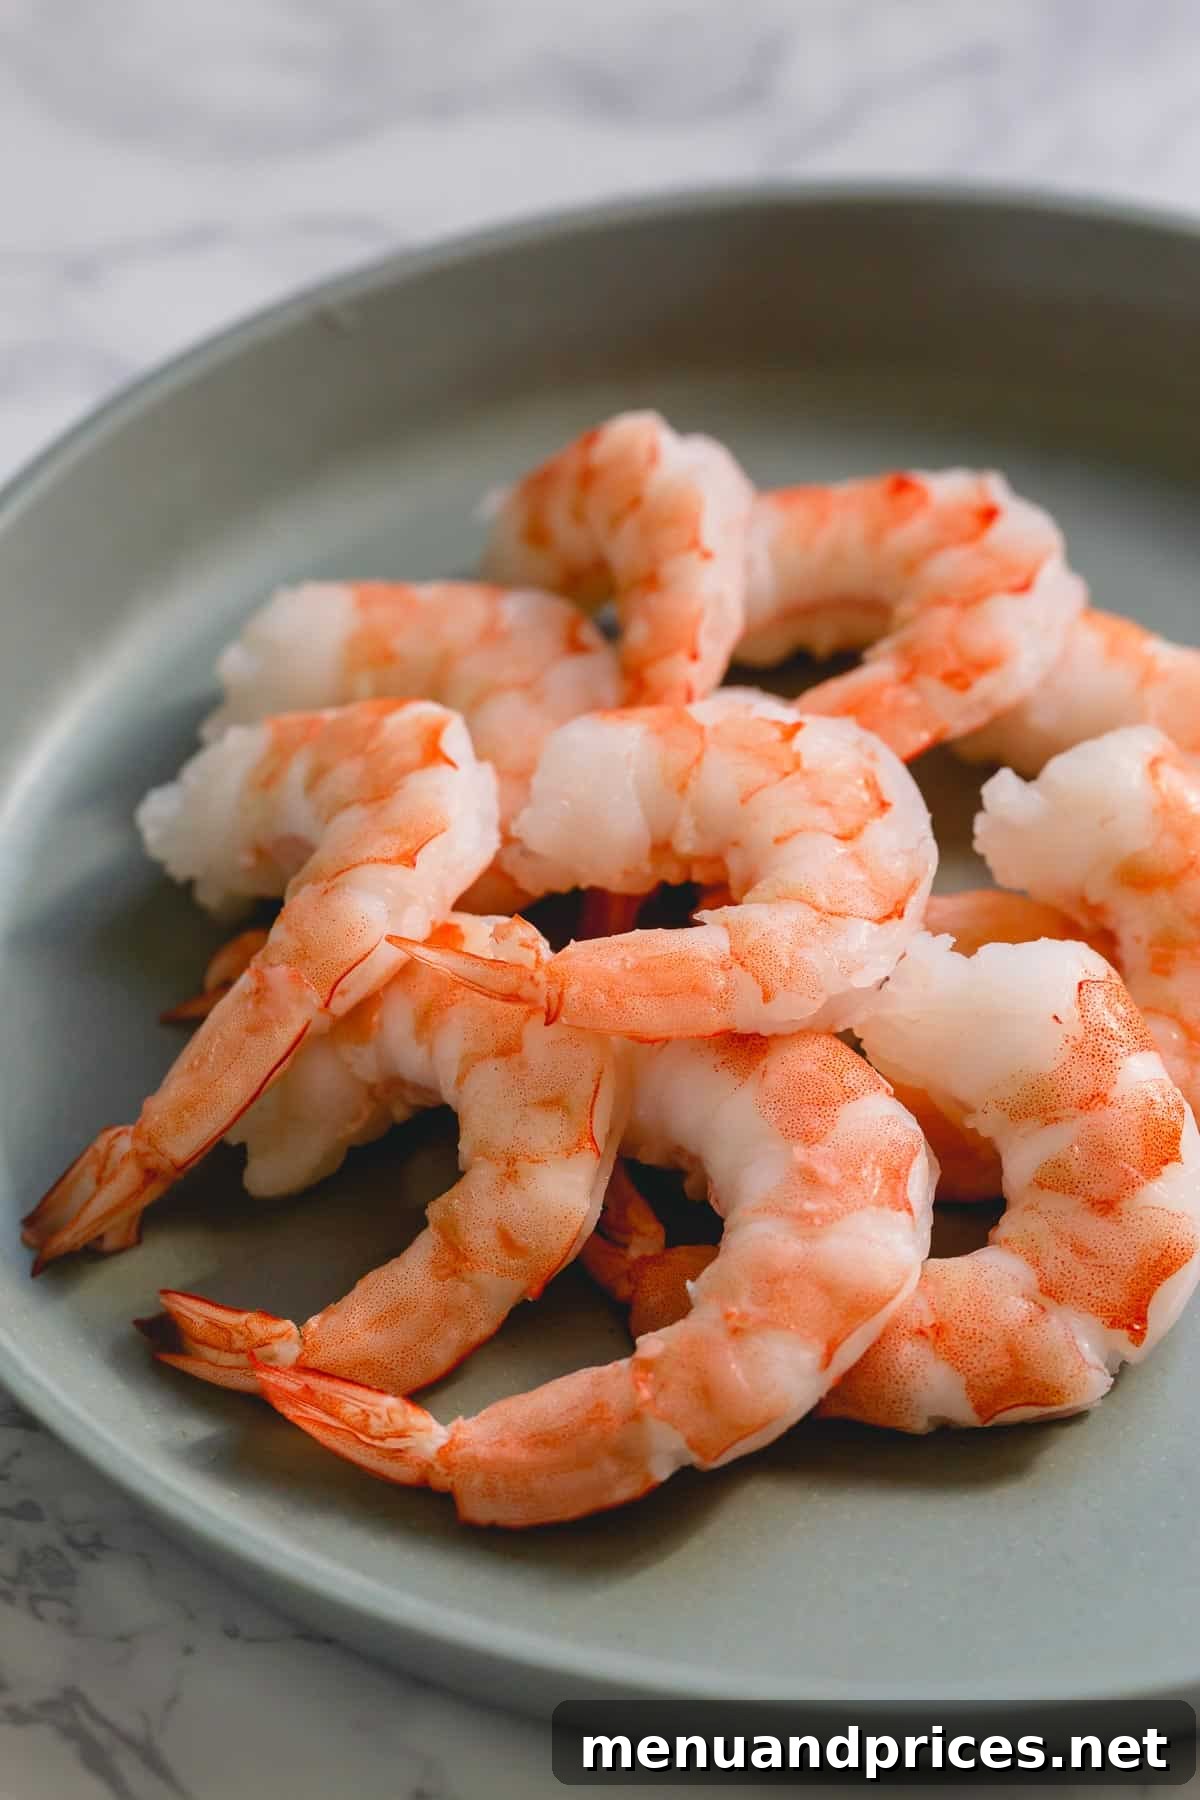
- Add Shrimp and Simmer: Carefully add the peeled and deveined shrimp to the boiling water. The water temperature will temporarily drop. Once the water returns to a simmer (not a full boil again, but gently bubbling), start your timer. Simmer the shrimp until they turn opaque pink with bright red accents and curl into a perfect “C” shape. This typically takes only about 1.5 to 2.5 minutes, depending on the size of your shrimp. Do not overcrowd the pot; if cooking a large quantity, boil in batches.
- Prepare an Ice Bath: While the shrimp are cooking, prepare a large bowl filled with ice water. This ice bath is crucial for stopping the cooking process immediately after the shrimp are removed from the heat, preventing them from becoming rubbery.
- Transfer to Ice Bath: As soon as the shrimp are perfectly cooked, use a slotted spoon or tongs to immediately transfer them from the hot water into the prepared ice bath. Let them chill for 2-3 minutes.
- Drain and Serve: Once cooled, drain the shrimp thoroughly from the ice bath. They are now ready to be served immediately as a shrimp cocktail, tossed into salads, or incorporated into any recipe of your choice.
Mastering Shrimp Doneness: The “C” and “O” Rule
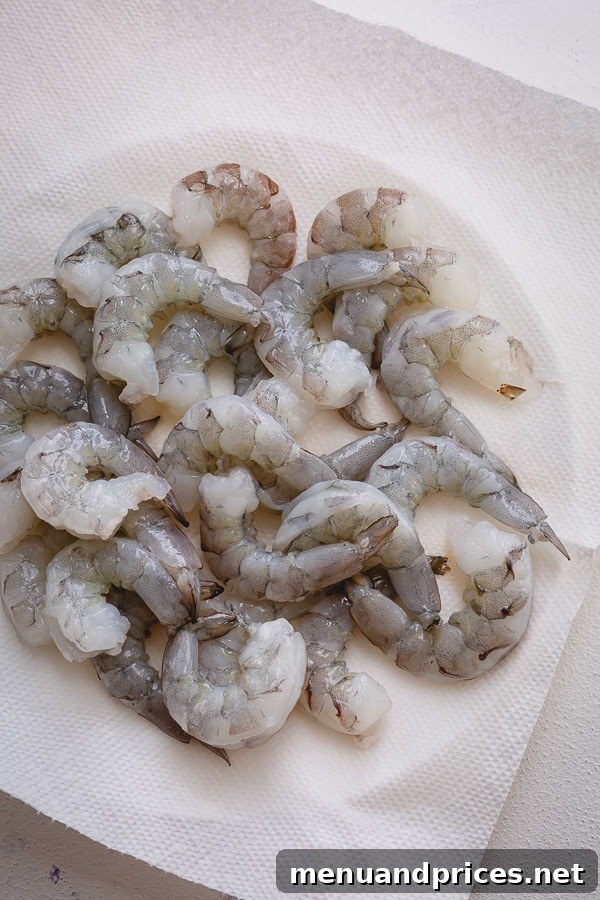
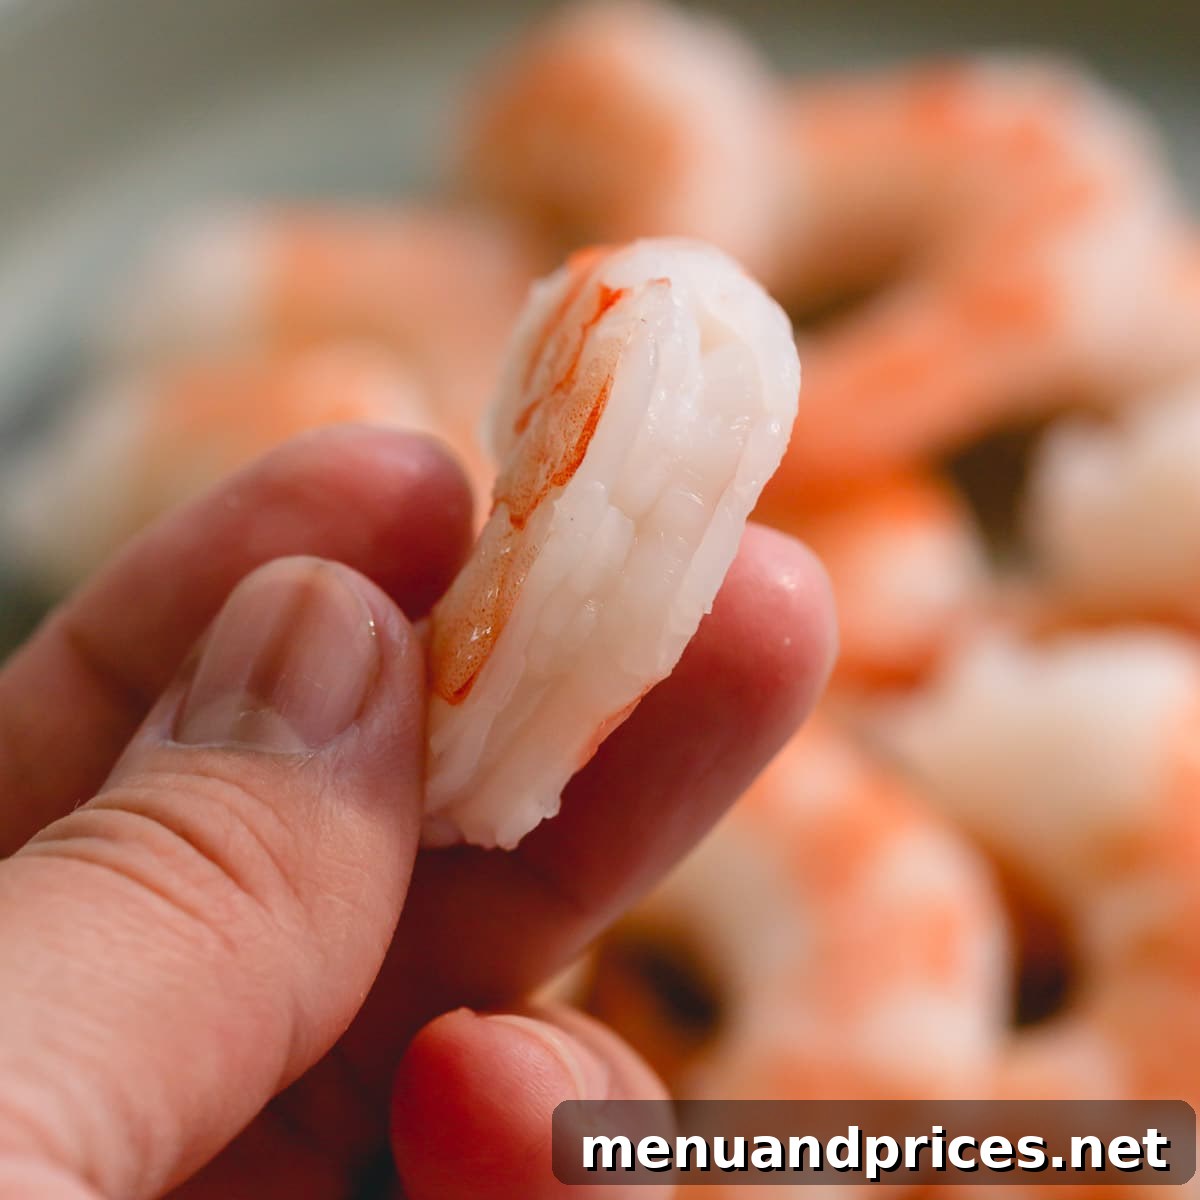
The cooking time for shrimp is remarkably short and highly dependent on their size. For 26/30 count shrimp (extra-large), approximately 2 minutes of simmering is usually perfect. Smaller shrimp will cook even faster, while jumbo shrimp might need slightly longer, up to 3 minutes. The best indicator of doneness is visual: raw shrimp are grey and straight. As they cook, they turn opaque pink/red and curl. Aim for a gentle “C” shape for perfectly cooked, tender shrimp. If they curl into a tight “O” shape, they are likely overcooked and will be rubbery. Always pull them from the heat as soon as they reach that ideal “C” shape.
Expert Tips for Flavorful & Tender Boiled Shrimp
Achieving consistently perfect boiled shrimp is simple when you keep a few key principles in mind. These expert tips will ensure your shrimp are always tender, juicy, and packed with flavor.
- Thaw Completely (and Properly!): This is arguably the most crucial step for frozen shrimp. Fully thawed shrimp cook quickly and evenly. As discussed, use cold water for thawing; hot water can start the cooking process, leading to rubbery results.
- Embrace Aromatics: Never underestimate the power of a flavorful poaching liquid! Plain water will cook shrimp, but it will leave them bland. Salt, lemon, and bay leaves are a great start. Experiment with garlic, peppercorns, onion slices, fresh dill, or a dash of Old Bay seasoning to infuse your shrimp with incredible depth and flavor.
- Don’t Overcrowd the Pot: Give your shrimp room to cook. Adding too many shrimp at once will significantly drop the water temperature, causing them to simmer rather than cook quickly and evenly. If you have a large batch, cook in two or more smaller batches to maintain that consistent cooking environment.
- Master the Visual Cues of Doneness: Forget timers if you’re unsure about shrimp size. Your eyes are your best tool. Watch for shrimp to turn opaque pink with vibrant red edges and curl into a gentle “C” shape. A tightly curled “O” means it’s overcooked. Pull them from the hot water *immediately* once they reach that perfect “C”.
- The Essential Ice Bath: This step is non-negotiable. Transferring cooked shrimp directly into an ice bath instantly halts the cooking process, preserving their tender texture and preventing them from turning rubbery. It also chills them rapidly if you plan to serve them cold.
- Season the Water Generously: Just like pasta water, your shrimp boiling water needs to be well-seasoned. The salt not only flavors the shrimp but also helps firm up their texture. Don’t be shy with kosher salt!
Creative Ways to Enjoy Your Boiled Shrimp
Once you’ve mastered boiling shrimp, a world of culinary possibilities opens up! Their delicate flavor and tender texture make them incredibly versatile. Here are some inspiring ideas to put your perfectly cooked shrimp to delicious use:
- Classic Shrimp Cocktail: The quintessential appetizer! Serve chilled boiled shrimp with a zesty cocktail sauce, lemon wedges, and fresh parsley.
- Refreshing Salads: Add them to a crisp Caesar salad, a Mediterranean quinoa salad, a vibrant Cobb salad, or a light pasta salad. Their lean protein content makes any salad a satisfying meal.
- Tacos, Burrito Bowls & Wraps: A fantastic filling for seafood tacos with a slaw and creamy sauce, or as a healthy protein in a rice-based burrito bowl.
- Pasta Perfection: Toss with garlic butter, lemon, and fresh herbs for a quick shrimp scampi. Or add them to a creamy Alfredo or a light tomato-based sauce.
- Stir-Fries: Add them in the last few minutes of cooking your favorite vegetable stir-fry for a quick and healthy meal.
- Asian-Inspired Dishes: Ideal for homemade sushi rolls, spring rolls, or a simple noodle soup.
- Appetizer Dips & Spreads: Chop them finely and mix into creamy dips or spreads for crackers and crudités.
- Seafood Boils & Platters: Serve alongside corn on the cob, potatoes, and sausage for a mini seafood boil experience.
Make-Ahead & Storing Boiled Shrimp
Boiled shrimp are excellent for meal prepping, allowing you to have a healthy protein source ready for quick meals throughout the week. Proper storage is key to maintaining freshness and safety.
- Make-Ahead Thawing: If using frozen shrimp, you can thaw them gradually by transferring them to the refrigerator a day or two before you plan to boil them. This slow thaw is very gentle on the shrimp.
- Storing Uncooked Shrimp: Raw, defrosted shrimp should be stored in an airtight container or a sealed bag in the coldest part of your refrigerator and cooked within 24 hours.
- Storing Cooked Boiled Shrimp: Once boiled and chilled in an ice bath, ensure the shrimp are thoroughly drained. Store them in a shallow, airtight container in the refrigerator for up to 3-4 days. This prevents them from drying out or absorbing other fridge odors.
- To Freeze Boiled Shrimp: For longer storage, allow your boiled shrimp to cool completely after the ice bath, then pat them very dry. Quickly chill them in the fridge for about 30 minutes to an hour. Then, transfer them to a freezer-safe bag or container, removing as much air as possible to prevent freezer burn. Freeze for up to 3-6 months.
- Thawing Frozen Boiled Shrimp: To thaw, simply transfer the frozen shrimp to the refrigerator overnight. Once thawed, they are perfect for enjoying cold in salads or shrimp cocktail.
- Reheating Boiled Shrimp: Boiled shrimp are best served cold or at room temperature. If you must reheat them, do so gently and quickly to avoid a rubbery texture. You can warm them briefly in a skillet over medium-low heat with a little butter or olive oil, or steam them for just a minute or two. Avoid high heat or prolonged reheating.
Frequently Asked Questions About Boiling Shrimp
For most applications, especially shrimp cocktail, I recommend using extra-large raw shrimp, typically labeled as 26/30 count. Frozen EZ peel deveined shrimp are a great choice for convenience, as they significantly reduce prep time. Always ensure they are fully thawed before cooking for the best results.
The cooking time for shrimp is very short and depends on their size. For extra-large (26/30 count) shrimp, simmering for about 2 minutes is usually perfect. Smaller shrimp will cook faster, sometimes in as little as 90 seconds, while jumbo shrimp might take closer to 3 minutes. Always watch for the visual cues: opaque pink color and a gentle “C” shape.
Rubbery shrimp is almost always a sign of overcooking. Shrimp cook very quickly, and even an extra 30 seconds can make a big difference. Ensure you remove them from the heat as soon as they turn opaque pink and form a “C” shape (not a tight “O”). Immediately plunging them into an ice bath also stops the cooking process and preserves their tender texture.
Yes, you absolutely can! Boiling shrimp with the shells on adds more flavor to the shrimp and the poaching liquid. It might take slightly longer to cook (add about 30-60 seconds to the cooking time) and you’ll need to peel them after boiling, but many prefer this method for enhanced taste. Ensure you still devein them if desired, which is easier to do before cooking.
A good rule of thumb is to use about 2 quarts (2 liters) of water for every 1 pound of shrimp. This provides enough liquid for the shrimp to cook evenly without overcrowding and helps maintain the water temperature when they are added.
More Delicious Seafood Recipes to Explore
If you’re a fan of fresh and flavorful seafood, be sure to check out these other popular recipes:
- Garlic Butter Shrimp
- Oyster Stew Recipe with Potatoes
- Baked Salmon Cakes
- Jamaican Jerk Shrimp Skewers
★
★
★
★
How to Boil Shrimp: Quick & Easy Recipe
Shinee Davaakhuu
10 minutes
2 minutes
15 minutes
4
servings
Comment
Print Recipe
Ingredients
-
1 lb
raw extra large shrimp
peeled and deveined Note 1 -
1 teaspoon
coarse kosher salt -
Lemon wedges
optional -
Black peppercorns
optional -
Bay leaf
optional
Instructions
-
Bring a large pot of water with aromatics, if using, to a rolling boil. (TIP: About 2qt/2L of water is enough for 1-2lbs of shrimp.)
-
Add shrimp and simmer for about 2 minutes, or until shrimp turn opaque pink and curl into a ‘C’ shape. Immediately transfer the cooked shrimp into a bowl of ice water. (Note: Cooking time depends on the size of the shrimp. 2 minutes is perfect for 26/30 count shrimp.)
⭐️ Did you make this recipe?
Please leave a review and let us know how you liked it!
Tips & Notes
Storing Tips:
– Store boiled shrimp in an airtight container in the fridge for up to 3-4 days.
– To freeze, let your shrimp cool completely, and quickly chill them in the fridge. Then, transfer them to a freezer-safe container, and freeze for up to 3-6 months.
– Thaw in the fridge overnight when you’re ready to serve and enjoy cold. Or, quickly warm them in a skillet over medium heat on the stove.
Nutrition
1
serving
113
kcal
23
g
2
g
1462
mg
Appetizer
American

Did you make this?
Leave a rating and your feedback. Thank you!