

Instant Pot Beef Bone Broth: Your Guide to Nutrient-Rich Liquid Gold
Beef bone broth is a fundamental ingredient in countless cuisines, treasured for its deep flavor and remarkable health benefits. While traditional stovetop methods can demand an entire day of simmering, the Instant Pot offers a fantastic shortcut. In less than 5 hours, with only about 5 minutes of active preparation, you can yield up to 11 cups of this savory “liquid gold.” This guide will walk you through creating a rich, gelatinous beef bone broth that will become a true kitchen staple, ready to elevate your soups, stews, sauces, and overall well-being.
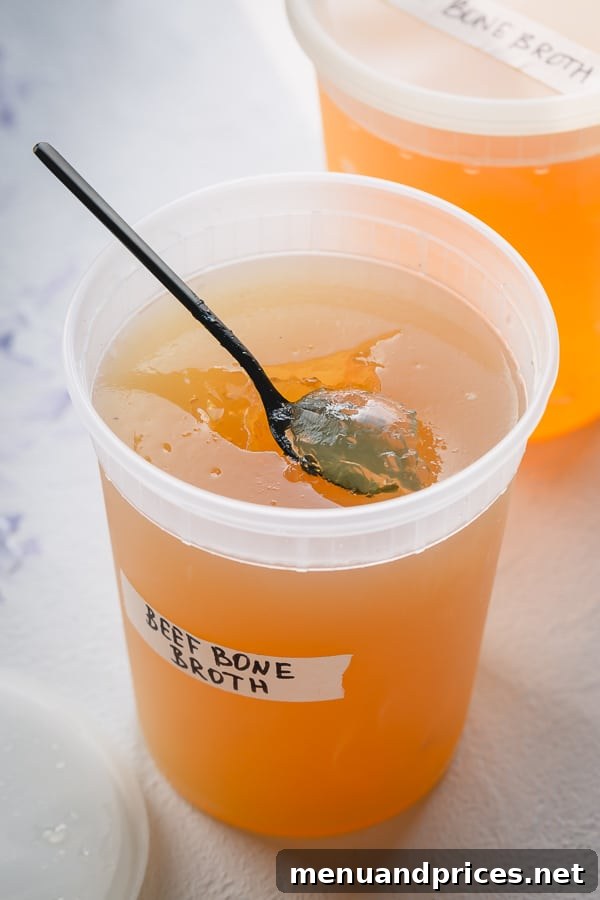
Understanding the Culinary Trio: Bone Broth, Broth, and Stock
The terms “bone broth,” “broth,” and “stock” are often used interchangeably, leading to some confusion. However, there are subtle but important distinctions that influence their flavor, texture, and nutritional profiles:
- Bone Broth & Stock: These two are fundamentally similar. Both are made by simmering animal bones (often with some connective tissue, vegetables, and aromatics) in water for an extended period. The goal is to extract gelatin, collagen, marrow, and minerals from the bones. The long cooking time results in a richer, thicker liquid, especially when chilled, due to the high gelatin content. Stock is traditionally less seasoned and primarily used as a base for other dishes, while bone broth is often seasoned more heavily and consumed on its own as a nourishing drink.
- Broth: Unlike bone broth and stock, traditional broth is primarily made from simmering meat (not just bones), typically with vegetables and seasonings, for a shorter duration. This yields a lighter, thinner liquid with a milder flavor. It’s often ready to drink or use as a lighter base for soups.
For this recipe, we’re focusing on true beef bone broth, emphasizing the rich extraction of nutrients from bones, making it both a flavorful culinary enhancer and a nourishing health tonic.
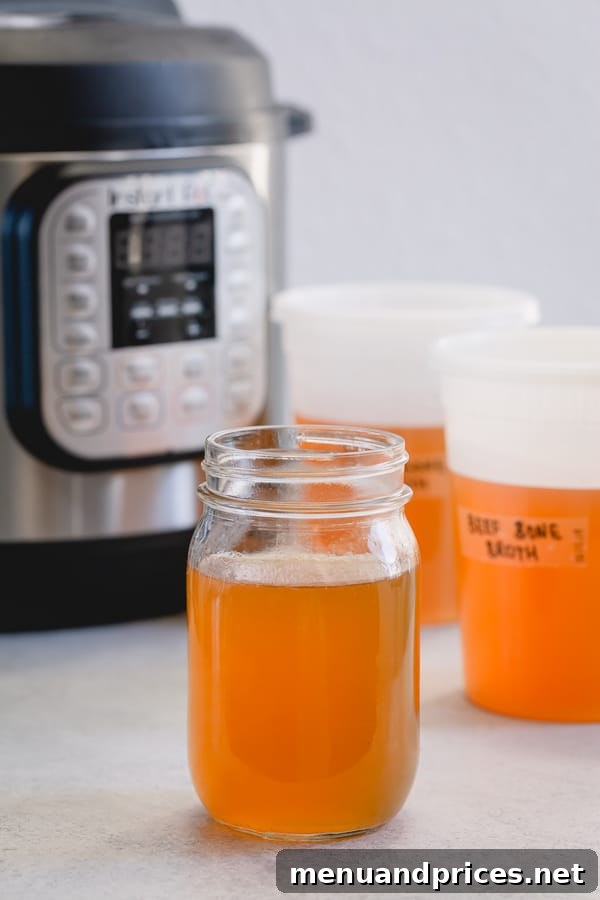
What Are the Incredible Benefits of Beef Bone Broth?
Bone broth has been cherished for centuries across various cultures, not just for its deep, savory flavor, but also for its impressive array of health benefits. Modern science is increasingly confirming what traditional wisdom has known all along. Here’s why beef bone broth is so good for you:
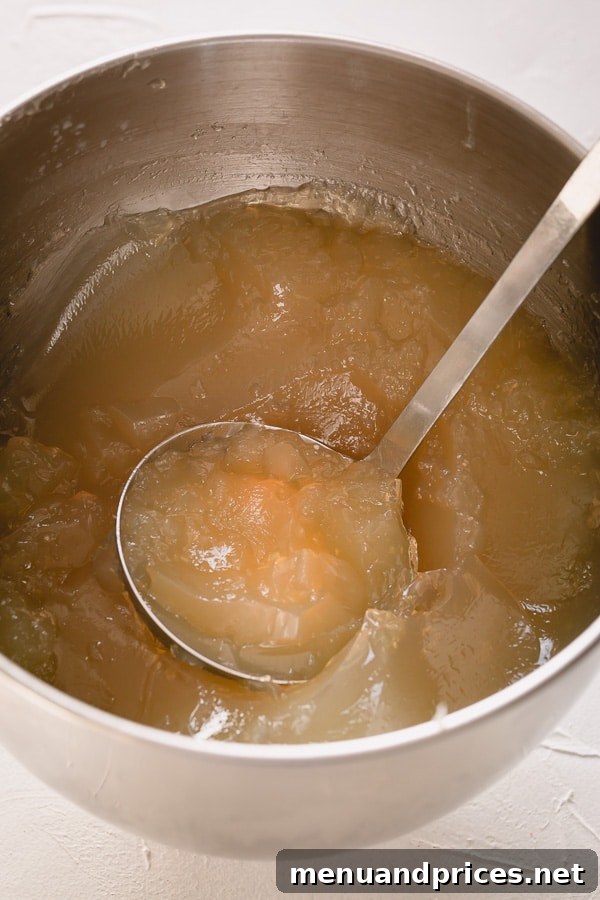
- Rich in Collagen and Gelatin: When bones and connective tissues are simmered, collagen breaks down into gelatin. Gelatin is packed with amino acids like glycine, proline, and glutamine. These are crucial for maintaining healthy skin, hair, nails, and joints. The gelatin also gives bone broth its characteristic jiggly texture when chilled.
- Supports Gut Health: Gelatin is known to help heal and seal the lining of the gut. This can be particularly beneficial for individuals dealing with leaky gut syndrome, inflammatory bowel diseases, or general digestive discomfort. Glycine also aids digestion by increasing gastric acid secretion.
- Boosts Joint Health: The collagen and other compounds like glucosamine and chondroitin sulfate found in bone broth are vital components of cartilage, which cushions our joints. Consuming bone broth may help reduce joint pain and inflammation, improving flexibility and mobility.
- Enhances Immune Function: A healthy gut is directly linked to a strong immune system. By supporting gut integrity, bone broth helps prevent harmful substances from entering the bloodstream, thus bolstering the body’s natural defenses. It’s a go-to remedy for colds and sore throats for a reason!
- Promotes Healthy Skin, Hair, and Nails: The collagen in bone broth is a building block for healthy skin, helping to improve elasticity and hydration, which can reduce the appearance of wrinkles. It also contributes to stronger hair and nails.
- Provides Essential Minerals: Bones contain a variety of important minerals such as calcium, magnesium, phosphorus, silicon, and sulfur. While the extraction amount can vary, bone broth can contribute to your daily mineral intake, supporting bone density and overall bodily functions.
- Detoxification Support: Glycine, an amino acid abundant in bone broth, plays a key role in the liver’s detoxification processes, helping the body eliminate toxins.
- Aids in Sleep and Mood: Glycine also acts as an inhibitory neurotransmitter, which can help promote relaxation and improve sleep quality.
Incorporating bone broth into your diet is an easy and delicious way to tap into these numerous health advantages, making it a valuable addition to any wellness routine.
How to Make Beef Bone Broth in the Instant Pot: A Quick & Easy Method
Making beef bone broth can be done on the stovetop or in an Instant Pot. While the stovetop requires a longer simmering time, the Instant Pot significantly cuts down on the hours needed while still yielding a rich, deeply flavored, and gelatinous broth. Here’s how to master it with your pressure cooker:
- Step 1: Gather Your Bones. Place 3-5 lbs of beef bones into your Instant Pot. For the best broth, consider a mix of marrow bones, knuckle bones, oxtail, and even leftover bones from roasts or steaks. (See section below for more tips on selecting the best bones.)
- Step 2: Add Flavor Enhancers. Include vegetable scraps (like onion peels, carrot ends, celery stalks, mushroom stems) if desired, along with a head of garlic (cut in half horizontally), a medium onion (optional), black peppercorns, and kosher salt. Be mindful not to overload with too many vegetables, as this can dilute the pure beef flavor.
- Step 3: Introduce Vinegar. Pour 1 tablespoon of apple cider vinegar (or white vinegar) into the pot. The acidity helps to draw out valuable minerals and collagen from the bones, enhancing the nutritional profile of your broth.
- Step 4: Fill with Water. Cover the bones and other ingredients with cold water, filling the Instant Pot up to its maximum fill line.
- Step 5: Pressure Cook. Secure the lid on your Instant Pot, ensuring the valve is set to the “sealing” position. Set it to “Manual” or “Pressure Cook” for 4 hours on high pressure. This extended high-pressure cooking time is crucial for extracting maximum flavor and nutrients, resulting in a thick, gelatinous stock.
- Step 6: Natural Pressure Release. After the cooking cycle completes, allow the pressure to release naturally. This typically takes about an hour or more, depending on the volume of liquid. Important Safety Note: Due to the large volume of hot liquid, a quick release is not recommended as it can cause hot broth to spray from the valve. If you’re in a hurry, you can do a partial natural release for 30-40 minutes, then carefully turn the valve to venting for the remaining pressure. Always exercise extreme caution when opening the lid.
- Step 7: Strain and Cool. Once the pressure has fully released and the lid can be safely opened, allow the broth to cool slightly. Carefully pour the broth through a colander placed over a large heat-safe bowl to separate the bones and vegetables. For an even clearer broth, strain it again through a fine-mesh sieve lined with cheesecloth or a paper towel.
- Step 8: Refrigerate Overnight. Cover the strained broth and refrigerate it for several hours, or preferably overnight. This chilling process allows the fat to solidify on top, forming a “fat cap.”
- Step 9: Skim and Store. The next day, easily skim off the solidified fat layer (don’t throw it away!). You’ll be left with a rich, clear, and gelatinous beef bone broth. Divide it into smaller containers, leaving headspace for expansion if freezing, and store in the refrigerator or freezer.
Your finished broth should have a beautiful brownish-orange hue, its exact shade varying based on the bones and optional vegetables used. For instance, carrots will impart an orange tint, while yellow onions might give a yellower shade. These variations are perfectly normal and don’t indicate a “wrong” result—just a unique batch!
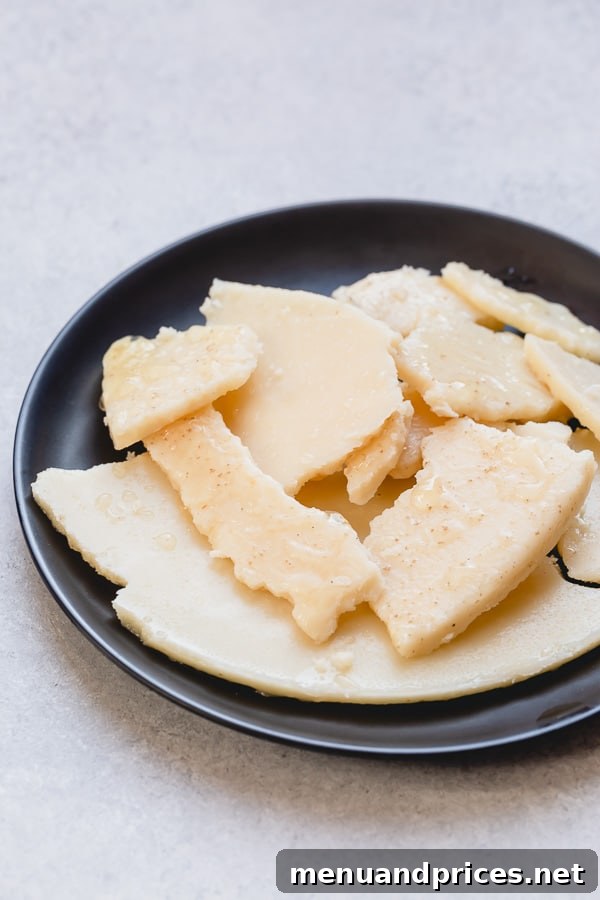
Don’t Discard the Fat Cap: It’s Liquid Gold Too!
The layer of fat that solidifies on top of your chilled bone broth is a treasure! Rich in flavor, this beef fat (tallow) is excellent for sautéing vegetables, cooking stir-fries, or even roasting potatoes. It adds a deep, savory umami that vegetable oils can’t match. Simply scoop it off and store it in a separate airtight container in the fridge or freezer for future culinary use.
Where to Source and What Are the Best Beef Bones for Broth?
The quality of your bone broth starts with the bones themselves. Choosing the right types of bones will significantly impact the flavor, richness, and gelatinous texture of your finished product.
- Butcher Shops: Your local butcher is an excellent resource. Ask for “soup bones,” “marrow bones,” or “oxtails.” Butchers often have various cuts available specifically for broth-making, and they can provide insights into what’s best.
- Marrow Bones: These are typically femur bones or other large leg bones, cut crosswise to expose the marrow. Marrow is a soft, fatty, nutrient-dense tissue that adds incredible flavor and richness to the broth. It’s packed with healthy fats and minerals.
- Knuckle Bones: Rich in cartilage and connective tissue, knuckle bones are fantastic for creating a gelatinous broth. The collagen breaks down during simmering, contributing to a thick, jiggly texture when cooled.
- Oxtails: These are a fantastic choice because they contain a good balance of bone, meat, and cartilage, yielding a broth that is both flavorful and highly gelatinous.
- Leftover Bones: Don’t underestimate the power of collecting bones! A clever way to accumulate enough bones for a batch of broth is to keep a large freezer-safe bag. Throughout the month, add bones from T-bone steaks, short ribs, prime rib roasts, or any other beef cuts. Once you’ve collected 3-5 pounds, you’re ready to make a hearty batch of homemade bone broth.
A combination of these bone types often yields the most balanced and beneficial broth.
Preparing Your Beef Bones for Optimal Broth
While making bone broth is straightforward, a couple of preparatory steps can significantly enhance the flavor and clarity of your final product. These steps are optional but highly recommended for those seeking the best possible results.
Roasting Beef Bones for Deeper Flavor
Roasting your beef bones before simmering is a game-changer for flavor. This step caramelizes the bones and any adhering meat, developing a richer, deeper, and more complex savory profile that translates beautifully into your broth. While it adds an extra step, the difference in flavor is truly remarkable.
- To Roast the Bones: Arrange your chosen beef bones in a single layer on a baking sheet. Roast them in a preheated oven at 450°F (230°C) for approximately 20-30 minutes, or until they are deeply browned. Once roasted, transfer them to your Instant Pot.
I often admit that sometimes I skip this step for sheer convenience, especially on busy days, but I can attest that the extra time spent roasting is absolutely worth it for a superior flavor experience!
Blanching Beef Bones for a Clearer Broth
Some culinary experts recommend blanching beef bones prior to making broth. This involves briefly boiling the bones in water for about 10-15 minutes, then draining and rinsing them. The purpose of blanching is to remove impurities, excess blood, and other residues that can cause the broth to be cloudy or have an off-flavor. This results in a cleaner, clearer broth.
While blanching can indeed lead to a more pristine broth, I’ve found that for everyday home cooking, this step isn’t strictly necessary for a delicious and nutritious end result. It can also be quite time-consuming. If a crystal-clear broth is a priority for you, then don’t hesitate to incorporate this step!
How to Make Beef Bone Broth on the Stovetop: The Traditional Way
For those who prefer the traditional method or don’t own an Instant Pot, a stovetop beef bone broth is equally rewarding, though it requires significantly more time. The key is a long, gentle simmer to extract all the goodness.
- Combine Ingredients: Place your beef bones (preferably roasted), vegetable scraps, herbs, and seasonings in a very large stockpot. Cover all the ingredients generously with cold water.
- Bring to a Boil, Then Simmer: Bring the pot slowly to a rolling boil over high heat. Once boiling, immediately reduce the heat to the lowest setting, allowing the broth to maintain a very gentle simmer.
- Long Simmer: Let the broth gently simmer for at least 12-24 hours. The longer the simmer, the more nutrients, collagen, and flavor will be extracted from the thick bones. You’ll notice the liquid level decreasing over time due to evaporation.
- Replenish Water (Optional): If you’re simmering for an extended period (beyond 12-16 hours), you might need to add more water periodically to keep the bones submerged.
- Strain and Cool: Once simmering is complete, carefully strain the broth as described in the Instant Pot method. Cool completely before refrigerating.
Note: As the broth simmers for many hours, some liquid will evaporate. You will likely end up with a few cups less than what you started with, but the remaining liquid will be incredibly concentrated and flavorful.

How to Store and Preserve Your Homemade Beef Bone Broth
Once you’ve made a delicious batch of beef bone broth, proper storage is key to enjoying its benefits for weeks or even months.
- Refrigeration: Freshly made bone broth can be stored in an airtight container in the refrigerator for up to 3-4 days. Always ensure it’s fully cooled before placing it in the fridge to prevent bacterial growth.
- Freezing for Long-Term Storage: Freezing is the best way to preserve bone broth for extended periods.
- Divide and Portion: Pour the cooled broth into freezer-safe containers. Leave about an inch of headspace at the top of each container, as liquids expand when frozen. For ultimate convenience, freeze your broth in various portion sizes (1-cup, 2-cup, or 4-cup volumes). This allows you to thaw only what you need for specific recipes. I highly recommend investing in good quality, versatile plastic containers that can withstand freezing.
- Ice Cube Trays: For smaller portions perfect for quick sauces or deglazing, pour broth into ice cube trays, freeze until solid, then transfer the frozen cubes to a freezer bag.
- Freezer Bags: For larger, flat storage, pour cooled broth into heavy-duty freezer bags, seal them, and lay them flat on a baking sheet until frozen. Once solid, you can store them upright to save space.
- Duration: Frozen beef bone broth can be safely stored for up to 6 months. While it will technically be safe beyond that, the quality and flavor may start to diminish.
- Thawing Tips: To use frozen broth, simply transfer it to the refrigerator overnight to thaw. For quicker thawing, place the container in a bowl of cold water, or gently heat it in a saucepan over low heat.

Versatile Ways to Use Your Homemade Beef Bone Broth
Once you’ve mastered this nutrient-packed beef bone broth, the culinary possibilities are endless. It’s truly a versatile ingredient that can elevate almost any dish:
- Soups and Stews: This is its most obvious application. Use it as the base for hearty beef stews, rich lentil soups, or classic chicken noodle soup for an unparalleled depth of flavor.
- Rice and Grains: Cook rice, quinoa, couscous, or any other grain in bone broth instead of water. It infuses them with a savory richness that transforms a simple side dish into something extraordinary.
- Sauces and Gravies: Use bone broth to deglaze pans, create luscious gravies for roasts, or build flavorful sauces for pasta or vegetables. Its gelatinous nature adds body and gloss.
- Braising Meats: Bone broth is an ideal liquid for braising tough cuts of meat, like pot roasts or short ribs, making them incredibly tender and flavorful.
- Pasto Dishes: Add a splash of bone broth to pasta dishes, especially those without a heavy sauce, to add moisture and a layer of savory flavor.
- Drinking Straight: Many people enjoy sipping warm bone broth on its own, perhaps with a pinch of salt and pepper or a squeeze of lemon. It’s a comforting, nourishing beverage, especially beneficial when feeling under the weather or as a daily wellness tonic.
- Stir-fries: A dash of bone broth can add moisture and umami to stir-fries, especially when you want to avoid heavy sauces.
- Enhance Roasted Vegetables: Drizzle a bit of broth over vegetables before roasting to keep them moist and add flavor.
For an inspiring recipe that showcases the power of beef broth, be sure to try this delicious Instant Pot Beef Pho recipe. It’s a fantastic way to utilize your homemade liquid gold!

Instant Pot Beef Bone Broth
By Shinee Davaakhuu
Create exceptionally rich and healthy beef bone broth in your Instant Pot with minimal hands-on time. This recipe yields a significant amount of liquid gold perfect for countless culinary applications and health benefits.
Prep Time: 5 mins
Cook Time: 4 hrs
Total Time: 4 hrs 5 mins
Yields: 11 cups
Print Recipe
Ingredients
- 3-5 lbs beef bones (soup bones, marrow bones, oxtail, leftover short rib bones, leftover T-bones, leftover ribs from rib roast)
- 1 tablespoon apple cider vinegar or white vinegar (Note 1)
- 1 tablespoon black peppercorns
- 2 teaspoons kosher salt
- 1 head of garlic, cut in half horizontally
- 1 medium onion (optional)
- 1-2 cups vegetable scraps (optional, Note 2)
Instructions
- Place Bones: Add beef bones to the Instant Pot.
- Add Aromatics: Incorporate vegetable scraps (if using), vinegar, peppercorns, salt, garlic, and onion.
- Fill with Water: Pour in cold water until it reaches the max fill line of your Instant Pot.
- Seal and Set: Secure the Instant Pot lid and ensure the steam release valve is set to ‘sealing’.
- Pressure Cook: Set the Instant Pot to ‘Manual’ or ‘Pressure Cook’ on high pressure for 4 hours. This long cooking time is crucial for a thick, flavorful, and gelatinous broth.
- Natural Release: Allow the pressure to release naturally once cooking is complete. This usually takes about an hour or more. WARNING: A quick release is not safe with this large volume of hot liquid. If you must speed it up, allow a natural release for at least 30 minutes, then carefully turn the valve to ‘venting’ to release any remaining pressure. Exercise extreme caution when opening the lid.
- Strain and Cool: Once safe to open, allow the broth to cool slightly. Place a colander over a large heat-safe bowl and carefully pour the broth to separate bones and vegetables. For a clearer broth, strain again through a fine-mesh strainer lined with cheesecloth or paper towel. Cover and refrigerate overnight.
- Skim and Store: The next day, scrape off the solidified fat cap. Divide the broth into freezer-safe containers, leaving space for expansion, and freeze. For convenience, freeze in 1-, 2-, and/or 4-cup volumes to suit various recipes.
⭐️ Did you make this recipe?
Please leave a review and let us know how you liked it!
Tips & Notes
Note 1: Adding vinegar helps to extract more beneficial minerals and collagen from the bones during the cooking process, enhancing the nutritional value of your broth.
Note 2: Vegetable scraps like onion peels, carrot ends, or celery pieces add subtle flavor. They are completely optional, and you can omit them entirely for a purer beef flavor.
Nutrition (per serving, estimated)
- Calories: 18 kcal
- Carbohydrates: 4g
- Protein: 1g
- Fat: 1g
- Sugar: 1g
- Sodium: 431mg
Course: Condiments, Soup Base
Cuisine: American, Global

Did you make this? Leave a rating and your feedback. Thank you!