
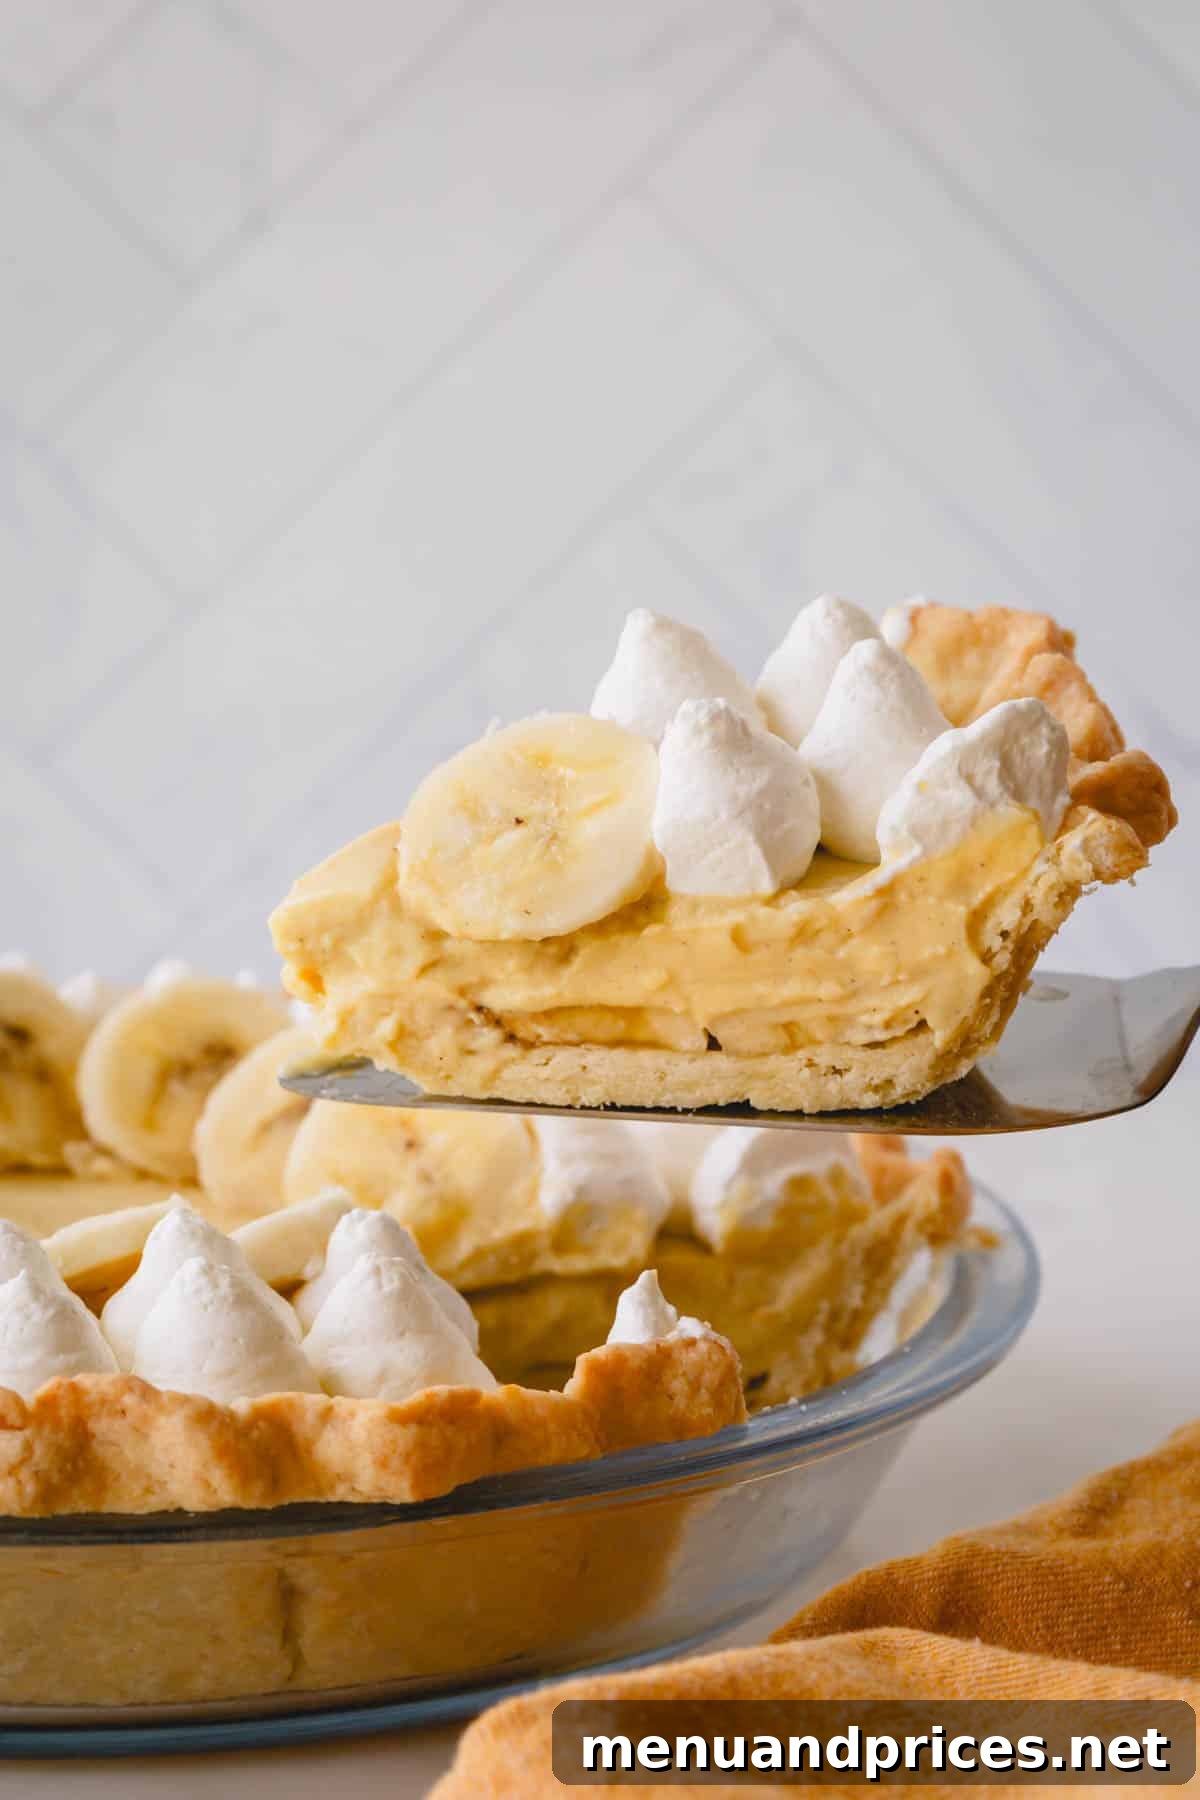
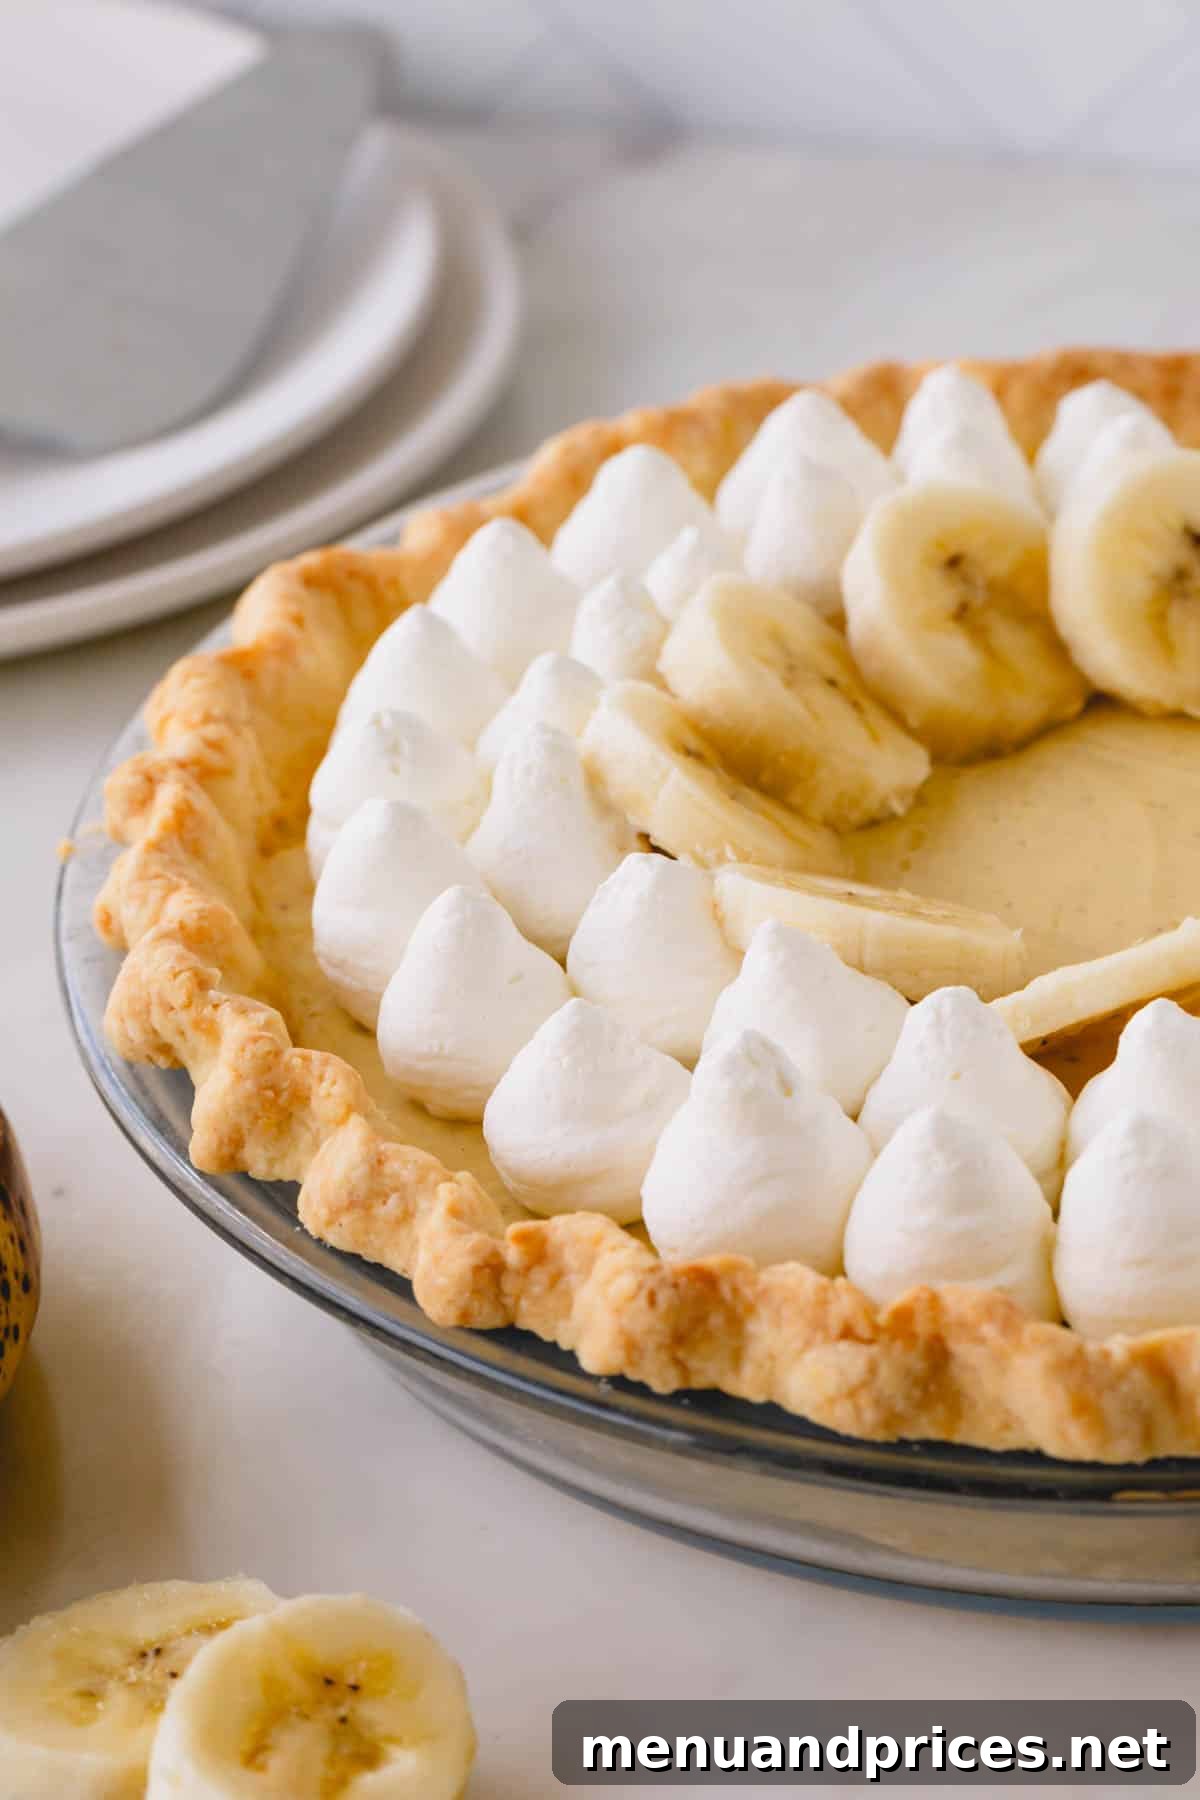
Indulge in the pure bliss of a truly homemade banana cream pie, a dessert that redefines comfort and luxury. From the moment your fork meets the impossibly buttery, flaky pie crust to the exquisite taste of silky smooth vanilla pudding, every element of this pie is 100% made from scratch with passion and precision. It’s generously packed with ripe, fresh bananas, surprisingly easy to prepare in advance, and guaranteed to be an utterly delicious showstopper at any gathering or a delightful treat just for you.
Pin this now to find it later
Pin It
Why You’ll Fall in Love with This Banana Cream Pie Recipe
A classic, all-American, old-fashioned banana cream pie holds a special place in the hearts of many, and it’s undoubtedly one of my absolute favorite desserts. If you haven’t yet experienced the sheer joy and unparalleled flavor of a 100% homemade banana cream pie, I wager you haven’t truly lived! This recipe isn’t just good; it’s a revelation, transforming simple ingredients into a masterpiece.
- This particular banana cream pie recipe is the real deal, a testament to traditional baking, much like my homemade cherry pie. You’ll find absolutely no pre-made ingredients or instant pudding mixes here. Every component is crafted with care, ensuring a depth of flavor and texture that shortcuts simply cannot replicate.
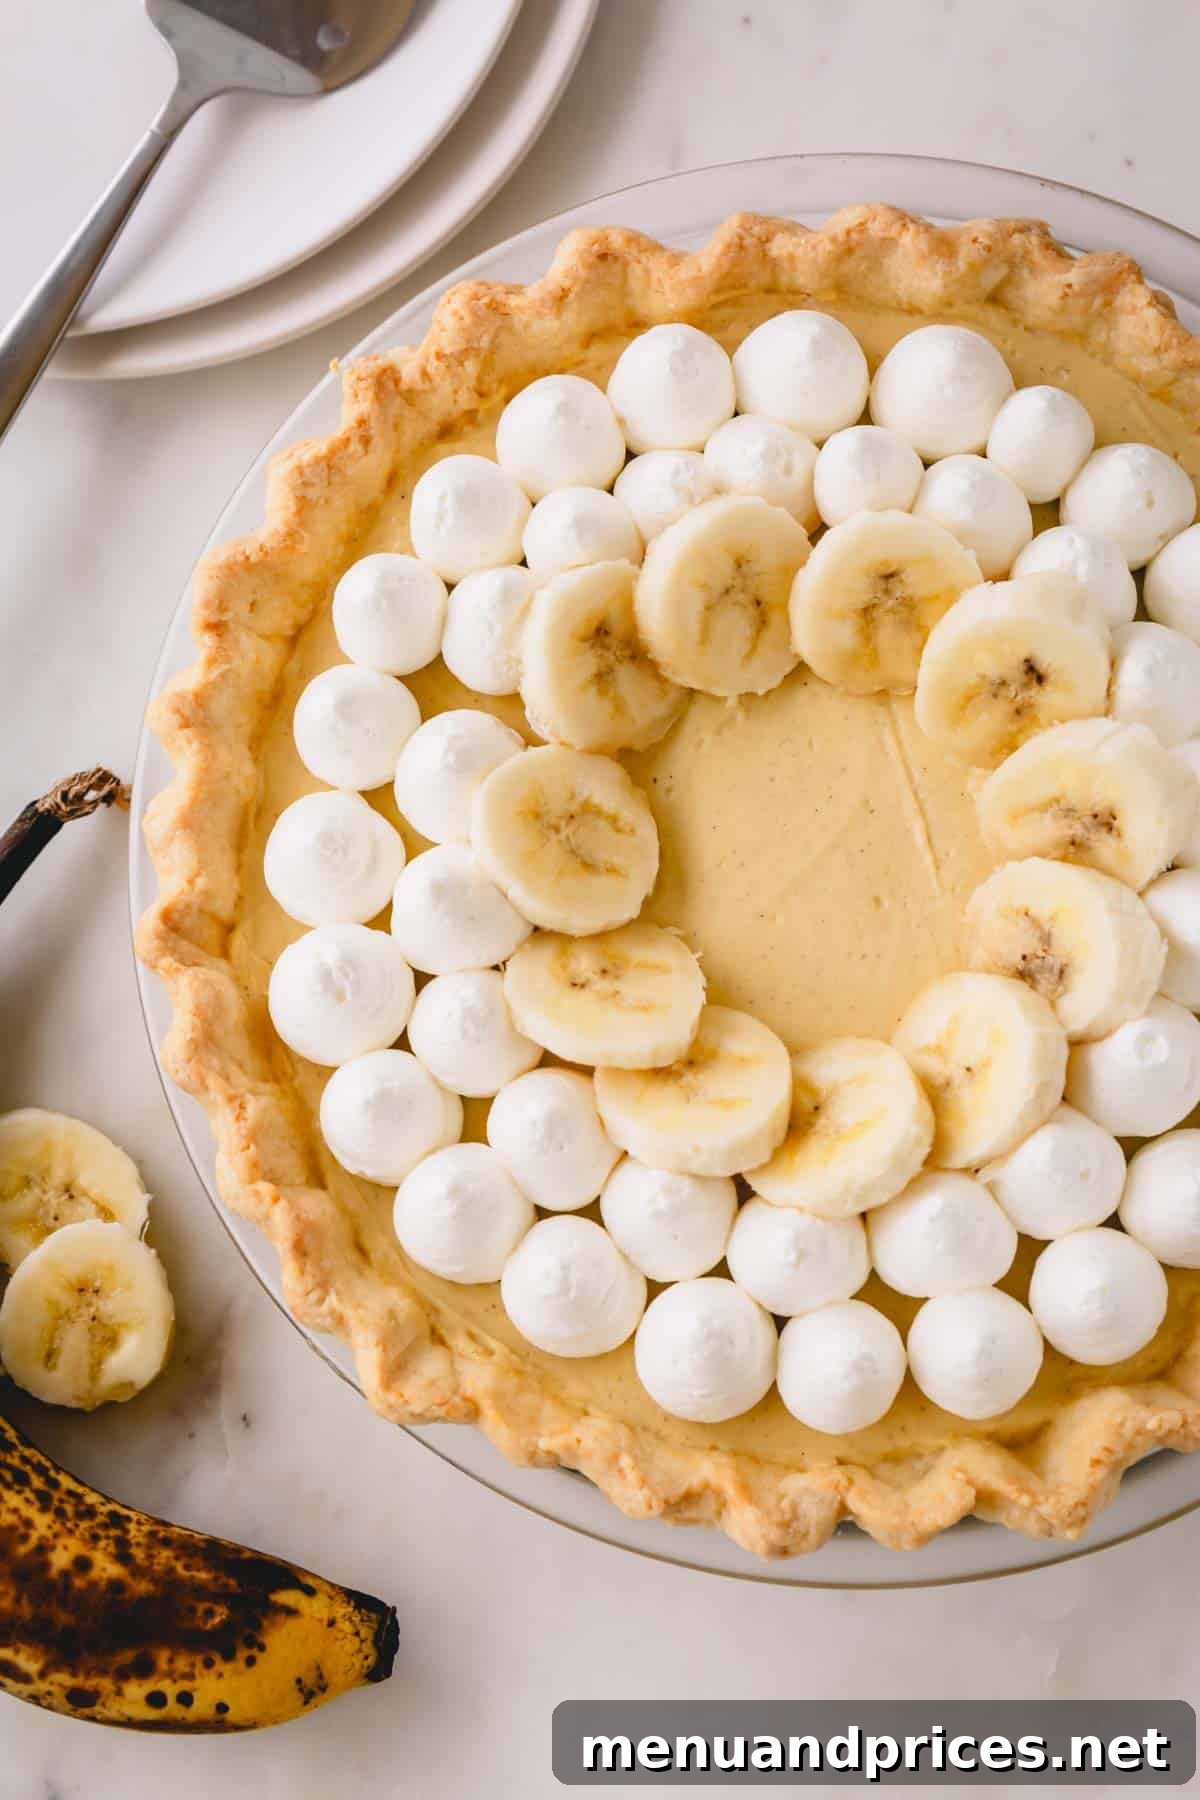
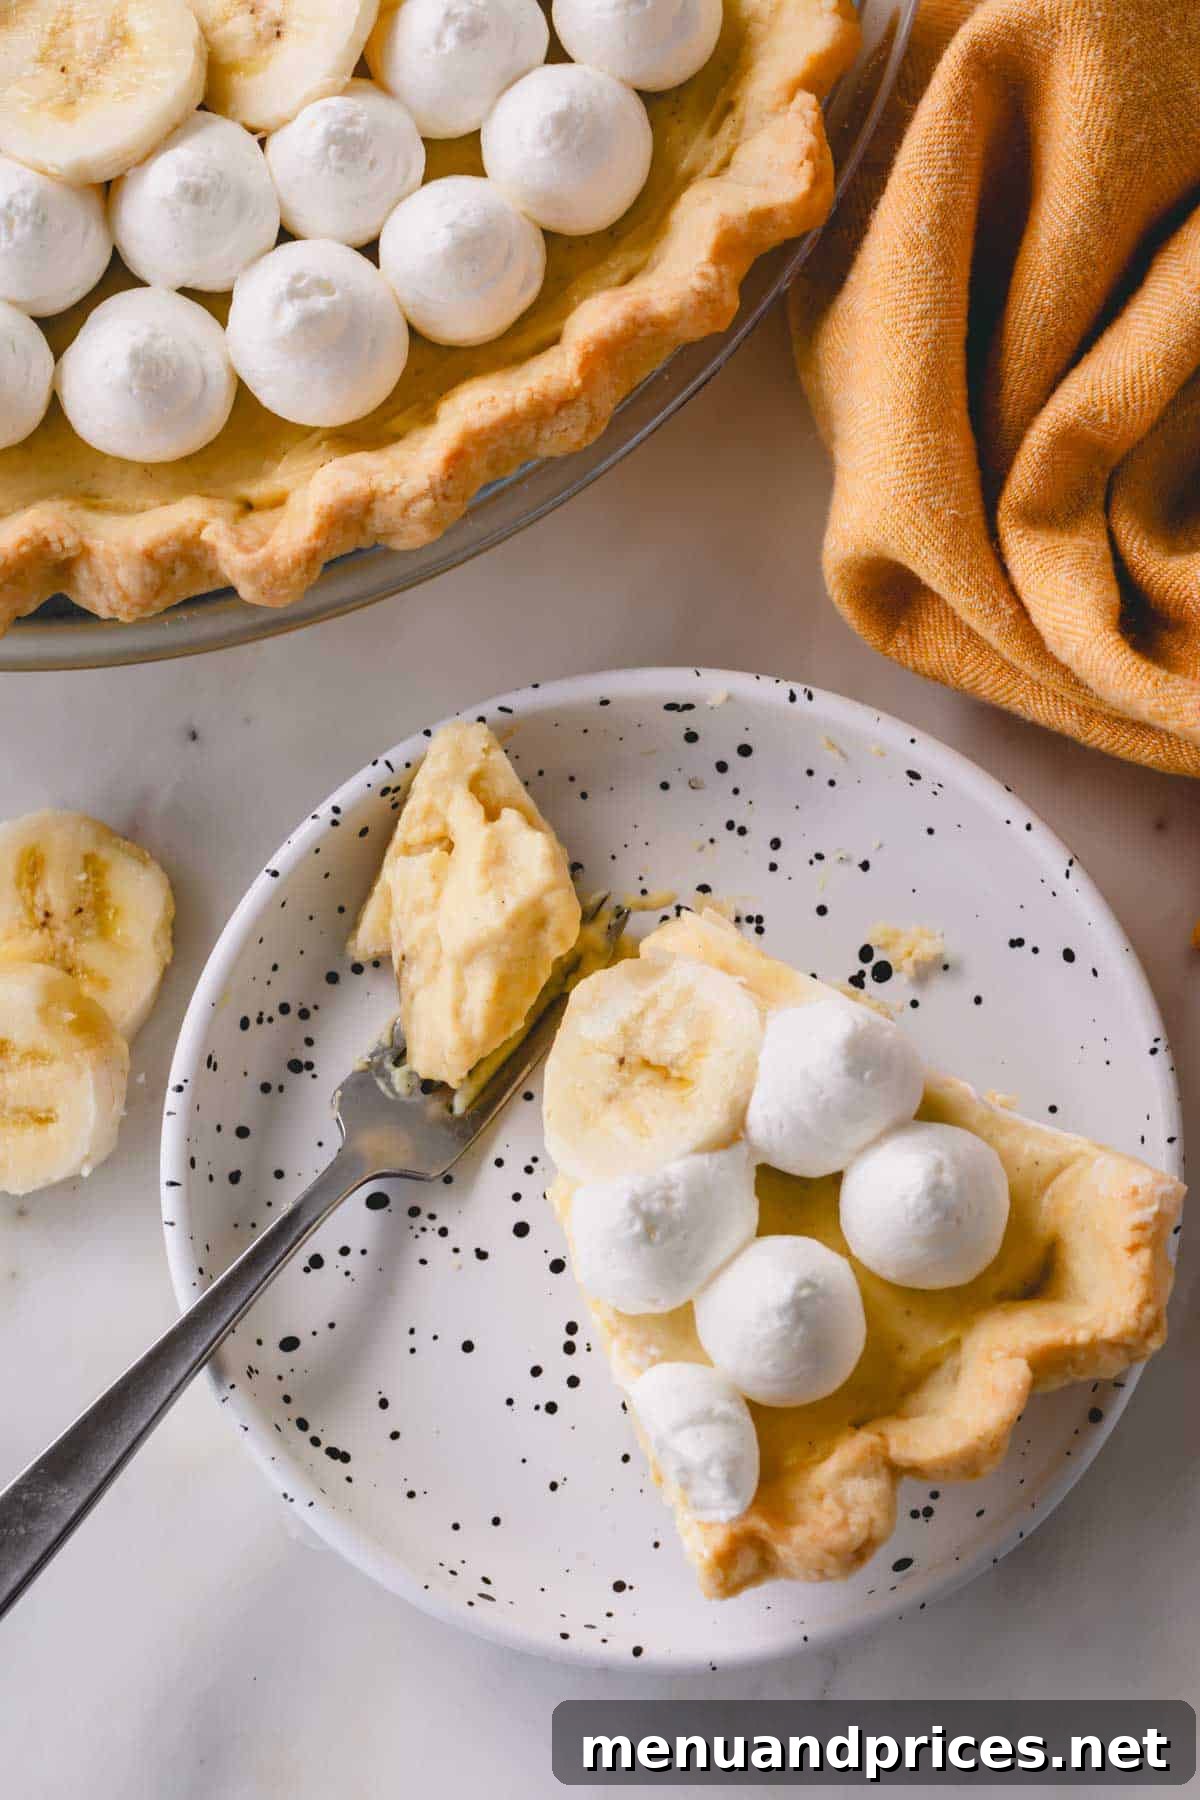
- Your taste buds will be enchanted by the irresistibly smooth yet perfectly sturdy vanilla custard, meticulously prepared to hold its shape while melting in your mouth. This luscious custard forms the perfect bed for generous layers of sweet, freshly sliced bananas, all crowned with an ethereal, fluffy homemade whipped topping.
- The vibrant, fresh flavors that burst forth from every bite make all the extra time and effort invested in this pie incredibly worthwhile. You’re not just baking a pie; you’re creating an experience, a memory, and a dessert that truly celebrates the natural goodness of its ingredients.
And don’t let the detailed length of the recipe directions intimidate you. They are intentionally as comprehensive as possible, designed to guide even novice bakers to guaranteed success and a perfect pie on your very first attempt! Consider them your personal guide to baking perfection.
Mastering the Four Essential Components of Banana Cream Pie
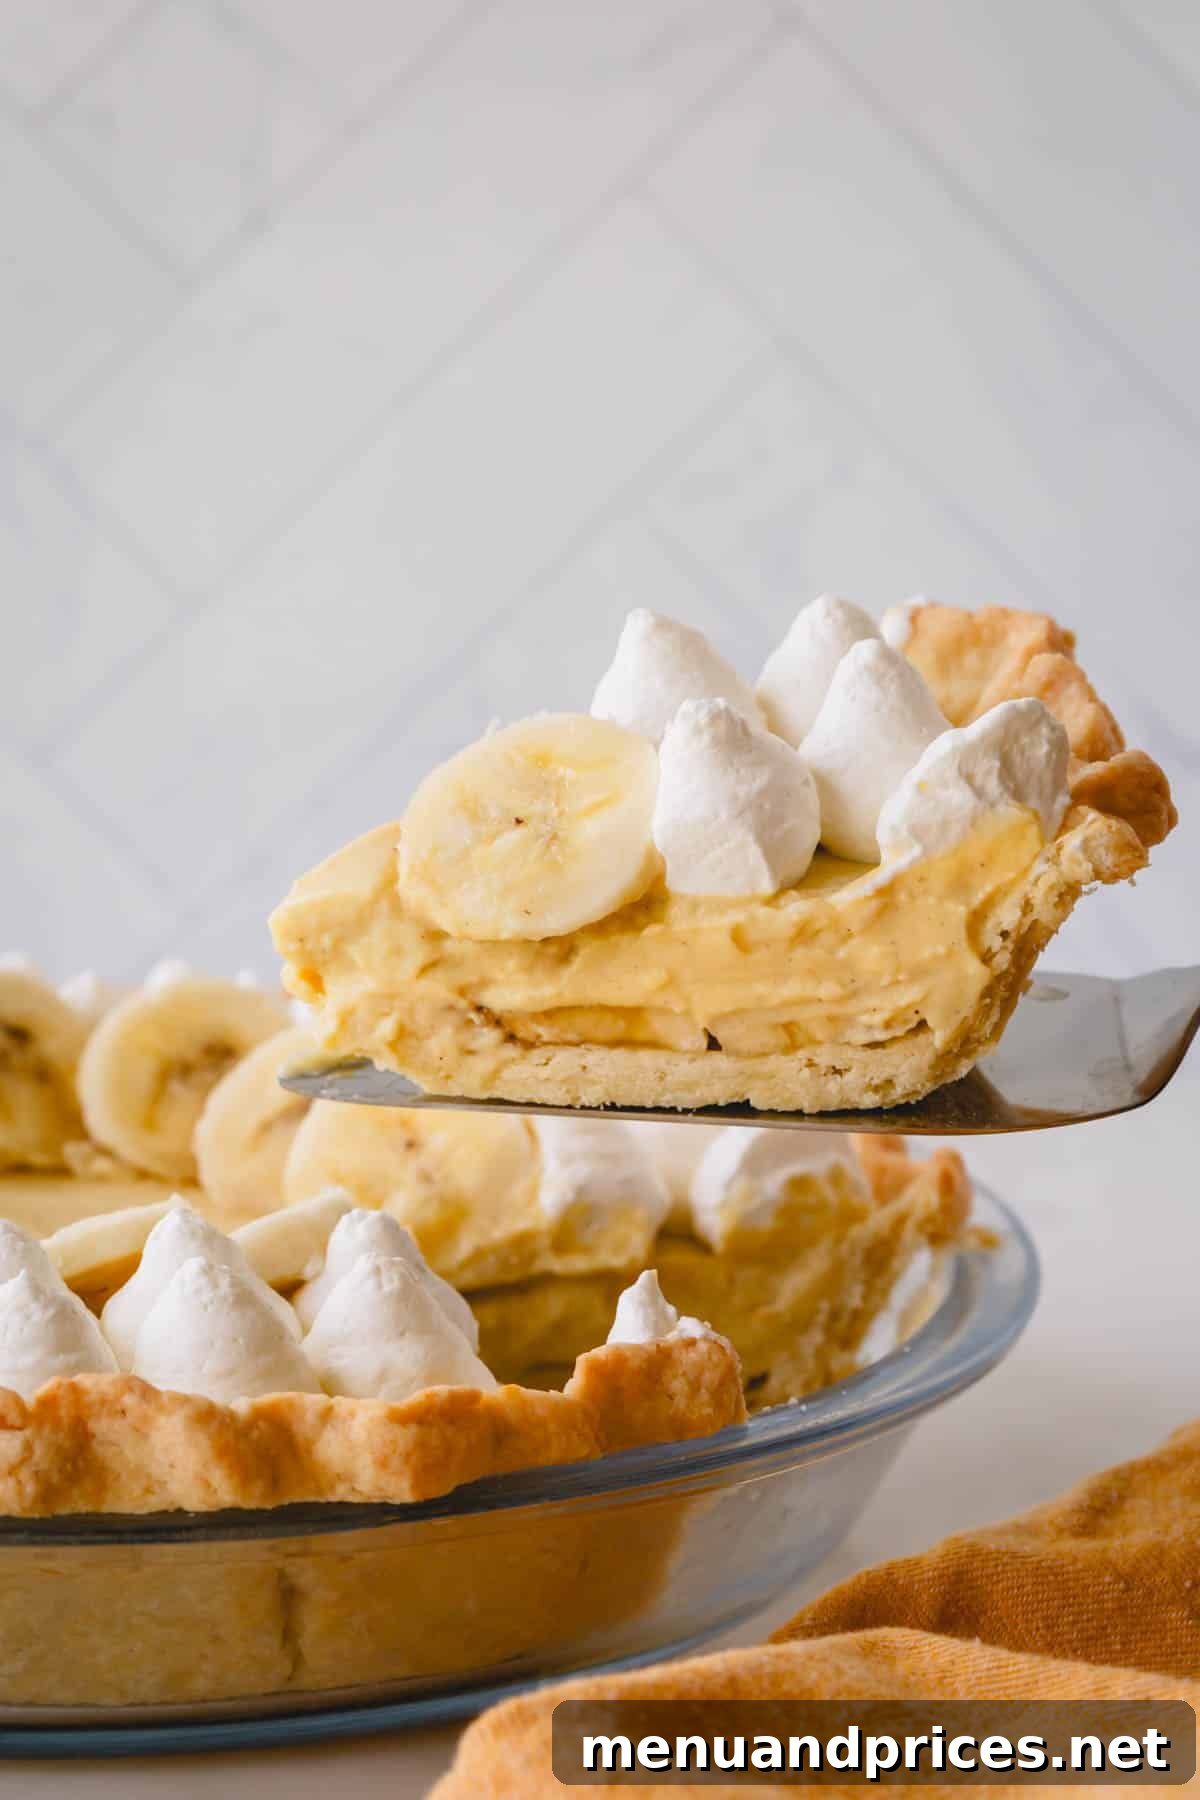
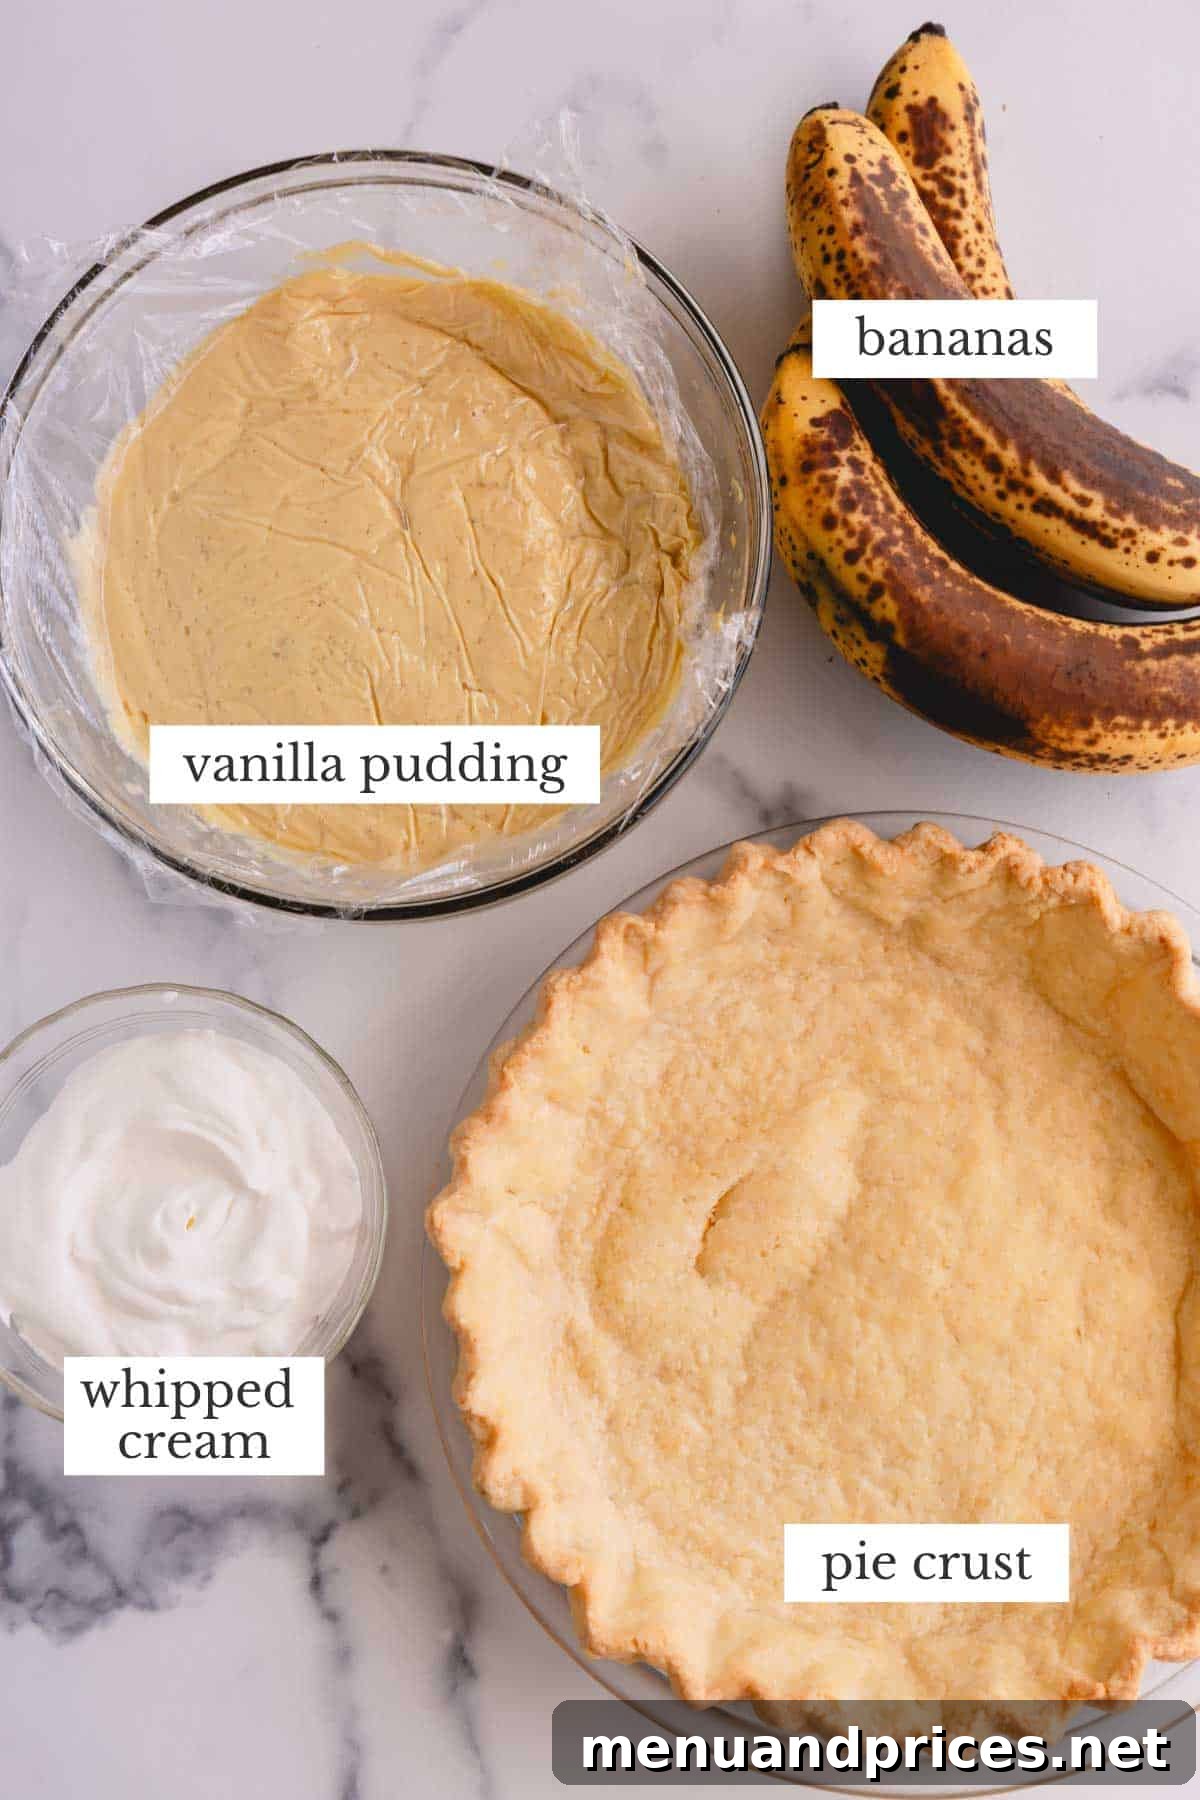
A truly exceptional homemade banana cream pie is a symphony of perfectly balanced textures and flavors, thoughtfully constructed from four distinct, yet harmonious, components. Each element plays a crucial role in creating the ultimate dessert experience, making every scratch-made step an investment in deliciousness.
- The Perfect Pie Crust: While readily available store-bought pie crusts offer convenience, embracing a homemade crust elevates this pie to an entirely new level. My signature all-butter pie crust recipe is a labor of love that pays off in spades. It’s surprisingly easy to make and yields an unbelievably flaky, tender, and rich foundation that complements the creamy filling beautifully. This isn’t just a container for the filling; it’s an integral part of the pie’s textural appeal.
- Luxurious Vanilla Pudding: The heart of this banana cream pie is its luscious, homemade vanilla pudding. Forget instant mixes; the depth of flavor and velvety texture achieved from scratch are simply unmatched. This rich, smooth custard is the element that truly makes this banana cream pie the best of the best, infusing every bite with genuine vanilla essence and a creamy mouthfeel that store-bought versions can only dream of.
- Cloud-Like Whipped Cream: No banana cream pie is complete without a generous topping of fresh, airy whipped cream. While my specialized homemade whipped cream with a secret ingredient offers an extra layer of gourmet delight, the simpler yet equally fabulous version included in this recipe provides the perfect light and fluffy counterpoint to the rich pudding and crust. It adds a refreshing coolness and elegant finish.
- Abundant Fresh Bananas: The star ingredient, of course, is fresh bananas! Don’t be shy – add as much banana as your heart (and pie!) desires. The natural sweetness and soft texture of ripe bananas are essential to this pie’s identity. I’ve also included an invaluable tip to prevent those pesky banana slices from browning, ensuring your pie remains picture-perfect from the first slice to the last.
How to Craft Your Banana Cream Pie from Scratch: A Detailed Guide
While the idea of a 100% scratch-made pie might conjure images of super high-maintenance baking, this easy banana cream pie recipe is designed to simplify the process without compromising on flavor or quality. I promise you, every single step is worth it for the incredible results you’ll achieve. The satisfaction of serving a truly homemade dessert, knowing every ingredient was prepared with care, is immensely rewarding. Let’s break down the journey to your perfect banana cream pie.
1. Preparing the Flaky Pie Crust: Your Foundation of Flavor
A spectacular pie begins with an exceptional crust. Our all-butter recipe ensures a foundation that’s both tender and remarkably flaky, providing the perfect contrast to the creamy filling.
- Craft the Dough: Begin by preparing the pie dough precisely according to my all-butter pie dough tutorial. This guide ensures you achieve the ideal texture, with perfectly incorporated butter chunks vital for flakiness. The key is to keep ingredients cold and handle the dough minimally to prevent gluten development.
- Roll with Care: On a lightly floured surface, gently roll the chilled dough out into a uniform 10 to 11-inch circle. The goal is an even thickness to ensure consistent baking. Carefully transfer this delicate dough into your chosen pie pan, ensuring it fits snugly without stretching.
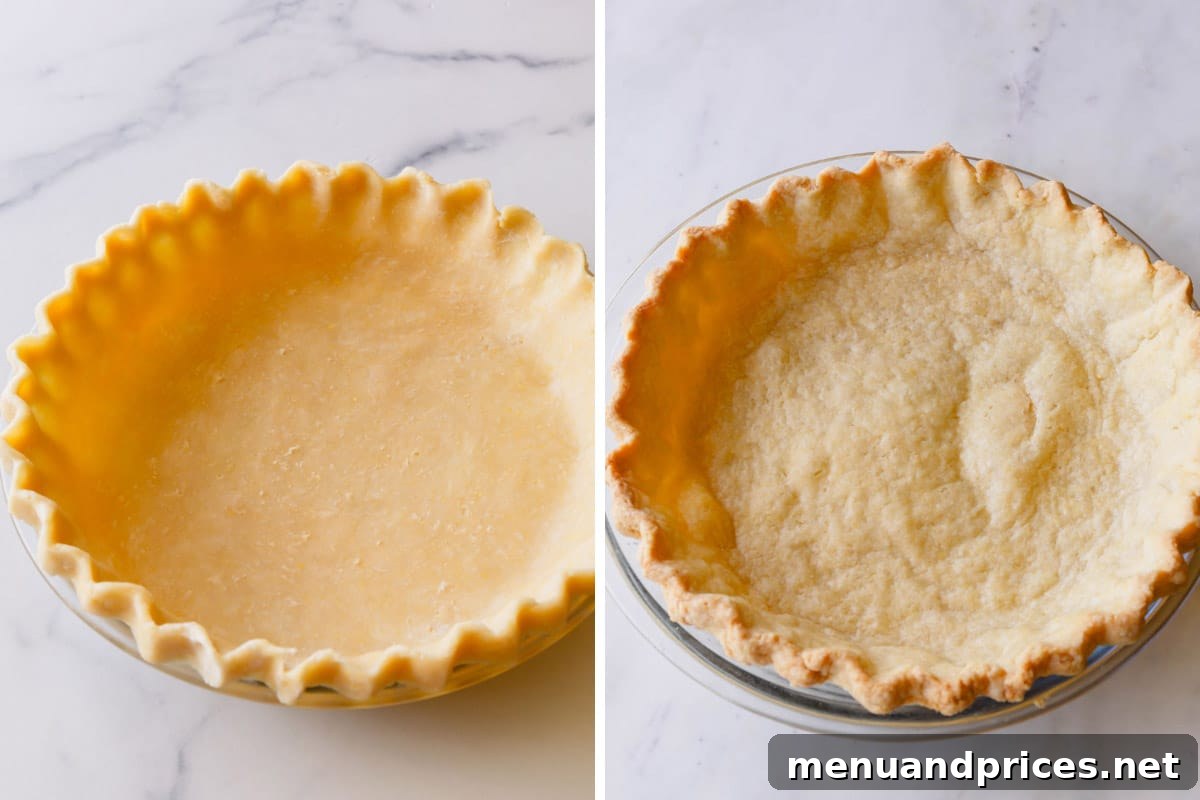
- Prevent Air Pockets: Using a fork, pierce holes generously all over the bottom and sides of the crust. This crucial step allows steam to escape during baking, preventing unsightly bubbles and air pockets from forming, which can lift the crust from the pan. (Even I sometimes forget this step, as seen in the image, resulting in minor bubbles—not a deal-breaker, but easily avoidable!)
- Blind Bake for Perfection: To ensure a crisp crust that won’t become soggy under the pudding, blind baking is essential. Cover the entire crust with aluminum foil, then weigh it down with pie weights (or dried beans). This prevents the crust from shrinking or puffing up excessively.
- Golden Brown Finish: Bake the weighted crust for an initial 15 minutes at 350°F (177°C). Then, carefully remove the foil and pie weights, allowing the crust to brown evenly. Continue baking for another 10-15 minutes, or until it achieves a beautiful golden hue. Once baked, let it cool completely on a wire rack before filling, as residual heat can affect the pudding’s texture.
2. Crafting the Silky Homemade Vanilla Pudding: The Soul of the Pie
The vanilla pudding is where this pie truly shines. Making it from scratch is surprisingly straightforward and yields a remarkably superior result compared to any instant mix. For a comprehensive, step-by-step visual guide, you can refer to my detailed tutorial for the best vanilla pudding. However, here’s a concise overview of how to achieve this creamy perfection:
- Scald the Dairy: In a heavy-bottomed saucepan, gently heat the milk and heavy cream over medium-low heat until it reaches a scalding point. This means you’ll see small bubbles forming around the edges, but it shouldn’t be boiling vigorously. Scalding helps infuse the vanilla flavor later and warms the liquid for tempering.
- Whisk the Base: In a separate bowl, whisk together the egg yolks, granulated sugar, cornstarch, both pure vanilla extract and vanilla bean paste (for maximum flavor), and a pinch of kosher salt. Whisk vigorously until the mixture becomes pale, creamy, and roughly doubles in volume. This aeration is key for a light pudding.
- Temper the Eggs: This critical step prevents the egg yolks from scrambling. While continuously whisking the egg yolk mixture, slowly pour about one cup of the hot, scalded milk into it. This gradual introduction of heat gently raises the temperature of the egg mixture, preparing it for the rest of the hot liquid.
- Combine and Thicken: Pour the tempered egg mixture back into the saucepan with the remaining scalded milk. Cook this combined mixture over medium heat, stirring constantly with a whisk or rubber spatula, for 8-10 minutes. The pudding will gradually thicken, becoming luscious and coat the back of your spoon beautifully. Constant stirring is essential to prevent scorching and ensure an even consistency.
- Achieve Ultimate Smoothness: For an extra-smooth, professional-grade pudding, you can press it through a fine-mesh sieve immediately after cooking. This removes any potential lumps or bits of scrambled egg that might have formed despite careful tempering.
- Prevent a Film: To avoid a rubbery film from forming on the surface as it cools, immediately cover the hot pudding with plastic wrap, ensuring the wrap touches the entire surface of the pudding. This seals out air and locks in moisture.
- Chill for Setting: Chill the pudding in the refrigerator for at least 1 hour, or until it is completely cold and set. This allows the cornstarch to fully activate and thicken the pudding to its ideal consistency for the pie.
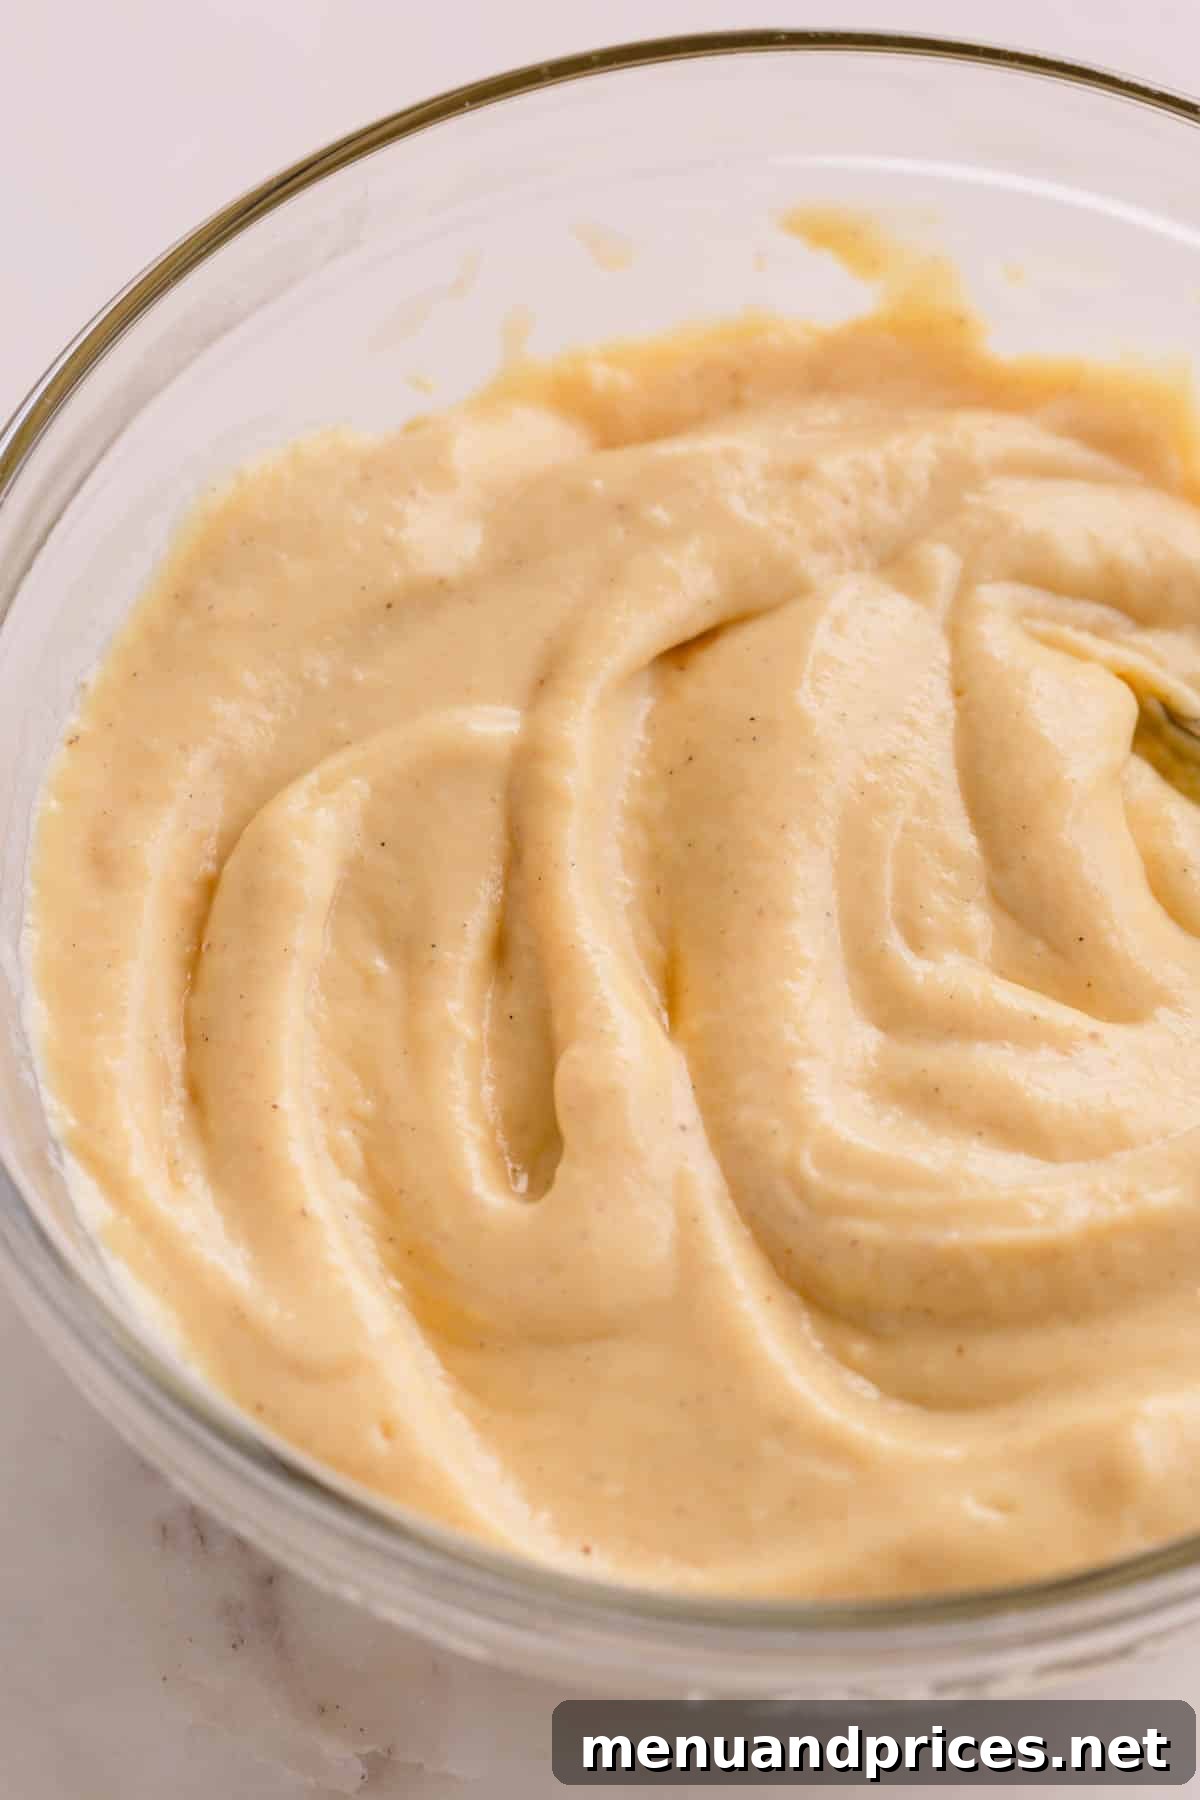
Expert Tip: How to Check Pudding for Doneness
There’s a simple, foolproof trick to confirm your pudding has reached the perfect thickness. First, dip the back of a spoon into the pudding, allowing it to coat the surface generously. Then, run your finger down the middle of the coated spoon. If your finger trail remains distinctly separated, with the pudding not flowing back together, your pudding is perfectly done! If the pudding immediately runs back together, it requires a bit more cooking time to achieve that ideal creamy, thick consistency.
3. Assembling Your Homemade Banana Cream Pie: Layers of Delight
With your perfectly baked pie crust and luscious vanilla pudding ready, it’s time to bring all the components together to create your magnificent banana cream pie. This assembly process is quick and satisfying, laying the groundwork for a truly memorable dessert.
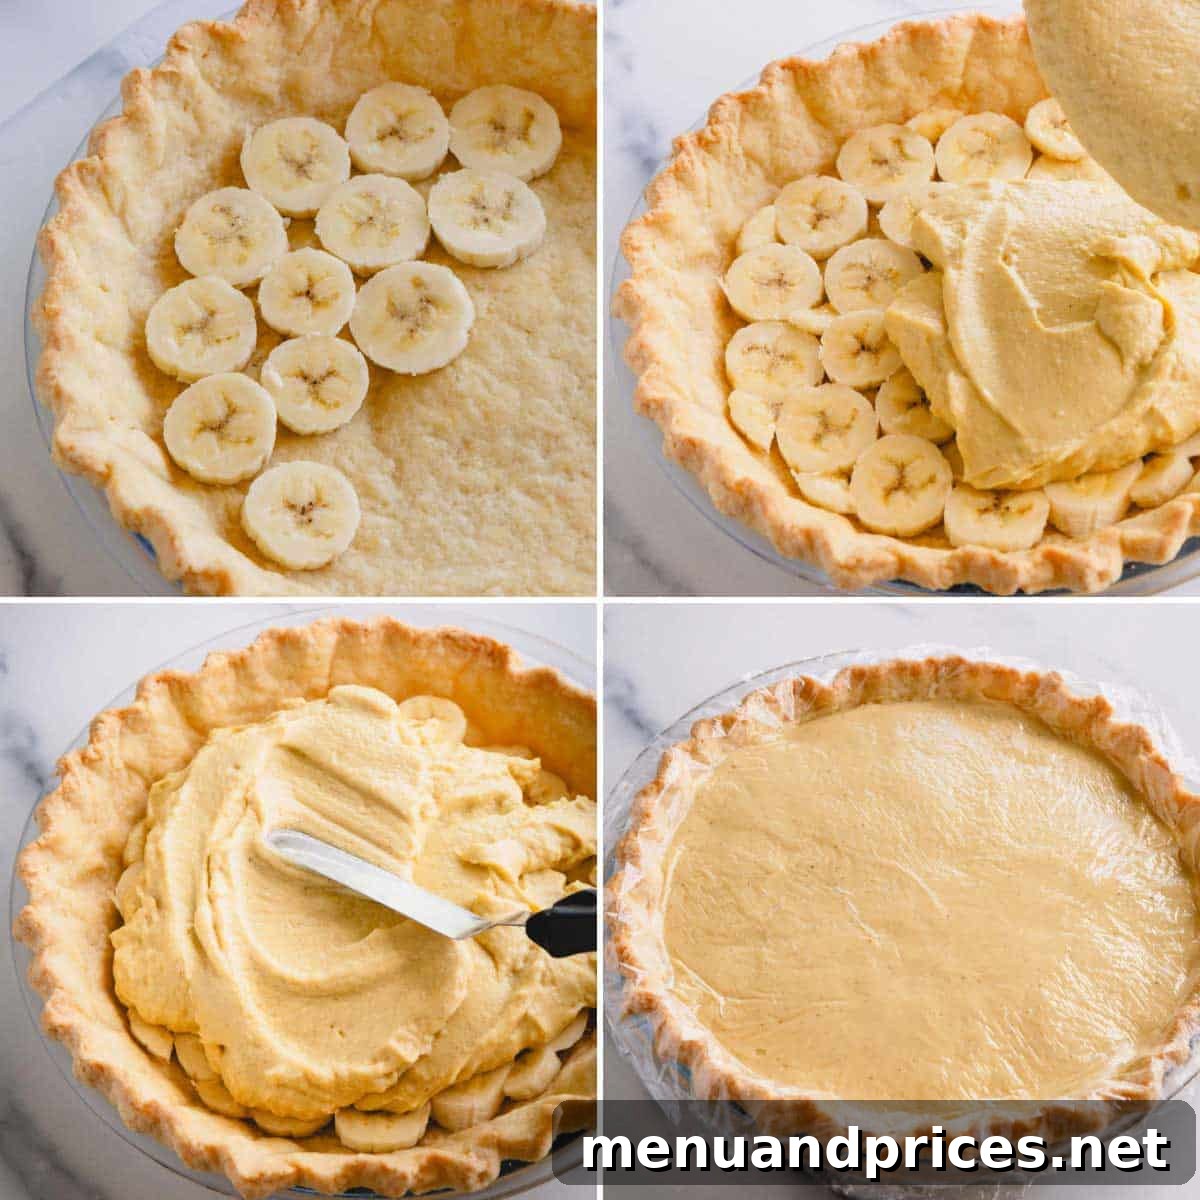
- Layer the Bananas: Begin by slicing your fresh bananas. Arrange approximately two-thirds of the sliced bananas in an even layer across the bottom of your prepared and cooled pie crust. This initial layer ensures a delightful banana flavor in every bite. Reserve the remaining banana slices for the final decoration, which will add visual appeal and an extra fresh touch.
- Add the Pudding: Carefully pour the thoroughly cooled and set vanilla pudding over the banana layer. Use an offset spatula or the back of a spoon to gently smooth the surface, ensuring the pudding evenly coats the bananas and fills the crust. The pudding should be firm enough to hold its shape once smoothed.
- Chill for Cohesion: Once the pudding is in place, cover the pie with plastic wrap, again ensuring the wrap directly touches the surface of the pudding to prevent a skin from forming. Chill the assembled pie in the refrigerator for at least 2-4 hours, or until it is completely firm and well-set. This chilling period is crucial for the pie to fully coalesce and make for clean, beautiful slices. Wait to decorate and serve until just before serving for the freshest appearance.
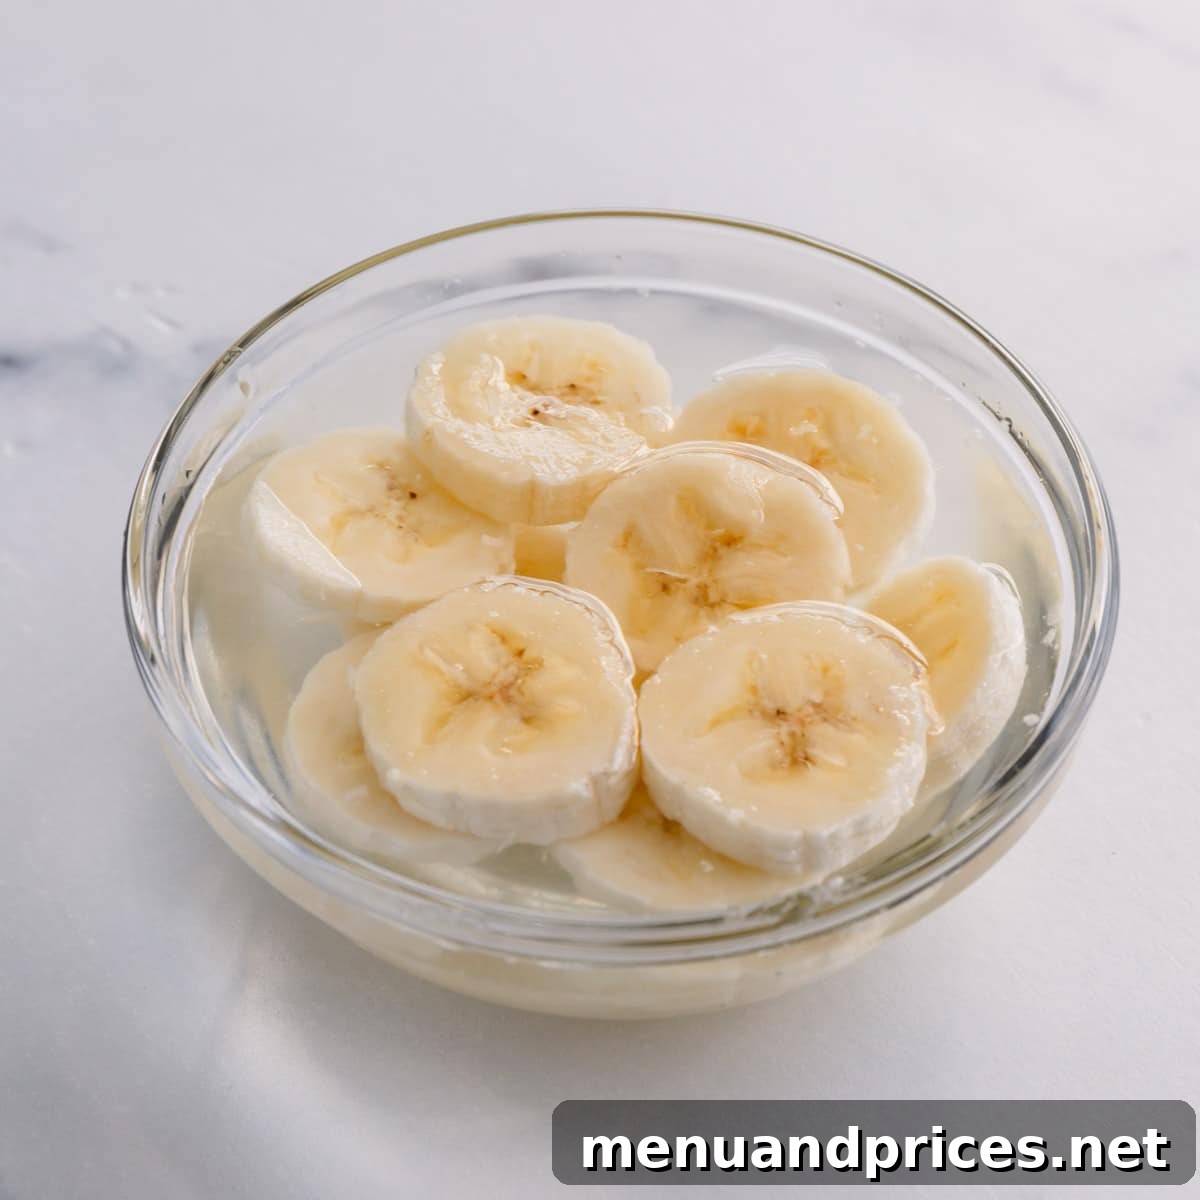
Crucial Tip: How to Prevent Banana Slices from Browning
Bananas, once peeled and sliced, oxidize quickly when exposed to air, leading to an undesirable brown discoloration. To keep your banana slices looking fresh and appealing in your pie, employ this simple yet effective trick: Prepare a bowl of water with a few drops of freshly squeezed lemon juice (about ½ teaspoon per cup of water). Soak your sliced bananas in this lemon water for a brief 1-2 minutes. The ascorbic acid in lemon juice acts as a natural antioxidant, slowing down the browning process. After soaking, remove the banana slices onto a plate lined with paper towels to gently blot away any excess water. This ensures your pie filling remains perfectly set without introducing extra moisture.
Important Note: Do not soak the banana slices for too long (e.g., more than 2 minutes), as prolonged exposure to water can make them mushy and detract from their texture in the pie.
4. Whipping Up the Perfect Topping: Light and Airy Whipped Cream
The final crowning glory of your homemade banana cream pie is a generous layer of freshly whipped cream. For the freshest and most visually appealing results, it’s always best to prepare the whipped cream just before you are ready to decorate and serve the pie. This ensures it’s at its peak fluffiness and stability.
- Begin Whipping: In a chilled mixing bowl fitted with the whisk attachment (a cold bowl helps cream whip faster and sturdier), pour in the cold heavy cream. Begin whisking on medium speed. The cream will gradually start to thicken and form soft peaks.
- Sweeten and Flavor: As soon as the heavy cream begins to visibly thicken and hold some shape, gradually add the granulated sugar and pure vanilla extract. Continue to whip the mixture, allowing the sugar to dissolve and the vanilla to distribute evenly.
- Achieve Stiff Peaks: Continue mixing on medium speed until stiff peaks form. Stiff peaks mean that when you lift the whisk, the peaks of cream stand upright and hold their shape without drooping. Be careful not to over-whisk, as this can turn the cream grainy or even into butter.
Why Medium Speed is Your Whipping Cream Secret Weapon
When making whipped cream, the temptation might be to blast the mixer on high speed to get it done quickly. However, whisking at medium speed is actually ideal for creating the sturdiest, most stable whipped cream with beautifully defined stiff peaks. Beating the cream too aggressively at high speed incorporates too much air too quickly, leading to a less stable structure. This excess air causes the whipped cream to “weep” (separate and become watery) much faster, especially when refrigerated. A slower, medium speed allows for a more controlled incorporation of air, resulting in a dense yet airy, long-lasting topping.
Essential Tips for Banana Cream Pie Success: Elevate Your Baking Game
Achieving the perfect homemade banana cream pie is all about attention to detail. These expert tips will help you navigate common baking challenges and ensure your pie turns out absolutely flawless every time.
- Precision in Flour Measurement: The accuracy of your flour measurement significantly impacts your pie crust’s texture. For the most reliable results, weigh your flour using a kitchen scale. If a scale isn’t available, utilize the spoon-and-level method: spoon flour into your measuring cup and then level off the top with a straight edge. Never scoop flour directly from the bag, as this compacts it and results in too much flour. My guide to measuring flour delves into both methods in detail.
- Preventing Pie Crust Shrinkage: A common frustration is pie crust shrinkage during baking. To combat this, ensure your dough is thoroughly chilled for at least 30 minutes (as instructed in the blind baking step) before it goes into the oven. Additionally, crimping the edges of the dough firmly over the lip of the pie dish helps to anchor it. For a simple yet effective technique, take a look at my no-fuss, 3-finger method for crimping pie dough. It may not be the fanciest, but it’s super simple, prevents waste, and creates a beautiful, rustic edge.
- Stock Your Freezer with Dough: To make future pie cravings a breeze, prepare a few extra batches of pie dough and store them in your freezer. Properly wrapped, pie dough can last for months, making homemade banana cream pie an achievable weeknight treat. Having it at arm’s reach ensures you’re always ready to whip up a delicious dessert!
- Use Your Preferred Pie Dough: While my all-butter pie crust recipe is fantastic, if you have a cherished family recipe or a store-bought favorite, feel free to use it! The most critical point is to never skip the blind-baking step. The crust for homemade banana cream pie absolutely must be baked until golden and crisp before you add the layers of bananas, creamy custard, and fluffy whipped topping to prevent a soggy bottom.
- Achieving a Thick, Creamy Pudding: To avoid a soupy, runny pudding that disappoints, always use whole milk (or at least 2%). The fat content is crucial for a rich, stable custard. Most importantly, ensure you cook the pudding until it is visibly nice and thick. Undercooked pudding is the primary culprit behind a runny pie. Remember the spoon test!
- Low and Slow for Dairy: When scalding the milk and cream for the pudding, always cook it low and slow, diligently stirring, and avoid bringing it to a full boil. High heat can cause the milk proteins to scorch and burn on the bottom of the pan, imparting an unpleasant burnt taste to your entire batch of pudding. Patience is key here.
- Ice-Cold Heavy Cream for Whipping: For the fluffiest, most voluminous whipped topping that whips up quickly and holds its shape, always use heavy cream straight from the coldest part of your refrigerator. A chilled bowl and whisk attachment also significantly aid in achieving perfect stiff peaks.
- Select Firm, Ripe Bananas: The quality of your bananas directly impacts the pie’s taste and presentation. Opt for firm, bright yellow bananas that are ripe but not overly so. Avoid soft, mushy bananas that have already started to show significant brown spots or bruises, as they will be difficult to slice neatly and can break down too much in the pie. Firm bananas provide the best texture and the brightest, most appealing presentation.
Smart Make-Ahead Strategies for Effortless Baking
One of the many reasons to adore this homemade banana cream pie recipe is its incredible flexibility for advance preparation. You can prepare nearly all the individual components at least a day ahead of time, significantly reducing stress on the day of serving. However, for peak freshness and visual appeal, it’s always best to assemble the full pie on the same day you plan on serving it, especially concerning the fresh banana slices.
- Pie Dough: The pie dough is wonderfully forgiving and can be prepared up to 3 days in advance. After making it, wrap the dough tightly in plastic wrap (ensuring no air exposure) and store it in the refrigerator. This chilling time also helps develop its flavor and makes it easier to roll out.
- Baked Pie Crust: Your blind-baked pie crust can be prepared up to 1 day in advance. Once fully cooled, store it uncovered at room temperature to maintain its crispness. This allows you to get a significant step out of the way without sacrificing quality.
- Vanilla Pudding: The star of the show, the homemade vanilla pudding, can be made up to 2 days ahead. After cooling, store it in the refrigerator. Remember the crucial step: cover it with plastic wrap pressed directly onto the surface of the pudding to prevent a skin from forming and to keep it fresh.
- Whipped Cream: While whipped cream is undeniably best when made fresh, it can be prepared up to 1 day in advance. Store it in an airtight container in the refrigerator. If it loses some of its stiffness before serving, a quick re-whisk for 15-30 seconds can often bring back its fluffy texture.
Storing Your Homemade Banana Cream Pie for Optimal Freshness
Homemade banana cream pie is truly at its peak when enjoyed on the day it’s assembled, offering the freshest bananas and the crispest crust. However, if you find yourself with delightful leftovers (a rare occurrence!), they can be stored covered in the refrigerator for up to 3 days. It’s important to note that the fresh banana slices will naturally begin to oxidize and turn brown as the pie sits, affecting their appearance. While still perfectly safe and delicious to eat, the visual appeal may diminish over time. Store it loosely covered with plastic wrap or in an airtight pie carrier to protect it from absorbing other refrigerator odors.
Frequently Asked Questions About Banana Cream Pie
The browning of banana slices in banana cream pie is due to oxidation when they are exposed to air. To prevent this, a simple trick is to soak the freshly sliced bananas in a bowl of water with a few drops of freshly squeezed lemon juice (about ½ teaspoon per cup of water) for 1-2 minutes. The citric acid in lemon acts as a natural antioxidant. After soaking, gently remove the banana slices and blot them dry with a paper towel to remove excess moisture before layering them into your pie.
There are a few common reasons why your banana cream pie filling might not be thickening properly. The most frequent culprits are using low-fat milk (whole milk or at least 2% is recommended for richer body and proper thickening) or not cooking the custard for a sufficient amount of time. The cornstarch in the pudding needs enough heat and time to activate and create that thick, creamy consistency. Ensure you cook the pudding until it coats the back of a spoon and leaves a clear trail when a finger is drawn across it. Also, remember that the pudding will continue to thicken significantly as it cools and chills in the refrigerator.
Yes, classic banana cream pie is indeed made with a pudding or custard-like filling. Traditionally, it features a rich, homemade vanilla pudding or custard that forms the creamy base. This pudding layer is typically combined with fresh sliced bananas, all nestled within a flaky pie crust and then generously topped with a cloud of whipped cream, often garnished with more fresh banana slices for a delightful finish. Some quicker versions might use instant banana-flavored pudding, but the authentic experience comes from a scratch-made vanilla custard.
Explore More Delicious Pie Recipes!
If you’ve enjoyed mastering this homemade banana cream pie, you’re in for a treat with these other fantastic pie creations from my kitchen. Each recipe offers a unique flavor profile and the satisfaction of homemade goodness:
- The Best Pecan Pie: A truly irresistible classic, featuring a rich, sweet filling and plenty of crunchy pecans.
- Homemade Cherry Pie: Bursting with tart, sweet cherry flavor, encased in a perfectly flaky crust.
- Easy Pumpkin Pie: The quintessential fall dessert, simple to make and wonderfully spiced.
- Lemon Meringue Pie: A delightful balance of tangy lemon curd and a towering, fluffy meringue topping.

Homemade Banana Cream Pie
Shinee Davaakhuu
50 mins
40 mins
4 hrs
8 servings
One 9-inch pie
Comment
Print Recipe
Ingredients
For the Pie Crust:
- 1 ½ cups (190 g) all-purpose flour
- ¼ teaspoon kosher salt
- ½ cup (113 g) unsalted butter cut into ½ tablespoon pieces and frozen
- 1 egg yolk
- 3-4 tablespoons ice water
For the Vanilla Pudding:
- 2 cups (480 ml) whole milk (2% will work too)
- ½ cup (120 ml) heavy (whipping) cream
- 1/3 cup (65 g) granulated sugar
- 3 egg yolks
- 3 ½ tablespoons cornstarch
- 1 tablespoon pure vanilla extract
- 1 tablespoon vanilla bean paste
- ¼ teaspoon kosher salt
- 4 medium bananas
For the Whipped Cream:
- 1 cup (240 ml) heavy whipping cream
- 2 tablespoons granulated sugar
- 1 teaspoon pure vanilla extract
Equipment
-
1 Pastry Cutter
-
1 Set of Pie Weights
Instructions
To make the pie dough:
-
In a large mixing bowl with a paddle attachment, combine the flour and salt.1 ½ cups all-purpose flour, ¼ teaspoon kosher salt
-
Add the frozen butter cubes. Mix on low speed until the butter is somewhat incorporated into the flour, with visible chunks still remaining. (Alternatively, a pastry cutter can be used instead of a stand mixer.)½ cup unsalted butter
-
Add the egg yolk and continue mixing until the butter pieces are about pea-sized.1 egg yolk
-
Stir in the ice water one tablespoon at a time, just until the dough almost comes together. (TIP: Depending on the humidity, you might need slightly less or more water. Add it gradually until large clumps of dough start to stick together. Don’t worry if you still see pieces of butter in the dough; these will create the most tender and flaky crust during baking.)3-4 tablespoons ice water
-
Form the dough into a ball, then gently flatten it into a disk. Wrap it tightly in plastic wrap and refrigerate for at least 1 hour, or up to 3 days. This chilling period is crucial for dough relaxation and ease of handling.
To blind bake the pie crust:
-
On a lightly floured surface, roll the chilled dough into an 11-inch circle. Carefully wrap the dough around your rolling pin and transfer it gently into your pie pan.
-
Trim any excess dough, then fold the edges under and crimp them in your preferred style to create a decorative edge that helps prevent shrinkage.
-
Using a fork, pierce holes generously all over the bottom and sides of the crust. This allows steam to escape, preventing bubbles and air pockets. Place the prepared crust in the fridge for at least 30 minutes to chill thoroughly.
-
Preheat your oven to 350°F (177°C).
-
Cover the chilled crust entirely with aluminum foil, pressing it gently against the edges, then fill it with pie weights or raw beans to hold its shape during baking.
-
Bake for 15 minutes. Then, carefully remove the foil and pie weights. Continue baking for another 10-15 minutes, or until the crust is beautifully golden brown. Allow it to cool completely before filling.
To make the vanilla pudding:
-
In a heavy-bottomed saucepan, combine the whole milk and heavy cream. Slowly bring the mixture to a simmer over medium heat, stirring frequently. (This process is called scalding the milk. Once you observe small bubbles forming around the edges, remove it from the heat. Be careful not to boil, as excessive heat can scramble the eggs later.)2 cups whole milk, ½ cup heavy (whipping) cream
-
In a medium bowl, whisk together the egg yolks, granulated sugar, cornstarch, pure vanilla extract, vanilla bean paste, and kosher salt. Whisk vigorously until the mixture is creamy, pale yellow, and has doubled in size, indicating it’s well aerated.1/3 cup granulated sugar, 3 egg yolks, 3 ½ tablespoons cornstarch, 1 tablespoon pure vanilla extract, 1 tablespoon vanilla bean paste, ¼ teaspoon kosher salt
-
To temper the egg mixture, slowly ladle about 1 cup of the hot, scalded milk into the egg yolk mixture while continuously whisking. This gradually raises the temperature of the eggs, preventing them from scrambling when fully combined with the hot milk.
-
Pour the tempered egg mixture back into the saucepan with the remaining scalded milk.
-
Cook the mixture over medium heat, stirring constantly with a whisk or rubber spatula, for 8-10 minutes, or until the mixture becomes thick and coats the back of a spoon. (TIP: Test for doneness by coating the back of a wooden spoon with pudding and running your finger through the middle. If the trail stays separate without the pudding running back together, it’s done.)
-
For an extra smooth texture, press the finished custard through a fine-mesh sieve into a clean bowl.
-
Cover the pudding immediately with plastic wrap, ensuring the wrap touches the entire surface to prevent a film from forming. Chill the pudding in the refrigerator for at least 1 hour, or until completely cold and set.
To assemble the pie:
-
Slice 2-3 of the bananas and arrange them in an even layer on the bottom of the prepared pie crust. Reserve the remaining banana for decorating the top of the pie.4 medium bananas
-
Pour the completely cooled vanilla pudding over the banana layer in the pie shell. Gently smooth the surface with a spatula. Cover the pie with plastic wrap, ensuring it touches the entire surface of the pudding to prevent a skin.
-
Chill the pie in the refrigerator for at least 2-4 hours, or until fully set, before you are ready to decorate and serve.
To make the whipped cream:
-
In a cold mixing bowl fitted with a whisk attachment, combine the cold heavy cream, granulated sugar, and pure vanilla extract. Beat on medium speed until stiff peaks form. (TIP: Beating at medium speed yields a sturdier whipped cream that is less prone to weeping. Whisking at high speed incorporates too much air, causing the whipped cream to break down quicker.)1 cup heavy whipping cream, 2 tablespoons granulated sugar, 1 teaspoon pure vanilla extract
-
When you are ready to serve, generously decorate the chilled pie with the freshly whipped cream and the reserved banana slices. Slice and enjoy immediately!
⭐️ Did you make this recipe?
Please leave a review and let us know how you liked it!
Tips & Notes
– Pie Crust: You can prepare and blind bake the pie shell up to 1 day in advance. Store the blind-baked pie crust at room temperature.
– Vanilla Pudding: The pudding can also be prepared 1-2 days ahead of time. Store it separately in the fridge, making sure to cover it with plastic wrap so it touches the surface of the pudding to prevent a skin from forming.
It’s best to assemble the entire pie (especially adding the banana slices and whipped cream) on the day you plan on serving it, so that banana slices look fresh and the whipped cream is at its prime.
Nutrition
1 slice
544kcal
50.9g
10.2g
33.3g
23.5g
220.4mg
Dessert
American

Did you make this?
Leave a rating and your feedback. Thank you!
This recipe was originally published on May 16th, 2018, and has since been updated with enhanced details and tips for your perfect baking experience.