
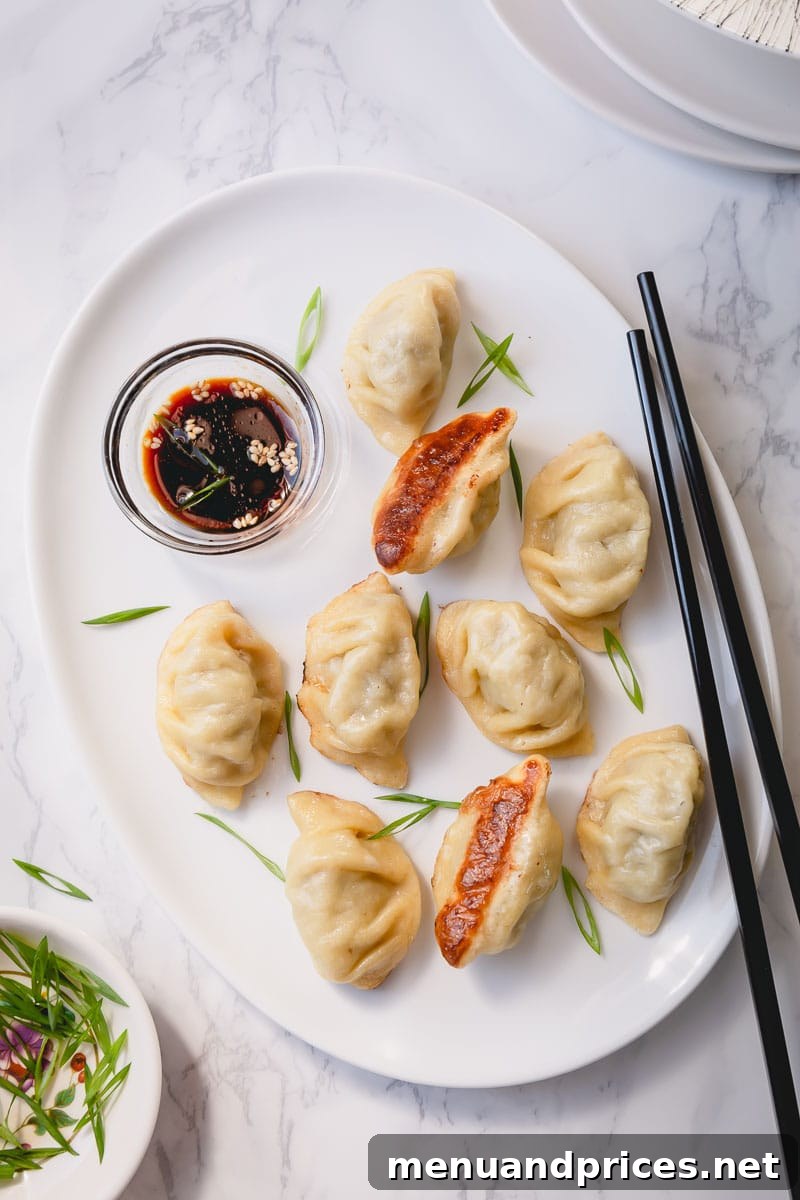
Welcome to the definitive guide for crafting the most succulent and satisfying beef dumplings right in your own kitchen! Whether you’re a seasoned chef or a culinary beginner, this comprehensive tutorial will walk you through everything you need to know. We’ll explore three classic cooking methods – steamed, pan-fried, and boiled – ensuring you can enjoy these delightful morsels exactly how you like them. Plus, I’ll share three simple yet effective techniques to wrap beautiful, restaurant-quality dumplings, making the process both fun and rewarding.
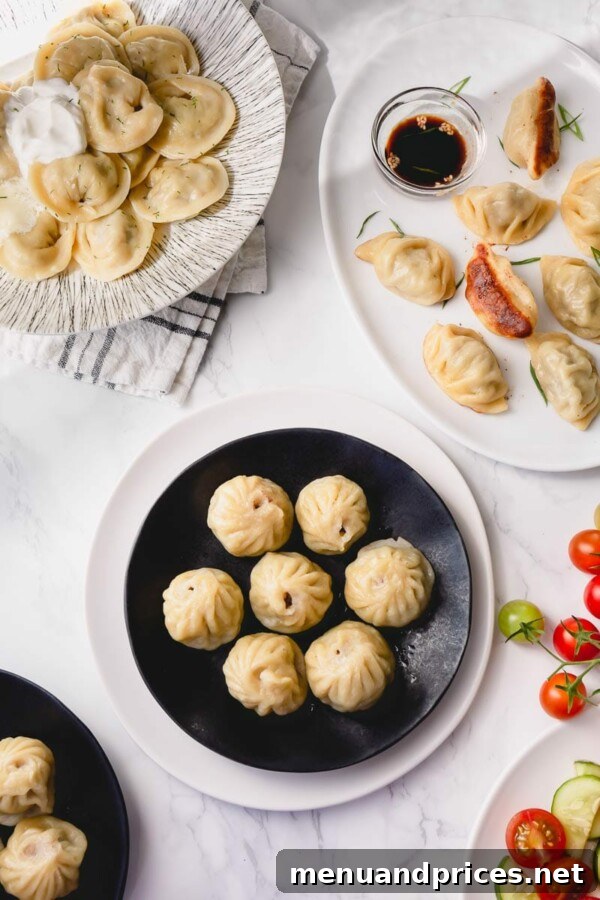
Beef Dumplings: A Global Culinary Treasure
Beef dumplings are much more than just a traditional Mongolian food; they are a universal comfort dish enjoyed across countless cultures, each with its own unique twist. From the bustling streets of Beijing to the cozy kitchens of Moscow, these flavorful pockets of dough and meat have captivated palates for centuries. What makes them so universally loved? Perhaps it’s their versatility, their hearty nature, or the sheer joy of biting into a perfectly cooked dumpling bursting with savory filling.
It’s truly fascinating to see how a simple concept – wrapping seasoned meat in dough – has evolved into such a diverse array of culinary masterpieces around the globe. This article will not only teach you how to make them but also celebrate their rich international heritage.
A World of Wonderful Meat Dumplings
The concept of a meat-filled dumpling transcends borders, with each country adding its distinct culinary signature. Here’s a glimpse at some famous variations:
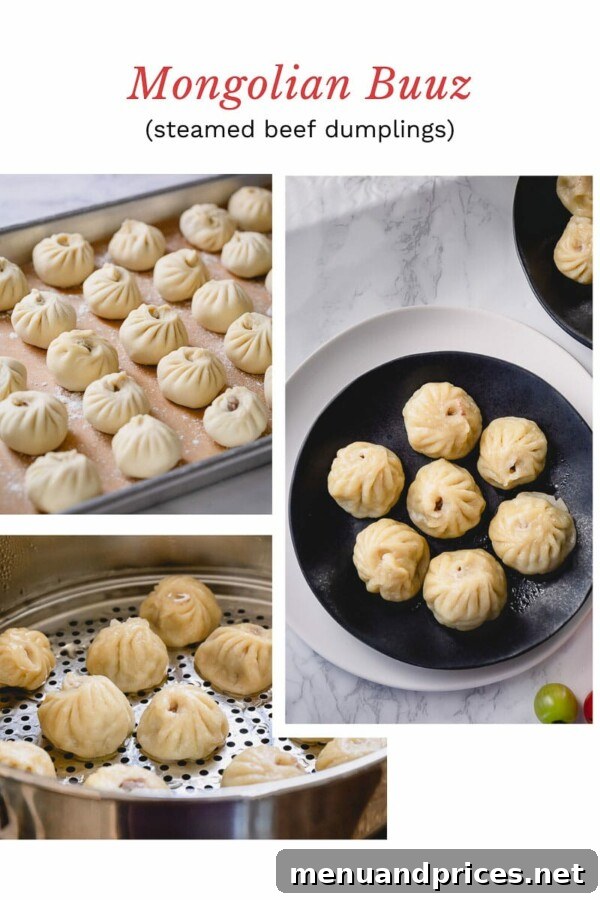
- Mongolia’s Buuz and Bansh: These often steamed delights are traditionally filled with seasoned mutton, reflecting the country’s nomadic heritage. Bansh are simply a smaller, more delicate version of buuz, perfect for a lighter bite.
- Russia’s Pelmeni: Small, ear-shaped, and typically boiled, Russian pelmeni are a staple comfort food, often filled with a mixture of ground beef, pork, or chicken and served with a dollop of sour cream and butter.
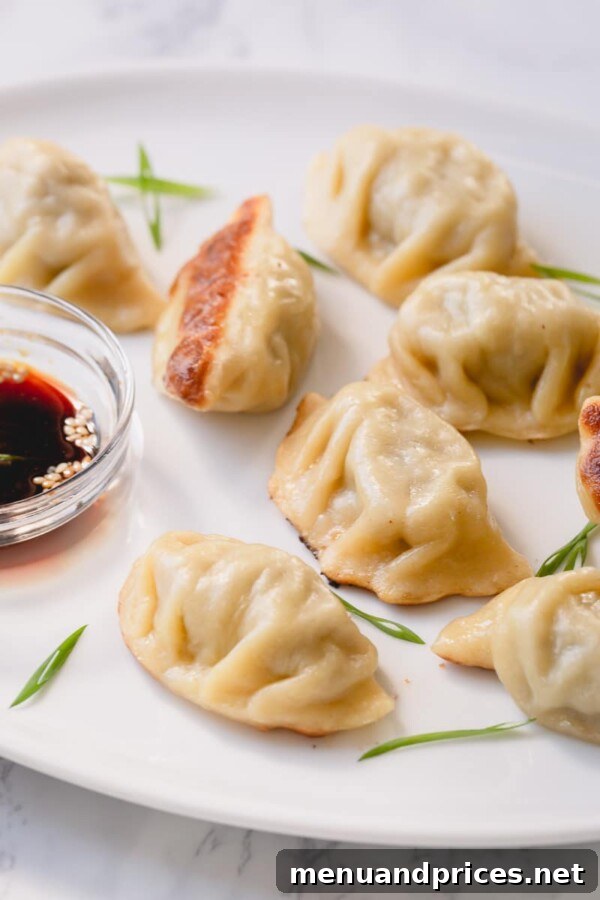
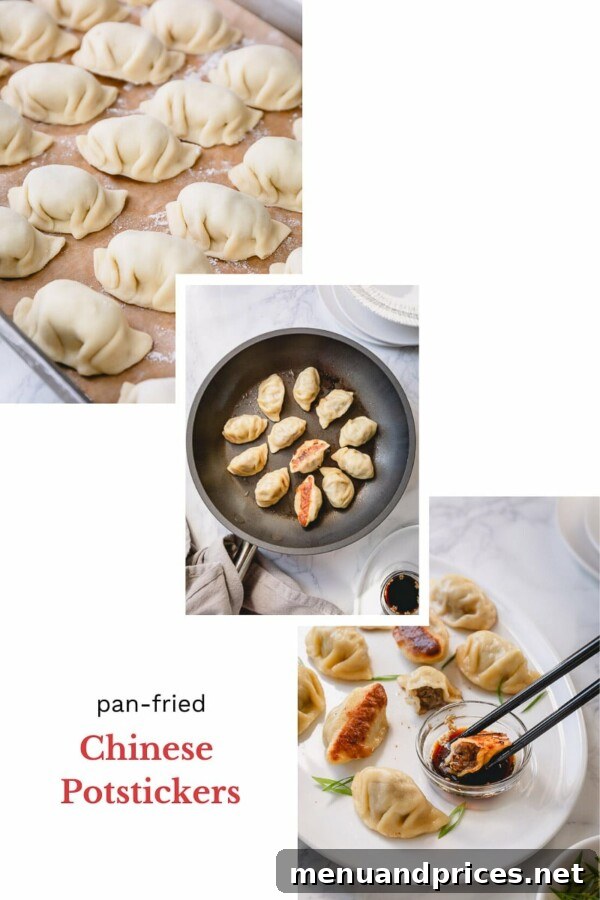
- China’s Potstickers (Guotie): Known for their crispy pan-fried bottoms and tender steamed tops, Chinese potstickers feature a savory mix of ground meat (often pork or beef) and finely chopped vegetables like napa cabbage, ginger, and garlic.
- Japan’s Gyoza: Similar to Chinese potstickers, Japanese gyoza are also pan-fried to achieve a crispy bottom, but they often boast a thinner wrapper and a distinct flavor profile with a higher proportion of garlic and nira (garlic chives).
- Korea’s Mandu: These versatile Korean dumplings can be steamed, boiled, pan-fried, or even added to soups. Fillings vary widely, from kimchi and tofu to ground meats and an array of vegetables.
- Nepal’s Momo: Hugely popular in Nepal, Tibet, and India, momos are usually steamed or fried and filled with seasoned ground meat (often buffalo, chicken, or lamb) or vegetables, served with a spicy dipping sauce.
- And many more from across Europe, Asia, and beyond, proving the dumpling’s enduring appeal!
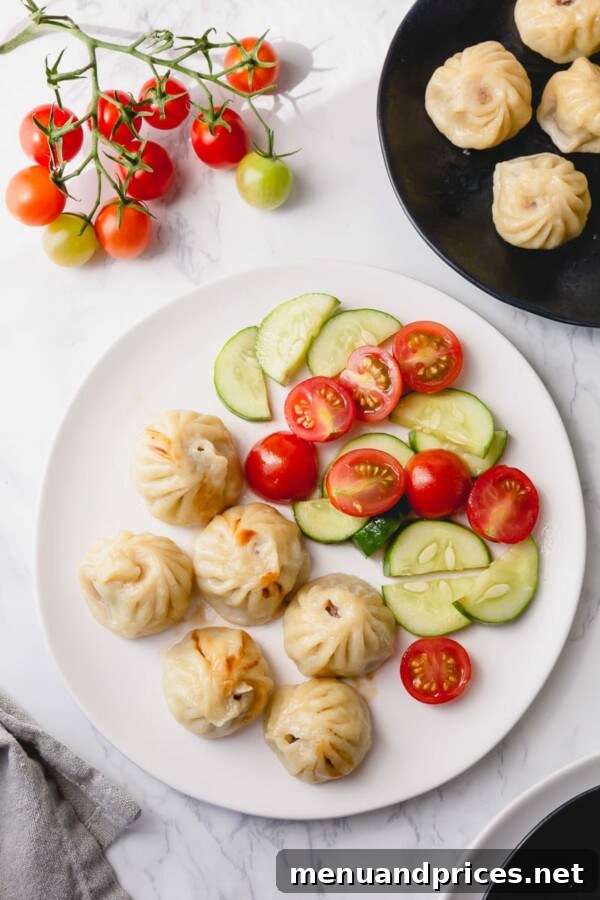
Today, I’m excited to guide you through making homemade beef dumplings, drawing inspiration from my personal experiences with these global flavors. We’ll be crafting a versatile beef filling and dough that can be transformed into three distinct culinary experiences:
- Mongolian-style Steamed Dumplings (Buuz): Soft, tender, and incredibly satisfying.
- Russian-style Boiled Dumplings (Pelmeni): Hearty and comforting, perfect for a cold day.
- Chinese-style Pan-Fried Dumplings (Potstickers): Crispy on the bottom, tender on top, and bursting with flavor.
To ensure you can recreate these beauties with confidence, I’ve also included a video tutorial demonstrating three easy yet elegant ways to wrap your dumplings. Get ready to impress your family and friends with your newfound dumpling-making skills!
The Genius of Make-Ahead Freezer Dumplings
Dumplings are truly the ultimate make-ahead freezer meal! This is not just a convenience; it’s a game-changer for busy households. Every few months, I dedicate a day to making a substantial batch of dumplings and freezing them. This simple act provides a reliable stash of delicious, home-cooked meals ready at a moment’s notice.
Imagine those hectic weeknights when you’re short on time or energy. Instead of resorting to takeout, you can simply grab a handful of these frozen treasures and cook them in minutes, with virtually no effort. They are an absolute staple in my freezer, and I can confidently say my kids adore them! The joy of serving a healthy, homemade meal that required minimal immediate fuss is unparalleled.
While the initial process of making dumplings from scratch might seem a bit tedious and time-consuming, I assure you it’s incredibly fun and therapeutic. Plus, the reward is well worth the effort: a freezer full of delicious, on-demand dumplings that will make your future self very happy. It’s an investment in convenience and flavor!
Pro Tip: Make It a Dumpling Party!
Making dumplings is a fantastic communal activity! Invite your friends or family over for a “dumpling party.” Not only will you have a wonderfully fun and memorable time together, but you’ll also collectively produce a massive quantity of dumplings, leaving everyone with plenty to take home and freeze for future enjoyment. It’s a win-win situation!
Essential Beef Dumpling Recipe Ingredients
Crafting perfect beef dumplings begins with quality ingredients. Here’s a breakdown of what you’ll need for both the tender wrappers and the savory filling:
- All-Purpose Flour: This is the foundation of our dumpling wrappers. All-purpose flour works beautifully to create a dough that is both pliable and results in a wonderfully soft, yet resilient, wrapper that holds its shape and cooks evenly.
- Egg: Adding an egg to the dough enhances its richness, elasticity, and contributes to a softer, silkier texture. It also helps bind the dough, making it easier to work with.
- Milk: Using milk in the dough, instead of just water, adds another layer of richness and a subtle tenderness to the wrappers. While milk is my preferred choice for a superior dough, you can certainly substitute it with water for a slightly firmer texture.
- Ground Beef: For the filling, I typically opt for lean ground beef (90/10) to keep the dumplings from being overly greasy, but an 80/20 ground beef works absolutely fine and offers a richer flavor. For added complexity or different dietary needs, feel free to use a combination of beef and pork, or even ground turkey or chicken for a lighter alternative.
- Onion: While optional, finely minced onion is highly recommended. It introduces a crucial aromatic depth and a subtle sweetness to the filling that truly elevates the overall flavor profile of the beef.
- Seasoning: This is where you can truly personalize your dumplings! I’ll provide a classic seasoning blend, but don’t hesitate to experiment with your favorite spices, herbs, or even a touch of ginger for an Asian-inspired twist.
Step-by-Step: How to Make Beef Dumplings from Scratch
Embarking on the journey of homemade dumplings means crafting everything from the ground up, ensuring maximum freshness and flavor. Don’t be intimidated; it’s a surprisingly straightforward and immensely satisfying process!
- The Dough: Crafting Perfect Wrappers
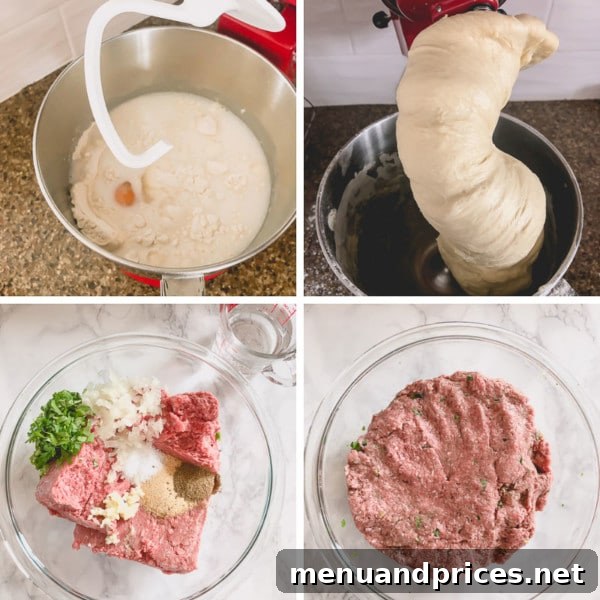
Our dough is designed to be wonderfully soft, pliable, and incredibly easy to handle, even for beginners. While a stand mixer with a dough hook attachment makes quick work of kneading, it’s absolutely not required. You can achieve fantastic results by mixing and kneading the dough by hand in a large bowl. The key is to develop enough gluten for elasticity without overworking it. A well-made dough will give you tender, resilient wrappers that cook beautifully, whether steamed, boiled, or pan-fried. - The Beef Filling: Flavorful and Customizable
The beef filling recipe I’m sharing is intentionally kept simple to highlight the rich flavor of the beef, but it serves as an excellent canvas for customization. You can easily adapt it to your preferences by adding finely chopped vegetables such as crisp napa cabbage, sweet carrots, vibrant spinach, or even earthy mushrooms. Experiment with different aromatics like ginger or chives to truly make this recipe your own. The goal is a juicy, well-seasoned filling that complements the tender dough.
Dough Master Tip
Dough Hydration is Key: When adding water to your dough, do so gradually, a little at a time. The amount of water needed can vary depending on factors like humidity and the specific type of flour you’re using. Continue adding water until your dough reaches a wonderfully soft, elastic, and just slightly tacky consistency – it should not be excessively sticky. This ensures a perfect dough that’s easy to roll and shape.
Time-Saving Alternative: If you’re short on time or prefer a quicker route, store-bought potsticker wraps are a perfectly acceptable substitute. They make the dumpling-making process much faster and are widely available. However, in my experience, homemade wrappers offer a superior texture and flavor that truly elevate the dumplings. My kids, for instance, overwhelmingly prefer the tender chewiness of our homemade wraps over store-bought alternatives!
Filling Flavor Enhancers
The Secret to Juicy Filling: Don’t skip adding a splash of water to your meat mixture! This simple step is crucial for achieving a remarkably soft, tender, and incredibly juicy filling. The water gets absorbed by the meat as it cooks, preventing it from drying out and ensuring every bite is succulent.
Vegetable Additions: Feel free to incorporate any finely chopped vegetables into your meat mixture to boost flavor, texture, and nutrition. My personal favorites for beef dumplings include crisp napa cabbage for a subtle crunch, finely grated carrots for a touch of sweetness, and fresh spinach for added color and vitamins. Just make sure to squeeze out any excess moisture from watery vegetables before adding them to the meat.
Three Delicious Ways to Cook Your Homemade Dumplings
Once your beautiful beef dumplings are wrapped, it’s time for the magic to happen! There are three primary and incredibly delicious ways to cook them: steaming, pan-frying, and boiling. Each method offers a unique texture and experience, and here’s how to master all three:
How to Steam Dumplings: For a Tender, Delicate Finish
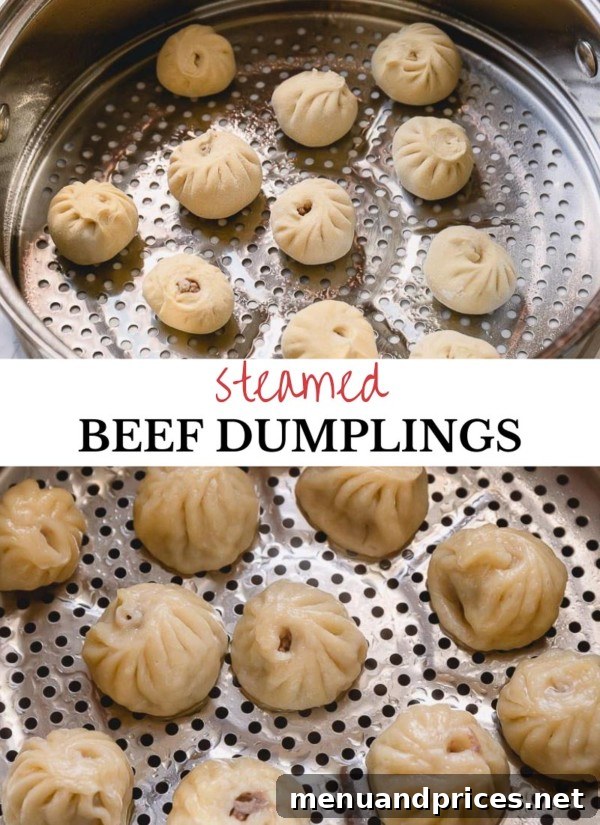
Steaming is the traditional method for many Asian dumplings, resulting in a wonderfully soft and delicate wrapper with a juicy filling. For best results, you’ll need a steamer pot, ideally one with multiple tiers to cook a larger batch efficiently.
- Prepare Your Steamer: Fill the bottom of your steamer pot with about 2-3 inches of water and bring it to a rolling boil over high heat.
- Arrange Dumplings: Lightly spray your steamer baskets with a non-stick cooking spray or line them with parchment paper to prevent sticking. Carefully arrange the dumplings in a single layer, ensuring there’s a little space between each one for even cooking. Overcrowding can lead to unevenly cooked or sticky dumplings.
- Steam to Perfection: Place the filled steamer baskets over the boiling water. Cover tightly and steam for approximately 15 minutes for smaller, fresh dumplings. If cooking larger or frozen dumplings, you may need to increase the steaming time to 20-25 minutes, or until the wrappers are translucent and the filling is cooked through.
- Serve Immediately: Once cooked, carefully remove the lid to avoid condensation dripping onto the dumplings. Transfer them to a serving plate and fan them slightly with a plate to prevent them from becoming soggy. Serve hot with your favorite dipping sauce or a side of fresh vegetables.
How to Pan-Fry Dumplings (Potstickers): For Crispy Golden Bottoms
Pan-frying, also known as making potstickers, offers a delightful textural contrast: a wonderfully crispy, golden-brown bottom combined with a tender, steamed top and juicy filling. It’s a crowd-pleaser!
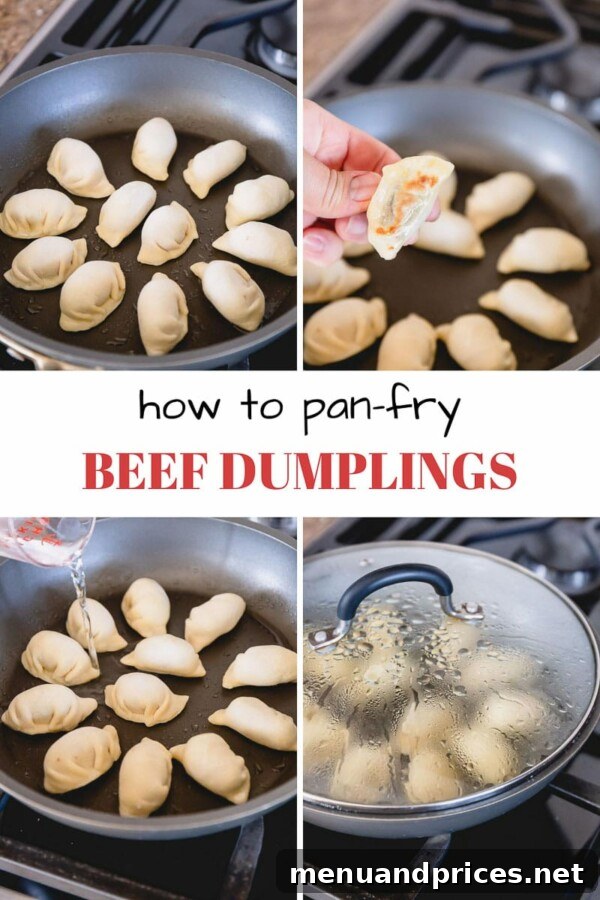
- Heat the Skillet: Heat a nonstick skillet over medium-high heat. Add 1-2 tablespoons of cooking oil (such as olive or vegetable oil). Once the oil shimmers, it’s ready.
- Sear the Bottoms: Carefully arrange fresh or frozen dumplings in a single layer in the hot skillet, making sure not to overcrowd. Fry them for about 2-3 minutes, or until their bottoms turn a beautiful golden brown and become crispy. This creates the signature “potsticker” crust.
- Steam and Finish: Once the bottoms are golden, carefully add about ¼ to ½ cup of water into the skillet (be mindful of splattering steam!). Immediately cover the skillet with a tight-fitting lid. Reduce the heat to medium-low and let the dumplings steam for approximately 10-15 minutes, or until the water has fully evaporated and the dumplings are cooked through and tender.
- Crispy Finish & Serve: Remove the lid and increase the heat slightly if needed to re-crisp the bottoms for another minute or two. Serve immediately with your preferred dipping sauce.
How to Boil Dumplings: Simple, Hearty, and Classic
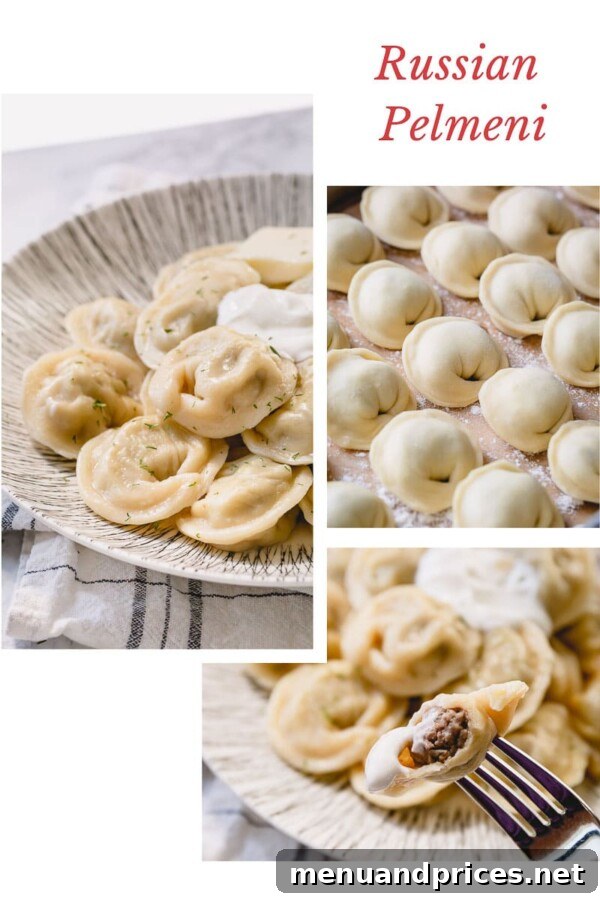
Boiling is perhaps the simplest and most comforting way to cook dumplings, especially popular for Russian pelmeni. It results in incredibly tender, soft-skinned dumplings that are perfect for enjoying with simple accompaniments like butter and sour cream, or floating in a flavorful broth.
- Prepare Boiling Liquid: Bring a large pot of lightly salted water to a rolling boil. For an extra layer of flavor, you can boil your dumplings in a seasoned broth (chicken or beef stock) instead of plain water. Add a bay leaf or a few black peppercorns to the water for subtle aromatics.
- Add Dumplings: Gently add your fresh or frozen dumplings to the boiling water/broth. Do not overcrowd the pot; cook in batches if necessary to maintain the water temperature.
- Cook Until Done: Cook the dumplings for 10-15 minutes, stirring occasionally to prevent them from sticking to the bottom of the pot or to each other. The dumplings are fully cooked when they float to the surface and the wrappers appear plump and translucent, and the filling is firm.
- Serve with Classic Accompaniments: Using a slotted spoon, carefully remove the cooked dumplings from the water. Serve them immediately, often tossed with a pat of melted butter and a generous dollop of sour cream or Greek yogurt. A sprinkle of fresh dill or parsley is also a wonderful addition.
Storage and Freezing Tips for Beef Dumplings
Proper storage is essential to enjoy your homemade beef dumplings for days or even months to come. Here’s how to handle both cooked and uncooked dumplings:
- Storing Cooked Dumplings: If you have leftover cooked dumplings (steamed, pan-fried, or boiled), allow them to cool completely. Store them in an airtight container in the refrigerator for up to 3 days. To reheat, you can pan-fry them until crispy, steam them gently, or even microwave them briefly.
- Freezing Uncooked Dumplings (Highly Recommended!): This is the secret to having quick, homemade meals on hand.
- Arrange the freshly wrapped, uncooked dumplings in a single layer on a baking sheet lined with parchment paper or a silicone mat. Ensure they are not touching each other to prevent them from freezing together.
- Place the baking sheet in the freezer for at least 1-2 hours, or until the dumplings are fully frozen solid.
- Once frozen, transfer the solid dumplings into freezer-safe bags or airtight containers. This prevents them from sticking together and reduces freezer burn.
- Label the bag with the date. Frozen uncooked dumplings can be stored for up to 3 months.
- Cooking from Frozen: The best part about frozen dumplings? There’s no need to thaw them! You can cook them directly from frozen using any of the three methods described above (steaming, pan-frying, or boiling). Simply add a few extra minutes to the cooking time to ensure they are heated through.
Perfect Pairings: How to Serve Beef Dumplings
Beef dumplings are wonderfully versatile and can be served with a variety of accompaniments, from simple dipping sauces to refreshing salads. Here are some ideas to complete your meal:
- Classic Dipping Sauces:
- Soy Sauce Based: A simple mix of soy sauce, a splash of rice vinegar, and a dash of sesame oil is a perfect classic. You can add finely chopped green onions, a pinch of chili flakes, or a tiny bit of grated ginger for extra zing.
- Spicy Chili Oil: For those who love a kick, chili oil or a spicy sriracha mayo makes an excellent dipping sauce.
- Sour Cream/Yogurt: Especially for boiled dumplings (pelmeni), a dollop of sour cream or plain Greek yogurt is traditional and incredibly delicious.
- Homemade Garlic Sauce: Whisk together minced garlic, a bit of sugar, soy sauce, rice vinegar, and a touch of water for a balanced, aromatic sauce.
- Refreshing Side Salads: Complement the richness of the dumplings with a light and crisp salad:
- Cucumber Mango Salad: A vibrant, sweet, and tangy salad that provides a refreshing contrast.
- Cucumber Edamame Salad: A crunchy and protein-packed salad with an Asian-inspired dressing.
- Russian Potato Salad: A creamy and hearty salad that pairs wonderfully with boiled pelmeni, offering a comforting side.
- Clear Broth: Boiled dumplings can also be served directly in a light, clear beef or chicken broth, making for a comforting and complete meal.
Beef Dumpling FAQ
For most fresh, small to medium-sized dumplings, steam for about 15 minutes. If you are steaming larger or frozen dumplings, increase the time to 20-25 minutes to ensure they are cooked through and tender.
Boil dumplings, whether fresh or frozen, for approximately 10-15 minutes. Stir them occasionally to prevent sticking. They are cooked when they float to the top of the water and appear plump and translucent.
Absolutely! This recipe is incredibly versatile. You can easily substitute ground beef with ground pork, chicken, turkey, lamb, or even a combination of different meats to suit your taste preferences. Adjust seasoning as needed for different meats.
To prevent sticking, always lightly spray your steamer baskets with a non-stick cooking spray or line them with parchment paper (you can poke a few holes in the paper for steam circulation). Also, ensure you arrange dumplings in a single layer with a little space between each one.
Yes, you can! You can prepare the dough up to a day in advance. After kneading, wrap it tightly in plastic wrap and store it in the refrigerator. Allow it to come to room temperature for about 30 minutes before rolling and shaping your dumplings.
More Culinary Adventures from Sweet & Savory
If you enjoyed making these beef dumplings, explore more delicious recipes from our kitchen. Here are some other favorites:
- Decadent Macaron Cookies
- Best Prime Rib Recipe
- Hearty Oyster Chowder
- Silky White Chocolate Ganache Recipe
- Fluffy Angel Food Cake Strawberry Shortcake
- Clever Buttermilk Substitutes
Ultimate Beef Dumplings (Steamed, Pan-Fried & Boiled)
Shinee Davaakhuu
1 hour
30 minutes
20 minutes
2 hours
11 servings
About 115 mini dumplings
Comment
Print Recipe
Ingredients
For the Dumpling Dough Wraps:
- 5 cups (625 g) all-purpose flour
- 1 teaspoon table salt
- 1 large egg
- 1 cup (240 ml) milk (Note 1: Any kind of milk works, or substitute with water)
- ½ cup (120 ml) water (Note 2: Adjust as needed based on dough consistency)
For the Savory Beef Filling:
- 2 lbs (1 kg) lean ground beef (Note 3: 90/10 or 80/20, or other ground meat)
- ¼ cup minced yellow onion
- 4 garlic cloves grated or finely minced
- ½ cup (120 ml) water (for juicy filling)
- 3 teaspoons coarse kosher salt
- 2 teaspoons garlic powder
- 1 teaspoon coriander seed (optional, adds depth)
- 1 handful fresh cilantro (finely chopped, optional)
For Serving Boiled Russian Pelmeni:
- 1-2 tablespoons butter
- Sour cream (or Greek yogurt)
For Serving Pan-Fried Chinese Potstickers:
- 1 tablespoon olive oil (for frying)
- 2 tablespoons soy sauce (low sodium recommended)
- 1 tablespoon rice vinegar
- ½ tablespoon sesame oil
Instructions
To Prepare the Dumpling Dough:
-
In a large mixing bowl (or the bowl of a stand mixer fitted with a dough hook), combine the all-purpose flour, salt, egg, and milk. Begin mixing on low speed. Once the ingredients are mostly combined and a shaggy dough forms, add about half of the water.
-
Continue to knead the dough until it forms a smooth, elastic ball, which should take approximately 5-7 minutes. Add the remaining water gradually, only as needed, to achieve a soft, pliable, and slightly tacky (but not overly sticky) dough. (TIP: The goal is a dough that feels soft and is easy to work with for rolling.)
-
Cover the dough tightly with plastic wrap or a damp cloth and let it rest at room temperature for at least 30 minutes, or up to 1 hour, while you prepare the filling. This resting period allows the gluten to relax, making the dough easier to roll.
To Prepare the Juicy Beef Filling:
-
In a medium mixing bowl, combine the ground beef, grated garlic, and minced onion.
-
In a separate small bowl, stir together the salt, garlic powder, and coriander seed (if using) with the ½ cup of water until the seasonings dissolve slightly. Pour this seasoned water into the meat mixture. Mix everything thoroughly with your hands until well combined and the water is fully absorbed. This step ensures a very juicy and flavorful filling.
To Shape the Dumplings:
-
Lightly flour a clean work surface. Take a portion of the rested dough and roll it out into a very thin circle, approximately 1/16th of an inch thick. Using a 2.5-inch round cookie cutter (or a drinking glass), cut out individual dough wraps. Gather and re-roll any scraps. If the dough shows any signs of stickiness, dust your surface and rolling pin with additional flour, but avoid excessive flour which can dry out the dough.
-
Place about ½ tablespoon of beef filling in the center of each round dough wrap. (TIP: A medium cookie scoop is excellent for portioning out consistent amounts of beef, usually about half a scoop per 2.5-inch wrap.)
-
Moisten the edges of the dough wrap with a little water, then pinch the edges together firmly to create your desired dumpling shape. (For visual guidance and three different wrapping techniques, please refer to the video tutorial provided above.)
-
As you finish each dumpling, place it on a baking sheet that has been lined with floured wax paper, parchment paper, or a silicone mat. Ensure there is enough space between dumplings to prevent them from sticking.
-
Continue this process until you have used up all the beef filling and dough. Once a baking sheet is full, immediately transfer it to the freezer for at least 3 hours, or until the dumplings are completely frozen solid. Once frozen, transfer the solid dumplings into airtight freezer bags or containers and return them to the freezer. They will keep for up to 3 months.
COOKING DIRECTIONS (Choose your preferred method):
1. Boiled Russian Pelmeni Style:
-
In a large pot, bring a generous amount of water (about a quart or more) to a rolling boil. Season the water with a couple of bay leaves, a few black peppercorns, and a good pinch of salt. (Alternatively, for richer flavor, use beef or chicken stock instead of water.)
-
Add the fresh or frozen dumplings to the boiling liquid. Cook for 10-15 minutes, stirring occasionally to prevent sticking. The dumplings are ready when they float to the top and are cooked through. Serve immediately, traditionally tossed with butter and a dollop of sour cream or Greek yogurt.
2. Steamed Mongolian Buuz Style:
-
Fill the bottom of a large steamer pot with approximately 3 inches of water and bring it to a vigorous boil.
-
Lightly spray your steamer baskets with non-stick spray or line them with perforated parchment paper. Arrange the fresh or frozen dumplings in a single layer, ensuring they do not touch. Place the filled steamer baskets over the boiling water.
-
Cover the steamer tightly and cook for 15-25 minutes (depending on size and whether they are fresh or frozen), or until the wrappers are translucent and the filling is fully cooked. Once cooked, carefully transfer the steamer to a counter, uncover the lid, and gently fan the dumplings with a plate for a moment to prevent them from becoming sticky. Serve steamed dumplings hot with a side of vegetables or a fresh salad of your choice.
3. Pan-Fried Chinese Potstickers Style:
-
Heat a nonstick skillet over medium-high heat and add 1 tablespoon of olive oil (or other cooking oil).
-
Once the oil is hot and shimmering, carefully place fresh or frozen dumplings in a single layer in the skillet. Sear the dumplings for approximately 2-3 minutes, or until their bottoms are beautifully golden brown and crispy.
-
Carefully add ¼ cup of water into the skillet, then immediately cover with a tight-fitting lid. Reduce the heat to medium-low and continue to cook for about 10-15 minutes, or until the water has evaporated and the dumplings are tender and cooked through.
-
To make a simple dipping sauce: In a small bowl, whisk together the soy sauce, rice vinegar, and sesame oil. Serve this flavorful dipping sauce alongside your hot, pan-fried beef dumplings.
⭐️ Did you make this recipe?
Please leave a review and let us know how you liked it!
Video Tutorial: How to Wrap Beef Dumplings 3 Different Ways
Tips & Notes for Success
Note 1 (Milk in Dough): Any type of milk (whole, 2%, skim) will work well in the dough. For a simpler or dairy-free option, water can be used as a direct substitute, though milk adds a subtle richness and tenderness.
Note 2 (Water in Dough): The exact amount of water needed for the dough can vary significantly due to factors like flour brand, humidity levels, and ambient temperature. Therefore, it’s crucial to add the water little by little until you achieve a dough that is soft, pliable, and just slightly tacky – avoid making it too sticky or too dry.
Note 3 (Ground Beef Choice): While I prefer lean ground beef (e.g., 90/10) for a less greasy dumpling, any type of ground beef (like 80/20 for richer flavor) is perfectly suitable. This recipe is also highly adaptable to other ground meats, such as ground chicken or turkey, if you prefer.
Note 4 (Cooking Fresh vs. Frozen): You can cook freshly made dumplings immediately without freezing them. Simply follow the cooking directions for steaming, pan-frying, or boiling as written – no adjustments to cooking times are needed for fresh dumplings compared to frozen, aside from slightly shorter cook times for fresh.
Nutrition Information (per serving)
10 dumplings
441kcal
46g
21g
18g
1g
919mg
Main Course, Appetizer
Asian, Chinese, Mongolian, Russian
Did you make this?
Leave a rating and your feedback. Thank you!