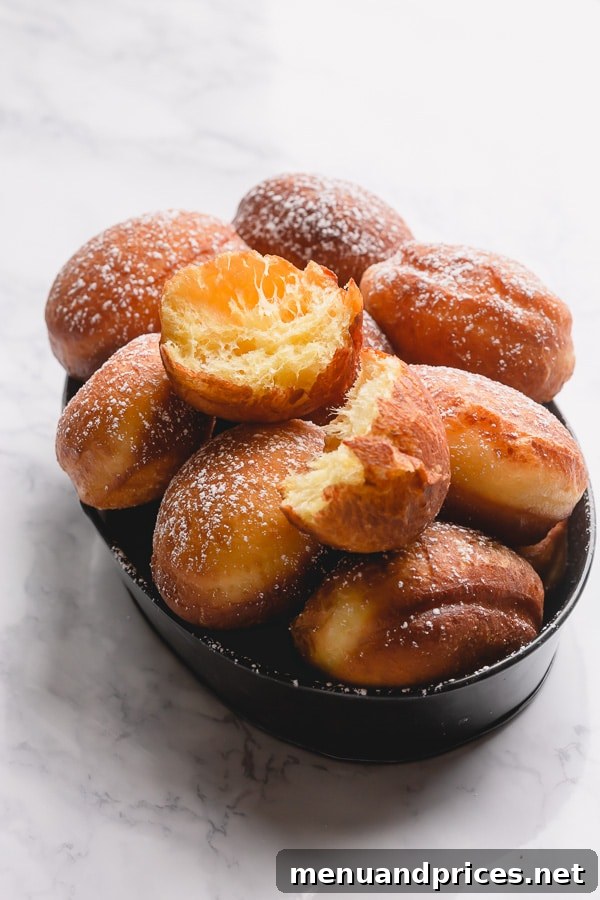
The Ultimate Guide to Homemade Jelly Donuts (Berliners): Fluffy, Light & Delicious
Imagine biting into a cloud of sweet perfection – that’s precisely what homemade jelly donuts, famously known as Berliners, offer. These aren’t just any donuts; they are an ethereal experience: incredibly fluffy, wonderfully light, and perfectly balanced in sweetness. Forget those dense, cakey imposters. We’re talking about the real deal here: authentic, yeast-based, deep-fried delights that will captivate your taste buds. Get ready, because I’m thrilled to share a foolproof, step-by-step guide to making these magical treats right in your own kitchen.
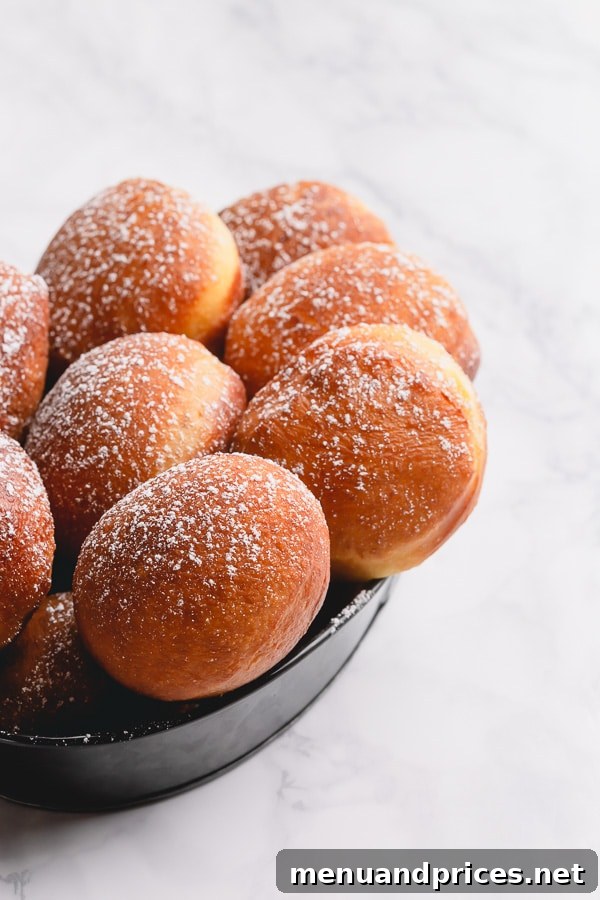
Why Homemade Jelly Donuts Are a Game-Changer
Many shy away from making deep-fried donuts at home, intimidated by yeast or the frying process. But I’m here to tell you that it’s far easier and more rewarding than you think! Once you experience the unparalleled freshness and superior texture of a donut made from scratch, you’ll never look back. These homemade Berliners are a revelation compared to anything you can buy, offering a pillowy softness and delicate crispness that simply can’t be replicated.
And yes, while we are working with yeast, there’s absolutely nothing to fear. I’ll walk you through every single stage, providing plenty of expert tips and insights. So, take a deep breath, gather your ingredients, and prepare for an incredible culinary adventure. The reward is truly unreal – just look at this irresistible creation!
A Brief History of Berliners: The Classic Jelly Donut
Before we dive into the delicious details, let’s appreciate the heritage of the Berliner. Known by various names across Germany and beyond—Krapfen in Southern Germany and Austria, Pfannkuchen in Berlin itself (confusingly, as “Pfannkuchen” usually means pancakes elsewhere!), and Berliner abroad—these jam-filled donuts have a rich history. They are believed to have originated in the 17th or 18th century, becoming a beloved treat, especially during carnival season and New Year’s Eve. Their enduring popularity is a testament to their simple yet utterly satisfying nature, making them a truly classic deep-fried pastry.
Key Ingredients for the Perfect Jelly Donuts
While the full ingredient list is in the recipe card below, understanding a few key components can make all the difference in your homemade jelly donuts:
- All-Purpose Flour: Provides the structure for our light and airy dough.
- Instant Yeast: The magic ingredient that makes these donuts rise and become incredibly fluffy. Ensure your yeast is fresh for optimal results.
- Buttermilk: Adds a beautiful tenderness and subtle tang to the dough, contributing to its unique flavor and texture.
- Eggs and Egg Yolks: Enrich the dough, adding moisture, flavor, and a lovely golden hue. The extra yolks contribute to a richer, softer crumb.
- Unsalted Butter: Incorporated late in the kneading process, butter makes the dough wonderfully pliable, smooth, and flavorful.
- Seedless Jelly: Crucial for a smooth, mess-free filling experience. Raspberry is a classic choice, but feel free to experiment!
- Oil for Frying: Canola or vegetable oil are ideal due to their high smoke point and neutral flavor.
How to Make Homemade Jelly Donuts: A Step-by-Step Guide
Ready to create some culinary magic? Let’s get started on these irresistible deep-fried donuts!
Step 1. Crafting the Silky Dough
Making the dough is the foundation of perfect jelly donuts. For this recipe, a stand mixer is your best friend, transforming what could be a lengthy manual process into an effortless one. You’ll be kneading the dough for a good 20 minutes in total, but your mixer will do all the heavy lifting, developing the gluten necessary for that signature light and airy texture.
Begin by whisking your dry ingredients—flour, sugar, and instant yeast—in the stand mixer bowl using a whisk attachment. In a separate bowl, combine the wet ingredients: buttermilk, large eggs, and egg yolks. Once prepared, switch to a dough hook attachment and gradually add the wet mixture to the dry. Mix on low speed until the ingredients just come together, forming a shaggy dough, which usually takes about 3 minutes.
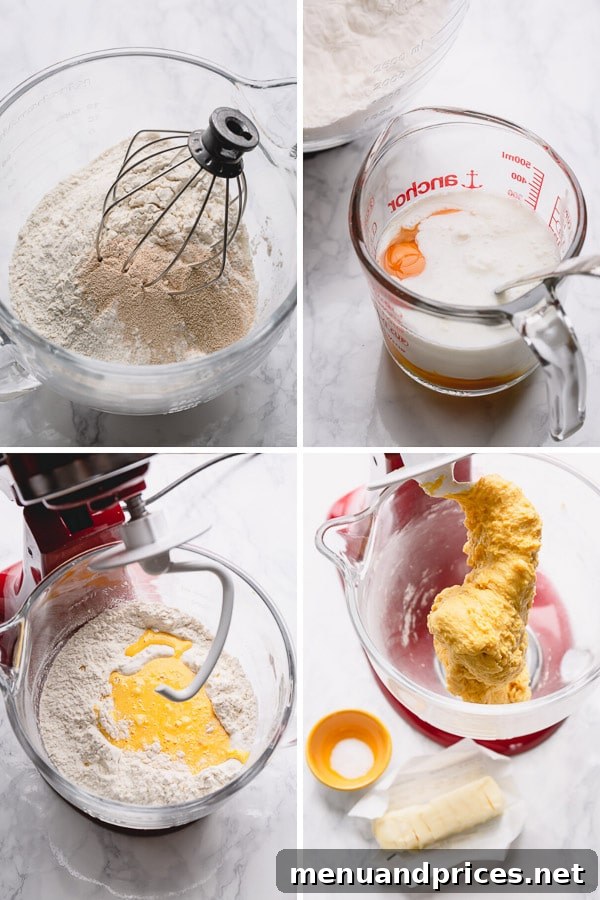
Next, add the salt and continue mixing for another minute. Then, incorporate the unsalted butter, piece by piece, allowing each addition to mix in before adding the next. Now, for the critical part: continue kneading with the dough hook for a solid 10-15 minutes on medium-low speed. Don’t be alarmed at this stage! The dough will initially appear incredibly soft, sticky, and perhaps even a bit messy. This is completely normal for a rich, brioche-style dough. Just let your stand mixer do its work. You can even step away for a cup of tea while it transforms!
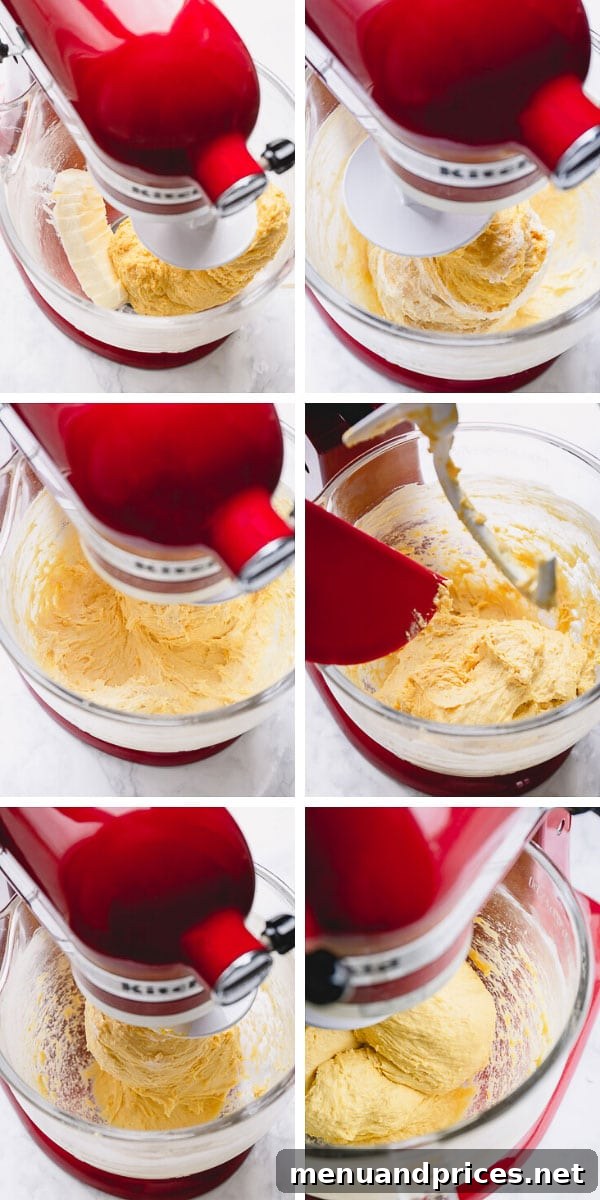
After 10-15 minutes, you’ll witness a magical transformation. Your sticky mess will become a beautiful, smooth, and shiny dough. It will still be soft and elastic, but it should easily unstick from your fingers, indicating proper gluten development. Cover the dough with a clean kitchen towel and place it in a warm, draft-free spot. Let it rise for approximately 1 hour, or until it has visibly doubled in size.
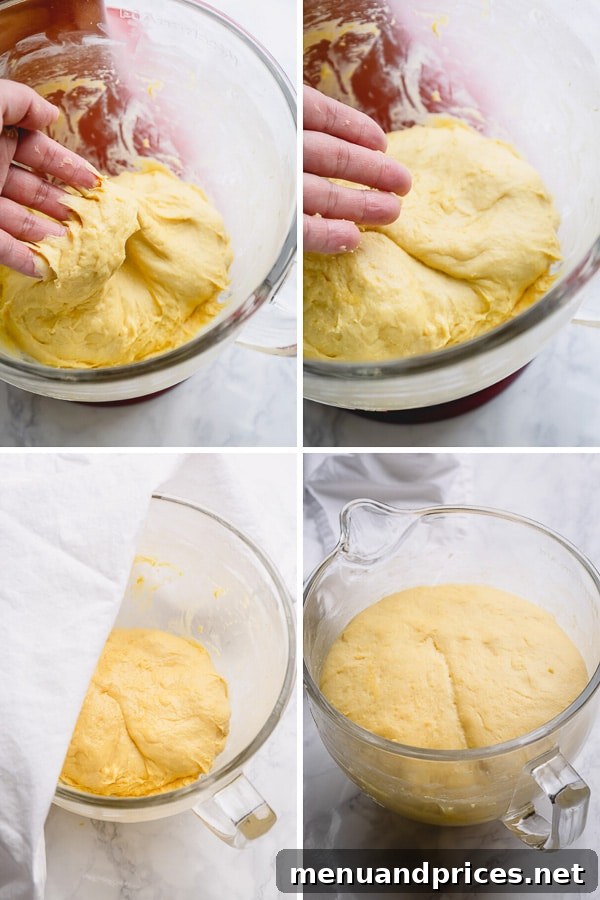
Step 2. Shaping Your Delicious Discs
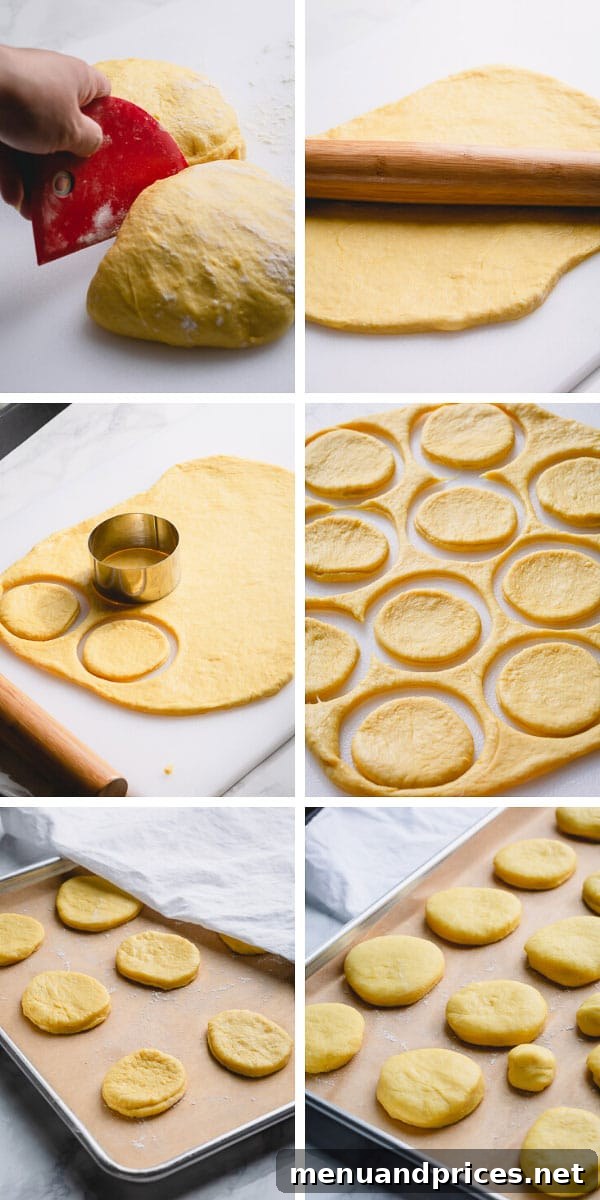
Once your dough has completed its first rise and doubled in size, gently turn it out onto a lightly floured surface. Avoid adding too much flour, as this can make your donuts tough. Divide the dough into two equal parts to make it more manageable. Work with one half at a time, keeping the other covered.
Form each dough portion into a smooth ball, then use a rolling pin to roll it out into a uniform ¼-inch thick rectangle. Precision here helps ensure evenly sized donuts that cook consistently. Now comes the fun part: cutting out your donuts! A 3-inch pastry cutter is ideal for this, but you can easily use a cookie cutter or even the rim of a drinking glass. Be sure to press straight down without twisting to get clean cuts.
Carefully transfer the cut donut circles onto a baking sheet that has been lightly floured and lined with parchment paper. This prevents sticking and makes handling easier. Gather any dough scraps, gently knead them together into a smooth ball, and re-roll to cut out additional donuts. You can even roll any remaining small scraps into charming donut holes. Cover the shaped donuts with a kitchen towel or plastic wrap and let them rise again for another hour, or until noticeably puffy and light. This second rise is crucial for that characteristic fluffy texture.
Step 3. Mastering the Fry
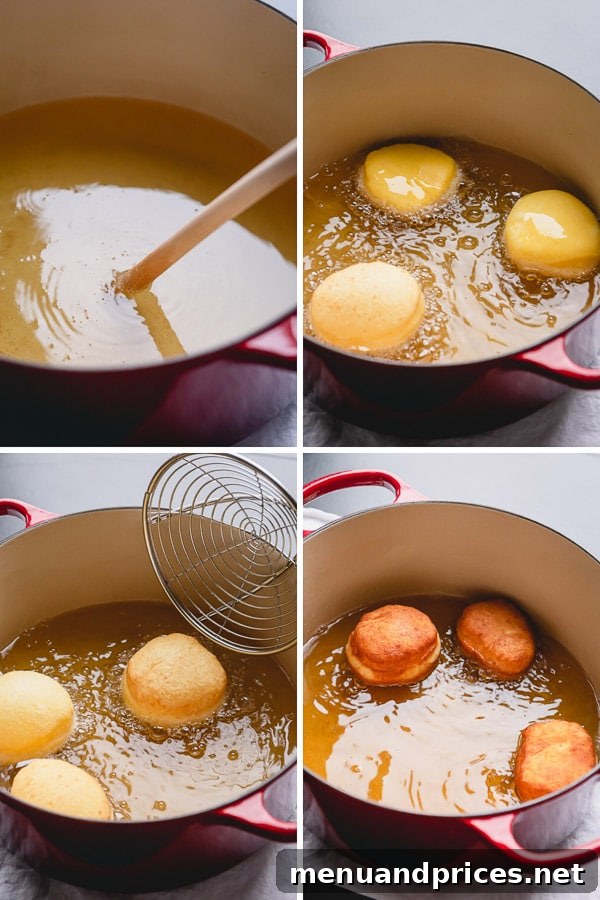
Deep-frying is what gives these homemade jelly donuts their incredible golden-brown exterior and airy interior. Choose a neutral-flavored oil with a high smoke point, such as canola or vegetable oil. It’s essential to use a sturdy, heavy-bottomed pot like a Dutch oven for frying, as it helps maintain a stable oil temperature.
Pour about 1 inch of oil into your pot and heat it to 350°F (180°C). A thermometer is highly recommended for accuracy, as maintaining the correct temperature is key to perfectly cooked donuts. If the oil is too cold, the donuts will absorb too much oil and become greasy. If it’s too hot, they’ll brown too quickly on the outside, leaving the inside raw. If you don’t have a thermometer, here’s a simple trick: insert the back of a wooden spoon into the hot oil. If small, consistent bubbles form around the wood (as shown in the image below), your oil is ready.
Crucial Frying Tips:
- Avoid Overcrowding: Fry only 2-3 donuts at a time. Overcrowding the pan will drastically drop the oil temperature, leading to undercooked, doughy donuts.
- Even Cooking: Donuts puff up quickly and might be stubborn, wanting to float on one side. Use a spider strainer or tongs to gently hold them down and turn them halfway through the frying process, ensuring they cook evenly on both sides for a beautiful golden hue. Each side should take about 1.5-2 minutes to cook, resulting in a total frying time of 3-4 minutes per donut.
- Safety First: Always be cautious when working with hot oil. Keep a lid nearby to smother any potential oil fires, and never leave the pot unattended.
Step 4. Filling and Finishing Touches
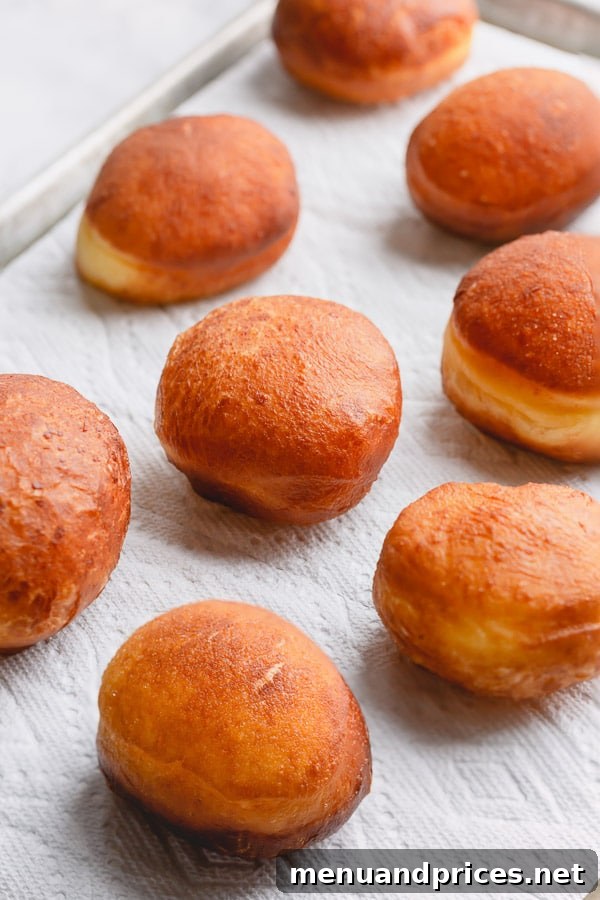
Once your donuts are beautifully golden and cooked through, use a spider strainer to transfer them to a baking sheet lined with several layers of paper towel. This allows excess oil to drain off, keeping your donuts light. While some, like my husband and sons, prefer to simply roll them in powdered sugar and enjoy them plain, the true magic of a Berliner lies in its jelly filling. But first, let them cool completely!
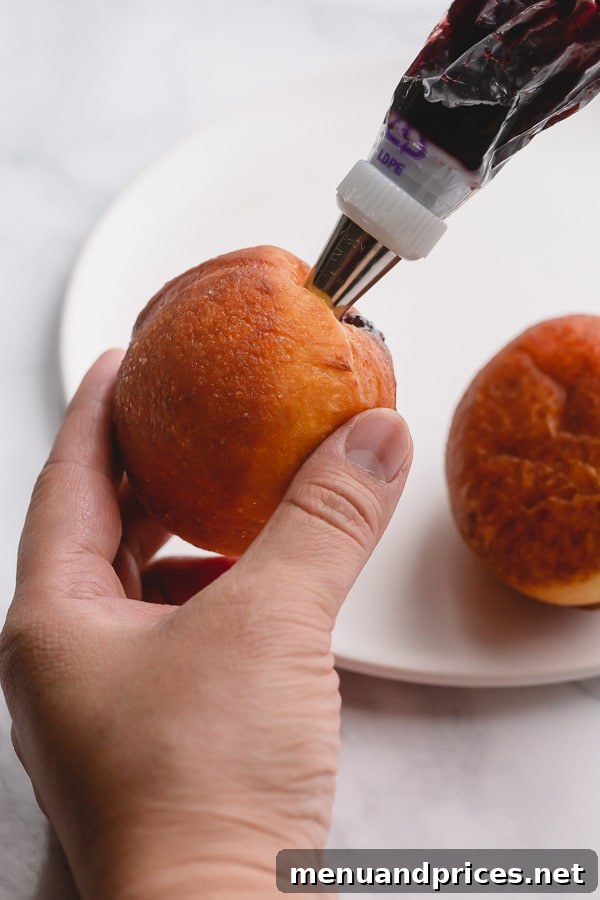
To fill your homemade jelly donuts, you’ll need a pastry bag fitted with a small round tip. The key is to use a smooth, seedless jelly. Lumpy or seedy jams can easily clog your pastry tip, making the filling process frustrating. If your jelly is too thick, simply add a teaspoon or so of warm water and mix it well to thin it slightly. My seedless raspberry jelly is a perfect match, creating that classic Berliner flavor!
Insert the pastry tip gently into the side of a cooled donut, pushing it about halfway into the center. Squeeze the pastry bag to inject about a teaspoon of jelly into the donut. You’ll feel the donut become slightly heavier. Repeat for all your delicious Berliners. Finally, for that perfect finish, generously dust your filled donuts with powdered sugar. Don’t limit your creativity to just jelly, though! These versatile donuts are fantastic with Nutella, pastry cream, chocolate ganache, or even a tangy lemon curd. The possibilities are endless!
The Great Donut Debate: Can You Bake Jelly Donuts?
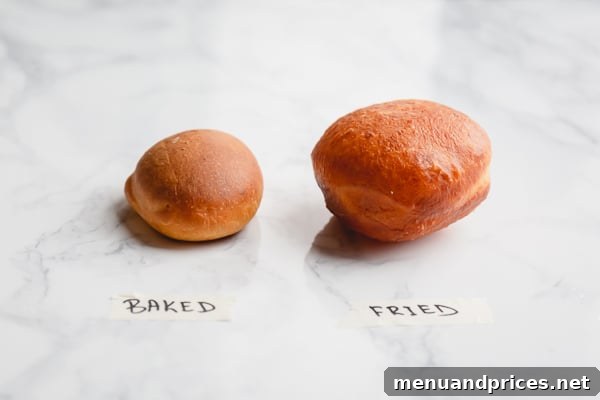
It’s a common question: can you bake these delectable jelly donuts instead of frying them? I understand the desire for a potentially “healthier” alternative, so I put it to the test. And, to be honest, I was quite disappointed with the results.
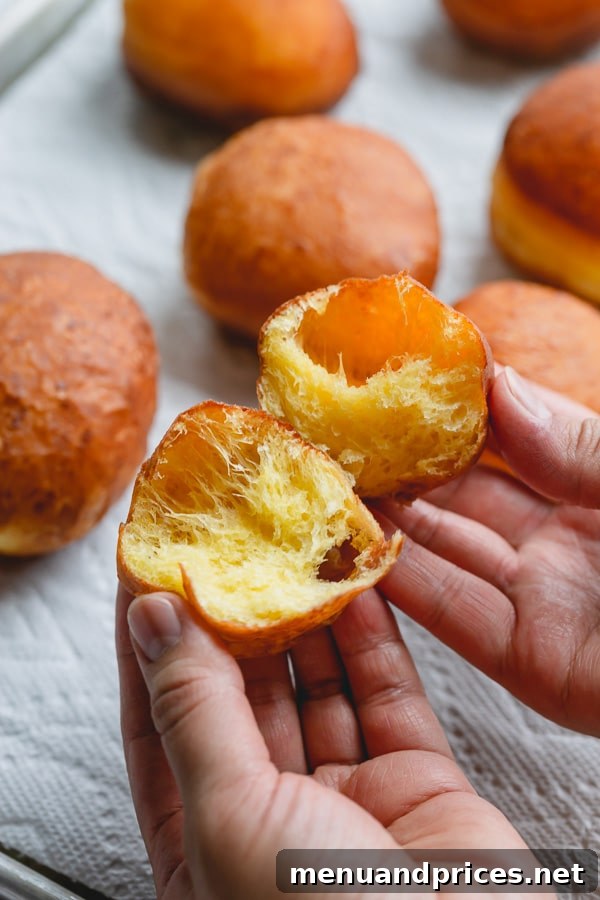
While technically possible, baked jelly donuts simply don’t achieve the same magical texture as their deep-fried counterparts. The baked versions were significantly denser, resembling more of a sweet bread roll than a light, airy donut. They lacked the golden crispness of the exterior and the fluffy, pillowy crumb that makes a fried Berliner so utterly delightful. Fried donuts, on the other hand, puff up beautifully, creating that gorgeous, airy texture we crave. See the visual difference for yourself below!
For an authentic, truly irresistible jelly donut experience, deep-frying is undeniably the superior method. Embrace the process, and you’ll be rewarded with unmatched flavor and texture.
How to Store Jelly Donuts and Enjoy Them Later
While it’s tempting to devour an entire batch of these heavenly homemade jelly donuts in one sitting, knowing how to store them properly ensures you can savor them over time. Truth be told, freshly made donuts are always best enjoyed within a few hours of frying. However, if you have leftovers, or want to prepare ahead, here are your best options:
- Room Temperature (Unfilled): Store cooled, unfilled donuts at room temperature in an airtight container for up to 24 hours. If filled, they tend to get soggy quicker, so it’s best to fill them just before serving.
- Freezing (Unfilled, Unglazed): For longer storage, you can freeze unfilled and unglazed donuts. Arrange the completely cooled donuts on a baking sheet lined with parchment paper and freeze for 2-3 hours until solid. Once frozen, transfer them to a freezer-safe container or a heavy-duty freezer bag. They will keep well for up to 3 months.
- Thawing Frozen Donuts: To thaw, simply remove the desired number of donuts from the freezer bag/container and let them defrost at room temperature for an hour or two. For a quicker thaw, microwave them in 15-20 second increments until soft. You can then fill and dust them with powdered sugar as desired.
Beyond the Classic: Creative Berliner Variations
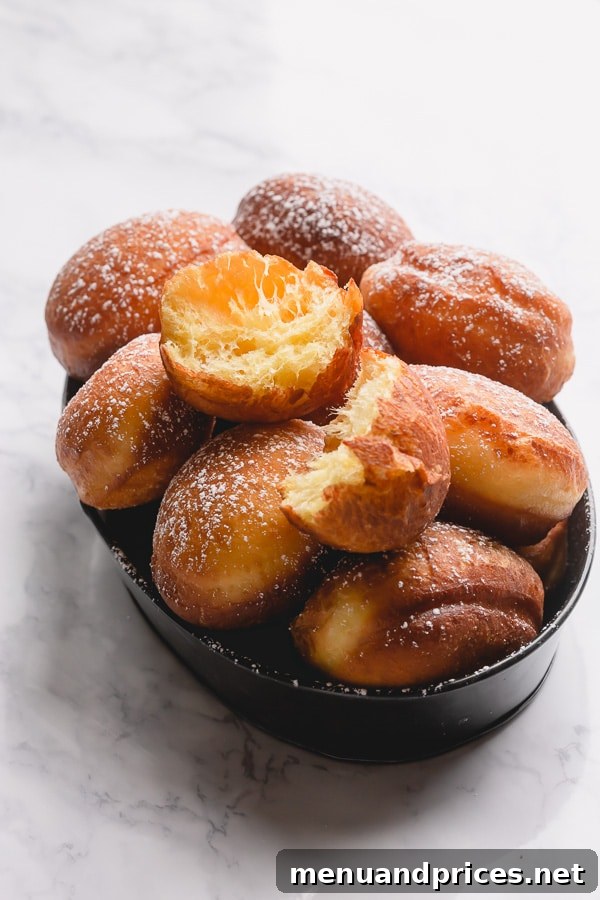
While the classic jam-filled Berliner is a timeless favorite, don’t hesitate to get creative with your toppings and fillings! In Germany, Berliners are a traditional New Year’s Eve treat, and it’s a wonderful custom to dress them up for the holidays. Consider glazing your homemade jelly donuts with a simple powdered sugar glaze (powdered sugar mixed with a little lemon juice or milk) and then adorning them with festive sprinkles. This instantly transforms them into a show-stopping holiday dessert or a delightful party treat!
Beyond the festive touches, think about other filling possibilities: a rich chocolate custard, a vibrant lemon curd, a creamy vanilla pastry cream, or even a spicy apple butter. Each variation offers a new adventure for your palate, proving just how versatile these amazing homemade jelly donuts can be.
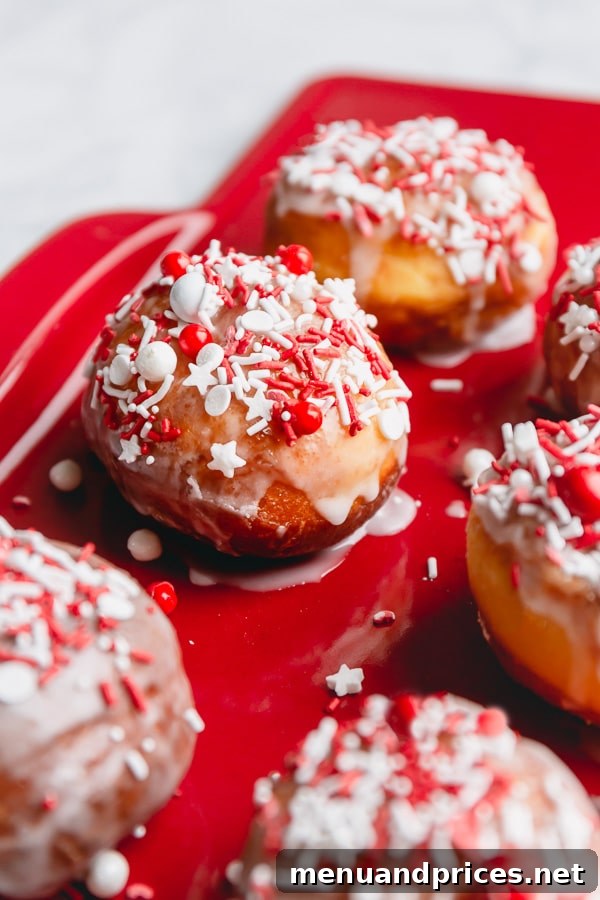
I genuinely hope you’ll cherish making and enjoying these amazing homemade jelly donuts. They are a labor of love that yields truly spectacular results, bringing a taste of authentic bakery-quality treats right into your home. If you try this recipe, please share your experience in the comments below, or snap a photo and tag me @shineshka on Instagram!

Homemade Jelly Donuts (Berliners)
Pin Recipe
Comment
Print Recipe
Ingredients
- 4 cups 500gr all-purpose flour
- ¼ cup 50gr sugar
- 1 packet instant yeast
- ¾ cup 180ml buttermilk
- 2 large eggs
- 2 egg yolks
- 1 teaspoon salt
- 1 stick 115gr unsalted butter, cut into pieces
- Oil for frying vegetable or canola oil
- Powdered sugar for dusting
Instructions
-
To make the dough, in a large mixing bowl of a stand mixer, whisk together flour, sugar, and instant yeast with a whisk attachment.
-
In a separate 2-cup measuring cup or bowl, thoroughly mix together buttermilk, large eggs, and egg yolks.
-
Attach the dough hook to your stand mixer. Add the wet ingredients into the dry ingredients in the mixer bowl.
-
Mix the dough on low speed until all ingredients are just combined and a shaggy dough forms, about 3 minutes.
-
Add the salt to the dough and continue mixing for another minute.
-
Gradually add the unsalted butter pieces, one at a time, making sure each piece is incorporated before adding the next. Continue to mix on medium-low speed until the dough becomes smooth, shiny, elastic, and forms a ball that easily pulls away from the sides of the bowl. This process can take 10-15 minutes.
-
Cover the mixer bowl with a clean kitchen towel (or plastic wrap) and let the dough rest and rise in a warm, draft-free place for about 1 hour, or until it has doubled in size.
-
To shape the donuts, gently turn the risen dough out onto a lightly floured countertop. Divide the dough into 2 equal parts for easier handling.
-
Take one portion of dough, form it into a smooth ball, and then use a rolling pin to roll it evenly into a ¼-inch thick rectangle.
-
Using a 3-inch pastry cutter (or a round cookie cutter/drinking glass rim), cut out individual 3-inch circles. Arrange these cut circles on a lightly floured baking sheet that has been lined with parchment paper. Gather any dough scraps, gently form them into a smooth ball, and re-roll to cut out more donuts. Any very small remaining scraps can be rolled into small donut holes.
-
Cover the shaped donuts loosely with a kitchen towel or plastic wrap and allow them to rise for a second time, for about 1 hour, or until they look visibly puffy and light.
-
To fry the donuts, in a large, heavy-bottomed Dutch oven or pot, heat 1-inch deep vegetable or canola oil until it reaches 350°F (180°C). TIP: If you don’t have a thermometer, test the oil by inserting the back of a wooden spoon; if the oil shimmers and produces small, steady bubbles around the edges of the stick, it’s hot enough (refer to the image in the post above for a visual guide).
-
Carefully drop 2-3 donuts into the hot oil at a time, taking care not to overcrowd the pot. Fry for 3-4 minutes total, turning each donut once halfway through (about 1.5-2 minutes per side). Donuts will puff up quickly. Some may be stubborn and want to flip back to the same side; if so, gently hold them down with a spider strainer or tongs to ensure even cooking and a golden-brown finish on both sides. Frying in small batches is crucial for maintaining oil temperature and achieving the best results.
-
Remove the cooked, golden donuts from the oil using a spider strainer and transfer them to a baking sheet lined with several layers of paper towel to drain excess oil. Let them cool completely before filling.
-
Once fully cooled, you can now fill the donuts with your favorite seedless jelly and dust generously with powdered sugar for serving.
-
To fill the donuts, place your smooth, seedless jelly into a pastry bag fitted with a small, round tip. Insert the tip into the side of a cooled donut, pushing it gently into the center. Squeeze the pastry bag to inject about a teaspoon or so of jelly into the middle of the donut.
⭐️ Did you make this recipe?
Please leave a review and let us know how you liked it!
Nutrition