

The Ultimate Holiday Butter Cookie Platter: Six Irresistible Varieties from One Easy Dough
Imagine creating a magnificent platter showcasing six distinct and delightful holiday butter cookies, all originating from a single, incredibly versatile dough! This large-batch recipe provides the perfect canvas for endless creativity, allowing you to experiment with various mix-ins, festive shapes, and charming decorations. Say goodbye to complicated multi-recipe baking and embrace the joy of simple, flavorful homemade treats this holiday season.

Why You’ll Adore This Butter Cookie Recipe
My heart truly belongs to butter cookies. They captivate with their delicately golden, crisp edges, a luxuriously rich, buttery texture that melts in your mouth, and a perfectly balanced subtle sweetness. This particular butter cookie recipe transcends expectations, offering not just exceptional taste but also an incredibly enjoyable and adaptable baking experience.
- Effortless Dough Preparation: The base cookie dough comes together in a mere 10 minutes, making it incredibly quick and convenient, especially during busy holiday preparations.
- Unleash Endless Creativity: With this adaptable dough, you can craft countless variations of holiday cookies by simply incorporating diverse mix-ins, toppings, and shaping techniques. The possibilities are truly limitless!
- Wonderfully Easy to Work With: This dough boasts a fantastic consistency that’s smooth, pliable, and incredibly forgiving, making it ideal for rolling, cutting, and shaping without sticky messes or excessive crumbling.
This year, skip the generic, often disappointing store-bought cookie tins. Once you experience the superior flavor and delightful texture of these homemade butter cookies, you won’t look back. These festive Christmas cookies are not only a joy to bake and eat, but they also make incredibly thoughtful and cherished gifts for friends, family, and neighbors. Imagine the smiles when they receive a beautifully curated platter of handmade treats!
Essential Ingredients for Your Master Dough
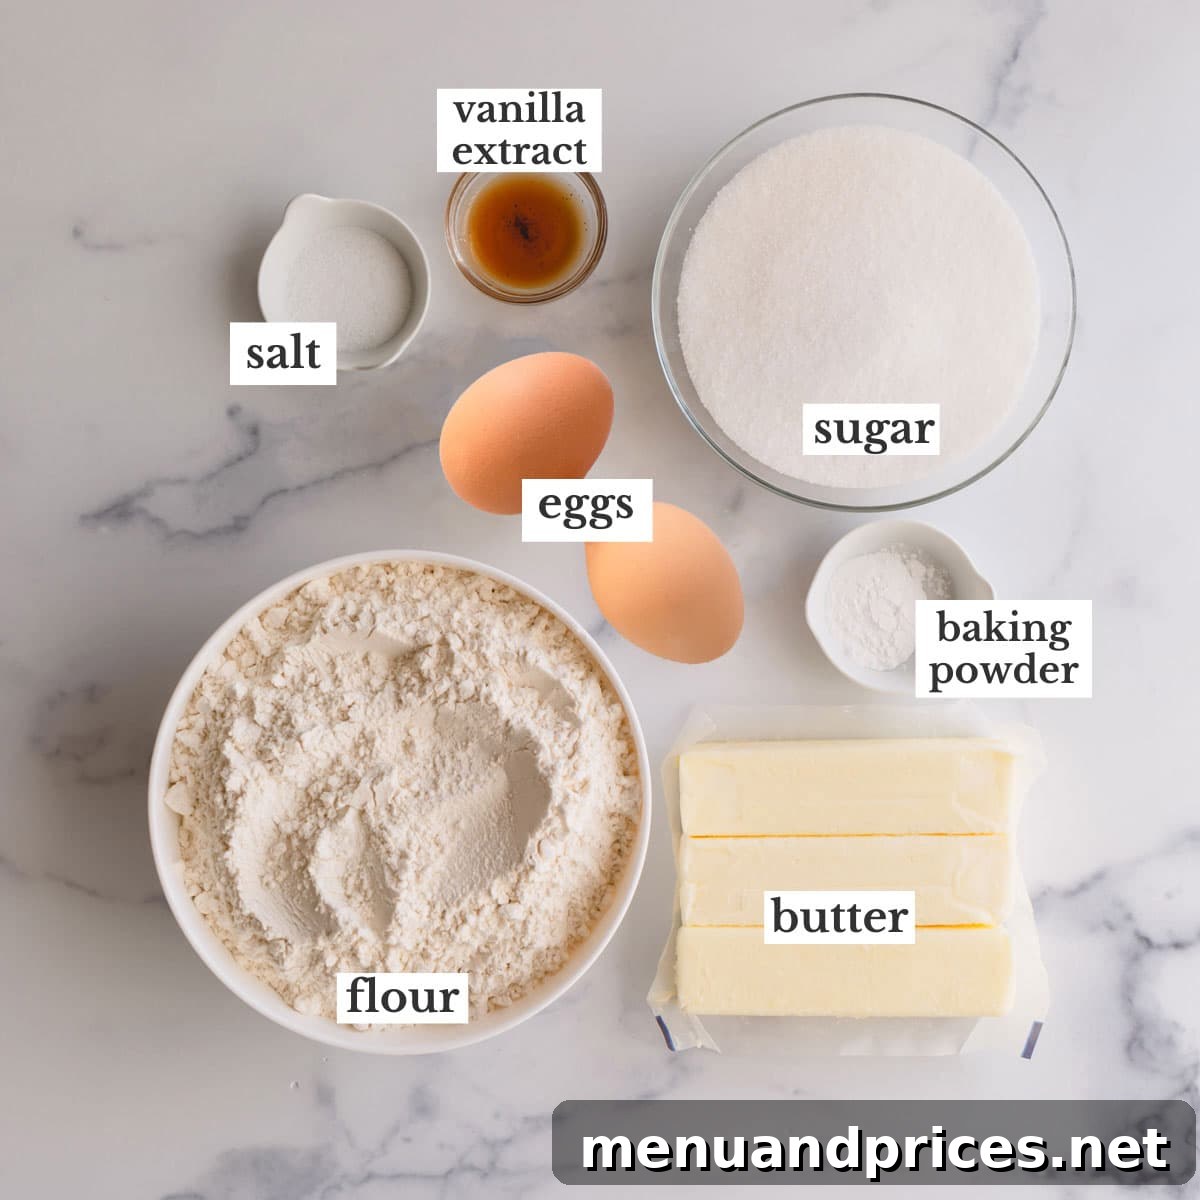
Creating the perfect butter cookie begins with high-quality ingredients. Here’s a closer look at what you’ll need for our versatile base dough and why each component is crucial:
- Unsalted Butter: Three sticks might seem like a generous amount, and it is – but butter is the star of the show! It’s the cornerstone ingredient that imparts the rich, creamy, and undeniably buttery flavor that defines these cookies. Using unsalted butter allows you to control the exact amount of salt in the recipe. If you only have salted butter on hand, simply omit the salt called for in the recipe to maintain balance. Ensure your butter is at room temperature for optimal creaming.
- Granulated Sugar: This classic sweetener not only provides the perfect level of sweetness without overpowering the delicate butter flavor but also contributes to the cookies’ crisp texture and golden-brown edges.
- Large Eggs: A key differentiator between a classic shortbread cookie and a butter cookie lies in the eggs! Eggs add moisture, act as a binding agent, and contribute to the dough’s elasticity. This results in a less crumbly, more pliable dough that is much easier to roll out and cut into intricate shapes, yielding a tender, yet firm cookie. Ensure they are at room temperature for better incorporation.
- Pure Vanilla Extract: A crucial flavor enhancer, vanilla extract beautifully complements and deepens the buttery notes, adding a warm, aromatic dimension to every bite.
- All-Purpose Flour: The structural foundation of our cookies. For the most consistently accurate results, I highly recommend weighing your flour with a kitchen scale. If a scale isn’t available, use the “spoon and level” method: gently spoon the flour into your measuring cup until it overflows, then level it off with the flat edge of a butter knife. Avoid scooping directly from the bag, as this compacts the flour and leads to over-measurement.
- Baking Powder: While not all butter cookie recipes include a leavening agent, a touch of baking powder gives these cookies a slightly lighter, perfectly tender texture without making them cakey. It helps create a cookie that is both crisp and delightfully soft.
- Salt: A small but mighty ingredient, salt is essential for enhancing all the other flavors, particularly the sweetness of the sugar and the richness of the butter. It brings balance and depth to the cookie’s profile.
Crafting the Perfect Butter Cookie Dough: Step-by-Step Guide
The beauty of this recipe starts with a simple, forgiving base dough. Follow these steps for success:
- Cream Butter and Sugar: In the bowl of a stand mixer fitted with the paddle attachment (or using an electric hand mixer), beat the softened unsalted butter and granulated sugar together on medium speed. Continue mixing for about 2 minutes, or until the mixture becomes visibly pale, light, and fluffy. This essential step incorporates air, contributing to the cookies’ tender texture.
- Incorporate Wet Ingredients: Add the large eggs and pure vanilla extract to the creamed mixture. Beat for another 2 minutes, ensuring everything is thoroughly combined and smooth. Scrape down the sides of the bowl as needed to ensure all ingredients are well incorporated.
- Add Dry Ingredients: Gradually add the all-purpose flour, baking powder, and salt to the wet ingredients. Mix on low speed until a thick, cohesive cookie dough forms. Be careful not to overmix; stop as soon as the flour streaks disappear to avoid developing too much gluten, which can result in tough cookies.
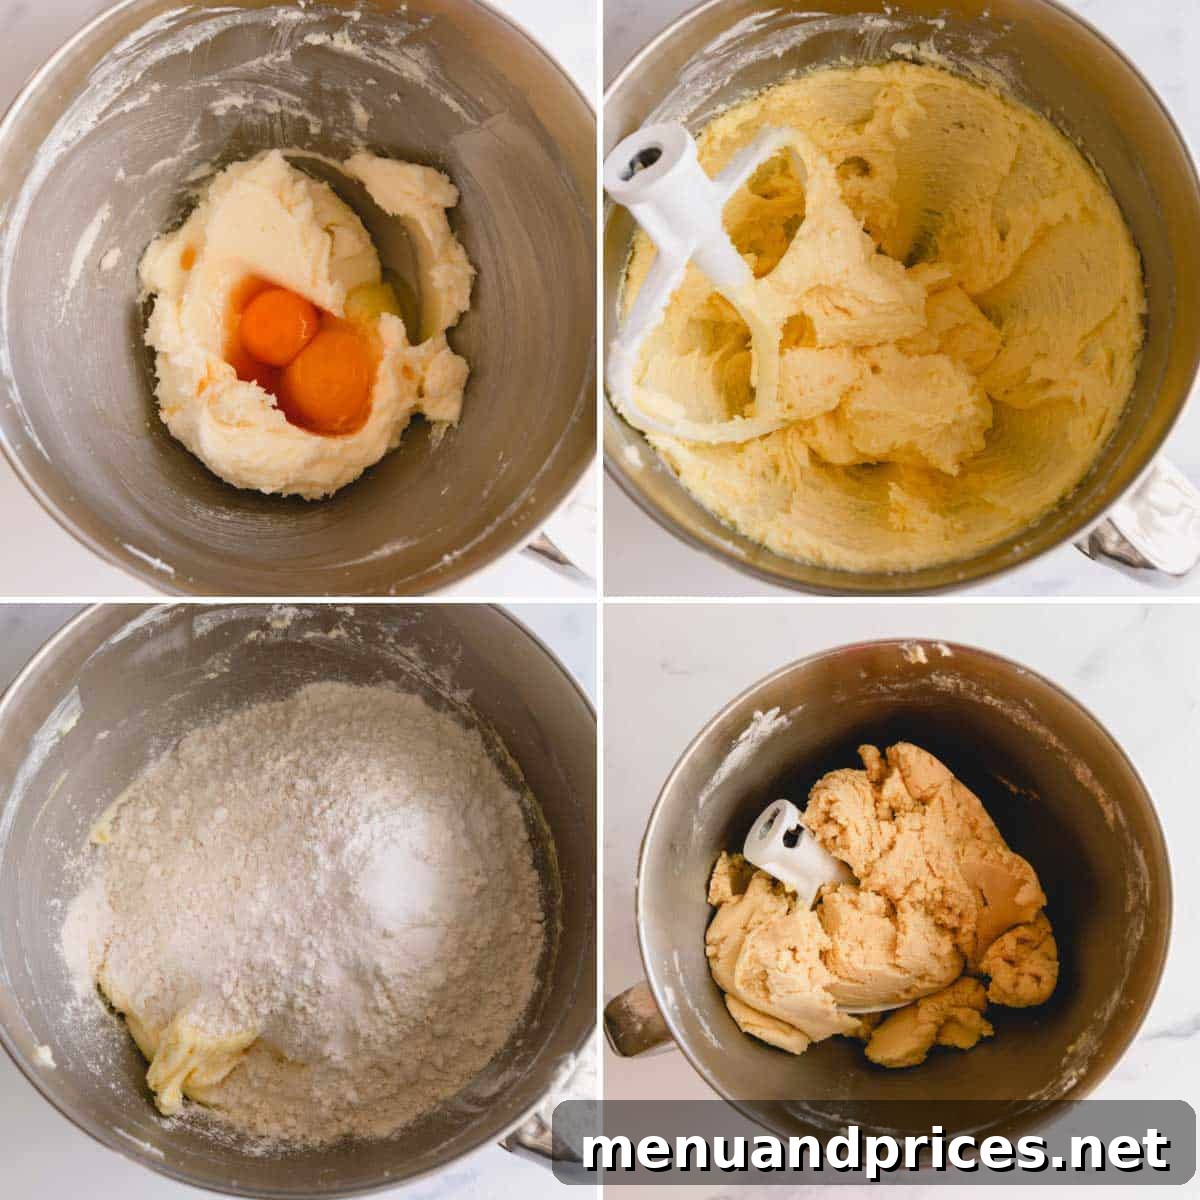
- Knead and Portion: Transfer the freshly made cookie dough to a clean, lightly floured work surface. Briefly knead the dough with your hands for about 30 seconds until it forms a smooth, uniform ball. This brief kneading helps bring the dough together and ensures a consistent texture.
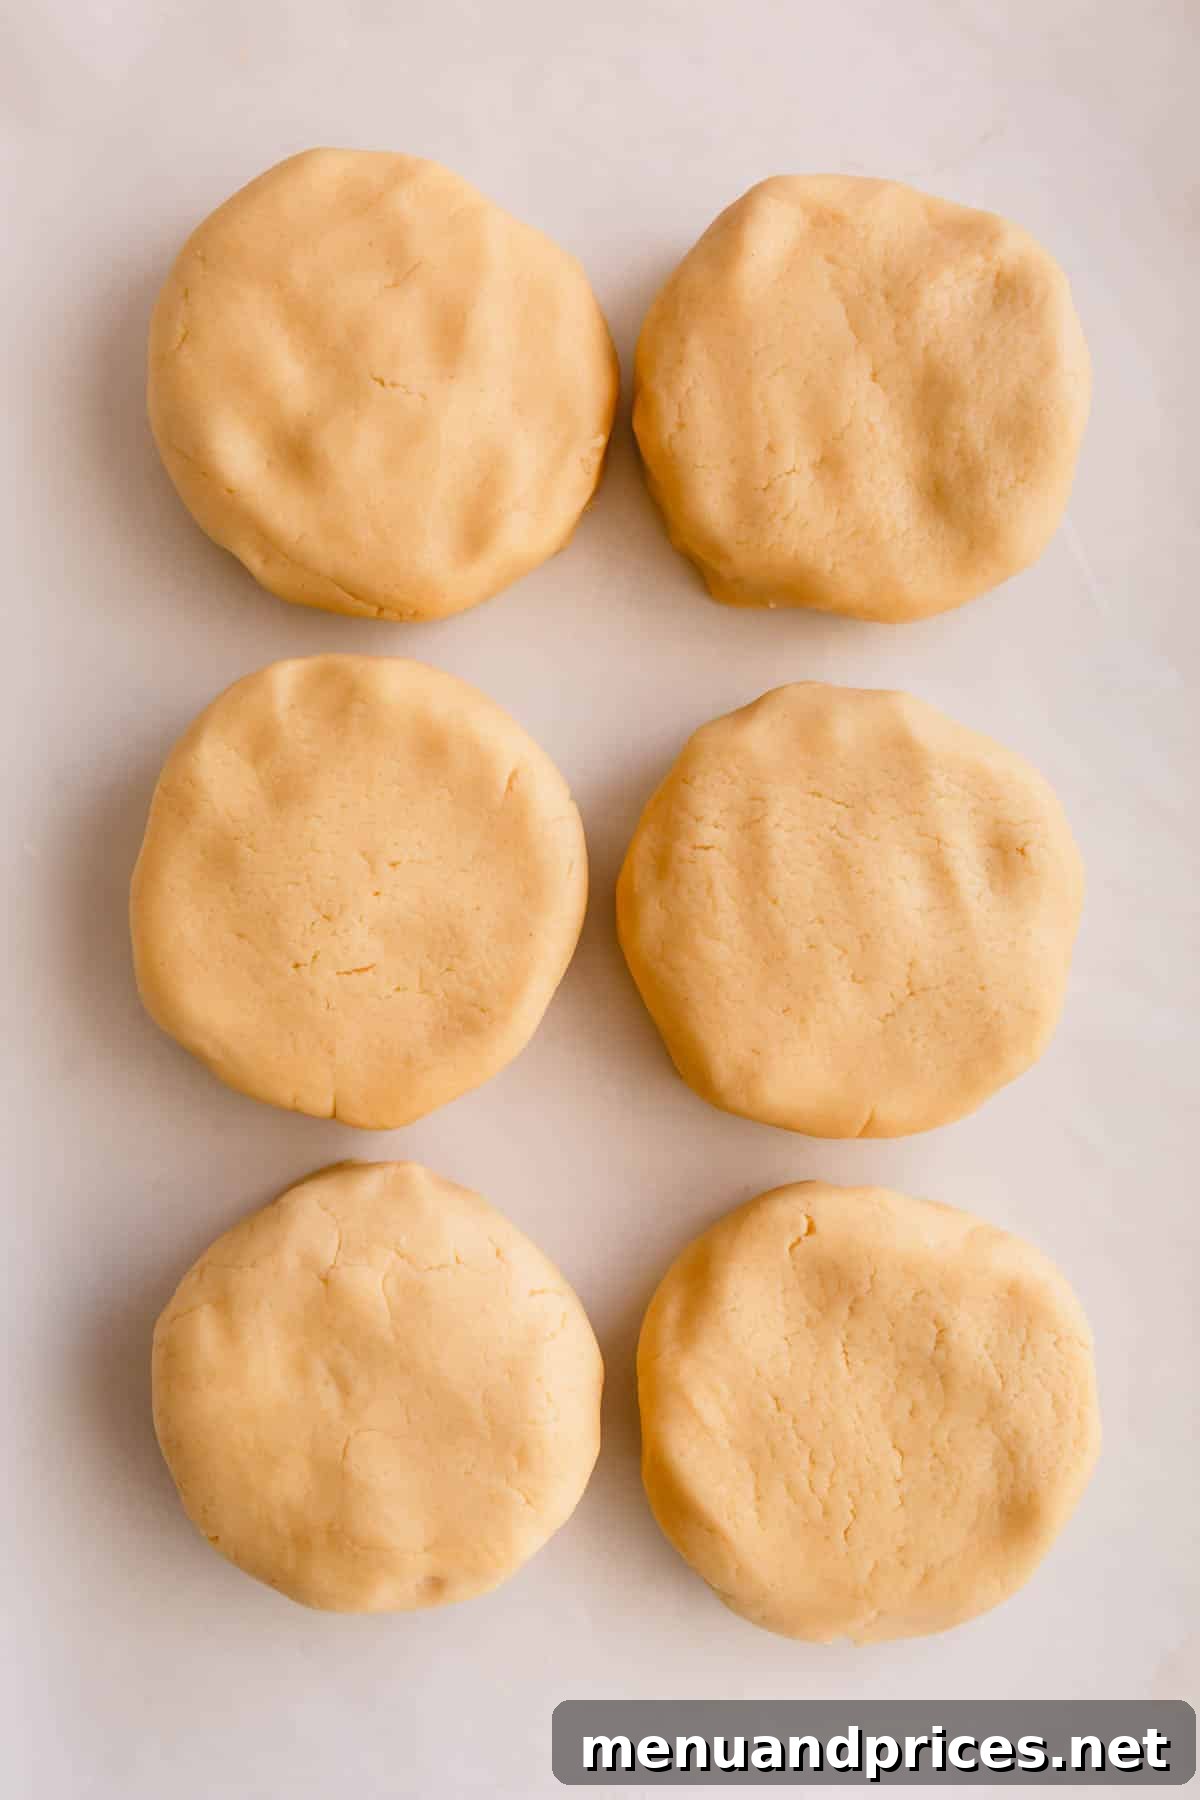
- Divide for Versatility: Divide the large dough ball into 6 equal portions, each weighing approximately 220 grams. Shaping them into disks or balls makes them easier to handle for the subsequent variations.
- Begin Your Cookie Creations: Now, you’re ready to use these individual cookie dough portions to create any of the six delicious cookie variations described below!
Six Festive Transformations: Your Cookie Dough Adventure Begins!
Now for the fun part! Take one of your 220-gram dough portions and turn it into a unique, delectable holiday cookie. Here are six fantastic ideas to inspire your baking:
1. Decadent Chocolate Cutout Cookies
Transform your classic butter cookie dough into rich, deep chocolate delights, perfect for cutting into festive shapes. The addition of cocoa powder creates a wonderful contrast in flavor and color on your holiday platter.
What You’ll Need:
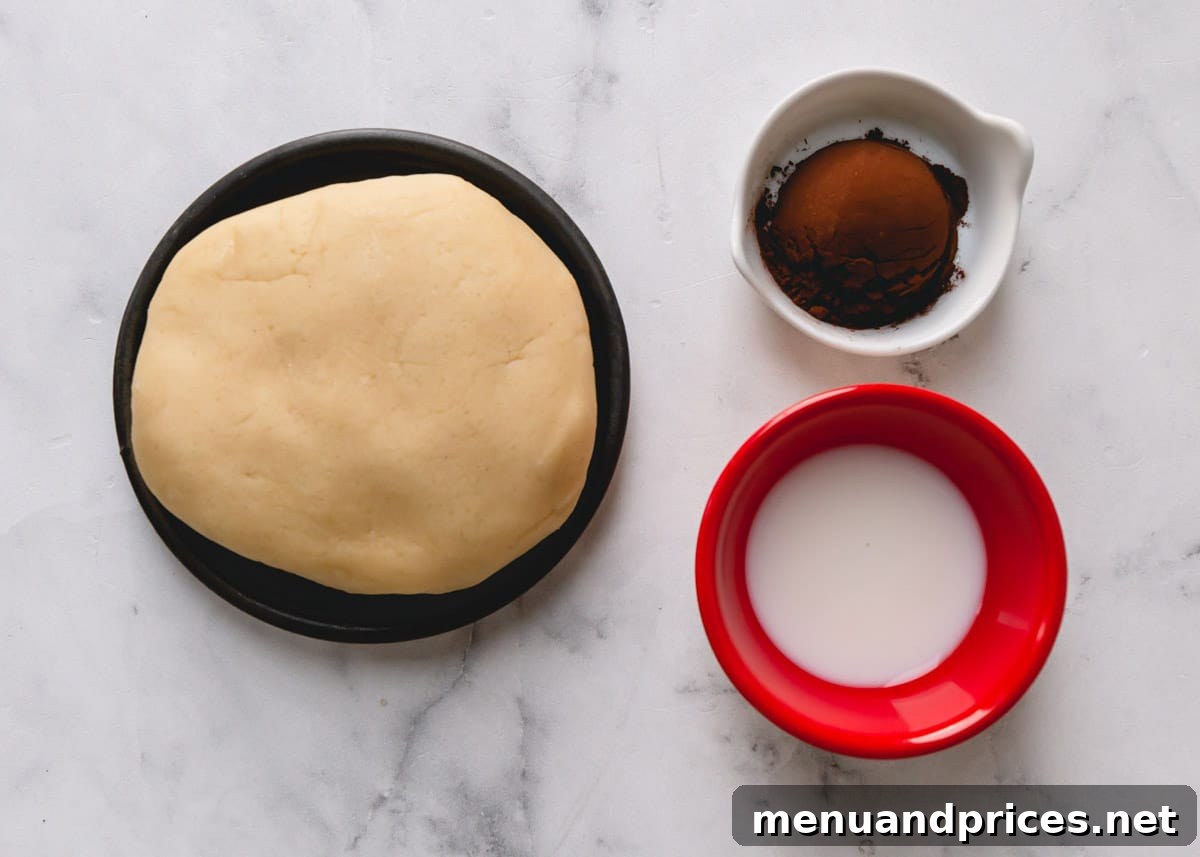
- Cookie Dough: One 220-gram portion (one dough ball).
- Cocoa Powder: You can use either natural unsweetened cocoa powder or Dutch-processed cocoa powder. I personally prefer Dutch-processed for its darker hue and smoother, less acidic, more intense chocolate flavor, which pairs beautifully with the buttery base.
- Milk or Coffee: Cocoa powder is very absorbent, so a small amount of liquid is needed to rehydrate the dough and maintain its pliable texture. Both milk and coffee work wonderfully; coffee can even subtly enhance the chocolate flavor.
How to Make Chocolate Cutout Cookies:
- Combine Ingredients: In the same mixing bowl you used for the main dough, combine one 220-gram portion of the plain cookie dough with the cocoa powder and milk (or coffee). Mix on low speed until the cocoa powder is fully incorporated and the dough is a uniform chocolate color.
- Form Dough Ball: Transfer the chocolate cookie dough to a clean work surface and briefly knead it into a smooth ball.
- Roll and Cut: Place the dough between two sheets of parchment paper. Roll it out evenly to about a 1/2-inch thickness. The parchment paper prevents sticking and ensures easy transfer. Use your favorite Christmas cookie cutters (stars, trees, gingerbread men) to cut out shapes. Carefully arrange the cut cookies on a baking sheet lined with parchment paper or a silicone mat. Gather any dough scraps, gently form them into a ball, re-roll, and cut out more cookies until all dough is used.
- Bake: Bake the cookies in a preheated oven at 350 degrees Fahrenheit (175°C) for 10 to 12 minutes, or until the edges are lightly set and the centers look just baked through.
- Cool: Allow the cookies to cool on the baking sheet for at least 3 minutes; this allows them to firm up before handling. Then, carefully transfer them to a wire rack to cool completely. Hot cookies are fragile and need a few minutes to set their structure.

2. Whimsical Candy Cane Swirl Cookies
These festive candy cane cookies are as fun to make as they are to eat, bringing a cheerful swirl of color to your holiday spread. Their iconic shape and vibrant appearance make them a holiday favorite.
What You’ll Need:
- Cookie Dough: One 220-gram portion (one dough ball).
- Red Food Coloring: Both liquid and gel food coloring work beautifully to achieve a vibrant red. Gel food coloring often provides a more intense color with less liquid, which is ideal for dough. For a delightful twist without artificial coloring, consider using chocolate cookie dough (prepared as above) for one half to create striking chocolate and vanilla candy canes!
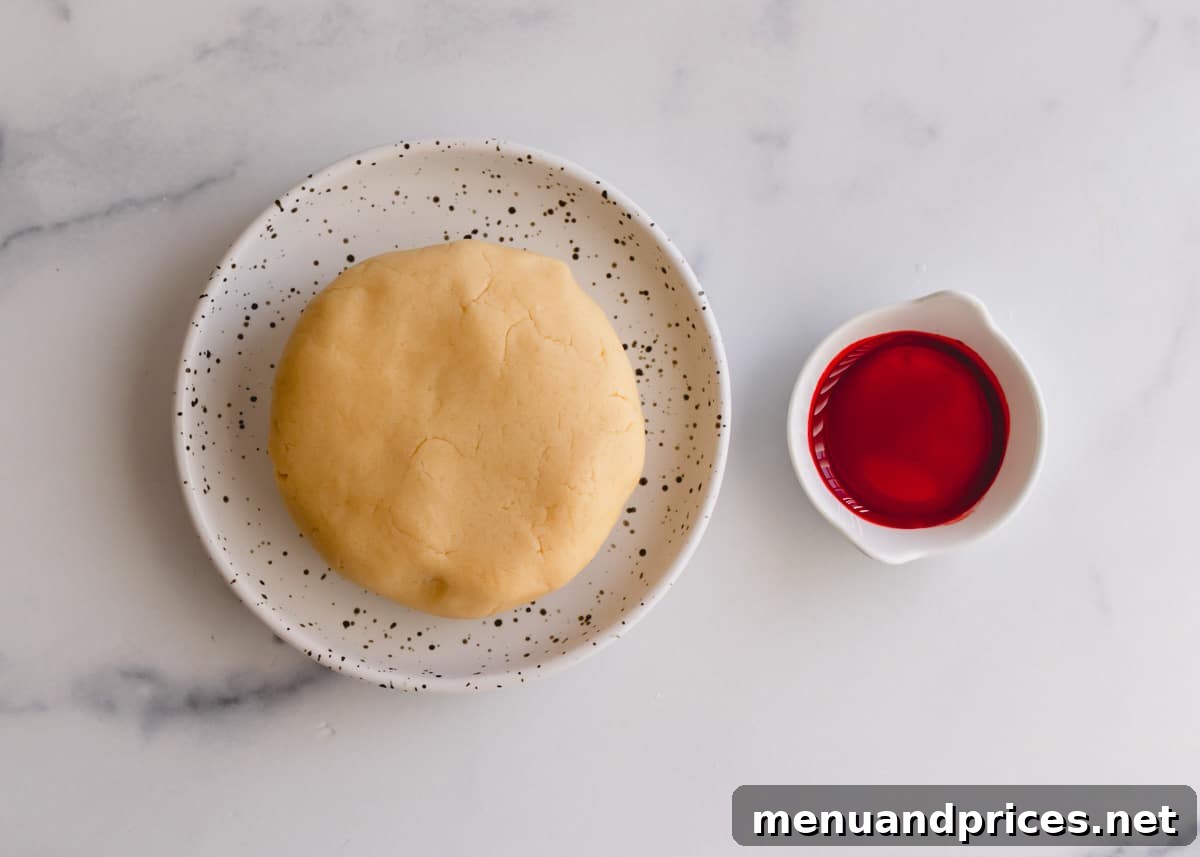
How to Make Candy Cane Cookies:
- Divide and Color Dough: Divide the 220-gram dough ball exactly in half. In the same mixing bowl, combine one half of the dough with a few drops of red food coloring. Mix until the dough is uniformly red. Now you will have two distinct dough balls: one white and one red.
- Portion Dough: Divide each of the colored dough balls (red and white) into 10 equal pieces, so you have twenty small pieces in total (10 red, 10 white), each approximately 10 grams.
- Shape Logs: Roll each small piece of dough (red and white) between your palms into a thin, smooth 3-inch log. Try to make them as consistent in thickness as possible.
- Twist and Form: Take one red log and one white log. Gently twist them together to create a striped pattern. Then, very carefully roll the twisted logs between your hands to smooth them slightly and fuse them together, ensuring they maintain their distinctive two-tone appearance. Bend one end down to form the classic candy cane shape.
- Bake: Place the shaped candy cane cookies on a baking sheet lined with parchment paper or a silicone mat. Bake at 350 degrees Fahrenheit (175°C) for 10 to 12 minutes, or until the edges are just set.
- Cool: Let the cookies cool and firm up on the sheet pan for at least 3 minutes before transferring them to a wire rack to cool completely.
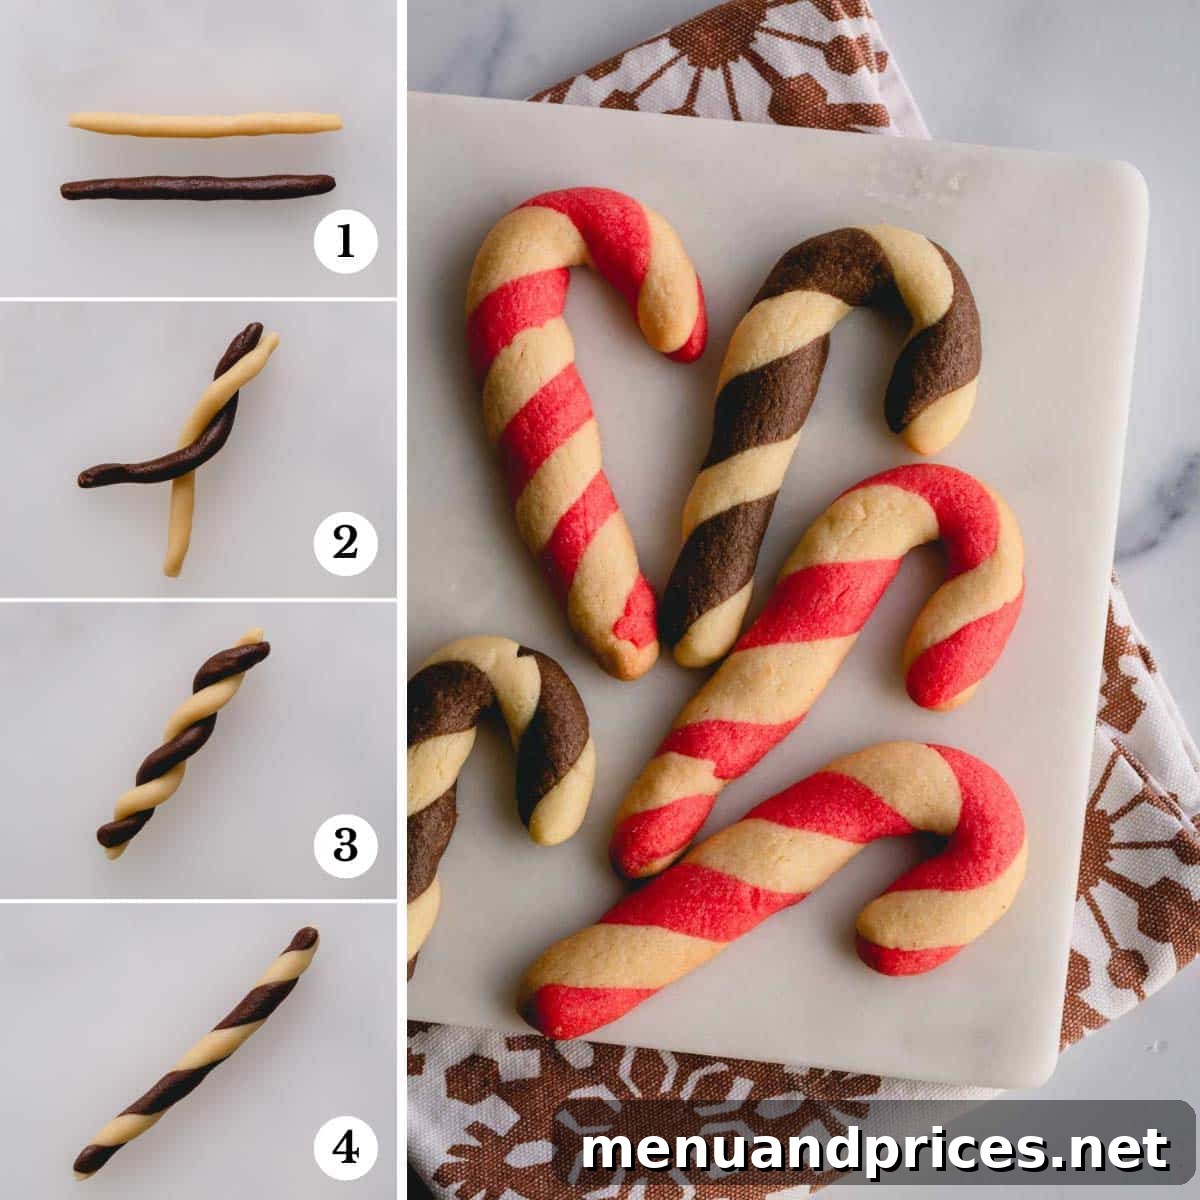
3. Classic Cinnamon Sugar Snickerdoodle Cookies
Embrace the warm, comforting flavors of the holidays with these delightful snickerdoodle cookies. Coated in a fragrant cinnamon-sugar mixture, they offer a chewy interior and a crisp, spiced exterior that’s simply irresistible.
What You’ll Need:
- Cookie Dough: One 220-gram portion (one dough ball).
- Granulated Sugar & Ground Cinnamon: These two ingredients combine to create the iconic, flavorful cinnamon-sugar coating. Feel free to adjust the amount of cinnamon to your preference if you enjoy a stronger spice flavor.
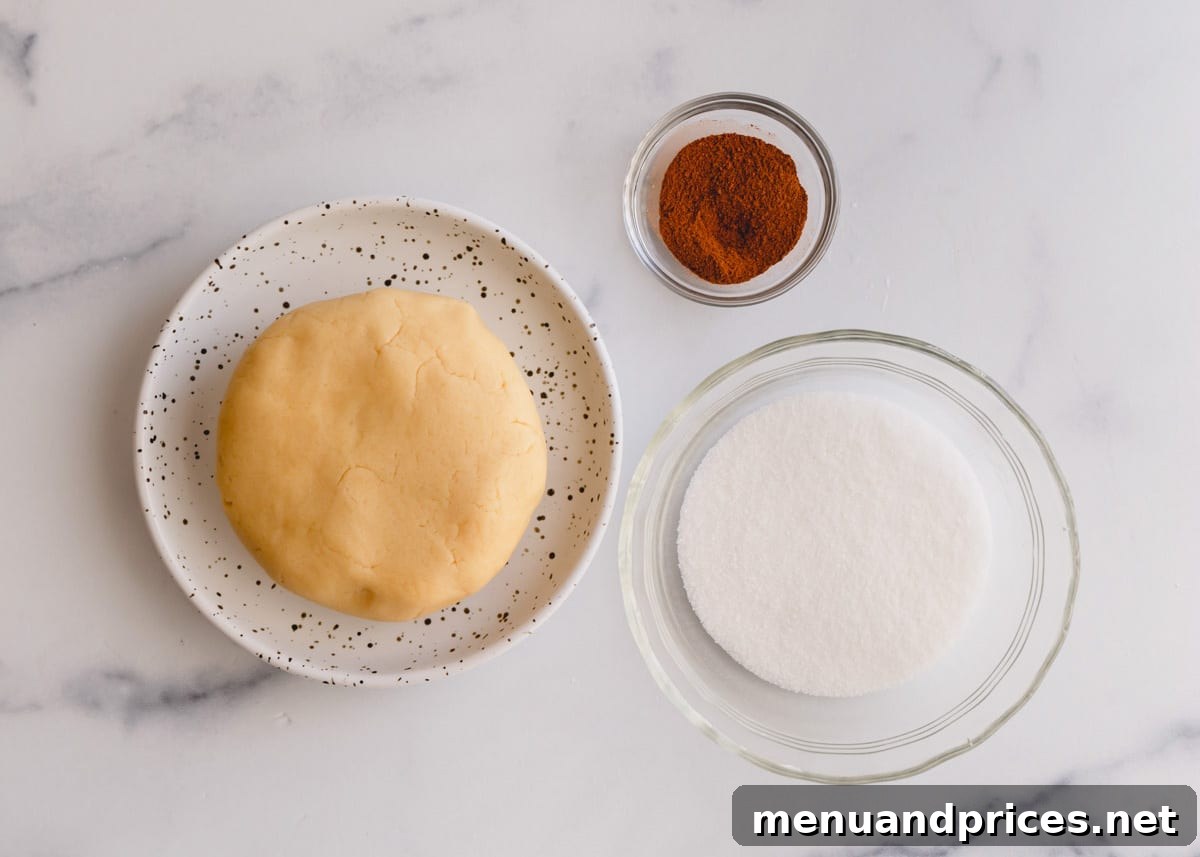
How to Make Snickerdoodle Cookies:
- Prepare Cinnamon Sugar: In a medium-sized shallow bowl, stir together the granulated sugar and ground cinnamon until well combined. Set this mixture aside.
- Portion Dough: Divide the 220-gram dough portion into 12 equal pieces, each weighing approximately 18 grams. Roll each piece between your palms into a smooth, round ball.
- Coat and Arrange: Roll each dough ball generously in the cinnamon-sugar mixture, ensuring it’s fully coated. Place the coated cookies onto a baking sheet lined with parchment paper. Since these cookies don’t spread significantly during baking, you can gently flatten each dough ball with your hand or the bottom of a glass before baking if you prefer a wider, thinner cookie.
- Bake and Cool: Bake the cookies at 350 degrees Fahrenheit (175°C) for 10 to 12 minutes, or until the edges are lightly golden and the centers are set. Transfer the baked cookies to a wire rack immediately to cool completely.
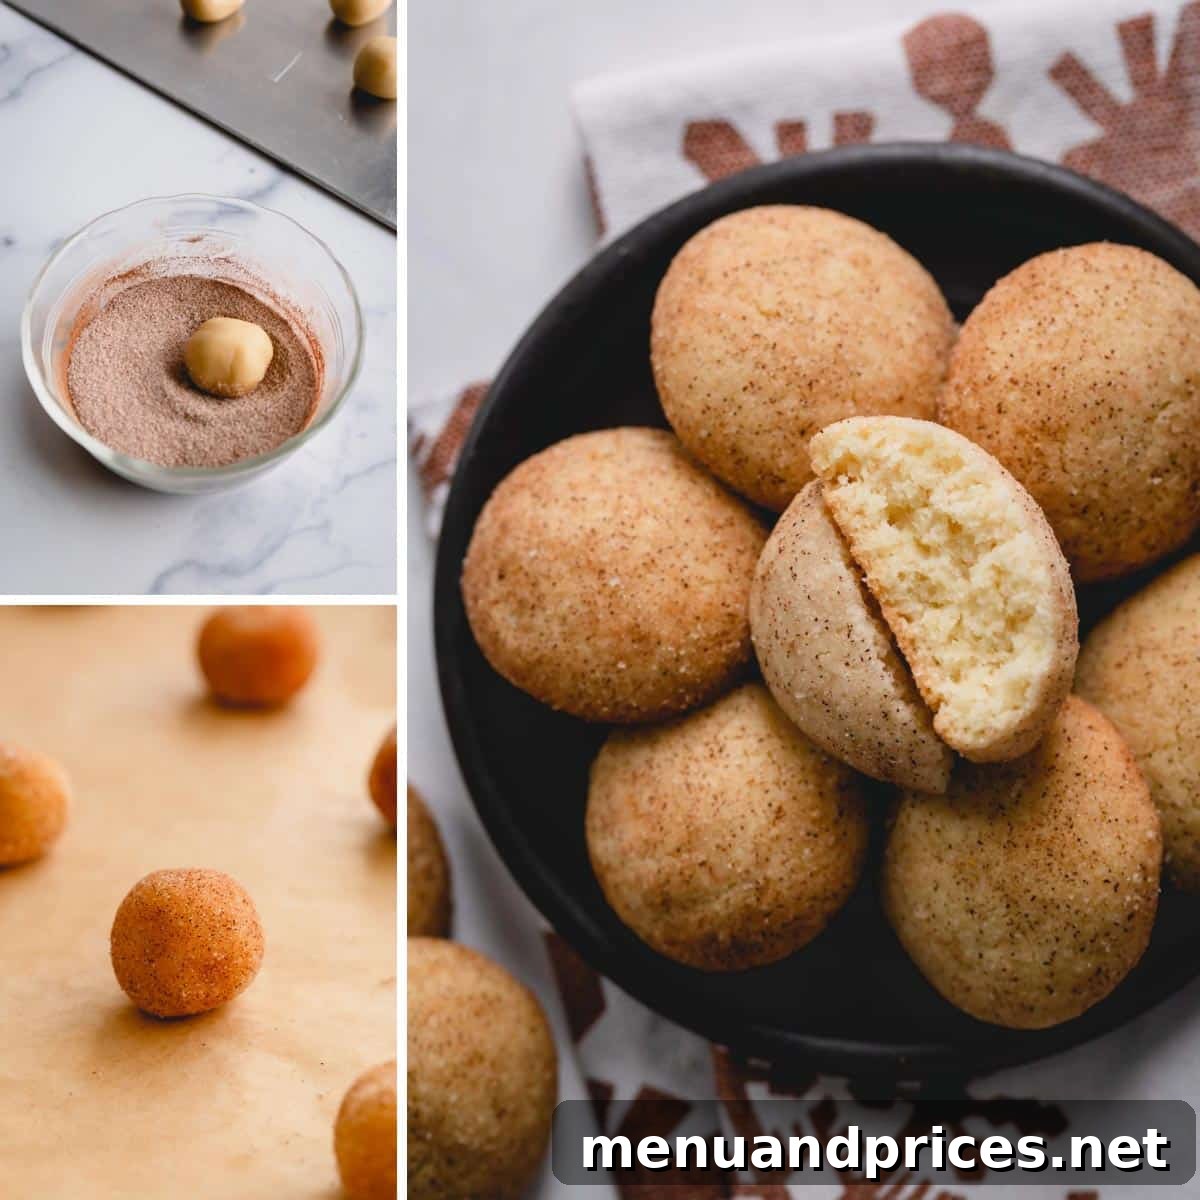
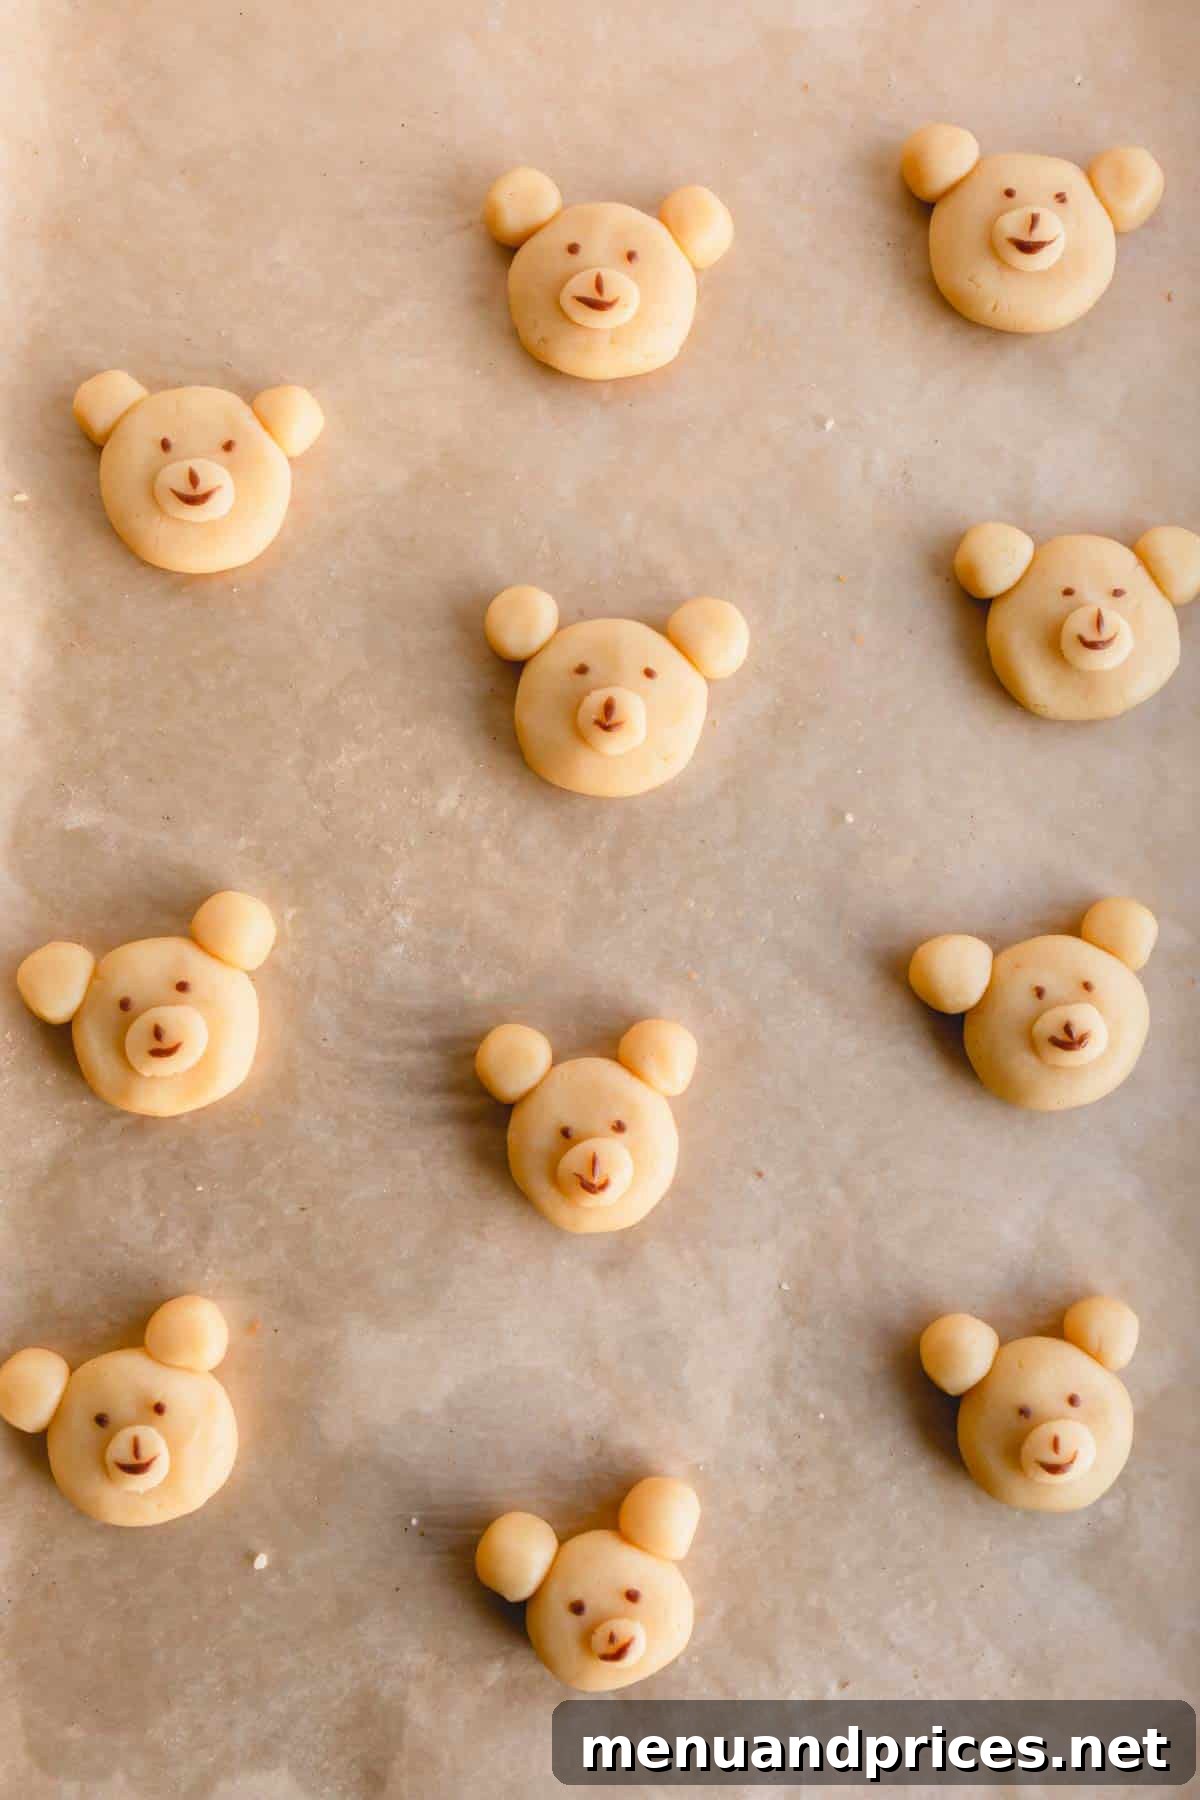
4. Adorable Teddy Bear Shaped Cookies
These charming teddy bear cookies are sure to bring smiles to faces of all ages. They’re surprisingly simple to shape and offer a delightful canvas for simple chocolate decorations, making them a heartwarming addition to any holiday platter.
What You’ll Need:
- Cookie Dough: One 220-gram portion (one dough ball).
- Melted Chocolate: For ease of use and reliable setting, I highly recommend Ghirardelli melting chocolate wafers or chocolate chips. These are designed to melt smoothly and set without requiring tempering, making decoration a breeze. You can use dark, milk, or white chocolate based on preference.
How to Make Teddy Bear Cookies:
- Portion Main Body: Divide the 220-gram dough portion into 12 equal pieces, with each piece weighing approximately 18 grams. Take about three-quarters of one dough ball and roll it between your palms into a smooth sphere. This will form the bear’s head. Place it on a baking sheet lined with parchment paper or a silicone mat.
- Shape Snout and Ears: From the remaining quarter of that dough ball, take a small piece, flatten it slightly, and press it onto the lower half of the main dough ball to create the snout, as pictured. Divide the very last small piece of dough into two equal parts, roll them into tiny balls, and gently press them onto the top of the main head for the ears. Repeat this process with the remaining dough balls.
- Bake: Bake the cookies at 350 degrees Fahrenheit (175°C) for 10 to 12 minutes, or until the edges are lightly golden and the cookies are set.
- Cool and Decorate: Transfer the cookies to a wire rack to cool completely. Once fully cooled, use melted chocolate (transferred to a piping bag with a fine tip or a small Ziploc bag with a corner snipped off) to pipe on the eyes and a mouth for your adorable teddy bears. For a more detailed look, you can also add a small dot of chocolate for the nose.

5. Irresistible Butterfinger Cookie Bars
For those who love a delightful crunch and a burst of candy flavor, these Butterfinger cookie bars are an absolute must-try. The buttery dough perfectly complements the crispy, peanut-buttery pieces, creating a uniquely satisfying treat.
What You’ll Need:
- Cookie Dough: One 220-gram portion (one dough ball).
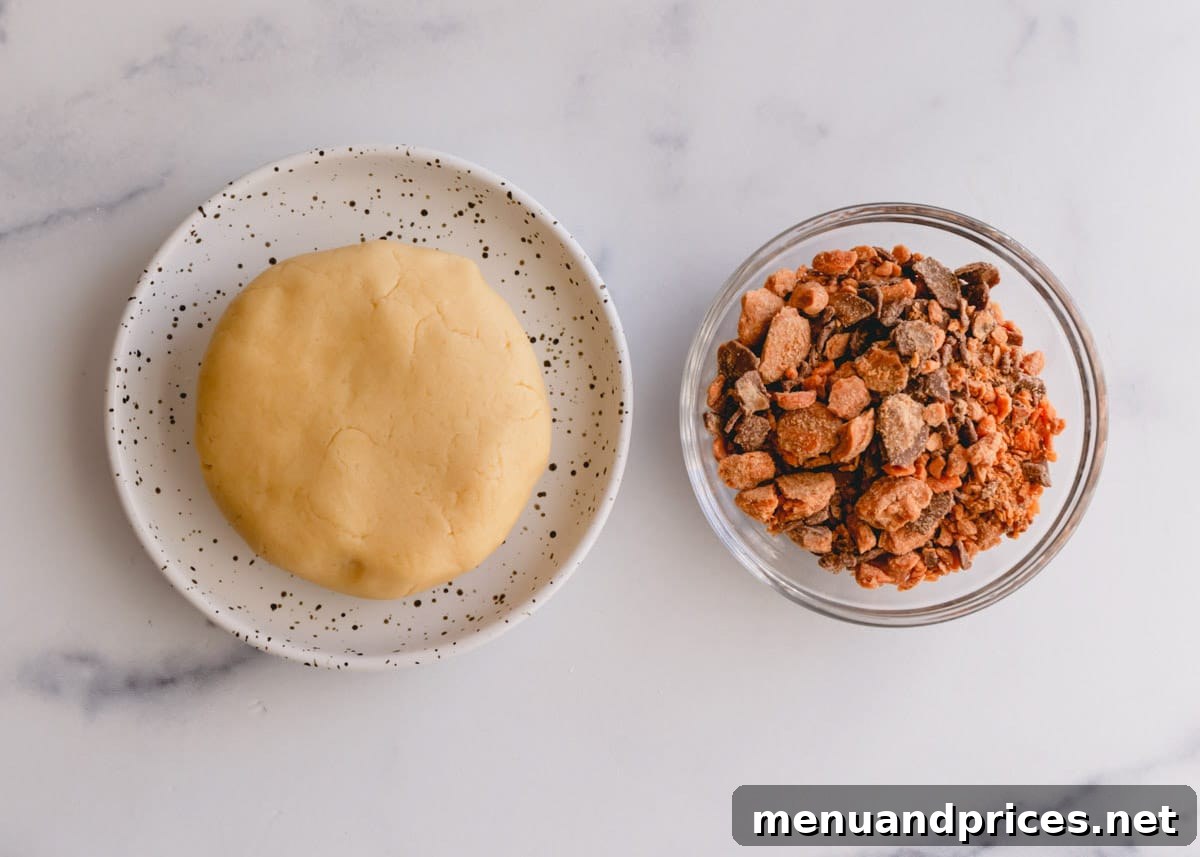
- Butterfinger Pieces: Finely chopped or crushed Butterfinger candy bars are perfect for this. The beauty of this variation is its adaptability: feel free to use any kind of candy bits you love! I’ve had fantastic results with chopped chocolate mint candies, mini chocolate chips, or even chopped nuts like pecans or walnuts for a different texture profile.
How to Make Butterfinger Cookie Bars:
- Incorporate Mix-ins: On a clean counter or in your mixer, thoroughly mix the Butterfinger pieces into the 220-gram cookie dough portion. If mixing by hand, knead gently until the candy pieces are evenly distributed throughout the dough.
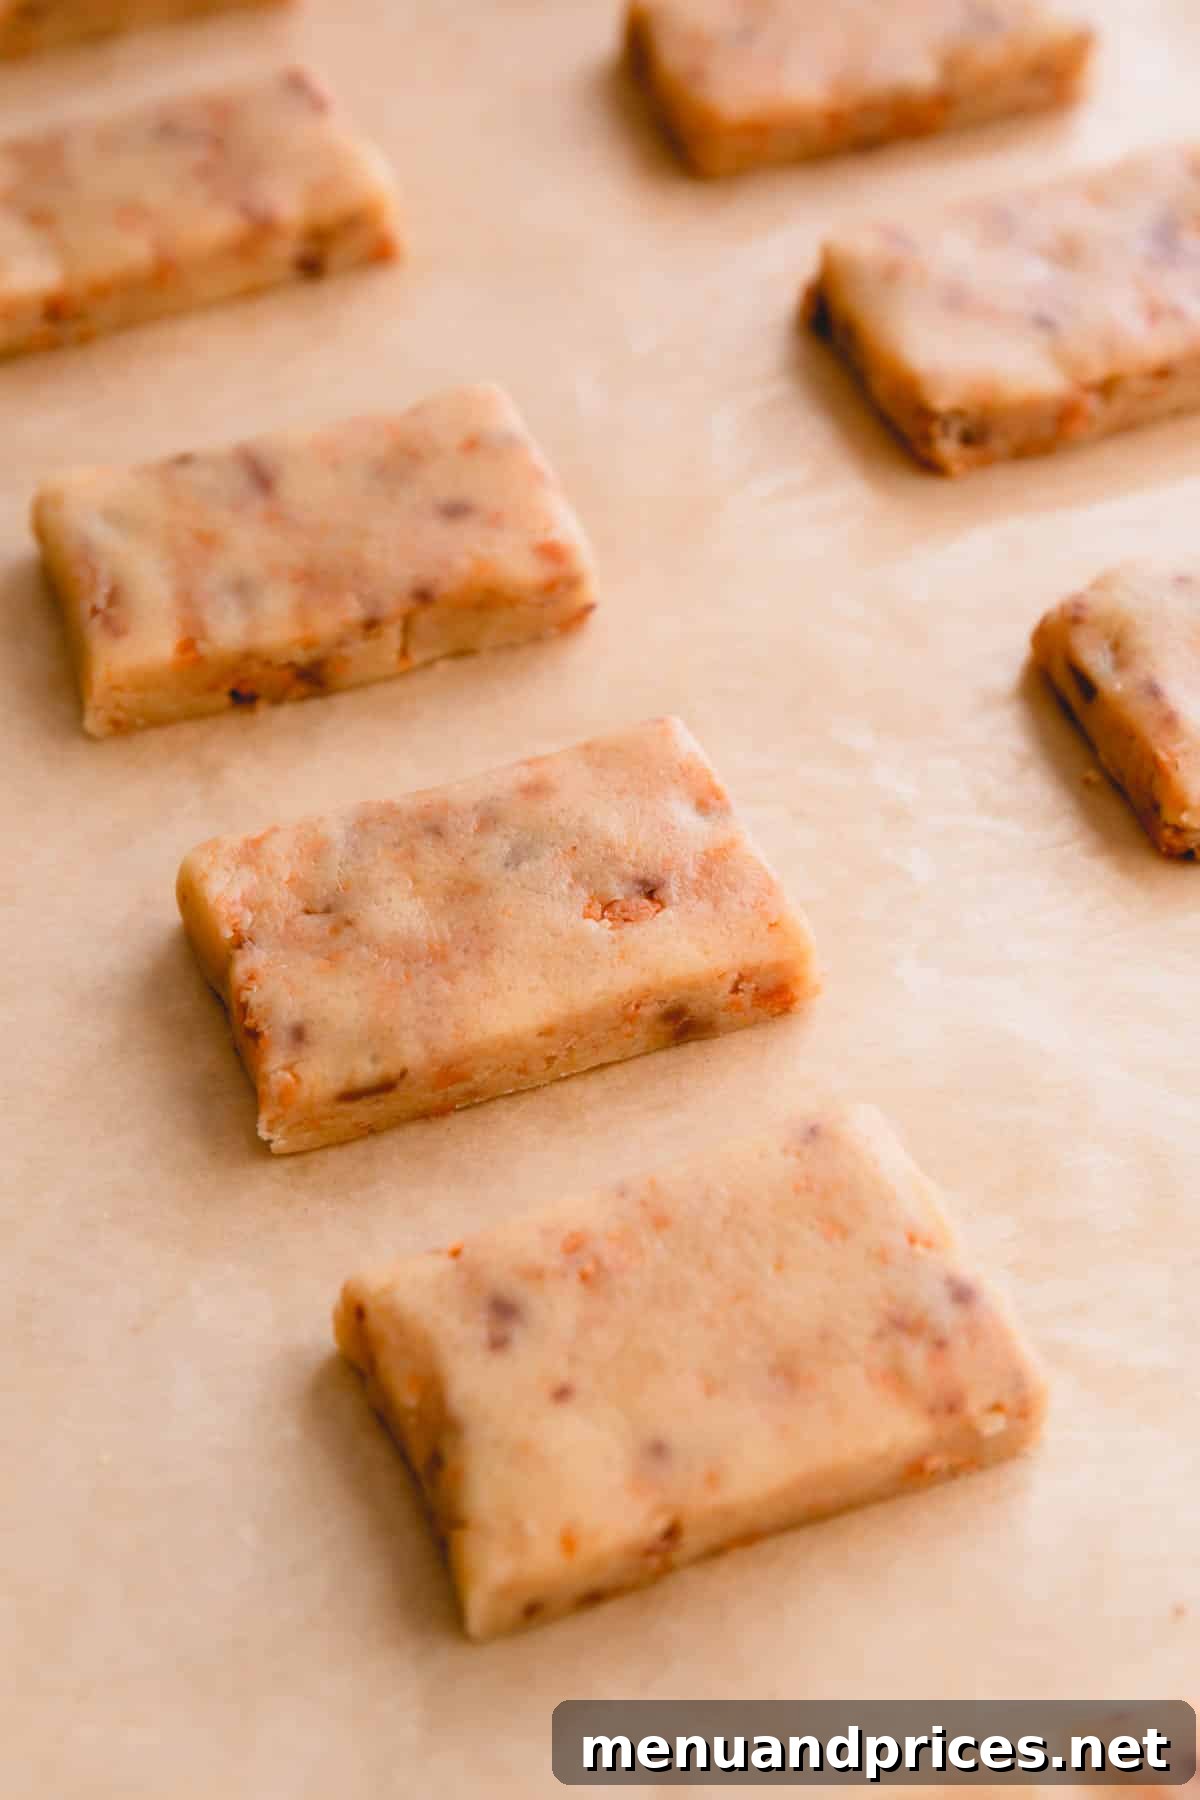
- Shape into Rectangle: Place the dough between two sheets of parchment paper. Using a rolling pin, roll the dough evenly into a 1/2-inch thick rectangle. Aim for a relatively consistent thickness to ensure even baking.
- Slice and Arrange: Using a sharp knife or a pizza cutter, slice the dough rectangle into 12 equal bars. Carefully transfer these bars to a baking sheet lined with parchment paper.
- Bake and Cool: Bake the cookies at 350 degrees Fahrenheit (175°C) for 10 to 12 minutes, or until the edges are lightly golden. Allow the cookie bars to cool and set up on the sheet pan for at least 3 minutes before carefully transferring them to a wire rack to cool completely. This prevents them from breaking apart.

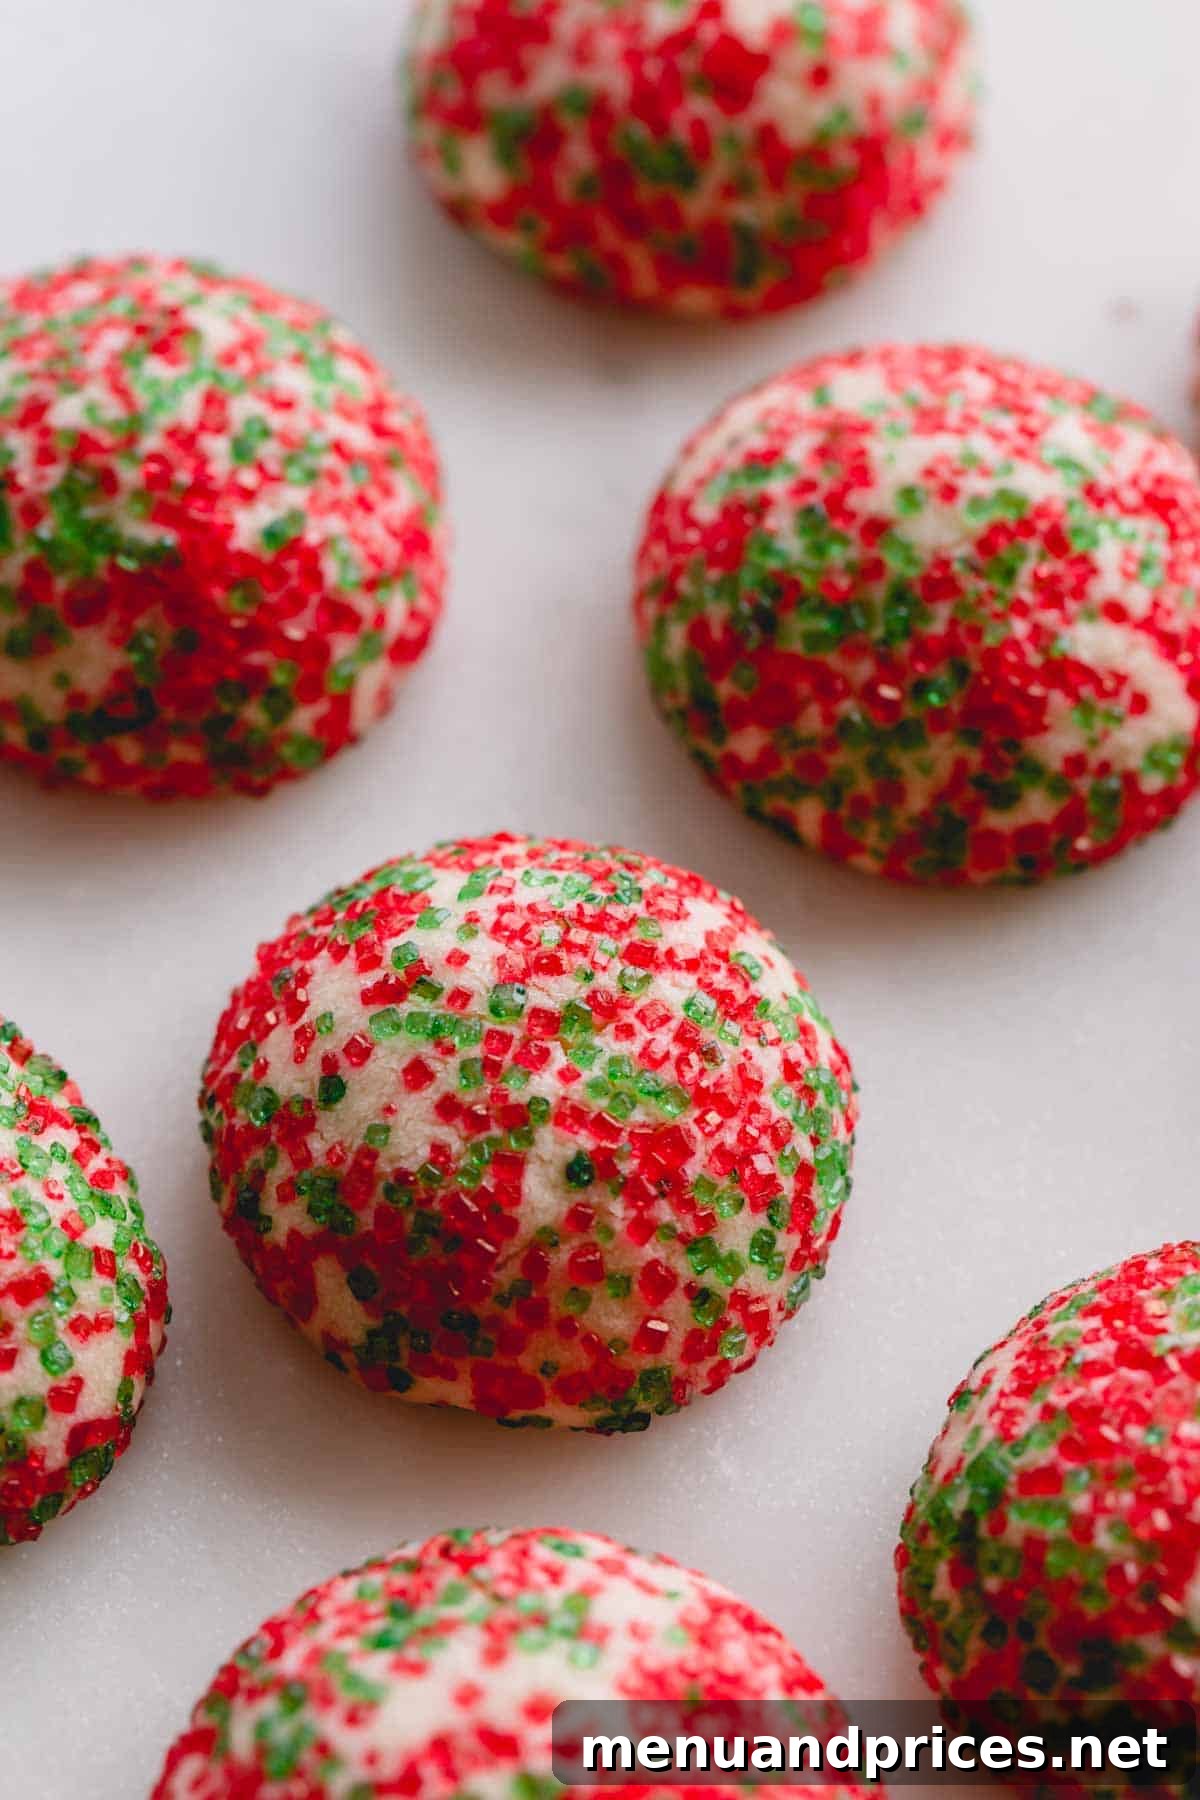
6. Joyful Holiday Sprinkle Cookies
These vibrant holiday sprinkle cookies are a burst of color and cheer, making them incredibly appealing to both children and adults. They’re quick, easy, and endlessly customizable with your favorite festive sprinkles.
What You’ll Need:
- Cookie Dough: One 220-gram portion (one dough ball).
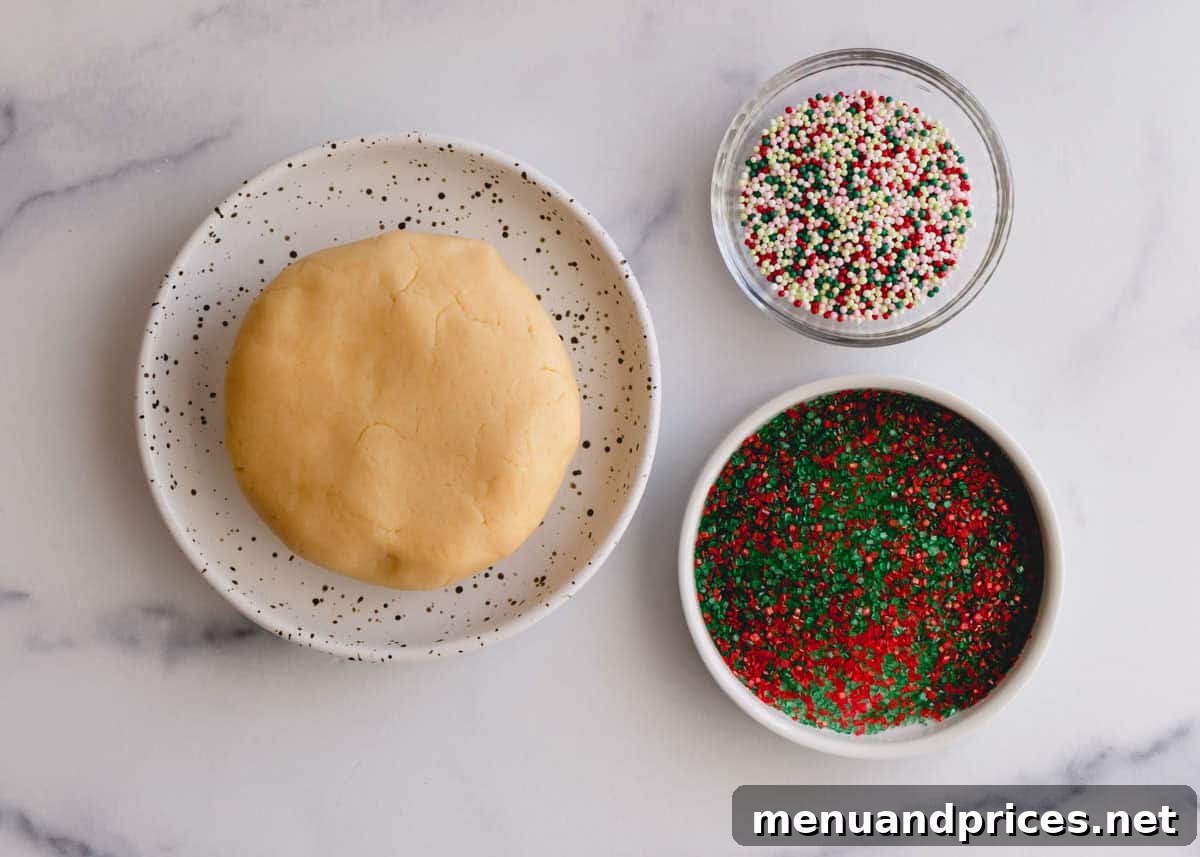
- Holiday Sprinkles: This is where you can truly let your festive spirit shine! Use any of your favorite holiday-themed sprinkles or colored sugars. Jimmies (rod-shaped), sanding sugar (coarse, sparkly), or nonpareils (tiny spheres) all work wonderfully to add texture and visual appeal. Mix and match for an even more dynamic look!
How to Make Holiday Sprinkle Cookies:
- Prepare Sprinkles: Pour your chosen holiday sprinkles into separate, shallow bowls. This makes it easy to roll the dough balls evenly.
- Portion Dough: Divide the 220-gram cookie dough portion into 12 equal pieces, each weighing about 18 grams. Roll each piece between your palms into a smooth, round ball.
- Coat and Arrange: Roll each cookie dough ball thoroughly in the sprinkles, ensuring it’s completely covered. Place the coated cookies on a baking sheet lined with parchment paper. Similar to snickerdoodles, these cookies don’t spread much, so if you prefer a flatter cookie, gently flatten each dough ball with your hand before baking.
- Bake and Cool: Bake the cookies at 350 degrees Fahrenheit (175°C) for 10 to 12 minutes, or until the edges are just set and lightly golden. Transfer the cookies immediately to a wire rack to cool completely.

Expert Tips for Butter Cookie Perfection
Achieving consistently delicious butter cookies is simple with a few key techniques:
- Master Flour Measurement: This is arguably the most crucial tip! Too much flour leads to dry, tough cookies, while too little can make them spread excessively. Always weigh your flour with a kitchen scale for precision. If you don’t have one, use the “spoon and level” method: gently spoon flour into your measuring cup until it’s overflowing, then use the flat edge of a knife to level it off. Never pack or scoop flour directly from the bag.
- Don’t Overmix the Dough: Once you add the flour, mix only until the dry ingredients are just combined and no streaks of flour remain. Overmixing develops the gluten in the flour, resulting in dense, tough cookies rather than tender ones.
- Use Room Temperature Ingredients: Ensuring your butter and eggs are at room temperature is vital. Room temperature butter creams more easily with sugar, incorporating air for a lighter texture. Room temperature eggs emulsify better into the mixture, creating a smoother, more cohesive dough.
- Line Your Baking Sheets: Always line your baking sheets with parchment paper or a silicone baking mat. This prevents sticking, promotes even baking, and makes for easier cleanup.
- Allow Adequate Cooling: Hot cookies are very delicate. Always let them cool on the baking sheet for at least 3-5 minutes before attempting to transfer them to a wire rack. This allows them to firm up and prevents breakage.
- Calibrate Your Oven: Oven temperatures can vary significantly. If you find your cookies are consistently under or over-baked despite following instructions, consider investing in an oven thermometer to ensure your oven is accurately heated.
- Explore More Flavor Variations: This base dough is wonderfully adaptable! Try adding almond extract for a marzipan-like flavor, lemon or orange zest for a bright citrusy note, or a pinch of cardamom for an exotic touch. You can also make plain cutout cookies and decorate them with an easy powdered sugar icing, or mix in colorful M&M’s for simple festive cookies. This dough also works perfectly for jam-filled thumbprint cookies. The possibilities are truly endless!
Plan Ahead: Make-Ahead & Freezing Strategies
These butter cookies are perfect for preparing in advance, making holiday baking less stressful. You can freeze either the unbaked cookie dough or the baked cookies for later enjoyment.
- To Freeze the Cookie Dough: Prepare the main cookie dough as directed in the recipe. Once divided, shape each of the six 220-gram portions into a disk or log. Wrap each disk or log tightly in plastic wrap, ensuring no air can get in, then place them into a heavy-duty freezer bag. Label with the date. The dough can be frozen for up to 3 months. When ready to use, thaw the dough in the refrigerator overnight or on the counter for a few hours until it’s pliable enough to work with. Then proceed with your desired cookie variation.
- To Freeze the Baked Butter Cookies: Bake your desired butter cookie variations and allow them to cool completely on a wire rack. Once fully cooled, arrange them in a single layer on a baking sheet and flash freeze for about 30 minutes until solid. This prevents them from sticking together. Transfer the frozen cookies to an airtight container or a freezer-safe bag, separating layers with parchment paper. Freeze for up to 3 months. To enjoy, simply defrost them on the counter for a few hours, in the refrigerator overnight, or gently warm them in the microwave for a few seconds.

Storing Your Delicious Butter Cookies
Proper storage ensures your homemade butter cookies remain fresh and delicious for as long as possible:
- Cool Completely: Always wait until the cookies are completely cool to the touch before storing them. Storing warm cookies will create condensation, making them soggy.
- Room Temperature Storage: Transfer the cooled cookies to an airtight container. Store them at room temperature for up to 1 week. For best results, separate layers with parchment paper to prevent sticking and preserve their delicate texture.
- Freezer Storage: To significantly extend their shelf life, transfer the completely cooled cookies to a freezer-safe airtight container or bag. They will keep well in the freezer for up to 3 months. Thaw at room temperature when ready to enjoy.
Frequently Asked Questions (FAQs)
Do I have to roll and cut out the cookies?
No, absolutely not! This versatile dough is also fantastic for “slice and bake” cookies. To do this, shape each portion of dough into a log (you can roll it in sprinkles or cinnamon sugar if desired!), then wrap the log tightly in wax paper or plastic wrap. Chill the dough in the refrigerator until it’s firm, then simply slice it into uniform disks and bake. This is a great time-saving option!
Is a butter cookie the same as shortbread?
While butter cookies and shortbread are often confused due to their similar rich, buttery profiles, there’s a key difference: butter cookies typically include eggs and often a slightly higher sugar content than shortbread. The addition of eggs makes butter cookie dough less crumbly and more pliable, allowing for easier rolling and cutting into intricate shapes, while also contributing to a more tender, less dense texture. Shortbread, on the other hand, is known for its high butter content and crumbly, melt-in-your-mouth texture.
Do I need to chill the dough?
One of the fantastic features of my butter cookie dough is that it generally does not require chilling before use. It’s designed to be easy to work with right away and holds its shape well during baking without excessive spreading. However, if you prefer, or if your kitchen is particularly warm, you can certainly make the cookie dough up to three days in advance and store it in the refrigerator until you’re ready to bake. This can also help if you find the dough too soft to handle.
Can I halve this recipe?
Yes, you can absolutely halve this recipe if you want a smaller batch of cookies. Simply divide all the ingredient quantities by two. The process for making the dough and variations remains the same. This is perfect for smaller gatherings or if you just want to try out a couple of variations.
Discover More Festive Cookie Creations
Looking for even more baking inspiration? Explore these other wonderful holiday cookie recipes:
- Honey Cookies (Heirloom Recipe)
- Thin and Crispy Chocolate Chip Cookies
- Russian Tea Cakes (Snowball Cookies)
- Classic Linzer Cookies

Ultimate Butter Cookie Dough
By Shinee Davaakhuu
Make a platter of six different holiday butter cookies out of just one cookie dough! This big batch of versatile butter cookie dough is a perfect canvas for mix-ins and intricate shapes!
Cook: 12 mins
Total: 22 mins
Servings: 84 cookies
Ingredients
For Main Cookie Dough:
- 3 sticks (340g) unsalted butter at room temperature
- 1 ½ cups (300g) granulated sugar
- 2 large eggs at room temperature
- 2 teaspoons pure vanilla extract
- 4 ½ cups (580g) all-purpose flour
- 1 teaspoon baking powder
- 1 teaspoon salt
For Chocolate Cutout Cookies:
- 220 grams cookie dough
- 1 tablespoon (15g) cocoa powder (sweetened or Dutch processed)
- ½ tablespoon milk or coffee
For Candy Cane Cookies:
- 220 grams cookie dough
- Red food coloring (liquid or gel)
For Snickerdoodle Cookies:
- 220 grams cookie dough
- 2 tablespoons granulated sugar
- 1 teaspoon ground cinnamon
For Teddy Bear Cookies:
- 220 grams cookie dough
- 1 tablespoon melted chocolate (for eyes and mouth, if desired)
For Cookie Bars with Butterfinger Pieces:
- 220 grams cookie dough
- ⅓ cup (50g) Butterfinger pieces (or other candy bits)
For Holiday Sugar Cookies:
- 220 grams cookie dough
- Holiday sprinkles (jimmies, sanding sugar, nonpareils)
Equipment
- Stand mixer with paddle attachment or electric hand mixer
- Measuring cups & spoons
- Baking sheets
- Wire rack
- Parchment paper or silicone baking mats
Instructions
To Make the Main Cookie Dough:
- In a large mixing bowl with the paddle attachment, beat butter and sugar until pale and fluffy, about 2 minutes.
- Add the eggs and vanilla, then beat for another 2 minutes until well combined.
- Add the flour, baking powder, and salt, and mix on low speed until a cohesive dough forms. Do not overmix.
- Transfer cookie dough onto a clean counter and knead it briefly into a smooth ball. Divide the dough into 6 equal balls (about 220g each).
To Make Chocolate Cutout Cookies:
- In a mixing bowl, combine one 220g cookie dough portion with cocoa powder and milk (or coffee). Mix until well combined and uniformly colored.
- Transfer the dough onto the counter and form into a smooth ball.
- Place it between 2 sheets of parchment paper and roll into a ½-inch-thick disk. Using Christmas cookie cutters, cut out cookies and arrange them on a baking sheet lined with parchment paper or a silicone mat. Gather scraps, re-roll, and cut more.
- Bake the cookies at 350°F (175°C) for 10-12 minutes. Cool on the baking sheet for 3 minutes, then transfer to a wire rack to cool completely.
To Make Candy Cane Cookies:
- Divide one 220g cookie dough portion in half.
- In a mixing bowl, mix a few drops of red food coloring with one half of the cookie dough until evenly red.
- Now you have 2 dough balls, red and white. Divide each dough ball into 10 equal pieces (approx. 10g each), so you have 10 red and 10 white dough balls.
- Roll each small dough piece into a 3-inch log. Twist together one red and one white log. Gently roll them into a smooth log, then shape into a candy cane.
- Arrange the cookies on a baking sheet lined with parchment paper or a silicone mat.
- Bake at 350°F (175°C) for 10-12 minutes. Cool on the baking sheet for 3 minutes, then transfer to a wire rack to cool completely.
To Make Snickerdoodle Cookies:
- In a medium bowl, combine 2 tablespoons granulated sugar and 1 teaspoon ground cinnamon.
- Divide one 220g cookie dough portion into 12 equal pieces (approx. 18g each). Roll each piece into a smooth ball.
- Roll each dough ball in the cinnamon sugar mixture and arrange on a baking sheet lined with parchment paper or a silicone mat. (Optional: flatten slightly before baking).
- Bake at 350°F (175°C) for 10-12 minutes. Transfer to a wire rack to cool completely.
To Make Teddy Bear Cookies:
- Divide one 220g cookie dough portion into 12 equal pieces (approx. 18g each). For each, take ¾ of the dough, roll into a smooth ball for the head, and place on a lined baking sheet.
- Take a small piece from the remaining ¼ dough, flatten it for the snout, and place on the lower half of the head. Divide the last small piece into 2 equal parts, roll into balls for ears, and attach to the top of the head. Repeat for all bears.
- Bake at 350°F (175°C) for 10-12 minutes. Transfer to a wire rack to cool completely.
- Once cooled, pipe eyes and a mouth with melted chocolate, if desired.
To Make Cookie Bars with Butterfinger Pieces:
- Mix one 220g cookie dough portion with ⅓ cup (50g) Butterfinger pieces until evenly distributed. Knead on the counter or use a mixer.
- Place the dough between 2 sheets of parchment paper and roll into a ½-inch-thick rectangle.
- Slice the dough into 12 equal rectangles and arrange on a baking sheet lined with parchment paper or a silicone mat.
- Bake at 350°F (175°C) for 10-12 minutes. Cool on the baking sheet for 3 minutes, then transfer to a wire rack to cool completely.
To Make Holiday Sprinkle Cookies:
- Place your chosen sprinkles or colored sugars in separate medium bowls.
- Divide one 220g cookie dough portion into 12 equal pieces (approx. 18g each). Roll each into a smooth ball.
- Roll each dough ball in sprinkles until fully coated, then arrange on a baking sheet lined with parchment paper or a silicone mat. (Optional: flatten slightly before baking).
- Bake at 350°F (175°C) for 10-12 minutes. Transfer to a wire rack to cool completely.
Tips & Notes
Nutrition information is calculated based on the butter cookie dough base only. Mix-ins are not included.
Cocoa Powder: You can use either unsweetened natural or Dutch-processed cocoa powder. Dutch-processed cocoa powder tends to offer a richer taste and darker color.
Liquid for Chocolate Dough: We’ve tested this recipe with both milk and coffee. Both work well, but many prefer milk for a slightly milder flavor, while coffee can enhance the chocolate depth.
Food Coloring: Either liquid or gel food coloring will work for these cookies. If you prefer not to use food coloring, consider using chocolate cookie dough to create fun chocolate and vanilla candy cane shaped cookies!
Candy Mix-ins: Feel free to customize the Butterfinger cookies with any candy bits you enjoy! Chopped chocolate mint bits or mini chocolate chips are also fantastic options.
Storing Tips:
- Wait until the cookies are completely cool before storing.
- Transfer cookies to an airtight container and store at room temperature for up to 1 week.
- For longer storage, transfer to a freezer-safe container and freeze for up to 3 months.
Nutrition (per cookie, based on base dough)
- Calories: 69 kcal
- Carbohydrates: 9g
- Protein: 1g
- Fat: 3g
- Sugar: 4g
- Sodium: 35mg

Did you make this?
We’d love to hear your feedback! Leave a rating and your comments. Thank you!