

Unlock the secret to perfect pies with this time-tested, practically fool-proof all-butter pie crust recipe! Prepare to be amazed by its unbelievably flaky texture, rich flavor, and the sheer ease of its preparation. This isn’t just a recipe; it’s your definitive guide to achieving pie perfection every single time.
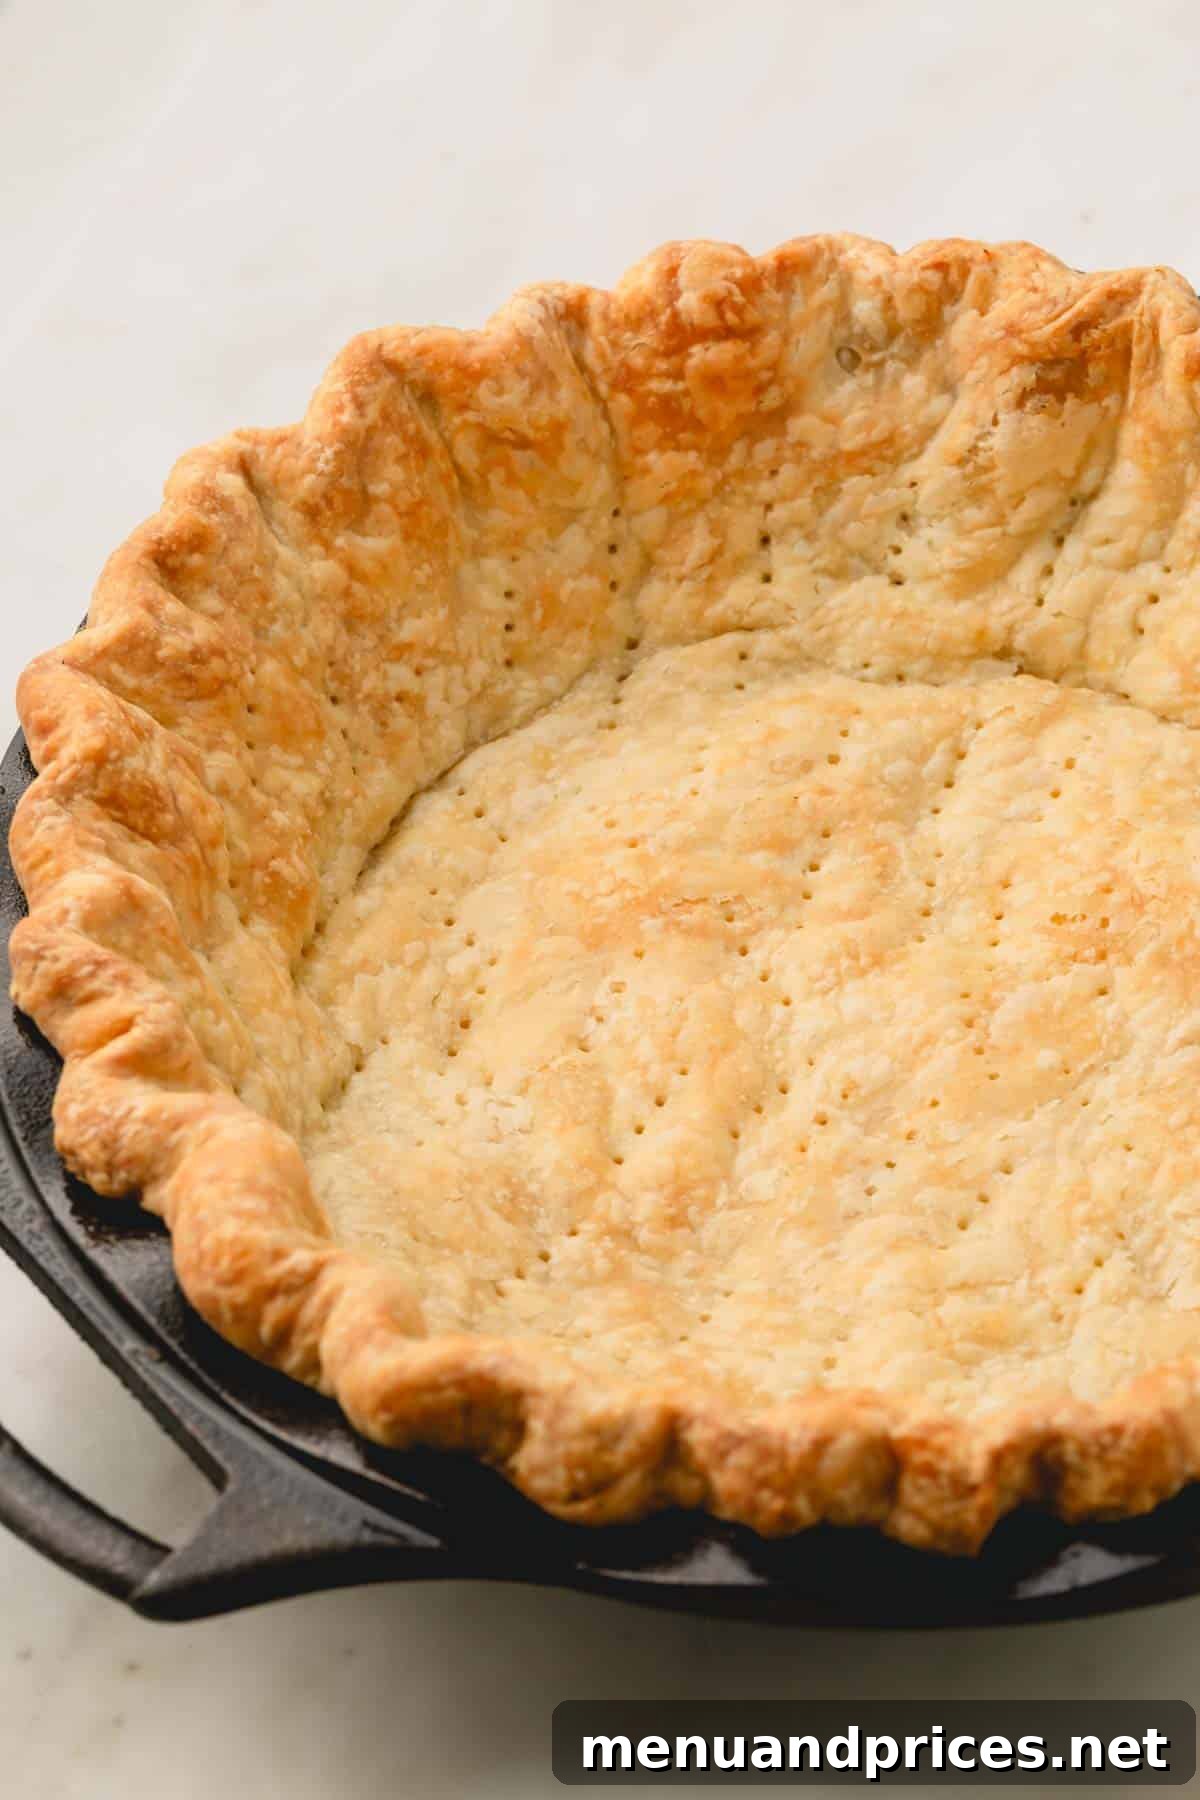
Every truly exceptional pie begins with an equally exceptional crust. It’s the foundation – a delicate balance of flakiness, buttery richness, and tender melt-in-your-mouth goodness that elevates any filling. Without a stellar crust, even the most delicious pie can fall flat.
The culinary world abounds with countless “perfect” pie crust recipes. From grandmother’s cherished, hand-written recipe cards passed down through generations to modern interpretations, the variations are endless. Some swear by all shortening, others prefer a blend of butter and shortening, while traditionalists champion lard. Then there are the intriguing additions like vodka, promising unparalleled flakiness. Each method has its devotees, each promising the ultimate result.
Today, I’m thrilled to share my personal rendition of the classic all-butter pie crust. More than just a recipe, this guide includes invaluable tips on how to properly store and freeze pie dough for convenience, along with crucial advice to minimize frustrating shrinkage issues during baking. My goal is for this recipe to become your trusted, go-to pie crust for many years to come, simplifying your baking and impressing your guests with consistently stunning results.
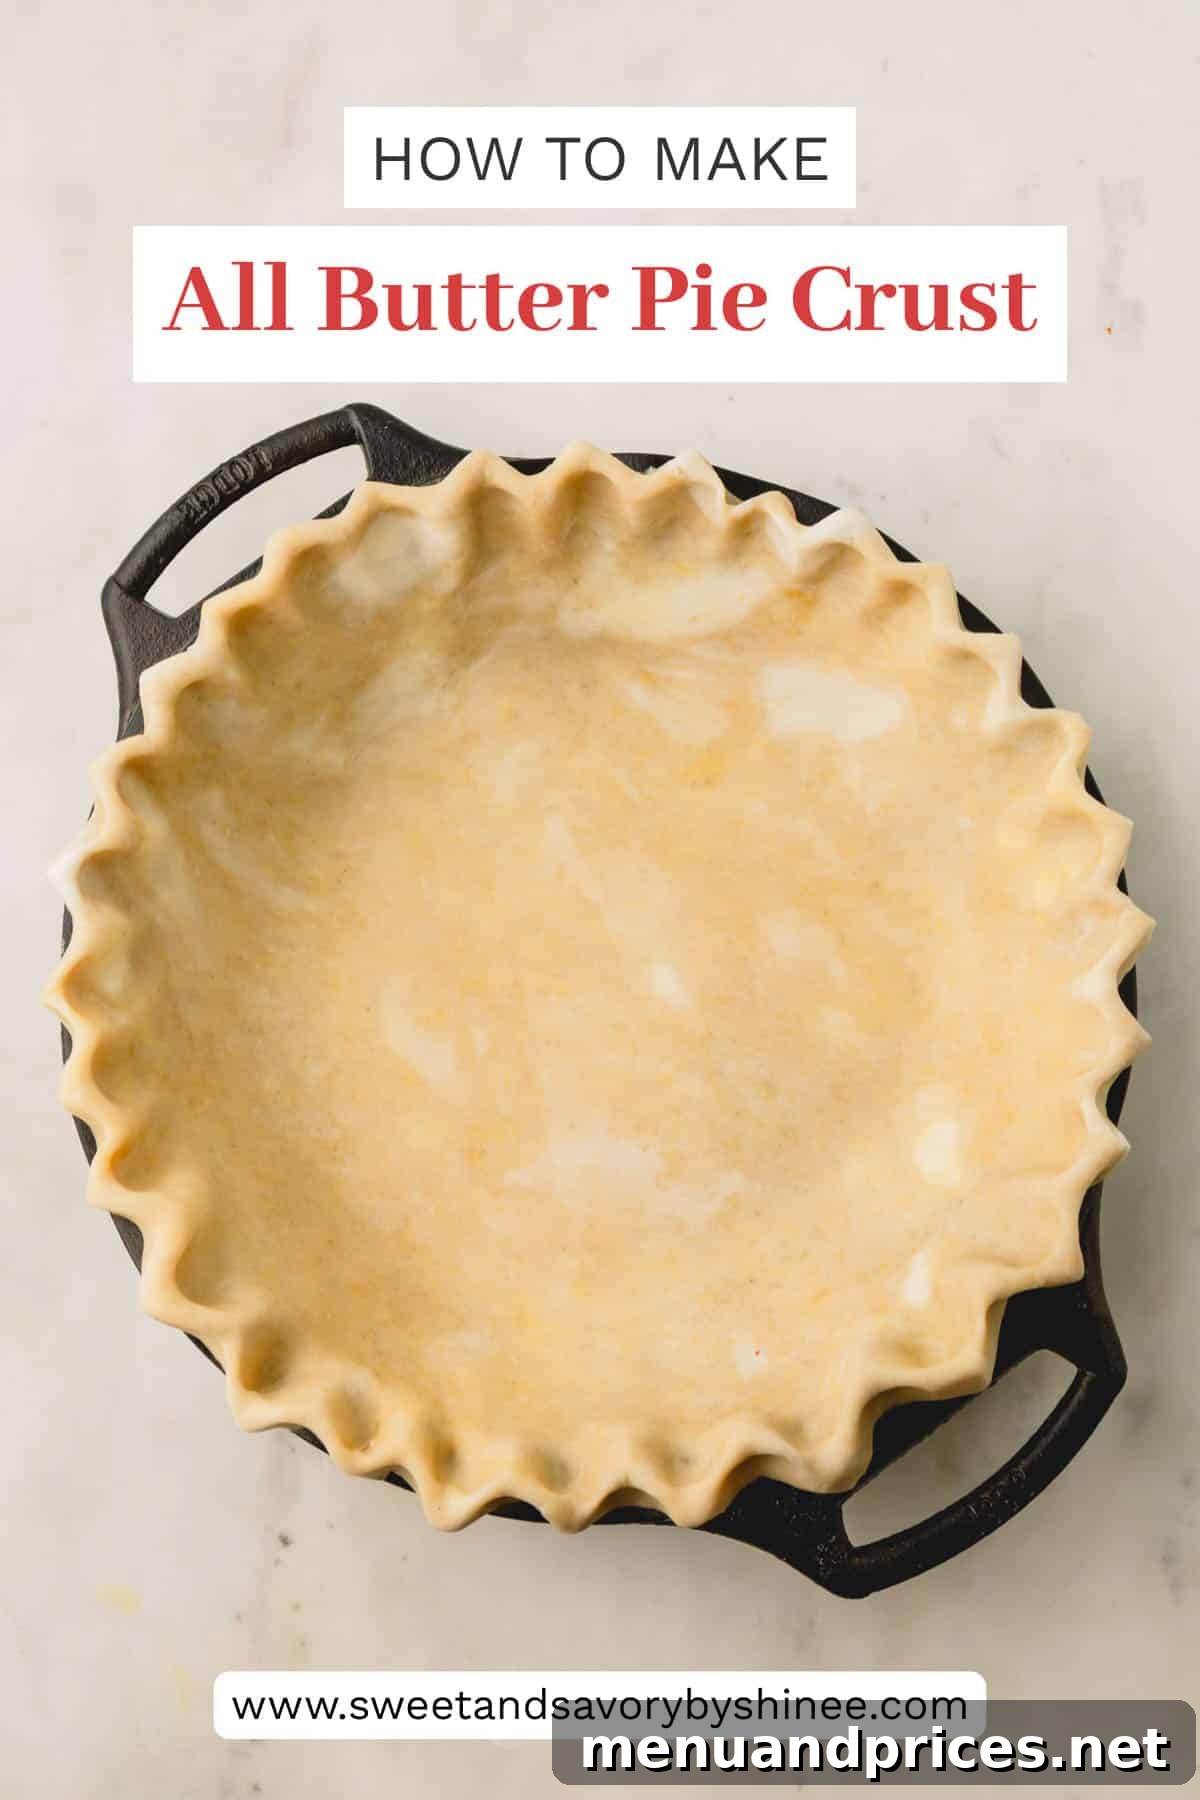
Table of Contents
- Why This All-Butter Pie Crust Is Your New Favorite
- The Science of a Flaky Pie Crust
- Essential Ingredients for Perfect Pie Dough
- Butter vs Shortening: A Detailed Comparison
- Step-by-Step Guide to Making Butter Pie Crust
- Rolling and Transferring Your Pie Dough
- Mastering Pie Dough Edge Crimping
- How to Blind Bake a Pie Crust for Superior Results
- Critical Tips for Pie Crust Success
- Make-Ahead and Freezing Instructions
- Frequently Asked Questions About Pie Crust
- More Pie Recipes to Inspire You
- All Butter Pie Crust Recipe
Why This All-Butter Pie Crust Is Your New Favorite
This all-butter pie crust recipe isn’t just another option; it’s designed to be your steadfast companion in the kitchen. Here’s why you’ll fall in love with it:
- Effortlessly Simple Ingredients – As the name suggests, this pie dough relies purely on butter, making it incredibly convenient. For many home bakers, butter is a pantry staple, eliminating the need to specially procure shortening or lard. While those fats certainly have their place in baking, the beauty of this recipe lies in its accessible, uncomplicated ingredient list.
- Unrivaled Flavor and Richness – The star here is, of course, butter, which imparts a deep, authentic flavor and luxurious richness that vegetable shortenings simply can’t match. An added egg yolk further enriches the dough, contributing to its tender texture and a subtle depth of flavor that complements any sweet or savory filling beautifully.
- Remarkably Easy to Make – Forget intimidating techniques. This recipe is designed for ease. While I personally opt for my trusty stand mixer to streamline the process, a simple pastry cutter or even your hands can achieve perfect results. The method is straightforward, allowing even novice bakers to create a professional-quality crust.
- Incredibly Convenient & Versatile – Planning a double-crust pie or simply want extra dough on hand? This recipe doubles with absolute ease, making it ideal for larger baking projects or meal prepping. Its robust yet tender nature makes it suitable for a wide variety of pies, from fruit to cream to savory quiches.
With this method and my detailed tips, you are guaranteed to achieve a flaky, tender, and intensely flavorful pie crust every single time. I’ve personally perfected this recipe over eight years and counting, making it hundreds of times to confirm its absolute reliability and foolproof nature. Trust me, pie success is within your reach!
The Science of a Flaky Pie Crust
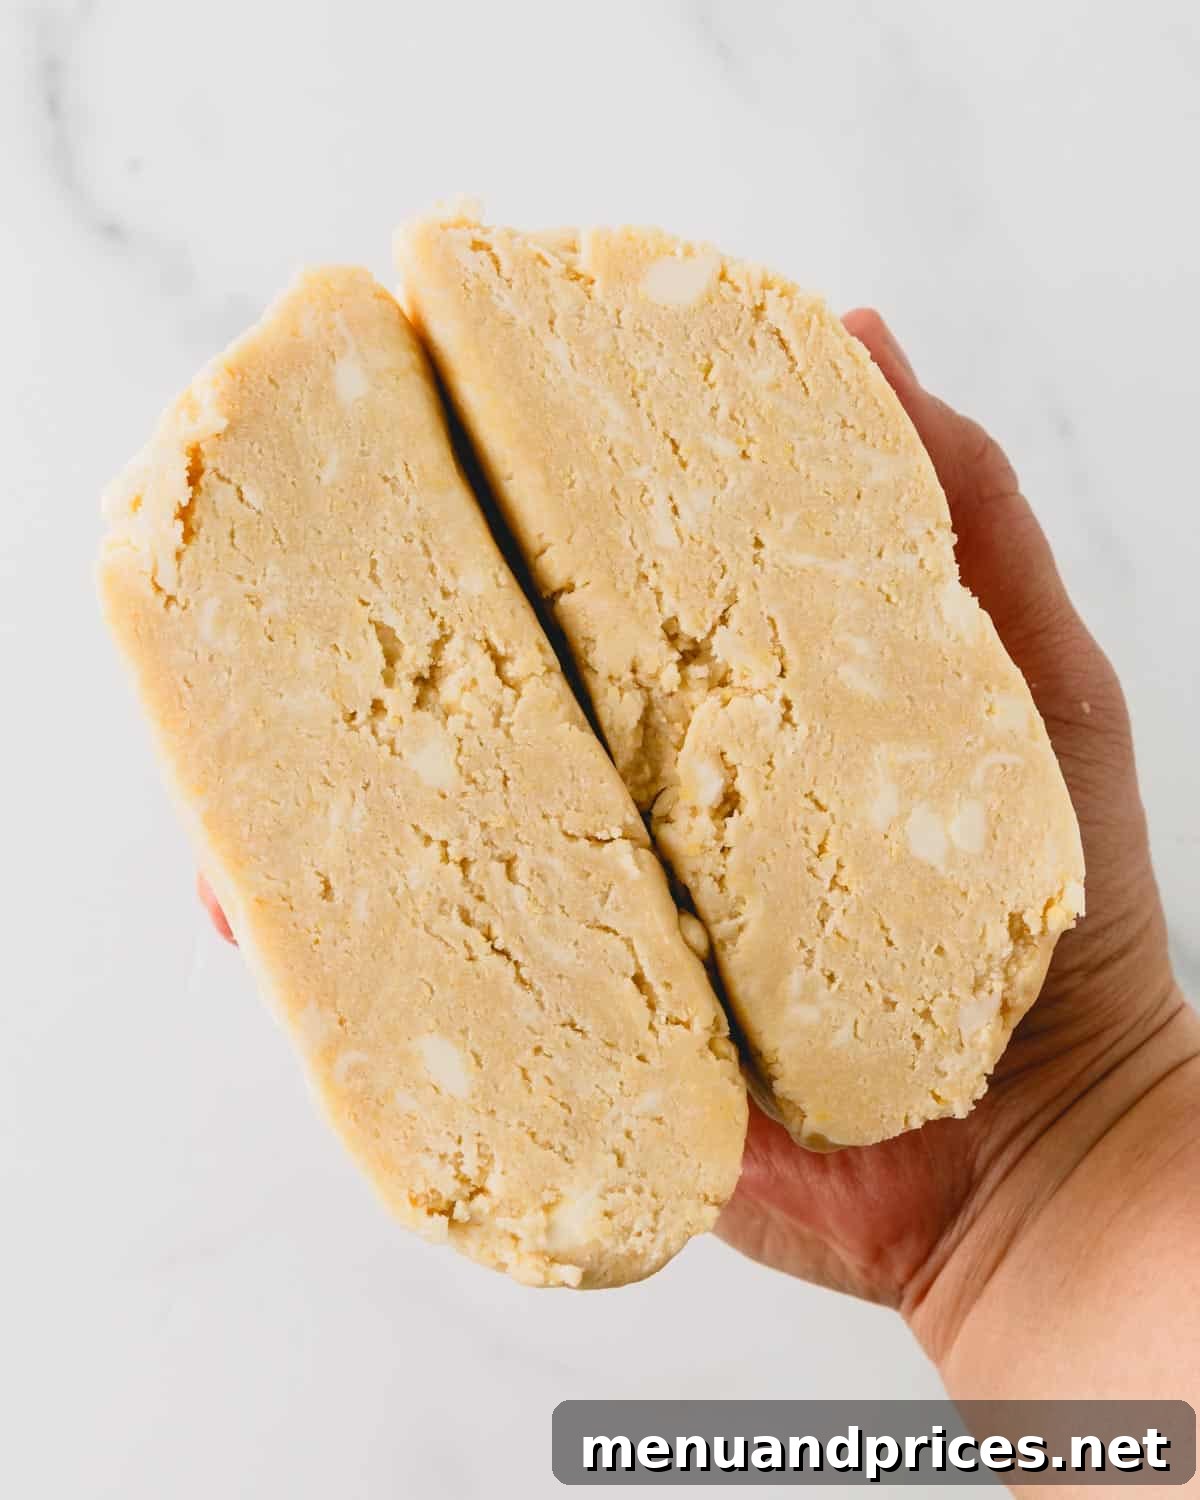
Understanding the science behind a truly flaky pie crust is key to consistently achieving perfect results. The magic lies in the interaction of cold fat (butter), flour, and ice water. When butter is kept cold and incorporated into the flour without fully melting, it creates distinct pockets within the dough. During baking, as the pie crust heats up, these cold butter pockets melt and release steam. This steam then pushes apart the layers of dough, creating the airy, separated layers that define a flaky texture. Overworking the dough or allowing the butter to get too warm will result in a tough, dense crust rather than a light and flaky one, because the gluten will develop too much and the butter will incorporate too thoroughly.
Essential Ingredients for Perfect Pie Dough
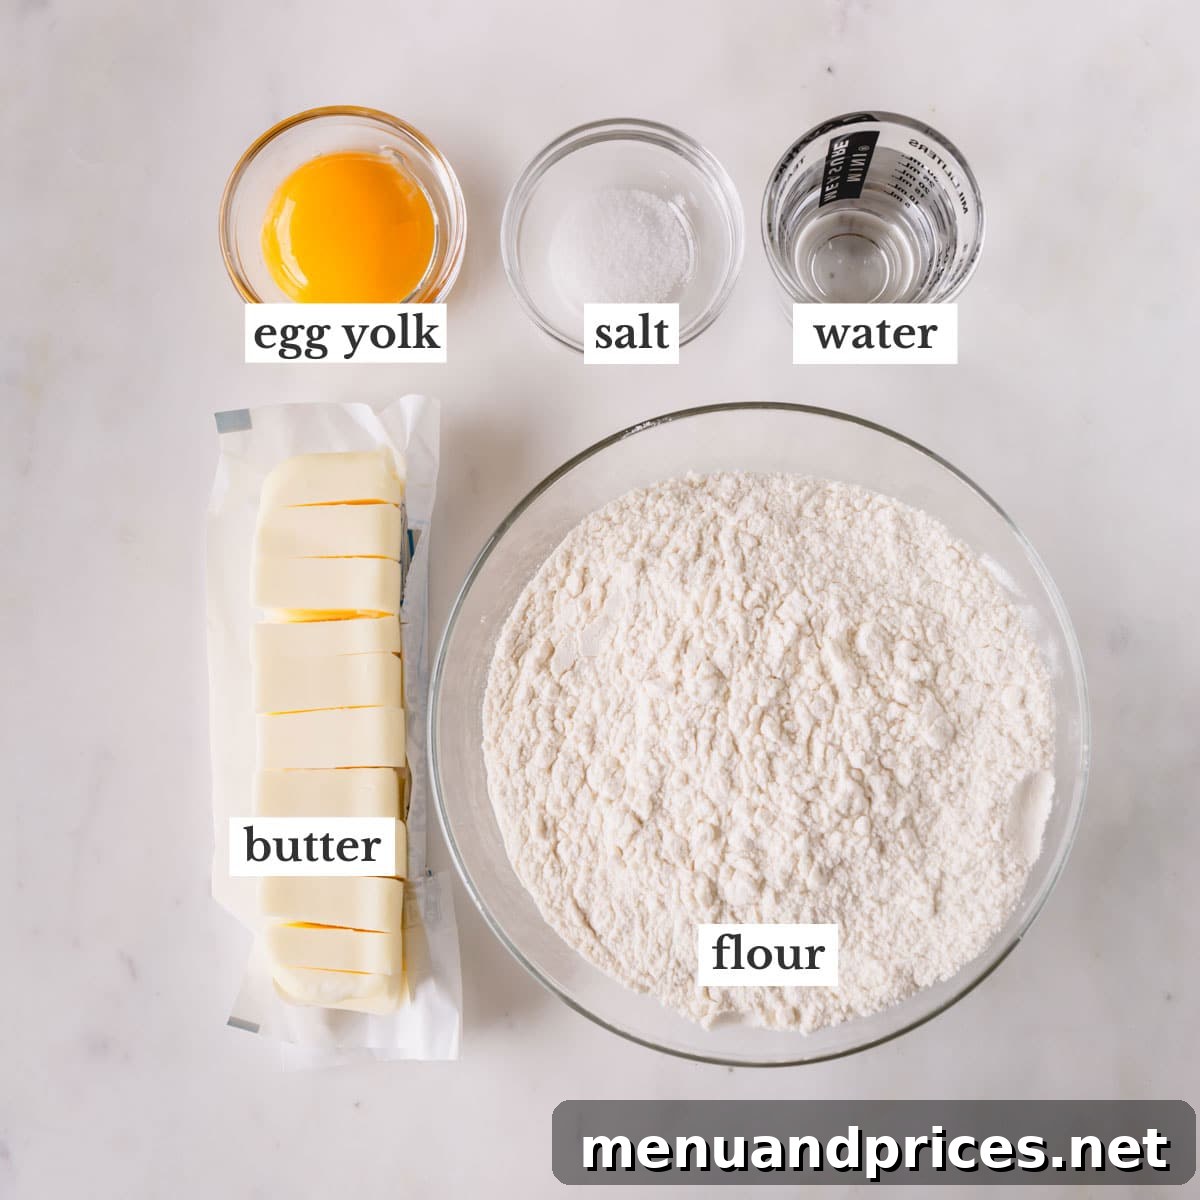
The beauty of this pie crust lies in its simplicity. Each ingredient plays a vital role in creating that desirable flaky and tender texture:
- Flour – Opt for regular unbleached all-purpose flour. Its protein content (typically 10-12%) is ideal for forming just enough gluten for structure without making the crust tough. Avoid high-protein flours like bread flour or low-protein ones like cake flour, as they can significantly alter the texture.
- Salt – A touch of salt is crucial for enhancing the flavor of the crust and balancing the richness of the butter. I prefer flaky kosher salt for its nuanced taste, but if using fine table salt, remember to reduce the amount by half to prevent over-salting.
- Butter – Unsalted butter is my choice as it allows precise control over the overall saltiness of the recipe. If you only have salted butter on hand, simply omit the additional salt from the recipe. Crucially, the butter must be very cold, preferably frozen and cut into small pieces, to ensure maximum flakiness.
- Egg Yolk – This often-overlooked ingredient is a game-changer. The egg yolk enriches the dough, adding extra fat and lecithin, which contribute to a more tender and flavorful crust. It also helps bind the dough without adding too much moisture, preventing a sticky or tough outcome.
- Ice Water – The temperature of your water is paramount. Ice-cold water is essential for keeping the butter firm and preventing it from melting prematurely into the flour. This ensures that the butter remains in distinct pieces, which are crucial for creating those coveted flaky layers during baking.
What is the best type of flour to use for pie crust?
With a protein content typically ranging from 10-12%, all-purpose flour is undeniably the best choice for crafting a perfect pie crust. Its balanced gluten development provides enough structure to hold its shape while remaining tender. Flours with higher protein levels, such as whole wheat or bread flour, will result in a tougher, less desirable pie crust. Conversely, lower protein flours like cake flour might produce a crumbly dough that is difficult to work with.
Butter vs Shortening: A Detailed Comparison
The age-old debate in pie making: which is superior, an all-butter pie crust or a traditional shortening pie crust? Both have distinct advantages, and the “better” choice often depends on your priorities for flavor, texture, and workability.
Shortening Pie Crust: Shortening, being 100% fat and having a higher melting point than butter, creates an incredibly tender and easy-to-handle dough. It excels at holding intricate shapes and crimps, making it the preferred choice for elaborate, decorative pie designs that require crisp, defined edges. Shortening also tends to yield a very flaky crust, often with larger, more distinct flakes due to its ability to prevent gluten development more effectively than butter. However, its neutral flavor means the crust itself contributes little to the overall taste of the pie.
All-Butter Pie Crust: While an all-butter crust might not hold its intricate shapes quite as sharply as a shortening-based one – often resulting in a slightly more “rustic” appearance – it shines brilliantly in terms of flavor and melt-in-your-mouth tenderness. The rich, nuanced taste of real butter is unmistakable and adds an unparalleled depth that complements any pie filling. The flakiness achieved with butter is often described as more delicate and ethereal, dissolving on the tongue. If flavor is your ultimate priority, butter is the undisputed champion.
So, if your goal is an impressive pie with detailed, intricate designs that hold their form beautifully, a pie crust recipe with shortening might be your best bet. That being said, you’ll still achieve a wonderfully rustic and charming pie with this butter pie dough, boasting a superior tender texture and an utterly melt-in-your-mouth flakiness that will leave everyone craving more!
Step-by-Step Guide to Making Butter Pie Crust
Creating this all-butter pie crust is surprisingly straightforward. I often double the recipe and utilize my stand mixer, but the fundamental steps remain the same regardless of your tools.
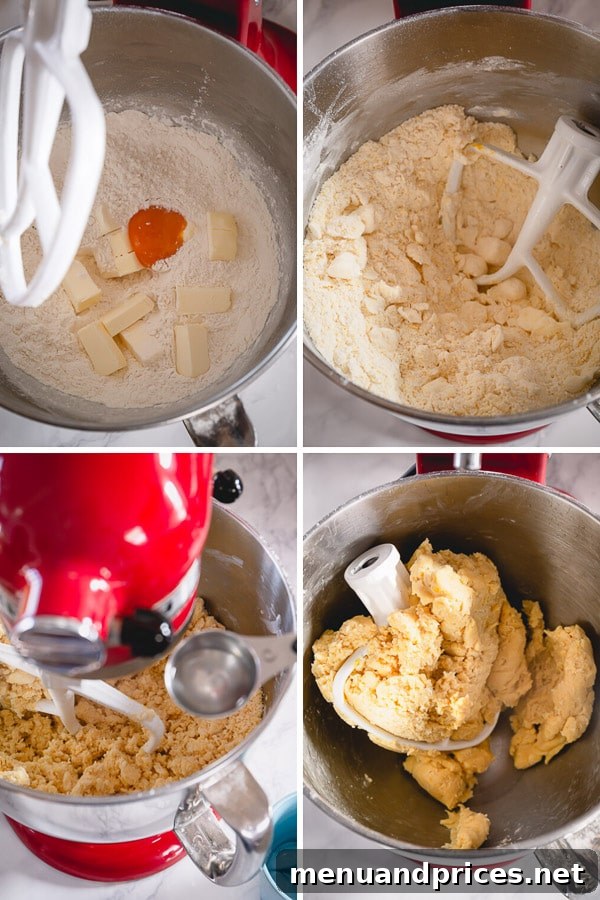
- Combine Dry Ingredients: In a large mixing bowl (or the bowl of your stand mixer), whisk together the all-purpose flour and salt. This ensures even distribution of the salt, which is crucial for flavor.
- Incorporate the Fat and Egg Yolk: Add the frozen butter cubes and the egg yolk to the flour mixture. Mix (using a paddle attachment on low speed, a pastry cutter, or your fingertips) until most of the butter resembles pea-sized pieces, with some slightly larger chunks still visible. These larger chunks are key to developing those desirable flaky layers.
- Add Ice Water Gradually: Begin adding the ice water, one tablespoon at a time, mixing gently after each addition. The goal is for the dough to just come together into a loose ball. Be cautious not to add too much water; the dough should not be sticky. Depending on the humidity and your flour, you might need slightly more or less than the specified amount.
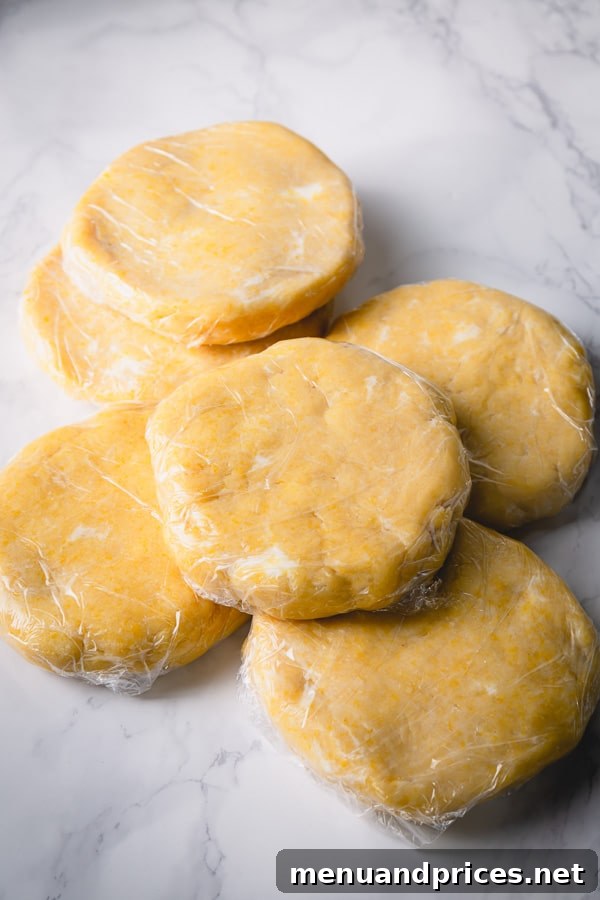
- Form and Chill: Gently gather the dough onto a clean counter and lightly form it into a cohesive ball. Flatten this ball into a disc shape, which makes it easier to roll out later. Wrap the dough disc tightly in plastic wrap and refrigerate it for at least 1 hour. Chilling is a critical step, allowing the butter to firm up and the gluten to relax, preventing shrinkage during baking.
Rolling and Transferring Your Pie Dough
Once your pie dough is properly chilled, it’s time to roll it out. Lightly flour your work surface and your rolling pin to prevent sticking. Roll the dough from the center outwards, rotating it frequently to maintain an even thickness and a round shape. Aim for a circle that is about 10-11 inches in diameter for a standard 9-inch pie dish, ensuring enough overhang for crimping. To transfer the rolled dough without tearing, gently roll it around your rolling pin, then carefully unroll it over your pie dish. Center the dough, allowing the edges to drape over the sides.
Mastering Pie Dough Edge Crimping
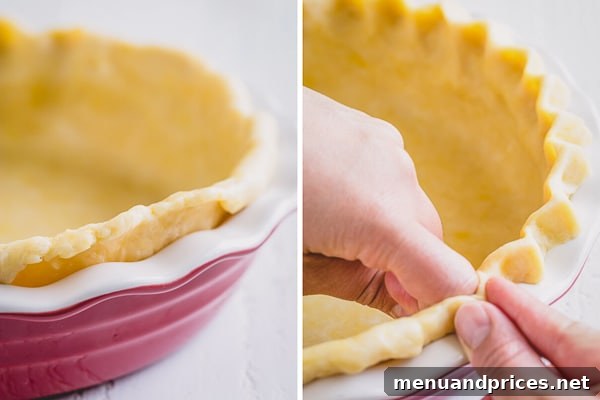
When it comes to crimping pie edges, I prefer a simple, rustic approach that’s both elegant and efficient. There’s no need for elaborate cuts or excessive trimming that can feel wasteful. Here’s my preferred method:
- First, fold the excess dough edges outwards and roll them until they meet the very lip of your pie dish. This technique creates a beautifully thick, sturdy border that’s less prone to burning and offers a satisfying bite. Don’t worry if it’s not perfectly uniform all around; the charm of a homemade pie often lies in its slight imperfections.
- Next, employ the timeless 3-finger method to crimp the edges. Place your thumb and forefinger on the outside of the rolled edge, gently pressing inwards, while simultaneously pushing outwards with the forefinger of your other hand. Repeat this around the entire circumference of the pie, creating a classic, scalloped edge. This method is simple, effective, and results in a truly beautiful, homemade aesthetic.
How to Blind Bake a Pie Crust for Superior Results
Blind baking, also known as pre-baking, is a crucial step for many pie recipes, particularly those with liquid fillings like my lemon meringue pie, rich pecan pie, or creamy banana cream pie. It involves baking the crust without its filling, ensuring a crisp, fully cooked base that prevents a soggy bottom.
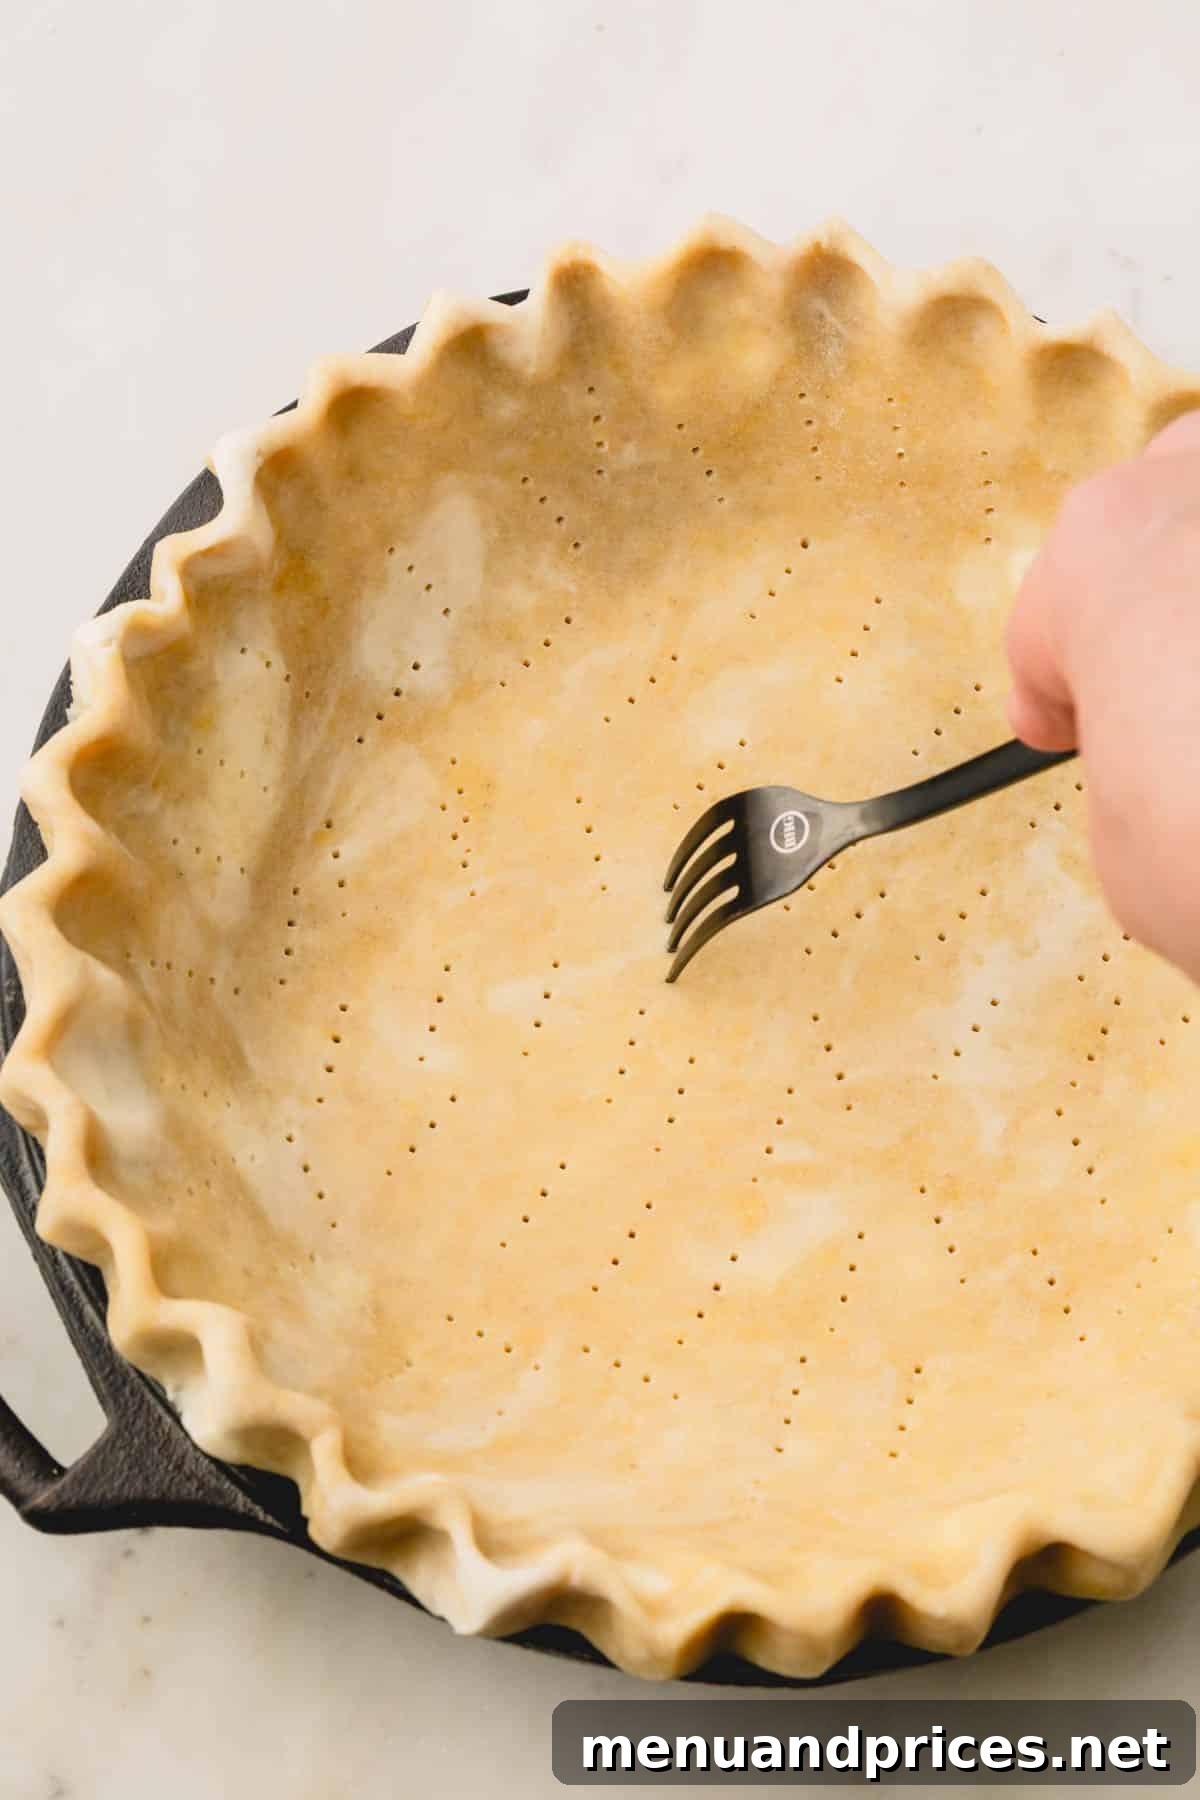
- Prepare the Crust: After placing your rolled and crimped pie dough into the pie dish, use a fork to generously pierce holes all over the bottom and sides of the crust. This venting prevents steam from building up and forming bubbles or air pockets that can distort the crust’s shape.
- Weigh it Down: Carefully line the chilled pie crust with a sheet of aluminum foil or parchment paper, ensuring it covers the bottom and extends up the sides. Fill this lining with pie weights (ceramic beads), raw beans, or rice. The weights keep the crust from bubbling up and shrinking dramatically during baking.
- Initial Bake: Place the pie dish on a baking sheet (this makes it easier to transfer in and out of the oven and catches any potential spills). Bake for 15 minutes at 350°F (177°C).
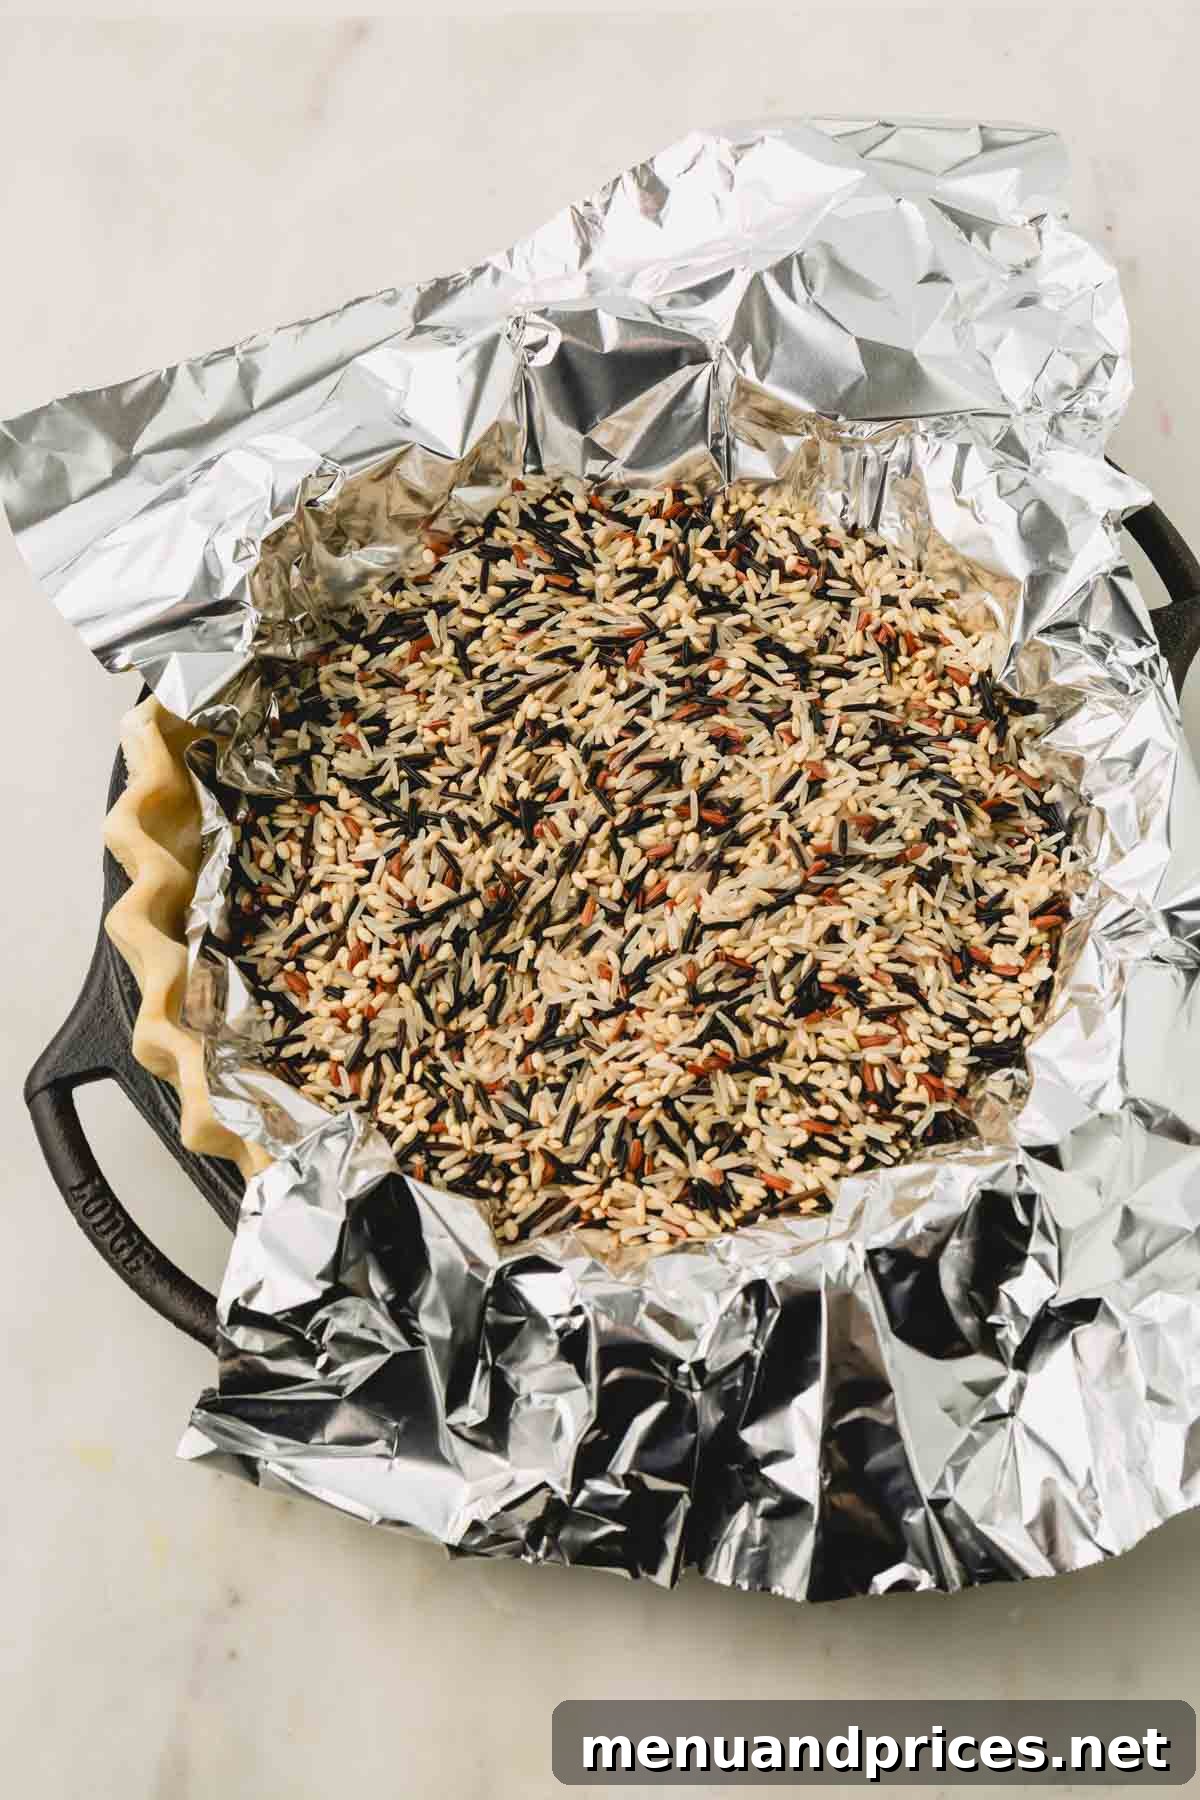
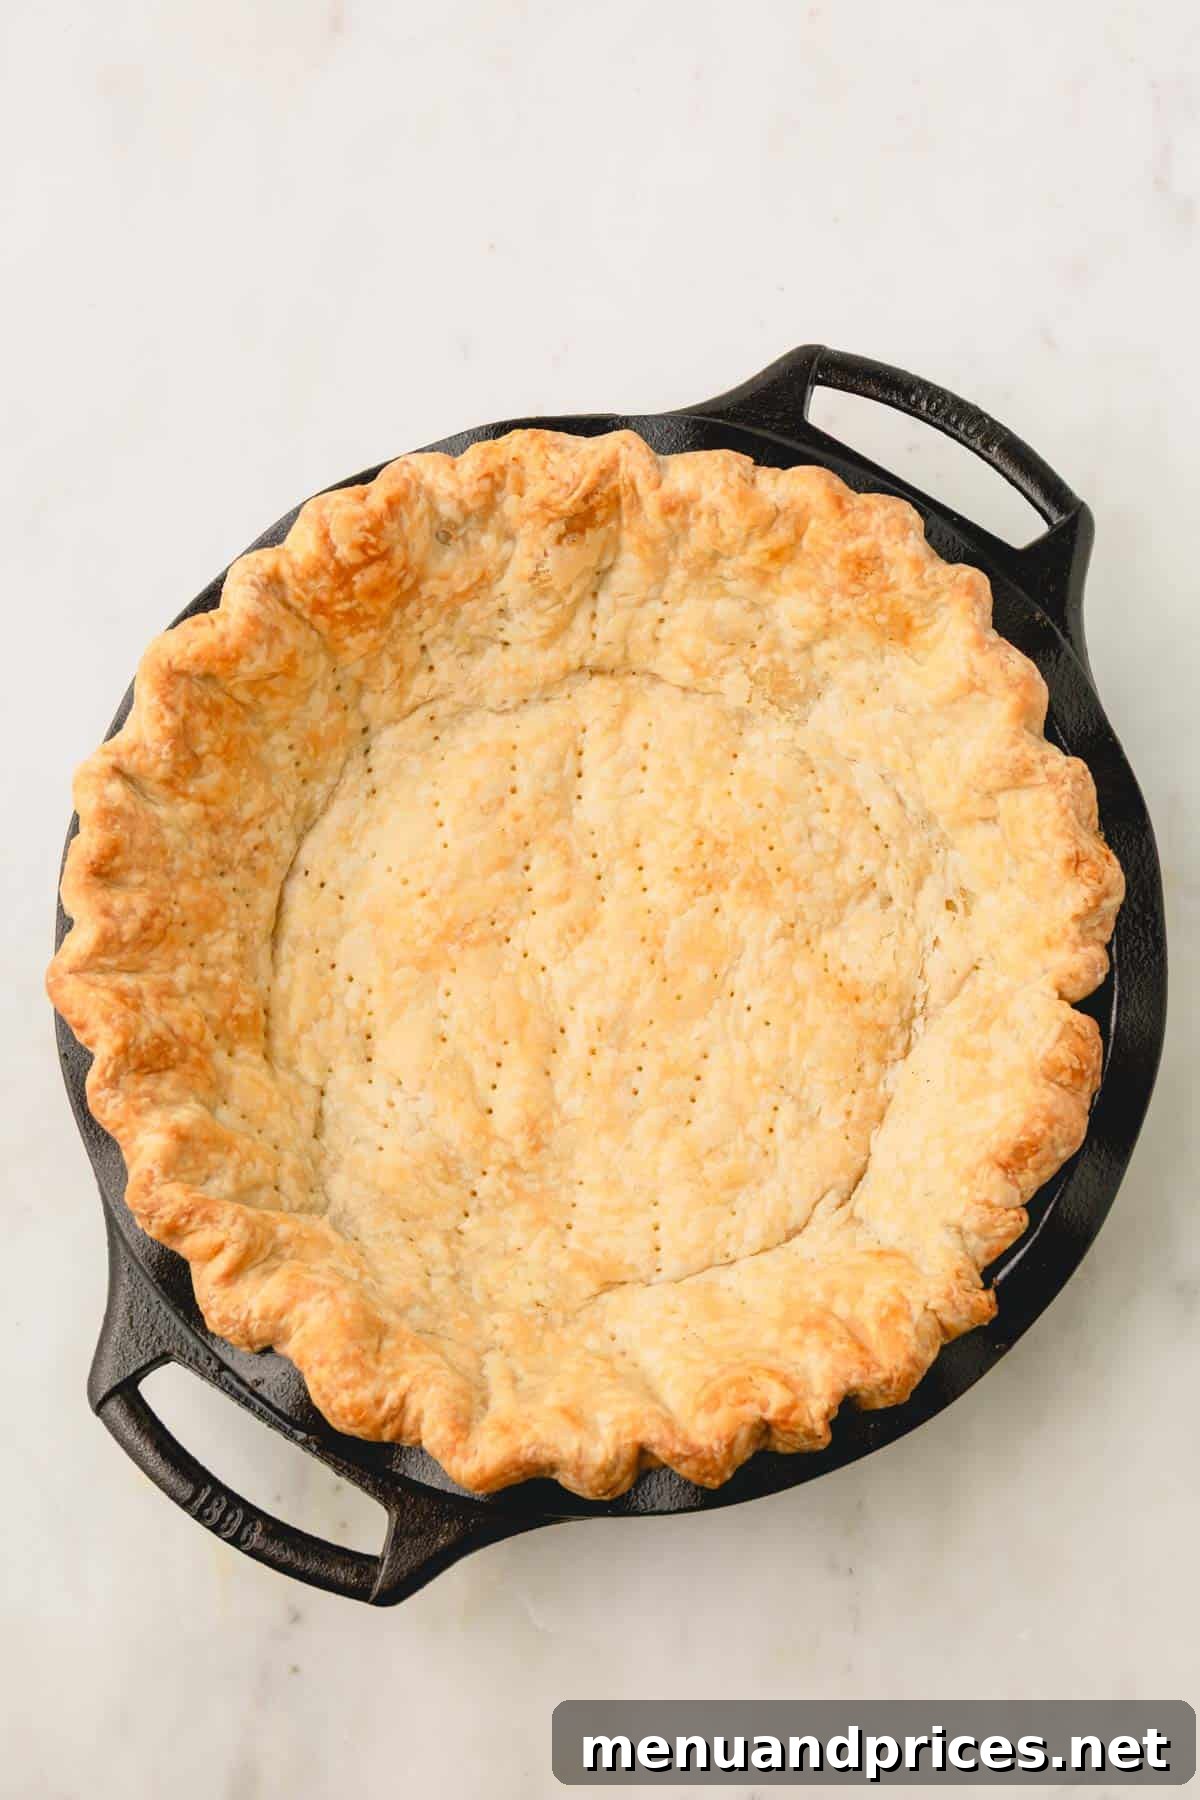
- Second Bake: After 15 minutes, carefully remove the baking sheet from the oven, then gently lift out the aluminum foil and pie weights. Return the crust to the oven for another 10-15 minutes, or until it achieves a beautiful golden brown color. This second phase ensures the bottom of the crust is thoroughly cooked and crisp.
Minimize Pie Crust Shrinkage
Preventing pie crust shrinkage is a common concern for bakers. While all-butter crusts can be a bit more prone to shrinking than those made with shortening, these crucial steps will help you maintain those beautiful edges:
- The #1 Key: Rest and Chill! After you’ve rolled out your dough and carefully crimped the edges into the pie dish, it is absolutely essential to give it a generous rest in the refrigerator. Chill the prepared crust for at least 30 minutes, or ideally, while you prepare your filling. The longer it chills, the better. This allows the butter to firm up and the gluten strands to relax, which minimizes their tendency to contract in the oven.
- Crimp Over the Lip: Always make sure to crimp your pie dough edges directly over the lip of the pie dish, rather than inside the wall. This provides a structural anchor, helping the dough adhere to the dish and resist pulling inward during baking.
Critical Tips for Pie Crust Success
Achieving a consistently perfect pie crust relies on a few key practices. Follow these expert tips to ensure flaky, tender results every time:
- Weigh Your Flour: While not strictly crucial, I highly recommend weighing your flour using a kitchen scale rather than measuring by volume. Flour can compress in a measuring cup, leading to varying amounts. Weighing ensures a precise ratio of dry to wet ingredients, which is fundamental for proper dough consistency.
- Freeze Your Butter: Cut your very cold butter into ½-tablespoon chunks, then place them in the freezer for 15-30 minutes before incorporating them into the flour. This ensures the butter remains solid and forms distinct pockets in the dough, crucial for flakiness.
- Avoid Over-mixing Butter: When adding butter to flour, resist the urge to over-mix. You want most of the butter pieces to be pea-sized, but a few slightly larger chunks are actually ideal! These larger pieces will create bigger pockets of steam, resulting in wonderfully dramatic flakes.
- Always Use Ice Water: The temperature of your water is critical. Using ice-cold water (and even an ice cube or two in the water you’re measuring) helps keep the dough nice and cold, preventing the butter from melting and fully incorporating into the flour.
- Add Water Incrementally: Introduce the ice water one to two tablespoons at a time. Mix gently after each addition, stopping as soon as the dough just comes together. Over-hydrating the dough is a common pitfall that leads to a sticky, hard-to-handle dough and a tough crust. It’s better to have a slightly crumbly dough that you can gently press together than a wet one.
- Handle Gently: Once the dough is formed, avoid excessive kneading or handling. Overworking the dough develops too much gluten, leading to a tough rather than tender crust.
Make-Ahead and Freezing Instructions
Having extra pie dough ready to go is an absolute game-changer, especially during busy holiday seasons or when a sudden pie craving strikes! This recipe is incredibly freezer-friendly, allowing you to prep ahead and bake fresh whenever you like.
Pie dough can be conveniently refrigerated for up to 3 days. For longer storage, you can freeze it for up to 3 months without compromising quality.
2 Ways to Freeze Pie Dough:
- Method #1: Freezing Dough Discs
- Once you’ve formed your dough into a flattened disc, wrap it tightly in plastic wrap. If you plan to freeze it for more than a month, double-wrap it in an additional layer of plastic wrap or aluminum foil for extra protection against freezer burn.
- Place the wrapped disc into a freezer-safe bag, pressing out as much air as possible, then freeze for up to 3 months.
- To Use: When you’re ready to bake, transfer the frozen pie dough disc to the refrigerator and let it thaw overnight. Once thawed, it’s ready to be rolled out and used as fresh dough.
- Method #2: Freezing Pre-formed Pie Crusts
- Roll out your chilled pie dough and carefully lay it into your pie dish. Crimp the edges as desired.
- Wrap the entire pie dish, with the crust inside, thoroughly in plastic wrap, then an outer layer of aluminum foil. This dual wrapping protects it from freezer odors and ice crystals.
- Freeze for up to 3 months. Ensure it has ample space in the freezer and isn’t squashed by other items, ideally in an upright freezer where it won’t be easily jostled.
- To Use: For blind-baking, you can often take the pre-formed frozen crust straight from the freezer and place it directly into the preheated oven. Follow the blind-baking instructions as usual, adding a few extra minutes to the initial baking time if needed due to its frozen state.
Frequently Asked Questions About Pie Crust
While both pie dough and many types of pastry dough share similar core ingredients (flour, fat, water), they differ significantly in technique and resulting texture. Pie dough aims for a flaky, tender texture through minimal gluten development and visible fat pockets. Puff pastry, a specific type of pastry dough, involves a laminating process of repeatedly folding butter into the dough to create hundreds of distinct, incredibly thin, and airy layers, resulting in a much lighter and more dramatic puff.
Keeping both the butter and the dough extremely cold is the cardinal rule for a truly flaky pie crust. When the butter is frozen and added to the flour, it remains in distinct, separate pieces. As the crust bakes, these cold butter chunks melt and release steam, which creates countless tiny air pockets and separates the layers of dough, giving you that coveted flaky texture. If the butter melts too early (due to warm ingredients or overworking), it will fully incorporate into the flour, leading to a tough, dense crust instead of a light, layered one. Think of it like making flaky croissants; the principle of keeping fat separate to create layers is the same! Visible butter swirls and chunks throughout your dough are always a good sign!
The ultimate secret to a remarkably flaky pie crust is using frozen butter. It’s paramount to ensure the dough remains as cold as possible throughout the mixing process, preventing the butter from melting. The presence of small, distinct pieces of butter suspended within the dough is what creates those magical air pockets during baking. As these butter pieces melt, they steam, separating the layers of gluten and resulting in an exquisitely tender, melt-in-your-mouth flaky crust.
While butter crusts are unparalleled in flavor, they can sometimes be more prone to shrinking than their shortening counterparts. The key to minimizing shrinkage lies in proper chilling. Once you have formed the dough, placed it in the pie dish, and crimped the edges, return the entire pie crust to the refrigerator to chill for at least 30 minutes, or even longer. This chilling period allows the butter to firm up and, more importantly, gives the gluten strands in the dough time to relax. Relaxed gluten is less likely to contract dramatically when exposed to the heat of the oven, helping your beautiful crimped edges hold their shape.
No, there is absolutely no need to spray your pie pan with cooking spray or grease it with butter before adding your pie crust. A well-made pie crust, especially one with a good fat content like this all-butter recipe, contains enough fat to prevent sticking. Greasing the pan can sometimes even lead to a soggy bottom crust, which is exactly what we want to avoid.
Yes, when you are blind-baking a pie crust (baking it without a filling), it is essential to prick the bottom and sides of the crust with a fork. This process, known as “docking,” creates small vents that allow steam to escape during baking. Without these holes, the steam can get trapped underneath the dough, causing it to puff up unevenly, form large bubbles, and lose its shape. Docking ensures a flat, evenly baked crust.
More Pie Recipes You’ll Enjoy
Now that you’ve mastered the art of the perfect pie crust, explore these delectable pie recipes that will put your skills to delicious use:
- Pear Tarte Tatin
- Homemade Banana Cream Pie
- Lemon Meringue Pie
- Classic Cherry Pie
- The Best Pecan Pie
All Butter Pie Crust
Comment
Print Recipe
Ingredients
- ▢ 1 ½ cups (190 g) all-purpose flour
- ▢ ¼ teaspoon kosher salt
- ▢ ½ cup (113 g) unsalted butter cut into ½ tablespoon pieces and frozen
- ▢ 1 (17 g) egg yolk
- ▢ 3-4 tablespoons (45-60 ml) ice water
Instructions
To make the pie dough
-
In a large mixing bowl with a paddle attachment (or using a pastry cutter or your hands), whisk together the all-purpose flour and salt until well combined.
-
Add the frozen butter cubes and egg yolk. Mix on the lowest/stir speed (or cut in with a pastry cutter) until most of the butter pieces are about pea-size. It’s okay, and even desirable, to have some slightly bigger butter chunks remaining.
-
Gradually add ice water, one tablespoon at a time, mixing gently after each addition until the dough begins to form a loose ball and stick together in large clumps. Depending on the humidity and absorption of your flour, you may not need all the water, or you might require an additional tablespoon or two. Stop adding water as soon as the dough holds together; too much water will result in a sticky dough that is difficult to handle. TIP: Don’t be concerned if you observe small pieces or swirls of butter throughout the dough; this is precisely what you want! These distinct butter pieces will melt during baking, creating an incredibly tender and flaky crust.
-
Gently gather the dough into a ball on a clean surface, then flatten it into a uniform disc. Wrap the disc tightly in plastic wrap and refrigerate for at least 1 hour, or up to 3 days. For longer storage, place the wrapped dough in a freezer bag and freeze for up to 3 months.
To blind bake a pie crust
-
On a lightly floured surface, roll the chilled pie dough into a 10 to 11-inch circle. Carefully wrap the dough around your rolling pin and gently transfer it over your pie dish. Unroll it into the pan, then fold the excess edges outwards and roll them until they meet the lip of the pie pan. Crimp the edges using your preferred method, such as the simple 3-finger technique described above.
-
Place the prepared pie crust back into the fridge for at least 30 minutes to ensure it is thoroughly chilled before baking, which helps minimize shrinkage.
-
Meanwhile, preheat your oven to 350°F (177°C).
-
Using a fork, generously pierce holes all over the bottom and sides of the chilled crust. This essential step prevents the crust from puffing up and forming uneven bubbles or air pockets during baking.
-
Carefully line the pierced crust with a sheet of aluminum foil, ensuring it covers the bottom and extends up the sides. Fill the foil-lined crust with pie weights, raw beans, or rice. (Note: Beans or rice used as pie weights cannot typically be cooked for consumption afterward.)
-
Place the pie dish on a baking sheet for easier handling and to catch any potential spills. Bake for 15 minutes. After this initial bake, carefully remove the baking sheet from the oven, then gently lift out the foil and pie weights. Return the crust to the oven for another 10-15 minutes, or until it achieves a beautiful, even golden brown color throughout.
⭐️ Did you make this recipe?
Please leave a review and let us know how you liked it!
Video
Tips & Notes
Nutrition
This recipe was originally published on January 6th, 2013, and has been continuously refined to guarantee your success.