
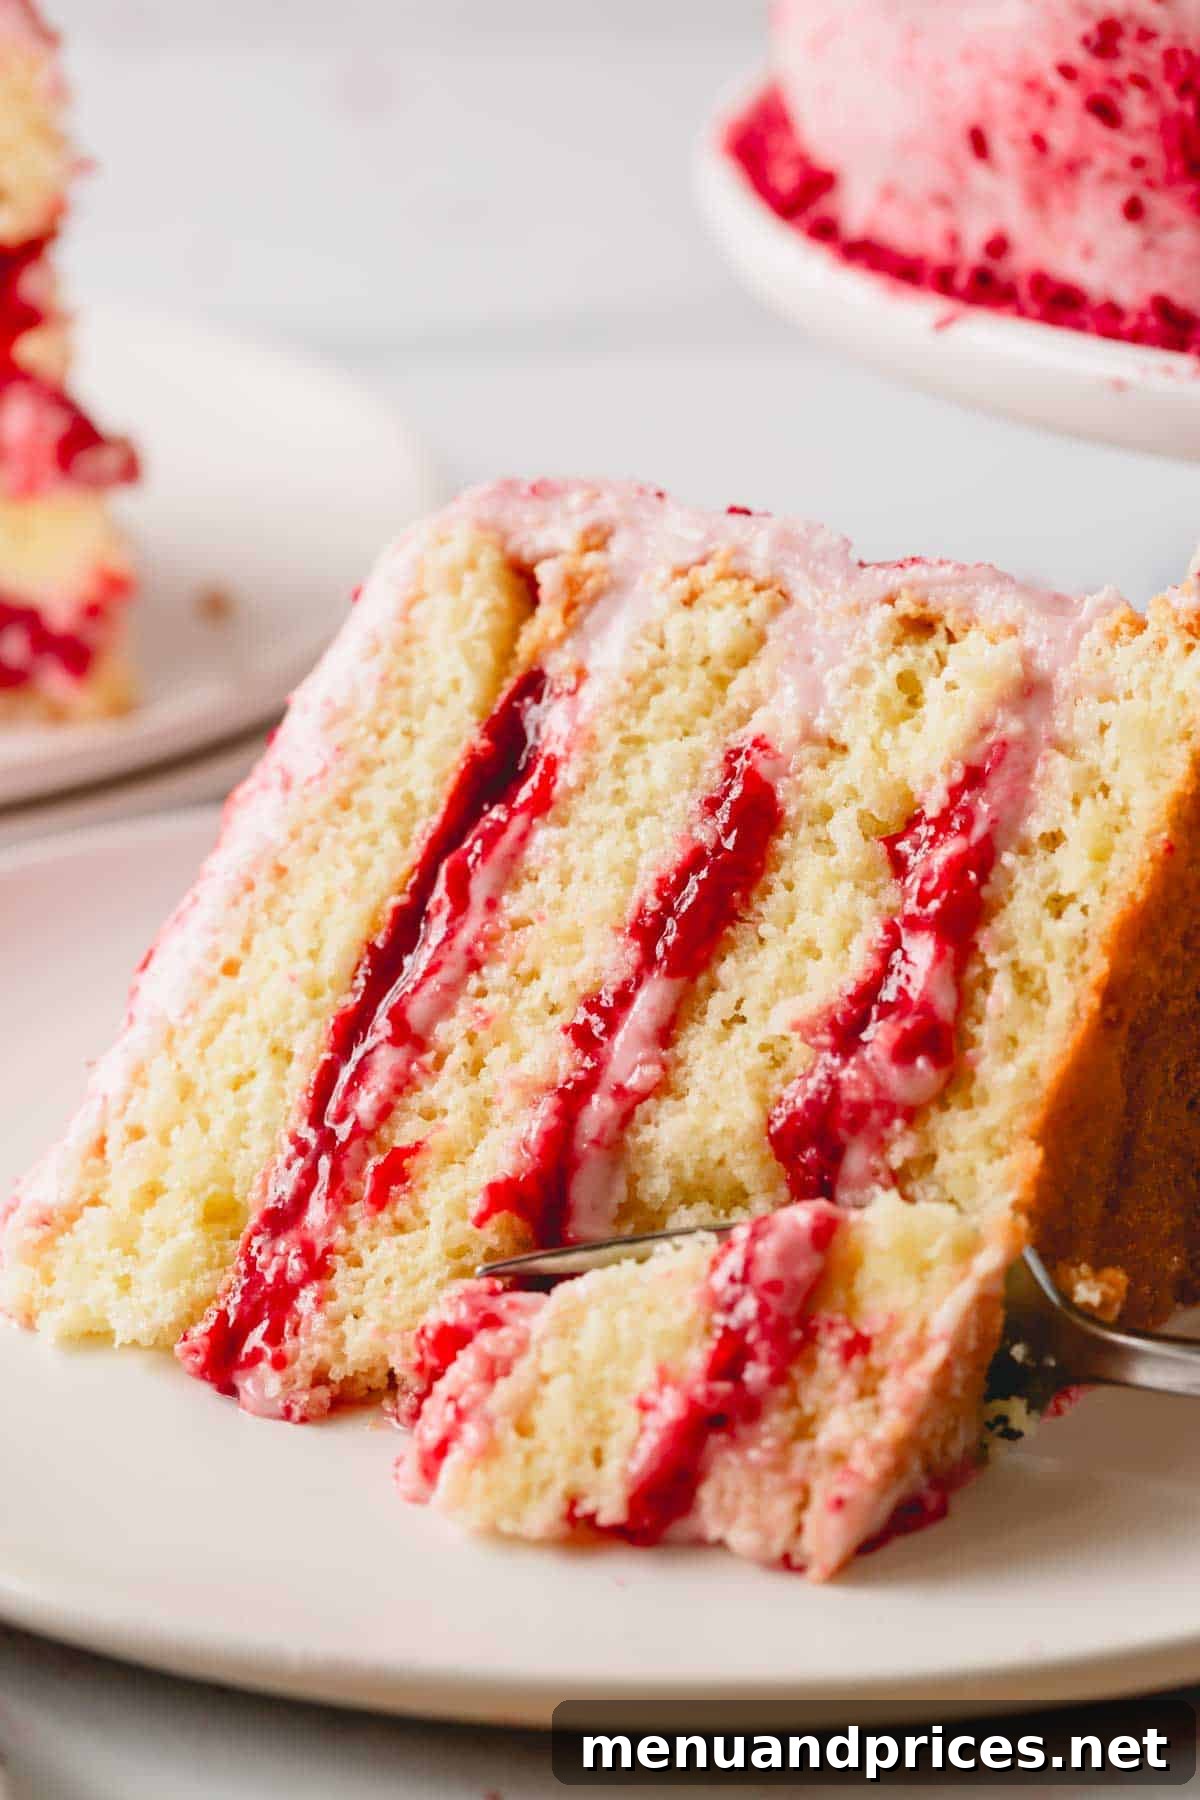
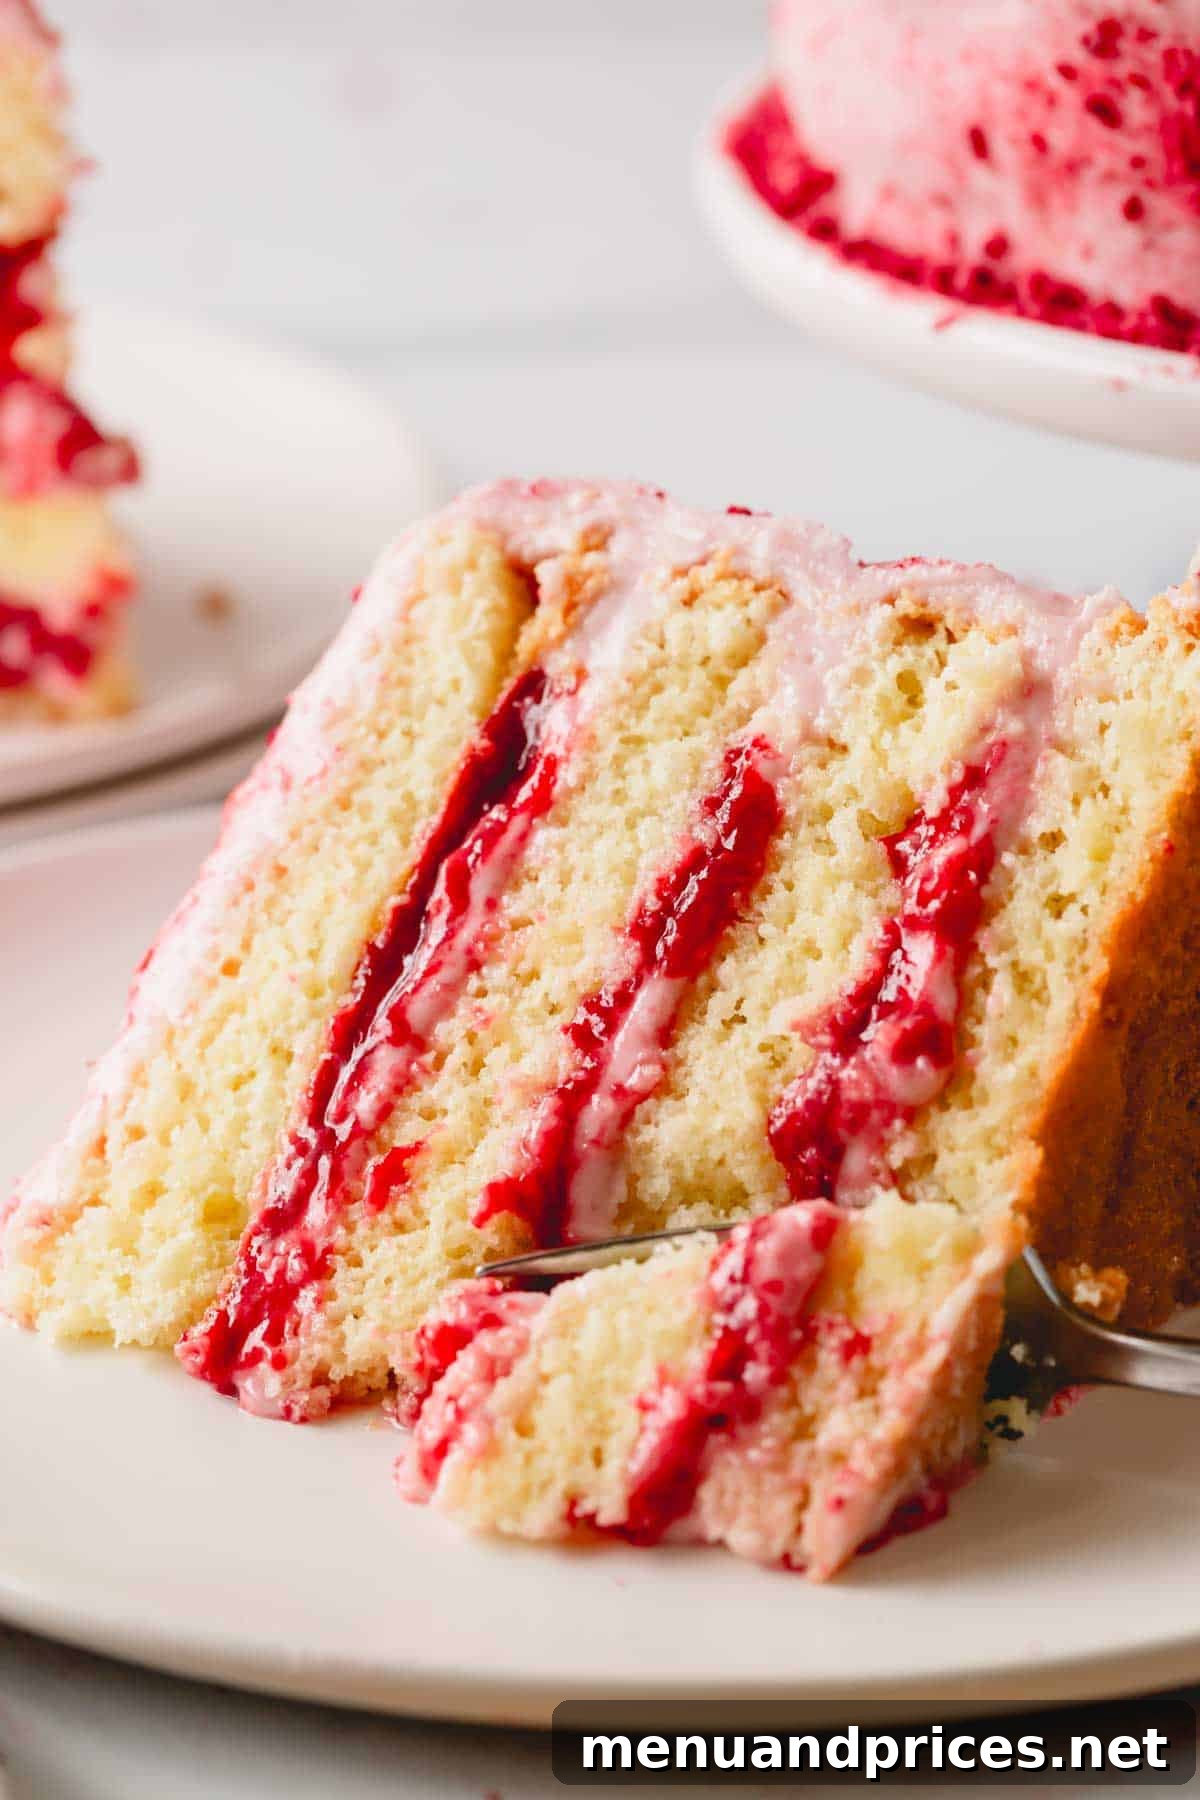
Transform your baking experience with this exquisite Raspberry Layer Cake! Delicate, light-as-air sponge cake layers are expertly moistened with a simple syrup, then lavishly paired with a vibrant, tangy-sweet raspberry cream cheese frosting and a luscious, homemade raspberry puree. This recipe elevates the humble sponge cake from potentially dry to a truly moist, flavorful, and unforgettable masterpiece, perfect for any special occasion or a delightful everyday treat.
Planning a Celebration? Save This Recipe for Later!
Pin This Recipe
Why This Raspberry Layer Cake Will Be Your New Favorite
This raspberry layer cake isn’t just a dessert; it’s an experience. Perfect for birthdays, anniversaries, holidays, or simply to brighten a weekend, its moist texture and rich flavors consistently impress. Here’s why this recipe will earn a permanent spot in your baking repertoire:
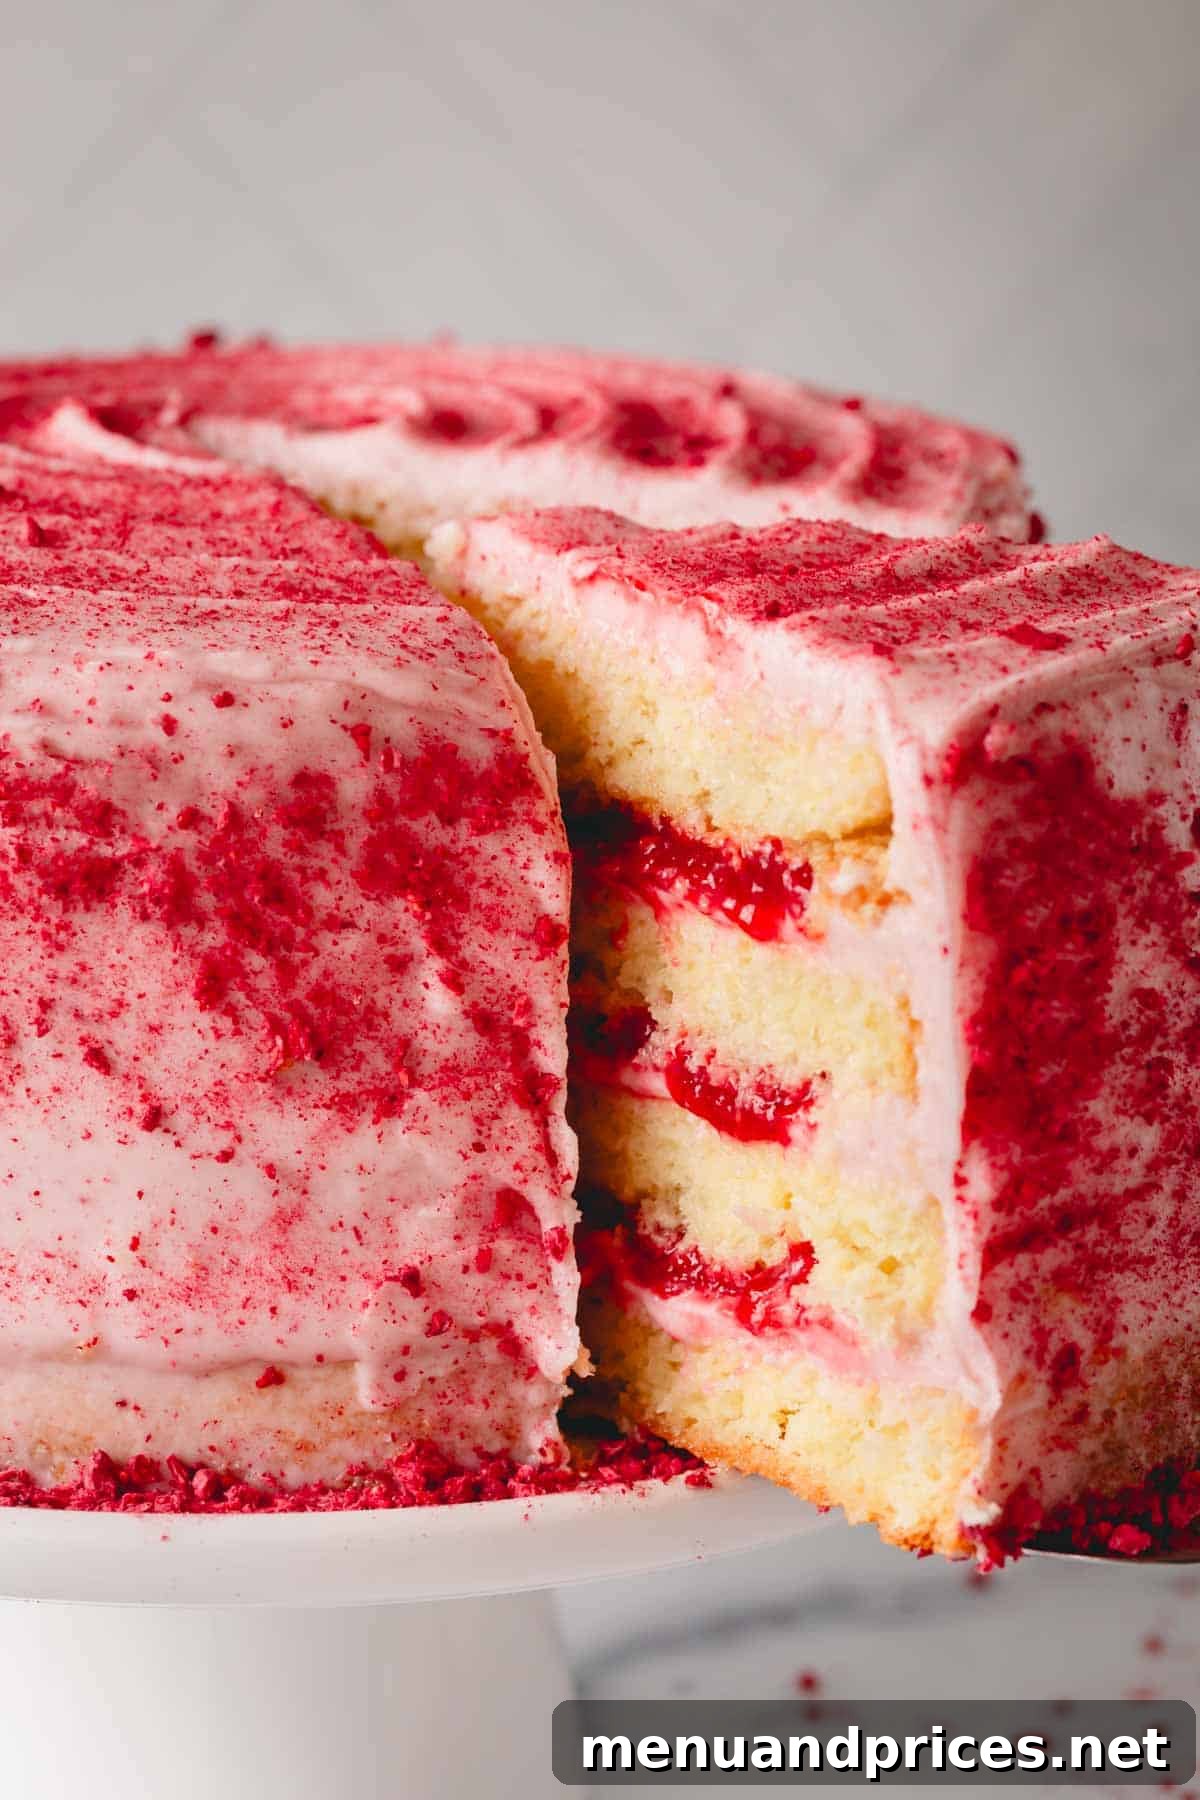
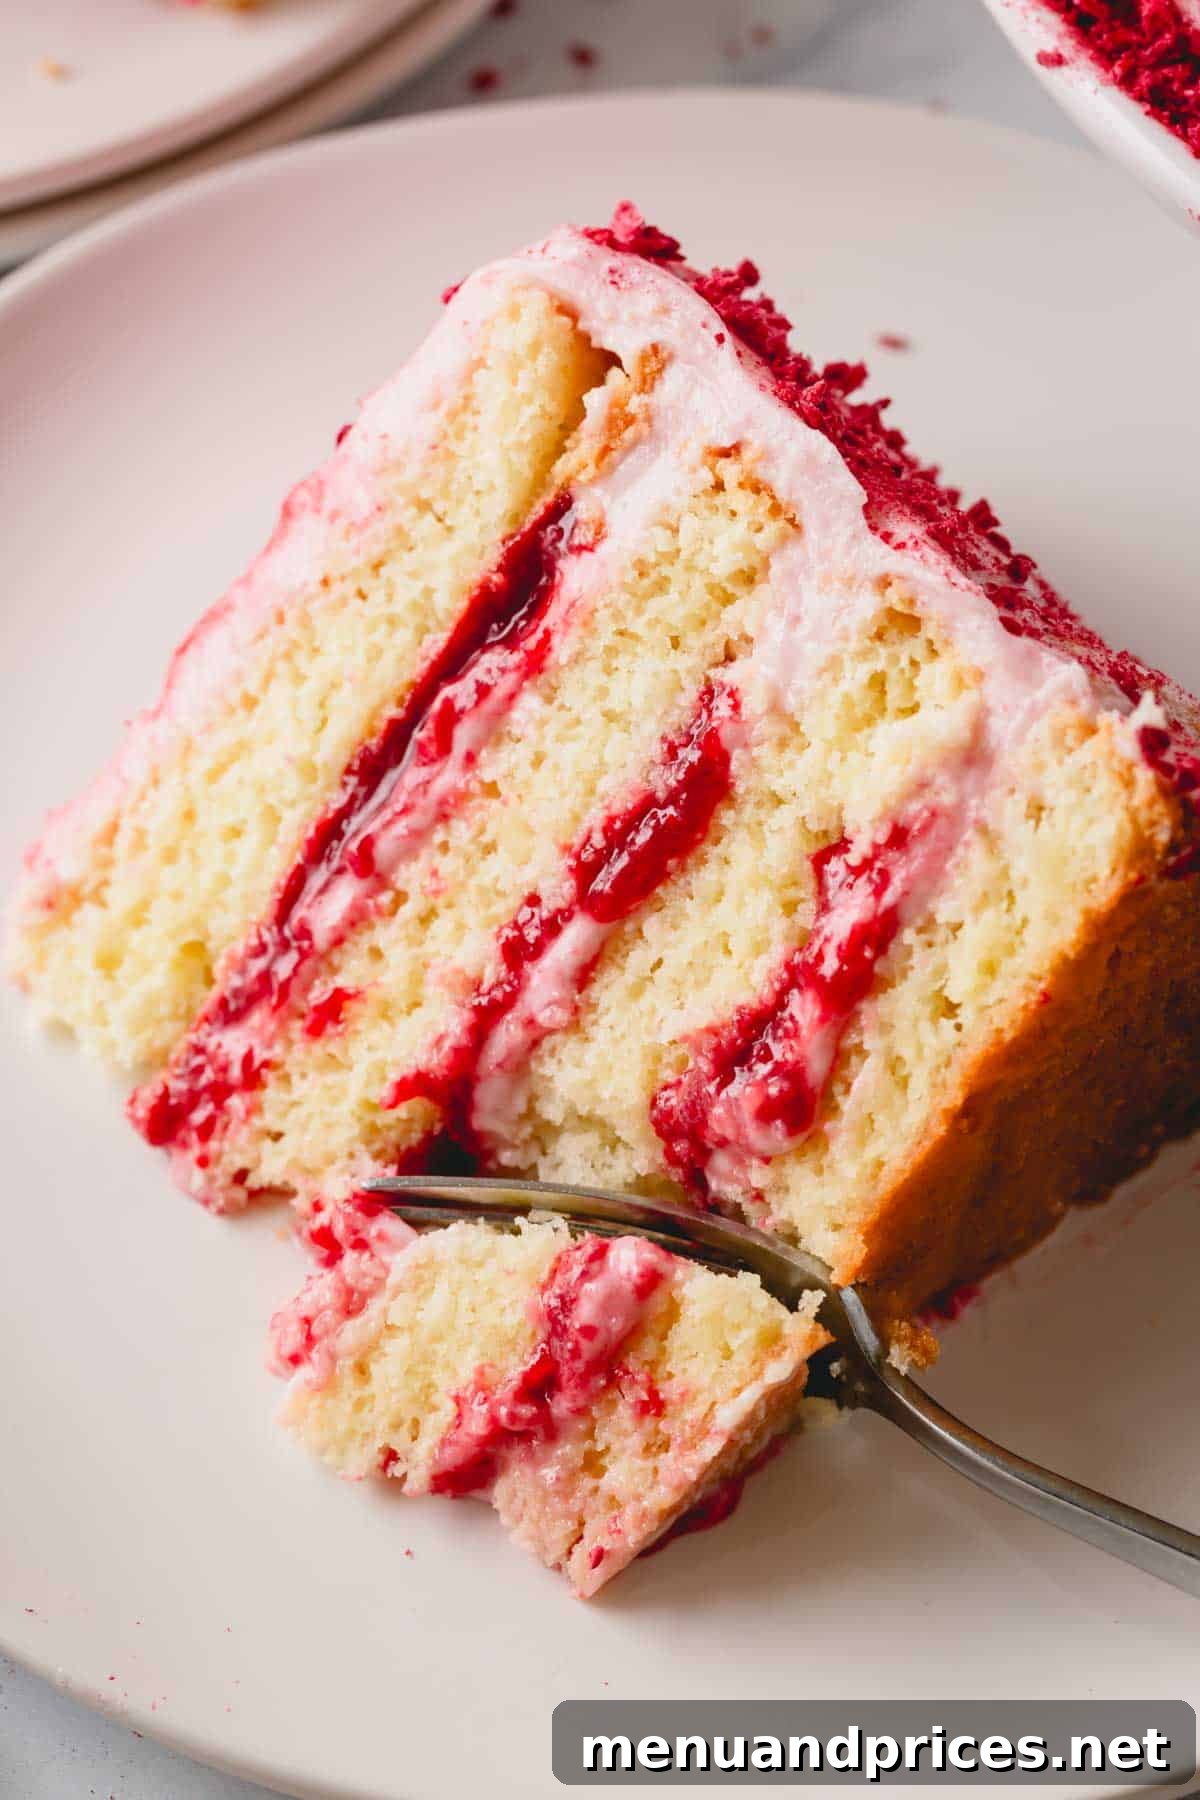
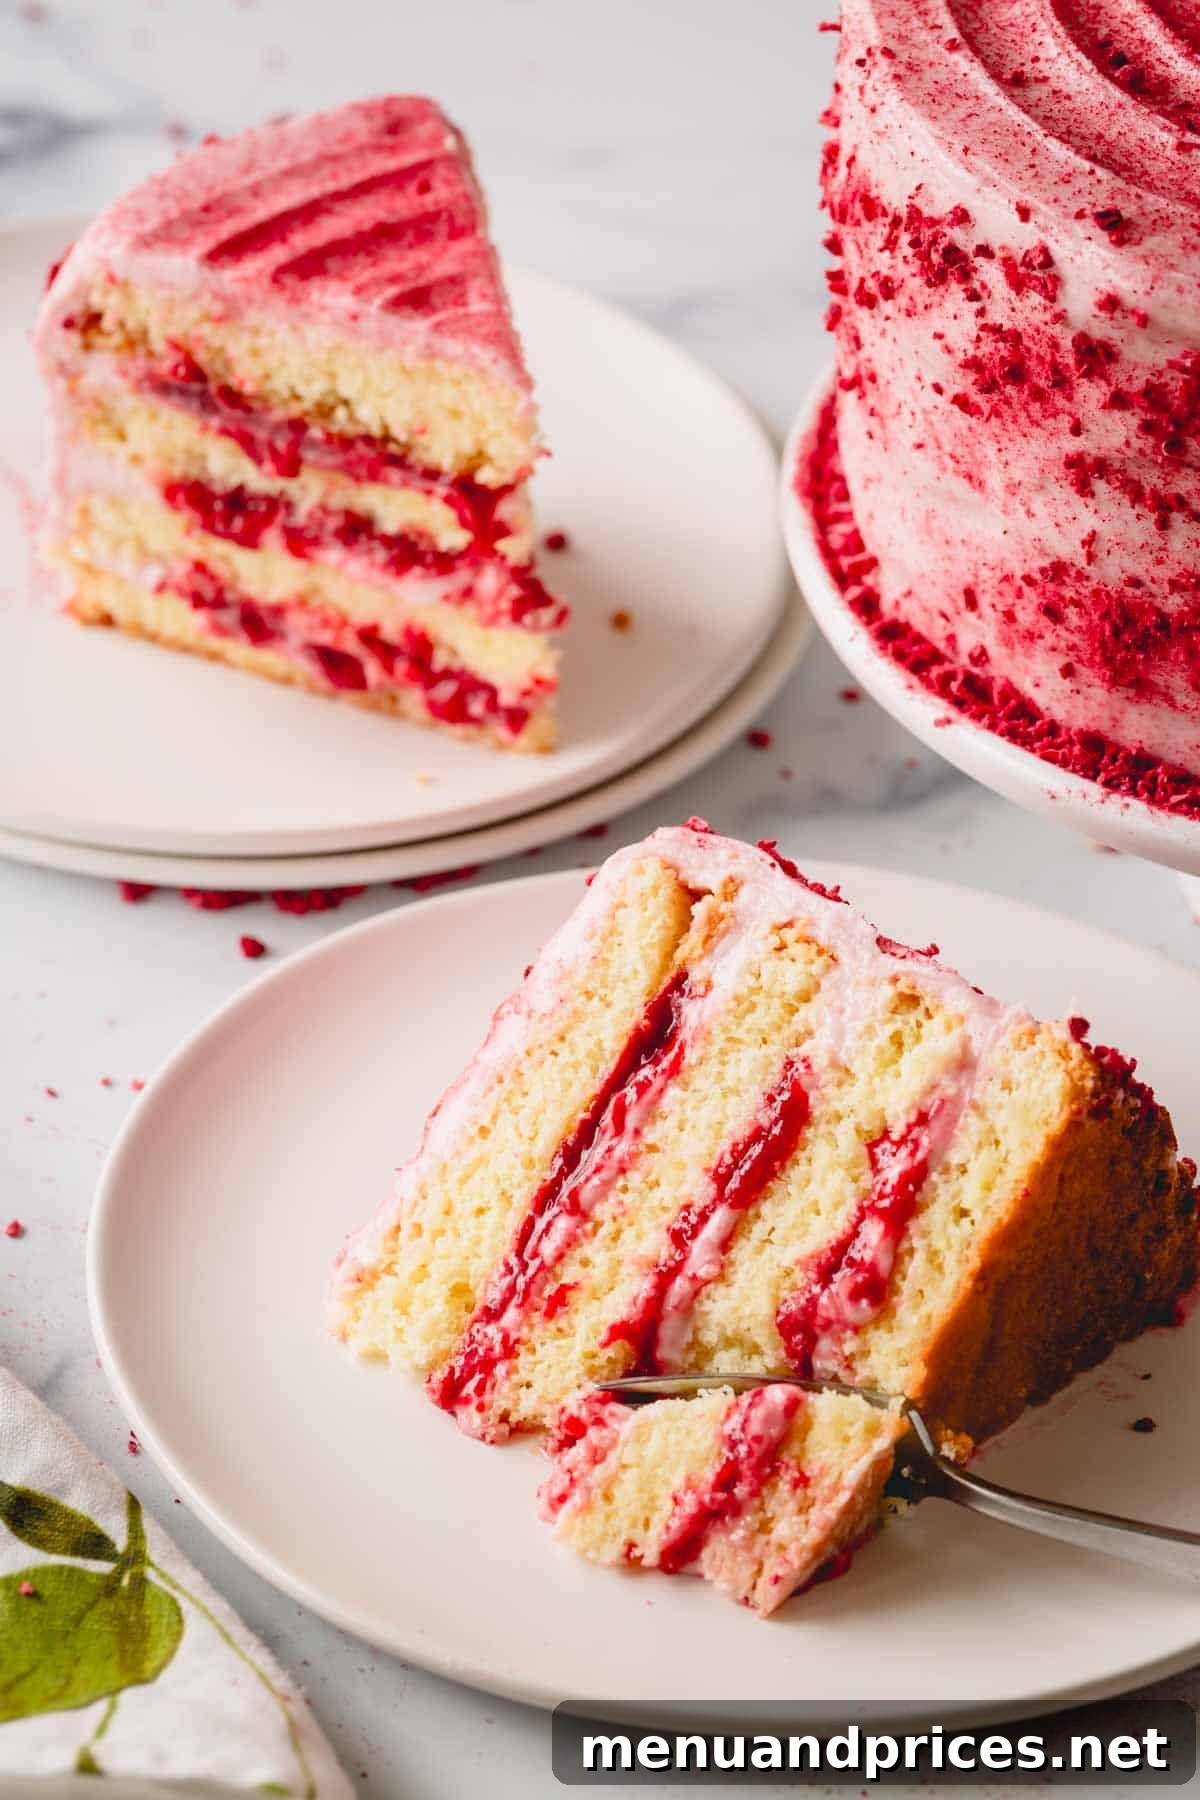
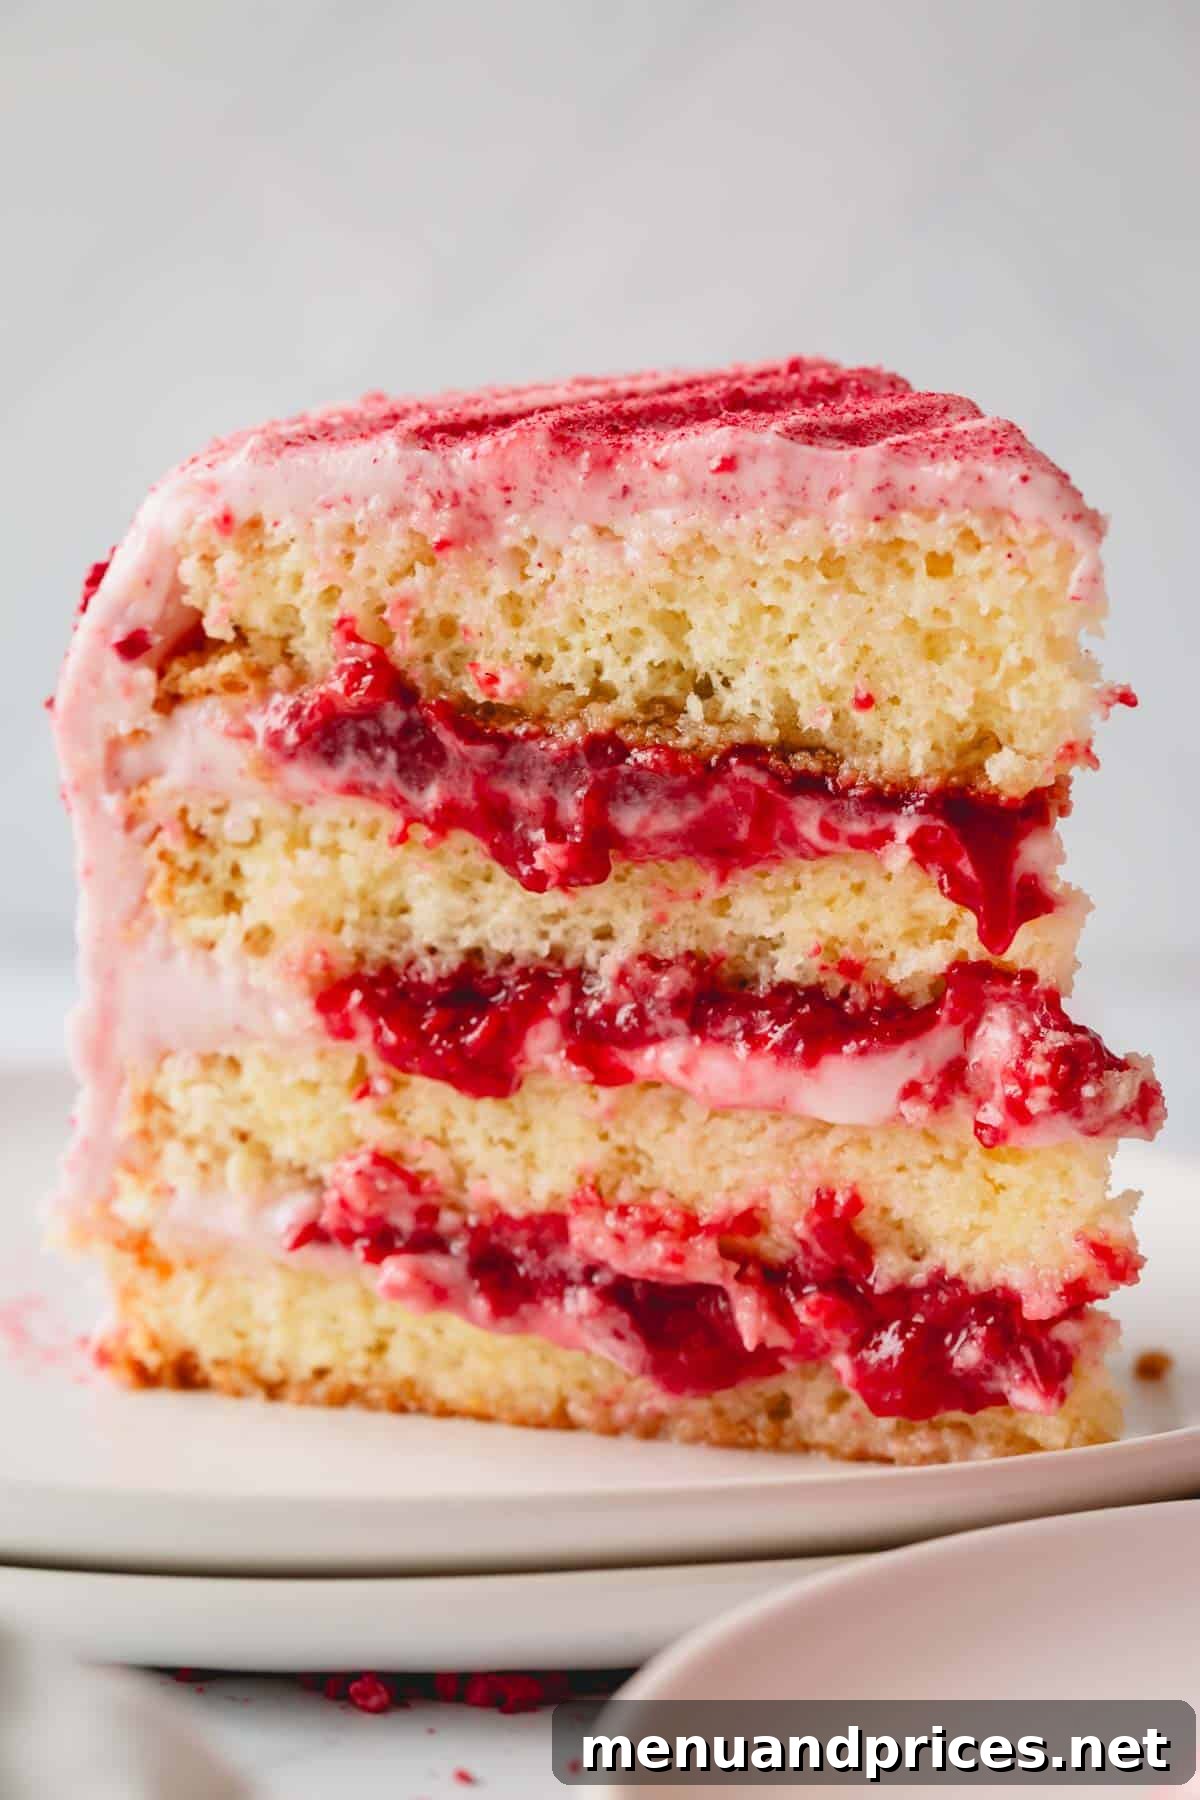
- Elegant Presentation: With its smooth, minimalist finish and vibrant raspberry layers peeking through, this cake is visually stunning. It looks far more complex than it is, making you look like a pastry pro!
- Perfectly Balanced Textures: The foundation is a light, incredibly airy sponge cake, offering a delicate contrast to the rich, creamy elements. It’s never heavy, always delightful.
- Bursting with Fresh Raspberry Flavor: The homemade, seedless raspberry sauce infuses each bite with a tart yet sweet berry essence, providing a natural and refreshing taste.
- Velvety Dream Frosting: Our raspberry cream cheese frosting is luxuriously smooth and fluffy, offering a perfect balance to the cake’s sweetness with its fruity, slightly tangy profile. It’s addictive on its own!
While creating a multi-layered cake might seem daunting at first glance, I assure you it’s entirely achievable! I highly recommend breaking down the recipe steps over two days, or even starting components up to a week in advance, to make the process enjoyable and stress-free. With careful planning, you’ll create a masterpiece that tastes as incredible as it looks.
Mastering the Four Essential Components of Your Raspberry Layer Cake
The secret to this spectacular raspberry layer cake lies in its four perfectly harmonized components, each contributing to its overall moistness, flavor, and texture:
- Fluffy Sponge Cake: This versatile cake, made with just three main ingredients, serves as the ideal foundation. Its airy structure is perfectly designed to absorb moisture, which is why enriching it with simple syrup is a crucial step to achieve that desired tender, moist crumb.
- Homemade Simple Syrup: Our easy 2-ingredient simple syrup recipe (detailed in the recipe card below) is the key to transforming sponge cake from potentially dry to wonderfully moist and flavorful. You can even explore variations like a peach simple syrup for other summer treats!
- Vibrant Raspberry Puree: Taking only about 15 minutes to prepare, this seedless puree delivers an intense burst of fresh raspberry flavor. You can use either fresh or frozen raspberries, making it accessible year-round. Its tartness beautifully cuts through the sweetness of the frosting.
- Luxurious Raspberry Cream Cheese Frosting: This frosting is a true standout! It boasts a wonderfully creamy, fluffy consistency and a delightful fruity flavor that’s perfectly balanced – not overly sweet, allowing the natural tang of the cream cheese and raspberries to shine. It’s undeniably one of my absolute favorite cream cheese frostings.
Suggested Baking Schedule: Planning for Perfection
Given the multiple delightful components of this raspberry layer cake, I highly recommend a two-day approach to ensure a relaxed and enjoyable baking experience, yielding the best possible results without rushing:
- Day 1: Foundation & Flavor Building
- Make the Sponge Cake: Allow ample time for cooling and chilling, which is essential for easy slicing.
- Prepare the Simple Syrup: This can be made ahead and chilled, ready to moisten your cake layers.
- Craft the Raspberry Puree: Develop its rich flavor and thick consistency, then chill thoroughly.
- Day 2: Frosting & Final Assembly
- Whip up the Raspberry Cream Cheese Frosting: Ensure your ingredients are at room temperature for the perfect fluffy texture.
- Assemble the Layer Cake: Enjoy the creative process of layering and decorating your stunning dessert.
Unlock the Power of Make-Ahead!
For ultimate convenience, all four components of this cake can be prepared and stored up to one week in advance. This flexibility allows you to spread out the work and enjoy fresh cake with minimal last-minute effort. Refer to the detailed storage instructions further down for best practices.
How to Craft This Irresistible Raspberry Layer Cake: A Step-by-Step Guide
Follow these detailed instructions to create a show-stopping raspberry layer cake that’s as delightful to make as it is to eat.
1. Bake the Fluffy Sponge Cake Layers
- Preheat your oven to 350°F (177°C). Prepare one 8-inch springform pan (at least 3 inches tall) by lining the bottom with parchment paper. There’s no need to grease the sides; this helps the cake climb. If you don’t have a tall pan, you can bake in two 8-inch cake pans, adjusting baking time.
- Carefully separate egg whites from yolks. This step is crucial for achieving a light sponge. Ensure absolutely no yolk mixes with the whites, as even a tiny drop of fat can prevent the whites from whipping properly.
Expert Tip: Separate Cold Eggs
It’s significantly easier to separate eggs when they are cold, directly from the refrigerator. The yolks are firmer and less likely to break. For a foolproof method, refer to this guide on separating egg whites from yolks.
- Whisk the egg yolks with ½ cup of granulated sugar until the mixture becomes pale yellow and triples in volume. This typically takes about 5 minutes of continuous whisking.
- In a separate, clean bowl, combine the egg whites and the remaining ½ cup of sugar. Beat on medium speed until soft, billowy peaks form. The whites should hold their shape but still be somewhat flexible.
- Gently fold in 1/3 of the whipped egg whites into the egg yolk mixture. This lightens the yolk batter, making it easier to incorporate the remaining whites without deflating them. Then, carefully add the rest of the egg whites and gently fold until the mixture is smooth and evenly combined. Overmixing will lead to a dense cake.
- Sift the flour and salt into the batter in three stages. After each addition, gently mix the batter with a spatula until just combined. Sifting prevents lumps and ensures an even distribution.
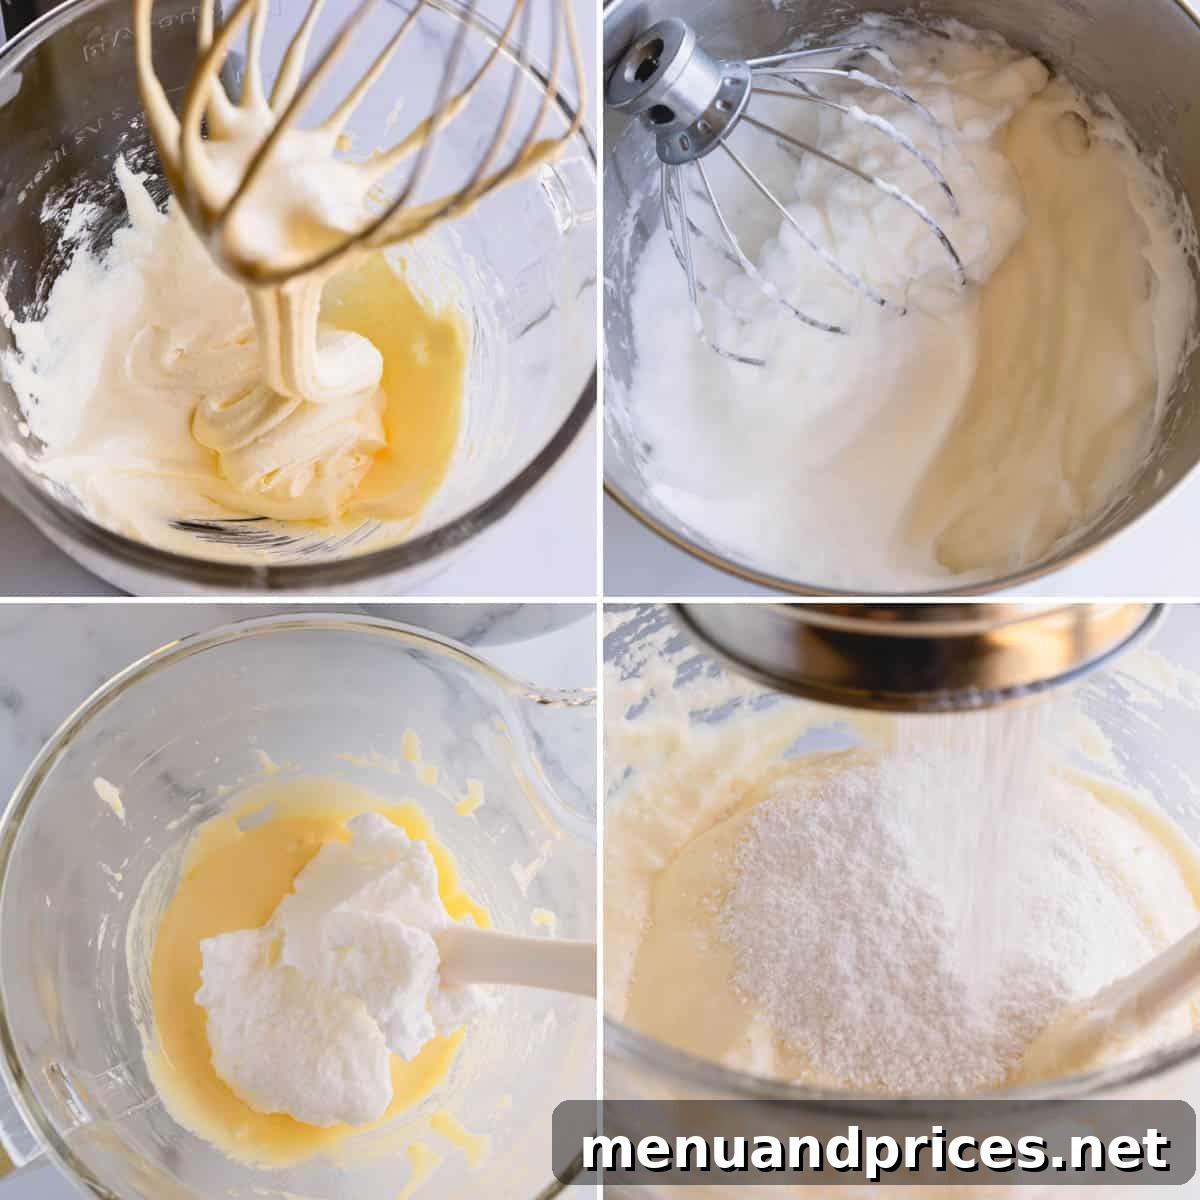
- Pour the batter into your prepared cake pan and gently smooth the top with a spatula.
- Bake the cake for approximately 40 minutes, or until a wooden skewer or toothpick inserted into the center comes out clean. It’s important not to open the oven door for at least the first 30 minutes to prevent the cake from deflating. (If using two 8-inch pans, baking time will be shorter, around 25-30 minutes.)
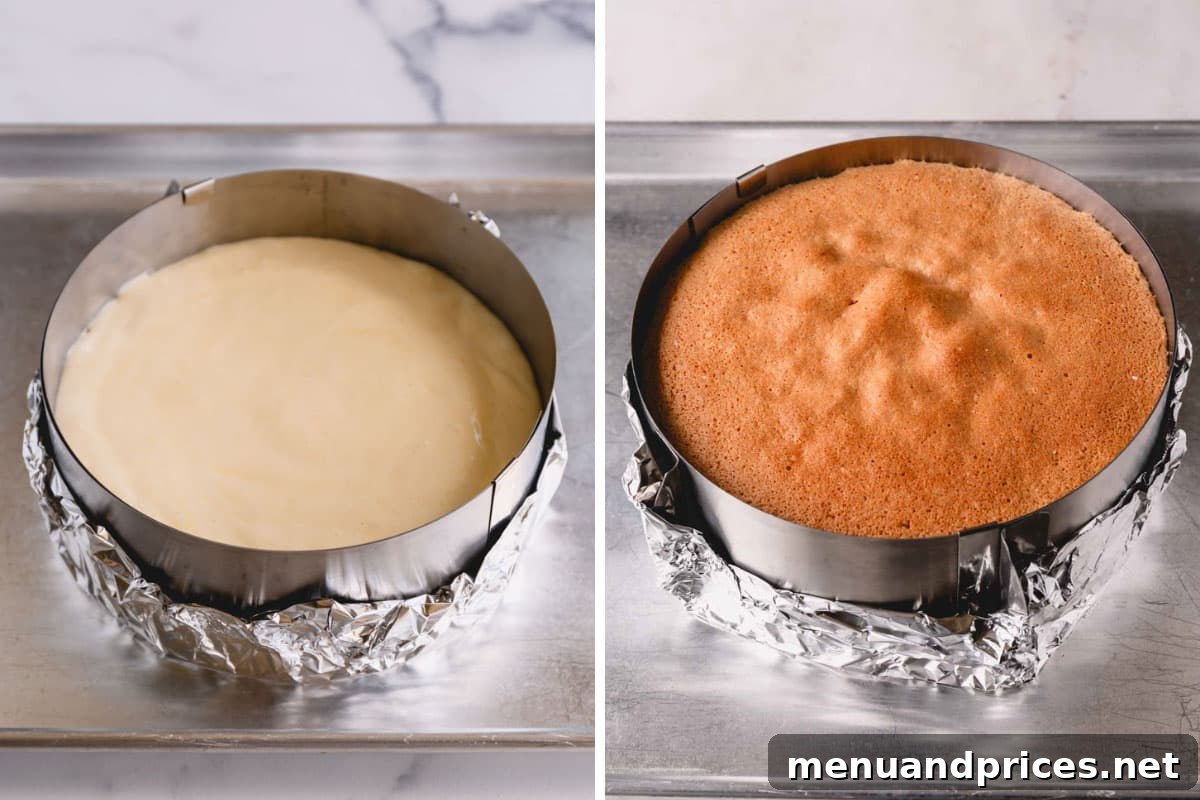
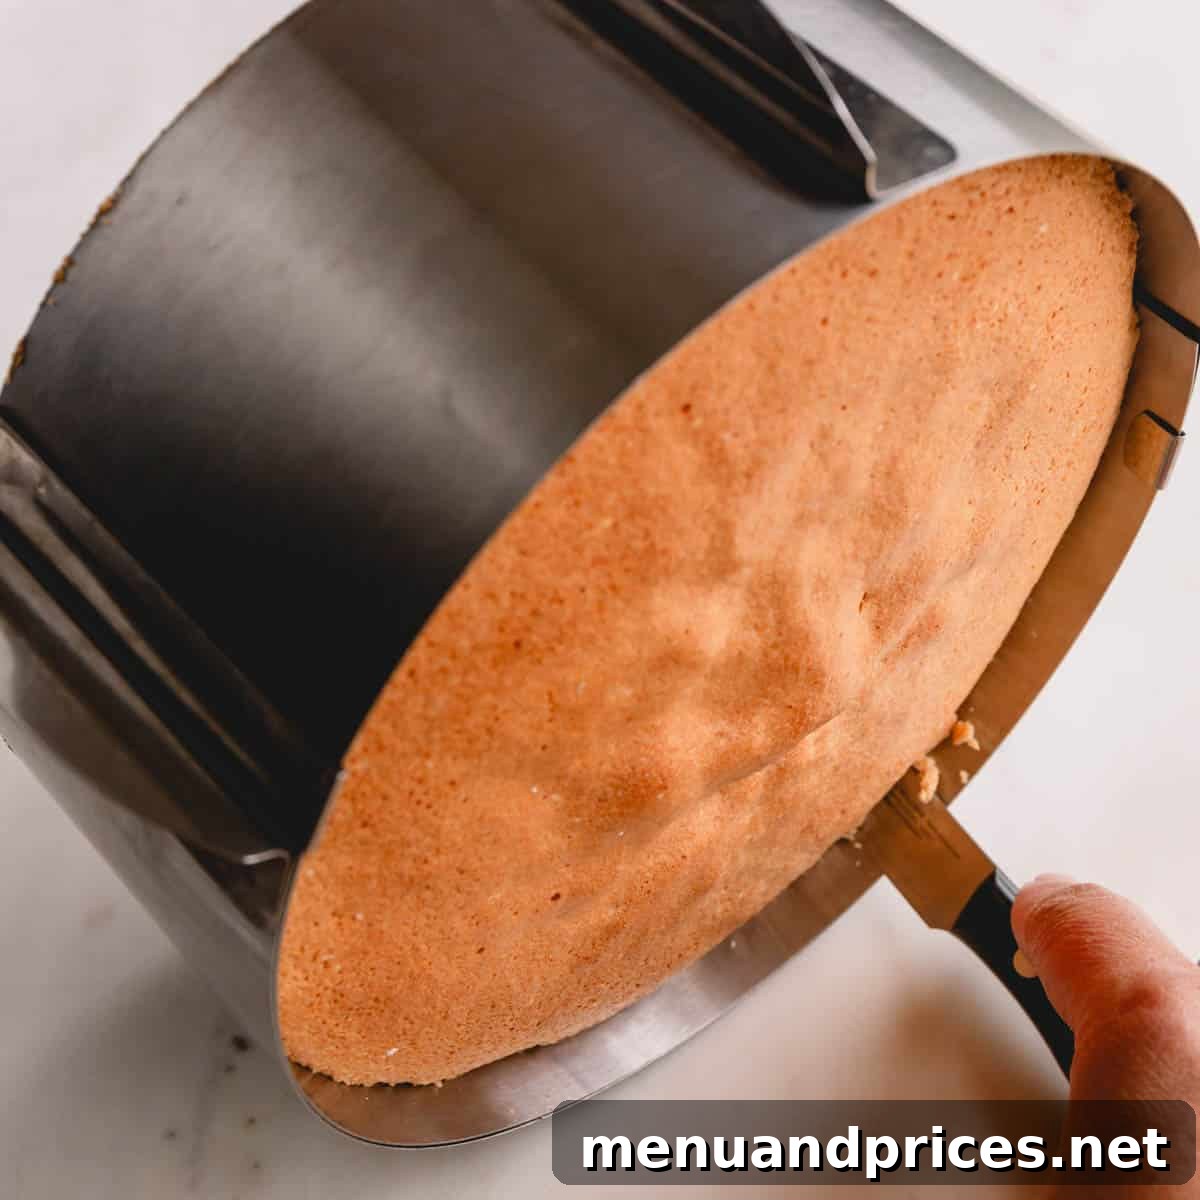
- Allow the cake to cool completely in the pan on a wire rack. Once fully cooled, carefully loosen the edges with a thin knife and invert the cake.
- Wrap the cooled cake tightly in plastic wrap and refrigerate for at least 3 hours, or ideally overnight. Chilling the sponge cake thoroughly makes it significantly easier to slice into even layers without crumbling, ensuring a professional finish.
2. Prepare the Essential Simple Syrup
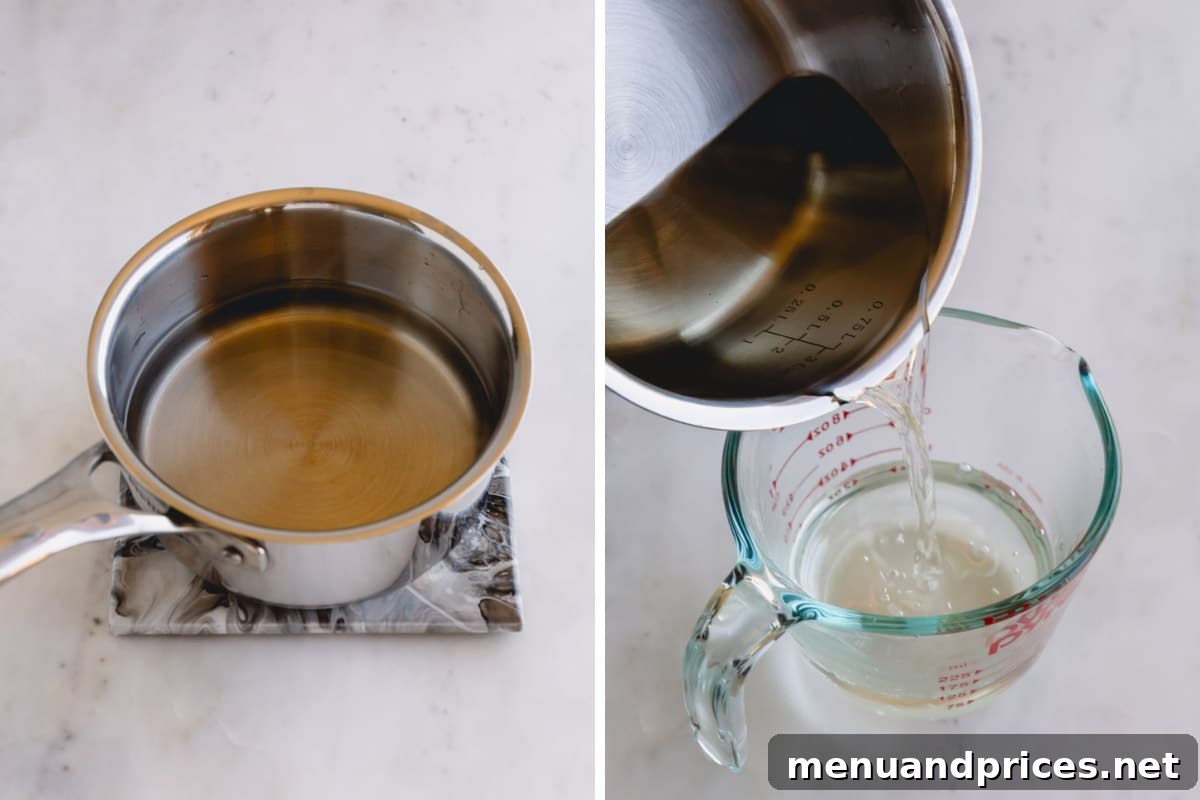
- In a small saucepan, combine 1 cup of water and ¾ cup of sugar.
- Bring the mixture to a gentle boil over medium heat, stirring occasionally, and then reduce heat to simmer until the sugar is completely dissolved.
- Remove the syrup from the heat and let it cool down completely to room temperature before using. This simple syrup can be made up to a week in advance and stored in the refrigerator.
3. Create the Luscious Raspberry Puree
- Combine raspberries (fresh or frozen), granulated sugar, and fresh lemon juice in a medium-sized saucepan. Bring the mixture to a boil over medium heat, stirring frequently to prevent sticking.
- Once boiling, reduce the heat to medium-low and let it simmer for at least 10 minutes, stirring gently but frequently. The longer it simmers, the thicker your puree will become, which is ideal for a cake filling.
- Carefully pour the warm sauce through a fine-mesh strainer into a clean bowl. Take your time to press and squeeze as much sauce as possible through the sieve, ensuring a smooth, seedless puree. Don’t forget to scrape any thicker pulp from the bottom of the sieve – it’s packed with flavor! This extra step for a seedless puree is absolutely worth the effort for a refined cake.
- Once strained, stir the raspberry puree until it’s nice and smooth. Cover the bowl and chill the puree for at least 1 hour, allowing it to thicken further as it cools.
Pro Tip: Achieving the Perfect Thick Puree
A thick raspberry sauce is essential for a stable cake filling that won’t ooze out. To achieve this, ensure you cook the raspberry puree for at least the recommended 10 minutes. Remember, the puree will continue to thicken significantly as it cools, so don’t be alarmed if it seems a little runny when warm.
4. Whip Up the Raspberry Cream Cheese Frosting
- Prepare the freeze-dried raspberries by crushing them into a fine powder. You can achieve this by placing them in a freezer bag and crushing with a rolling pin, or by pulsing them briefly in a food processor.
- Sift the crushed raspberry powder through a fine mesh sieve to remove any remaining seeds or larger bits. This ensures a perfectly smooth frosting.
- In a large mixing bowl, using a paddle attachment (if using a stand mixer), beat the softened cream cheese and unsalted butter on medium-high speed until the mixture is light and fluffy, usually about 1 minute. Ensure both ingredients are at room temperature to prevent lumps.
- Gradually add the powdered sugar, along with the raspberry powder and a pinch of kosher salt, to the cream cheese mixture. Beat on low speed for about 1 minute until just combined.
- Then, increase the speed to medium-high and continue to beat for approximately 3 minutes, until the frosting is wonderfully smooth, airy, and fluffy. Be careful not to overbeat, as this can make cream cheese frosting too soft.
- Transfer the prepared frosting into a piping bag fitted with your preferred round tip (a Wilton 2A round piping tip is excellent for this). This makes assembly much cleaner and easier.
5. Assemble Your Magnificent Raspberry Layer Cake
- Using a long serrated knife or a cake slicing kit (or a cheaper slicing kit option), carefully slice the thoroughly chilled sponge cake into four even layers. This is much easier with a cold cake.
- Place the bottom cake layer onto your chosen serving platter or cake stand.
Pro Tip: Keep Your Serving Platter Pristine!
To ensure a clean and professional presentation, arrange 3-4 strips of parchment or wax paper slightly underneath the edges of your bottom cake layer on the serving platter. These can be easily pulled away once the cake is fully frosted, leaving a spotless platter.
- Brush ¼ cup of the chilled simple syrup evenly over the entire surface of the cake layer. This is essential for a moist cake.
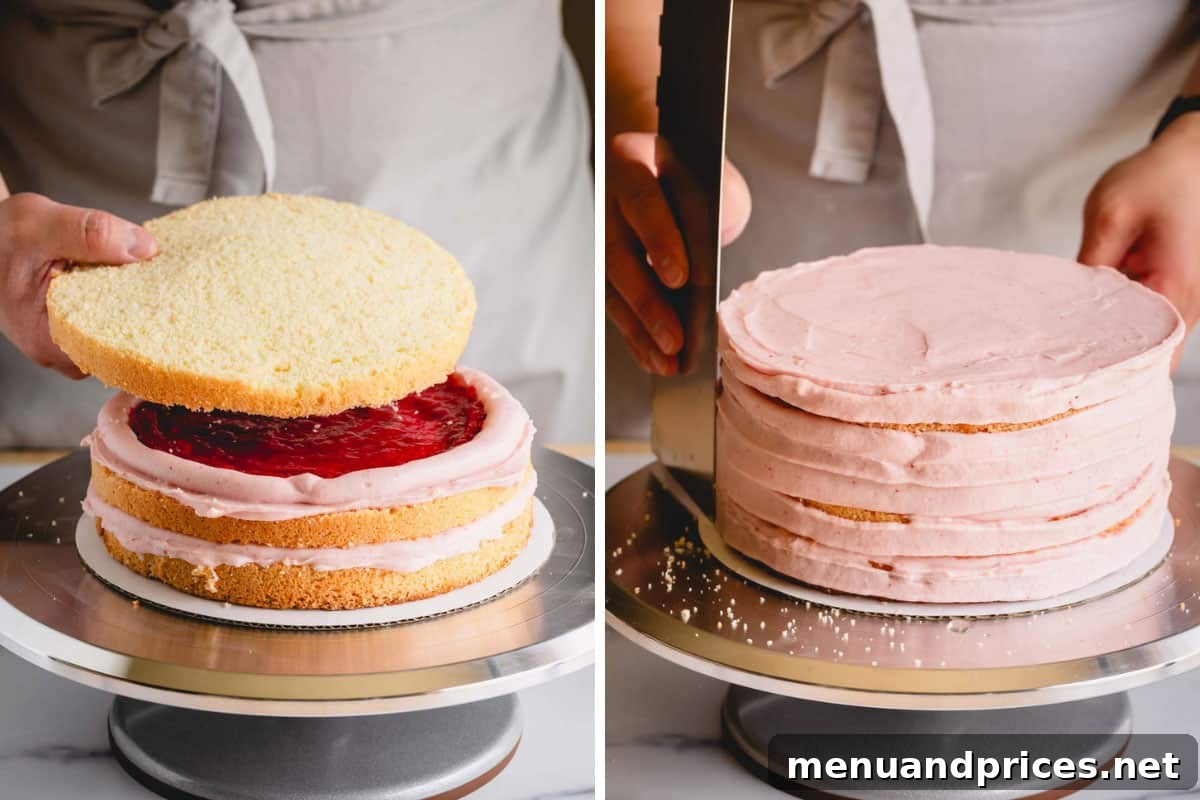
- Pipe a generous layer of the raspberry cream cheese frosting over the syrup-soaked cake. Use an offset spatula to gently smooth it out evenly.
- Next, pipe a decorative border of frosting around the very edges of the cake layer. This creates a “dam” for your fruit filling. Seal this border by gently swiping the end of an offset spatula around the inside edge, pressing it slightly against the piped border.
- Spoon approximately ⅓ of the chilled raspberry puree into the middle of the cake, spreading it evenly within the frosting border. The border acts like a wall, preventing the puree from oozing out.
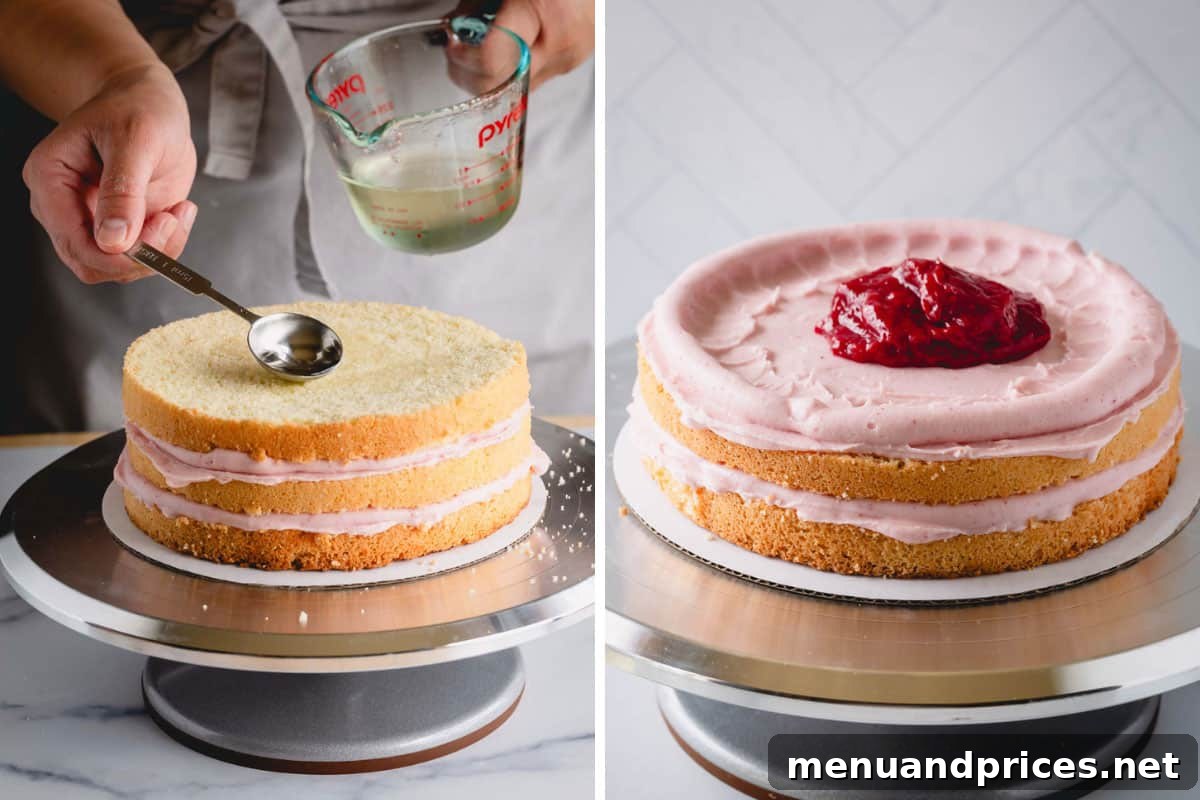
- Carefully place the next cake layer on top, and repeat the process: brush with simple syrup, apply frosting, pipe a border, and fill with raspberry puree. Continue with the remaining layers.
- For the very top layer, it’s best to place it upside down. This ensures a perfectly flat and smooth top surface for frosting, as the bottom of the cake is typically flatter.
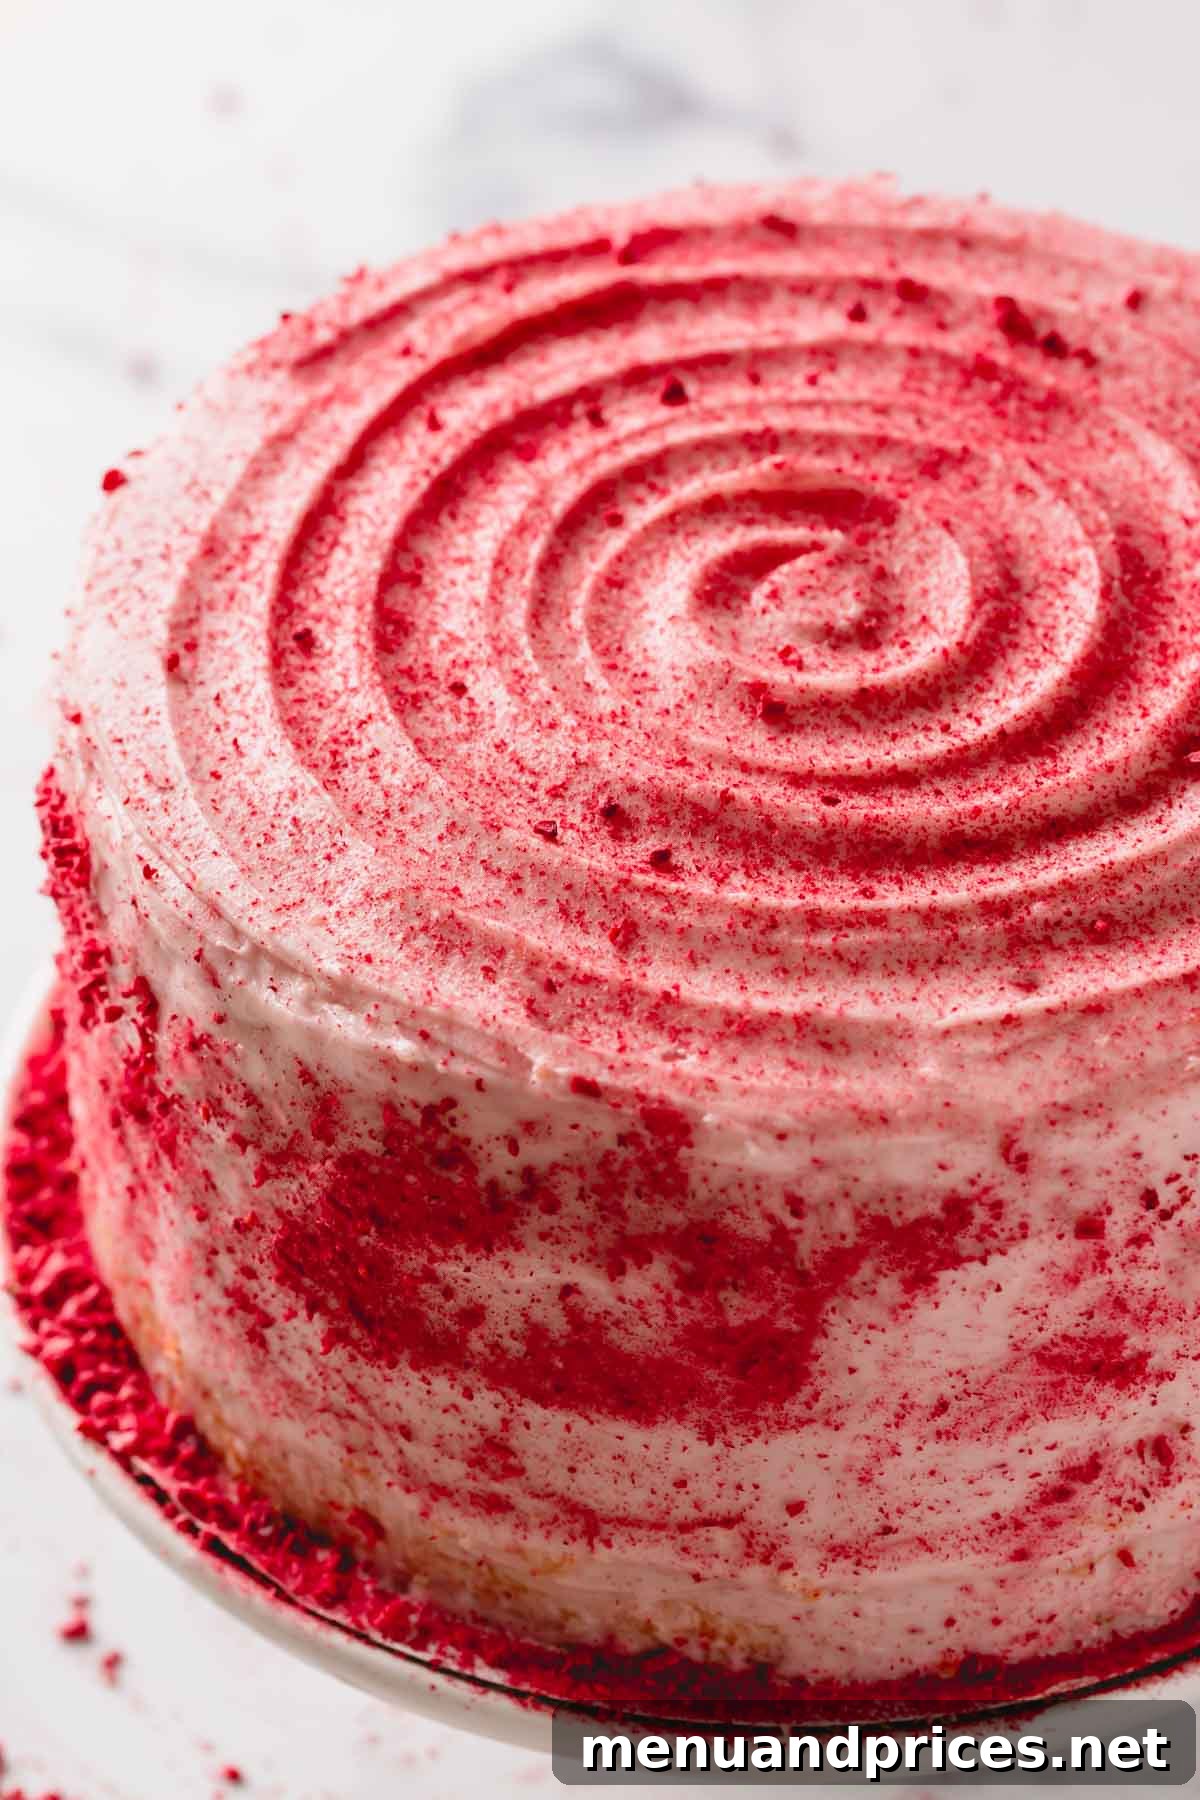
- Once all layers are stacked, coat the entire cake with the remaining raspberry cream cheese frosting. Use an offset spatula to smooth the frosting evenly around the sides and top, achieving a neat and polished finish.
- Finally, decorate your raspberry layer cake according to your preference! For a beautiful yet simple touch, I dusted the entire cake with additional raspberry powder for an extra pop of color and flavor. Fresh raspberries and mint leaves also make lovely garnishes.
Essential Tips for a Flawless Raspberry Layer Cake
Achieving a bakery-worthy cake is easier with these expert tips:
- Baking in Multiple Pans: If you don’t own a single tall 8-inch cake pan, you can absolutely bake the sponge cake batter in two separate 8-inch cake pans. Just remember to adjust your baking time; smaller pans will only require about 25-30 minutes in the oven. Always check for doneness with a toothpick.
- Precision in Egg Separation: The success of a light and airy sponge cake hinges on perfectly separated egg whites and yolks. Any trace of fat (yolk) in the whites will prevent them from whipping into stiff, stable peaks. For a reliable method, explore my detailed guide on how to separate egg whites and yolks using the shell-to-shell technique with separate bowls.
- Sponge Cake Troubleshooting Guide: If you’re new to sponge cakes or encounter issues, my comprehensive 3-Ingredient Classic Sponge Cake recipe offers invaluable troubleshooting advice. It addresses common questions like how to properly whip egg whites for maximum volume and how to prevent your delicate sponge cake from deflating.
- Using Frozen Raspberries for Puree: Don’t worry if you only have frozen raspberries for the puree! There’s no need to thaw them beforehand. Any extra moisture released from the frozen berries will simply evaporate during the simmering process, contributing to a flavorful, thick sauce.
- Room Temperature Ingredients for Frosting: To achieve the smoothest, fluffiest raspberry cream cheese frosting without any lumps, ensure both your cream cheese and unsalted butter are at proper room temperature before you begin mixing. This allows them to cream together effortlessly and incorporate air.
Smart Make-Ahead Strategies
Planning is key to enjoyable baking, especially for multi-component cakes. Here’s how you can prepare various elements of this raspberry layer cake in advance:
You can assemble the entire raspberry layer cake up to 1 day in advance. Store it securely covered in the fridge, and for optimal flavor and texture, allow it to come to room temperature for about 30-60 minutes before serving.
Alternatively, prepare each cake component and store them separately until you’re ready for the grand assembly:
- Sponge Cake Layers: Baked sponge cake layers are remarkably versatile. They can be wrapped tightly in plastic wrap and stored in the refrigerator for up to 1 week, or even frozen for up to a month. If frozen, thaw them in the refrigerator overnight before slicing and assembling.
- Raspberry Cream Cheese Frosting: This luscious frosting can be made up to 3 days in advance. Transfer it to an airtight container or cover it tightly with plastic wrap and store it in the refrigerator. Before using, allow it to come to room temperature for about 30 minutes, then re-whip it briefly to restore its fluffy consistency.
- Simple Syrup: Your homemade simple syrup will stay fresh and ready to use in the refrigerator for up to 1 week when stored in a sealed container.
- Raspberry Puree: The vibrant raspberry puree can also be prepared up to 1 week in advance. Store it in an airtight container in the refrigerator, ensuring it’s well-chilled before using as a cake filling.
Storing Your Delicious Raspberry Layer Cake
To keep your leftover raspberry layer cake as fresh and delicious as possible, follow these storage recommendations:
Cover any remaining cake tightly with plastic wrap or place it in an airtight cake carrier. Store it in the refrigerator for 3-4 days. Cream cheese frosting requires refrigeration. For the best taste and texture, allow the cake to sit at room temperature for approximately 30 minutes before serving again. This brings out the full range of flavors and softens the frosting to its ideal creamy consistency.
Frequently Asked Questions About Raspberry Layer Cake
The key to a well-contained fruit filling in a layered cake is creating a sturdy “frosting dam” or barrier. After applying the main layer of frosting, pipe a continuous ring of frosting around the very edge of each cake layer. This ring acts like a protective wall, keeping the fruit filling (like our raspberry puree) perfectly nestled inside, preventing any messy leaks or seepage from the sides of the cake. This technique ensures a neat and stable cake structure.
While convenient, I strongly advise against substituting homemade raspberry puree with store-bought raspberry jam. Store-bought jams often vary greatly in thickness, texture, and more importantly, sweetness. Our homemade puree is designed to have a specific tart-sweet balance that perfectly complements the cake and frosting. Most jams are significantly sweeter, and using them would make this cake excessively sugary, overwhelming the delicate flavors. The texture might also be too loose, leading to a less stable cake.
No, it’s not recommended to use fresh raspberries in the cream cheese frosting. Fresh raspberries contain a significant amount of moisture, which would thin out the frosting, giving it a watery, unstable consistency. This would make it difficult to pipe and achieve the desired fluffy texture. Freeze-dried raspberries, on the other hand, provide concentrated raspberry flavor and color without adding any unwanted liquid, ensuring a perfectly stable and flavorful frosting.
For the best possible texture and stability in your cream cheese frosting, always opt for full-fat, block-style cream cheese. Avoid whipped cream cheese or cream cheese from a tub, as these often have added water or stabilizers that can result in a thinner, less pipeable frosting. Bringing the block cream cheese to room temperature before mixing is also crucial.
Explore More Irresistible Layer Cake Recipes
If you loved making this raspberry masterpiece, you’ll surely enjoy these other fantastic layer cake recipes from our collection:
- Super Tall Red Velvet Layer Cake
- Tropical Pineapple Layer Cake
- Decadent Tiramisu Layer Cake
- Bright Lemon Layer Cake with Swiss Meringue Buttercream
Happy baking, and enjoy every sweet, flavorful slice!
Raspberry Layer Cake
Shinee Davaakhuu
1 hour
30 minutes
40 minutes
3 hours
5 hours
10 minutes
12 servings
1 8-inch 4-layer cake
Comment
Print Recipe
Ingredients
Sponge Cake:
- 6 large eggs at room temperature
- 1 cup (200 g) granulated sugar divided
- 1 ½ cups (180 g) plain cake flour
- ½ teaspoon kosher salt
Simple Syrup:
- 1 cup water
- ¾ cup (150 g) granulated sugar
Raspberry Puree:
- 12 oz (340 g) fresh or frozen raspberries Note 1
- ¼ cup (50 g) granulated sugar Note 2
- 2 tablespoons fresh lemon juice
Raspberry Cream Cheese Frosting:
- ½ oz (15 g) freeze-dried raspberries
- 16 oz (450 g) cream cheese at room temperature Note 3
- ½ cup (113 g) unsalted butter at room temperature
- 4 cups (520 g) powdered sugar
- ⅛ teaspoon kosher salt
Equipment
-
1 (8-inch) tall cake pan at least 3-inch tall
-
1 Cake Slicing Kit optional
Instructions
To make the cake:
-
Preheat the oven to 350°F (177°C). Line the bottom of 1 8-inch springform pan (at least 3 inches tall) with parchment paper. No need to grease the pan. (Alternatively, you can bake the cake in two 8-inch cake pans, adjusting time.)
-
Separate egg whites and yolks, making sure not even a little bit of egg yolk gets into the whites. (TIP: It’s easier to separate the egg when they’re cold right out of the fridge.)
-
In a mixing bowl with a whisk attachment, whisk together egg yolks and ½ cup of sugar until pale and tripled in volume, about 5 minutes.
-
Meanwhile, sift flour and salt together.
-
In another clean mixing bowl with a whisk attachment, combine egg whites and the remaining ½ cup of sugar.
-
Beat on medium speed until soft peaks form.
-
Using a spatula, add 1/3 of the whipped egg whites into the egg yolk mixture and gently fold until mostly smooth. Add the remaining egg whites and gently fold until smooth.
-
Add the sifted flour mixture into the batter in 3 stages, gently folding the batter well after each addition until just combined.
-
Pour the batter into the prepared pan and smooth the top.
-
Bake the cake until an inserted toothpick comes out clean, about 40 minutes. Do not open the oven door for at least the first 30 minutes! (If baking in two 8-inch cake pans, bake for 25-30 minutes.)
-
Let the cake cool completely in the pan on a wire rack. Then, loosen the edges with a knife and invert the cake. Wrap the cake tightly in plastic wrap, and refrigerate for at least 3 hours or preferably overnight. Sponge cake is much easier to slice when it’s thoroughly chilled.
To make the simple syrup:
-
In a small saucepan, combine 1 cup water and ¾ cup granulated sugar.
-
Bring to a boil and simmer until sugar is fully dissolved. Remove from heat and cool completely. The simple syrup can be made up to 1 week in advance and stored in the refrigerator.
To make raspberry puree:
-
In a medium saucepan, place raspberries, sugar, and lemon juice. Bring to a boil over medium heat, stirring frequently.
-
Reduce the heat to medium-low and simmer the sauce for at least 10 minutes, gently stirring constantly. (Be sure to cook the sauce for at least 10 minutes for a thick consistency, as it will thicken further upon cooling.)
-
Pour the sauce through a fine-mesh strainer to remove the seeds into a clean bowl. Take your time here and squeeze as much sauce as you can. This extra step is totally worth it for a smooth puree! Don’t forget to scrape off the thicker pulp from the bottom of the sieve.
-
Then stir the sauce until nice and smooth. Chill the sauce, covered, for at least 1 hour. Store in an airtight container for up to 1 week.
To make raspberry cream cheese frosting:
-
Place the freeze-dried raspberries in a freezer bag and crush them with a rolling pin until a fine powder.
-
Sift the crushed raspberries through a fine mesh sieve. Discard any remaining seeds and large bits.
-
In a mixing bowl with a paddle attachment, beat room temperature cream cheese and butter on medium-high speed until fluffy, about 1 minute.
-
Add powdered sugar, raspberry powder, and kosher salt.
-
Beat on low speed for a minute until combined. Then increase the speed to medium-high and continue to beat until smooth and fluffy, about 3 minutes.
-
Transfer the frosting into a piping bag fitted with a round tip. (I use a Wilton 2A round piping tip for neat application.)
To assemble the cake:
-
Slice the chilled cake into 4 even layers. (I recommend using a cake slicing kit, or this more affordable version.)
-
Place the bottom cake layer on a serving platter. (TIP: Place 3-4 strips of parchment or wax paper on the bottom to keep the serving platter clean during frosting.)
-
Brush ¼ cup of chilled simple syrup evenly all over the top of the cake layer.
-
Pipe a layer of cream cheese frosting all over the cake and smooth it with an offset spatula. Then pipe a border around the edges of the cake layer to create a dam for the filling. Seal the border by gently swiping the end of an offset spatula around the inside of the piped border (see pictures above for visual guidance).
-
Spoon 1/3 of the raspberry puree in the middle and spread it evenly inside the frosting border.
-
Place the next cake layer on top and repeat with the remaining layers until all are stacked.
-
Place the top cake layer upside down to ensure a nice, flat top surface. Coat the entire cake with the remaining frosting and smooth it with an offset spatula for a clean finish.
-
Decorate the cake as desired. Here, I simply dusted the entire cake with raspberry powder for a beautiful, subtle touch.
⭐️ Did you make this recipe?
Please leave a review and let us know how you liked it!
Tips & Notes
Note 2: You may substitute raw honey for granulated sugar in the raspberry puree, using a 1:1 ratio.
Note 3: For the best results with your cream cheese frosting, always use full-fat, brick-style cream cheese, rather than softer cream cheese from a tub. Ensure it’s at room temperature for a smooth consistency.
Make-Ahead Tip: All components of the cake can be made separately well in advance to simplify the baking process.
1. Sponge cake layers can be baked and frozen for up to a month, or refrigerated for up to a week. Thaw frozen cake in the fridge overnight before use.
2. The cream cheese frosting can be prepared up to 3 days in advance. Cover tightly with plastic wrap and refrigerate. Re-whip briefly before using to restore fluffiness.
3. Simple syrup can also be made a week in advance. Refrigerate until ready to use.
4. Raspberry puree can be prepared up to a week in advance and stored in the refrigerator.
You can assemble the entire cake 1 day in advance and store it in the fridge, covered. Bring it to room temperature for about 30 minutes before serving for optimal flavor.
Total Time Calculation:
– Sponge Cake: 20 min prep and 40 min bake
– Raspberry Puree: 5 min prep, 15 min cook
– Simple Syrup: 10 min
– Frosting: 10 min
– Assemble: 30 min
Nutrition
1 serving
588kcal
90g
7g
23g
75g
275mg
Dessert
American
Did you make this?
Leave a rating and your feedback. Thank you!