
Strawberries are a delightful treat, bursting with sweet flavor and vibrant color. Whether you enjoy them fresh, in smoothies, jams, or desserts, maximizing their freshness is key to savoring every berry. This comprehensive guide will teach you the ultimate method for cleaning strawberries using vinegar, along with expert tips for proper storage, freezing, and answering all your frequently asked questions. Get ready to extend the shelf life of your strawberries and keep them perfectly pristine!
Why Thoroughly Cleaning Strawberries is Essential
Fresh strawberries are a staple in many households, especially when they’re in season. I personally love keeping a fresh supply in my fridge, ready for snacking or to incorporate into a wide variety of recipes, such as strawberry pear smoothies or homemade strawberry jam. However, beyond just rinsing them under water, there are crucial reasons to give your strawberries a proper deep clean:
- Eliminate Contaminants: Strawberries, with their porous surface and direct contact with soil, are susceptible to carrying dirt, harmful bacteria, and even tiny insects. Commercial strawberries are also often treated with pesticides. A simple rinse isn’t enough to remove these hidden impurities, which can be unappetizing and potentially unhealthy. A deep clean ensures you’re eating only the fruit itself, free from unwanted guests and chemicals.
- Extend Shelf-Life Significantly: One of the most common frustrations with fresh berries is how quickly they can spoil. The primary culprits are mold spores and bacteria that naturally cling to the fruit’s surface. A thorough vinegar wash acts as a natural disinfectant, killing these microscopic organisms. By effectively sanitizing the berries, you drastically slow down the spoilage process, allowing your delicious strawberries to stay fresh and vibrant for much longer in the refrigerator. This means less food waste and more enjoyment!
- Preserve Natural Flavor: While it might seem counterintuitive, properly cleaning your strawberries can actually enhance their natural flavor. Removing residual dirt, pesticide residues, and even slight off-flavors from early spoilage ensures that when you bite into a strawberry, you’re experiencing its pure, unadulterated sweetness and juiciness.
How to Clean Strawberries with a Vinegar Wash for Optimal Freshness
Using a simple vinegar and water solution is one of the most effective and natural ways to deep clean your strawberries. White vinegar is a mild acid that acts as a powerful antimicrobial agent, safely eliminating bacteria and mold spores without leaving behind a vinegary taste, provided you use the correct ratio and rinse thoroughly. Here’s a step-by-step guide to achieving perfectly clean berries:
- Prepare the Cleaning Solution: Grab a large mixing bowl. For every 1 cup of distilled white vinegar you use, add 3 cups of cold water. This 1:3 ratio is crucial – it’s strong enough to sanitize effectively but diluted enough to prevent any sour taste from transferring to your berries. Adjust the quantities based on how many strawberries you’re cleaning, ensuring enough liquid to fully submerge them.
- Submerge and Swish the Berries: Gently add your fresh strawberries to the vinegar and water mixture. Ensure they are completely submerged. Using your hands, gently swish the berries around in the liquid for about 30 seconds to a minute. This gentle agitation helps to dislodge dirt, debris, and any lingering organisms from the fruit’s delicate surface. Let them soak for an additional 5 minutes to allow the vinegar to work its magic.
- Rinse Thoroughly: After the soaking period, carefully drain the vinegar water from the bowl. Immediately rinse the strawberries under cold running water for at least a minute. Alternatively, you can fill the bowl with fresh cold water, swish the berries again, drain, and repeat once more. This step is vital to wash away any remaining vinegar solution and ensure your berries taste perfectly fresh.
- Air Dry Completely: This is perhaps the most critical step for extending shelf life. Excess moisture is the enemy of fresh berries, as it creates an ideal environment for mold growth. Arrange your rinsed strawberries in a single layer on a baking sheet lined with several layers of paper towels or a clean kitchen towel. Allow them to air dry completely, which can take anywhere from 30 minutes to an hour, depending on humidity levels. You can also gently pat them dry with additional paper towels. Ensure there is no visible moisture before moving to the storage phase.
- Enjoy or Store: Once your strawberries are completely dry, they are ready to be enjoyed! If you’re not eating them immediately, proceed to store them properly in the refrigerator to maintain their extended freshness.

Optimal Storage Methods for Freshly Washed Strawberries
Once your strawberries are sparkling clean and thoroughly dry, proper storage is crucial to lock in that freshness and prevent premature spoilage. Here are the best methods to keep your berries vibrant for as long as possible:
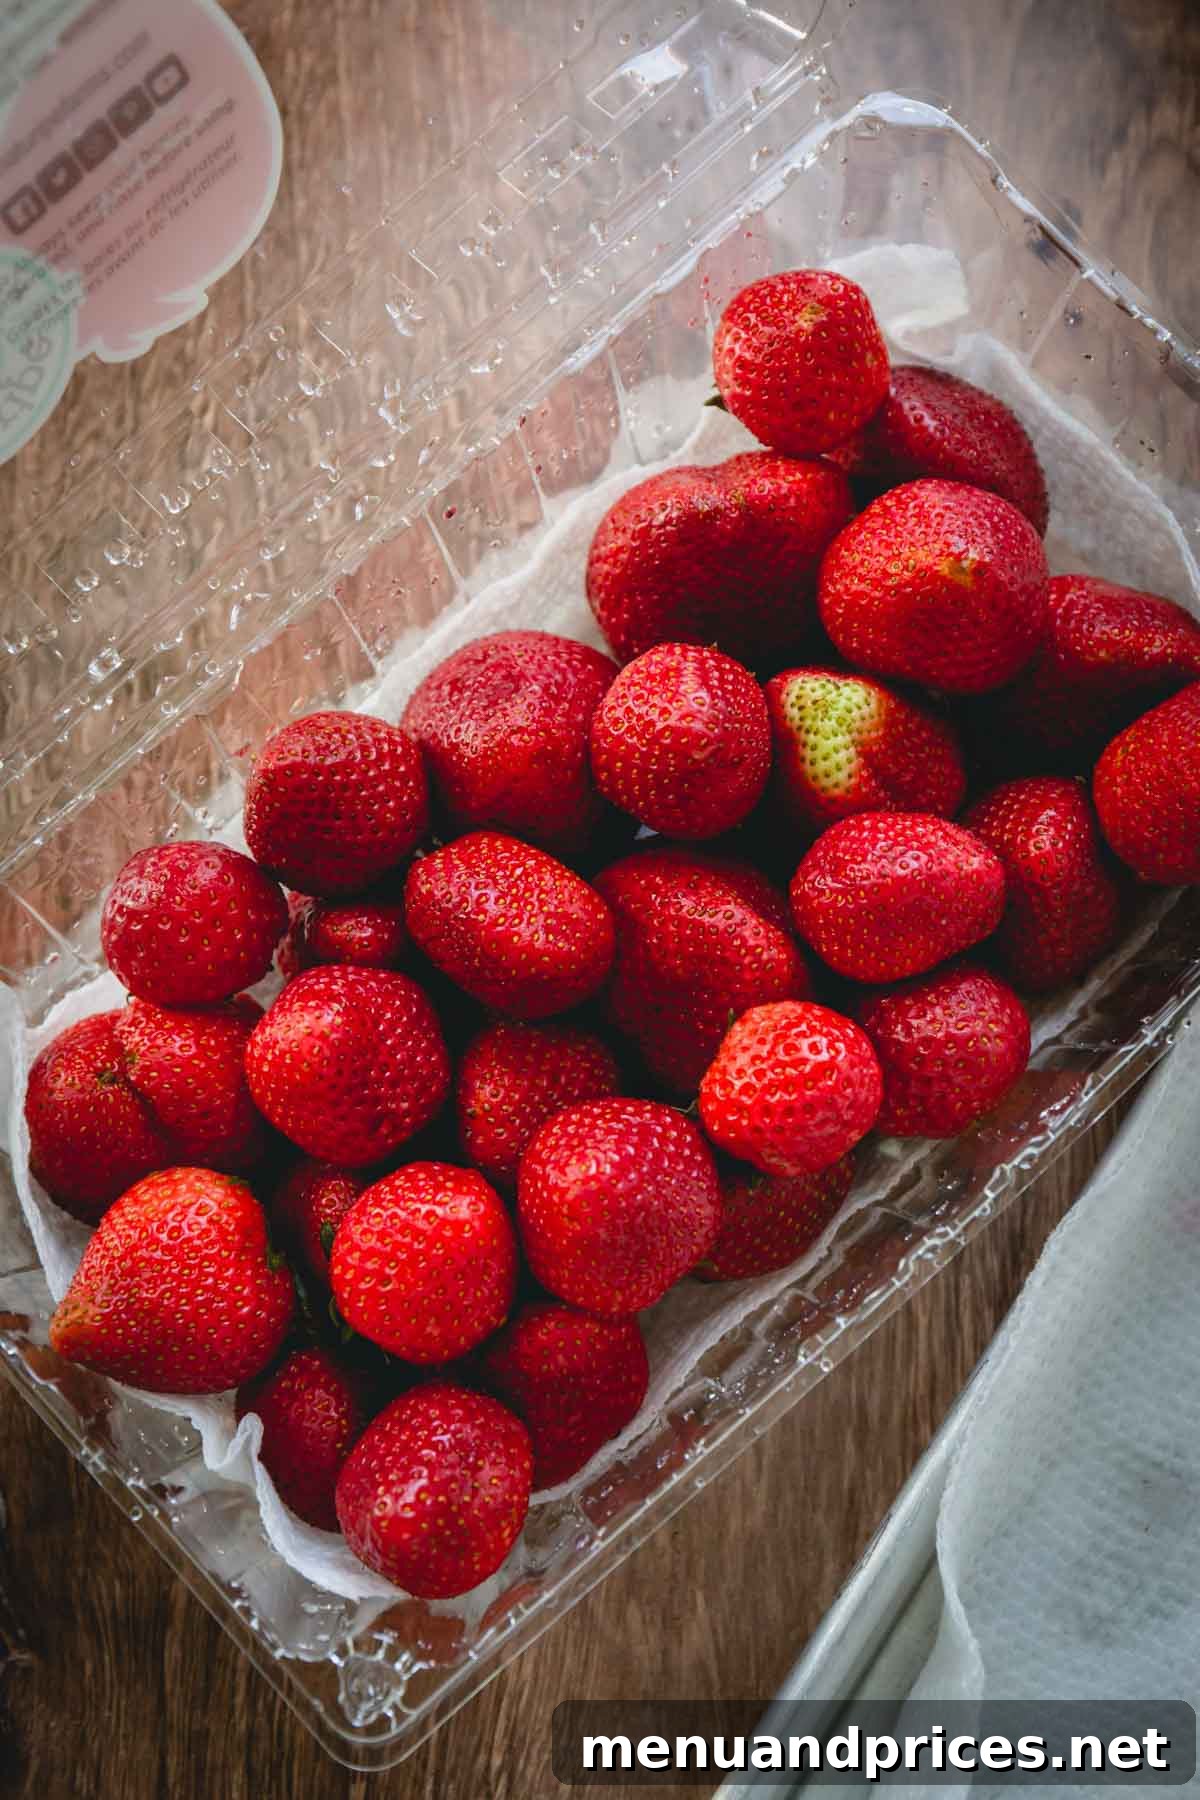
- Paper Towel-Lined Container Method: This is a highly recommended technique. Line a food storage container (such as a glass container with a lid or a shallow plastic container) with a layer of paper towels. Carefully arrange the clean, completely dry strawberries in a single layer, stem side down if possible. Add another layer of paper towels on top before placing the lid. The paper towels absorb any residual moisture, which is key to preventing mold. This method promotes air circulation around each berry, significantly extending their freshness.
- Reusing Clamshell Containers with a Twist: If you prefer to use the original plastic clamshell container your strawberries came in, you can still improve their storage. Line the bottom of the container with a paper towel. Since these containers often have small ventilation holes, the strawberries don’t need to be quite as bone-dry as with airtight containers, as the existing air circulation will aid in natural drying. However, ensure they are still as dry as possible before placing them inside. You can also place an additional paper towel on top of the berries.
- Maximize Refrigerator Life: Stored correctly using these methods, freshly cleaned strawberries can last remarkably long in the refrigerator – typically up to 7 days, and sometimes even up to 10 days! Always store them in the crisper drawer, which usually has higher humidity levels that are beneficial for fruit.
Pro Tip: Year-Round Enjoyment!
Don’t let seasonal availability limit your strawberry cravings! For year-round enjoyment, consider freezing your berries. It’s a fantastic way to preserve their taste and nutritional value for smoothies, desserts, or baking.
How to Freeze Strawberries for Long-Term Storage
Freezing strawberries is an excellent way to capture their peak flavor and enjoy them long after their season has ended. Frozen strawberries are perfect for smoothies, sauces, jams, and baking. Here’s how to freeze them properly to prevent clumping and maintain quality:
- Prepare the Berries: Begin by washing and thoroughly cleaning your strawberries using the vinegar method described above. Ensure they are completely dry before proceeding.
- Hull and Cut: Once dry, gently remove the green tops (hulling) and any white centers of the fruit. This ensures you’re freezing only the best parts of the berry. If you prefer, you can half or quarter larger strawberries at this stage, which can be convenient for later use.
- Flash Freeze on a Baking Sheet: This crucial step prevents the berries from clumping together in the freezer bag. Arrange the hulled strawberries in a single layer on a baking sheet lined with a silicone mat or parchment paper. Make sure the berries aren’t touching each other. Place the baking sheet in the freezer and freeze until the berries are solid, which usually takes at least 2 to 4 hours.
- Transfer to Freezer Bags: Once the strawberries are completely frozen solid, transfer them from the baking sheet into heavy-duty freezer bags or airtight freezer-safe containers. Remove as much air as possible from the bags before sealing to prevent freezer burn. Label the bags with the date.
- Store and Enjoy: Store your frozen strawberries in the freezer for up to 6 to 12 months. They can be used directly from frozen in most recipes or thawed slightly for others.
Essential Tips for Cleaning and Storing Strawberries Like a Pro
Achieving perfectly clean and long-lasting strawberries isn’t complicated, but a few key details can make all the difference. Keep these expert tips in mind for the best results:
- Adhere to the Proper Vinegar-to-Water Ratio: The ideal balance for your cleaning solution is 1 part distilled white vinegar to 3 parts cold water. This ratio is scientifically effective at breaking down bacteria and mold spores without imparting any noticeable vinegar taste to your delicate berries. Using too much vinegar can affect the flavor, while too little may not be effective enough for deep cleaning. Always measure to ensure optimal results.
- Ensure Adequate Swishing and Soaking: Simply submerging the fruit isn’t enough; active participation in the cleaning process is important. Gently move and swish the berries around in the vinegar solution. This physical agitation helps to loosen and dislodge stubborn dirt, debris, and tiny organisms that might be clinging to the strawberry’s textured surface. A 5-minute soak after swishing allows the vinegar to thoroughly penetrate and sanitize. Without proper movement, the berries will only get wet, not truly clean.
- Dry Berries Completely – No Exceptions: This cannot be overstated: excess moisture is the number one enemy of fresh strawberries, as it creates the perfect breeding ground for mold. After rinsing, arrange your washed strawberries in a single layer on a baking sheet lined with clean paper towels or a microfiber cloth. Allow them ample time to air dry completely. For faster drying, you can gently pat them dry with additional clean paper towels, making sure to get into all the crevices. Even a tiny amount of lingering moisture can drastically reduce their shelf life.
- Select High-Quality Berries: The cleaning and storage process begins at the grocery store or farmer’s market. Choose strawberries that are firm, bright red, and free of soft spots, mold, or discoloration. Inspect the bottom of the container as well. Starting with fresh, healthy berries will give you the best chance for extended freshness after cleaning.

Frequently Asked Questions About Cleaning and Storing Strawberries
Should I remove the stems from strawberries before washing them?
No, it is highly recommended to keep the green stems (caps) attached to the strawberries before washing. Removing the stems prematurely can expose the delicate flesh of the fruit to water, causing it to absorb excess moisture. This can negatively impact the taste, texture, and overall shelf life of the fruit, making it mushy and encouraging spoilage. Always wait until after you have washed, rinsed, and thoroughly dried your strawberries to remove the stems.
Is it better to use salt or vinegar to clean strawberries?
Both vinegar and salt can be effective for cleaning strawberries, and each has its proponents. However, many find vinegar to be slightly more effective as an antimicrobial agent. To clean strawberries with salt, combine 1 tablespoon of salt with every 1 cup of water. Submerge your strawberries in this mixture for about 5 minutes, then drain, rinse thoroughly under cold water, and pat dry. While salt works, the vinegar method is generally preferred for its strong yet safe sanitizing properties.
How long can strawberries sit in vinegar water?
For the best results and to ensure thorough cleaning without affecting the fruit’s integrity, I recommend letting strawberries soak in the vinegar and water mixture for approximately 5 minutes after an initial swish. While they can stay submerged for up to 20 minutes without significant harm, prolonged soaking might subtly alter their texture or flavor, though typically not if the vinegar-to-water ratio is correct.
Is it better to wash fruit with vinegar or baking soda?
Both vinegar and baking soda are effective, natural alternatives to plain water for washing fruits and vegetables, including strawberries. Vinegar is a mild acid, excellent for killing bacteria and mold. Baking soda, being an alkaline substance, is also great at breaking down pesticides and dirt. To use baking soda, combine 1 teaspoon with every 2 cups of water, then follow the same steps as the vinegar wash: submerge, swish, soak for 5-10 minutes, rinse thoroughly, and dry completely. Both methods have their merits, and personal preference often dictates which one you choose.
Can I use apple cider vinegar instead of white vinegar?
While apple cider vinegar (ACV) does have similar acidic properties to white vinegar, it also has a stronger, more distinct flavor. Using ACV to clean strawberries might leave a subtle apple cider taste on your berries, even after rinsing. For this reason, distilled white vinegar is generally recommended as it is neutral in flavor and equally effective as a disinfectant, ensuring the pure taste of your strawberries shines through.
Delicious Strawberry Recipes to Try
Now that you’re an expert in cleaning and storing strawberries for maximum freshness, it’s time to put those juicy, clean berries to good use! Here are some delightful recipes that highlight the incredible versatility of this beloved fruit:
- Strawberry Macarons
- Strawberry Matcha Roll Cake
- Strawberry Cheesecake Tart
- Strawberry Banana Ice Cream

How to Clean Strawberries (for Longer Storage)
Shinee Davaakhuu
5
5
3 serving
Ingredients
-
1 lb
(450g) fresh strawberries -
1 cup
(240ml) distilled white vinegar Note 1
Equipment
-
1 large bowl
Instructions
-
Fill a large bowl with 1 cup of white vinegar and 3 cups of cold water. (See Note 1)
-
Add fresh strawberries and gently swish them around for about half a minute. Let them soak for an additional 5 minutes.
-
Drain the vinegar water from the bowl. Rinse the strawberries thoroughly under fresh cold running water or by filling the bowl with fresh water and swishing them.
-
Arrange the rinsed strawberries in a single layer on a baking sheet lined with paper towels. Allow the strawberries to air dry completely for several minutes, or gently pat them dry with more clean paper towels. (TIP: Ensure the strawberries are as dry as possible, as any excess moisture promotes mold growth and reduces shelf life.)
-
Transfer the completely dry strawberries to a food storage container lined with a paper towel, arranging them stem side down. (You can also reuse their original plastic clamshell container; in this case, they don’t need to be quite as thoroughly dry due to the existing air circulation.)
-
Store the prepared strawberries in the refrigerator. With this method, strawberries can last exceptionally well, often up to 7-10 days in the fridge!
⭐️ Enjoy your clean strawberries!
Tips & Notes
Storing Tips:
– Store clean, dry strawberries in the fridge for up to 7-10 days.
– To freeze: wash, dry, remove stems and white centers, then transfer the strawberries to a single layer on a baking sheet to flash freeze. Once solid, move them to a sealable freezer bag or airtight container. They can be frozen for up to 6-12 months.
Nutrition
1 cup
48kcal
12g
1g
0.5g
7g
2mg
Snack
American

Enjoy your perfectly clean and fresh strawberries!
Share your tips and favorite recipes with us.