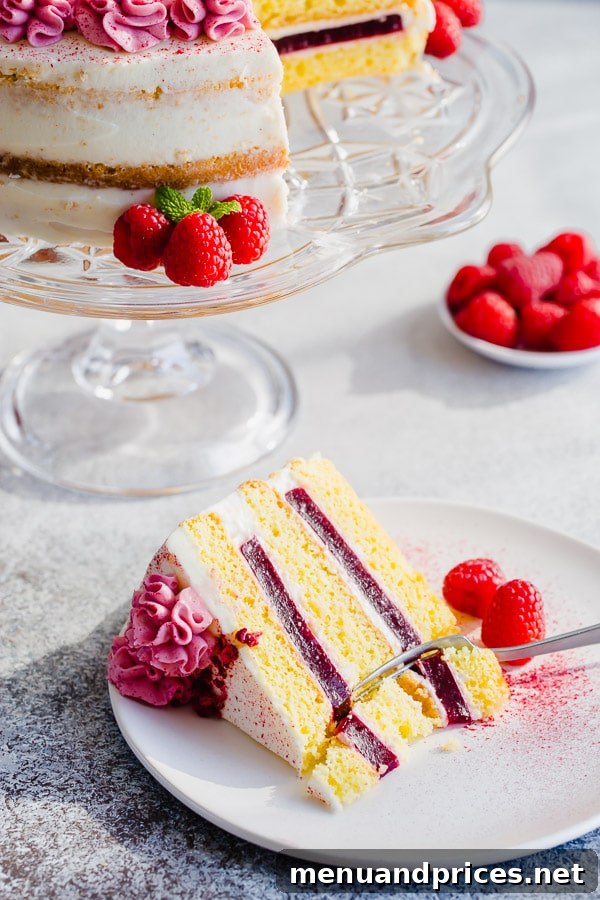
Ultimate Raspberry Cake with Cream Cheese Frosting and Homemade Jello
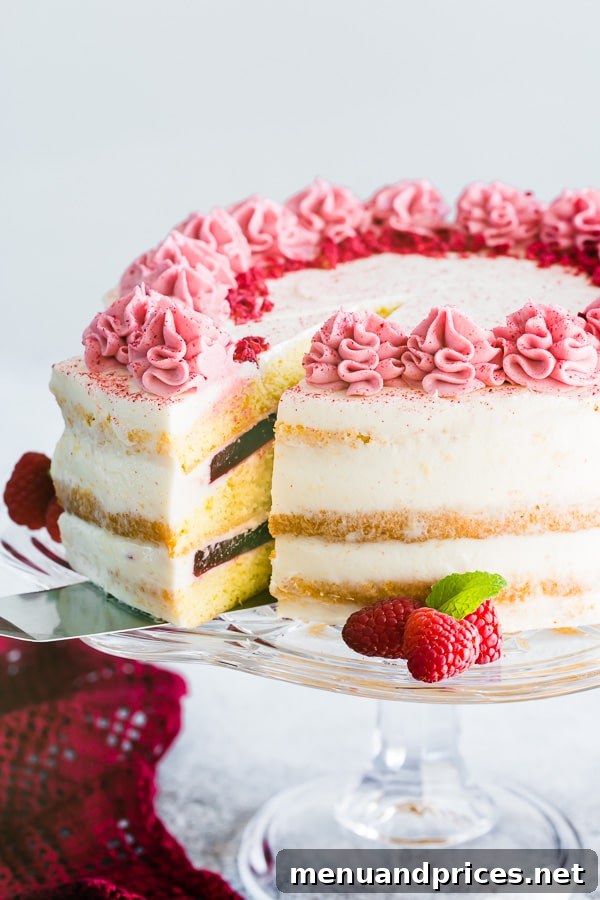
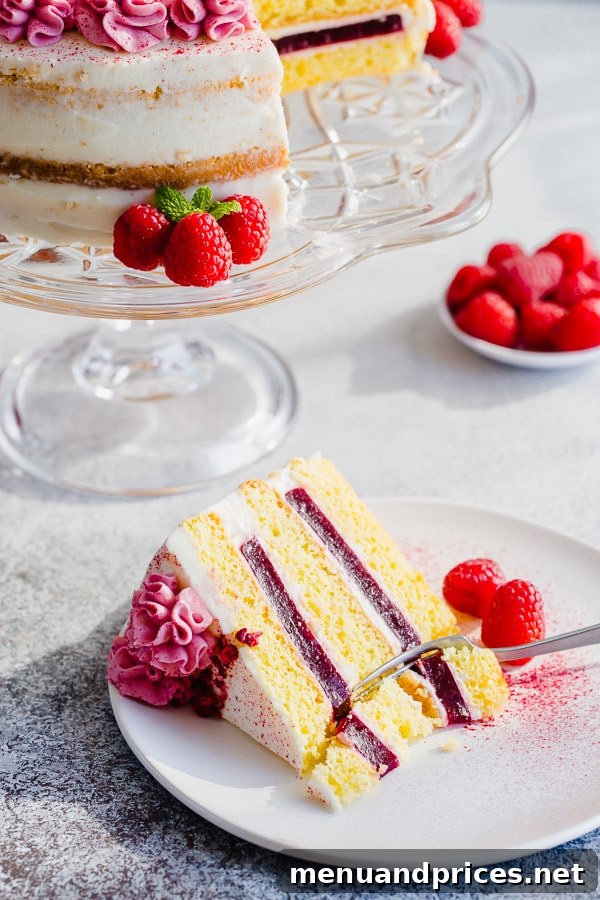
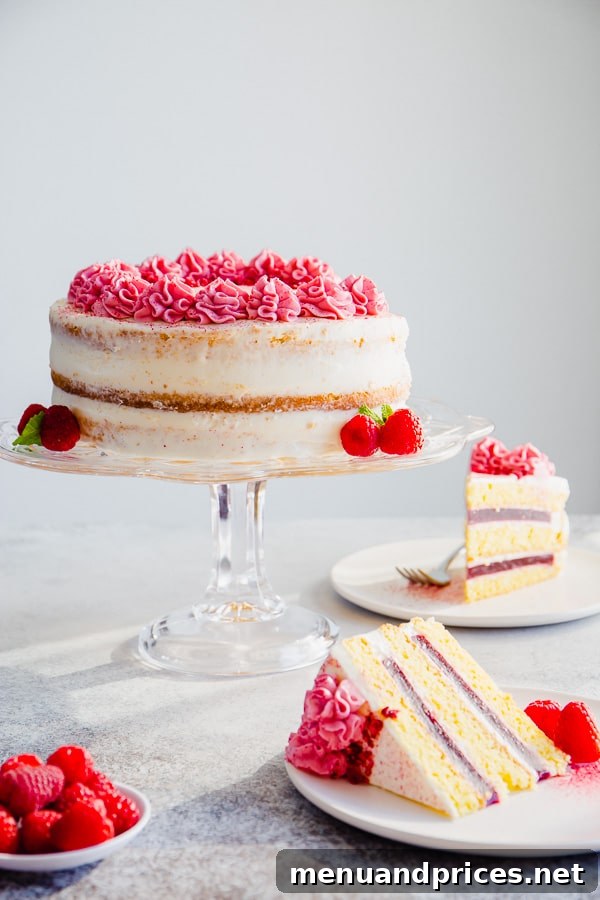
Prepare to be captivated by this ultimate raspberry cake recipe! Featuring incredibly delicate sponge cake layers, generously filled with a sweet, tangy, and impossibly creamy cream cheese frosting, and a show-stopping homemade raspberry jello bursting with real fruit flavor. This stunningly tall and impressive cake is designed to be the centerpiece of any special occasion, promising a delightful blend of textures and an unforgettable taste experience.
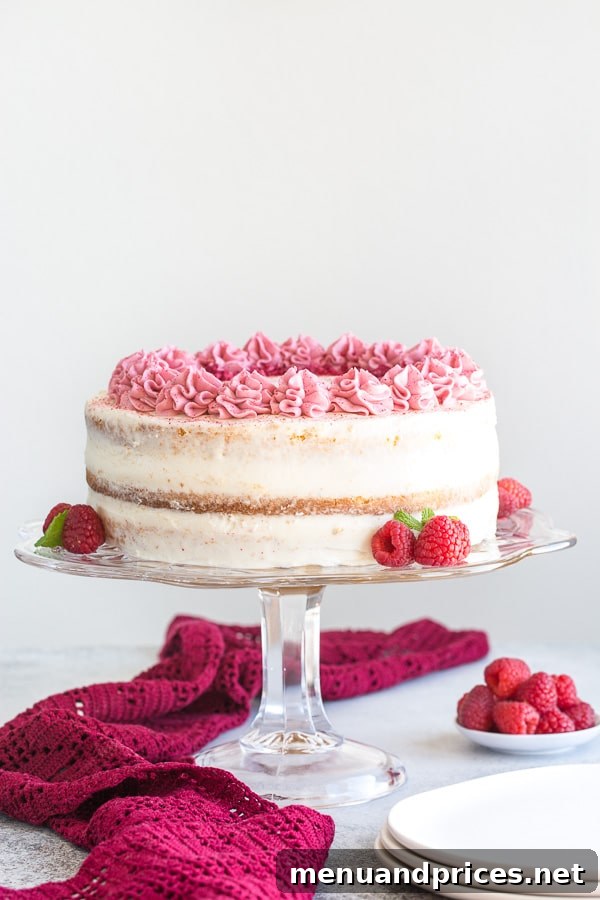
Crafting Your Masterpiece: A Delectable Raspberry Creation
We are beyond thrilled to finally share this extraordinary cake recipe with you. It’s a project that brings immense joy, not only in the baking and presentation but especially in savoring each delightful bite. While this raspberry cake comprises several distinct components—fluffy sponge layers, rich cream cheese frosting, and a vibrant raspberry jello—we want to assure you that the process is far more manageable than it might appear. With a bit of planning, you’ll find it a rewarding culinary adventure.
Imagine the satisfaction of creating such a beautiful dessert from scratch! We believe that anyone, regardless of their baking experience, can achieve fantastic results. The key lies in breaking down the process into smaller, more digestible steps, allowing you to tackle each part at your own pace. This approach makes the journey to a spectacular homemade cake enjoyable and stress-free.
A Thoughtful Timeline for Effortless Baking:
To make the creation of this multi-layered delight feel effortless, consider a phased approach:
- **Day 1: Foundation Building.** Focus on baking the delicate sponge cake layers and preparing the simple syrup. These can cool and chill overnight, making them easier to handle later.
- **Day 2: Jello Perfection.** Dedicate this day to crafting the fresh raspberry jello. Allowing it ample time to set ensures perfect, firm layers for assembly. (For the ambitious, this can also be done on Day 1!)
- **Day 3: Frosting & Assembly.** Whip up the creamy dream cheese frosting fresh, then bring all the components together for the grand assembly. This final stage is quick and incredibly satisfying.
Doesn’t that sound entirely achievable? This methodical approach transforms a seemingly complex recipe into an enjoyable weekend project or a spread-out treat throughout the week.
The Star Components: Unpacking Each Layer of Flavor
The Light-as-Air Sponge Cake: A Cloud of Perfection
The foundation of this incredible dessert is a classic sponge cake, renowned for its airy, tender crumb. Unlike denser cakes, sponge cake provides a delicate canvas that perfectly absorbs the simple syrup and complements the rich fillings without overpowering them. Its subtle sweetness and incredibly soft texture make every forkful a dream. For a detailed guide on achieving the perfect sponge cake, we recommend referring to our comprehensive perfect sponge cake recipe here. Ensuring your ingredients are at room temperature and exercising patience during the whipping process are key to its success.
The Vibrant Raspberry Jello: A Burst of Freshness
Forget the artificial flavors of boxed mixes! Our homemade raspberry jello is a revelation, offering a bright, authentic raspberry flavor and a delightful textural surprise within the cake. It’s delicately sweet, allowing the natural tartness of the raspberries to shine, unlike overly sweet jams or jellies. This fresh fruit jello adds an incredible dimension, both in taste and appearance, that elevates the entire cake. We absolutely adored it, and we’re confident you will too.
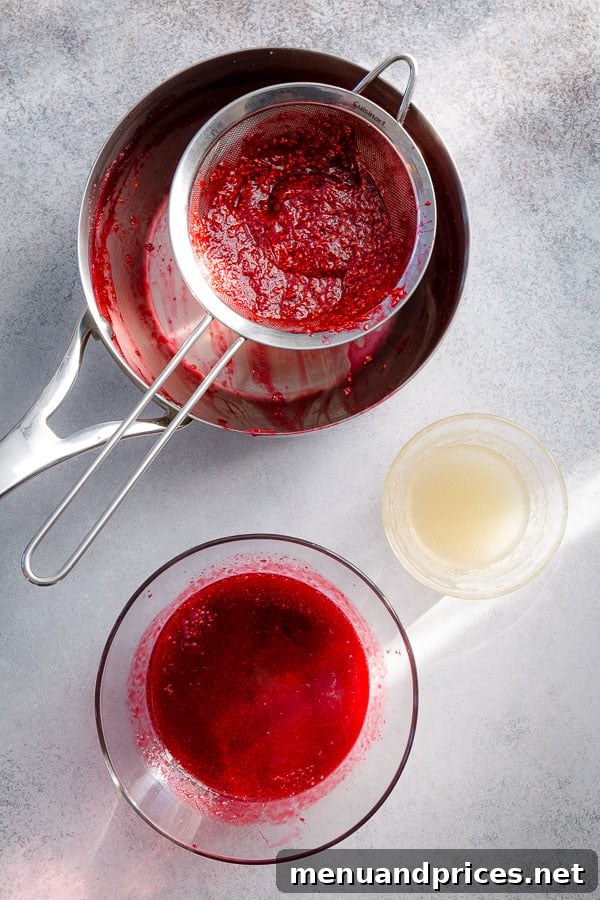
How to Make Real Fruit Raspberry Jello from Scratch:
Crafting this ruby-red jello is surprisingly straightforward and incredibly rewarding. You can use either fresh or frozen raspberries, making it accessible year-round.
- **Berry Base:** Begin by gently cooking raspberries and sugar together over low heat until the sugar completely dissolves and the berries soften. This process extracts maximum flavor.
- **Gelatin Infusion:** While the berries cook, hydrate your gelatin powder in cold water. Once bloomed, stir the hydrated gelatin into the warm berry mixture, continuing to cook gently until the gelatin is fully dissolved and thoroughly incorporated.
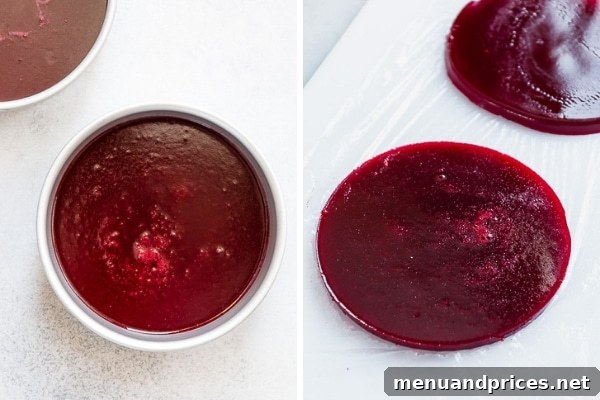
- **Smooth Finish:** For a beautifully smooth jello layer, pass the raspberry puree through a fine-mesh sieve to remove all the seeds. This step ensures a luxurious, silky texture. Divide the strained mixture evenly into lightly oiled pans and refrigerate until perfectly set.
This simple method ensures a pure, intense raspberry flavor that truly stands out.
The Velvety Cream Cheese Frosting: A Harmonious Complement
What could be better than a classic cream cheese frosting to pair with the bright zest of raspberries? This frosting is the epitome of creamy delicacy, offering a perfect balance of sweetness and a hint of tanginess that cuts through the richness, creating a harmonious flavor profile for the entire cake. Its smooth, spreadable consistency makes it a joy to work with, whether you’re piping intricate designs or simply spreading generous layers between your cake and jello.
Assembling Your Stunning Raspberry Layer Cake
Now for the exciting part: bringing all these magnificent components together to create your showstopping cake. A little preparation and a few tricks will ensure a professional-looking finish.
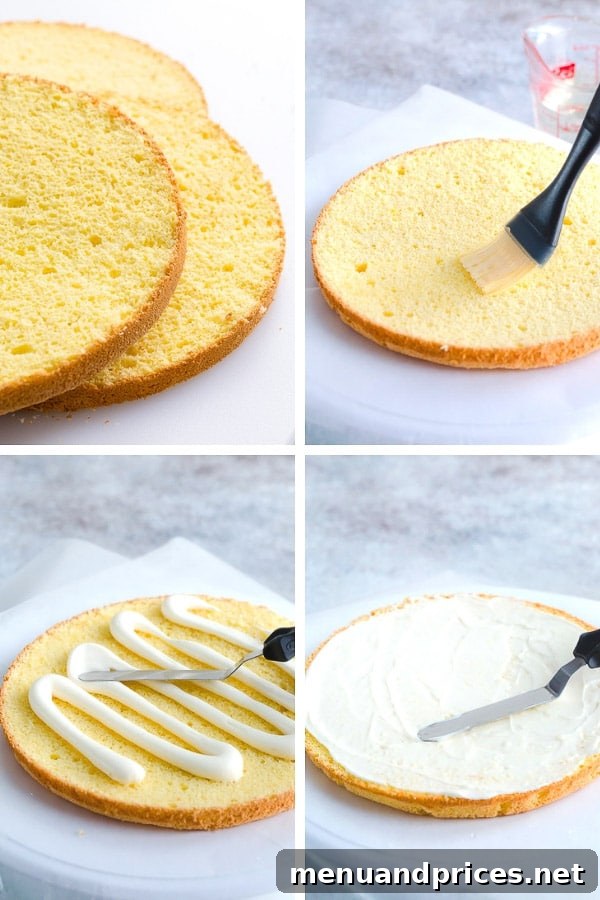
Begin by slicing your chilled sponge cake into three even layers. Chilling the cake overnight makes this process significantly easier and results in cleaner cuts. Once sliced, each layer needs a generous brush of simple syrup. This step is crucial, not optional, as the syrup ensures an incredibly moist, tender, and soft crumb, preventing the cake from drying out and enhancing its overall appeal. Do not skip it!
Next, it’s time for the creamy delight. Fill the cake layers with your prepared cream cheese frosting. A helpful tip for neat and even distribution: transfer the frosting into a piping bag. This allows for precise application, especially when creating borders and filling in around the jello layers.
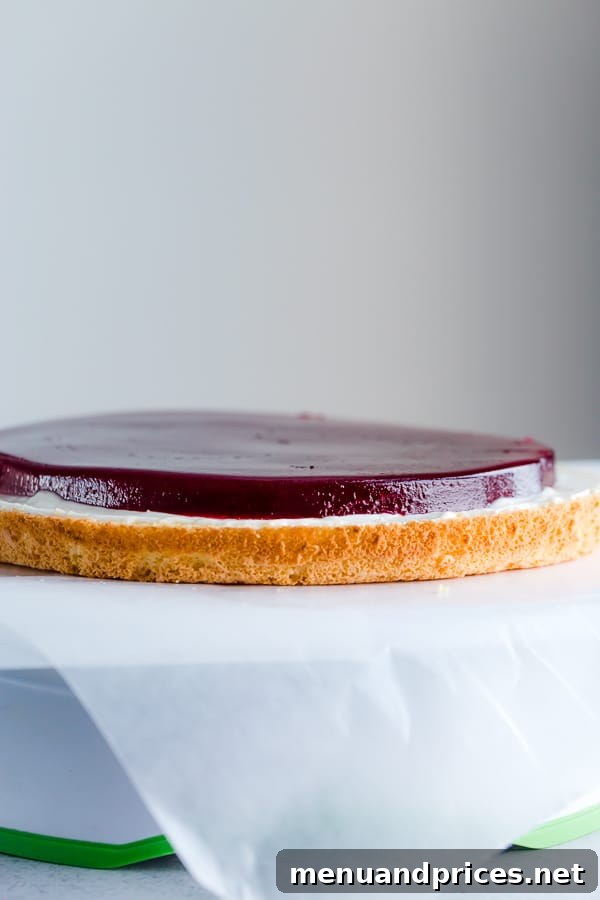
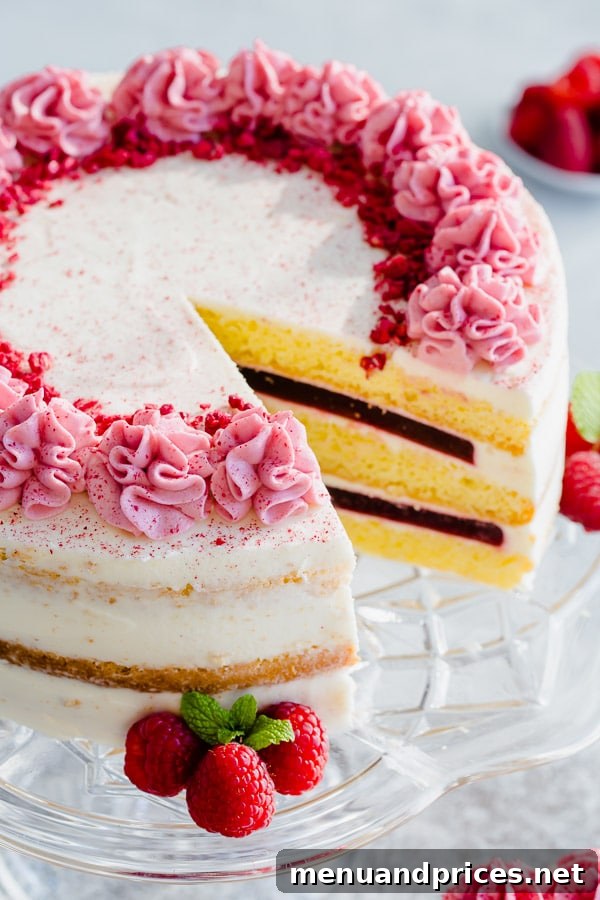
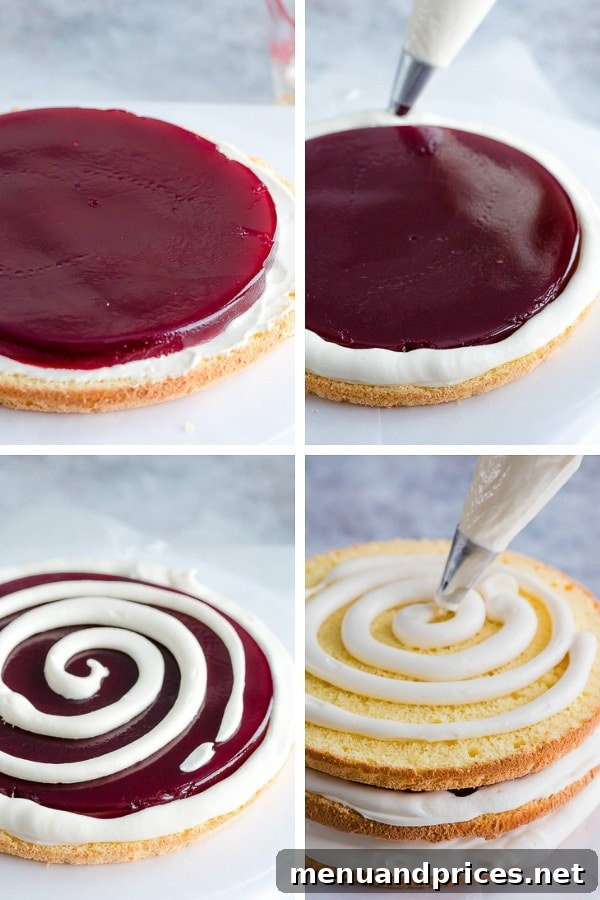
And here’s where the beautiful raspberry explosion comes to life! Carefully place a disc of the set raspberry jello onto a frosted cake layer. Then, pipe more cream cheese frosting around the jello, creating a delicious border and ensuring the jello is encased in creamy goodness. Don’t be shy with the frosting – we’re aiming for luscious, substantial layers. A final spread of frosting over the jello prepares it for the next cake layer.
Continue this layering process, ensuring ample frosting on both sides of each jello layer. This creates a stunning visual effect when the cake is sliced and ensures every bite delivers a balanced flavor profile.
Decorating Your Showstopping Creation
Once your cake is assembled, it’s time to unleash your creativity with the decoration! You can keep it simple and elegant, or go all out with intricate designs. For a lovely touch, we recommend mixing some freeze-dried raspberry powder into any leftover cream cheese frosting. This creates a beautiful naturally pink frosting perfect for piping designs, swirls, or a delicate top border. A sprinkle of crushed freeze-dried raspberries on top also adds a gorgeous pop of color and an extra layer of concentrated raspberry flavor and texture.
For an even more intense raspberry experience, consider making your entire frosting raspberry-flavored by incorporating freeze-dried raspberry powder throughout. The possibilities are endless, allowing you to personalize this cake to your heart’s desire. The end result is not just a dessert, but a true work of art, deserving of admiration and, of course, enjoyment!

Raspberry Cake with Cream Cheese Frosting
Comment
Print Recipe
Ingredients
Sponge cake:
- 6 large eggs at room temperature
- 1 cup (200gr) sugar, divided
- ½ teaspoon cream of tartar optional
- 1 ½ cups (180gr) plain cake flour
- ½ teaspoon salt
Simple Syrup:
- 1 cup water
- ¾ cup (150gr) sugar
Raspberry Jello Layer:
- 1 packet (7gr/about 2 teaspoons) gelatin powder (1 packet = 0.25oz)
- 3 tablespoons (50ml) cold water
- 10 oz (300gr) raspberries fresh or frozen
- ¾ cup (150gr) sugar
Cream Cheese Frosting:
- 16 oz (500gr) cream cheese, at room temperature
- ½ cup (110gr) unsalted butter, at room temperature
- 4 cups powdered sugar
- 1 tablespoon pure vanilla extract
- 1 tablespoon freeze-dried raspberry powder* optional (Note 1)
Instructions
- To make the cake, preheat the oven to 350°F (177°C). Line the bottom of a 9-inch springform pan (at least 3 inches tall) with parchment paper. There’s no need to grease the sides of the pan.
- Carefully separate egg whites and yolks, ensuring no trace of yolk mixes with the whites. Tip: Eggs are easier to separate when they’re cold, directly from the fridge.
- In a mixing bowl fitted with a whisk attachment, beat the egg yolks with ½ cup of sugar until the mixture becomes pale in color and triples in volume, which typically takes about 5 minutes.
- Meanwhile, sift the cake flour and salt together into a separate bowl. This prevents lumps and aerates the flour.
- In another clean mixing bowl with a whisk attachment, begin to beat the egg whites at a medium-low speed until they become foamy.
- If using, stir in the cream of tartar at this stage. It helps stabilize the egg whites.
- Gradually add the remaining ½ cup of sugar, one tablespoon at a time, to the egg whites. Continue whisking, gradually increasing the speed to medium-high, until stiff, glossy peaks form. This can take 7-10 minutes.
- Using a spatula, gently fold 1/3 of the whipped egg whites into the egg yolk mixture until mostly smooth. Then, carefully fold in the remaining egg whites until the mixture is uniform and smooth.
- Add the sifted flour into the batter in three stages, folding gently after each addition until just combined. Be careful not to deflate the airy batter.
- Pour the light batter into the prepared springform pan and gently smooth the top with a spatula.
- Bake the cake for approximately 40 minutes, or until a toothpick inserted into the center comes out clean. Avoid opening the oven door for at least the first 30 minutes to ensure proper rising.
- Allow the cake to cool in the pan for 5 minutes. Then, run a thin knife around the edges to loosen it, invert it onto a cooling rack, and remove the parchment paper. Cool completely. For easier slicing, wrap the cooled cake in plastic wrap and refrigerate, preferably overnight.
- To make raspberry jello layer, lightly spray two 7-inch round cake pans with cooking spray.
- In a small bowl, combine the gelatin powder and cold water. Let it sit for 5 minutes to bloom.
- In a small saucepan, combine the raspberries and sugar. Cook over medium-high heat, stirring frequently and mashing the berries, until the sugar is completely melted and the mixture is simmering.
- Stir in the bloomed gelatin mixture and continue to cook over medium-low heat until the gelatin is fully dissolved.
- Pass the warm mixture through a fine-mesh sieve to remove all the seeds, creating a smooth raspberry puree. Divide the strained mixture evenly into the prepared pans. Refrigerate for 2-3 hours, or ideally overnight, until thoroughly set.
- To make the simple syrup, in a small saucepan, combine 1 cup of water and sugar. Bring the mixture to a boil, then reduce heat and simmer until the sugar is completely dissolved. Remove from heat and allow to cool completely before using.
- To make the cream cheese frosting, in a large mixing bowl, beat the softened cream cheese and unsalted butter on medium-high speed until light and fluffy, about 1 minute. Ensure both ingredients are at room temperature for a smooth consistency.
- Gradually add the powdered sugar and vanilla extract to the cream cheese mixture. Beat on low speed initially for about a minute to prevent a sugar cloud, then increase the speed to medium-high and continue beating for approximately 3 minutes until the frosting is smooth, light, and fluffy.
- Transfer the finished frosting into a large piping bag. A round piping tip can be used for ease and neatness, but it’s not strictly necessary.
- To assemble the cake, slice the chilled cake into three even layers. (Consider using a cake slicing kit or a cheaper alternative for precision.)
- Place the first cake layer on your chosen serving platter. Tip: For a clean presentation, tuck three strips of parchment or wax paper slightly under the edges of the cake. Brush 1/3 of the chilled simple syrup evenly over this layer. Pipe a generous amount of cream cheese frosting all over the cake layer and smooth it with an offset spatula. Carefully place one disc of raspberry jello directly in the center of the frosted layer. Pipe more frosting around the jello to create a border, then cover the jello entirely with frosting, spreading evenly. Place the second cake layer on top and repeat the process.
- Position the final cake layer upside down on top of the stacked layers (the bottom of the baked cake becomes the top of the assembled cake for a perfectly flat surface). Generously coat the entire cake with the remaining cream cheese frosting, smoothing it with an offset spatula for a polished finish.
- To decorate, mix any leftover cream cheese frosting with freeze-dried raspberry powder for a beautiful color and intensified flavor. Decorate the cake as desired using your preferred piping techniques. We used a Wilton M1 piping tip for the elegant top decoration and sprinkled crushed freeze-dried raspberries for a final flourish.
⭐️ Did you make this recipe?
Please leave a review and let us know how you liked it!
Tips & Notes
Make-Ahead Tip: This recipe is perfect for making components in advance, reducing stress on assembly day:
- **Cake Layers:** Bake and freeze cake layers for up to a month, or refrigerate for up to a week. Thaw frozen cakes in the refrigerator overnight before use.
- **Cream Cheese Frosting:** Prepare the frosting up to 3 days ahead. Cover tightly with plastic wrap and refrigerate. Re-whip briefly before using to restore its fluffy texture.
- **Simple Syrup:** Can be made a week in advance and stored in the refrigerator until needed.
- **Raspberry Jello:** Prepare the jello up to 3 days in advance and keep it refrigerated.
You can also assemble the entire cake one day in advance and store it in the fridge. For the best flavor and texture, allow the cake to come to room temperature for about 30-60 minutes before serving.
Nutrition