

There’s nothing quite like the irresistible aroma and delightful taste of homemade waffles to kickstart your day. Imagine waking up to the perfect balance: crisp, golden-brown edges that yield to a light, airy, and fluffy interior. This isn’t just a recipe; it’s your new go-to guide for creating the best homemade waffles, whether you’re facing a bustling weekday morning or savoring a leisurely weekend brunch. Prepare to impress your family and friends with waffles that are simply unforgettable.

Why You’ll Adore This Perfect Homemade Waffle Recipe
For me, there’s an unparalleled joy in indulging in a warm, carb-rich breakfast, especially when it involves these incredible crispy waffles. Each golden-brown square is meticulously designed to cradle delightful pools of sweet maple syrup and luscious melted butter, creating a truly heavenly breakfast experience. My family absolutely adores these waffles, always asking for more, and I’m confident they’ll become a beloved staple in your home too! Forget sad, soggy excuses for waffles; prepare for a culinary delight that consistently delivers on texture and flavor, making every bite a celebration.
- Unrivaled Texture: Achieve truly crispy, golden-brown exteriors that provide a satisfying crunch with every bite, offering that perfect contrast.
- Cloud-Like Interiors: Experience incredibly light, fluffy, and airy centers, a delightful and tender contrast to their crisp shells.
- Effortlessly Easy & Versatile: This recipe is straightforward to make, perfect for any skill level, and incredibly convenient for meal prepping thanks to its freezer-friendly nature.
Don’t reserve the pleasure of these delightful waffles solely for late mornings or leisurely Saturdays. This recipe makes it incredibly easy to prepare them ahead of time and freeze them. Simply pop a frozen waffle into your toaster or toaster oven, and a warm, crispy breakfast is ready in minutes, transforming even the busiest weekdays into a moment of special indulgence.
Essential Ingredients for Superior Homemade Waffles
Crafting the perfect waffle begins with understanding the role each ingredient plays. This recipe relies on a few key components that work in harmony to produce those coveted crispy edges and fluffy centers. Let’s explore what makes them so special, ensuring you get the best out of every batch:
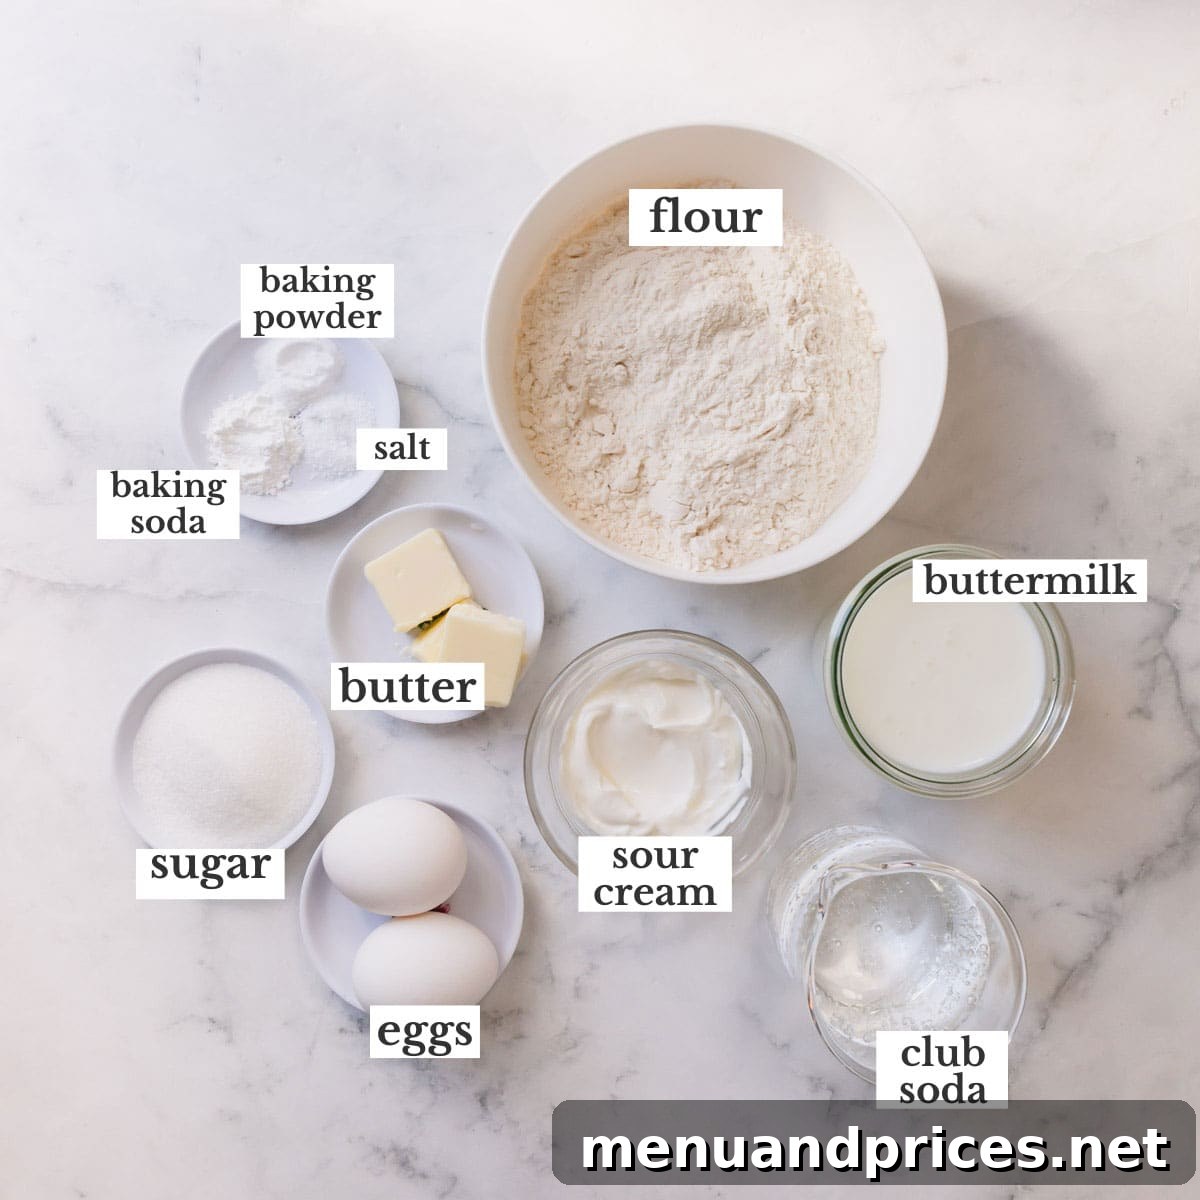
- Sour Cream: While it contributes a subtle richness and a hint of tang, the primary function of sour cream in this recipe is to enhance the waffle’s texture and overall flavor profile. Its fat content helps create a remarkably light and airy crumb, preventing dryness and adding a luxurious, tender depth to each bite, making your waffles incredibly moist.
- Buttermilk: This acidic ingredient is absolutely crucial for activating the baking soda. When combined, they initiate a powerful chemical reaction that produces carbon dioxide bubbles. These bubbles are what cause the batter to rise beautifully in the waffle iron, guaranteeing those delightfully crisp edges and wonderfully tender, fluffy centers. If buttermilk isn’t readily available, don’t fret! You can create a simple yet effective substitute by combining 1 ½ cups of sour cream with ½ cup of water.
- Granulated Sugar: Just two tablespoons of sugar are perfectly sufficient to subtly sweeten your waffles. This amount provides a foundational sweetness without being overpowering, allowing the other flavors to shine through. Remember, the true sweetness often comes from your choice of toppings, especially a generous drizzle of premium maple syrup, which beautifully complements the waffle’s inherent flavor.
- Leavening Agents (Baking Powder & Baking Soda): This dynamic duo is essential for achieving maximum lift and lightness. Baking powder, a blend of baking soda and an acid (like cream of tartar), activates upon contact with liquid, releasing carbon dioxide. Baking soda, on the other hand, reacts with the natural acidity of the buttermilk (and sour cream) to create additional gas. Together, they ensure your waffles achieve that impressive rise and incredible fluffiness. To ensure your baking powder is still active, drop a teaspoon into hot water; it should fizz vigorously. If it doesn’t, it’s time for a fresh can!
- Club Soda: This might seem like an unusual addition, but club soda is a secret weapon for super aerated batter. The extra carbonation introduces even more tiny bubbles throughout the batter, contributing to an incredibly light, delicate, and tender texture that truly sets these waffles apart. Unflavored sparkling water works equally well, but steer clear of tonic water, as its quinine content can impart an unwanted bitter note to your otherwise perfect waffles.
- Melted Butter: For that classic, rich, and undeniably buttery flavor that elevates homemade waffles from good to absolutely outstanding. It also plays a vital role in the browning process, contributing to that beautiful golden-brown exterior and enhancing the overall crispness.
Your Step-by-Step Guide to Crafting the Perfect Homemade Waffles
Creating these classic, crowd-pleasing waffles is a surprisingly simple process. Follow these straightforward steps, and you’ll be enjoying a plate of delicious, homemade goodness in no time. We’ve included practical tips to ensure your success, from mixing the batter to achieving that perfect golden finish!
1. Prepare Your Waffle Batter
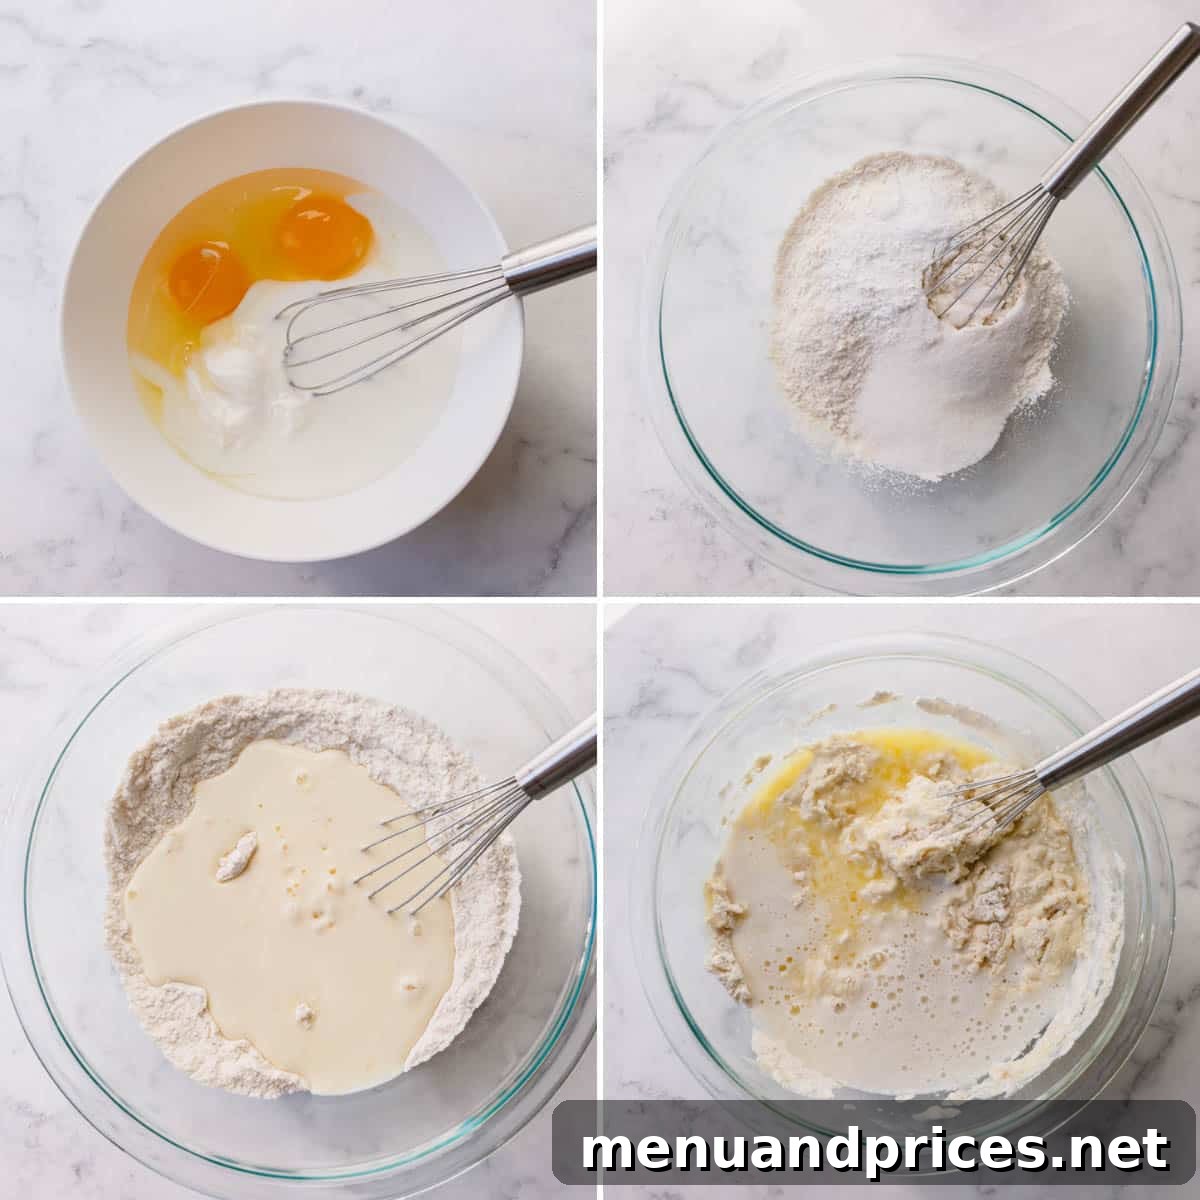
- In a medium-sized mixing bowl, thoroughly whisk together the wet ingredients: eggs, sour cream, and buttermilk. Ensure they are well combined and smooth, creating a homogeneous liquid base for your batter.
- In a separate, larger bowl, combine all the dry ingredients: all-purpose flour, granulated sugar, baking powder, baking soda, and salt. Whisk these together until they are evenly distributed, preventing pockets of unmixed leavening agents.
- Carefully pour the wet ingredient mixture into the bowl containing the dry ingredients. Mix them gently using a whisk or rubber spatula until they are just barely combined. It’s crucial not to overmix at this stage; a few lumps are perfectly fine and even desired, as they indicate tender waffles.
- Finally, gently stir in the club soda and melted butter. Again, mix just until incorporated. The batter should remain somewhat lumpy – this is a good sign that you haven’t overdeveloped the gluten, which can lead to dense, tough waffles. The club soda will add an extra airy boost!
Pro Tip for Batter Perfection
Whisking your wet ingredients thoroughly before combining them with the dry significantly reduces the likelihood of overmixing the batter once all components are together. This simple step helps maintain the delicate balance needed for truly light and fluffy waffles, ensuring you don’t activate too much gluten.
2. Allow the Batter to Rest
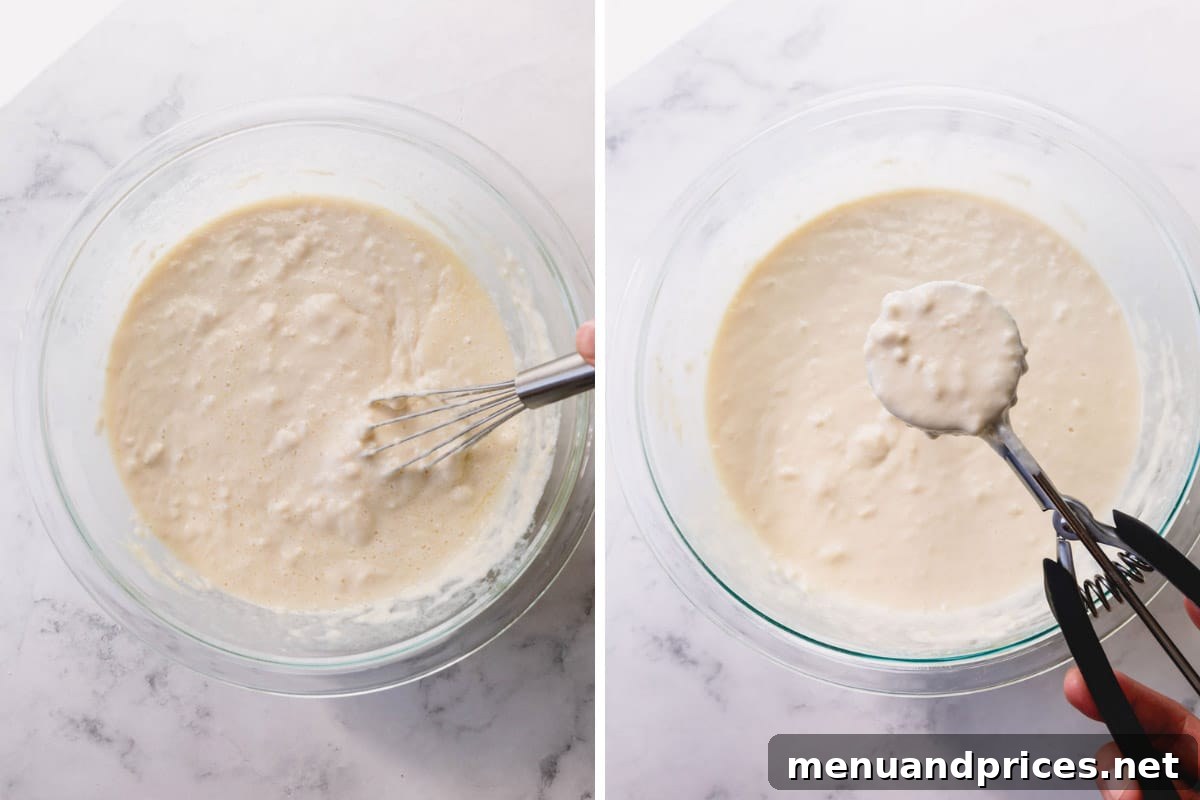
- Embrace the lumps! Remember, a slightly lumpy batter is actually ideal. It indicates that you haven’t overmixed, which would lead to excessive gluten development and a deflated, tougher waffle. These lumps will smooth out during cooking.
- Let your waffle batter rest for a minimum of 10 minutes (and up to 30 minutes for even better results). This resting period is crucial: it allows the flour to fully hydrate, the gluten to relax, and the leavening agents to begin their work, resulting in a noticeably lighter, more tender, and perfectly textured waffle. While the batter rests, take this opportunity to preheat your waffle iron according to the manufacturer’s instructions. A hot waffle iron is essential for crispiness.
3. Cook Your Golden Waffles
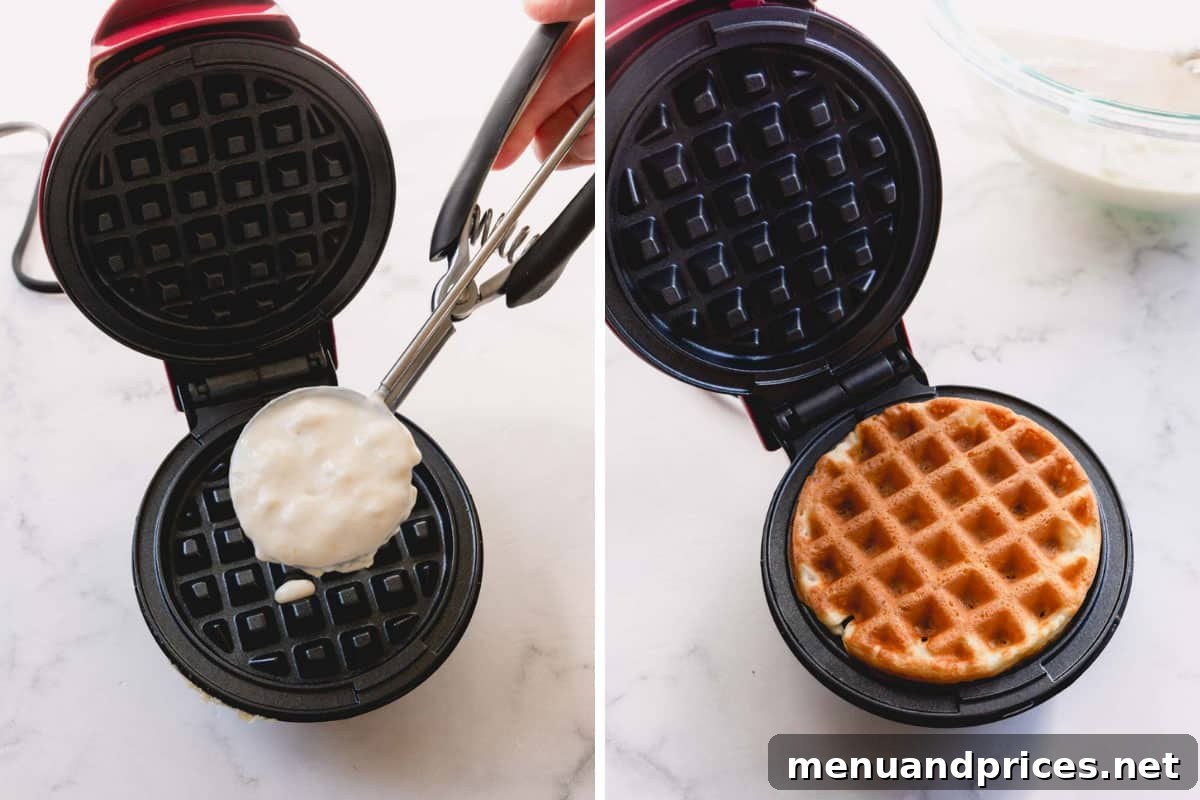
- Once your waffle iron is hot and ready (most irons have an indicator light or beep when preheated), use a portion scoop or a ladle to carefully drop the batter onto the center of the grates. Consult your waffle iron’s instruction manual for the precise amount of batter needed; typically, a 1/4 cup is perfect for a standard 4-inch waffle to prevent overflow.
- Close the lid and cook the waffles until they are beautifully golden brown and steam is no longer visibly escaping from the sides, usually around 4-6 minutes, depending on your iron’s wattage and desired crispness. A good indicator that a waffle is done is when it releases easily from the iron with a gentle tug. If it resists, close the lid and give it another minute or so to continue cooking and firm up.
- As each waffle finishes cooking, transfer it immediately to a wire rack. This is crucial for maintaining crispness by allowing air to circulate around the waffle and prevent condensation. Avoid stacking them directly on a plate. Continue cooking in batches until all your delicious batter has been transformed into perfectly golden, irresistible waffles.
Expert Tips for Waffle Perfection: Master Your Homemade Waffles
Achieving consistently perfect waffles, with that coveted crisp exterior and fluffy interior, is easier than you think with a few key techniques. Keep these professional tips in mind to ensure every batch is a resounding success and you become a true waffle master:
- Never Stack Hot Waffles: This is arguably the most important rule for truly crispy waffles. Stacking freshly cooked waffles allows steam and heat to get trapped between them, instantly softening those prized crisp edges and leading to a soggy, undesirable texture. Always place cooked waffles in a single layer on a wire rack to allow air circulation and maintain their delicious crunch. If you’re making a large batch, you can keep them warm in a low oven while the rest cook.
- Avoid Overmixing the Batter at All Costs: It bears repeating: do not overmix your waffle batter! While it might feel counterintuitive, a slightly lumpy batter is exactly what you want. Overmixing develops the gluten in the flour excessively, resulting in dense, chewy, and tough waffles instead of the light and airy ones you desire. Mix just until the ingredients are combined and no dry streaks of flour remain, then stop.
- Ensure Your Waffle Iron is Properly Oiled: Even waffle irons with “non-stick” coatings benefit from a little help. A light application of oil is always a good practice, especially if you experience any sticking. Lightly brush the grates with a neutral, high-smoke-point oil (like canola or grapeseed) or use a nonstick cooking spray before the first waffle and periodically as needed (every 2-3 waffles). This ensures easy release and helps achieve that beautiful, even golden crust.
- Use the Right Amount of Batter: Resist the urge to overfill your waffle maker, no matter how tempting it might be. Too much batter will inevitably seep out the sides, creating a sticky mess and resulting in misshapen, unevenly cooked waffles. Aim to fill the grates almost to the edge, leaving just a tiny gap, which allows the batter to expand perfectly without overflowing. Refer to your waffle iron’s manual for specific portion recommendations, but a quarter cup is often a good starting point for a standard iron.
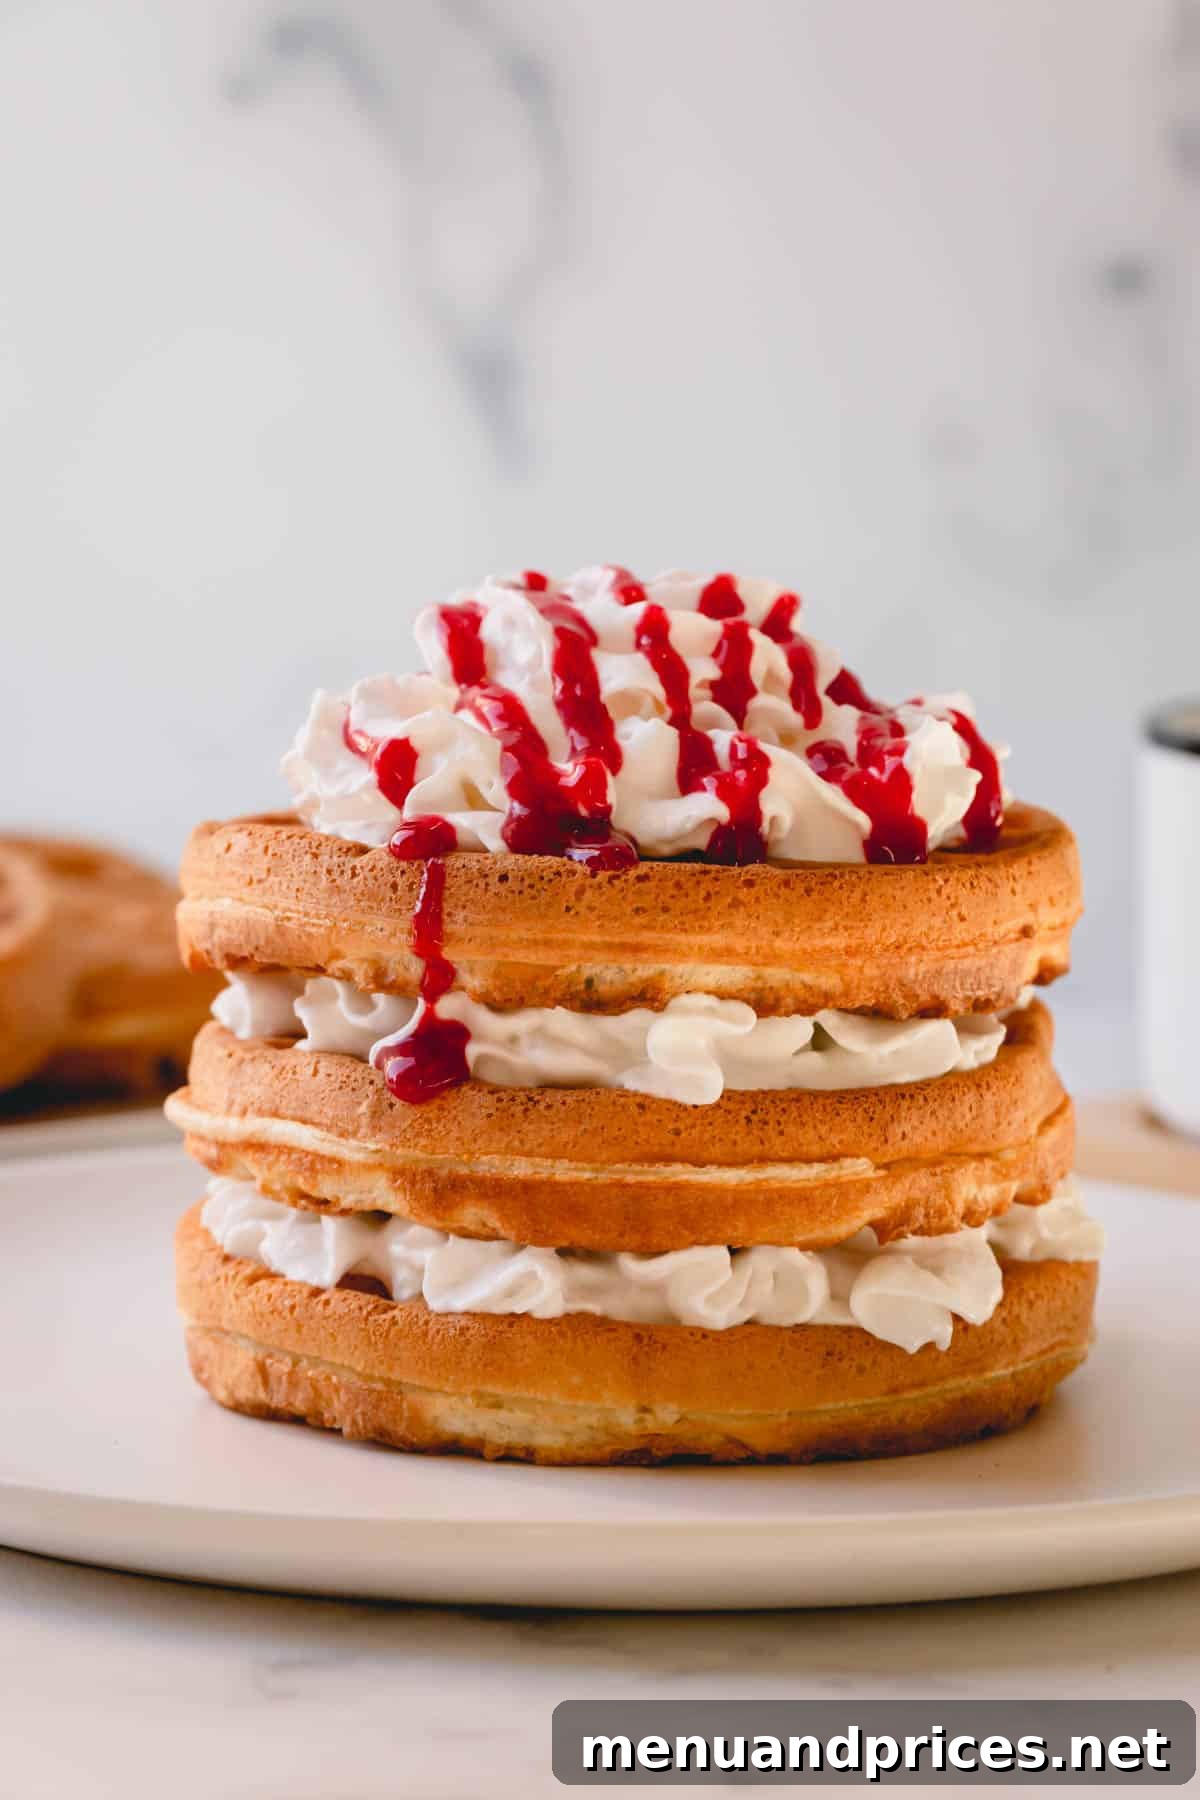
Delectable Waffle Toppings to Elevate Your Breakfast Experience
The inviting pockets of a freshly made waffle are practically begging to be filled with classic liquid gold – sweet maple syrup and rich melted butter. But why stop there? These versatile canvases are perfect for a myriad of delicious toppings that can transform your breakfast into a gourmet experience, suitable for any craving. Get creative and try some of these fantastic ideas to customize your perfect waffle:
- Classic Sweetness: Indulge with a generous dollop of fluffy whipped cream paired with a decadent swirl of Nutella for a rich, chocolate-hazelnut treat that feels truly luxurious.
- Fruity & Creamy: Combine creamy peanut butter, spread generously, with fresh, thinly sliced bananas for a wholesome, satisfying, and energy-boosting combination.
- Naturally Sweet & Fresh: Drizzle with golden honey and adorn with an assortment of vibrant, fresh berries like sweet strawberries, juicy blueberries, and tangy raspberries for a burst of natural flavor.
- Healthy & Hearty: Top with a scoop of your favorite Greek yogurt and a sprinkle of crunchy granola for a nutritious, protein-packed, and texturally interesting option.
- Elegant Indulgence: Elevate your waffles with a homemade raspberry sauce and delicate Chantilly cream for a sophisticated, fruit-forward dessert-like breakfast.
- Unexpected Savory Delight: For the adventurous palate, try a perfectly fried egg paired with a sprinkle of shredded sharp cheddar cheese. Trust us, the savory-sweet combination is surprisingly delicious, incredibly satisfying, and makes for a fantastic brunch option!
Smart Make-Ahead & Freezing Solutions for Busy Mornings
For those who love to meal prep and save time without sacrificing quality, homemade waffles are an absolute game-changer. Their incredible freezer-friendly nature means you can enjoy a warm, wholesome, and perfectly crisp breakfast even on the most hectic days without any extra fuss. Imagine the convenience of a delicious breakfast ready in minutes!
- Simply prepare a big batch of these delicious waffles, allowing them to cool completely before freezing. Then, on busy mornings, just grab one or two directly from the freezer and pop them into your toaster or toaster oven. They’ll be perfectly crispy and ready to enjoy in mere minutes, making your mornings smoother and more delicious!
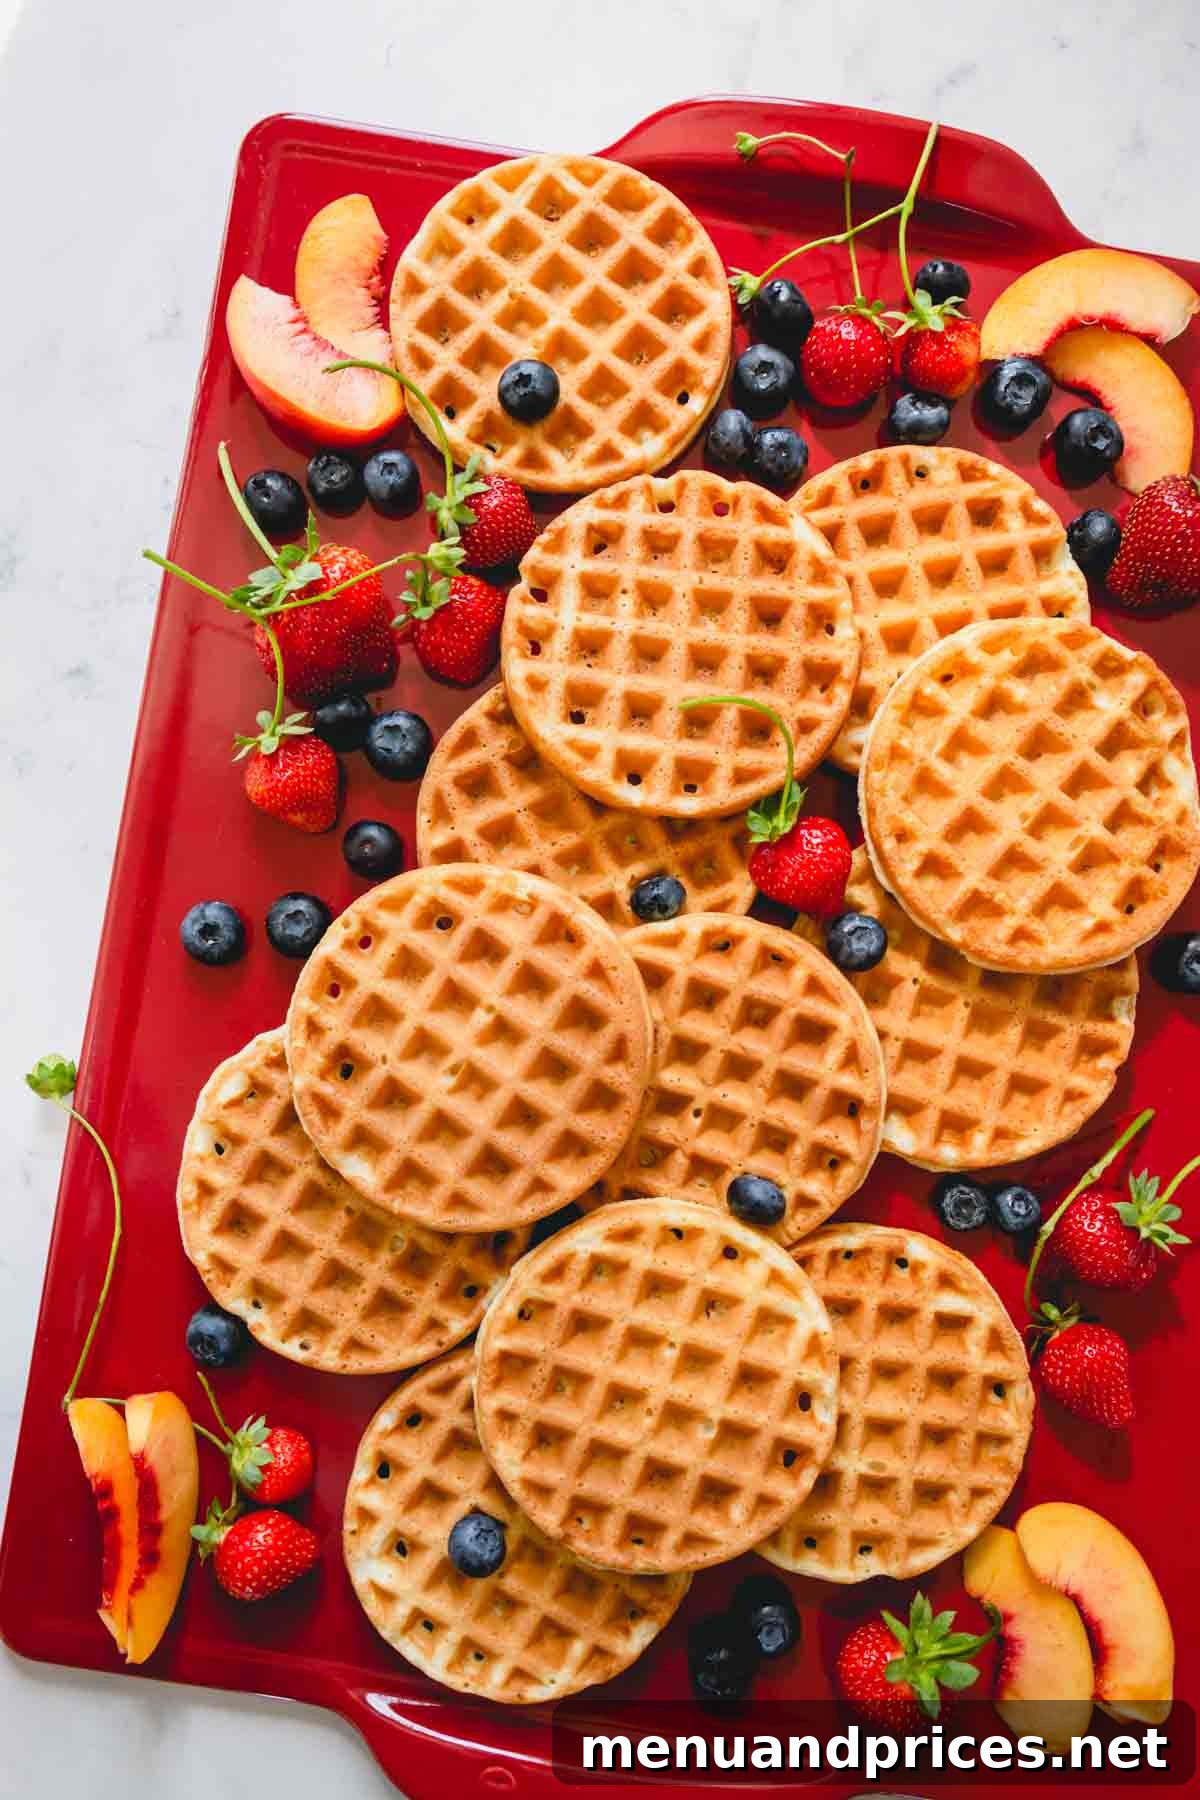
Storing and Reheating Your Homemade Waffles for Optimal Freshness
Proper storage is key to extending the life of your delicious homemade waffles and ensuring they retain their best texture. Here’s how to keep them fresh and reheat them perfectly, preserving their delightful crispness and fluffiness:
- Always allow your cooked waffles to cool completely to room temperature before storing. Once cooled, they can be kept in an airtight container in the refrigerator for up to 6 days. For longer storage, they freeze exceptionally well for up to 3 months, offering a convenient breakfast option.
- We highly recommend storing your waffles in the freezer. This method not only prevents them from drying out but also helps them maintain their structural integrity and crisp potential. When you’re ready to enjoy, simply reheat them directly from frozen in a toaster or toaster oven until they are piping hot and wonderfully crispy again, just like they were freshly made.
- A crucial note: Never reheat waffles in the microwave! While convenient, a microwave will steam your waffles, causing them to lose their beloved crisp edges entirely and become soft, rubbery, or chewy. Preserve their perfect texture by sticking to a toaster or a conventional oven for reheating.
To Freeze Waffles Effectively: Once completely cooled, arrange the waffles in a single layer on a baking sheet and freeze until firm (this step prevents them from sticking together in the bag). Then, transfer the frozen waffles to a large, freezer-safe ziplock bag or airtight container, placing a piece of parchment paper between layers to prevent them from fusing. They will keep beautifully in the freezer for up to 3 months, ready for a quick and delicious breakfast anytime.
Frequently Asked Questions About Homemade Waffles
Got questions about making the best waffles? We’ve got comprehensive answers to help you troubleshoot and perfect your technique, ensuring waffle success every time:
- Why did my waffles stick to the waffle iron?
- Waffles typically stick to the iron if they haven’t cooked long enough, if the iron wasn’t properly seasoned or adequately greased, or if it wasn’t preheated sufficiently. Ensure your waffle iron is adequately preheated to the correct temperature and lightly oiled before adding batter. A perfectly cooked waffle should be beautifully golden brown and release easily from the iron with just a gentle lift of the lid. If it resists, close the lid and allow it to cook for another minute or two until it releases without force.
- How should I keep my waffles warm if serving a crowd?
- If you’re making a large batch of waffles and can’t serve them straight from the iron, you can easily keep them warm and crispy for your guests. Place the cooked waffles in a single layer on a wire rack set over a baking sheet. Transfer the baking sheet to an oven preheated to a very low temperature, around 200-225 degrees Fahrenheit (90-107 degrees Celsius). This will keep them warm without making them soggy, allowing you to finish cooking the remaining batter and serve everyone simultaneously.
- Can I make this waffle batter ahead of time?
- While it’s generally best to cook waffles with freshly made batter for optimal rise and crispness due to the active leavening agents, you do have some options. You can prepare the dry ingredients and wet ingredients (excluding the club soda) separately the night before, storing them covered in the refrigerator. Combine them just before cooking, adding the club soda and melted butter last. If you must mix the full batter ahead, store it in an airtight container in the refrigerator for no more than 1-2 hours, stirring very gently before use, but be aware it might lose some of its leavening power and result in slightly less fluffy waffles.
More Must-Try Breakfast Recipes You’ll Love
If you’re a fan of delicious homemade breakfasts and love starting your day with something special, be sure to explore these other fantastic and highly-rated recipes from our collection:
- Fluffy Buttermilk Pancakes
- Irresistible Blueberry Cheesecake Muffins
- Easy Peel Hard Boiled Eggs (Farm Fresh Eggs)
- Extra Fluffy Pumpkin Pancakes
- Foolproof English Scones
Delicious Homemade Waffles Recipe
By Shinee Davaakhuu
This ultimate waffle recipe guarantees perfectly crispy, golden-brown edges and delightfully light, airy centers. It’s the ideal choice for both quick busy mornings and leisurely weekend brunches, ensuring a memorable breakfast every time!
Preparation Details:
- Prep Time: 5 minutes
- Cook Time: Approximately 5 minutes per waffle
- Resting Time: 10 minutes
- Total Time: Approximately 20 minutes (for the first batch, overall time depends on waffle iron capacity)
- Yields: 24 waffles
Ingredients
- 2 large eggs
- ¼ cup (60 g) sour cream
- 1 cup (240 ml) buttermilk
- 2 cups (285 g) all-purpose flour
- 2 tablespoons (30 g) granulated sugar
- 1 teaspoon baking powder
- ½ teaspoon baking soda
- ½ teaspoon salt
- 1 cup (240 ml) club soda
- 3 tablespoons (42 g) unsalted butter, melted
Equipment
- Waffle iron
- Mixing bowls (one medium, one large)
- Whisk
- Wire rack
Instructions
- In a medium bowl, whisk together the eggs, sour cream, and buttermilk until thoroughly combined and smooth.
- In a separate large bowl, whisk together the dry ingredients: all-purpose flour, granulated sugar, baking powder, baking soda, and salt, ensuring they are evenly distributed.
- Pour the wet ingredients mixture into the bowl containing the dry ingredients. Mix gently using a whisk or rubber spatula until they are just barely combined. A few lumps are perfectly normal and desired; avoid overmixing.
- Gently stir in the club soda and melted butter until just incorporated. The batter should still be somewhat lumpy after this step.
- Allow the batter to rest for 10 minutes. During this time, preheat your waffle iron according to the manufacturer’s instructions.
- Once the waffle iron is hot, use a portion scoop (e.g., ¼ cup for a standard 4-inch waffle maker) to drop the batter onto the center of the grates. Close the lid.
- Cook the waffles until they are golden brown and easily release from the iron, typically around 4-6 minutes, depending on your waffle iron.
- Transfer the cooked waffles immediately to a wire rack to cool and maintain crispness. Repeat with the remaining batter until all waffles are cooked.
Important Notes & Tips
- Note 1 (Buttermilk Substitute): If you don’t have buttermilk, you can easily make your own by mixing 1 ½ cups of sour cream with ½ cup of water.
- Note 2 (Club Soda Alternative): Unflavored sparkling water can be used in place of club soda for similar aeration. Avoid tonic water, as it can introduce a slightly bitter flavor to your waffles.
- Storing Tips:
- Let waffles cool completely to room temperature before storing.
- Store in an airtight container in the refrigerator for up to 6 days.
- For longer storage (up to 3 months), freeze waffles in a single layer on a baking sheet until firm, then transfer to a freezer-safe bag with parchment paper between layers.
- Reheat frozen waffles in a toaster or toaster oven for best crispy results. Never microwave, as it will make them soft and chewy.
Nutrition Information (per waffle, based on 24 servings)
- Calories:
- 71 kcal
- Carbohydrates:
- 10 g
- Protein:
- 2 g
- Fat:
- 3 g
- Sugar:
- 2 g
- Sodium:
- 108 mg
Recipe Metadata
- Course: Breakfast
- Cuisine: American
⭐️ Did you make this recipe?
Please leave a review and let us know how you liked it!