
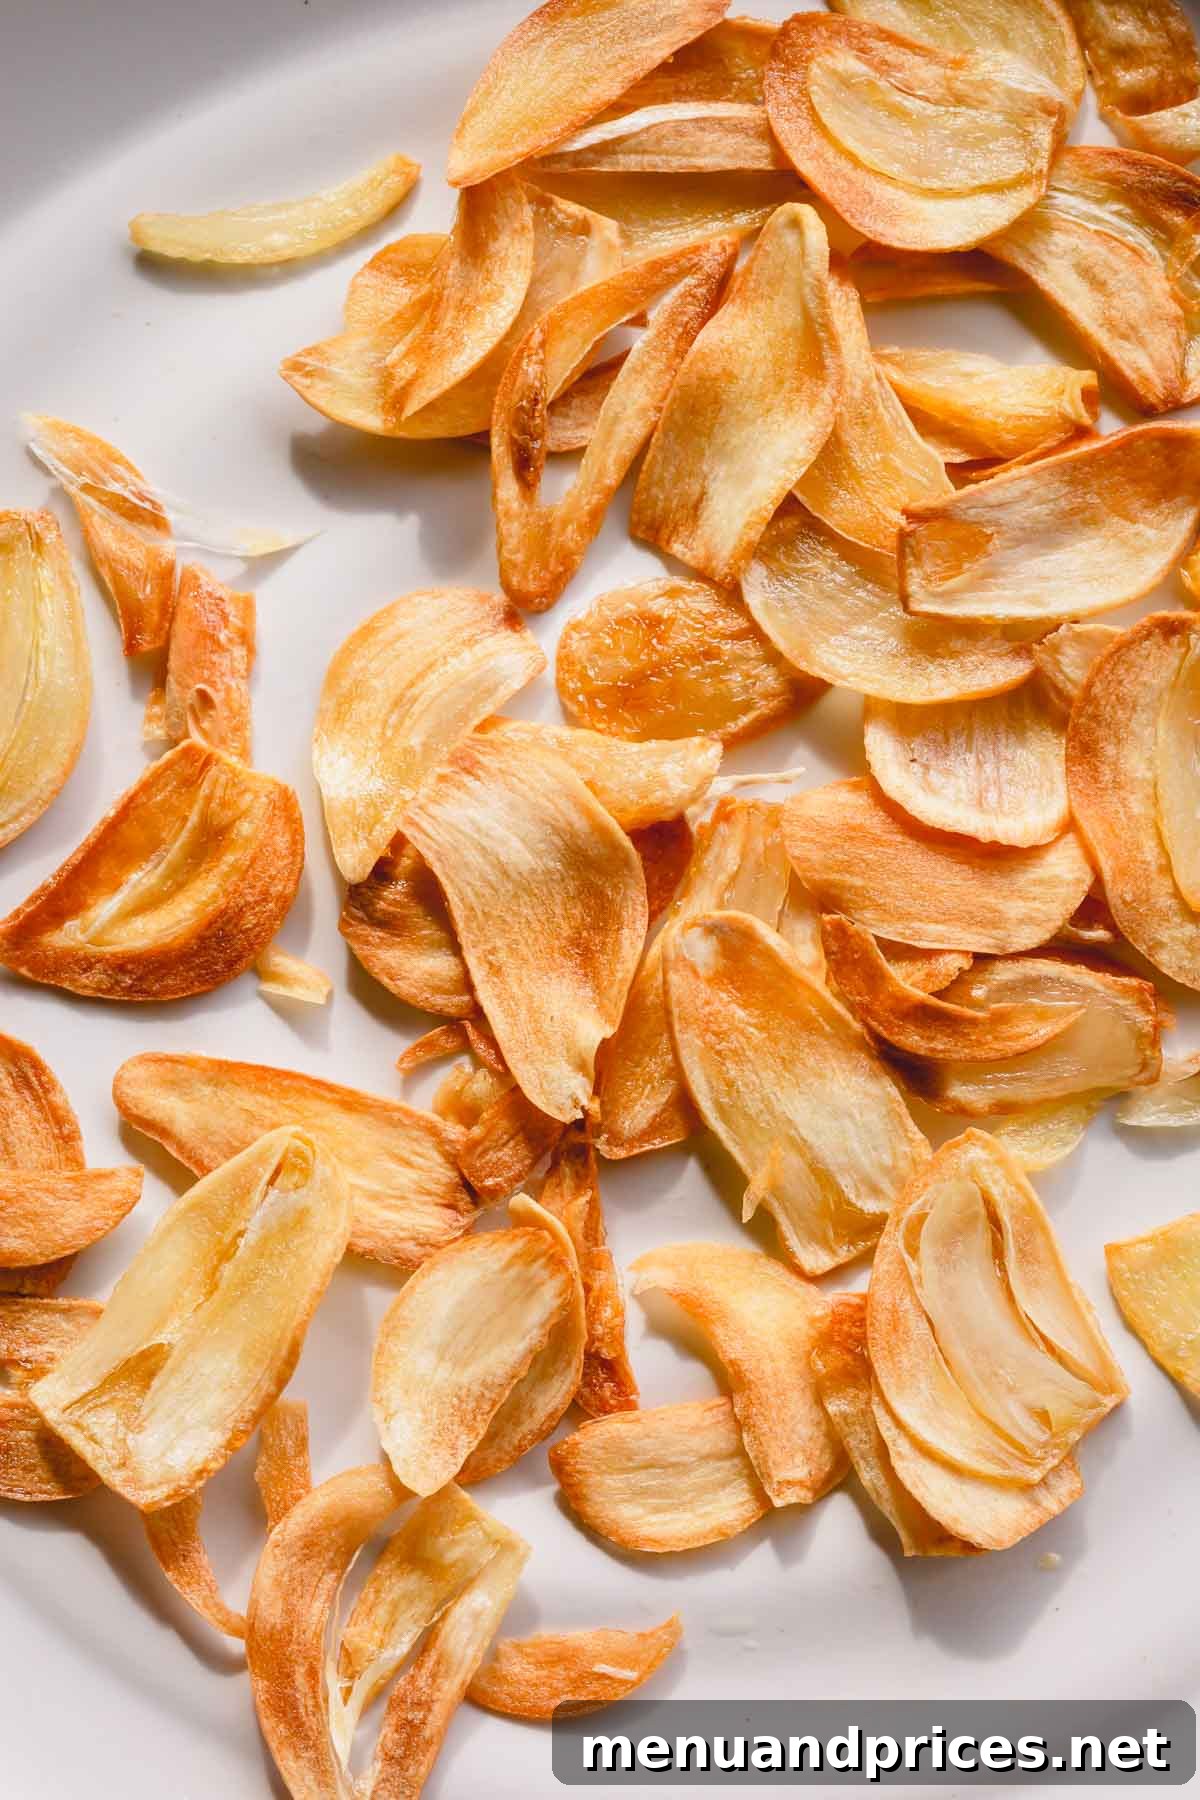
Uncover the simple yet profound secret to creating ultra-crispy, golden-brown fried garlic chips right in your own kitchen. This delightful topping brings a burst of savory flavor and an irresistible crunch to a wide array of dishes, transforming everyday meals into culinary experiences. From selecting the perfect bulb of garlic to mastering the frying technique, and discovering creative ways to incorporate these aromatic treasures into your cooking, this comprehensive guide provides all the essential tips and tricks you need. Get ready to impress your taste buds and elevate your home cooking with this surprisingly easy-to-make condiment.
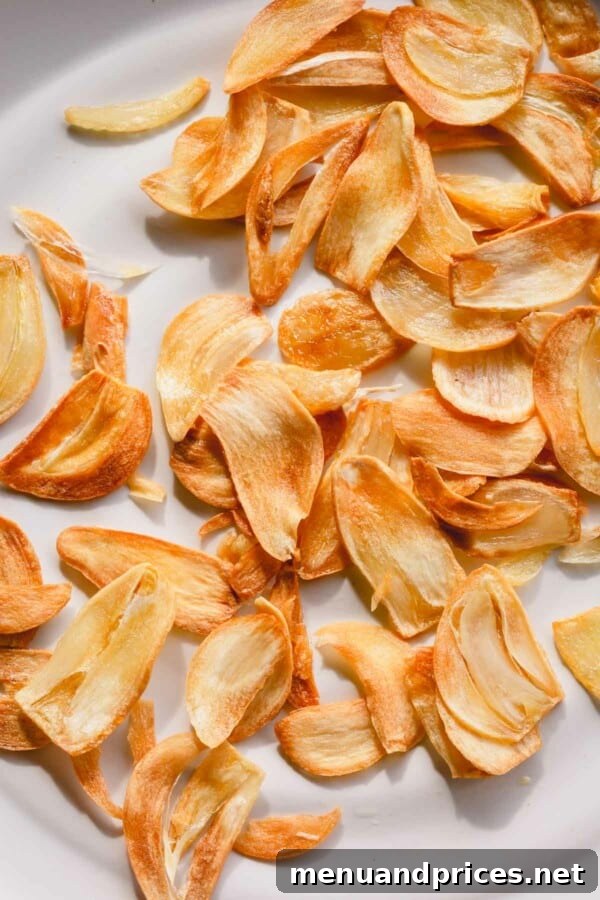
Why You’ll Adore These Homemade Crispy Garlic Chips
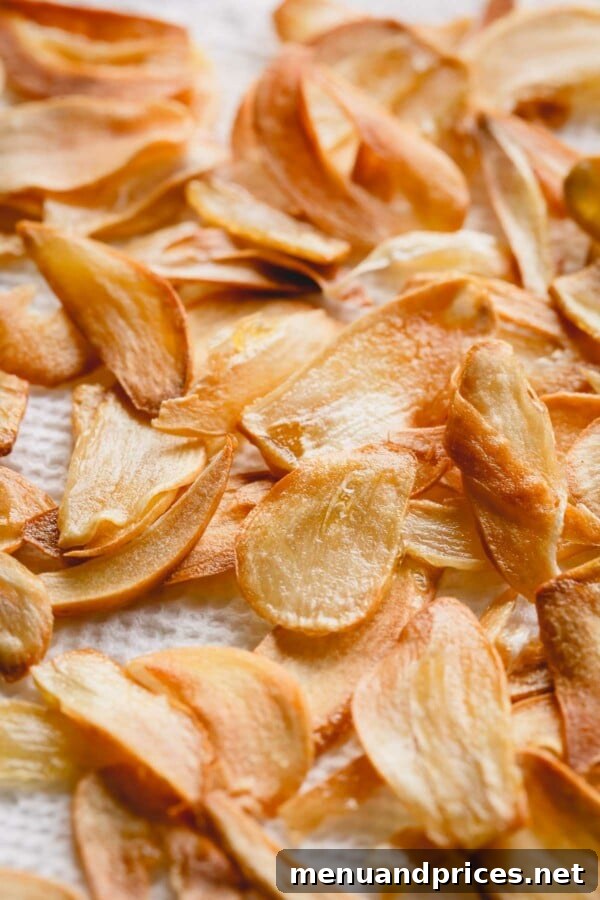
For every garlic enthusiast, and indeed anyone who appreciates a simple ingredient elevated to star status, these homemade fried garlic chips are about to become your new kitchen obsession. They are more than just a garnish; they are a transformative element that adds depth, texture, and an incomparable nutty sweetness to virtually any savory dish. Unlike the sharp, pungent bite of raw garlic, frying gently caramelizes the garlic, mellowing its intensity and concentrating its aromatic qualities into a delicate, crispy wafer.
Imagine the satisfying crackle as you sprinkle these golden nuggets over a steaming bowl of noodles, a vibrant stir-fry, or a rich, creamy soup. The texture alone is enough to captivate: light, airy, and utterly crispy, providing a perfect counterpoint to softer components of your meal. The flavor profile is equally enchanting – a rich, savory nuttiness with a subtle sweetness that dances on the palate, enhancing rather than overpowering other ingredients. Beyond their sensory appeal, these fried garlic chips win major points for their simplicity. They are incredibly easy and remarkably quick to prepare, making them an accessible luxury for any home cook. With minimal effort, you can create a batch of these addictively delicious chips that promise to elevate your culinary creations and leave everyone asking for your secret ingredient.
Essential Tools and Ingredients for Crafting Perfect Garlic Chips
Creating exquisite crispy garlic chips doesn’t require a professional kitchen or exotic ingredients. With just a few basic tools and fresh components, you can achieve restaurant-quality results. Here’s a detailed look at what you’ll need to gather:
- Mandoline Slicer or a Super Sharp Chef’s Knife: The secret to evenly fried, consistently crispy garlic chips lies in the uniformity of your slices. A mandoline slicer is truly a game-changer here, allowing you to achieve paper-thin, even slices with remarkable ease and speed. This consistency ensures every piece fries at the same rate, preventing some from burning while others remain soft. If a mandoline isn’t available, a very sharp chef’s knife and careful, controlled strokes can also yield good results. Just focus on making your slices as thin and uniform as possible.
- Small Skillet or Saucepan: The dimensions of your frying vessel are more important than you might think. For a typical batch of garlic chips, a smaller skillet or saucepan (such as a 2.5-quart stainless steel saucepan with roughly a 5-inch bottom diameter) is ideal. A smaller pan minimizes the amount of oil needed while still providing sufficient depth to fully submerge the garlic slices, which is crucial for even, golden frying. Using too large a pan might require excessive oil or result in scattered, unevenly cooked chips.
- High-Quality Cooking Oil: Your choice of oil plays a significant role in the flavor and success of your fried garlic chips. I often use olive oil for its rich flavor profile that complements the garlic beautifully. However, you have excellent alternatives depending on your preference and what you have on hand. Avocado oil, vegetable oil, or canola oil are all fantastic choices. These oils are favored for frying because they have a relatively high smoke point, meaning they can reach the necessary temperatures without burning or imparting off-flavors. Additionally, their neutral taste allows the inherent sweetness and aroma of the garlic to truly shine.
- Fresh Garlic Bulbs: This is, of course, the star ingredient. The freshness and type of garlic you select will directly impact the taste, texture, and overall success of your chips. We will delve into the nuances of choosing between hardneck and softneck garlic in the following section to help you make the best choice for optimal flavor and ease of preparation.
- Slotted Spoon or Spider: An indispensable tool for safely and efficiently removing the delicate fried garlic chips from the hot oil. Its design allows the hot oil to quickly drain back into the pan, ensuring your chips are crisp and not greasy.
- Paper Towel-Lined Plate: A simple yet crucial setup. Line a plate with a few layers of paper towels to create an absorbent surface. This is where your freshly fried chips will rest, allowing any residual oil to be absorbed, which is key to achieving that ultimate, dry crispness.
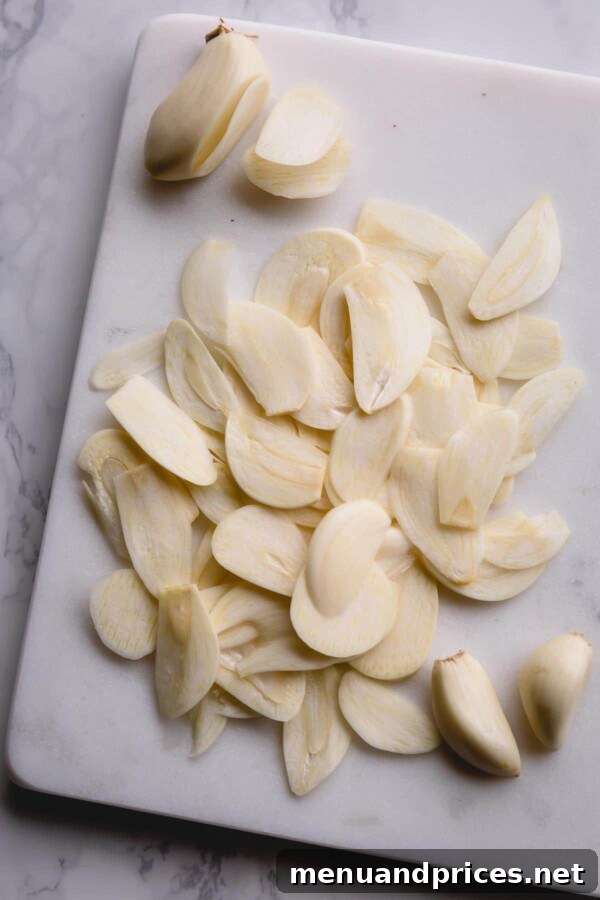
Choosing the Best Garlic for Your Chips: A Deep Dive into Hardneck vs. Softneck
The world of garlic is more diverse than many realize, with distinct varieties offering different culinary experiences. When making fried garlic chips, understanding the characteristics of hardneck and softneck garlic can significantly influence your final product. Both types will work, but one often yields superior results for this specific application.
- Hardneck Garlic: Easily identifiable by its rigid, woody central stem, hardneck garlic thrives in colder climates. This stem is actually a flower stalk, often referred to as a garlic scape, which is also edible and quite delicious. Hardneck varieties are renowned for their robust, complex, and often more pungent flavor profile, which can sometimes have a spicy undertone. A single hardneck bulb typically contains fewer, but significantly larger, cloves arranged in a single ring around the central stem. This structural characteristic makes hardneck garlic much easier to peel and slice into uniform pieces, saving you precious preparation time and effort. The concentrated, rich flavor of hardneck garlic translates into deeply aromatic and intensely savory fried chips.
- Softneck Garlic: This is the most prevalent type of garlic found in standard grocery stores. Softneck varieties are preferred by commercial growers due to their adaptability to warmer climates and their excellent storage capabilities, often boasting a longer shelf life. As their name suggests, they lack the hard central stem, allowing their stems to be braided – a common sight in traditional kitchens. Softneck garlic generally has a milder flavor compared to hardneck, and its bulbs typically contain numerous smaller cloves, often arranged in multiple concentric layers. While perfectly suitable for general cooking, peeling and slicing these smaller, more numerous cloves can be a bit more tedious when preparing for garlic chips.
For making truly exceptional fried garlic chips, my strong recommendation is to opt for hardneck garlic. Here’s a detailed breakdown of why it’s the preferred choice:
- Superior Ease of Preparation: The larger size and fewer number of cloves in hardneck garlic simplify the peeling and slicing process immensely. This means less time spent on prep and more time enjoying your delicious creation. Achieving thin, consistent slices is also easier, which is paramount for even frying.
- Rich and Complex Flavor: Hardneck garlic possesses a naturally more intense and nuanced flavor. When thinly sliced and slowly fried, this complexity deepens, resulting in chips that are not just crispy, but bursting with a profound, savory garlic taste that truly stands out. The robust flavor holds up beautifully to the frying process, delivering a more satisfying culinary experience.
Where to Find Hardneck Garlic
Hardneck garlic is commonly available during harvest season at local farmer’s markets. You can also frequently find it in specialty grocery stores, organic food shops, and particularly in Asian markets, which often stock a wider variety of less common produce. When choosing any garlic, look for firm, heavy bulbs with intact, dry papery skins. Avoid bulbs that feel soft, squishy, or show any signs of sprouting or mold.
The Perfect Fry: Step-by-Step Guide to Crispy Garlic Chips
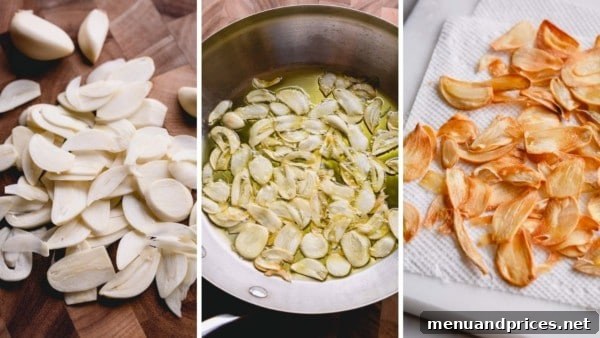
Achieving perfectly crispy, golden fried garlic chips is a simple process that relies on careful execution and a bit of patience. Rushing the process can quickly lead to burnt or unevenly cooked results. Follow these detailed steps to ensure a flawless batch every time:
- Set Up Your Draining Station: Before you even think about heat, prepare a plate by lining it with several layers of paper towel. This absorbent surface is crucial for wicking away excess oil from your freshly fried chips, ensuring they cool to an ultimate crispness rather than becoming greasy. Have a slotted spoon or a spider ladle ready and within reach for safely removing the garlic from the hot oil.
- Slice Your Garlic Uniformly Thin: This is arguably the most critical step for success. Peel your garlic cloves thoroughly. Then, using a mandoline slicer or a very sharp chef’s knife, slice the garlic as thinly and evenly as humanly possible. Think paper-thin, almost translucent slices. Inconsistent thickness will lead to uneven cooking—some pieces will burn quickly while others remain soft and undercooked. Uniformity is the key to that coveted, consistent crunch.
- Pre-warm the Oil Gently: Pour your chosen cooking oil into your small skillet or saucepan. Place the pan over medium heat. The goal here is to gently warm the oil, not make it smoking hot. You can test the oil’s temperature by dropping a single garlic slice into it. If it immediately sizzles and bubbles vigorously, the oil is too hot; remove it from the heat and allow it to cool slightly. Ideally, you should see gentle, steady bubbling around the garlic slice, indicating a perfect temperature for slow, even frying.
- The Gentle Fry for Golden Perfection: Once the oil is at the correct temperature, carefully add all your thinly sliced garlic to the pan. Initially, you might notice the oil bubbling gently, but it may seem as though the garlic isn’t cooking much for the first minute or so. This is completely normal and part of the process! Resist any temptation to increase the heat. High heat is the arch-enemy of fried garlic chips; it will cause the delicate slices to burn rapidly on the outside while leaving them soft on the inside. Fry the garlic for approximately 2-4 minutes, or until it reaches a beautiful, uniform golden brown color. Stir and flip the slices gently and continuously with your slotted spoon or spatula to ensure every piece cooks evenly and prevents sticking. Stay attentive, as the transition from golden to burnt happens very quickly.
- Drain and Cool for Maximum Crispness: The instant your garlic chips achieve that perfect golden hue (they should not be dark brown, which indicates bitterness), immediately remove them from the hot oil using your slotted spoon. Transfer them directly onto the prepared paper towel-lined plate, spreading them out in a single layer. This allows any residual oil to drain away efficiently and promotes even cooling. As they cool to room temperature, they will continue to crisp up, becoming delightfully crunchy. Do not cover them, as this can trap steam and make them soggy. Once completely cool, they are ready to be used or stored.
Don’t Discard the Flavorful Infused Garlic Oil!
The oil left in your skillet after frying the garlic chips is now infused with an incredible, subtle garlic essence. This “garlic oil” is liquid gold and too precious to throw away! After it has cooled completely, strain it through a fine-mesh sieve or cheesecloth to remove any tiny garlic bits. Transfer the strained oil into a clean, airtight container, like a mason jar. This infused oil is fantastic for sautéing vegetables, roasting potatoes, drizzling over pasta, or simply using as your everyday cooking oil. It imparts a wonderful, aromatic depth to countless dishes, adding a layer of flavor that plain oil can’t match.
Endless Culinary Possibilities: Creative Garlic Chips Garnish Ideas
Once you’ve experienced the sheer delight of these homemade, crispy fried garlic chips, you’ll discover they are incredibly versatile and can elevate almost any savory dish. Their satisfying crunch and deep, nutty garlic flavor make them a fantastic finishing touch that adds both texture and an aromatic boost. While they might not be ideal for every dessert (though, who knows, maybe an adventurous savory ice cream could work!), their applications in main courses and appetizers are truly limitless. Here are some of my favorite and most creative ways to incorporate these addictive crispy garlic chips:
- Elevate Noodle and Rice Dishes: A generous sprinkle of fried garlic chips transforms a humble bowl of sesame noodles, rich garlic butter rice, or a hearty steak fried rice into a gourmet experience. The textural contrast with soft grains or slippery noodles is simply divine.
- Enhance Stir-fries and Asian Cuisine: Add an authentic and delicious crunch to virtually any stir-fry, from a classic chicken and vegetable medley to a zesty skillet shrimp and cabbage stir-fry. They are a staple in many Asian dishes for good reason!
- Boost Roasted Vegetables and Salads: Take your oven-roasted veggies to an entirely new level. Sprinkling garlic chips over broccoli, asparagus, carrots, or Brussels sprouts after roasting adds an incredible depth of flavor and a delightful textural pop. They also make an exciting and flavorful alternative to traditional croutons in almost any salad.
- Perfect for Soups and Stews: A spoonful of crispy garlic chips over creamy tomato soup, a comforting lentil stew, a spicy ramen, or even a simple chicken noodle soup provides an unexpected crunch and a concentrated burst of garlic that beautifully complements the liquid.
- Jazz up Pasta Dishes: Finish off your favorite pasta preparations, such as aglio e olio, carbonara, or a rich bolognese, with a scattering of fried garlic chips. They add a sophisticated texture and intensify the savory notes of the sauce.
- Savory Breakfast Topping: Don’t limit them to dinner! These chips are surprisingly delicious sprinkled over scrambled eggs, fried eggs, omelets, or even avocado toast for an unexpected savory crunch at breakfast or brunch.
- Upgrade Sandwiches and Wraps: Add a layer of exciting texture and rich flavor to your sandwiches, burgers, or wraps. It’s an easy way to make a simple lunch feel more special and gourmet.
- Pizza and Flatbread Perfection: Before serving your homemade pizza or flatbread, scatter some fried garlic chips over the top. The warmth will release even more aroma, and the crunch adds a fantastic dimension.
- Complement Savory Pastries and Breads: Sprinkle them on freshly baked focaccia, garlic bread, savory muffins, or even a cheese scone for an extra layer of garlicky goodness and texture.
Once you have a jar of these golden beauties in your pantry, you’ll find countless opportunities to reach for them, transforming mundane meals into memorable culinary adventures. They are truly the secret weapon for adding that irresistible “something extra” to almost any dish.
Storing Your Homemade Garlic Chips and Infused Oil for Freshness
Proper storage is paramount for both preserving the irresistible crispness of your homemade fried garlic chips and ensuring the safety and longevity of your flavorful infused oil. Follow these essential tips to enjoy your delicious creations for as long as possible:
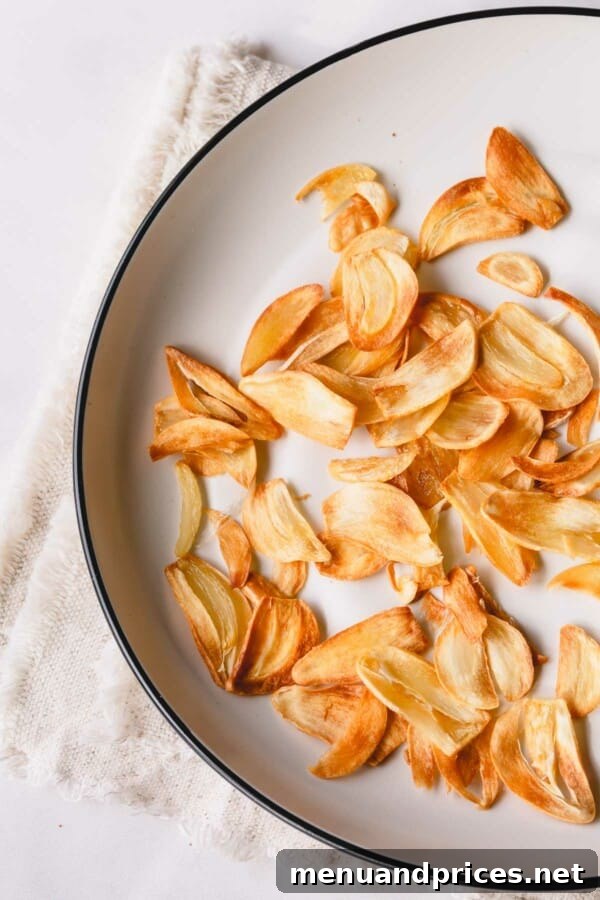
- Storing Fried Garlic Chips: Once your garlic chips have been fried to golden perfection, it is absolutely crucial that they cool completely to room temperature before storage. This step prevents condensation from forming inside the container, which would inevitably lead to soggy, unappetizing chips. Once cool, transfer the crispy chips into a clean, airtight container. A glass jar with a tight-fitting lid is an excellent choice. Store these containers at room temperature, ideally in a cool, dry place away from direct sunlight and excessive humidity. Stored correctly, your homemade fried garlic chips will retain their delightful crunch and potent flavor for up to 1 month. Avoid refrigerating the chips, as the moisture and cold environment of a refrigerator will quickly diminish their crisp texture.
- Storing Garlic Infused Oil: The garlic-infused oil is a valuable byproduct of this recipe, packed with aromatic flavor. After frying, allow the oil to cool completely. Strain it meticulously through a fine-mesh sieve or several layers of cheesecloth to remove every tiny particle of garlic. Any remaining garlic bits can contribute to spoilage and, more critically, create an environment for the growth of harmful bacteria, including *Clostridium botulinum*, which causes botulism. For this reason, it is imperative that garlic-infused oil is ALWAYS refrigerated. Transfer the strained, cooled oil into a clean, airtight glass bottle or jar and store it in the refrigerator. When properly refrigerated, this flavorful oil can be safely used for cooking for approximately 2 to 3 weeks. Always inspect the oil for any signs of spoilage, such as off-odors, cloudiness, or mold, before use. When in doubt, it’s always best to discard it.
By adhering to these straightforward storage guidelines, you can ensure a consistent supply of both crunchy fried garlic chips and incredibly aromatic garlic oil, ready to infuse your next meal with delicious, homemade goodness.
How to Make Crispy Fried Garlic Chips
By Shinee Davaakhuu
A quick and easy recipe to create addictive, golden, and crispy fried garlic chips – the ultimate savory topping for everything!
Prep Time: 5 minutes
Cook Time: 5 minutes
Total Time: 10 minutes
Servings: 4 servings
Pin Recipe
| Comment
| Print Recipe
Ingredients
- 3 tablespoons cooking oil (olive oil, avocado oil, vegetable, or canola oil)
- 6 large garlic cloves (preferably hardneck for superior flavor and easier slicing)
Instructions
- Prepare a plate by lining it with several layers of paper towel. Keep a slotted spoon or spider nearby for easy removal of chips.
- Peel the garlic cloves and slice them as thinly and uniformly as possible. A mandoline slicer is recommended for best results.
- Pour the oil into a small skillet or saucepan. Heat over medium heat until just warm. To test, drop a single garlic slice into the oil; it should gently bubble around the edges.
- Add all the sliced garlic to the warm oil. Fry for approximately 2-4 minutes, stirring and flipping occasionally, until the garlic turns a uniform golden brown. Do NOT increase the heat to speed up the process, as this will cause the garlic to burn.
- Immediately remove the crispy garlic chips from the oil using the slotted spoon and transfer them to the paper towel-lined plate to drain and cool completely. The chips will become fully crisp as they cool. Once cooled, store them in an airtight container at room temperature.
- Allow the infused oil to cool completely in the pan. Strain it through a fine-mesh sieve or cheesecloth into an airtight mason jar. Store the strained garlic oil in the refrigerator for future use.
Tips & Notes
- Oil Selection: While olive oil imparts a rich flavor, neutral oils like avocado, vegetable, or canola oil are excellent alternatives that allow the pure garlic essence to shine.
- Garlic Variety: Hardneck garlic (often found at farmer’s markets or Asian grocers) is recommended for its larger cloves and more complex flavor, resulting in more flavorful and easier-to-prepare chips. Softneck garlic also works well if hardneck is unavailable.
- Infused Oil Safety: For safety reasons, it is crucial to refrigerate the garlic-infused oil immediately after straining and cooling. Store it in an airtight container in the fridge for up to 2-3 weeks. Do not store garlic oil at room temperature, as it poses a botulism risk.
Nutrition Facts
(Estimated per serving, based on 4 servings. Nutritional values can vary based on specific ingredients and preparation methods. Please consult a professional nutritionist for precise values.)
- Calories: 100 kcal
- Carbohydrates: 1 g
- Protein: 1 g
- Fat: 11 g
- Sugar: 1 g
- Sodium: 1 mg
Course: Garnish, Appetizer, Topping, Condiment
Cuisine: American, Asian, Global
⭐️ Did you make this recipe for crispy fried garlic chips? We’d love to hear about your experience! Please take a moment to leave a review and share how much you enjoyed this delicious topping!