
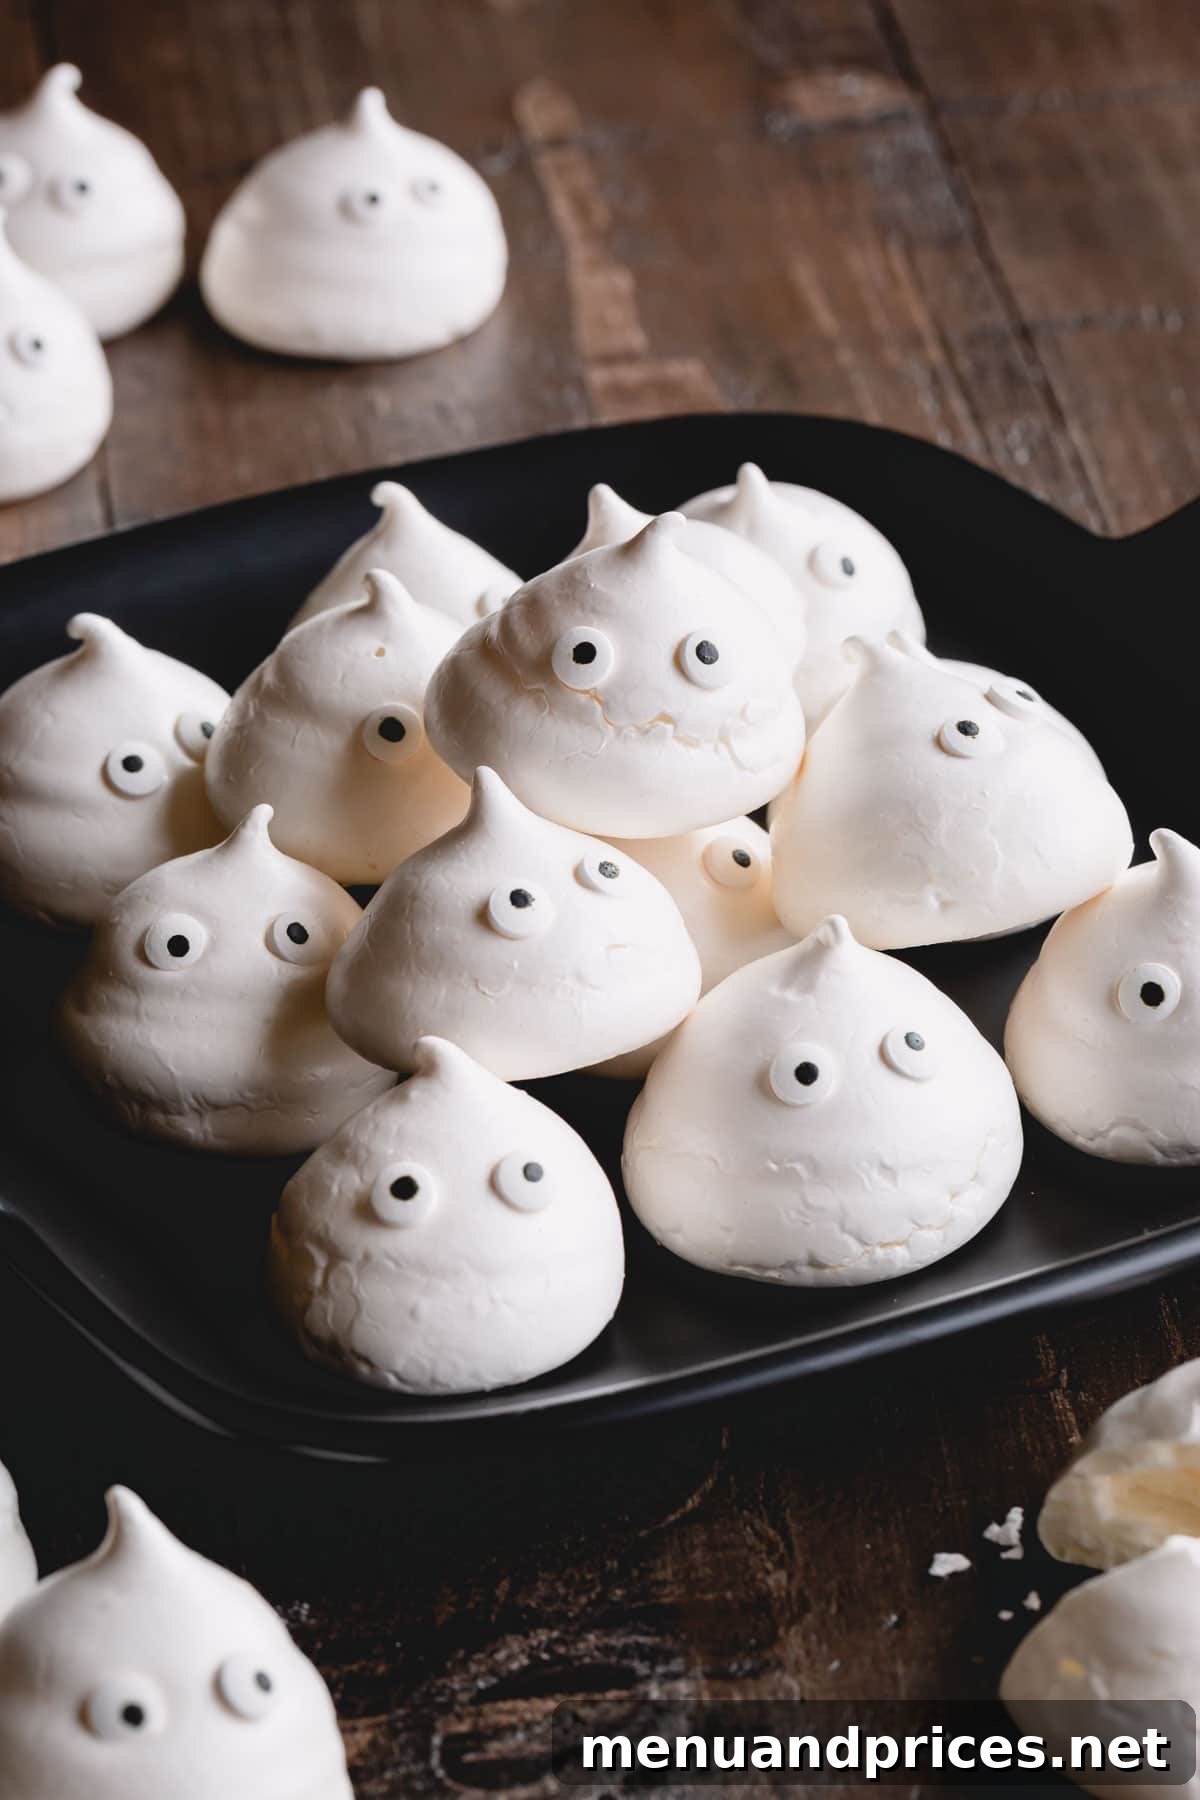
Meringue Ghosts: Your Go-To Recipe for Spooktacular Halloween Treats
Delightfully crisp, incredibly light, and melt-in-your-mouth sweet, these adorable meringue ghosts are not just a treat for the taste buds but also a feast for the eyes! They are the quintessential Halloween confection – charming, spooky, and surprisingly simple to create. Forget complicated Halloween baking; this recipe brings maximum impact with minimal fuss, making it perfect for bakers of all skill levels.
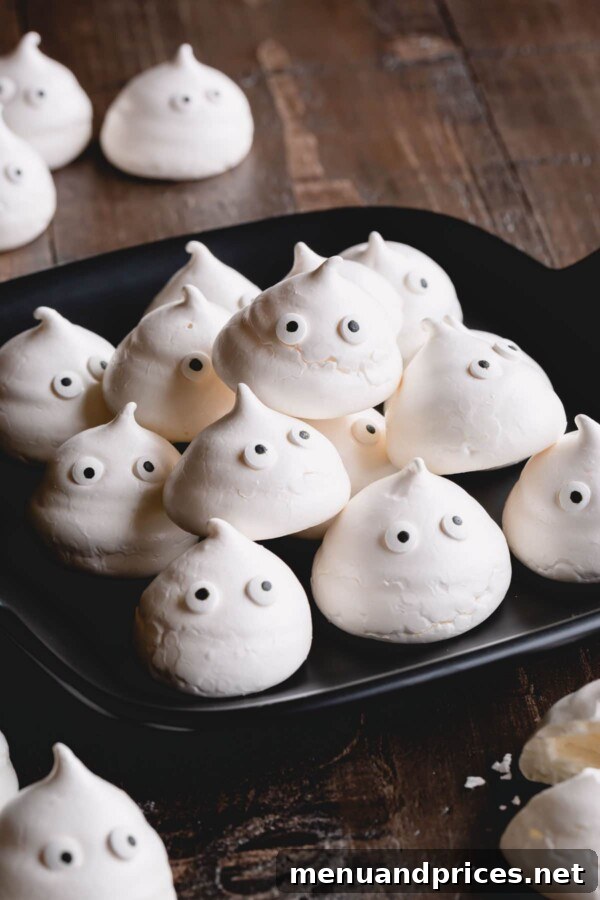
Haunted History: A Family Favorite for Halloween
There’s something truly enchanting about Halloween, and in our household, the magic lasts all year! My eldest son, now five, developed an obsession with ghosts when he was just two years old. And as often happens with siblings, his younger brother has enthusiastically adopted the same fascination. For them, Halloween isn’t just a holiday; it’s a way of life, filled with imaginative play and spooky fun.
Naturally, with their ghost-centric world, I knew exactly what kind of treat would be a monumental success. Crafting these meringue ghosts for them was an absolute joy, and sure enough, they were an instant hit! The excitement in their eyes as they helped pipe and decorate these ethereal figures made every moment worthwhile. This recipe isn’t just about baking; it’s about creating cherished memories and celebrating the playful spirit of Halloween with treats that are as fun to make as they are to eat.
Why You’ll Fall in Love with This Meringue Ghost Recipe
While the sheer cuteness of these meringue ghosts might be enough to win you over, there are even more compelling reasons why this recipe deserves a permanent spot in your Halloween baking repertoire. Here’s why you’ll absolutely adore making and sharing these ghostly delights:
- Effortlessly Easy to Master: Don’t be intimidated by the elegant appearance of meringues. This recipe is designed to be straightforward, making it perfect for beginners and seasoned bakers alike. With just a few simple steps, you’ll whip up perfect, airy meringues every time.
- Pantry Staples Only: You likely already have all the ingredients you need right in your kitchen. We’re talking about basic, accessible ingredients like egg whites, sugar, and a pinch of salt. No specialty store runs required, which means you can decide to whip up a batch on a whim!
- Irresistibly Adorable & Delicious: These aren’t just any sweet treats; they’re conversation starters! Their crisp texture and delicate sweetness are perfectly balanced, while their charming ghost shapes are guaranteed to bring smiles and a touch of spooky fun to any gathering. They’re light, airy, and literally melt in your mouth.
- Versatile for Any Occasion: While perfect for Halloween, these meringue cookies can be easily adapted for other holidays or themes by simply changing the piping shape or decoration.
- Make-Ahead Friendly: Meringue cookies store exceptionally well, making them an ideal treat to prepare in advance, freeing up your time closer to your Halloween festivities.
From their charming appearance to their delightful taste and simple preparation, these meringue ghosts are truly a win-win for any festive occasion. Get ready to impress your friends and family with these hauntingly good creations!
Meringue Mastery: Essential Tips for Perfect Meringue Ghosts
The thought of working with meringue might seem daunting to some. Whispers of collapsed peaks, sticky textures, and temperamental egg whites can make it feel like a culinary challenge. But I’m here to tell you that it’s not nearly as complicated as it sounds!
With a few key techniques and a little patience, you’ll be whipping up flawless, crisp meringue ghosts like a pro. These three fundamental tips are your secret weapons for achieving airy, stable, and perfectly textured meringue cookies every single time:
- Ensure a Fat-Free Environment: This is arguably the most critical rule for successful meringue. Any trace of fat—whether from egg yolk, greasy bowls, or uncleaned whisks—can prevent egg whites from whipping up properly. Egg whites contain proteins that, when agitated, unfold and trap air, forming a stable foam. Fat interferes with this process, coating the proteins and inhibiting their ability to create and hold air.
- Cleanliness is Key: Always use squeaky-clean bowls and whisk attachments. Metal or glass bowls are highly recommended over plastic, as plastic can absorb grease over time, even after washing.
- Egg Separation: Be extremely careful when separating egg whites from yolks. Even a tiny speck of yolk can ruin your meringue. If any yolk gets into the whites, it’s best to start over with fresh eggs and clean equipment.
- Room Temperature Egg Whites are a Must: While it’s easier to separate cold eggs (as the yolks are firmer and less likely to break), egg whites whip up best when they are at room temperature.
- Why Temperature Matters: Room temperature egg whites have lower surface tension, allowing them to incorporate air more efficiently and achieve a greater volume and more stable foam.
- Simple Trick: Separate your eggs while they’re cold, then let the egg whites sit on the counter for at least 30 minutes (or up to an hour) before whipping. This small step makes a significant difference in the volume and stability of your meringue.
- Add Sugar Slowly and Dissolve Completely: Sugar plays a vital role in stabilizing the whipped egg whites, but it must be incorporated correctly.
- Gradual Addition: Never dump all the sugar into the egg whites at once. Add it slowly, one tablespoon at a time, while the mixer is running. This allows the sugar crystals to dissolve gradually without deflating the foam.
- The Dissolution Test: The key to crispy, stable meringues is ensuring the sugar granules are completely dissolved. To check, rub a small amount of meringue between your fingers. If you feel any grittiness, continue whipping until smooth. Undissolved sugar will melt during baking, creating a sticky, chewy, or weeping meringue rather than the desired light and crispy texture.
By diligently following these three simple yet powerful tips, you’ll unlock the secret to creating consistently perfect meringues that are light, airy, and beautifully crisp—the ideal foundation for your adorable ghost cookies!
Demystifying Key Ingredients for Meringue Ghosts
Crafting perfect meringue ghosts requires just a few basic ingredients, each playing a crucial role in achieving that signature crisp and airy texture. Understanding these components will help you master the art of meringue baking.
- Egg Whites: The Foundation of Meringue
- Separation Technique: It’s generally easier to separate cold eggs because the yolk is firmer and less likely to break. So, separate your eggs right after taking them out of the fridge. Once separated, let the egg whites come to room temperature before whipping (as discussed in the tips above) to achieve maximum volume.
- Fresh vs. Carton Egg Whites: You can certainly use carton egg whites for convenience. However, it’s vital to read the labels carefully. Some pasteurized carton egg whites are treated in a way that prevents them from whipping up properly into stiff peaks. Look for brands specifically labeled “for baking” or “suitable for meringues.”
- Yield: Typically, one large egg yields about 1 ounce (30g) of egg white. This recipe calls for 140g, which is approximately 4-5 large egg whites.
- Sugar: Sweetness, Stability, and Shine
- Granulated vs. Powdered Sugar: I’ve successfully made meringue cookies using both granulated sugar and powdered (confectioners’) sugar, and both work wonderfully!
- Fine Granulated Sugar: If using granulated sugar, I highly recommend opting for fine granulated sugar (also known as caster sugar in some regions). Its smaller crystals dissolve much faster into the egg whites, reducing the risk of grittiness and ensuring a smooth, stable meringue.
- Powdered Sugar: If you prefer to use powdered sugar, you’ll need a bit more by weight/volume because it’s less dense. For this recipe, if substituting, use approximately 1¼ cups (170g) of powdered sugar. Powdered sugar often contains cornstarch, which can add a touch more stability to your meringue.
- Role in Meringue: Sugar not only sweetens the meringue but also stabilizes the whipped egg white foam, helping to create that glossy, firm peak consistency. It also contributes to the crisp texture once baked.
- Granulated vs. Powdered Sugar: I’ve successfully made meringue cookies using both granulated sugar and powdered (confectioners’) sugar, and both work wonderfully!
- Cream of Tartar: The Meringue Stabilizer
- What it is: Cream of tartar is an acidic salt (potassium bitartrate) that acts as a stabilizer for egg whites. It helps the egg whites whip up faster, achieve greater volume, and prevents them from collapsing.
- Optional but Recommended: While it’s an optional ingredient and your meringue will still work without it, I highly recommend including it for the most reliable and stable results, especially for beginners.
- Substitutions: If you don’t have cream of tartar, you can substitute it with an equal amount of white vinegar or lemon juice (about ½ teaspoon for 4 egg whites). The acid provides a similar stabilizing effect.
- Salt: Flavor Enhancer
- Balance and Brightness: Just a pinch of salt enhances the overall flavor of the meringue, balancing the sweetness and adding depth.
- Coarse Kosher Salt: Coarse kosher salt dissolves well and provides a clean flavor. Any fine salt will also work.
- Pure Vanilla Extract: A Touch of Aroma
- Flavor Profile: Vanilla extract adds a lovely aromatic note that complements the sweetness of the meringue. Use pure vanilla extract for the best flavor.
With these simple yet powerful ingredients, you’re well on your way to creating stunning and delicious meringue ghosts that everyone will adore!
How to Craft Your Adorable Meringue Ghosts: A Step-by-Step Guide
Creating these delightful meringue ghosts is a straightforward process that yields impressive results. Follow these detailed steps to ensure your meringues are perfectly crisp, airy, and ready to haunt your Halloween spread:
- Prepare Your Baking Environment: Begin by preheating your oven to a very low temperature, typically 200°F (95°C). Meringues don’t bake; they slowly dry out in a low oven, which helps them retain their white color and crisp texture. Line two large baking sheets with parchment paper. Parchment paper is essential to prevent sticking and for easy removal.
- Whip Egg Whites to Foamy Stage: In a meticulously clean mixing bowl (preferably metal or glass) fitted with a whisk attachment, begin beating your room-temperature egg whites on medium-low speed. Continue to whisk until the egg whites become frothy and foamy, resembling soft dish soap suds. This initial aeration builds the foundation for your meringue.
- Introduce Stabilizers: Once the egg whites are foamy, add the cream of tartar (if using) and salt. Continue whisking on medium-low speed. The cream of tartar will help stabilize the developing foam, making it stronger and more resilient.
- Gradually Add Sugar: This is a crucial step! While the mixer is still running on medium-low speed, begin adding your fine granulated sugar (or powdered sugar) very slowly, one tablespoon at a time. Allow each spoonful of sugar to dissolve into the egg whites before adding the next. This gradual process ensures the sugar fully incorporates and stabilizes the egg white proteins without deflating the foam. Continue until all the sugar is added.
- Increase Speed and Whip to Soft Peaks: Once all the sugar is incorporated, gradually increase the mixer speed to medium-high. Continue beating the egg whites until they form soft peaks. When you lift the whisk, the peaks should hold their shape briefly but then gently curl over.
- Add Vanilla and Whip to Stiff Peaks: Stir in the pure vanilla extract. Continue beating the egg whites on medium-high speed until stiff, glossy peaks form. When you lift the whisk, the meringue should hold a firm, upright peak that does not collapse or curl. The meringue should also look smooth, shiny, and feel completely smooth (no grittiness) when rubbed between your fingers.
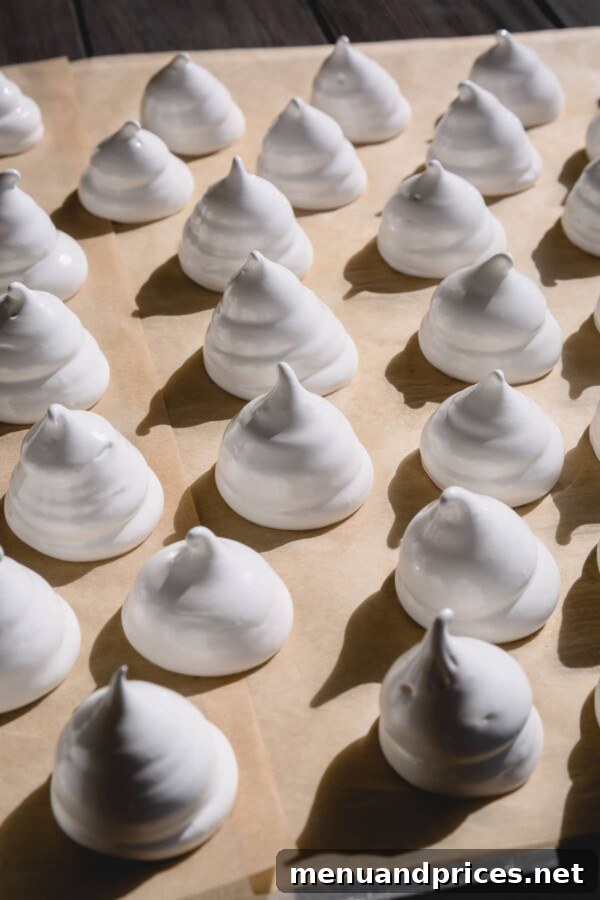
- Prepare for Piping: Transfer the stiff meringue into a piping bag fitted with a large round tip. A Wilton 1A tip is ideal for creating the classic ghost shape, allowing for a generous and smooth flow of meringue.
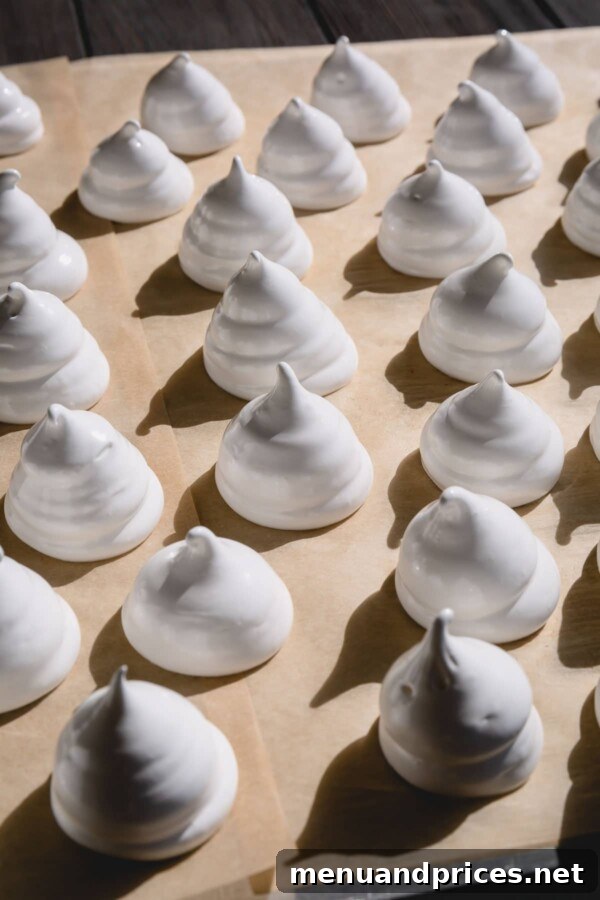
- Pipe Your Ghosts: On your prepared baking sheets, pipe 1.5-inch tall mounds of meringue. Start with a firm base, then gently lift the piping bag straight up as you release pressure, creating a whimsical ghost shape. Leave a little space between each ghost to allow for air circulation. If you’re using candy eyes for decoration, gently place two on each meringue ghost immediately after piping.
- Slow Bake and Cool: Place the baking sheets in the preheated 200°F (95°C) oven. Bake the meringue cookies for approximately 2 hours. After 2 hours, turn off the oven completely. Do not open the oven door. Allow the meringue cookies to cool completely inside the turned-off oven for a few hours or, ideally, overnight. This slow cooling process prevents cracking and ensures they dry out completely, resulting in a perfectly crisp interior.
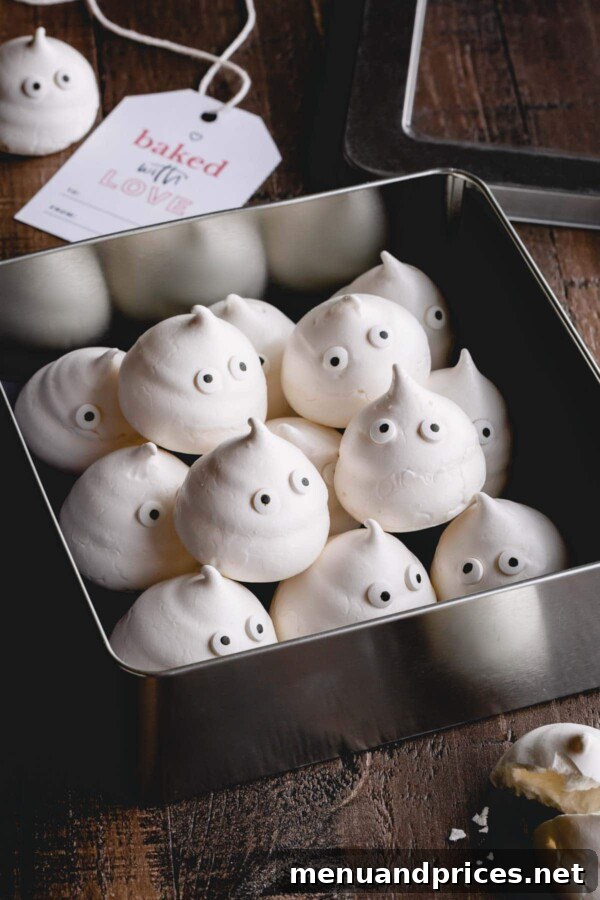
- Store for Freshness: Once the meringue ghosts are completely cool and crisp to the touch, carefully transfer them into an airtight container. Store them at room temperature for up to two weeks, preserving their delightful crunch.
With these steps, you’ll create a batch of charming meringue ghosts that are sure to be a highlight of your Halloween celebrations!
Creative Decorating Ideas for Your Meringue Ghosts
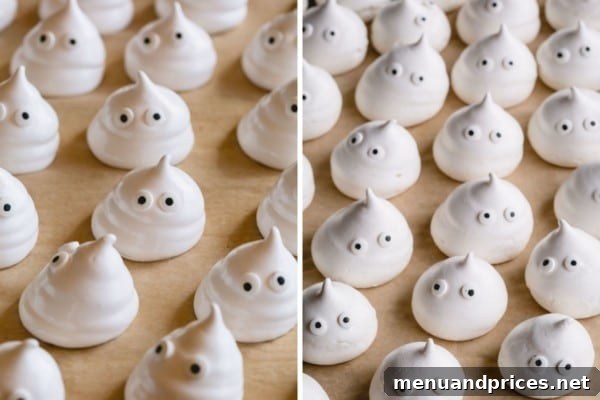
One of the most fun parts of making meringue ghosts is bringing their little personalities to life! Even if you don’t have candy eyes on hand, there are plenty of simple and effective ways to add those adorable (or spooky!) facial features. Here are three fantastic methods to decorate your baked and cooled meringue cookies:
- Gel Food Coloring: For Hand-Drawn Charm
- Method: Dip a toothpick or a fine-tipped food-safe brush into black gel food coloring. Carefully draw two eyes and, if you’re feeling adventurous, a little mouth onto each cooled meringue ghost.
- Tips: Gel food coloring is concentrated, so a little goes a long way. Work with a steady hand. If you make a mistake, you can often gently scrape it off with a clean toothpick before it dries completely. This method offers the most artistic freedom for different expressions.
- Edible Markers: Quick and Easy Precision
- Method: Use a black edible food marker to draw eyes and mouths. These markers are designed for food surfaces and provide a clean, consistent line.
- Tips: Edible markers are incredibly convenient, especially for kids who want to help with decorating. They are less messy than gel coloring and perfect for creating uniform eyes. Ensure the meringue surface is completely dry before drawing to prevent bleeding.
- Melted Chocolate: Classic and Delicious
- Method: Melt a small amount of dark chocolate (or any chocolate of your choice) in a microwave-safe bowl or over a double boiler. Transfer the melted chocolate to a small piping bag with a very tiny snip at the end, or a Ziploc bag with a corner snipped off. Alternatively, you can use a toothpick or a small brush. Carefully pipe two dots for eyes and a small ‘O’ or wavy line for a mouth onto each ghost.
- Tips: Let the chocolate set completely before storing the cookies. This method adds an extra layer of chocolatey flavor, which is always a bonus! You can use milk or white chocolate, too, for different effects.
No matter which method you choose, personalizing your meringue ghosts is a fun way to express your creativity and make each one uniquely yours!
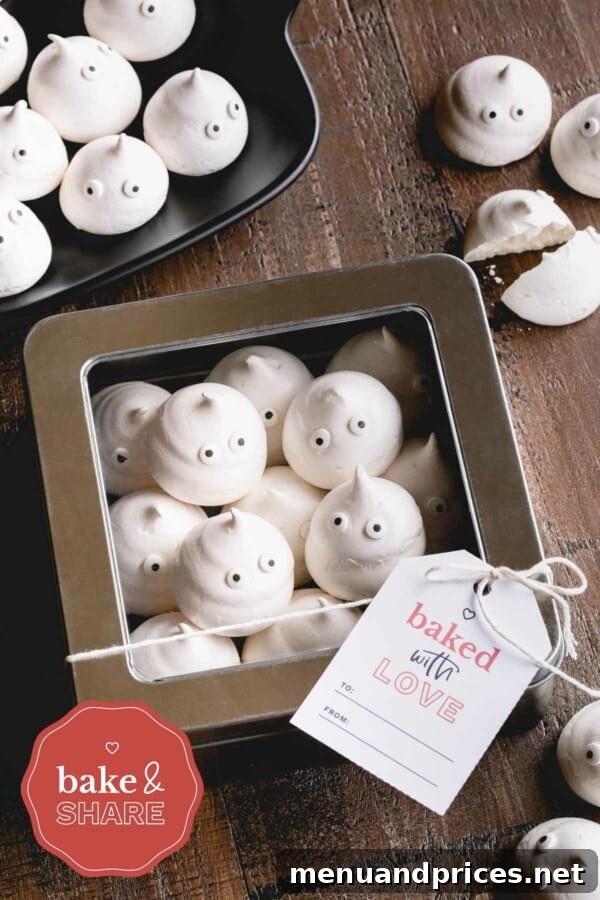
Looking for a special touch? Grab some FREE printable gift tags!
Enhance your homemade gifts with these adorable, themed tags. Perfect for sharing your ghostly treats with friends and family!
Click Here To Download My Free Printable Gift Tags
How to Properly Store Meringue Ghosts for Lasting Crispness
The hallmark of a perfect meringue cookie is its delightful crisp texture. To preserve this crispness and prevent your beautiful meringue ghosts from becoming sticky or soft, proper storage is absolutely essential. Meringues are highly susceptible to humidity, so keeping them dry is key.
- Ensure Complete Cooling: This step cannot be emphasized enough. Before even thinking about storage, your meringue cookies must be completely cooled and thoroughly dried. Although it’s a slower process, I consistently find the best results by cooling my meringue cookies in the oven overnight after baking. Turning off the oven and leaving the cookies inside allows them to dry out gradually and completely, which is crucial for maintaining their delicate structure and preventing cracks. Resist the urge to open the oven door until they are fully cooled.
- Use an Airtight Container: Once your meringue ghosts are unquestionably cool and crisp, transfer them into an airtight container. Any exposure to air, especially humid air, will quickly cause them to soften and become sticky.
- Room Temperature Storage: Store the airtight container at room temperature. Avoid refrigerating meringues, as the cold, damp environment of a fridge will almost certainly make them sticky and chewy.
- Shelf Life: When stored correctly in an airtight container at room temperature, your meringue ghosts will remain perfectly dry and crisp for up to 2 weeks. This makes them an excellent make-ahead treat for Halloween parties!
- Humidity Alert: Meringues are notorious for absorbing moisture from the air. If you live in a particularly humid climate, consider adding a food-safe desiccant packet (like silica gel packets, often found with dried foods) to your airtight container for extra protection against moisture.
By following these storage tips, you can enjoy your beautiful, crispy meringue ghosts for an extended period, ensuring their spooktacular charm lasts well beyond the baking day.
Pro Tip: Battling Humidity
Meringue cookies are highly sensitive to humidity, which can quickly turn them from delightfully crisp to disappointingly sticky. The best defense is a good offense: always store them in an airtight container immediately after they’ve completely cooled. This barrier is crucial for keeping them dry and maintaining that signature crunch for as long as possible!
Meringue Ghosts Recipe Card
Shinee Davaakhuu
15 minutes
2 hours
3 hours
6 hours
36 cookies
Comment
Print Recipe
Ingredients
- 4 (140g) egg whites at room temperature Note 1
- ¾ cup (150g) fine granulated sugar Note 2
- ½ teaspoon cream of tartar Note 3
- ¼ teaspoon coarse kosher salt
- 2 teaspoons pure vanilla extract
- Candy eyes Note 4
Instructions
-
Preheat the oven to 200°F (95°C). Line 2 baking sheets with parchment paper.
-
In a clean mixing bowl with a whisk attachment, beat the egg whites on medium low speed until foamy.
-
When egg whites are foamy, add cream of tartar and salt and continue to whisk.
-
Then slowly add sugar one tablespoon at a time, while mixer is still running. Allow the sugar to dissolve after each addition.
-
Gradually increase the speed to medium high and continue beating the egg whites until soft peaks form.
-
Stir in vanilla extract and continue beating the egg whites until stiff peaks form.
-
Transfer the meringue into a piping bag with a round tip. (I use Wilton 1A tip.)
-
Pipe 1.5-inch tall mounds on prepared baking sheets. If using candy eyes, place the candy eyes on each meringue.
-
Bake the meringue cookies for about 2 hours at 200°F. Then turn off the oven and cool the cookies completely in the oven, for a few hours or overnight.
-
Once completely cooled, transfer the cookies into an airtight container. Store at room temperature for up to 2 weeks.
⭐️ Did you make this recipe?
Please leave a review and let us know how you liked it!
Tips & Notes
Note 2: I’ve made meringue cookies with both granulated sugar and powdered sugar. Both works great for meringue cookies! For granulated sugar, I highly recommend fine granulated sugar, so they dissolve faster. If using powdered sugar, use 1 ¼ cups (170g) of powdered sugar.
Note 3: Cream of tartar is an acid and used to stabilize egg whites. It’s an optional ingredient and can be omitted.
Note 4: In place of candy eyes, you can use black gel food coloring, black edible marker, or melted chocolate to draw eyes on baked and cooled meringue cookies.
Nutrition
1 cookie
19kcal
4g
1g
1g
4g
22mg
Dessert
American

Did you make this?
Leave a rating and your feedback. Thank you!
Common Meringue Troubleshooting: Solving Sticky, Flat, or Cracked Ghosts
Even with the best intentions, meringues can sometimes present challenges. Don’t get discouraged if your first batch isn’t picture-perfect. Understanding common issues can help you troubleshoot and achieve consistently excellent results. Here are some frequent problems and their solutions:
- Problem: Meringues are Sticky or Chewy (not crisp)
- Cause: High humidity, undissolved sugar, or insufficient baking/drying time.
- Solution: Ensure sugar is completely dissolved before piping (the “no grit” test). Bake at a very low temperature for the full duration, and most importantly, allow them to cool completely *inside* the turned-off oven. Store immediately in an airtight container once fully cooled. If humidity is very high, you might need to extend the drying time in the oven slightly.
- Problem: Meringues are Flat and Don’t Hold Shape
- Cause: Presence of fat (yolk, grease), egg whites not at room temperature, over-whipping, or under-whipping.
- Solution: Re-emphasize a fat-free environment (clean bowls!). Use room-temperature egg whites. Ensure you whip to stiff peaks—they should be firm and hold their shape when the whisk is lifted, but not curdled or separated, which indicates over-whipping.
- Problem: Meringues Crack or Weep (exude liquid)
- Cause: Too high baking temperature, rapid cooling, or sugar not fully dissolved.
- Solution: The oven temperature must be low and consistent. Cooling slowly inside the oven is crucial to prevent thermal shock and cracking. Again, ensure all sugar is dissolved to prevent weeping, as undissolved sugar can draw moisture.
- Problem: Meringues Brown Instead of Staying White
- Cause: Oven temperature is too high.
- Solution: Double-check your oven thermometer to ensure accuracy. Meringues need a very low temperature (200°F / 95°C) to dry slowly without browning. If your oven tends to run hot, you might even consider lowering it to 175°F (80°C).
With a little practice and attention to these common pitfalls, you’ll soon be churning out perfect batches of crisp, white meringue ghosts every time!
Frequently Asked Questions About Meringue Ghosts
- Can I make meringue ghosts in advance?
Absolutely! Meringue cookies are excellent make-ahead treats. Once fully baked and cooled, store them in an airtight container at room temperature for up to two weeks. This makes them perfect for preparing ahead of busy Halloween festivities.
- What if I don’t have cream of tartar?
Cream of tartar helps stabilize egg whites, but it’s optional. You can substitute it with an equal amount of white vinegar or lemon juice (about ½ teaspoon for 4 egg whites). The acid helps achieve a similar stabilizing effect.
- Why did my meringues turn out sticky?
Stickiness is usually caused by too much humidity, sugar not fully dissolved, or not enough drying time in the oven. Ensure your sugar is fully dissolved, bake at a low temperature for the recommended time, and cool completely in the oven. Always store in an airtight container.
- Can I use liquid egg whites from a carton?
Yes, but be cautious. Some pasteurized liquid egg whites are treated in a way that prevents them from whipping to stiff peaks. Look for brands specifically labeled “for baking” or “suitable for meringues” to ensure success.
- How can I tell if my sugar is fully dissolved?
Rub a tiny bit of the meringue between your thumb and forefinger. If you feel any grittiness, continue whipping until it feels perfectly smooth. This is crucial for a non-sticky, crispy meringue.
- Can I freeze meringue cookies?
It’s generally not recommended to freeze meringue cookies, as the defrosting process can introduce moisture and make them sticky or chewy. They store very well at room temperature in an airtight container, so freezing isn’t usually necessary.
Ready to Create Your Own Spooky Sweet Meringue Ghosts?
As you can see, creating these adorable meringue ghosts is a delightful and achievable baking project, even for those new to the world of meringues. With just a handful of simple ingredients and a few key tips, you’ll be able to whip up a batch of crispy, airy, and utterly charming treats that are perfect for Halloween.
Whether you’re looking for a fun activity to do with the kids, a unique dessert for a Halloween party, or just a sweet, seasonal indulgence, these meringue ghosts fit the bill. They’re light, delicate, and surprisingly easy to customize with different expressions, making each ghost uniquely yours. So gather your ingredients, fire up your oven, and prepare to bring some deliciously spooky fun into your kitchen!
We hope you enjoy making these hauntingly good meringue ghosts as much as we do. Happy baking, and have a wonderfully spooky Halloween!