
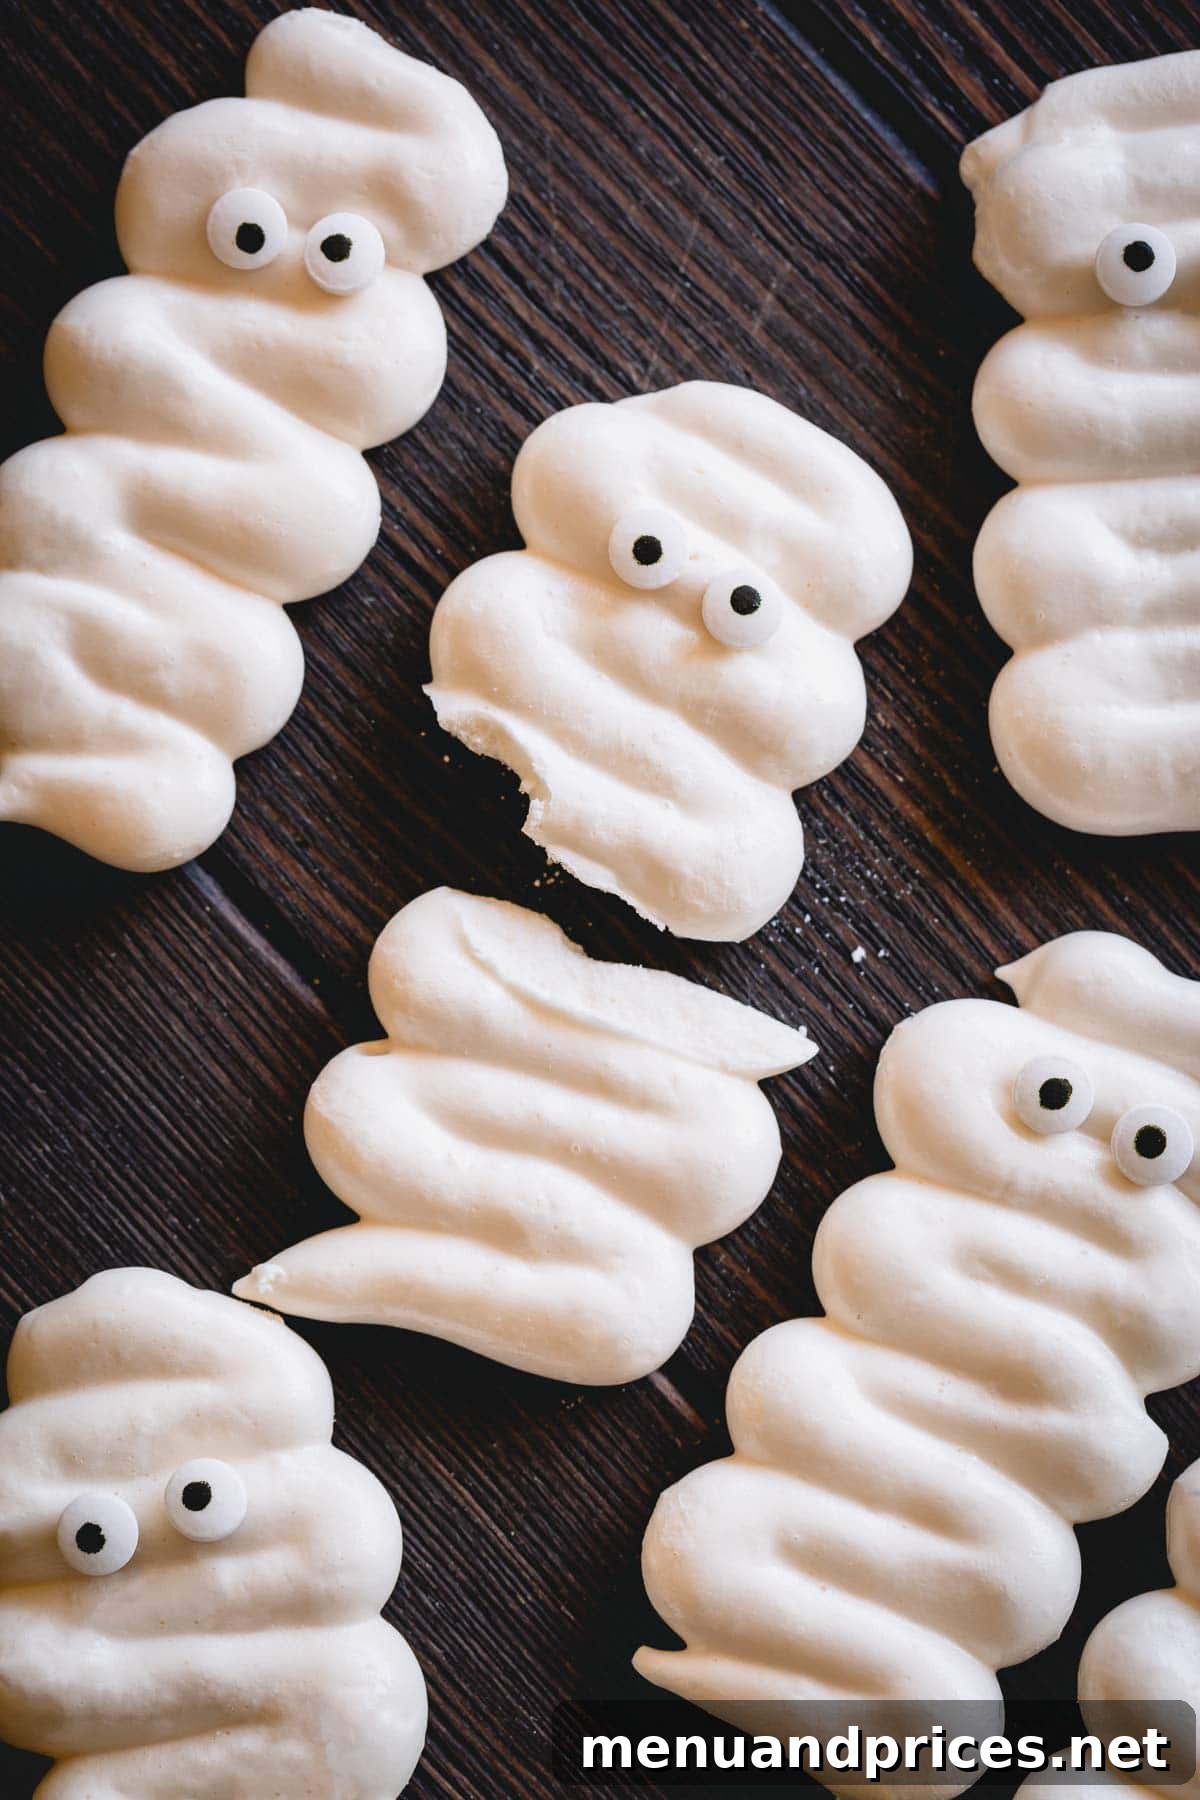
Delightful Mummy Meringue Cookies: Your Ultimate Halloween Treat!
Get ready to whip up some truly enchanting treats this Halloween with our fun and spooky Mummy Meringue Cookies! These ethereal delights are famously light as air, melt effortlessly in your mouth, and bring a whimsical touch to any festive gathering. Perfect for parties, trick-or-treaters, or simply enjoying with a cup of cocoa, these meringue mummies are surprisingly easy to make and guaranteed to be a hit with both kids and adults.
Forget complicated baking projects; this recipe is designed for ease and maximum impact. With just a few simple ingredients and our expert tips, you’ll be creating perfectly piped, adorable meringue mummies in no time. Their crisp texture and delicate sweetness make them an irresistible indulgence, and their charming googly eyes add just the right amount of spooky fun. Let’s dive into creating these irresistible Halloween confections!
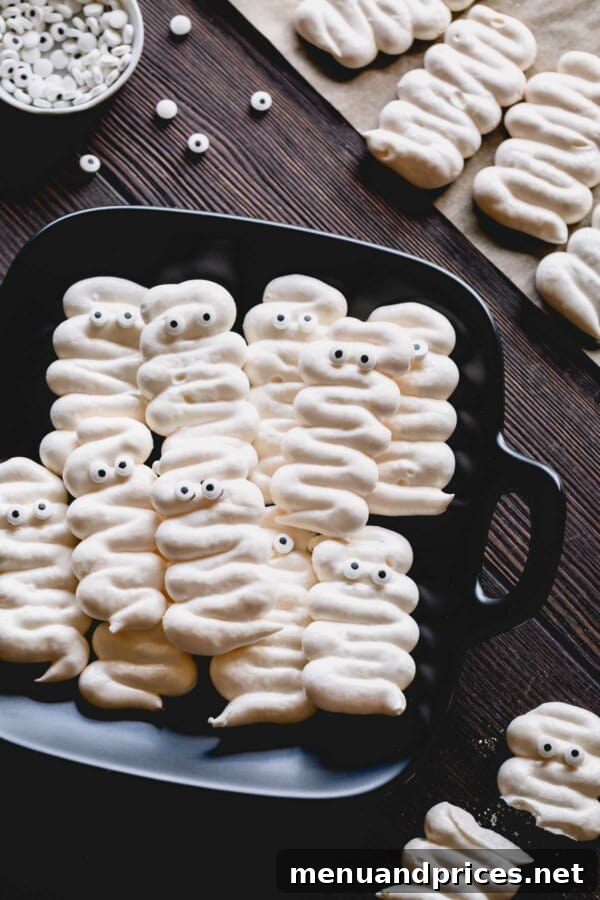
Why You’ll Adore These Halloween Meringue Cookies:
Searching for a treat that’s both spectacularly festive and incredibly simple for your Halloween festivities? Look no further! These Mummy Meringue Cookies tick all the boxes and will quickly become a cherished part of your holiday baking repertoire. Here’s why you’ll fall in love with them:
- Effortlessly Easy: Don’t let their intricate appearance fool you! This recipe requires minimal hands-on time, making it perfect for busy bakers or beginners. The process is straightforward, focusing on whipping egg whites to perfection.
- Make Ahead Magic: One of the best features of meringue cookies is their excellent shelf life when stored correctly. You can prepare these delightful mummies a day or two, or even a week, in advance, freeing up your time closer to your event. It’s a true win-win for party planning!
- Melt-in-Your-Mouth Sensation: These cookies offer an unparalleled texture – light, airy, and delicately crisp, dissolving beautifully on your tongue. It’s a delightful surprise that truly sets them apart from traditional cookies.
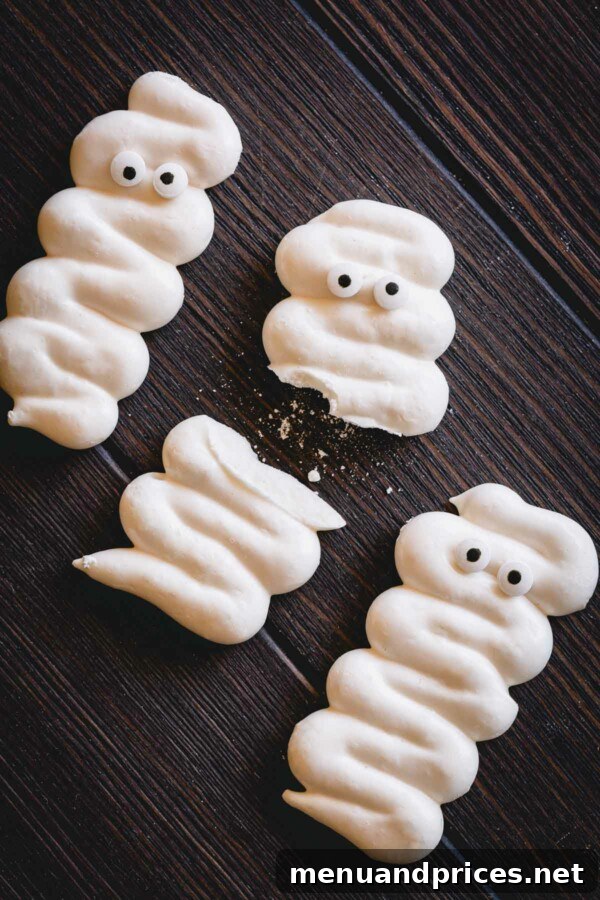
- Utterly Adorable & Spooky: Their charming mummy shape, complete with playful candy eyes, makes them an instant crowd-pleaser and a perfect conversation starter. They’re an ideal centerpiece for any Halloween dessert table, adding a touch of whimsical spookiness.
- Naturally Gluten-Free: Made primarily from egg whites and sugar, these meringue cookies are a fantastic gluten-free option, ensuring that more of your guests can enjoy these sweet treats.
Who knew that mummies could be so incredibly sweet and charming? These cookies prove that Halloween treats can be both fun to look at and divine to eat!
The Magic of Meringue: Essential Tips for Perfection
Meringue cookies, while simple in ingredients, rely on a few crucial techniques to achieve that signature light and airy perfection. Mastering these secrets will ensure your mummy meringues are flawless every time, preventing common pitfalls like flat, sticky, or cracked cookies.
- Immaculate, Grease-Free Utensils: This is arguably the most critical rule for successful meringue. Any trace of fat or grease – no matter how small – will prevent your egg whites from whipping up properly. Always use super clean, grease-free bowls and whisks. Stainless steel or glass bowls are preferred over plastic, as plastic can absorb fats and oils into its scratches and surface, even after washing. Before starting, wipe your bowl and whisk with a paper towel dampened with lemon juice or vinegar to ensure they are absolutely pristine.
- Precise Egg White Separation: Be extremely careful when separating egg whites from yolks. Even the tiniest drop of yolk contaminating the whites can ruin the entire batch, preventing them from whipping into a stable, voluminous meringue. For easier separation, it’s often best to separate eggs when they are cold, as the yolks are firmer and less likely to break. Once separated, allow the whites to come to room temperature before whipping, as this helps them whip up faster and achieve greater volume.
- Bake Low and Slow, Cool in the Oven: Meringue cookies are essentially dried, not baked in the traditional sense. Baking them at a low temperature for an extended period ensures they dry out completely, becoming crisp throughout without browning. After baking, resist the urge to open the oven door immediately. Instead, turn off the oven and let the cookies cool down gradually inside. This slow cooling process prevents drastic temperature changes that can cause the meringues to crack or become chewy, ensuring they retain their beautiful shape and delicate texture.
Pro Tip: Egg Temperature Matters
While separating cold eggs is easier, egg whites whip best at room temperature. After separating, let your egg whites sit on the counter for 30 minutes to an hour before whipping. This allows them to achieve maximum volume and stability.
Gather Your Ingredients: What You’ll Need
Crafting these adorable mummy meringue cookies requires just a handful of common pantry staples. While the list is short, understanding each ingredient’s role can make a big difference in the final outcome of your meringues.
- Egg Whites: These are the foundation of your meringue. This recipe works wonderfully with both fresh egg whites from whole eggs and carton egg whites. If using carton egg whites, be sure to check the label carefully, as some brands are processed in a way that makes them unsuitable for whipping into a stable meringue. Fresh, room-temperature egg whites generally yield the best volume and stability.
- Powdered Sugar (Confectioners’ Sugar): For this specific mummy meringue recipe, we use powdered sugar. Its fine texture dissolves quickly, resulting in a super smooth and stable meringue with a delicate finish. While granulated sugar can also be used for meringue (check out our meringue ghosts recipe for an example), powdered sugar contributes to the melt-in-your-mouth quality of these mummies.
- Cream of Tartar: This acidic powder is a meringue-maker’s best friend! Cream of tartar acts as a stabilizer, helping the egg whites whip up faster, achieve greater volume, and hold their stiff peaks longer. It also helps prevent weeping and contributes to a crisp texture. While optional, especially if you’re confident in your egg white whipping skills, it’s highly recommended for consistently perfect results.
- Vanilla Extract: Pure vanilla extract adds a lovely depth of flavor to your meringues. Feel free to experiment with other extracts like almond, peppermint, or even a touch of orange zest to customize your treats for different occasions.
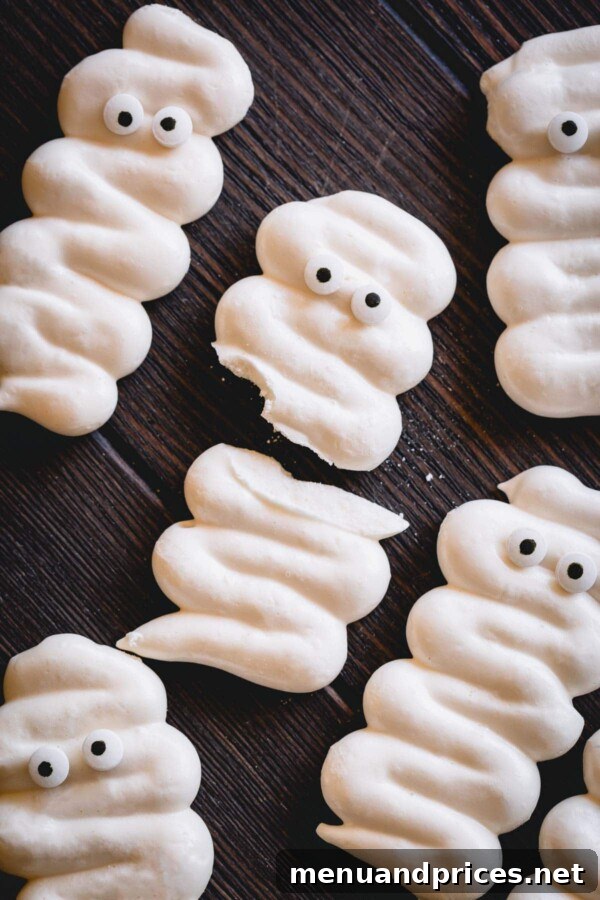
- Candy Eyes: These are essential for bringing your mummy meringues to life! Edible candy eyes are readily available in most baking aisles or online. If you can’t find them, you can easily create eyes with a dot of melted dark chocolate or black food gel after the cookies have cooled.
Crafting Your Spooky Mummy Meringue Cookies: Step-by-Step Guide
Follow these simple steps to create enchanting mummy meringue cookies that are sure to impress!
- Prepare Your Oven and Baking Sheets: Preheat your oven to a low 200°F (95°C). Line two large baking sheets with parchment paper or silicone baking mats. This low temperature is crucial for drying out the meringues without browning them, ensuring they remain perfectly white and crisp.
- Begin Whipping Egg Whites: In your large, impeccably clean, grease-free bowl (preferably glass or stainless steel), start whipping the room-temperature egg whites with an electric mixer on low speed. Continue until they become foamy and bubbly, resembling soapy water.
- Add Cream of Tartar: Once foamy, add the cream of tartar to the egg whites. This will help stabilize them and increase their volume. Continue to beat, gradually increasing the speed to medium-high.
- Gradually Add Powdered Sugar: Once soft peaks begin to form (when the whisk is lifted, the peak bends over), start adding the powdered sugar, 1 tablespoon at a time. It’s essential to add the sugar slowly and incrementally, allowing each addition to fully incorporate before adding more. Continue beating on medium-high speed until stiff, glossy peaks form, typically about 5-7 minutes after all sugar has been added. The meringue should be thick, smooth, and hold its shape firmly when the whisk is removed. You should also not feel any sugar granules when rubbing a small amount between your fingers.
- Flavor Your Meringue: Gently stir in the vanilla extract or any other desired flavoring. Mix just enough to combine without deflating the meringue.
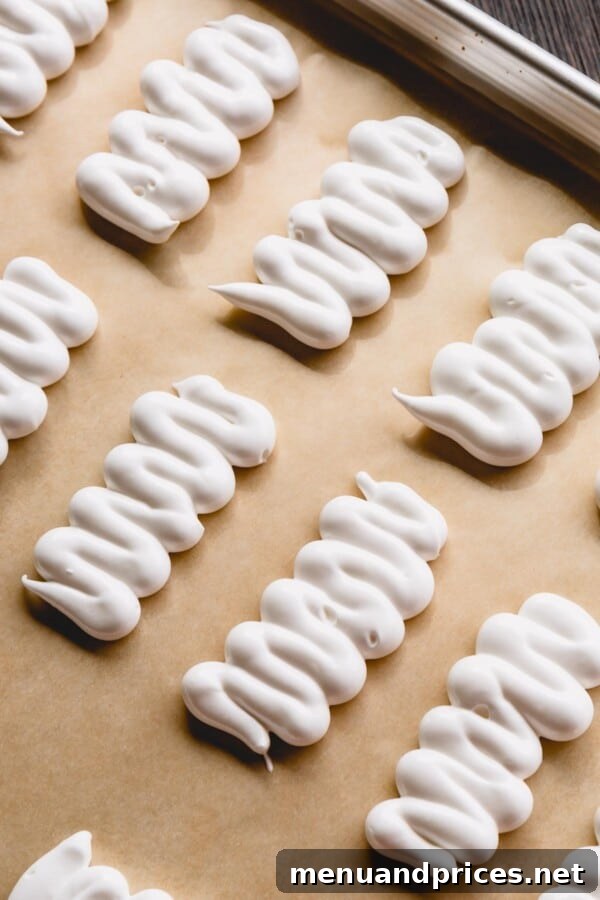
- Pipe Your Mummies: Transfer the prepared meringue into a piping bag fitted with a round tip (a Wilton #12 round tip works perfectly). Pipe the meringue onto your prepared baking sheets in 1×3-inch stick shapes, using a zigzag motion to create the appearance of mummy bandages. Leave a small space at one end for the eyes.
- Add the Eyes and Bake: Immediately place two candy eyes onto the designated “face” area of each piped meringue mummy. Bake for 30-40 minutes, or until the meringues are completely dry to the touch and easily lift off the parchment paper. They should not feel sticky.
- Cool in the Oven: Once baked, turn off the oven and leave the meringue cookies inside to cool slowly and completely for at least 1-2 hours, or even overnight. This crucial step prevents cracking and ensures a perfectly crisp texture. Do not open the oven door during this cooling period.
Pro Tip: Achieving the Perfect Mummy Look
Piping Precision
For uniform mummy shapes, practice piping a few strips on a separate piece of parchment paper first. Maintain steady pressure and a consistent zigzag motion. If your meringue is too soft, it might not hold its shape; if it’s too stiff, it might be hard to pipe. Adjust your meringue slightly if needed or ensure your egg whites were whipped to truly stiff, glossy peaks.
Storing Your Meringue Masterpieces: Keeping Them Crisp
Proper storage is key to maintaining the delicate crispness and shelf life of your mummy meringue cookies. Meringues are highly susceptible to humidity, which can turn them sticky and chewy. Follow these guidelines to keep them perfectly dry and delicious:
- Ensure Complete Dryness: Before storing, it’s absolutely crucial that your meringue cookies are baked until completely dry inside and out. They should feel light and crisp, and break cleanly rather than bend. Any residual moisture will lead to sogginess over time.
- Cool Completely: Allow the cookies to cool thoroughly within the turned-off oven. Rushing this step or exposing them to a humid environment too soon can compromise their texture.
- Airtight is Key: Once completely cool and dry, transfer the meringue cookies to an airtight container. A cookie tin or a plastic container with a tight-fitting lid works best.
- Store at Room Temperature: Keep the airtight container at cool room temperature, away from direct sunlight, heat, and especially humidity. Do not refrigerate meringues, as the refrigerator environment is typically too moist and will cause them to soften.
Longevity Tip
As long as your meringue cookies are thoroughly dry inside, completely cooled, and stored in an airtight container away from any humidity, they can stay perfectly crisp and dry for up to a month, if not longer!
Frequently Asked Questions (FAQs) About Meringue Cookies
Why did my meringue crack or weep?
Cracking often occurs due to rapid temperature changes, either during baking (if the oven is too hot) or during cooling (if removed from the oven too quickly). Weeping (a sticky syrup forming at the base) usually happens if the sugar wasn’t fully dissolved, if the meringue was overbeaten, or if it absorbed too much humidity after baking. Always bake low and slow, cool gradually in the oven, and ensure all sugar is dissolved into stiff, glossy peaks.
Can I make meringue cookies without cream of tartar?
Yes, you can! Cream of tartar is a stabilizer, but it’s not strictly essential. If omitting it, ensure your egg whites are perfectly grease-free and at room temperature. You might need to whip a little longer to achieve stiff peaks, and the meringue may be slightly less stable, but it’s certainly possible to get good results.
How can I tell if my meringues are done baking?
Meringues are done when they feel light, completely dry to the touch, and can be easily lifted from the parchment paper without sticking. They should also sound hollow when tapped from the bottom. If they still feel sticky or soft, continue baking at the low temperature for a little longer.
What if my egg whites won’t whip to stiff peaks?
The most common culprit is grease contamination. Even a tiny speck of egg yolk, oil, or fat on your bowl or whisk will prevent the egg whites from whipping. Ensure all equipment is spotless and grease-free. Using room-temperature egg whites and a touch of cream of tartar also helps.

Rated 5/5 stars by 2 users
Mummy Meringue Cookies
By Shinee Davaakhuu
These fun mummy meringue cookies are light as air and melt-in-your-mouth treats, perfect for your Halloween party!
Prep: 15 mins Cook: 1 hr Cooling: 3 hrs Total: 4 hrs
Servings: 30 cookies
Comment
Print Recipe
Ingredients
- 2 (70g) large egg whites, at room temperature
- ½ teaspoon cream of tartar
- 1 cup (130g) powdered sugar, sifted
- 1 teaspoon pure vanilla extract
- Candy eyes for decoration
Instructions
- Preheat the oven to 200°F (95°C). Line two baking sheets with parchment paper or silicone mat.
- In a large, grease-free bowl, whip the egg whites until foamy on low speed.
- Add cream of tartar and continue to beat, slowly increasing the speed to medium high.
- Start adding powdered sugar 1 tablespoon at a time. Beat the mixture until stiff, glossy peaks form, about 5-7 minutes.
- Then stir in vanilla extract, or any other flavor you would like.
- Transfer the meringue into a piping bag fitted with a round tip (e.g., Wilton 12 round tip). Pipe the meringue into 1×3-inch stick shapes in a zigzag motion.
- Place 2 candy eyes on each cookie and bake for 30-40 minutes, until meringues are completely dry. Turn off the oven and leave them in the oven to slowly cool completely.
⭐️ Did you make this recipe?
Please leave a review and let us know how you liked it!
Tips & Notes
Note 1: It’s easier to separate cold eggs as yolks are firmer and don’t break easily. So, separate the eggs as soon as you take them out of the fridge. Then, let the whites come to room temperature before whipping for best results. You can also use carton egg whites; just be sure to read the labels as some types are not meant for making meringue.
Note 2: Both granulated sugar and powdered sugar work great for meringue cookies! For a granulated sugar version, check out our meringue ghosts recipe.
Note 3: Cream of tartar is an acid used to stabilize egg whites. It’s an optional ingredient and can be omitted if unavailable, though it aids in achieving stable, high-volume meringues.
Note 4: In place of candy eyes, you can use black gel food coloring, a black edible marker, or melted dark chocolate to draw eyes on your baked and cooled meringue cookies.
STORING TIP: Store meringue cookies in an airtight container at room temperature for up to a week, or even more, provided they are completely dry inside and cooled before storing. Humidity is their enemy!
Nutrition
Servings: 1 cookie
Calories: 17kcal
Carbohydrates: 4g
Protein: 1g
Fat: 1g
Sugar: 4g
Sodium: 3mg
Course: Dessert
Cuisine: American

Did you make this? Leave a rating and your feedback. Thank you!
Watch How to Make This Below!
We hope you enjoy creating and sharing these delightful Mummy Meringue Cookies as much as we do. They truly add a special, homemade charm to any Halloween celebration. Happy baking!
This recipe was originally published on October 22, 2014, and has been updated for clarity and comprehensive tips.