
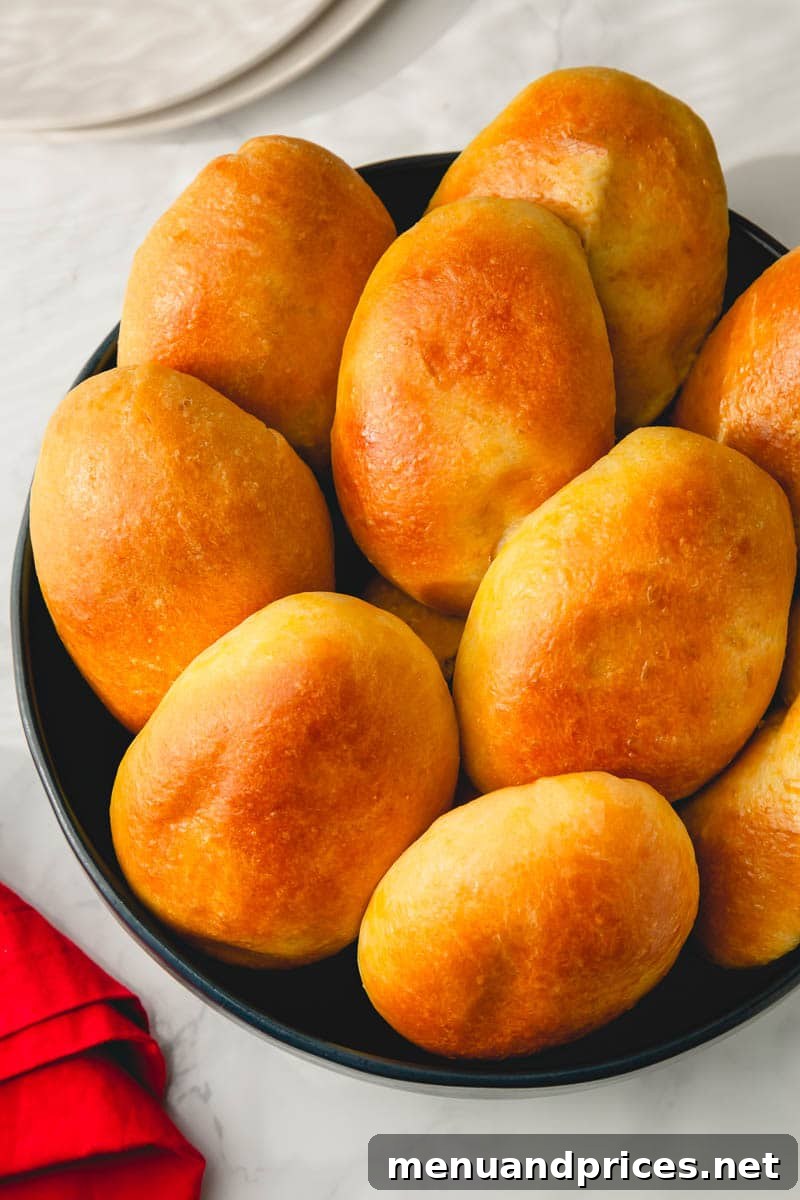
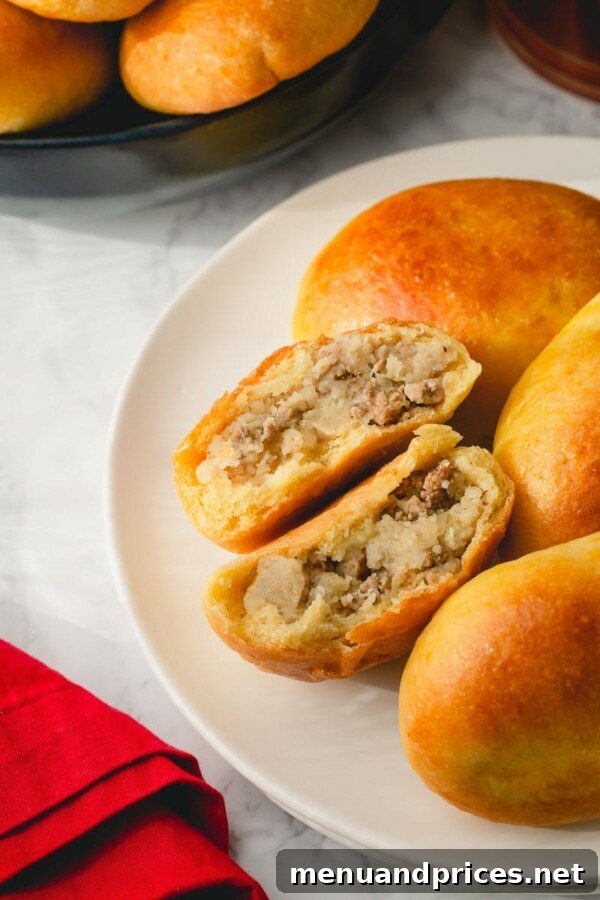
Prepare to fall in love with these incredibly pillowy soft Russian Pirozhki. These delightful baked hand pies feature a simple, tender yeast dough generously stuffed with a savory and satisfying filling of mashed potatoes and perfectly seasoned ground beef. Whether you’re looking for a comforting snack, a hearty appetizer, or a unique addition to your meal spread, these homemade pirozhki are guaranteed to impress. While our classic fried version is equally amazing, today we’re focusing on the irresistibly light and fluffy texture that only baked pirozhki can offer.

What Exactly Are Pirozhki? A Dive into Russian Hand Pies
Pirozhki (pronounced pee-rawsh-KEE, and spelled in various ways like pirojki, piroshki, or pirozhki; the singular form is pirojok, пирожок) are a beloved staple in Russian and Eastern European cuisine. At their heart, they are small, individual-sized hand pies, typically made with a soft, enriched yeast dough. The magic of pirozhki lies in their incredible versatility when it comes to fillings. They can be savory, brimming with ingredients like meat, potatoes, cabbage, or mushrooms, or delightfully sweet, often filled with fruit jams, fresh berries, or sweetened cottage cheese.
Traditionally, pirozhki can be either baked or fried. While both methods yield equally delicious results, they offer distinct textures. Fried pirozhki boast a crispy exterior, while baked pirozhki, like the ones we’re making today, are known for their incredibly soft, fluffy, and slightly bread-like texture. For this baked version, we’ve adjusted our classic yeast dough recipe to include a bit more fat, ensuring that characteristic pillowy softness that makes these hand pies so utterly irresistible. This extra richness helps keep the dough tender and moist, even after baking, providing the perfect contrast to the hearty filling within.
Beyond being a simple snack, pirozhki hold a special place in Russian culture, often served at family gatherings, celebrations, or as a comforting everyday treat. They are a true embodiment of homemade goodness, offering a taste of tradition with every bite.
Mastering the Art of Baked Pirozhki: Step-by-Step Guide
Making homemade pirozhki might seem intimidating at first, but with our detailed instructions, you’ll find the process incredibly rewarding. This recipe is designed to be straightforward, ensuring even novice bakers can achieve perfectly soft and flavorful hand pies.
Crafting the Perfect Yeast Dough: Our Foolproof Method
The foundation of exceptional pirozhki is a light and tender yeast dough. Don’t be intimidated by working with yeast; this recipe uses an easy, foolproof method that guarantees success. While a KitchenAid stand mixer makes the process even simpler, providing effortless kneading, you can absolutely achieve fantastic results by hand with just a little elbow grease.
For this recipe, we highly recommend using an instant dry yeast, such as Red Star Platinum yeast. While we’ve partnered with them in the past, this isn’t a sponsored endorsement; it’s genuinely our favorite go-to yeast for its consistent and reliable performance. Instant yeast simplifies the process significantly because it doesn’t require prior proofing in liquid. You can mix it directly with your dry ingredients, saving time and ensuring a robust rise every time.
Expert Tip for Yeast:
Using instant dry yeast, especially a high-quality one, eliminates the need to activate it in warm liquid. Simply combine it with your dry ingredients for a hassle-free start to your dough.
Dough Preparation Steps:
- **Combine Dry Ingredients:** In a large mixing bowl (or the bowl of your stand mixer), whisk together the all-purpose flour, granulated sugar, instant dry yeast, and coarse kosher salt. Ensure they are well combined.
- **Whisk Wet Ingredients:** In a separate medium bowl, gently whisk together the room temperature sour cream and large eggs until smooth and thoroughly blended.
- **Integrate and Mix:** Gradually add the wet ingredient mixture and about half of the room temperature milk to the dry ingredients. Begin mixing (with the dough hook on low speed, or by hand) until the dough starts to come together. Continue to add the remaining milk a little at a time, until the dough forms a smooth, elastic ball. The exact amount of milk may vary depending on the humidity and the type of flour used, so add cautiously until the dough is just right – soft but not overly sticky.
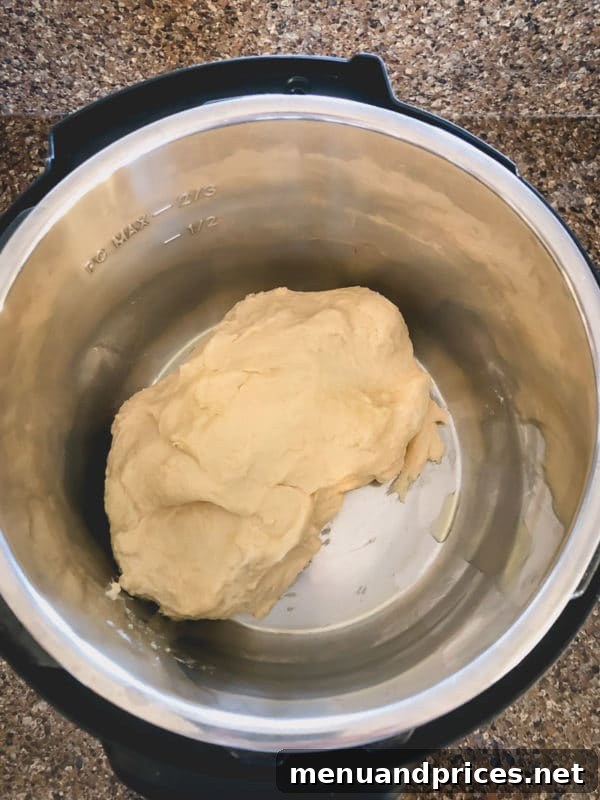
- **First Rise (Proofing):** Lightly coat a clean bowl with a touch of vegetable oil. Transfer the dough ball to this bowl, turning it once to coat. Cover the bowl with a damp kitchen towel or plastic wrap to prevent drying. Place it in a warm, draft-free spot. Let the dough rise for 1-2 hours, or until it has at least doubled in size. A warm environment is key for optimal yeast activity.
Alternative Proofing: Using an Instant Pot
For an accelerated and consistent rise, your Instant Pot can be a fantastic tool, especially if it has a “Yogurt” setting. This creates a perfectly warm environment for your dough to thrive.
- **Set the Pot:** Select the “Yogurt” setting on your Instant Pot.
- **Prepare Insert:** Lightly drizzle olive oil in the bottom of the Instant Pot insert.
- **Place Dough:** Place your dough ball inside the oiled insert.
- **Cover and Rise:** Cover the Instant Pot with a glass lid or even a plate. Let the dough rise until doubled in size, which typically takes about 30 minutes in this warm environment.
Preparing the Savory Mashed Potatoes and Beef Filling
This hearty filling is a fantastic way to utilize leftover mashed potatoes, transforming them into something truly special. If you don’t have leftovers, simply whip up a fresh batch, ensuring they are well-seasoned but not too loose. The key to a great pirozhki filling is balance and flavor.
Filling Preparation Steps:
- **Sauté Aromatics and Brown Beef:** Heat 1 tablespoon of olive oil in a large skillet or Dutch oven over medium-high heat. Add the lean ground beef, chopped onion, 1-3 pressed garlic cloves, and 1 teaspoon of coarse kosher salt. Break the meat apart with a wooden spoon and cook until it is thoroughly browned and no longer pink. For extra flavor, consider adding a pinch of black pepper, smoked paprika, or a touch of dried dill during this stage.
- **Drain and Cool:** Once the beef is cooked, drain any excess fat from the skillet. Transfer the seasoned ground beef mixture into a large bowl and allow it to cool completely. Cooling the filling is crucial; if it’s too warm, it can impact the dough’s texture and make assembly challenging.
- **Combine with Mashed Potatoes:** Add 1 cup of mashed potatoes to the cooled beef mixture. Mix until everything is well combined, ensuring the potatoes and beef are evenly distributed. Taste the filling and adjust seasonings with additional salt and pepper as needed. The filling should be robustly flavored to stand up to the mild dough.
- **Alternative Fillings:** While the mashed potato and beef filling is a classic, feel free to experiment! Cooked rice, sautéed stewed cabbage with carrots and dill, or a mixture of browned mushrooms and onions are also fantastic savory options. (More ideas listed below!)
Assembling Your Perfect Pirozhki
With your dough beautifully risen and your filling prepared, it’s time for the enjoyable process of assembling these delicious hand pies. This step requires a gentle touch and careful sealing to ensure your pirozhki bake up perfectly.
Assembly and Baking Steps:
- **Prepare Dough:** Once the dough has doubled in size, gently punch it down and turn it out onto a lightly oiled (or floured, if preferred) counter or work surface. Briefly knead it for 1-2 minutes to form a smooth, elastic ball. Lightly flatten this dough ball into a disk.
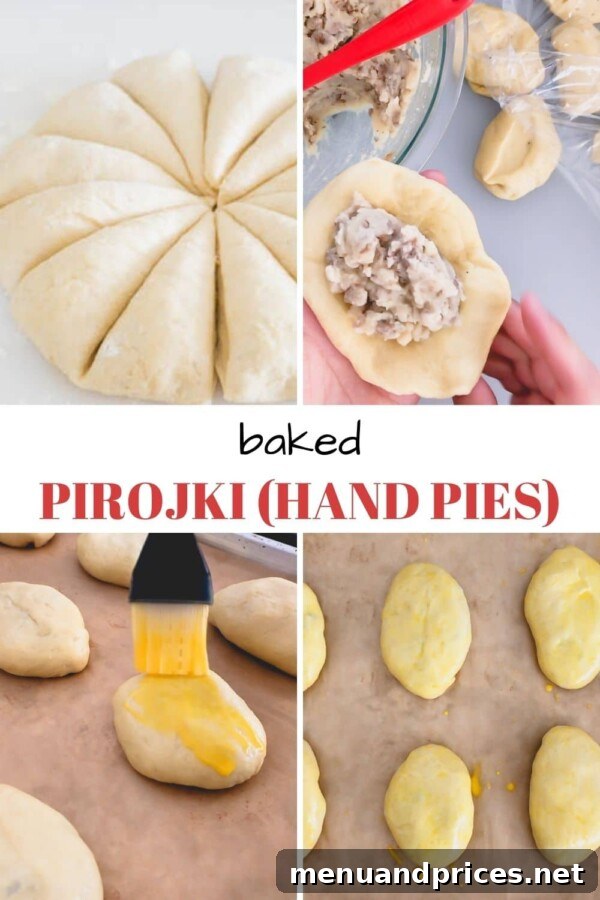
- **Divide the Dough:** Using a knife or a bench scraper, divide the dough into 12 equal portions. The easiest way to do this is to cut the disk as you would slice a pizza – first in half, then into quarters, and then each quarter into three pieces. Roll each of these pieces into a smooth ball. They don’t have to be perfectly identical, just roughly even.
- **Shape and Fill:** Take one dough ball and flatten it into a small circle or oval with your hands or a rolling pin, aiming for a thickness of about 1/4 inch. Place a generous spoonful of your cooled filling in the center of the flattened dough.
- **Seal the Pirozhki:** Carefully fold the dough over the filling, creating a half-moon shape. Pinch the edges tightly together to seal, ensuring no gaps remain for the filling to escape during baking. You can crimp the edges decoratively if desired. Gently flatten the sealed hand pie between your palms, making sure the sealed seam is facing downwards (resting on the flat side) to prevent it from bursting open.
- **Arrange on Baking Sheet:** Preheat your oven to 350°F (180°C). Line a large baking sheet with parchment paper. Arrange the assembled hand pies, seam side down, on the prepared baking sheet, leaving a little space between each one to allow for expansion.
- **Egg Wash and Bake:** In a small bowl, whisk together 1 egg yolk with 1 tablespoon of water until smooth. This egg wash will give your pirozhki a beautiful golden-brown color and a lovely sheen. Lightly brush the egg wash generously over the top and sides of each hand pie.
- **Bake to Perfection:** Bake in the preheated oven for about 20-25 minutes, or until the pirozhki are beautifully golden brown and cooked through. The exact baking time may vary slightly depending on your oven.
- **Serve:** Remove from the oven and let them cool slightly on the baking sheet before transferring them to a wire rack. Serve warm or at room temperature. They are delicious both ways!
Dough Dividing Tip:
A simple way to divide the dough into roughly equal parts is to flatten it slightly into a circle and then cut it like a pizza into 12 wedges. Don’t stress about perfection; rustic charm is part of homemade goodness!
Explore Endless Flavor: What Fillings Can You Use in Pirozhki?
The beauty of pirozhki lies in their incredible adaptability. This versatile yeast dough pairs beautifully with virtually any filling, whether you’re craving something rich and savory or delightfully sweet. Don’t be afraid to get creative and customize your hand pies to your personal taste or whatever ingredients you have on hand.
Today, we’ve highlighted our comforting mashed potato and ground beef filling, a hearty combination that’s always a crowd-pleaser. It’s a fantastic way to elevate simple ingredients into a gourmet experience. But the possibilities extend far beyond!
Other Delicious Savory Filling Ideas:
- **Stewed Cabbage:** Sautéed green cabbage with shredded carrots, onions, and a touch of dill makes for a wonderfully flavorful and tender vegetarian option.
- **Rice and Meat:** A mixture of cooked rice, finely ground beef or pork, and savory seasonings like cumin or coriander.
- **Cheesy Mashed Potatoes:** Elevate plain mashed potatoes with a generous amount of shredded cheese (cheddar, mozzarella, or a blend), chives, and a touch of garlic powder.
- **Mushroom and Onion:** Sautéed mushrooms (cremini, button, or a mix) with caramelized onions, fresh herbs, and a hint of sour cream for richness.
- **Any Ground Meat:** Experiment with ground chicken, turkey, pork, or lamb, seasoned with your favorite spices and maybe some finely diced vegetables.
- **Hard-Boiled Egg and Green Onion:** A simple yet classic Russian filling, offering a mild, comforting flavor.
Irresistible Sweet Filling Ideas:
- **Apple Pie Filling:** A quick and easy option using canned apple pie filling, or homemade diced apples cooked with cinnamon and a touch of sugar.
- **Fresh Berries:** Blueberries, raspberries, or a mix of berries, lightly sweetened and possibly thickened with a tiny bit of cornstarch to prevent excess moisture.
- **Any Jams or Preserves:** Your favorite fruit jams (apricot, cherry, strawberry) make for a simple and delicious sweet treat.
- **Sweetened Cottage Cheese (Tvorog):** A traditional Russian sweet filling, often mixed with a bit of sugar, an egg yolk, and vanilla extract.

Storing Your Delicious Pirozhki for Later Enjoyment
One of the many advantages of these delightful hand pies is their excellent make-ahead potential. Whether you’re preparing for a party or simply want a quick and easy snack throughout the week, knowing how to store them properly is key to preserving their freshness and flavor.
After baking, ensure your pirozhki have cooled completely to room temperature before storing. This prevents condensation from forming inside your container, which can lead to soggy pastries.
**Refrigeration:** Place the cooled pirozhki in an airtight container. They will remain fresh and delicious in the refrigerator for up to 5 days. Layer them carefully, perhaps with parchment paper between layers if stacking, to prevent them from sticking together.
Reheating Pirozhki to Perfection:
Bringing your refrigerated pirozhki back to their warm, delicious state is simple:
**Microwave Method (for softness):** For quick reheating, place 1-2 pirozhki on a microwave-safe plate. Cover them with a damp paper towel or a microwave-safe lid. Microwave on high for 30 seconds. Check for warmth and, if needed, continue heating in 15-30 second increments until heated through. Covering them is essential to prevent them from drying out and becoming rubbery.
**Oven Method (for slight crispiness):** For a slightly crispier crust, preheat your oven to 325°F (160°C). Place pirozhki on a baking sheet and heat for 10-15 minutes, or until warmed through. This method is great if you’re reheating several at once.
Reheating Best Practices:
Always cover pirozhki when microwaving to retain moisture. For oven reheating, a quick brush of melted butter or olive oil can refresh the crust.
Can I Freeze Pirozhki for Longer Storage?
Absolutely! These homemade hand pies freeze beautifully, making them an excellent option for meal prepping or having a delicious snack on standby. You can freeze both baked and unbaked pirozhki, though freezing them after baking is generally more convenient.
**To Freeze Cooked Pirozhki:** Once your pirozhki have cooled completely to room temperature, arrange them in a single layer on a baking sheet and freeze for 1-2 hours until solid. This prevents them from sticking together. Once frozen solid, transfer them to a freezer-safe bag or an airtight container. They will keep well in the freezer for up to 3 months.
**To Reheat Frozen Pirozhki:** To reheat frozen meat pies, you can use either the microwave or oven method. For the microwave, heat for 1 minute, then continue in 30-second increments as needed, ensuring they are covered. For the oven, preheat to 350°F (175°C) and bake for 20-25 minutes, or until heated through and the crust is revitalized.


Baked Pirozhki (Mashed Potato & Beef)
Shinee Davaakhuu
2 hours
12
hand pies
Comment
Print Recipe
Ingredients
For the Dough:
- 4 cups (500 g) all-purpose flour
- 1 tablespoon granulated sugar
- 1 packet instant dry yeast (Note 1)
- ½ teaspoon coarse kosher salt
- ½ cup (120 g) sour cream, at room temperature
- 2 large eggs, at room temperature
- 2/3 cup (160 ml) milk, at room temperature
For the Mashed Potato & Beef Filling:
- 1 tablespoon olive oil
- 1 lb (450 g) lean ground beef
- 1-3 garlic cloves, pressed
- 1 teaspoon coarse kosher salt
- ½ onion, chopped
- 1 cup mashed potatoes (preferably leftover or freshly made and cooled)
- Optional: black pepper, smoked paprika, or fresh dill to taste
For Egg Wash:
- 1 egg yolk
- 1 tablespoon water
Instructions
To make the dough:
-
In a large mixing bowl (or stand mixer bowl with dough hook), combine the flour, sugar, instant yeast, and salt. Mix briefly to combine the dry ingredients.
-
In a small bowl, whisk together the sour cream and eggs until smooth.
-
Add the sour cream mixture and half of the milk into the flour mixture. Begin mixing on low speed.
-
Continue mixing the dough. Add the remaining milk a little at a time until the dough comes together into a smooth, elastic ball that is soft but not overly sticky. (The exact amount of milk may vary. You can also easily make this dough by hand; knead until smooth and elastic, about 8-10 minutes.)
-
Lightly coat the dough with a little vegetable oil. Place it back in the bowl, cover with a damp kitchen towel or plastic wrap, and place in a warm, draft-free spot to rise for about 30-60 minutes, or until doubled in size. (For faster proofing, use an Instant Pot on the “Yogurt” setting for about 30 minutes, as described above.)
To prepare the filling:
-
Meanwhile, prepare the filling. Heat olive oil in a large skillet or Dutch oven over medium-high heat.
-
Add the ground beef, chopped onion, pressed garlic, and salt. Cook the meat, breaking it apart with a wooden spoon, until it’s thoroughly cooked through and browned. Drain any excess fat. Transfer the beef mixture to a large bowl and allow it to cool completely before mixing with mashed potatoes.
-
Add the mashed potatoes to the cooled beef mixture. Mix until well combined. Taste and adjust seasonings (salt, pepper, optional herbs) as needed.
To assemble and bake the hand pies:
-
Preheat the oven to 350°F (180°C). Prepare a baking sheet by lining it with parchment paper.
-
Once the dough has doubled in size, turn it out onto a lightly floured or oiled surface. Gently knead for 1-2 minutes to release air and form a smooth ball. Lightly flatten the dough ball into a disk and divide it into 12 equal parts (like slicing a pizza). Roll each piece into a smooth ball.
-
Take one piece of dough and flatten it into a small circle or oval with your hands or a rolling pin. Place a spoonful of filling in the center. Fold the dough in half over the filling and firmly pinch the edges to seal, forming a half-moon shape. Gently flatten the hand pie between your palms, ensuring the sealed crimp is on the flat side. (Refer to photos above for visual guidance.)
-
Arrange the assembled hand pies, seam side down, on the prepared baking sheet.
-
In a small bowl, beat 1 egg yolk with 1 tablespoon of water until smooth to make an egg wash. Brush the egg wash all over the tops and sides of the hand pies.
-
Bake the pirozhki for 20-25 minutes, or until they are a beautiful golden color and cooked through.
-
Serve them warm or at room temperature.
⭐️ Did you make this recipe?
Please leave a review and let us know how you liked it!
Tips & Notes
Nutrition Information
1
pirojok
290
kcal
38
g
14
g
8
g
2
g
346
mg
Main Course, Snack
Russian

Did you make this?
Leave a rating and your feedback. Thank you!
There you have it – a comprehensive guide to creating the most delectable baked Russian Pirozhki. With their soft, pillowy dough and savory mashed potato and beef filling, these hand pies are more than just a recipe; they’re a journey into comforting, homemade goodness. Whether you’re enjoying them fresh from the oven, as a make-ahead meal, or sharing them with loved ones, these pirozhki are sure to become a cherished favorite in your kitchen. Don’t hesitate to experiment with different fillings to find your perfect combination. Happy baking!