

Celebrate love and sweetness this Valentine’s Day with enchanting homemade sugar cookies. Imagine delicate, buttery heart-shaped treats, each meticulously decorated with a smooth, glossy, and brilliantly red royal icing. This comprehensive guide is designed for bakers of all skill levels, especially beginners, who aspire to create picture-perfect Valentine’s Day sugar cookies that taste as incredible as they look. We’ll walk you through every step, from preparing our reliable no-chill, no-spread cookie dough to mastering the art of vibrant red royal icing that remains bleed-free, ensuring your edible expressions of love are nothing short of spectacular.

Pin this now to find it later
Pin It
Why You’ll Adore This Valentine’s Day Cookie Recipe
Prepare to fall head over heels for this special Valentine’s Day adaptation of our trusted sugar cookie recipe. These aren’t just any cut-out cookies; they are a delightful combination of rich, buttery flavor and a perfectly crisp texture with delicate golden-brown edges. Crucially, our dough is engineered to prevent puffing during baking, creating a flat, even surface that makes decorating with vibrant red royal icing an absolute dream. Here’s why these cookies will become your new Valentine’s tradition:
- Effortlessly Beginner-Friendly: Our streamlined recipe method means no frustrating chilling time for the dough, allowing you to go from mixing bowl to baked cookies much faster. Plus, the royal icing can be prepared in advance, simplifying your baking schedule. Flooding heart-shaped cookies is surprisingly simple, making this a perfect project for those new to cookie decorating.
- Visually Stunning Appeal: These heart-shaped cookies are designed to capture hearts at first glance! Their immaculate shapes and the striking, deep red icing create an undeniable visual allure, making them utterly irresistible and a perfect gift or party treat.
- Exquisite Flavor Profile: Beyond their beauty, these cookies deliver on taste. They offer an ideal balance of sweetness and rich buttery notes, beautifully complemented by a subtle hint of vanilla. Each bite is a tender, flavorful experience that will leave you wanting more.
And before you tuck away those adorable heart-shaped cookie cutters, consider whipping up a batch of these equally delightful raspberry sugar cookies for another layer of Valentine’s charm!

Crafting Perfect Valentine’s Day Sugar Cookies: The Core Components
Creating these memorable festive sugar cookies relies on two fundamental, yet perfectly executed, components. Each plays a vital role in achieving cookies that are not only beautiful but also incredibly delicious and easy to work with:
- Our Signature No-Chill, No-Spread Sugar Cookies: This is our absolute favorite base for cut-out cookies. It’s a robust recipe that guarantees your cookies will hold their shape beautifully in the oven, without any inconvenient chilling time. This means crisp, defined edges—perfect for intricate decorating. You can find our detailed, step-by-step instructions for this foundational dough here.
- Flawless Royal Icing: The magic truly happens with the icing. Our comprehensive royal icing tutorial is specifically designed with beginners in mind, breaking down the process into manageable steps. It covers everything from achieving the perfect consistency for outlining and flooding to coloring techniques. Master the basics with our dedicated guide here.
While this post focuses on the specific techniques for Valentine’s Day decoration, we highly recommend referring to our in-depth tutorials for each of these core recipes for the most detailed preparation instructions.
Step-by-Step Guide to Making Heart Sugar Cookies
1. Prepare the Irresistible Cookie Dough
The foundation of any great decorated cookie is a reliable dough. Our recipe ensures a sturdy, flavorful base that holds its shape without spreading, making your decorating efforts shine.
- Combine Dry Ingredients: In the bowl of a stand mixer fitted with a paddle attachment, thoroughly mix together the all-purpose flour, granulated sugar, light brown sugar, cornstarch, baking powder, and coarse kosher salt. This initial step is crucial for ensuring all dry ingredients are evenly distributed, leading to a consistent cookie texture.
- Incorporate Butter: Add the room-temperature unsalted butter to the dry mixture. Mix on low speed for approximately 1-2 minutes until the butter is fully incorporated and the mixture takes on a uniform, moist, sandy texture. This step ensures proper fat distribution, contributing to the cookies’ rich flavor and tenderness.
- Add Wet Ingredients: Introduce the large egg, pure vanilla extract, and almond extract (if using) to the mixture. Continue mixing on low speed until the ingredients are just combined, typically around 30 seconds. Overmixing at this stage can develop gluten, resulting in tougher cookies, so stop as soon as the mixture comes together. The dough will appear crumbly, but should easily come together when squeezed.
- Form Dough Balls: Divide the prepared dough into two equal portions. Gently knead each portion by hand until it forms a smooth, pliable ball. This light kneading helps to bring the dough together, making it easier to roll out evenly.
2. Expertly Shape and Bake Your Heart Cookies
With your perfect dough ready, it’s time to transform it into delightful heart shapes, ready for baking to golden perfection.
- Roll Out the Dough: Take one of your dough balls and place it on a lightly floured surface or directly onto a silicone mat. Using a rolling pin, roll the dough out evenly to a consistent ¼-inch thickness. This precise thickness is key for creating cookies that are sturdy enough to decorate yet tender to eat.
- Cut Out Heart Shapes: Employ your favorite heart-shaped cookie cutters to cut out your cookies. Carefully transfer the cut-out shapes onto prepared baking sheets lined with parchment paper or silicone mats, ensuring a small space between each cookie for even baking.
- Utilize Dough Scraps: Gently gather any dough scraps, combine them, and lightly knead them together. Re-roll the dough and cut out additional cookies. Repeat this process until all of your precious dough has been used, minimizing waste.
- Bake to Perfection: Bake the cookies in a preheated oven for approximately 10-13 minutes. Keep a close eye on them; they are done when their edges begin to turn a very light golden brown. This indicates they are fully baked but still tender in the center.
- Cool Completely: Allow the baked cookies to cool on the baking sheets for about 5 minutes before carefully transferring them to a wire rack to cool completely. This prevents breakage and ensures they are firm enough for decorating.
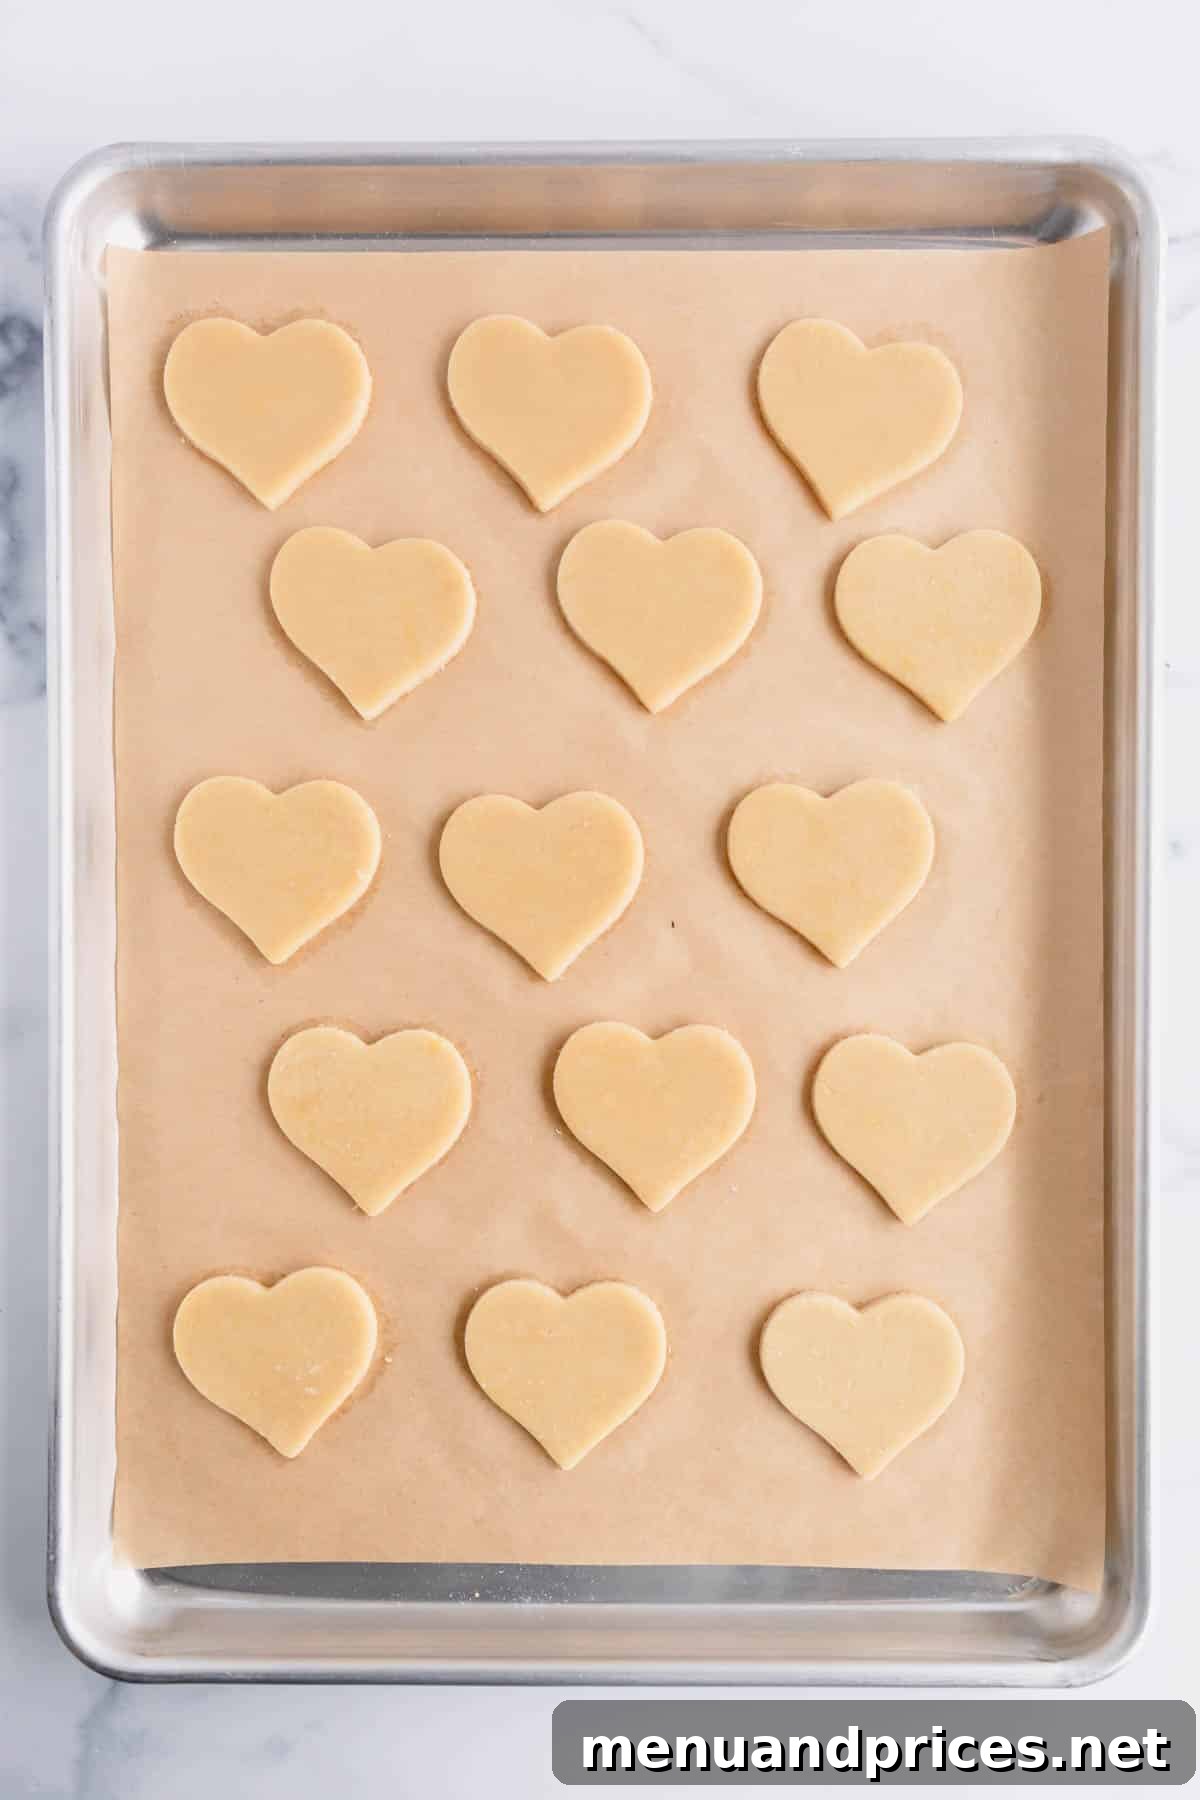
Pro Tip: Achieve Perfectly Even Cookies
For consistently uniform cookies, an adjustable rolling pin is an absolute game-changer! Its non-stick surface and adjustable rings ensure that your dough is rolled to the exact same thickness every time, leading to evenly baked and perfectly shaped cookies ready for decoration.
Mastering Vibrant Red Royal Icing: A Detailed Guide
The vibrant red royal icing is the heart of these Valentine’s Day cookies. Achieving that deep, rich hue without color bleed is an art, and we’re here to share all the secrets.
- Prepare Your Base Icing: Begin by preparing a half batch of our tried-and-true royal icing recipe. This amount is ideal for decorating a batch of sugar cookies and allows for easy handling and coloring.
- Divide and Reserve: Carefully divide the freshly prepared icing between two separate bowls. One bowl will be for your white icing, and the other for the star of the show: the deep red.
- Protect White Icing: Tightly cover the bowl containing the white icing with plastic wrap, ensuring it makes direct contact with the surface of the icing to prevent it from crusting over. Set this aside for later use.
- Color the Red Icing: Now for the magic! Add your red food coloring to the second bowl of icing. Mix thoroughly until you achieve a bright red shade. To deepen this red and give it that rich, sophisticated tone, add a couple of *small* drops of brown food coloring. This subtle addition will transform a bright red into a luxurious, deep crimson, preventing it from appearing too pink or orange.
Crucial Tip: Avoid Over-Coloring Your Red Icing
It’s vital to remember that the color of royal icing intensifies and deepens over time as the pigments develop. For the best results, it’s highly recommended to prepare your red royal icing the day before you plan to decorate. Allowing it to rest overnight at room temperature will naturally deepen the shade by at least one level. If you add too much food coloring initially, you significantly increase the risk of “bleeding” where the color seeps into adjacent icing or the cookie itself, marring your beautiful designs. Start lighter, and trust the process!
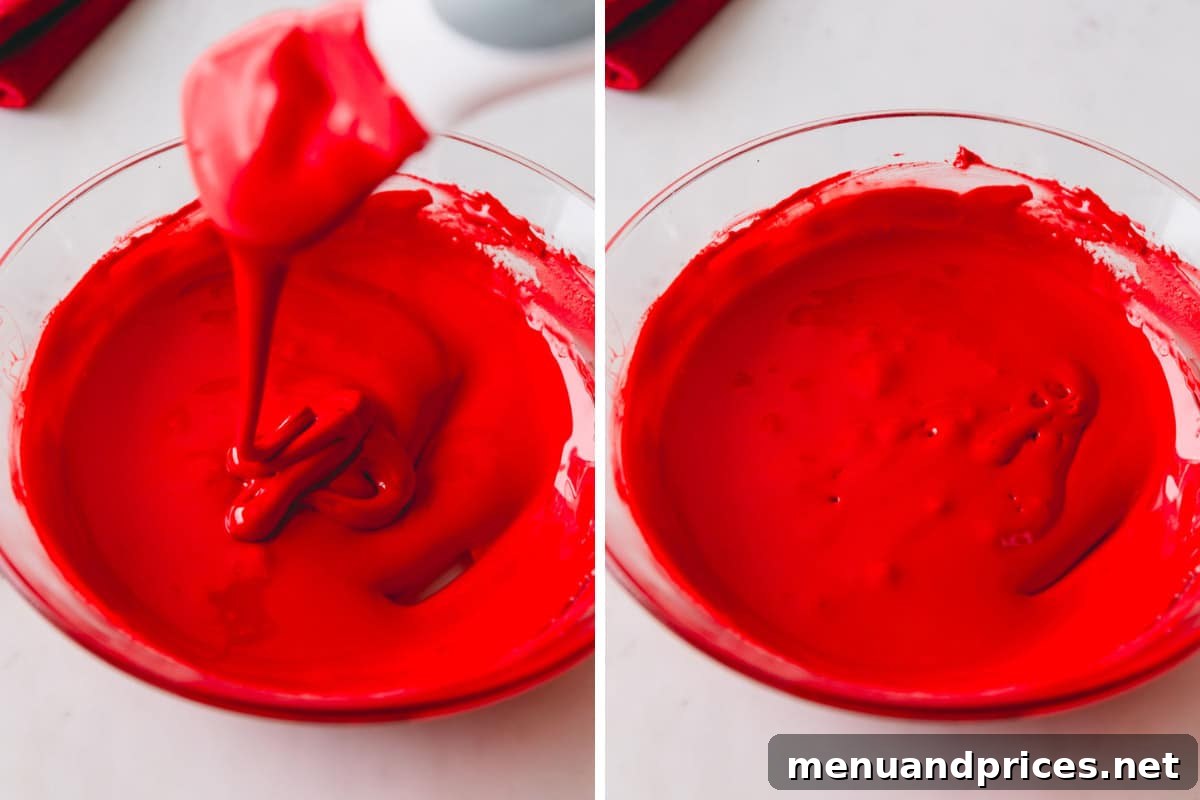
Expert Tips to Achieve a Flawlessly Deep Red Royal Icing
Creating that perfect, show-stopping deep red royal icing is easier than you think with these professional tips and tricks:
- Opt for Americolor Super Red Gel Food Coloring: When aiming for truly vibrant colors like red, Americolor Super Red gel food coloring is our top recommendation. Unlike liquid food dyes, gel coloring is highly concentrated. This means you need significantly less product to achieve a bold, intense color, which is crucial for not altering the delicate consistency of your royal icing. Less liquid means less chance of thinning the icing or causing color bleed.
- Add a Strategic Touch of Brown Food Coloring: This is a secret weapon for achieving a rich, true red. A tiny drop or two of brown food coloring helps to neutralize any pink or orange undertones that can sometimes appear with pure red dyes. It adds depth and vibrancy, creating a luxurious crimson shade. This technique is similar to how cocoa powder is used in our red velvet cupcake recipe to enhance its iconic deep red color.
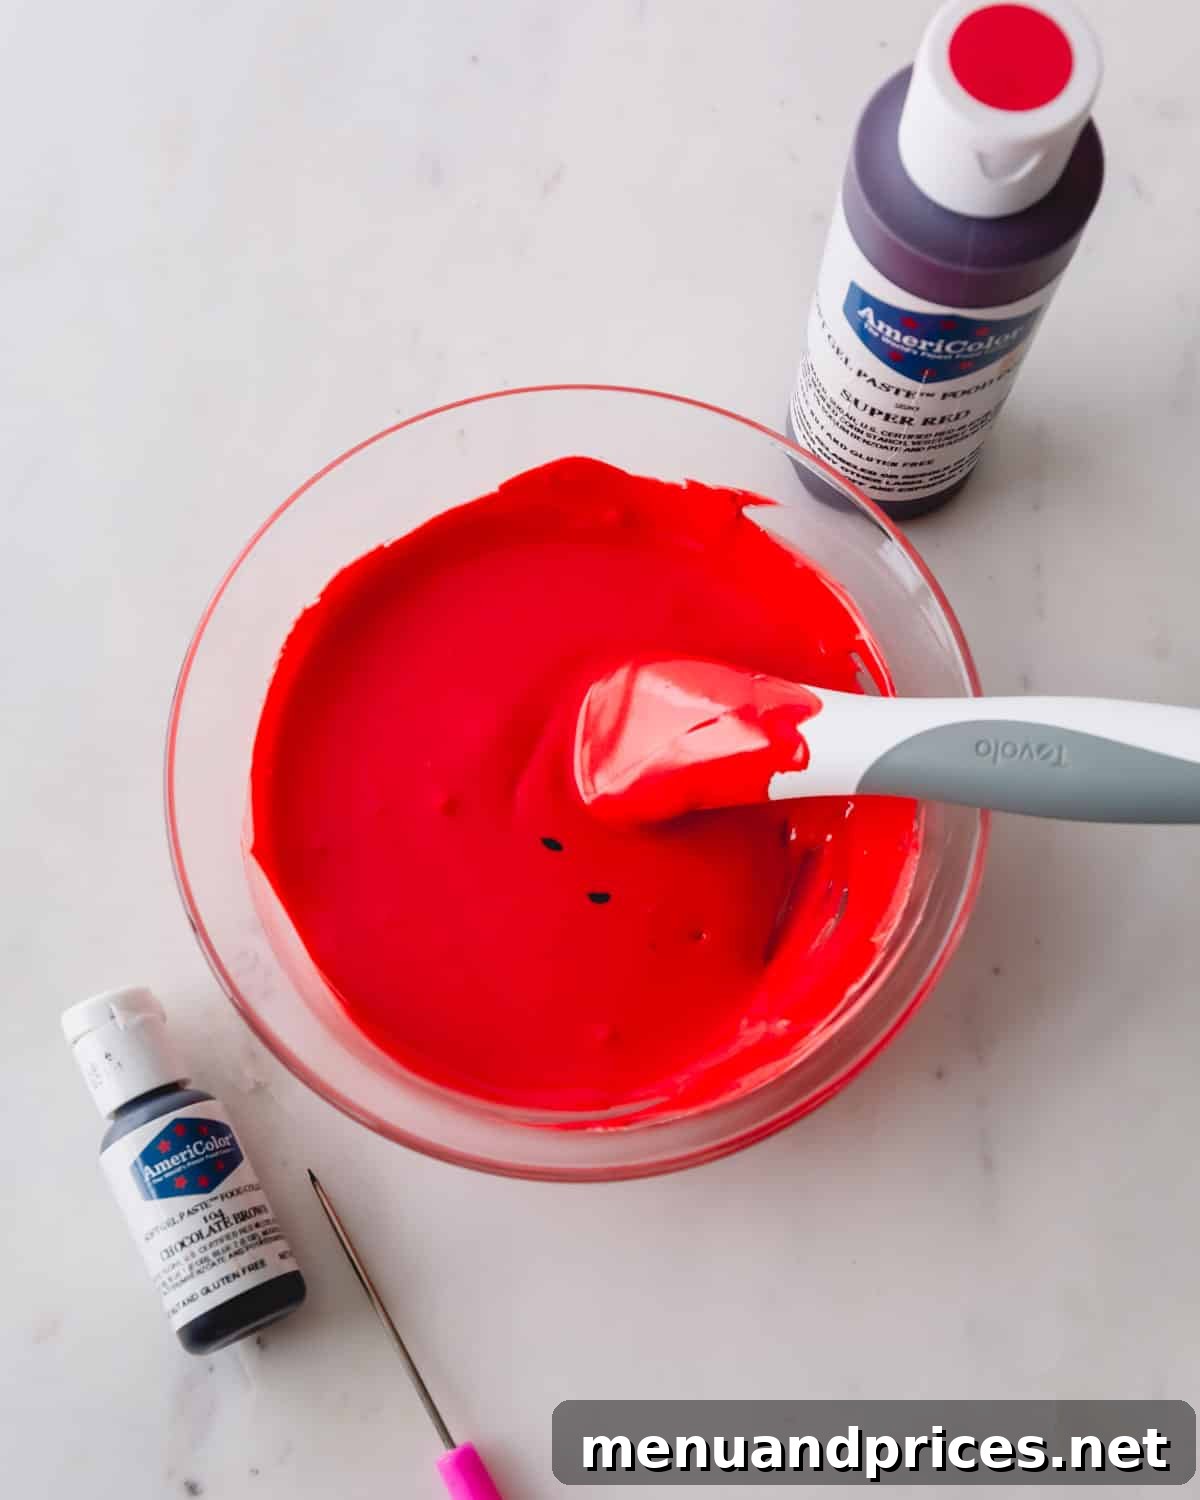
- Allow the Icing to Rest Overnight: Patience is a virtue, especially when it comes to royal icing colors. For the deepest, most stable red, allow your colored icing to rest at room temperature overnight.
- Ensure the prepared icing is covered tightly with plastic wrap, directly touching the surface, or placed securely in an airtight piping bag. This prevents drying and crusting.
- Simply leave it out on your kitchen counter at room temperature. The pigments will continue to develop and deepen during this time.
- Before decorating, give the icing a good stir to redistribute the color and achieve a smooth, consistent texture.
Creative Decorating: Adorning Your Heart-Shaped Sugar Cookies
Now for the most exciting part: bringing your heart cookies to life with beautiful royal icing designs! Decorating is where your creativity can truly shine.
- Prepare Piping Bags: Carefully transfer both your white and red royal icing into separate tipless piping bags. Tipless bags are excellent for beginners as they eliminate the need for piping tips, offering great control and easy clean-up. Snip a very small opening at the tip of each bag.
- Unleash Your Creativity: With your icing ready, it’s time to decorate! Let your imagination be your guide. You can outline your heart shapes and then flood the centers with the same color, or create intricate patterns, dots, and swirls with contrasting colors. The possibilities are endless!
Mastering Royal Icing Consistency for Seamless Decorating
For beginner decorators, managing different icing consistencies for outlining and flooding can be daunting. Our approach simplifies this: we use a single “hybrid” consistency. This means your royal icing is carefully prepared to be thick enough to hold a clean outline, yet fluid enough that with a gentle nudge or jiggle, it smoothly spreads to fill in the outlined area, creating a perfectly flat and even frosting surface. To test, lift your spoon or spatula from the icing; a line should form on the surface and disappear within 10-15 seconds for this ideal hybrid consistency. This versatile consistency makes the decorating process much more straightforward and enjoyable.
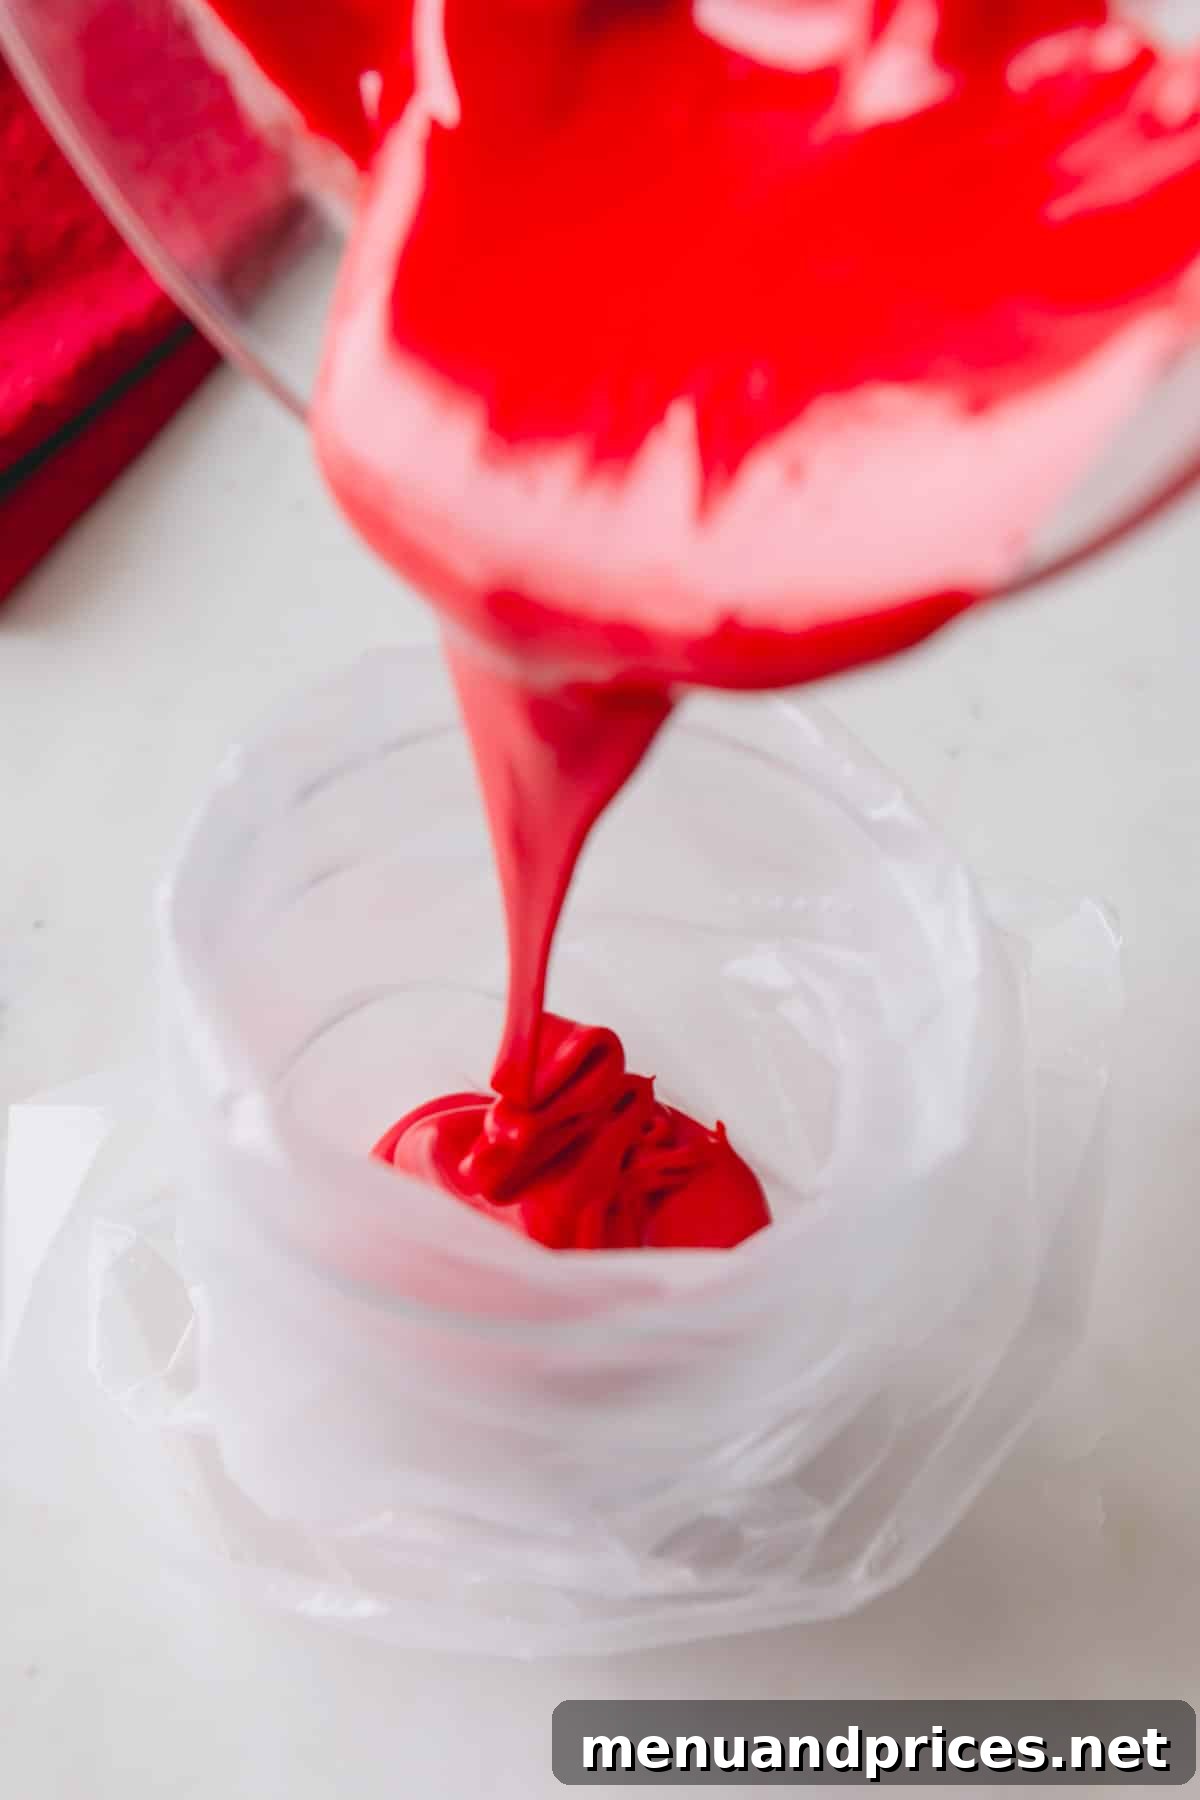

Essential Strategies to Prevent Color Bleed in Royal Icing
Color bleed is a common challenge in cookie decorating, but with a few careful techniques, you can ensure your vibrant red icing stays exactly where it should, creating sharp, beautiful designs.
- Avoid Oversaturating Icing with Food Coloring: The most frequent culprit behind color bleed is using excessive amounts of food coloring. Begin by adding a small amount of color, mixing thoroughly, and then gradually adding more until you achieve your desired shade. Remember, the color will naturally deepen as the icing sits, especially overnight. Overloading the icing with dye can make it unstable and prone to bleeding.
- Allow the First Icing Layer to “Crust Over” Before Adding Another: Patience is paramount here. After applying your first layer of icing (e.g., outlining or flooding the base of a cookie), allow it to dry for approximately 15 minutes before adding a second layer of a different color. The first layer doesn’t need to be completely hardened; it just needs to develop a firm “crust” on its surface. This crust acts as a barrier, preventing the wet second layer from sinking into or mixing with the first.
- Ensure Decorated Cookies Air Dry Completely Before Storage: This step is critical for preventing smudges, stickiness, and condensation-induced color bleed. Once all decorating is complete, leave your cookies exposed to air on a flat surface (like a cooling rack) for an extended period, typically 8-24 hours, depending on humidity. The royal icing must be fully set and hardened before you stack or place them in airtight containers. Premature storage can trap moisture, causing colors to run.

Essential Tips for Cookie Decorating Success
Achieving bakery-quality decorated sugar cookies at home is entirely possible with these tried-and-true tips:
- Always Test Your Cookie Dough: Before you fully knead your dough into smooth balls, take a small pinch and squeeze it in your hands. The dough should be crumbly but stick together easily when pressure is applied. If it’s too dry, it will crumble apart; if too wet, it will be sticky. This simple test ensures your dough has the perfect consistency for rolling and cutting.
- Utilize a Kitchen Scale for Accuracy: For the most consistent and precise baking results, especially with flour and sugars, always measure your ingredients by weight using a digital kitchen scale. Volume measurements (cups) can vary significantly depending on how ingredients are packed, leading to inconsistent dough texture and spread. Weighing ensures you get the exact proportions every time.
- Outline Cookies Before Flooding with Icing: For clean, crisp edges, always create an outline around the perimeter of your cookie first with royal icing. Once the outline is complete, you can then “flood” or fill the interior of the outlined shape with more icing. Our hybrid consistency icing (as discussed above) is perfect for both outlining and flooding without needing to switch between different icing densities.
- Never Refrigerate Plain or Decorated Sugar Cookies: It’s a common misconception, but refrigerating sugar cookies can be detrimental. For plain cookies, it can cause them to dry out and become stale quickly. For decorated cookies, the sudden change in temperature and humidity inside a refrigerator can cause condensation to form on the icing, which is a major contributor to color bleed and dullness. Always store them at room temperature once fully dry.
Smart Make-Ahead Tips for Stress-Free Baking
Preparing components in advance can significantly streamline your Valentine’s Day baking process, allowing you to enjoy the decorating more and stress less.
Prepping Cookie Dough
The cookie dough for these Valentine’s Day sugar cookies is incredibly versatile and can be prepared well in advance, saving you precious time on baking day.
- Refrigeration: Prepare the dough up to 3 days beforehand. Wrap it tightly in plastic wrap to prevent it from drying out, and store it in the refrigerator.
- Freezing: For longer storage, the dough can be frozen for up to 3 months. Form the dough into flat discs before wrapping tightly in plastic wrap (and optionally an additional layer of foil or a freezer bag) to facilitate quicker thawing.
- Thawing Frozen Dough: When you’re ready to bake, transfer frozen dough from the freezer to the refrigerator and allow it to thaw overnight.
- Room Temperature Acclimation: Once thawed and chilled, let the dough sit at room temperature for 15-30 minutes before rolling it out. This makes the dough more pliable and easier to work with, preventing cracks.
Preparing Royal Icing
Royal icing also benefits from being made ahead, particularly the red icing which deepens in color over time.
- Refrigerated Storage: Prepared royal icing can be stored on the counter at room temperature (if it contains no egg whites, only meringue powder) or in the refrigerator for up to 2 weeks. Always ensure it’s in an airtight container with plastic wrap pressed directly onto the surface to prevent crusting.
- Freezing: For even longer storage, royal icing can be frozen for up to 2 months. Store it in an airtight container with plastic wrap on the surface.
- Thawing Frozen Icing: Thaw frozen icing overnight in the refrigerator.
- Room Temperature Acclimation for Piping: Before you’re ready to decorate, let thawed or chilled icing sit at room temperature for approximately 30 minutes. Give it a gentle stir to restore its smooth consistency before transferring it into piping bags.
Optimal Storing Tips for Freshness and Beauty
Proper storage ensures your beautiful Valentine’s Day sugar cookies remain fresh, delicious, and aesthetically pleasing for as long as possible.
- Room Temperature is Key: These Valentine’s Day sugar cookies, whether plain or decorated, should always be stored at room temperature. Refrigeration is a definite no-go as it can dry out the cookies and cause unwanted condensation, leading to color bleed on your intricate designs.
- Wait for Icing to Fully Set: Do not transfer decorated cookies into storage containers until the royal icing has fully and completely set. Depending on humidity levels, this can take anywhere from 8 to 24 hours. The icing should be hard to the touch and resistant to dents or smudges.
- Short-Term Storage: Once fully decorated and dry, store cookies in an airtight container at room temperature for up to 1 week. For stacking, place a piece of parchment paper between layers to prevent them from sticking together or damaging the icing.
- Long-Term Freezing: Decorated cookies can be frozen for up to 1 month. Place them in a single layer on a baking sheet to freeze solid, then transfer them to an airtight freezer-safe container, again with parchment paper between layers.
- Thawing Frozen Cookies: To thaw frozen decorated cookies, simply leave the airtight container on the counter at room temperature for 8-12 hours. It is crucial to resist the urge to open the lid during this time. Keeping the lid closed prevents condensation from forming on the cold cookies, which would otherwise lead to immediate and unsightly color bleed.
Frequently Asked Questions About Sugar Cookies & Royal Icing
The secret to achieving a super rich, deep red royal icing involves a few key steps. First and foremost, always use high-quality gel food coloring, such as Americolor Super Red. Gel colors are far more concentrated than liquid dyes, allowing you to achieve intense color without adding excess moisture that can thin your icing or cause bleeding. Second, incorporate a tiny amount of brown food dye (just a drop or two) into your red icing. This subtle addition deepens the red tone, adds richness, and effectively counteracts any pinkish undertones, resulting in a more sophisticated, true crimson. Lastly, for optimal color development, prepare your red icing the day before and allow it to rest overnight at room temperature. The color pigments will naturally deepen and intensify over time, giving you a more vibrant final hue.
Color bleed in royal icing refers to the undesirable phenomenon where one color of icing seeps or mixes into an adjacent color, resulting in blurred lines, dulled colors, and an overall messy or lackluster appearance. This usually happens when the icing is unstable, too wet, or when insufficient drying time is allowed between layers of different colors. The primary causes include oversaturating the icing with too much food coloring (especially liquid dyes), applying wet icing on top of another wet icing layer, or storing decorated cookies in conditions that promote condensation, such as refrigeration. Ensuring proper consistency, adequate drying time, and appropriate storage are crucial for preventing this issue.
The main difference between liquid and gel food coloring lies in their base and concentration. Liquid food coloring typically has a water base, making it thin and less concentrated. It’s commonly found in small squeeze bottles at most grocery stores. Gel food coloring, on the other hand, has a base of water, glycerine, or corn syrup, giving it a thicker, gel-like consistency and a much higher concentration of pigment. It is often sold in dropper bottles or small pots and is considered more of a specialty baking product, often requiring purchase online or at baking supply stores.
For royal icing, gel food coloring is unequivocally superior. Its high concentration means you need only a tiny amount to achieve vibrant colors, thus minimizing the liquid added to your icing. This helps maintain the correct consistency, which is vital for precise decorating and preventing color bleed. Liquid food coloring would require adding much more volume to achieve intense colors, potentially thinning your icing too much and making it unsuitable for intricate designs or increasing the risk of colors running.
More Delightful Valentine’s Day Recipes to Explore
If you’re looking to expand your repertoire of romantic treats, consider these other fantastic recipes perfect for Valentine’s Day:
- Raspberry Sugar Cookies: A fruity twist on the classic, these cookies offer a delicate berry flavor.
- Chocolate Covered Strawberries: An elegant and timeless treat, simple yet luxurious.
- Red Velvet Macarons: Delicate French pastries with the beloved red velvet flavor.
- Red Velvet Cupcakes: Moist and flavorful cupcakes, a true classic for any romantic occasion.

Valentine’s Day Sugar Cookies
Shinee Davaakhuu
20
13
33
36 medium cookies
3 dozen cookies
Comment
Print Recipe
Ingredients
For sugar cookies:
- 3 cups (375 g) all-purpose flour
- ½ cup (100 g) granulated sugar
- ¼ cup (50 g) packed light brown sugar, Note 1
- 1 tablespoon cornstarch
- ½ teaspoon baking powder
- ¼ teaspoon coarse kosher salt
- 1 ½ sticks (170 g) unsalted butter, at room temperature
- 1 large egg at room temperature
- 2 teaspoons pure vanilla extract
- ¼ teaspoon almond extract optional
For decorating:
- ½ batch of royal icing
- Americolor Super Red gel food coloring
- Brown gel food coloring
Equipment
-
1 Heart-shaped cookie cutter set
Instructions
TO PREPARE THE DOUGH:
-
In a mixing bowl with a paddle attachment, combine all-purpose flour, granulated sugar, packed light brown sugar, cornstarch, baking powder, and coarse kosher salt. Mix thoroughly to ensure all dry ingredients are well combined.3 cups all-purpose flour, ½ cup granulated sugar, ¼ cup packed light brown sugar, Note 1, ½ teaspoon baking powder, ¼ teaspoon coarse kosher salt, 1 tablespoon cornstarch
-
Add the room-temperature unsalted butter and mix on low speed for 1-2 minutes until the mixture is evenly moistened and resembles wet sand.1 ½ sticks butter
-
Add the large egg, pure vanilla extract, and almond extract. Mix until just combined, about 30 seconds. The dough will appear crumbly, but should easily stick together when squeezed in your hand.1 large egg, 2 teaspoons pure vanilla extract, ¼ teaspoon almond extract
-
Divide the dough into 2 equal parts. Gently knead each part into a smooth ball.
-
You can proceed to shaping and baking immediately, as this is a no-chill dough. Alternatively, wrap the dough tightly in plastic and refrigerate for up to 3 days or freeze for up to 3 months.
TO SHAPE AND BAKE COOKIES:
-
Preheat your oven to 350°F (175°C). Line 2-3 baking sheets with parchment paper or silicone mats.
-
Place each dough ball on a silicone mat or lightly floured surface and roll it out into a ¼-inch-thick disc. (TIP: An adjustable rolling pin is excellent for achieving even thickness.)
-
Using heart-shaped cookie cutters, cut out your cookies and carefully arrange them on the prepared baking sheets.
-
Gather the dough scraps, lightly knead them, roll them out again, and cut out more cookies. Repeat until all the dough is used.
-
Bake the cookies for 10-13 minutes, or until the edges just begin to turn a light golden color.
-
Allow the cookies to cool on the baking sheet for 5 minutes, then transfer them onto a wire cooling rack to cool completely before decorating.
TO DECORATE THE COOKIES:
-
Prepare a half batch of royal icing. Divide the icing into 2 bowls. Tightly cover one bowl of white icing with plastic wrap, ensuring it touches the surface. Add red food coloring to the second bowl and mix until a vibrant red is achieved. Then, add a couple of small drops of brown food coloring to deepen the red to a rich crimson. Allow the red icing to rest overnight for the color to fully develop.½ batch of royal icing, Americolor Super Red gel food coloring, Brown gel food coloring
-
Once the red icing color has fully developed and the cookies are completely cooled, transfer both white and red royal icing into tipless piping bags. Decorate your heart cookies with creative designs as desired. Remember to allow each layer of icing to crust over before adding another, and allow the finished cookies to air dry completely before storing.
⭐️ Did you make this recipe?
Please leave a review and let us know how you liked it!
Tips & Notes
Note 1: Brown sugar adds a lovely subtle flavor and contributes to the cookies’ delicate softness. We’ve experimented with both light and dark brown sugars in this recipe. While both work, dark brown sugar can result in a slightly darker cookie, which is why we generally prefer light brown sugar for its more consistent appearance.
Make Ahead Tips:
- Prepare the royal icing up to 2 weeks in advance and store it in an airtight container in the refrigerator (or at room temp if meringue powder based with direct plastic wrap contact), or freeze it for up to 2 months.
- Prepare the cookie dough up to 3 days in advance and store it tightly wrapped in plastic in the fridge, or freeze for up to 3 months.
- Thaw frozen cookie dough overnight in the refrigerator. Before rolling, let the chilled dough come to room temperature for about 30 minutes to make it more pliable.
- Thaw frozen icing overnight in the refrigerator. Before piping, let the icing come to room temperature for 30 minutes and give it a gentle stir.
Storing Tips:
- Once cooled, leftover decorated cookies can be stored in an airtight container at room temperature for up to 1 week.
- To prevent sticking and preserve decorations, place a piece of parchment paper between each layer of stacked cookies.
- Decorated cookies can be frozen for up to 1 month.
- To thaw frozen cookies, leave them in their airtight container on the counter at room temperature for 8-12 hours WITHOUT opening the lid. Keeping the lid closed is crucial to prevent condensation from forming on the cookies, which can cause your beautiful red icing to bleed.
Nutrition
1 serving
110kcal
21g
1g
2g
12g
48mg
Dessert
American

Did you make this?
Leave a rating and your feedback. Thank you!