
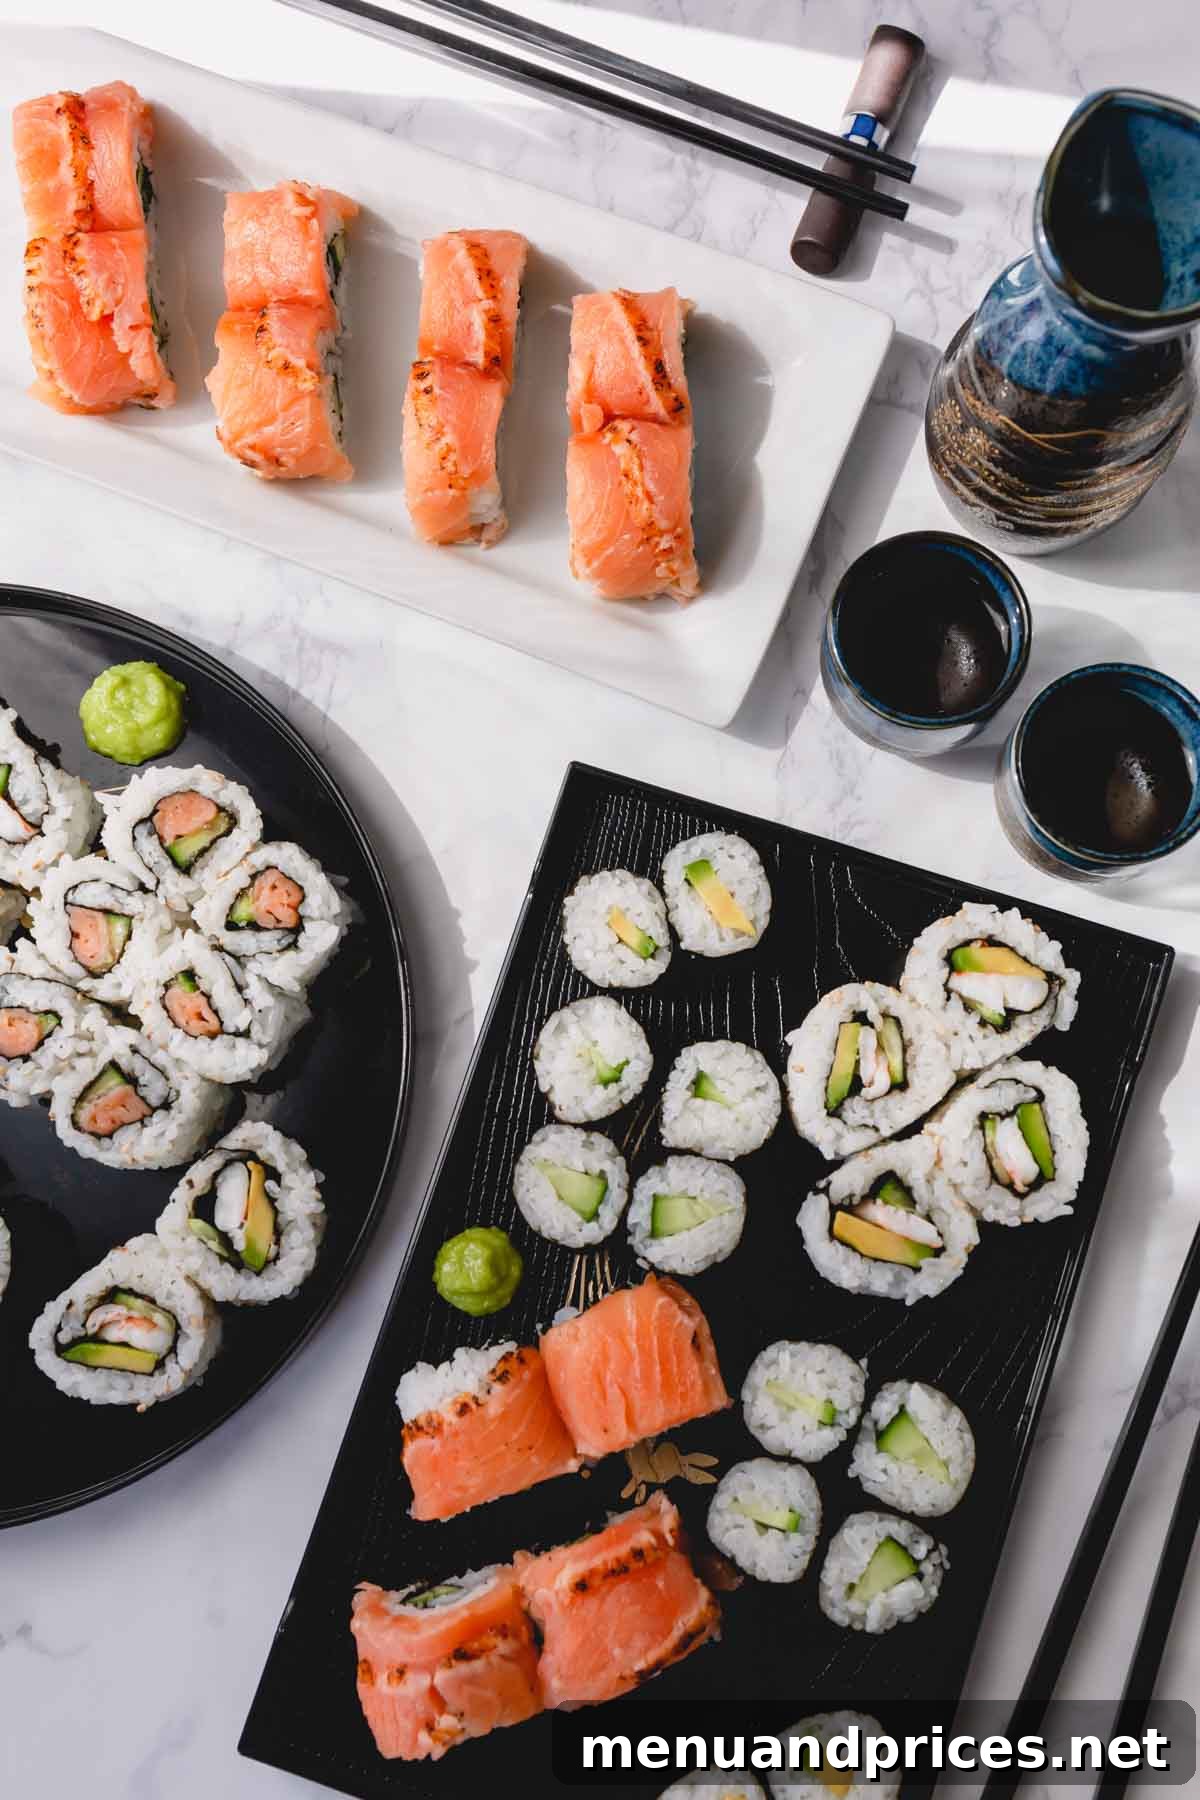
Mastering Homemade Sushi Rolls: Your Ultimate Guide to DIY Sushi
Embark on a culinary adventure right in your own kitchen! This comprehensive guide will teach you exactly how to make sushi rolls step by step, empowering you to create delicious, customized sushi with any ingredients you desire. Forget expensive restaurant bills and limited options – with homemade sushi, the possibilities are endless. The best part? Raw seafood is absolutely *not* required, making this recipe perfect for everyone, from avid sushi lovers to those who prefer cooked seafood, or even vegetarians and vegans!
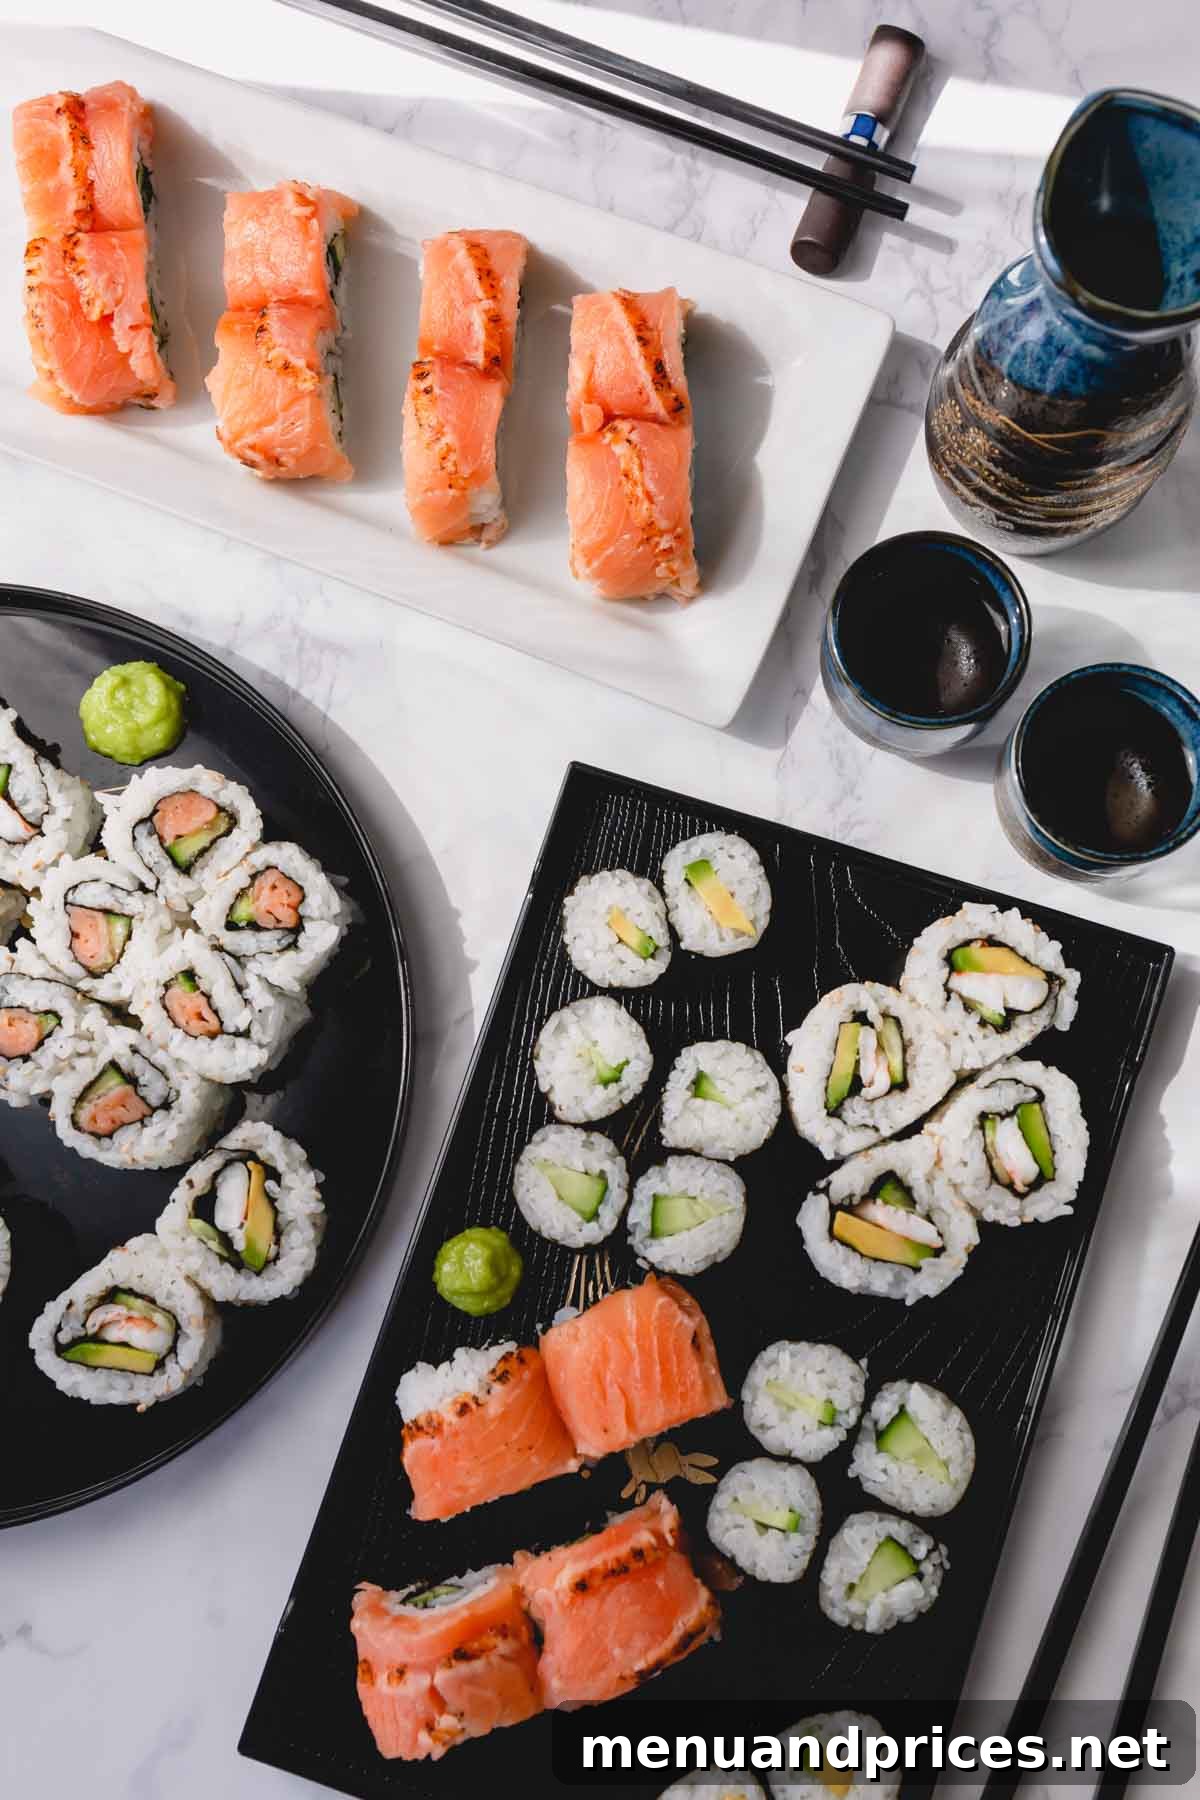
Making sushi at home offers unparalleled freedom. You get to choose every single component, ensuring your rolls perfectly suit your palate and dietary preferences. Whether you’re dreaming of classic cucumber and avocado rolls, seeking savory cooked shrimp creations, or exploring innovative vegetarian combinations, this guide will walk you through each stage. Plus, you’ll be amazed at how much money you save by crafting your own sushi!
It might seem intimidating at first, but with the right guidance, making sushi rolls at home is surprisingly fun and easy. Let’s dive in and discover the secrets to perfect homemade sushi!
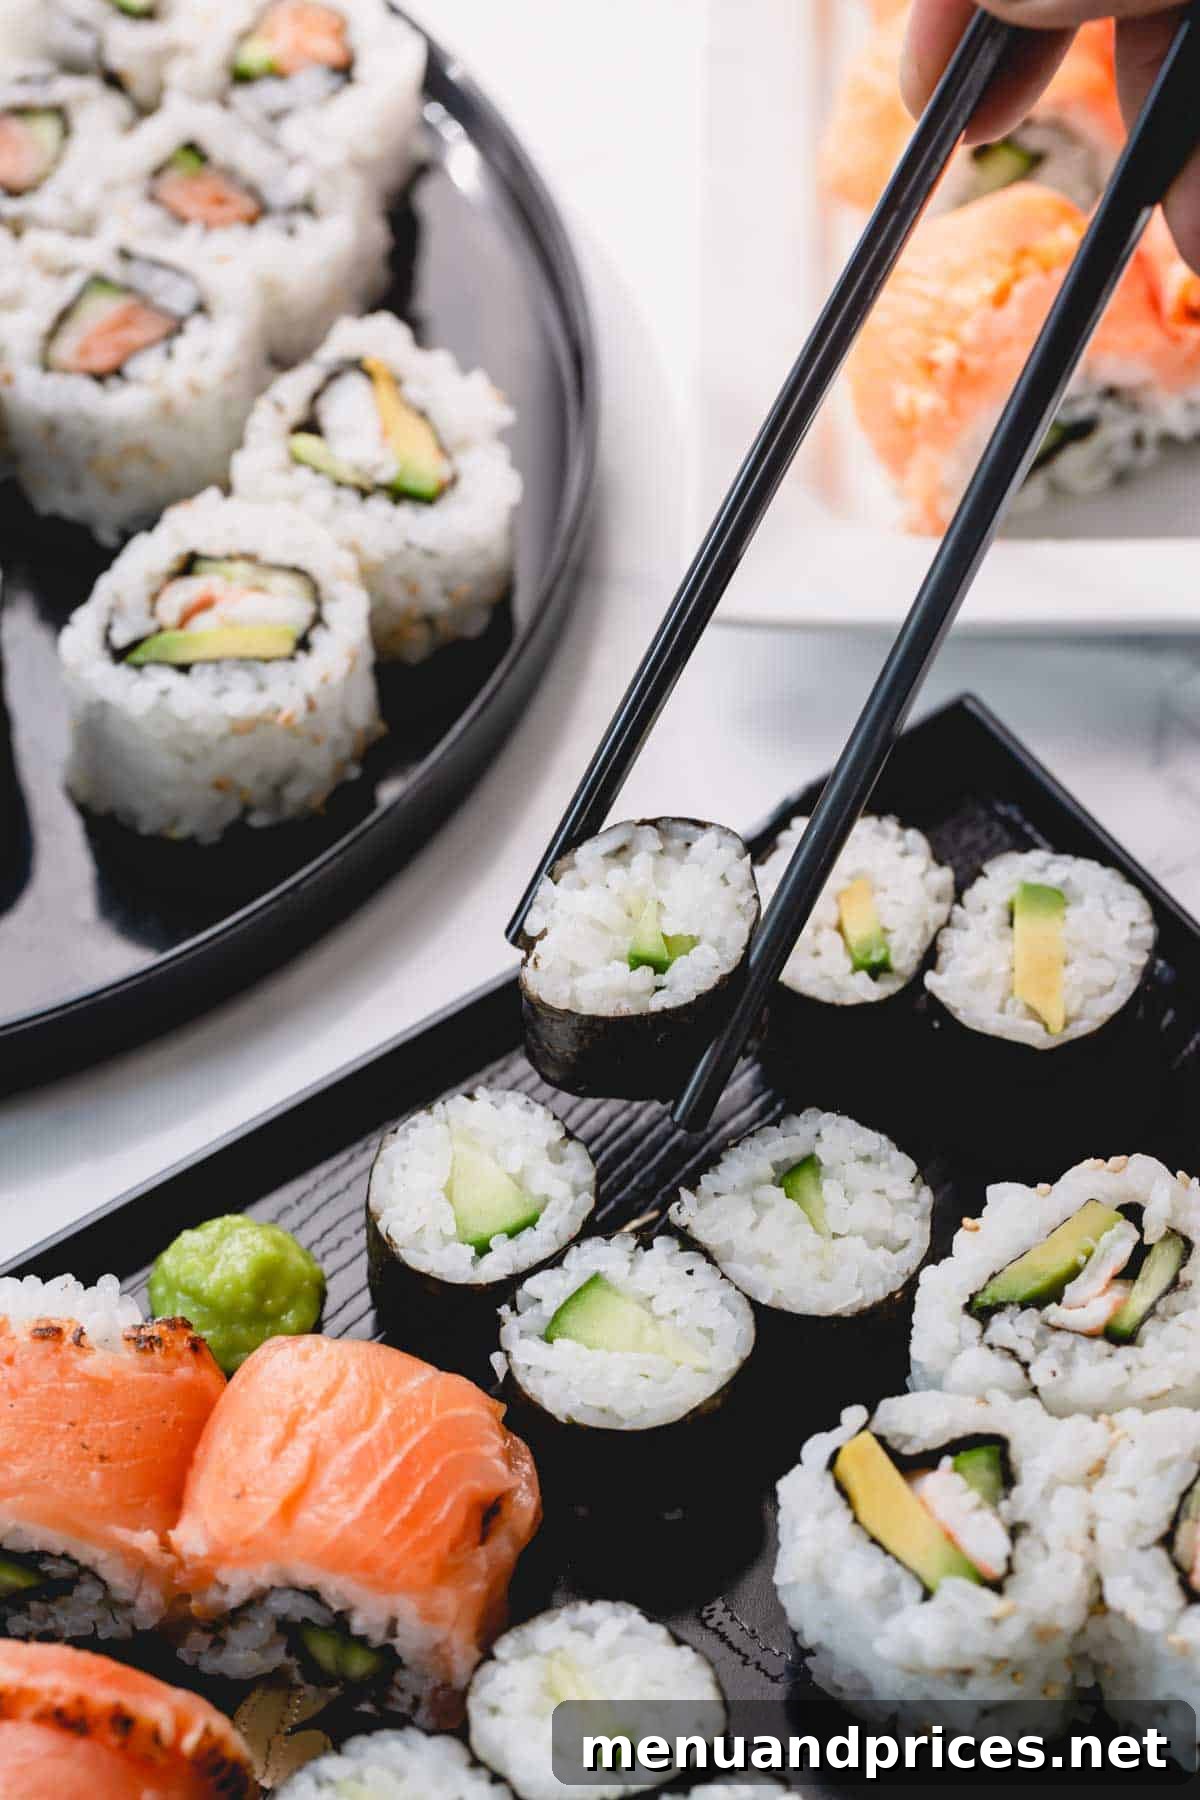
Essential Tools and Ingredients for Homemade Sushi
Before you begin your sushi-making journey, gather these fundamental tools and ingredients. Having the right equipment makes all the difference for a smooth and enjoyable experience.
Key Equipment:
- Sushi Rolling Mat (Makisu): An absolute must-have! A bamboo sushi mat is crucial for forming tight, neat, and perfectly shaped rolls. It provides the leverage and uniform pressure needed to compact the ingredients.
- Sharp Knife: Essential for clean cuts. A very sharp knife is vital for slicing your finished rolls without squishing them. A chef’s knife or a specific sushi knife works best.
- Large Mixing Bowl: For cooling and seasoning your sushi rice.
- Small Bowl of Water: To keep your hands moist and prevent rice from sticking during handling.
- Plastic Wrap or Ziplock Bag: To cover your sushi mat for easy cleanup and prevent rice from sticking to the bamboo.
Essential Ingredients:
- Short Grain Sushi Rice: This is non-negotiable! The unique stickiness of short-grain sushi rice, after proper preparation, is what holds your rolls together. Regular long-grain rice (like basmati or jasmine) simply won’t work as it lacks the necessary starch content and will fall apart.
- Nori (Seaweed) Sheets: These dried seaweed sheets are the edible wrapper for your sushi rolls. Look for high-quality, crisp nori at Asian markets or specialty grocery stores. Nori isn’t just for sushi; it also makes a great snack or accompaniment to plain rice.
- Rice Vinegar: Crucial for seasoning sushi rice. It provides the characteristic tangy flavor that distinguishes sushi rice from plain steamed rice.
- Sugar and Salt: Used in conjunction with rice vinegar to create the traditional sushi seasoning, balancing the flavors of the rice.
Step-by-Step Guide: How to Make Sushi Rolls
Ready to roll? Follow these detailed steps to create your own delightful sushi at home!
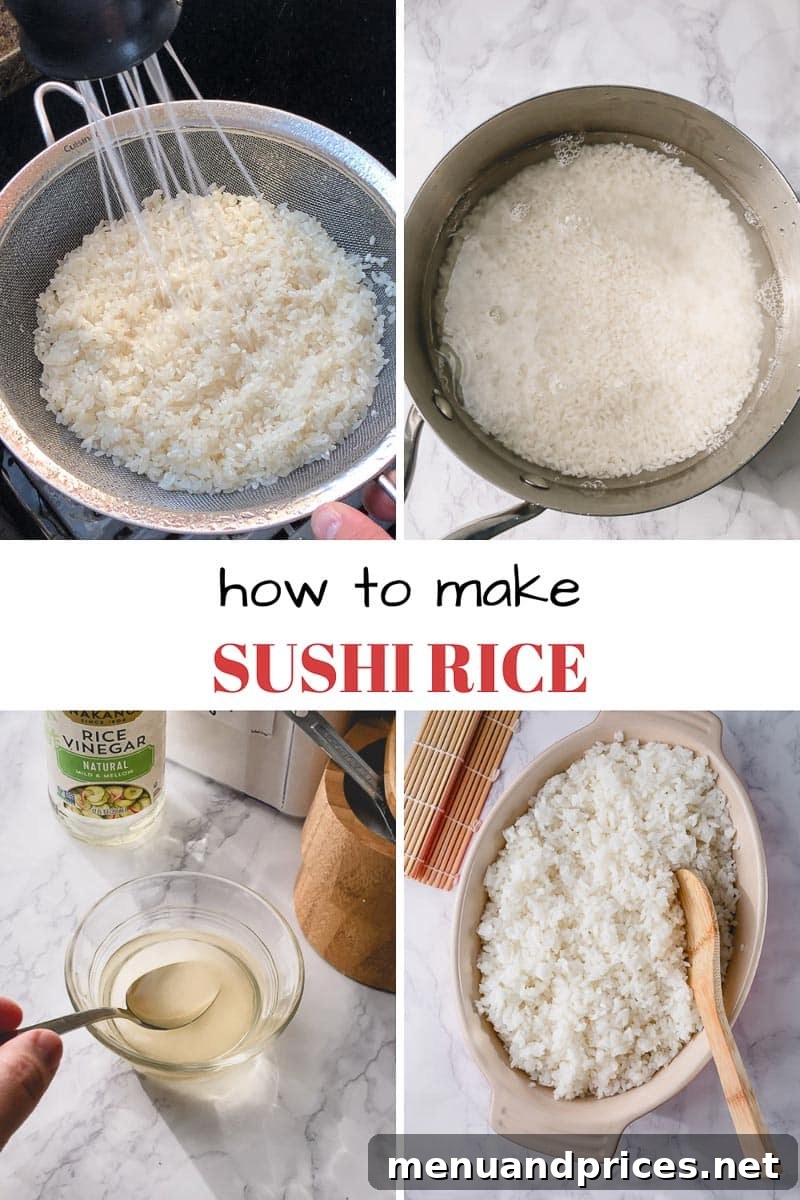
1. Prepare Perfect Sushi Rice
The foundation of any great sushi roll is perfectly prepared sushi rice. This involves careful washing, cooking, and seasoning.
- Rinse the Rice Thoroughly: Place 2 cups of short-grain sushi rice in a fine-mesh sieve or a large bowl. Rinse it under cold running water, stirring with your hand, until the water runs clear. This step is critical for removing excess starch, which helps achieve fluffy yet sticky rice and prevents it from becoming gummy. Drain well.
- Cook the Rice: Transfer the rinsed rice to a heavy-bottomed saucepan with a tight-fitting lid. Add 2.5 cups of water. Ensure the rice is level. Bring the water to a boil over medium-high heat. Once boiling, reduce the heat to the lowest setting, cover, and cook for exactly 10 minutes. Crucially, do not lift the lid during cooking!
- Steam and Rest: After 10 minutes, turn off the heat but keep the lid on. Let the rice steam for another 10-15 minutes. This allows the rice to fully absorb the moisture and achieve its ideal texture.
- Prepare the Sushi Seasoning (Su): While the rice cooks, combine ¼ cup rice vinegar, 2 tablespoons sugar, and 1 teaspoon salt in a small bowl. Stir until the sugar and salt are completely dissolved.
- Season the Rice: Once the rice has rested, transfer it immediately to a large, wide dish (like a casserole dish or a wooden hangiri bowl if you have one). The large surface area helps the rice cool down quickly and evenly. Pour the prepared sushi seasoning over the hot rice.
- Mix Gently: Using a wooden spatula or rice paddle, gently cut and fold the rice to incorporate the seasoning. Work carefully to avoid mashing the grains; you want the rice to remain fluffy yet sticky. This process also helps cool the rice. Continue mixing until the seasoning is evenly distributed and the rice cools to room temperature.
- Cover and Store: Cover the seasoned sushi rice with a damp kitchen towel to prevent it from drying out while you prepare your fillings.
Pro Tip: Rice Selection
Remember, the success of your sushi hinges on using short-grain sticky rice. Substituting with any other type of rice will result in rolls that fall apart, making your efforts frustrating!
2. Prepare Your Delicious Fillings
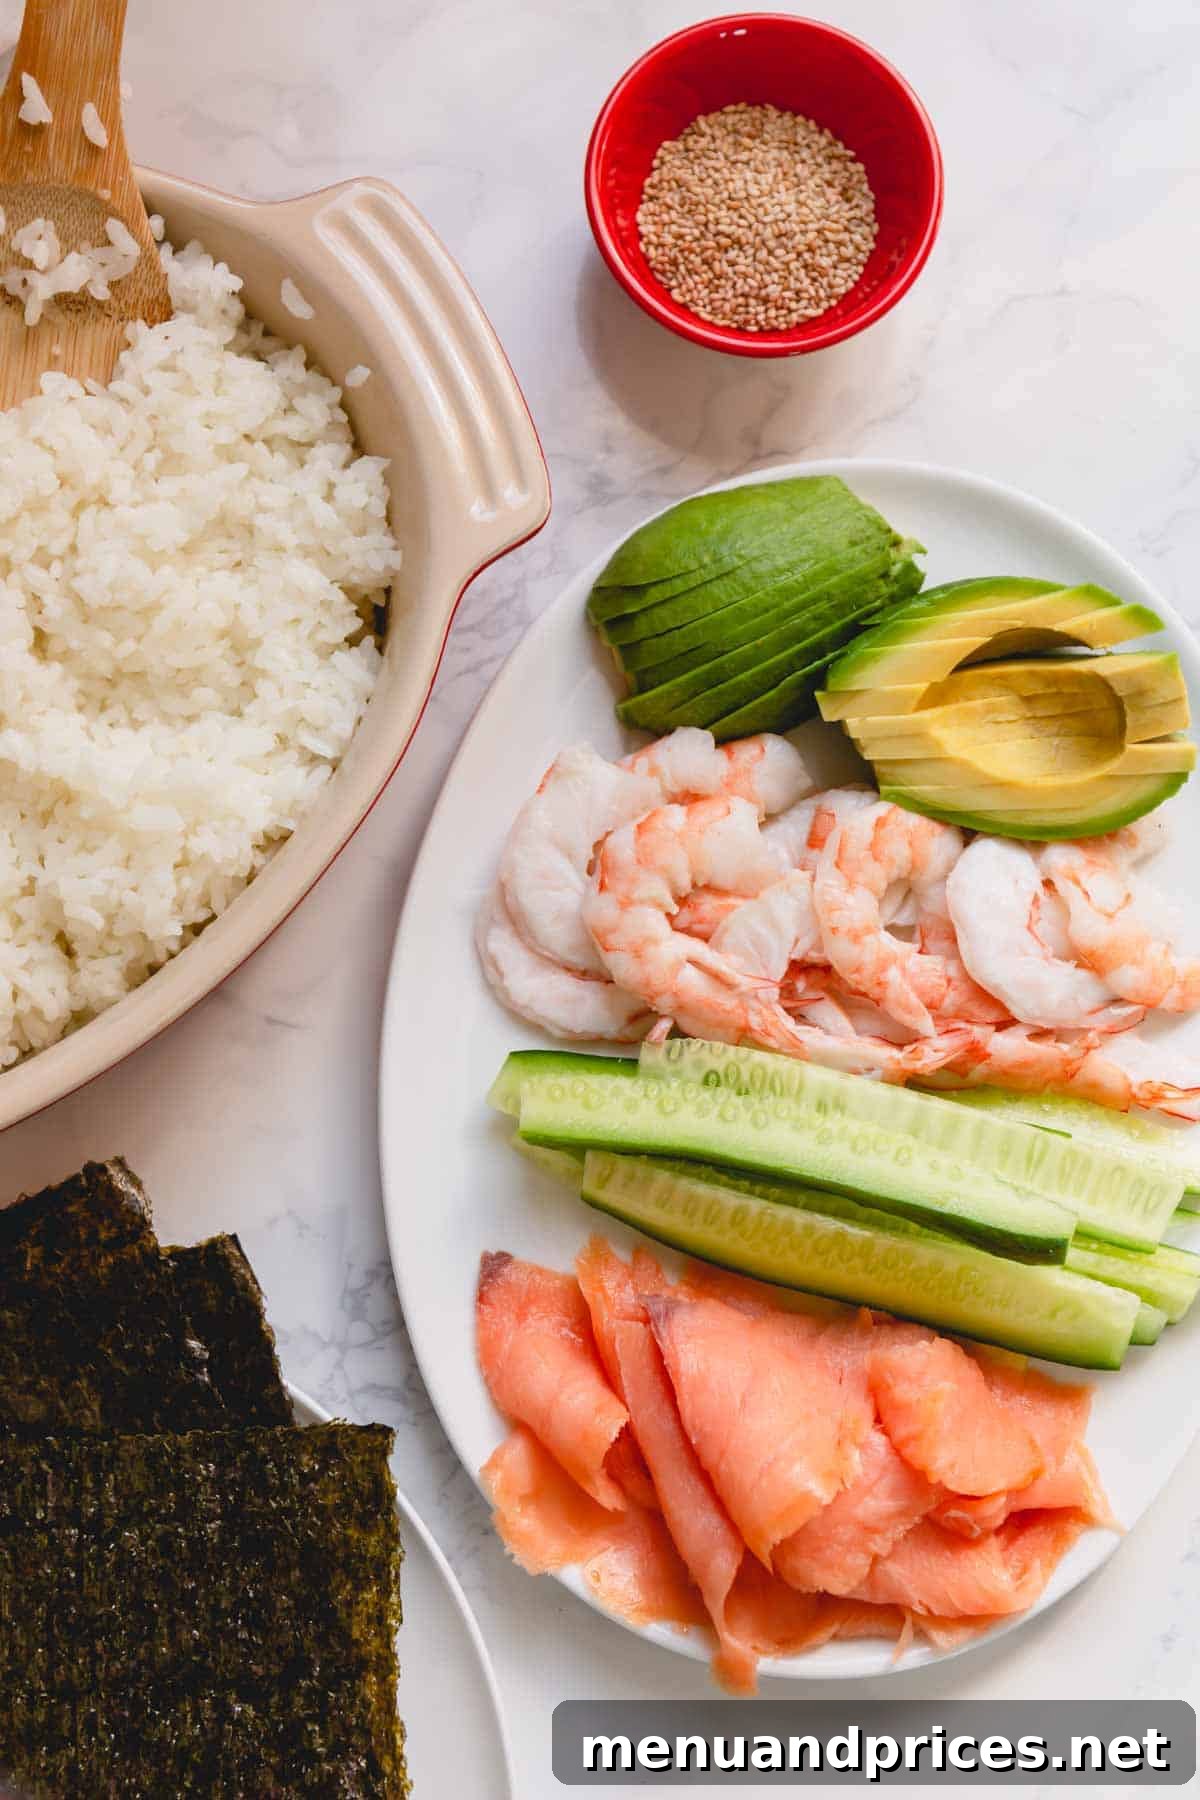
This is where your creativity shines! The beauty of homemade sushi is customizing your fillings. Here are some popular ideas and how to prepare them:
- Vegetables: Slice vegetables into long, thin strips (julienne style). Excellent choices include:
- Avocado: Ripe but firm, sliced thinly.
- Cucumber: Seedless varieties like English cucumber are best, cut into thin sticks.
- Carrots: Thinly sliced or julienned.
- Bell Peppers: Thin strips of colorful bell peppers add crunch and sweetness.
- Asparagus: Briefly blanched and chilled.
- Mango: Thin strips for a sweet and tangy contrast.
- Cooked Seafood: For those who prefer no raw fish, cooked options are fantastic:
- Cooked Shrimp: Halve cooked shrimp lengthwise for easy arrangement.
- Imitation Crab Meat (Surimi): Shredded or cut into strips.
- Smoked Salmon: Cold smoked salmon slices are a wonderfully flavorful and safe alternative to raw salmon.
- Canned Tuna/Salmon: Mixed with a touch of mayonnaise and seasoning.
- Other Protein Options:
- Cooked Chicken: Thinly sliced or shredded, perhaps seasoned with teriyaki.
- Tofu: Pan-fried or baked tofu strips.
- Egg Omelet (Tamagoyaki): Thin strips of sweet Japanese omelet.
Ensure all your fillings are prepared and laid out conveniently before you start rolling.
3. Master the Art of Rolling Sushi Rolls (Maki)
This is the exciting part! With practice, you’ll become a sushi rolling pro.
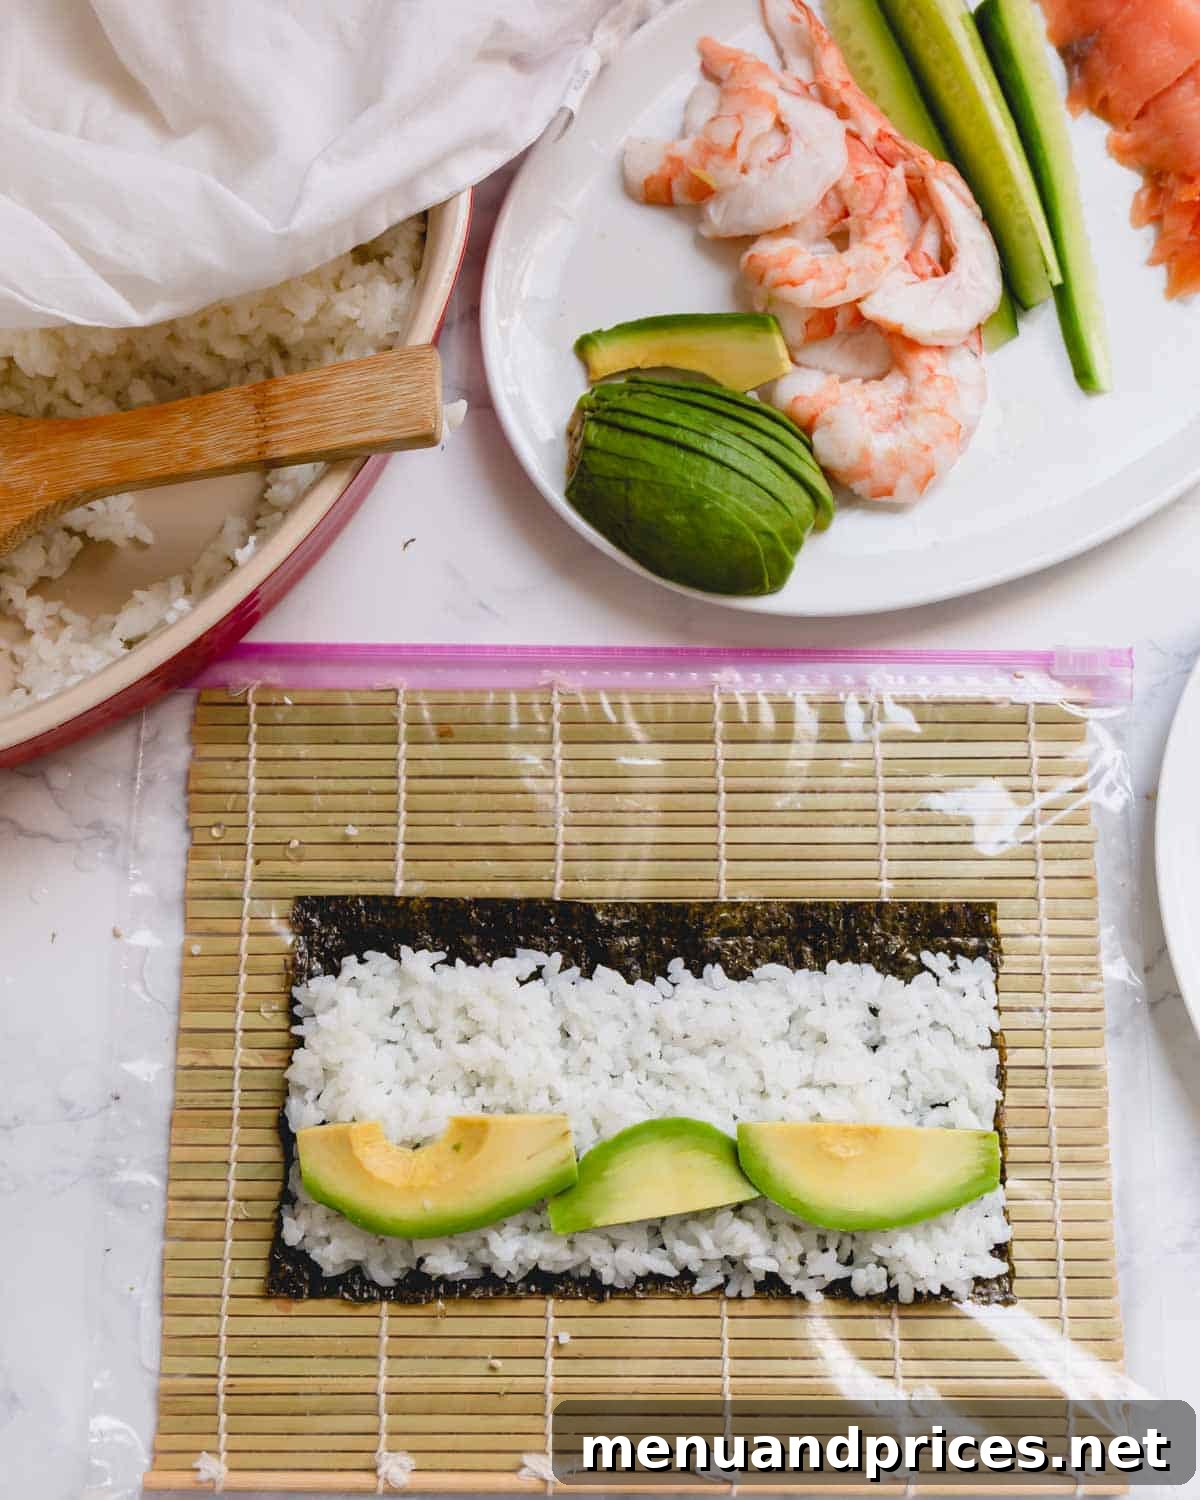
- Prepare Your Station: Lay your bamboo sushi mat flat. For easier cleanup and to prevent rice from sticking, cover the mat with a layer of plastic wrap or place it inside a large resealable plastic bag. Keep a bowl of cold water nearby to moisten your hands.
- Place the Nori: Take one sheet of nori and place it on the prepared sushi mat, with the rough side facing up. This rough surface helps the rice adhere better.
- Add the Rice: Dip your hands in the water to prevent the sticky rice from clinging to them. Take approximately ½ cup of prepared sushi rice and gently spread it evenly over the nori sheet. Leave about ½ inch of space at the top edge of the nori (the edge farthest from you). Avoid pressing down too hard on the rice; you want it to remain light and fluffy.
- Arrange the Fillings: Neatly arrange your chosen fillings in a horizontal line across the center of the rice-covered nori. Don’t overfill, as this makes rolling difficult and can cause the roll to burst. Think thin layers, not big chunks.
- Begin Rolling: Place your thumbs under the sushi mat, lifting the edge closest to you. Simultaneously, use your fingers to hold the fillings in place. Begin to roll the mat forward, bringing the bottom edge of the nori (with rice and fillings) over the fillings and tucking it tightly underneath.
- Form the Roll: Continue rolling, lifting the mat slightly as you go to ensure a snug roll. After the initial tuck, gently squeeze along the entire length of the roll through the mat to compact the ingredients and create a firm, even shape. Don’t press excessively hard, just apply firm, even pressure.
- Seal the Roll: Roll until the seam of the nori is on the bottom. Give it one final gentle squeeze to seal and shape.
Important Rolling Tip
Do not overfill your rolls! It’s not a burrito. Too many ingredients will make it impossible to roll tightly and neatly.
To Make Inside-Out Rolls (Uramaki):
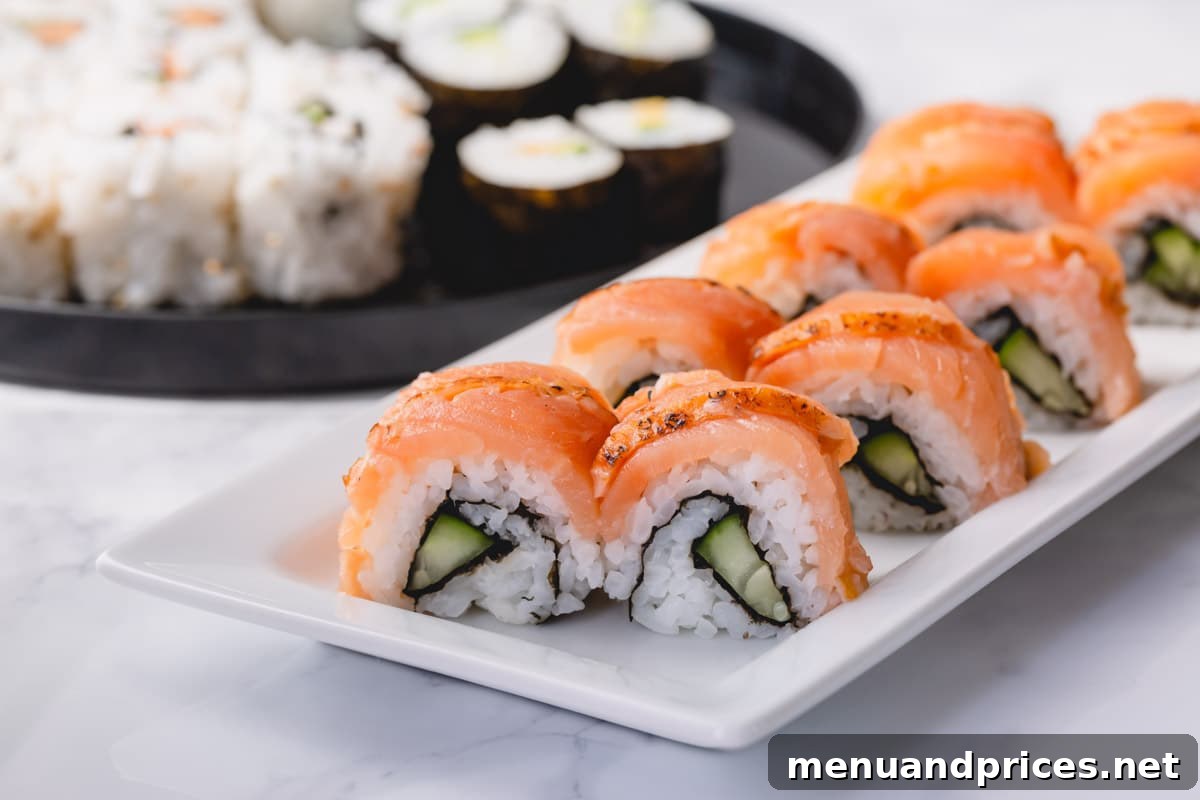
Inside-out rolls, where the rice is on the outside, offer a beautiful presentation and a different texture.
- Prepare Nori with Rice: Place a nori sheet on your plastic-wrapped sushi mat. Spread the sushi rice evenly over the entire surface of the nori, going edge-to-edge.
- Add Sesame Seeds (Optional): Sprinkle some toasted sesame seeds (black, white, or a mix) over the rice.
- Flip the Nori: Carefully flip the nori sheet (rice side down) onto the sushi mat. The nori should now be facing up, and the rice is against the mat.
- Arrange Fillings: Arrange your desired fillings in a horizontal line along the center of the exposed nori.
- Roll Carefully: Roll just like a regular maki roll, using the mat to guide and shape. Be extra gentle, as the rice on the outside is more delicate. Use light but firm pressure to maintain the roll’s shape.
How to Cut Sushi Rolls for Perfect Portions
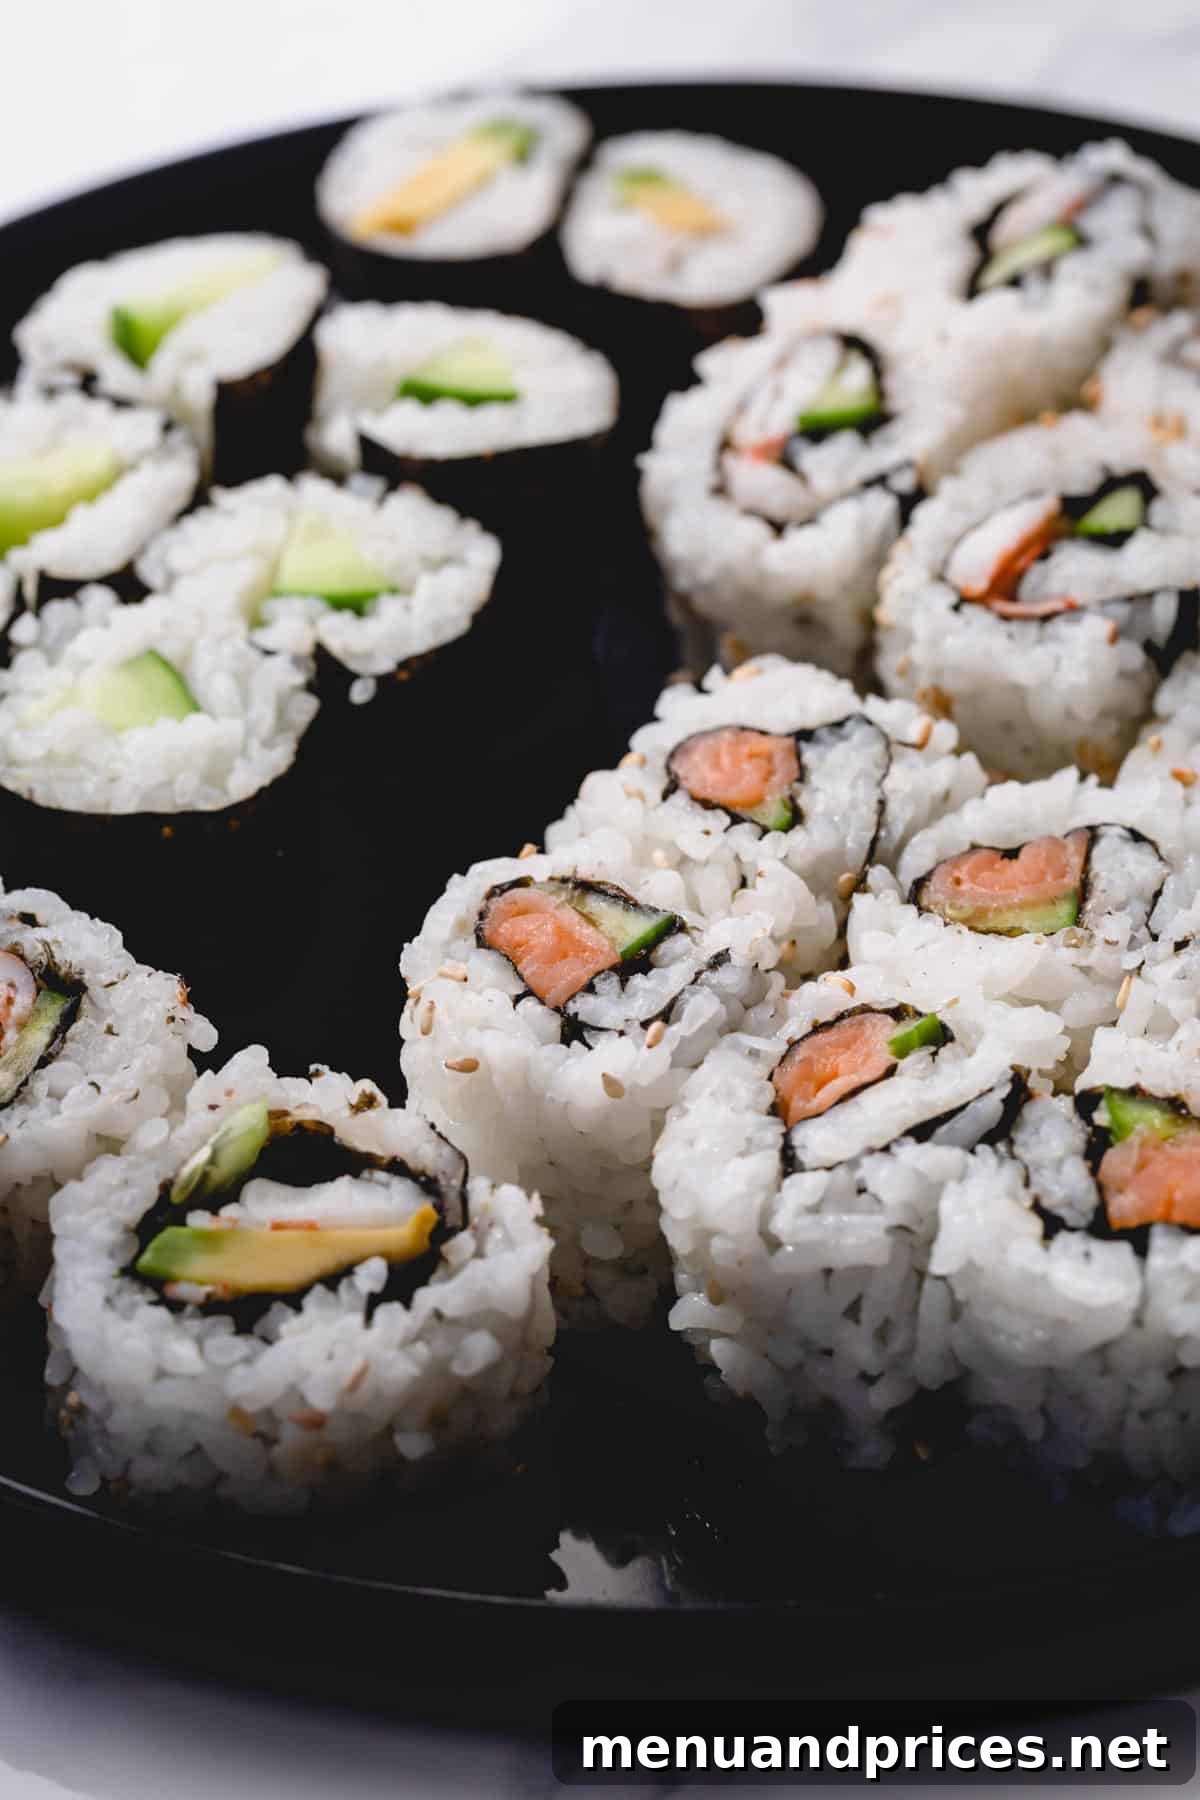
A beautifully rolled sushi can be ruined by improper cutting. Here’s how to achieve clean, attractive slices:
- Use a Very Sharp Knife: A dull knife will smash your rolls. Ensure your knife is honed and sharp.
- Moisten the Blade: Before each cut, lightly wet the knife blade. You can do this by dipping it in your bowl of water. This prevents the sticky rice from clinging to the knife.
- Gentle Sawing Motion: Place the roll on a clean cutting board. Use a gentle sawing motion, pushing the knife forward and slightly down, rather than pressing straight down. Avoid applying too much pressure, which can squish the roll.
- Clean Between Cuts: Wipe the knife blade clean with a damp towel between each cut. This removes any accumulated rice and ensures the next slice is as clean as the first.
- Portioning: Typically, a full roll is cut into 6-8 equal pieces. Start by cutting the roll in half, then cut each half in half, and so on, until you reach your desired portion size.
Cutting Technique Tip
Always wipe your knife on a clean, wet towel in between cuts to keep the blade non-stick and ensure clean, precise slices every time.
Tips for Sushi Success: Elevating Your Homemade Creations
Beyond the basic steps, these tips will help you consistently create outstanding sushi rolls:
- Creative Fillings are Your Best Friend: Don’t be afraid to experiment! While cucumbers, avocados, and thinly sliced carrots are classic, consider adding cream cheese, pickled radish (takuan), egg salad, or even grilled chicken for unique flavor profiles.
- Safe Seafood Choices: If fresh, sushi-grade raw fish is inaccessible, stick to delicious and safe cooked options. Cooked shrimp, imitation crab, canned tuna, and especially cold smoked salmon are fantastic choices that offer great flavor and texture without the risks associated with unprepared raw fish.
- Keep Your Hands Wet: This simple trick is a game-changer. Continuously dipping your hands in a bowl of cold water will prevent the sticky sushi rice from adhering to your fingers, making spreading and rolling much easier.
- Wrap Your Mat: Always cover your bamboo sushi mat with plastic wrap or slide it into a large ziplock bag. This keeps the mat clean and hygienic, and prevents rice from getting stuck in the bamboo slats, simplifying cleanup.
- Practice Makes Perfect: Your first roll might not be restaurant-quality, and that’s perfectly okay! Sushi making is an art that improves with practice. Don’t get discouraged; each roll gets easier and looks better than the last.
- Don’t Overstuff: A common beginner mistake is to overload the nori with too many fillings. This makes it impossible to roll tightly, resulting in loose, messy rolls. A thin, even layer of fillings is key.
- Serve Fresh: Sushi is best enjoyed fresh. While you can prepare components in advance, assemble and cut the rolls just before serving for the best taste and texture.
What to Serve with Your Homemade Sushi
Complete your sushi feast with these complementary dishes, turning your meal into a true Japanese dining experience:
- Homemade Miso Soup: A warm, savory, and comforting classic.
- Clam Miso Soup: A richer variation for seafood lovers.
- Seared Ahi Tuna: If you have access to sushi-grade tuna, a quick sear adds another dimension to your meal.
- Cucumber Mango Salad: A refreshing and sweet-tart side dish.
- Soba Noodle Salad: A light and flavorful buckwheat noodle salad.
- Pickled Ginger (Gari): To cleanse your palate between different types of sushi.
- Wasabi and Soy Sauce: The indispensable dipping accompaniments for traditional sushi.
Homemade Sushi Rolls Recipe

By Shinee Davaakhuu
Learn how to make sushi rolls at home with whatever ingredients you love! Raw seafood is not required!
- Total Time: 1 hour
- Servings: 10 rolls
Ingredients
For sushi rice:
- 2 cups short grain sushi rice (Note 1)
- 2.5 cups water
- ¼ cup rice vinegar
- 2 tablespoons sugar
- 1 teaspoon salt
For sushi rolls:
- 1 medium cucumber (Note 2)
- 1 avocado
- 4 cooked jumbo shrimp (Note 3)
- 4 oz cold smoked salmon
- 5 full nori (seaweed) sheets (Note 4)
- Black and white sesame seeds (optional)
- Wasabi and soy sauce for dipping (if desired)
Instructions
Make sushi rice:
- Wash the rice under running cold water until the water runs clear. (TIP: This helps to get rid of the excess starch and makes nice and fluffy rice. So don’t skip this step.)
- Drain and shake off the excess water. This is crucial because the rice-to-water ratio is very important for the right texture.
- Then place the washed rice in a saucepan and add 2.5 cups of water. Level the rice under the water so it’s nice and even. Cover with a tight-fitting lid and turn the heat to medium-high. Bring it to a boil.
- Once boiled, reduce the heat to low and cook for 10 minutes, still covered. Then turn the heat off and let it sit for another 10 minutes. Don’t open the lid the entire time!
- Meanwhile, prepare the rice seasoning by mixing together rice vinegar, sugar, and salt in a small dish until sugar is fully dissolved. Set aside.
- When the rice is fully cooked, transfer it into a large dish. (TIP: Choose a dish with the largest surface area, like a casserole dish, so that the rice cools quickly.)
- Pour the rice seasoning over the rice. And gently mix everything with a wooden spatula, using a cutting and folding motion. The goal here is to mix the seasoning evenly throughout the rice and also cool the rice quickly. Rice will also get stickier in the process. Avoid smashing the rice; you don’t want to make mashed rice here. Be gentle!
- Then cover the rice with a damp kitchen towel and prepare the fillings.
Prepare nori sheets and fillings:
- This is optional, but if desired, toast the nori sheets over an open flame to make them nice and crisp. (I do this over my gas burner. Make sure to quickly swipe nori sheets over the fire.)
- If using full nori sheets, cut them in half into 2 rectangular sheets.
- Prepare the fillings by cutting and slicing them into thin strips. Here I’m using cooked shrimp, cucumber, avocado, and smoked salmon. So I slice the shrimp horizontally, cut the cucumber into thin sticks (you can also remove seeds, if desired), and peel and slice avocado.
Make the rolls:
- Prepare a bowl of cold water to dip your hands in to keep them wet when you handle the rice. This will help prevent rice from sticking to your hands.
- Place a sushi mat in a large ziplock bag to prevent the rice from sticking to the mat. Arrange everything (rice, fillings, etc.) around the work area.
- Place a seaweed sheet rough side up on the prepared sushi mat.
- With wet hands, take about 1/2 cup of sushi rice and spread it evenly over the nori sheet, leaving about 1/2 inch space from the top. Again, don’t mash the rice too much. You want the rice to stay fluffy and light.
- Arrange the fillings in whatever combination you like. (For example, just cucumber, or just avocado, or cucumber + shrimp, or cucumber + smoked salmon, etc.)
- Then place your thumbs under the mat and bring the roll over the fillings. Use your other fingers to hold the fillings in place and continue rolling until it reaches the end of the nori. Make sure the seam is on the bottom. Gently squeeze along the bottom of the roll and don’t press too hard. Just gentle but firm squeeze to give it a good shape.
- To make inside-out rolls, spread the rice evenly on the seaweed sheet, sprinkle some toasted sesame seeds, and flip everything over. Now arrange the fillings straight on the nori sheet. And roll just like the previous roll. Again, try not to press too hard, just gently run your fingers along the bottom and top to shape the roll.
- To cut the rolls, use a sharp knife and wet it lightly for a clean cut. Run the knife in a gentle sawing motion without pressing too hard and squishing the rolls. Wipe the knife on a clean wet towel in between cuts to prevent the rice from sticking to the knife.
- Arrange the cut sushi rolls on a serving platter. Serve with soy sauce and wasabi for dipping.
⭐️ Did you make this recipe?
Please leave a review and let us know how you liked it!
Video Guide
Tips & Notes
Note 1: Make sure to use short-grain sushi rice, because long-grain rice, like jasmine or basmati rice, is fluffy and they’ll fall apart easily.
Note 2: It’s best to use a seedless variety of cucumber, like English cucumber.
Note 3: You can buy already peeled, deveined, and cooked shrimp for convenience.
Note 4: Full nori (seaweed) sheets are 8×8-inch square sheets. You can also purchase half sheets.
Nutrition
- Calories: 197 kcal
- Carbohydrates: 35g
- Protein: 5g
- Fat: 4g
- Sugar: 3g
- Sodium: 332mg
Recipe Details
- Course: Main Course
- Cuisine: Japanese

This recipe was originally published on December 29th, 2014.