
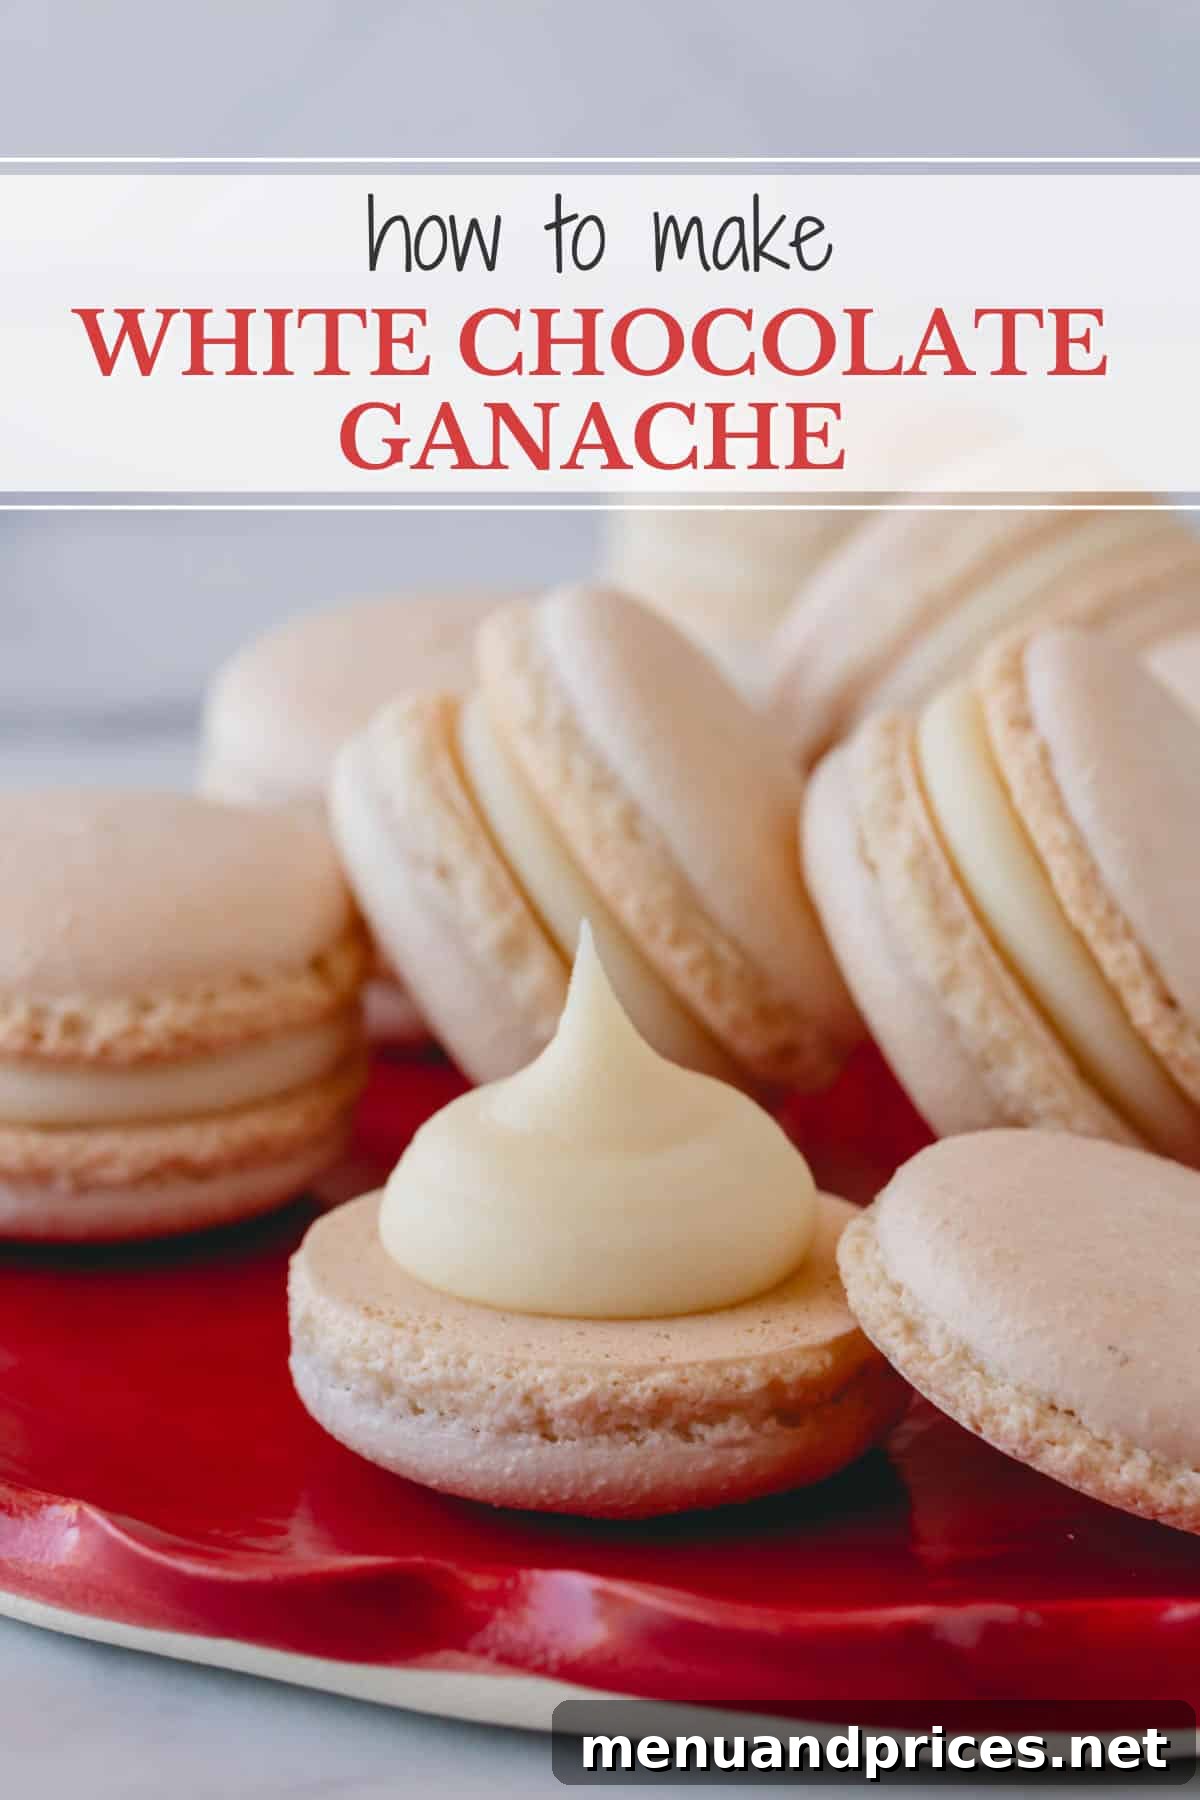
While often perceived as tricky, mastering white chocolate ganache is entirely achievable with the right knowledge and techniques. This comprehensive guide will equip you with all the essential tips, tricks, and variables needed to create a flawlessly smooth and decadent white chocolate ganache for all your baking needs, ensuring a perfect result every single time.
Pin this now to find it later
Pin It
Why You’ll Love This Essential White Chocolate Ganache Recipe
White chocolate is a uniquely delicate ingredient in the world of confections. Unlike its darker counterparts, white chocolate lacks cocoa solids, making its emulsification with cream a more nuanced process. This inherent delicacy is why many bakers find white chocolate ganache more challenging than a standard dark chocolate ganache.
Indeed, there isn’t a single “perfect” foolproof recipe that works universally for all white chocolate brands and desired consistencies. The ideal ratio and technique often depend on factors like the specific brand of white chocolate you choose, its cocoa butter content, and the intended use of the ganache (e.g., a firm filling, a soft frosting, or a pourable glaze).
But fear not! This guide is designed to demystify the process. We will explore all the crucial variables, equipping you with the knowledge to adapt and perfect your white chocolate ganache for any situation. You’ll soon discover the joy of consistently creating smooth, stable, and utterly delicious white chocolate ganache.
What Exactly is White Chocolate Ganache?
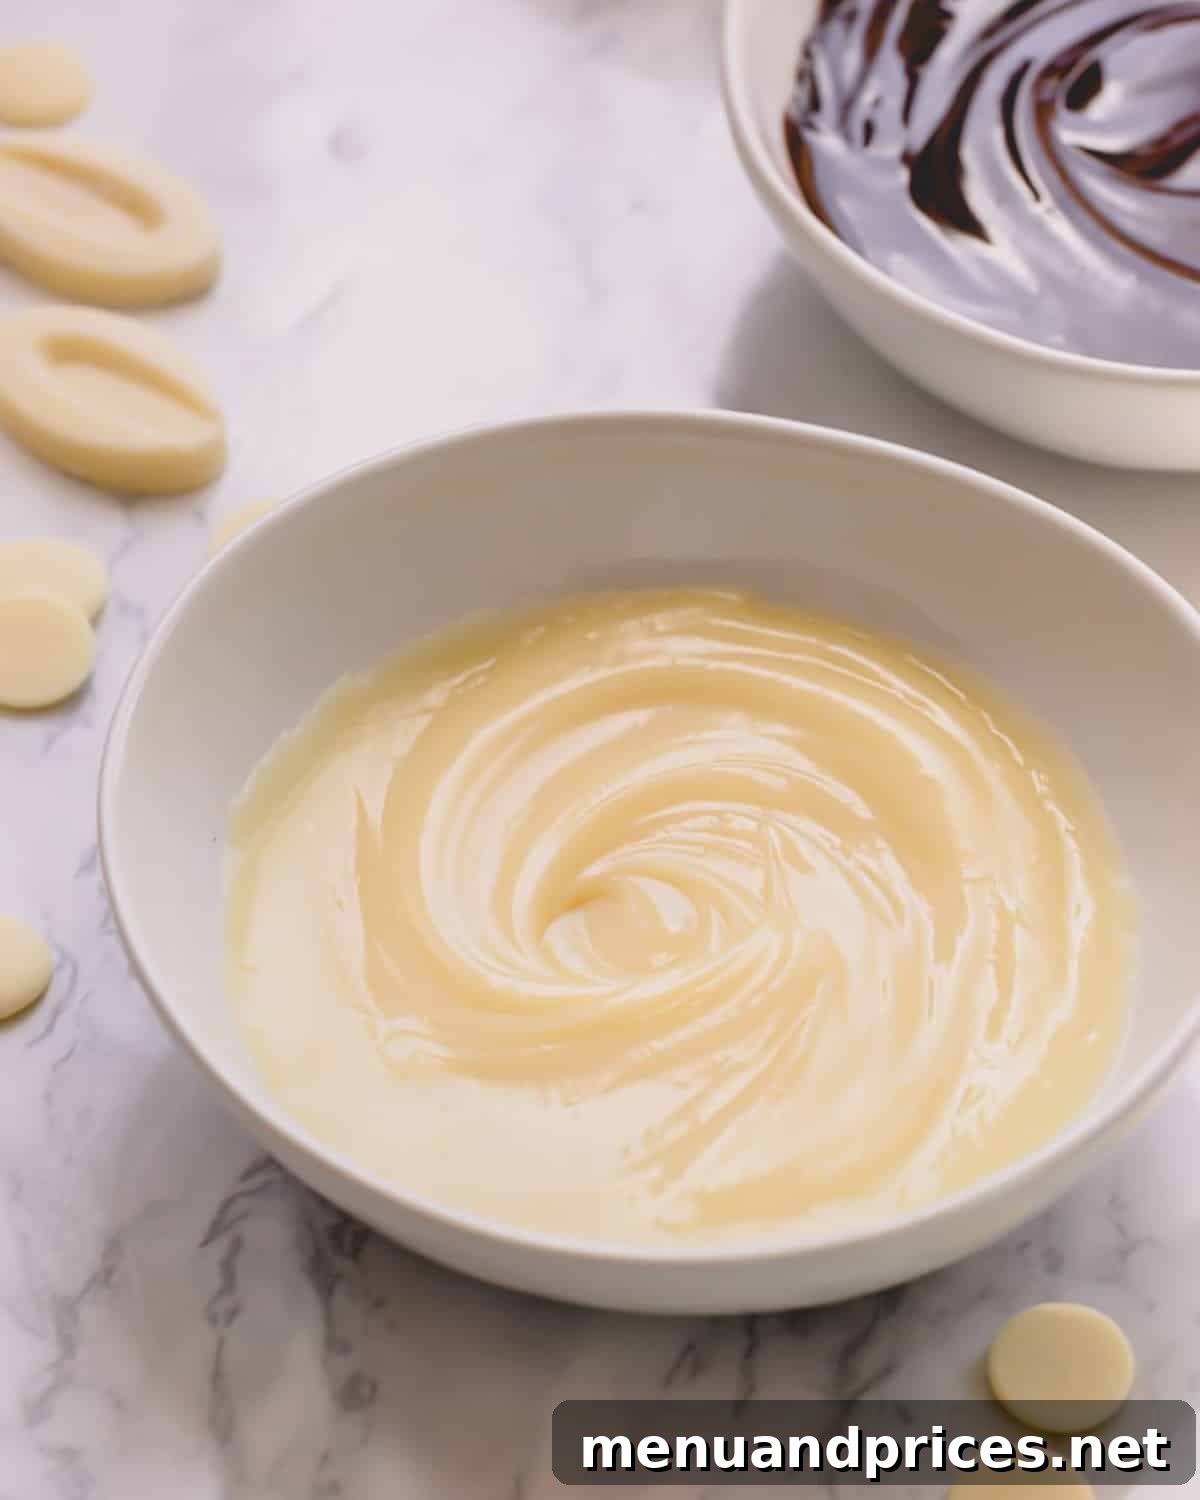
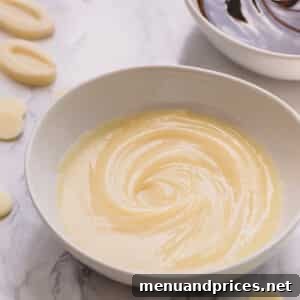
At its core, white chocolate ganache is a luxurious emulsion formed by combining melted white chocolate with warm heavy cream. This elegant, creamy mixture is incredibly versatile in the culinary world, serving as a rich filling for cakes and macarons, a decadent frosting for cupcakes, or a glossy glaze for various desserts.
It boasts a distinctively rich and sweet flavor profile, complemented by a luxurious texture that can be transformed. Depending on the desired consistency and application, ganache can be poured while warm for a smooth glaze or chilled and then whipped for a light, airy frosting. Its adaptability makes it a staple for both professional bakers and home enthusiasts alike.
Key Ingredient Notes for Perfect Ganache
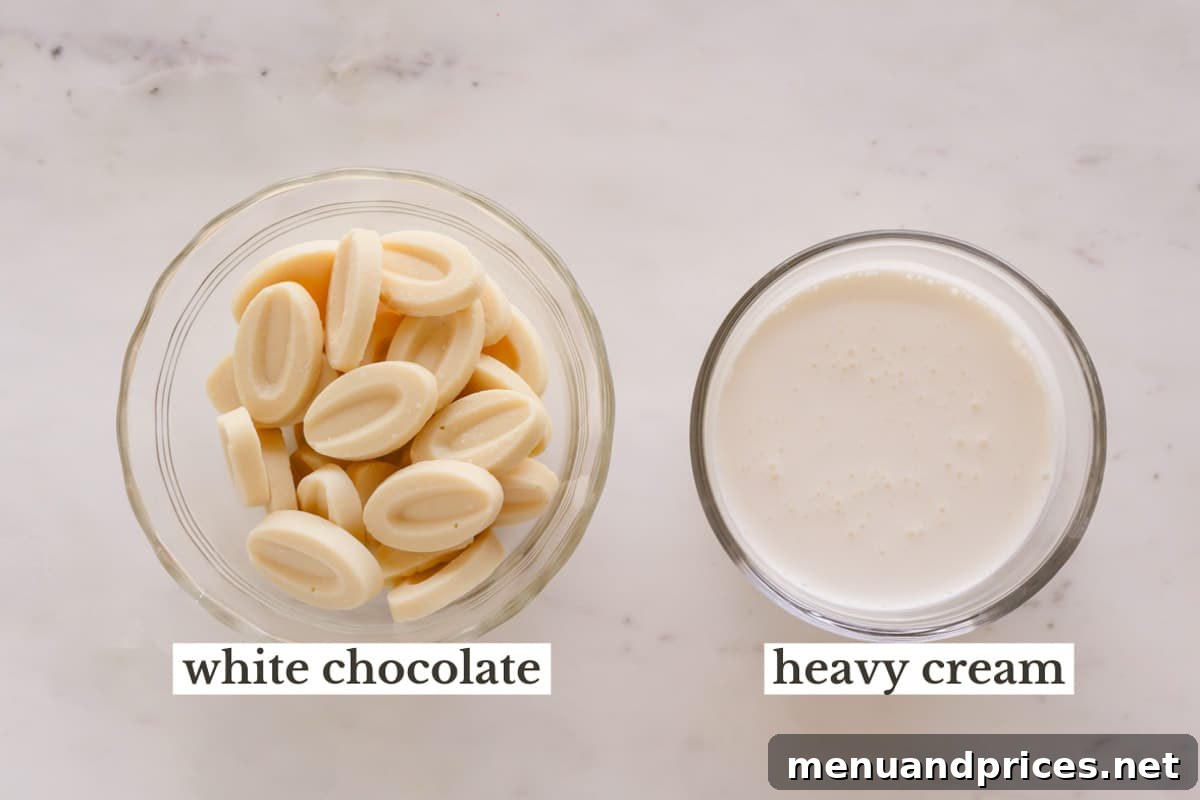
- White Chocolate: The Foundation of Flavor and Texture
Choosing the right white chocolate is paramount to your ganache’s success. It’s vital to differentiate between genuine white chocolate and imitation products. Always scrutinize the label; avoid anything that says “white chocolate confectionary” or “white coating wafer,” as these typically contain minimal or no cocoa butter and rely on other fats, leading to a waxy texture. True white chocolate lists cocoa butter as a primary ingredient. We’ll delve deeper into cocoa butter content below. - Heavy Whipping Cream: The Emulsifier
For the richest and most stable ganache, heavy whipping cream (with a fat content of at least 36%) is your best choice. Its high-fat content is crucial for a smooth emulsion and helps the ganache set beautifully. Avoid using milk or half-and-half, as their lower fat content can lead to a thinner, less stable, and more prone-to-splitting ganache.
Understanding White Chocolate: How to Choose the Best Kind
Authentic white chocolate is primarily composed of cocoa butter, sugar, milk solids, lecithin (an emulsifier), and sometimes vanilla. Cocoa butter, derived from the cacao bean, is the star ingredient that gives white chocolate its signature smooth melt and creamy texture.
Given that cocoa butter is a relatively expensive ingredient, many cheaper “white chocolate” products substitute it with other, less costly fats. This often results in that undesirable waxy mouthfeel. To be legally labeled as “white chocolate” in the US, the product must contain at least 20% cocoa butter, as per FDA regulations. High-end white chocolate couvertures, with their generous cocoa butter content, melt exquisitely on the tongue without any greasy residue, offering a truly luxurious experience.
Always Read the Labels Carefully!
This cannot be stressed enough. If a product is labeled “White Chocolate Confectionary” or “White Coating Wafers,” it is not true white chocolate. These products either contain no cocoa butter or an insufficient amount (likely less than the FDA-mandated 20%) to qualify. Using these will significantly compromise the quality and texture of your ganache.
The Impact of Cocoa Butter Content on Ganache Consistency
Indeed, not all white chocolates are created equal, and this disparity primarily stems from their varying cocoa butter percentages. This percentage is not merely a detail; it’s a critical factor in determining the final consistency and stability of your white chocolate ganache.
So, why is knowing the cocoa butter content so important?
The amount of cocoa butter in your chosen white chocolate profoundly influences the structure and firmness of the resulting ganache. A higher cocoa butter content means the chocolate will set more firmly, providing better structure to your ganache even with less chocolate in the ratio. This allows for a more balanced sweetness and a superior texture.
You don’t necessarily need to opt for the most expensive white chocolate available. However, understanding the cocoa butter content of your chosen brand is essential for adjusting the chocolate-to-cream ratio accordingly to achieve your desired consistency.
Here’s the key takeaway: The higher the cocoa butter content, the firmer your white chocolate ganache will set, requiring less chocolate for a given amount of cream to achieve a specific thickness.
Consider this illustrative example: Let’s prepare two batches of ganache using the same 1:1 ratio, but with different white chocolates:
- Batch A: Made with a generic white chocolate, such as Ghirardelli white chocolate chips, which typically have a lower and often undisclosed cocoa butter percentage (assumed to be around 20%).
- Batch B: Made with a high-quality white chocolate couverture, like Valrhona Ivoire, boasting a 35% cocoa butter content.
You would observe that Batch A’s ganache will be significantly softer and more fluid than Batch B’s. The higher cocoa butter content in Batch B contributes to a much firmer set, yielding a ganache with superior body and structure. This demonstrates why adjusting your cream ratio based on chocolate quality is crucial.
Recommended White Chocolate Brands for Ganache:
For consistently excellent results, I recommend using high-quality white chocolate couverture. Here are a couple of my go-to brands:
- Cacao Barry Blanc Satin 29% White Chocolate Discs: This is one of my top choices for ganache. Its 29% cocoa butter content provides excellent structure and a beautifully smooth melt. Many of my recipes are developed using this particular brand, ensuring reliable outcomes.
- Valrhona Ivoire 35% White Couverture Chocolate Feves: An absolutely superb option! Valrhona Ivoire is renowned for its exceptional quality. Its higher cocoa butter content (35%) makes it ideal for achieving a robust, thick ganache perfect for frosting cakes, decorating cupcakes, and creating stable macaron fillings.
Where to Purchase Quality Chocolate Couverture
While the Amazon links are provided for visual reference to the product packaging, I personally source my professional-grade chocolate from specialized retailers. For smaller, re-packaged quantities of these premium couvertures, I highly recommend World Wide Chocolate, which is my preferred supplier for all my chocolate needs.
Step-by-Step Guide: Crafting the Perfect White Chocolate Ganache
Making white chocolate ganache is a straightforward process when you follow these key steps:
1. Gently Melt the White Chocolate
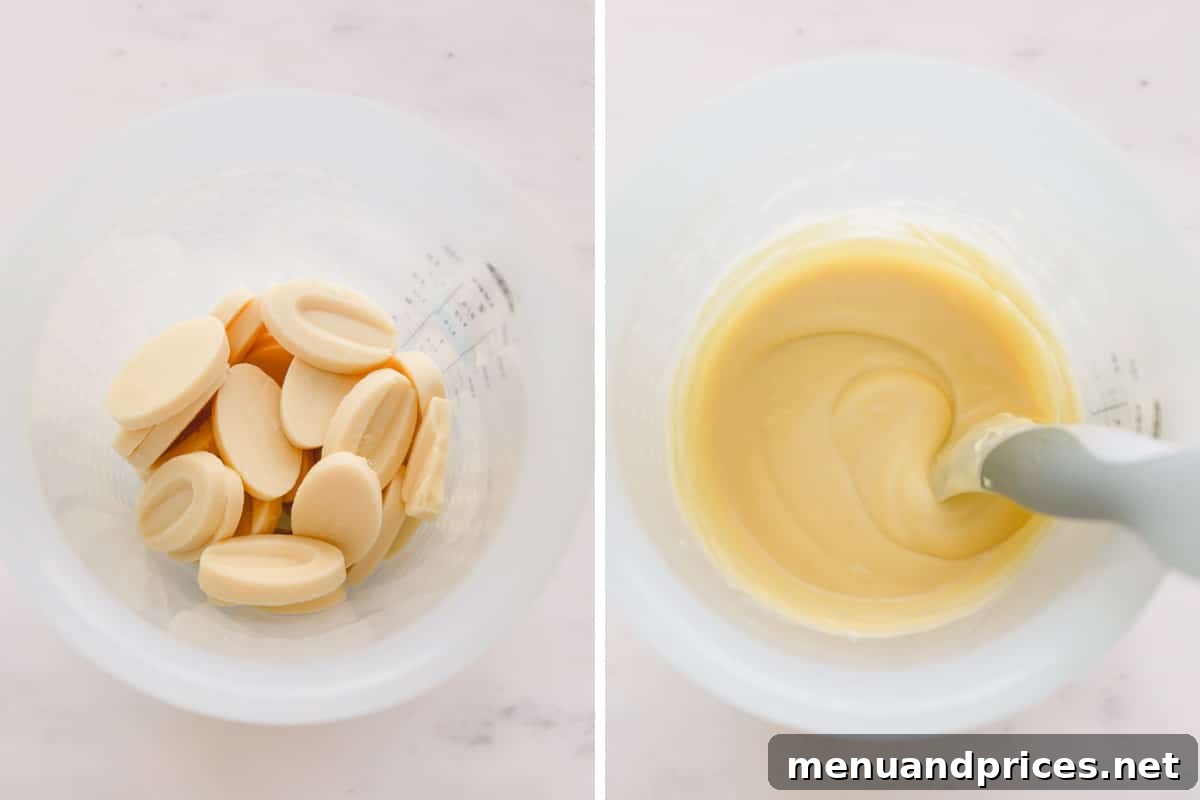
- Preparation: Place your chosen white chocolate (preferably in small pieces or callets for even melting) into a microwave-safe bowl. Alternatively, you can use a double boiler over simmering water, ensuring the bowl does not touch the water.
- Microwave Method: If using a microwave, set it to 50% power. For a 1000-watt microwave, begin with a 1-minute interval.
- Stirring and Continued Melting: After the initial minute, stir the chocolate thoroughly, even if it doesn’t appear fully melted. Return it to the microwave for shorter intervals (15-30 seconds at 50% power). If the chocolate still looks quite solid, opt for 30 seconds; if it has started to melt, use 15 seconds.
- Achieving Smoothness: Continue this process, stirring well after each interval, until the chocolate is completely melted and perfectly smooth, with no lumps remaining. Be careful not to overheat it, as white chocolate can scorch easily.
2. Gently Heat the Heavy Cream
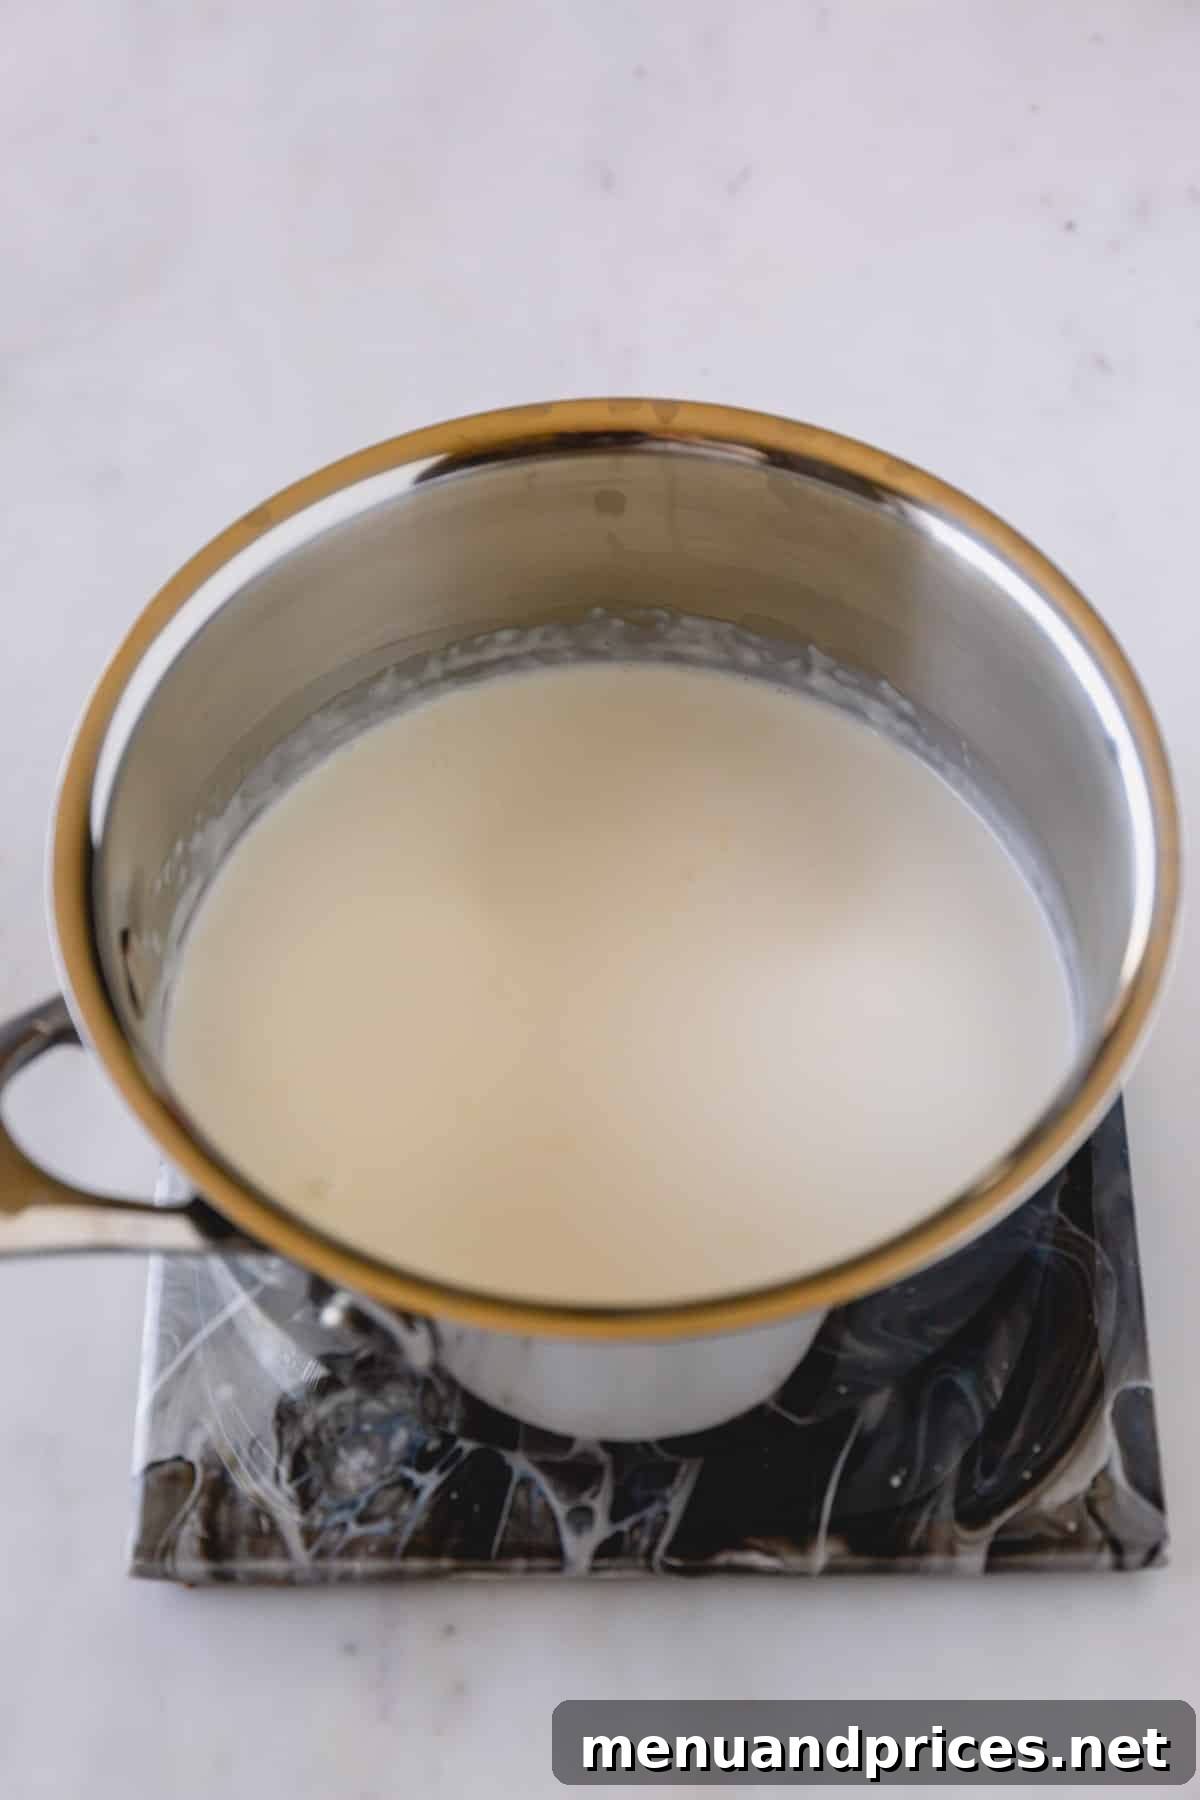
- Warm the Cream: Pour the heavy cream into a small saucepan.
- Bring to a Gentle Simmer: Heat the cream over medium heat. Watch carefully for small bubbles to form around the edges of the saucepan. This indicates the cream is warm enough. Crucially, do not allow the cream to come to a full boil, as excessive heating can cause too much moisture to evaporate, altering the balance of your ganache.
3. Expertly Emulsify Chocolate and Cream
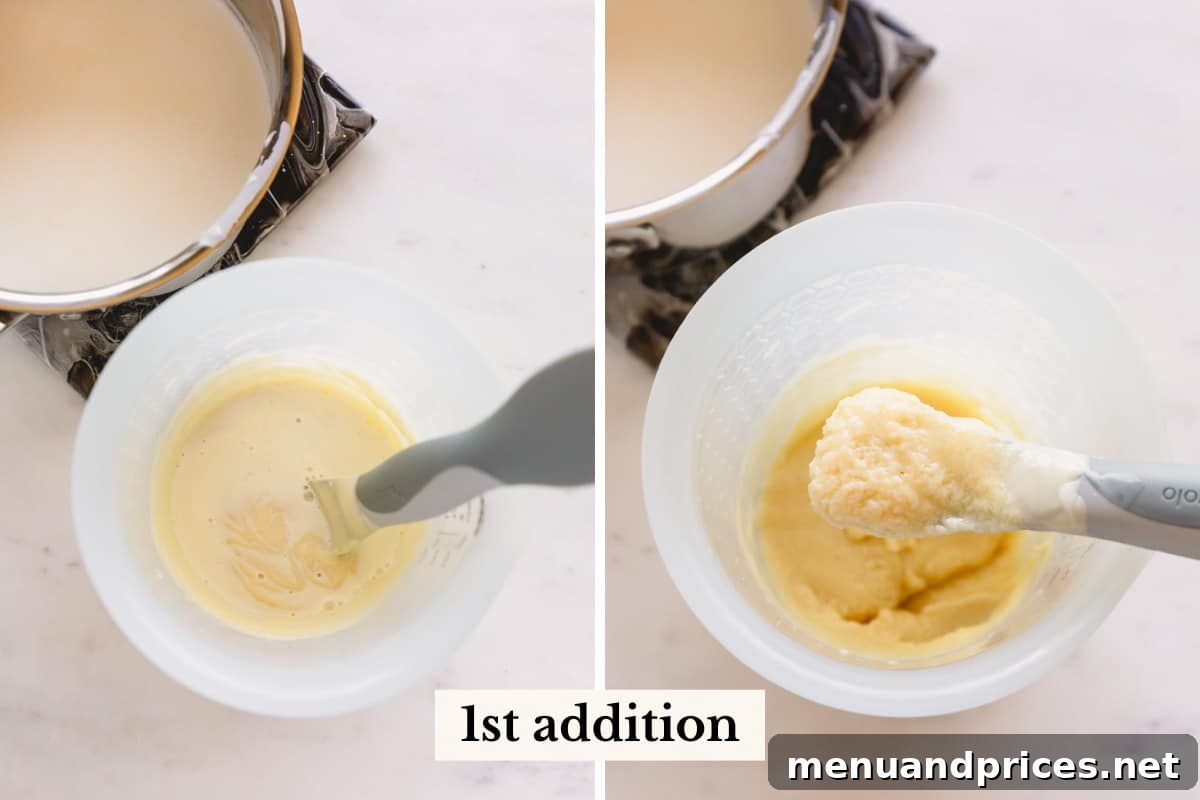
- First Addition: Pour approximately one-third of the warm cream into your bowl of melted white chocolate. Stir very gently with a rubber spatula or whisk. At this stage, the mixture might look grainy, curdled, or “seized.” This is a normal part of the emulsification process with white chocolate, so do not worry.
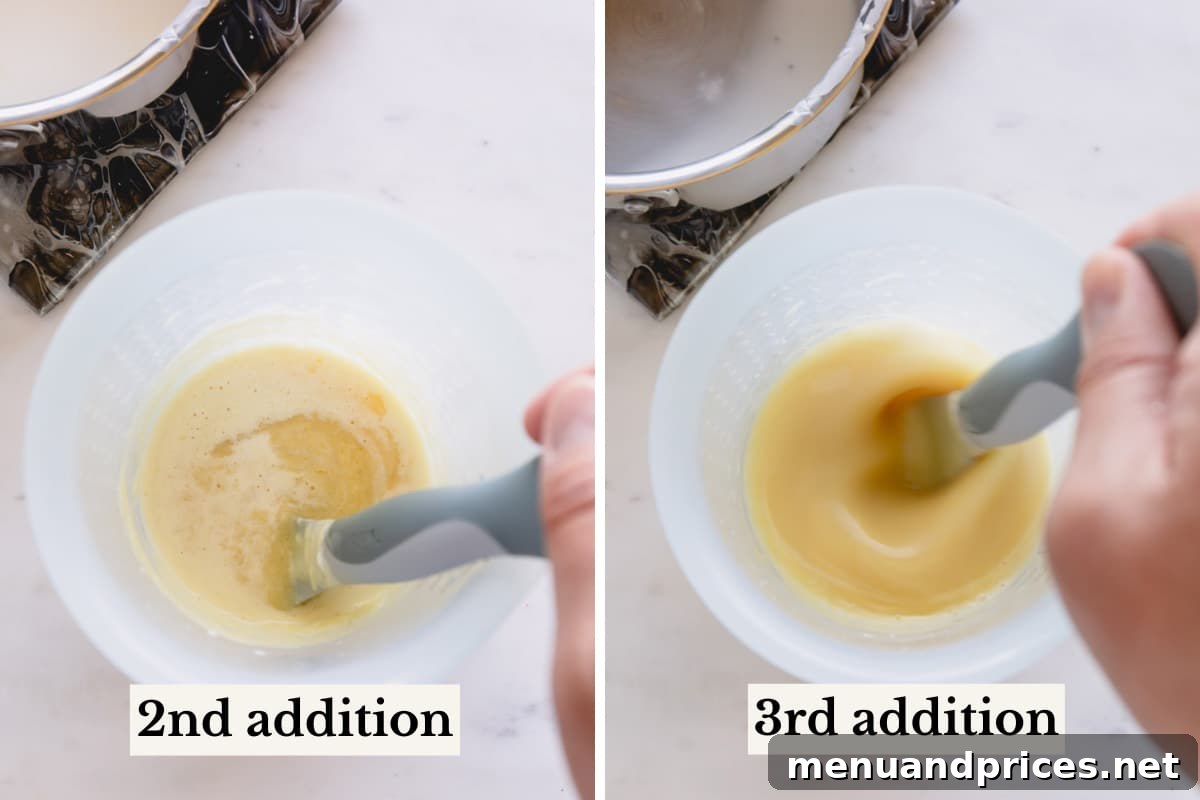
- Second Addition: Add another third of the warm cream to the mixture and continue to stir gently. You should notice the ganache beginning to smooth out significantly.
- Final Addition & Smoothness: Incorporate the last portion of the cream. At this point, continue stirring until the ganache transforms into a beautifully silky, smooth, and homogenous mixture.
- For Optimal Smoothness (Highly Recommended): For an extra-smooth and perfectly emulsified ganache, use an immersion blender. Blend the ganache directly in the bowl for about 30 seconds, moving it up and down to ensure all ingredients are thoroughly combined. This step helps create a stable emulsion and eliminates any tiny lumps, resulting in a professional-grade finish.
4. Chilling and Setting the Ganache for Stability
- Transfer for Setting: Pour the warm ganache into a shallow, flat container or a baking pan. This simple technique significantly aids in faster and more even cooling, crucial for proper setting.
- Preventing a Skin: Immediately cover the surface of the ganache with plastic wrap, ensuring the wrap directly touches the entire surface. This prevents a “skin” from forming, which can lead to a lumpy texture.
- Chill Thoroughly: Transfer the covered ganache to the refrigerator and allow it to chill for a minimum of 5 hours, or ideally, overnight. This extended chilling period is vital for the ganache to thicken, stabilize, and develop the desired consistency. Once properly chilled, the ganache should be firm enough to hold its shape when piped or spread.
- Achieving Perfect Consistency Before Use: Before using, remove the ganache from the fridge and let it come closer to room temperature for about 15-30 minutes. Then, stir it vigorously with a rubber spatula. This action softens the ganache slightly, restores its beautiful shine, and makes it workable for your specific application.
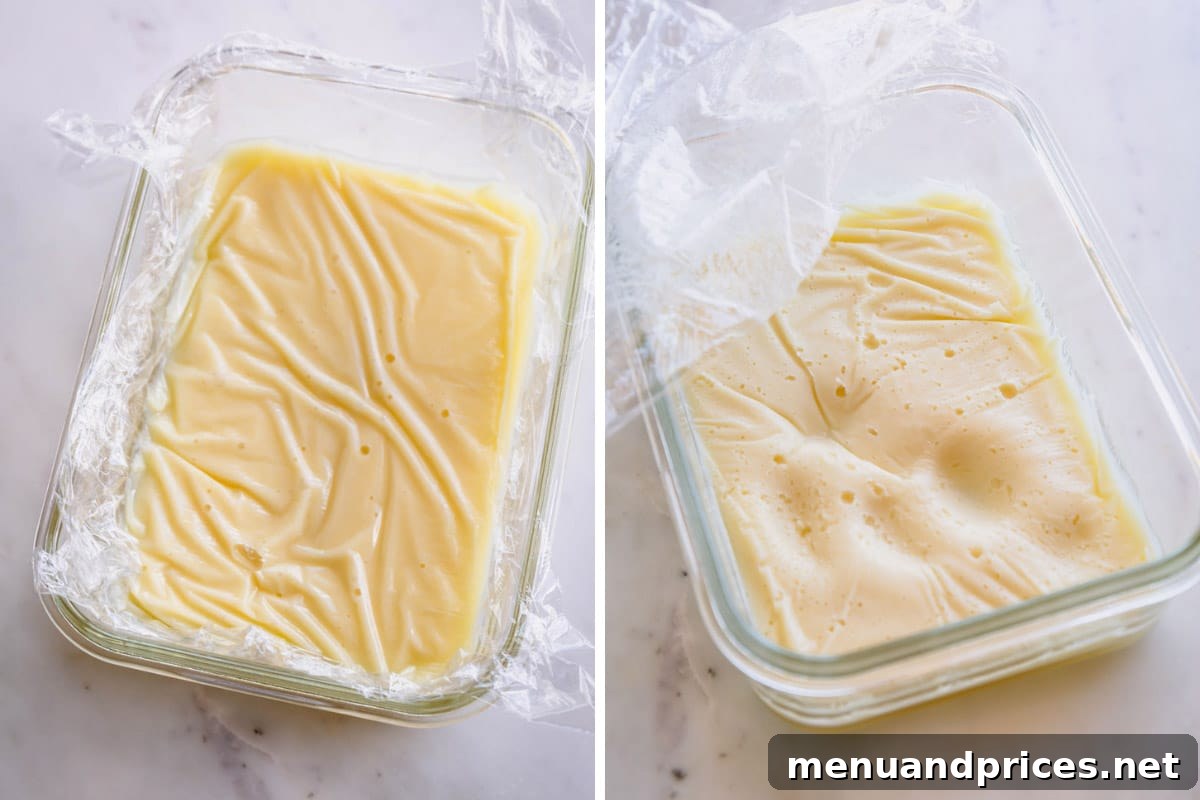
Pro Tip: Accelerated and Even Setting
Transferring your ganache to a flat container or baking pan offers two significant advantages: it allows the ganache to set evenly, preventing inconsistencies in texture, and it sets faster due to increased surface area for cooling. This is particularly helpful when you’re short on time.
Decoding White Chocolate to Cream Ratios for Every Application
Achieving the perfect white chocolate ganache consistency for specific uses—whether it’s a firm filling, a delicate whipped frosting, or a smooth drip—hinges on understanding the correct ratio of white chocolate to heavy cream. As we’ve established, the final texture is also significantly influenced by the cocoa butter content of your white chocolate.
For ease of understanding and common accessibility, the following ratio guidelines are provided for generic white chocolate, such as Ghirardelli white chocolate chips or bars, which are widely available in most grocery stores. Since the exact cocoa butter content is often not explicitly stated on such brands, we generally assume they contain the minimum required percentage, around 20%.
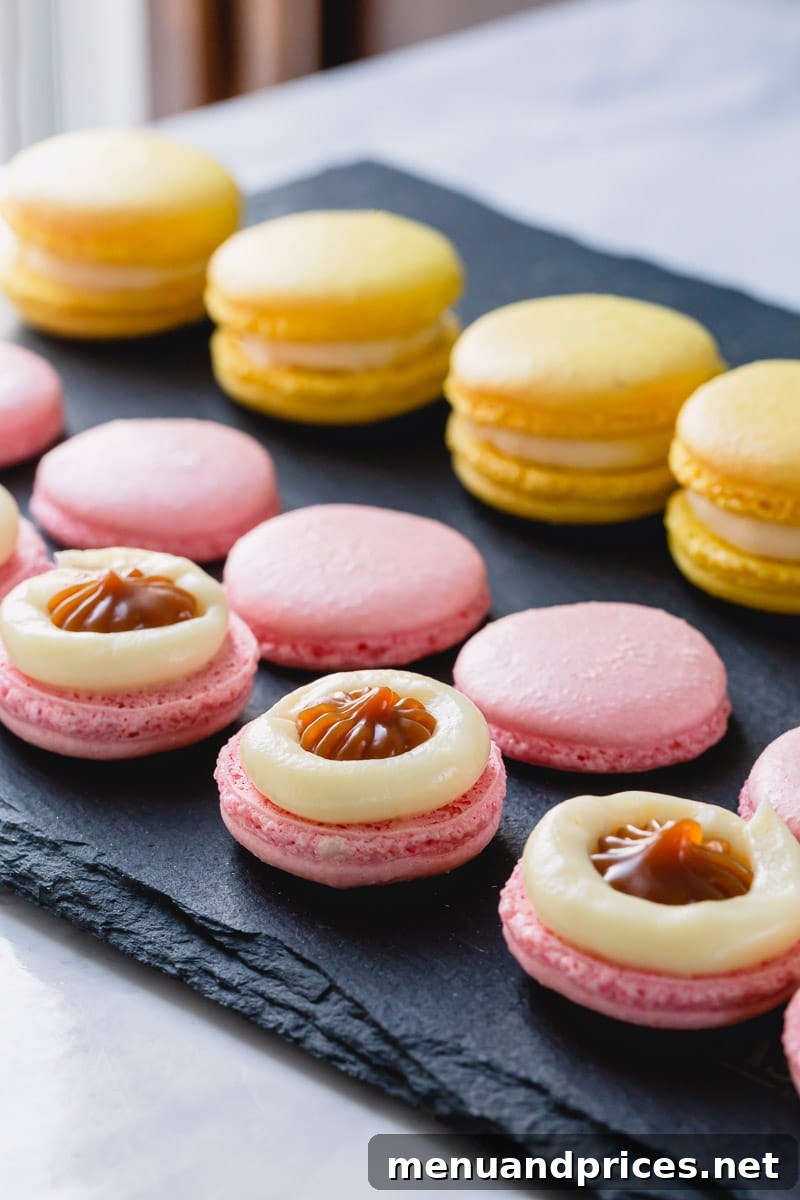
For Firm Fillings (e.g., Macarons, Tarts, Layer Cakes): 3:1 Ratio
A 3 parts white chocolate to 1 part heavy cream ratio is ideal for creating a rich, firm ganache with a consistency similar to thick peanut butter. This robust texture makes it perfect for filling delicate French macarons, robust tarts, or as a stable filling between cake layers.
Example: 6 oz generic white chocolate + 2 oz heavy cream
For Light and Fluffy Whipped Ganache: 1:2 Ratio
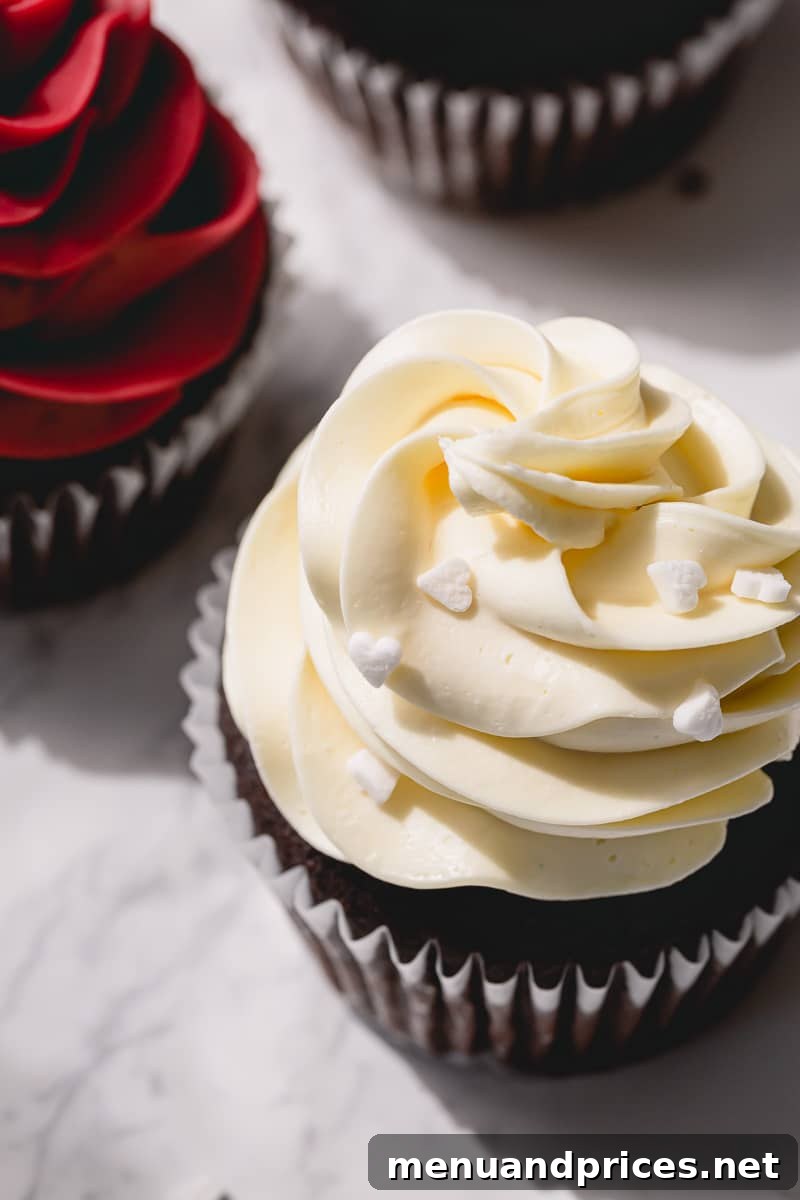
To achieve a lighter, airier consistency suitable for a whipped white chocolate ganache, a 1 part white chocolate to 2 parts heavy cream ratio is recommended. This produces a thinner initial ganache that, once chilled and whipped, transforms into a delightful, fluffy frosting.
Example: 4 oz generic white chocolate + 8 oz heavy cream
How to Make Whipped White Chocolate Ganache: Prepare the ganache using the 1:2 ratio as described. Allow it to cool completely and chill thoroughly in the refrigerator until very firm. Once chilled, transfer it to a stand mixer bowl fitted with a whisk attachment (or use a hand mixer) and whip on medium-high speed until it becomes light, fluffy, and holds stiff peaks. This is absolutely perfect for frosting cupcakes, cakes, or piping decorative borders.
For a Beautiful Cake Drip or Glaze: 1:1 Ratio
When you’re aiming for a ganache that is fluid enough to create elegant drips down the sides of a cake but still substantial enough to maintain its shape, a 1 part white chocolate to 1 part heavy cream ratio is ideal. This consistency strikes a perfect balance – not too runny to slide off, yet not too thick to clump.
Example: 4 oz generic white chocolate + 4 oz heavy cream
Important Considerations on Ratios and Sweetness
It’s crucial to remember the inverse relationship between cocoa butter content and the amount of cream needed. If your white chocolate has a lower percentage of cocoa butter, you will likely need to adjust by using proportionally more chocolate relative to the heavy cream to achieve a firm, thick filling consistency.
White chocolate with lower cocoa butter content naturally produces a softer, runnier ganache. To counteract this tendency and achieve a desired thickness, you’ll need to increase the chocolate component in your ratio. However, a significant consideration here is that increasing the amount of white chocolate will also directly increase the sweetness of your final ganache.
This is precisely why using higher quality white chocolate couverture with a higher cocoa butter content is often the ideal choice. It allows you to achieve the desired firmness and structure without making the ganache overly sweet, providing a more balanced and sophisticated flavor profile for your desserts.
Vibrantly Coloring White Chocolate Ganache
Adding color to white chocolate ganache can transform your desserts, making them visually stunning. However, it requires a careful approach to maintain the ganache’s delicate emulsion and smooth texture.
1. Select the Correct Type of Food Coloring
- Oil-Based Food Coloring: The Best Choice
Oil-based food colorings are universally recommended for coloring ganache because they blend seamlessly with the fat content in white chocolate. This prevents the chocolate from seizing, which is a common issue with water-based colorings. - Gel or Powdered Food Coloring: Suitable Alternatives
Both gel and powdered food colorings can also work effectively. They contain significantly less moisture than traditional liquid food colorings, reducing the risk of the ganache splitting or becoming grainy. - Avoid Liquid Food Coloring: A Critical Warning
Absolutely refrain from using standard liquid food coloring. Their high water content will almost certainly cause the white chocolate to seize and turn into a crumbly, unusable mess, ruining the texture of your ganache.
2. Prepare Your Ganache First
- Always prepare your white chocolate ganache following the steps outlined in this guide.
- It’s best to add color when the ganache has cooled slightly but has not yet fully set. This ensures the coloring can be smoothly incorporated without negatively impacting the texture or consistency. If the ganache is too hot, the color might bleed or fade; if it’s too cold and set, it will be difficult to mix evenly.
3. Gradually Add the Food Coloring
- Start with a very small amount: For oil-based or gel colors, begin with just a few drops. If using powdered color, a small pinch is sufficient.
- Stir gently but thoroughly: Incorporate the color into the ganache with a spatula until it is evenly distributed.
- Build the color: Continue adding more coloring in small, gradual increments, stirring well after each addition, until you achieve your desired shade. It’s always easier to add more color than to try and lighten an over-colored ganache.
4. Maintain a Gentle Touch While Mixing
- Due to white chocolate’s delicate nature, white chocolate ganache can be more susceptible to issues like splitting or becoming oily if over-mixed, especially once color has been introduced. Mix carefully until the color is uniform, then stop. Excessive mixing or using too much coloring agents can sometimes alter the ganache’s smooth consistency.
Optimal Storing Tips for White Chocolate Ganache
White chocolate ganache is surprisingly stable, largely thanks to its high sugar and fat content. Proper storage ensures its longevity and maintains its quality.
- Room Temperature: Unused ganache can be stored in an airtight container at cool room temperature (below 70°F or 21°C) for up to 2 days. This is ideal for short-term use and often produces the best texture for spreading.
- Refrigeration: For longer storage, refrigerate your ganache in an airtight container for up to a week. Ensure it’s tightly sealed to prevent it from absorbing odors from other foods.
- Freezing: Ganache freezes exceptionally well, making it perfect for meal prep or saving leftovers. Store it in a freezer-safe, airtight container for up to 3 months.
- Thawing and Reheating: To thaw, transfer the frozen ganache to the refrigerator overnight. Once thawed, bring it to room temperature. If it needs to be softened or re-emulsified for use, microwave it in 15-second bursts at 50% power, stirring thoroughly after each interval. Be extremely careful not to overheat the ganache, as this can cause it to separate and become oily. If it does separate, a quick blend with an immersion blender can often bring it back together.
Common White Chocolate Ganache FAQs
You typically don’t need additional thickening agents for ganache. Its consistency is primarily determined by the ratio of chocolate to liquid (cream) and the cocoa butter content of your chocolate. If your ganache is too thin, it usually means your initial ratio had too much cream for the amount of chocolate, or your chocolate had very low cocoa butter. Chilling it longer will make it firmer, and if still too loose, you may need to melt more chocolate, warm it with a small amount of cream, and whisk it into your existing ganache.
Yes, ganache absolutely hardens when chilled. The degree of hardness directly correlates with your chocolate-to-cream ratio. A higher proportion of chocolate results in a firmer, more solid ganache once cooled, making it suitable for firm fillings or truffles. Conversely, ganache with more cream will remain softer and more pliable even when chilled.
There are two primary reasons why your white chocolate ganache might not be hardening as expected:
1. Low Cocoa Butter Content: The white chocolate you used contains a low percentage of cocoa butter (e.g., generic white chips often have less than 20%). Chocolate with less cocoa butter naturally yields a softer ganache that struggles to set firmly.
2. Excessive Cream/Liquid: You might have used too much heavy cream relative to the amount of white chocolate. This imbalance will result in a ganache that remains too soft even after extended chilling. Refer to the ratio guidelines above to ensure you’re using the appropriate proportions for your desired consistency.
Ganache splitting or looking oily/grainy (often referred to as ‘breaking’) typically happens due to temperature shock, overworking, or an improper ratio. If it splits, try adding a tablespoon of warm cream (not hot!) and whisking vigorously. Repeat if necessary. An immersion blender can also help bring a split ganache back together by re-emulsifying the fats. Ensure all ingredients are at the right temperature when combining.
No, it is highly recommended to use heavy whipping cream (at least 36% fat) for white chocolate ganache. Milk or half-and-half have a much lower fat content, which can prevent proper emulsification, leading to a thin, unstable, and often separated ganache that will not set correctly. The high fat content in heavy cream is crucial for the ganache’s structure and smooth texture.
White Chocolate Ganache Recipe
Comment
Print Recipe
Ingredients
- 8 oz (227 g) 29% white chocolate Note 1
- 4 oz (113 g) heavy whipping cream
Instructions
-
In a microwave-safe bowl, melt white chocolate in a microwave. (Or you can use a double boiler.) For the microwave, set it for 1 minute at 50% power (for 1000watt microwave!).
-
Stir well and put it back for 15-30 seconds at 50% power, depending on the consistency. (If it looks pretty solid, put it for 30 sec, and if it started melting – for 15 sec.)
-
Then stir well and put it back for another 15 seconds at 50% power, if needed, or until the chocolate is completely melted, stirring well every 15 seconds.
-
Place the cream in a small saucepan.
-
Warm it up over medium heat until you see small bubbles around the edges. No need to scald/boil it.
-
Add 1/3 of cream into melted chocolate and stir gently with a spatula, or a whisk. It’ll look grainy and seized, but don’t worry.
-
Stir in another 1/3 of cream and mix until almost smooth. Then add the last of cream and it should turn silky smooth.
-
Optional, but highly recommended: Blend the ganache with an immersion blender for 30 seconds. This creates better emulsion and smoother ganache!
-
Transfer the ganache into a flat container, or a baking pan (it helps to set the ganache quickly!).
-
Cover with plastic wrap, touching the entire surface of the ganache to prevent any skin forming.
-
Refrigerate for at least 5 hours, or overnight, to thicken and stabilize the ganache. After the chilling time, ganache should be nice and thick, and hold its shape when piped.
-
Stir the ganache with a rubber spatula to soften it and restore the shine.
⭐️ Did you make this recipe?
Please leave a review and let us know how you liked it!
Tips & Notes
It’s crucial to choose the right type of white chocolate. Not all white chocolate made equally. Some white chocolate contains higher amount of cocoa butter, and some has less. If your white chocolate doesn’t specify this information, assume it has around 20%. In that case, use 3:1 ratio of chocolate to heavy cream. In other words, 6oz Ghirardelli white chocolate bar + 2oz heavy cream. Read the post above for more details.
Storing Tip:
– You can store ganache in an airtight container at room temperature for up to 2 days.
– Refrigerate it in airtight container for up to a week.
– Ganache also freezes well. Freeze the ganache in an airtight container for up to 3 months.
– To thaw, transfer it into the fridge for overnight. Then bring it to room temperature. If needed, microwave it in 15-second increments at 50% power, stirring after every 15 seconds. Be careful not to overheat the ganache, or it’ll separate.
Nutrition
Did you make this?Leave a rating and your feedback. Thank you!