
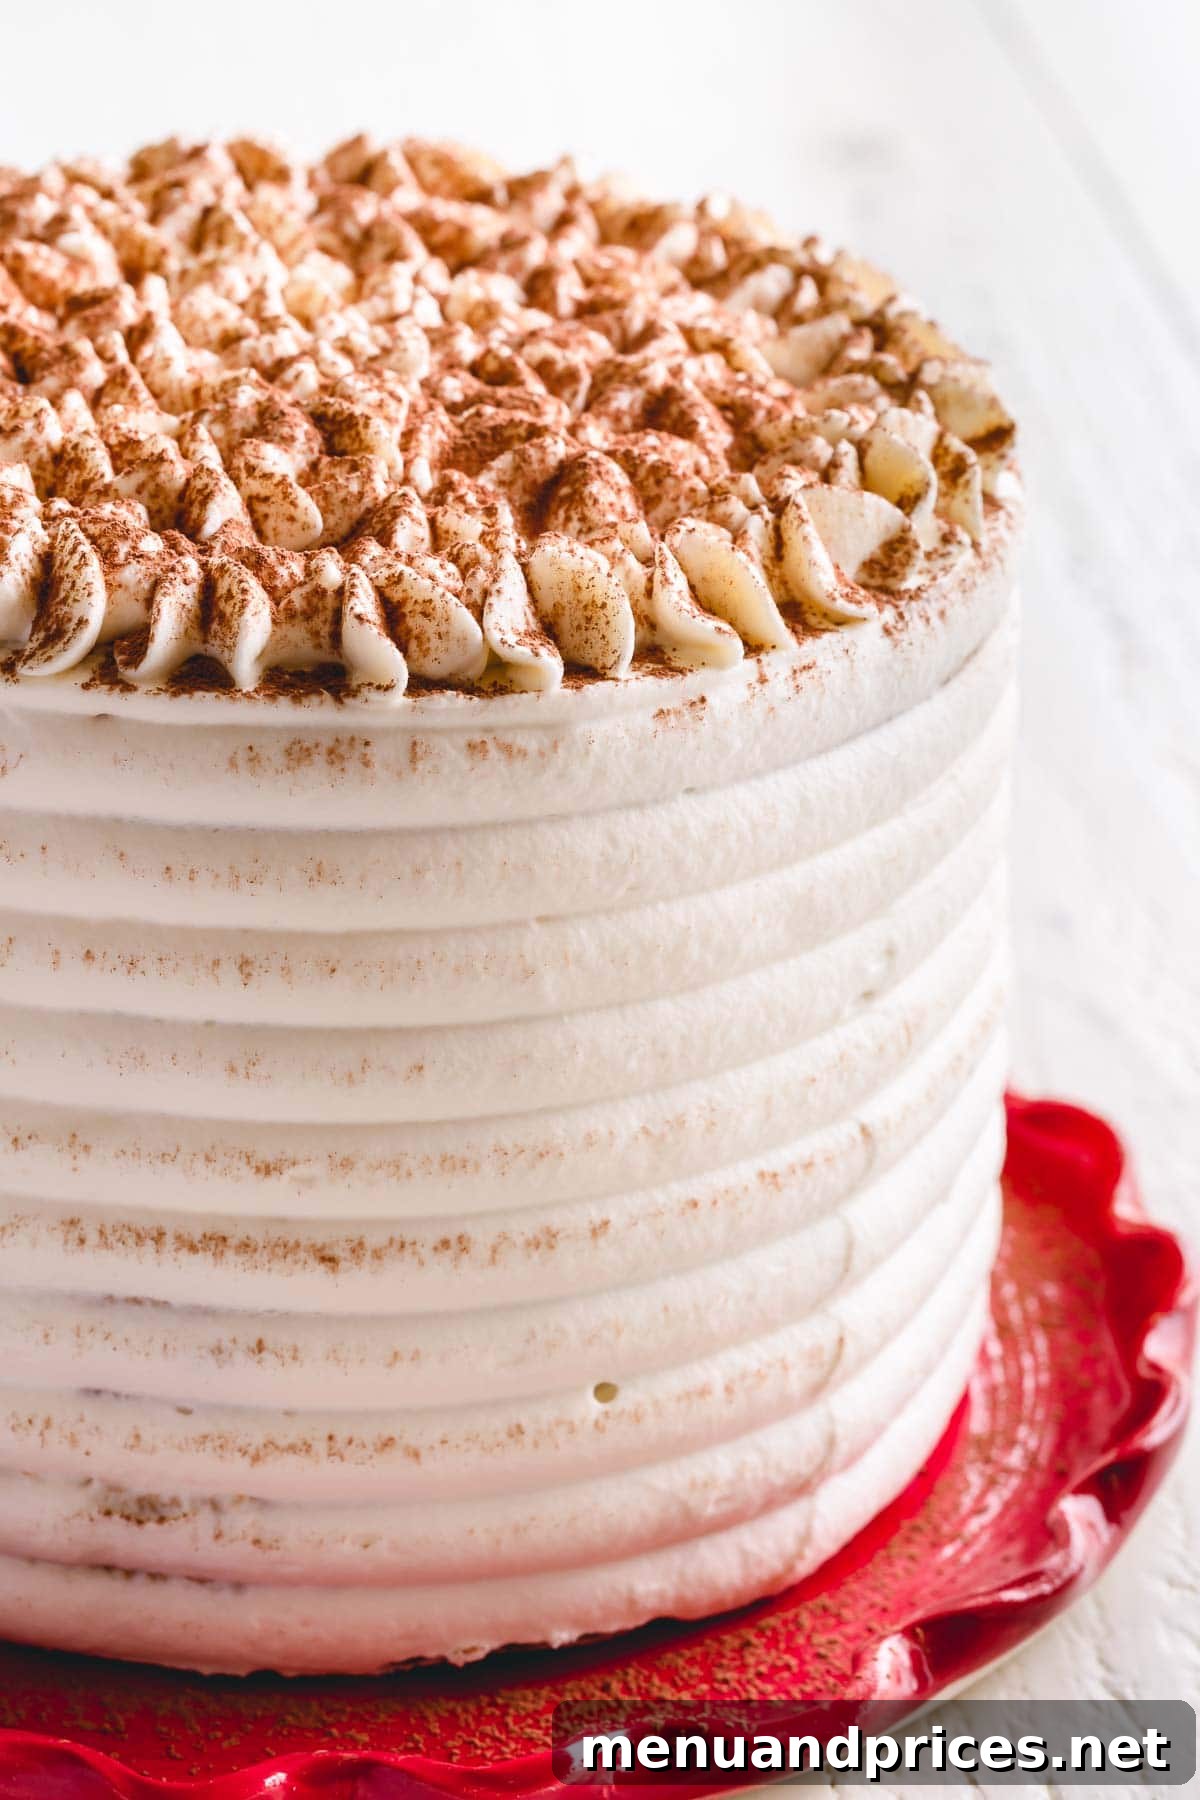
Prepare to be captivated by the ultimate dessert experience: a Decadent Tiramisu Layer Cake. Imagine melt-in-your-mouth tender, impossibly light sponge cake layers, generously soaked with an intense espresso and liqueur mixture. Each bite is further enhanced by a cloud-like, fluffy eggless mascarpone tiramisu cream filling that is simply dreamy. This sophisticated, yet surprisingly approachable, layer cake is the perfect showstopper for any celebration or a luxurious treat for a quiet indulgence.
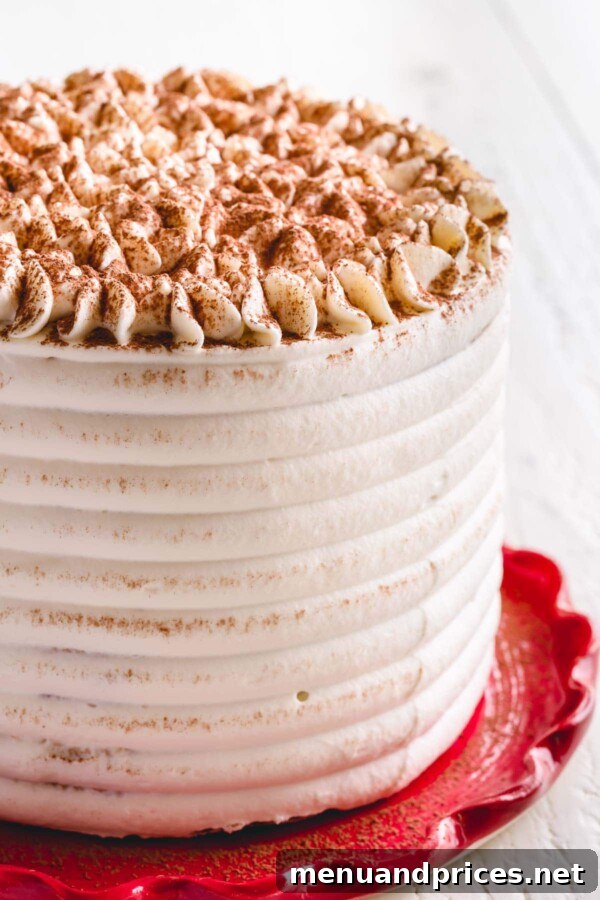
Decadent Tiramisu Layer Cake: Your Guide to a Coffee-Infused Masterpiece
The classic Italian tiramisu, meaning “pick me up” or “cheer me up,” is beloved worldwide for its rich coffee flavor and creamy texture. This recipe takes that timeless dessert and transforms it into an impressive layer cake, making it even more suitable for grand presentations and larger gatherings. While traditional tiramisu often features ladyfingers, this recipe opts for a delicate sponge cake, providing a sturdy yet incredibly moist foundation for the espresso and luxurious cream.
Why You’ll Fall in Love with This Tiramisu Layer Cake
This isn’t just any cake; it’s an experience. Here’s why this Tiramisu Layer Cake will quickly become a cherished recipe in your repertoire:
- Unbelievably Light and Delicate Texture: Each slice offers a truly melt-in-your-mouth sensation. The secret lies in the airy sponge cake layers, meticulously prepared and generously infused with a potent espresso syrup, ensuring every forkful is moist and flavorful.
- The Star: Fluffy Eggless Mascarpone Cream: Forget traditional fillings; our eggless tiramisu cream is a revelation. It’s ultra-creamy, wonderfully fluffy, and perfectly balanced in sweetness. While it may deviate from the classic raw-egg yolk method, its dreamlike texture and exquisite flavor prove that “perfect” doesn’t always mean “traditional.”
- A Perfect Make-Ahead Dessert: One of the greatest advantages of this cake is its ability to be prepared in advance. In fact, it only gets better with time! As the cake chills, the sponge layers continue to absorb the rich flavors of the espresso and cream, leading to an even more harmonious and intense taste experience. This makes it an ideal choice for entertaining, allowing you to focus on your guests, not last-minute baking stress.
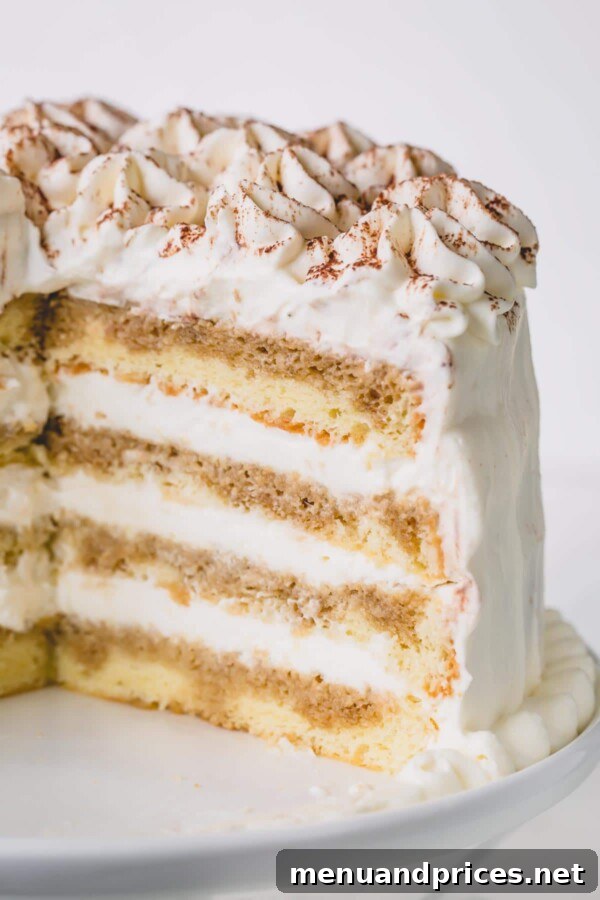
- Impressive Presentation: The towering layers, dusted with cocoa powder, create a visually stunning dessert that will undoubtedly impress your guests. It’s a showstopper that tastes as good as it looks.
- Balance of Flavors: The bittersweet coffee, the sweet and nutty amaretto, and the rich, subtle tang of mascarpone come together in a symphony of flavors that is sophisticated and deeply satisfying.
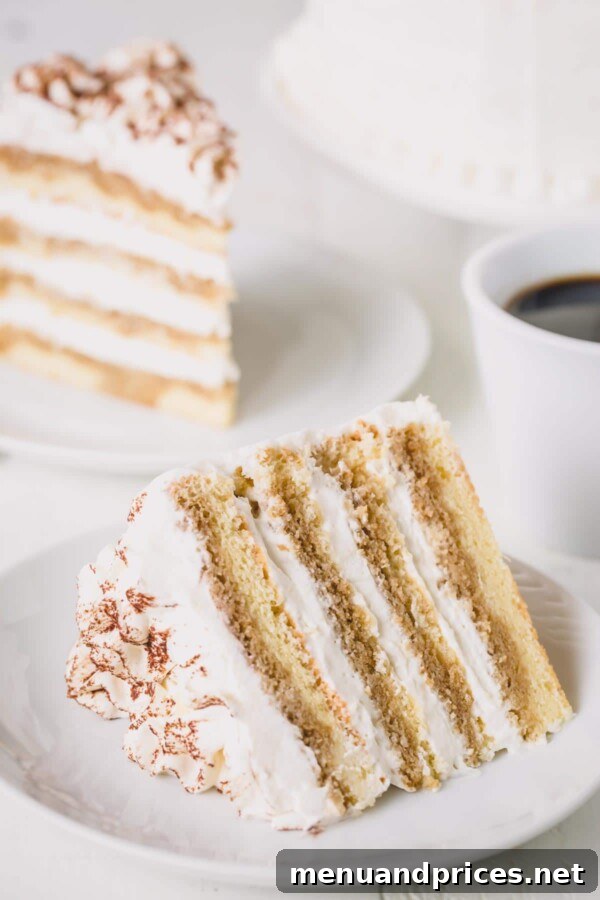
Key Ingredients for Your Tiramisu Masterpiece
Crafting this exquisite cake begins with understanding the role of each key ingredient. Quality makes a significant difference in the final taste and texture.
- Espresso Powder: For convenience and intense coffee flavor, instant espresso powder is highly recommended. It dissolves easily and provides a much stronger coffee essence than regular instant coffee. In a pinch, a very strong, freshly brewed coffee can be used as a substitute, but adjust the quantity slightly to achieve comparable intensity.
- Amaretto Liqueur: This sweet, almond-flavored Italian liqueur is absolutely essential for imparting the signature, warm, and nutty flavor that distinguishes authentic tiramisu. Disaronno is a well-regarded brand that delivers excellent results. If amaretto is not available or preferred, other liqueurs like Kahlua or even dark rum can offer a different but equally delicious depth. For an alcohol-free version, almond extract can be used, though the flavor profile will be slightly different.
- Mascarpone Cheese: A cornerstone of tiramisu, mascarpone is a soft, Italian cream cheese with a uniquely delicate, slightly sweet, and buttery flavor. Its high fat content contributes to the unparalleled richness and smoothness of the cream filling. While cream cheese can be substituted in a pinch, be aware that it has a tangier flavor and firmer texture, which will alter the overall taste and consistency of the tiramisu cream. Ensure it’s softened to room temperature for smooth mixing.
- Cake Flour: Essential for a light and airy sponge cake. Cake flour has a lower protein content than all-purpose flour, resulting in a more tender crumb.
- Heavy Whipping Cream: This provides the necessary structure and fluffiness for the eggless cream filling. It’s crucial that it’s very cold before whipping to achieve stiff peaks.
- Sweetened Condensed Milk: Adds sweetness and a creamy richness to the mascarpone filling without needing granulated sugar, contributing to its smooth consistency.
Crafting Your Tiramisu Layer Cake: Step-by-Step
This cake is assembled in several stages, each contributing to its remarkable flavor and texture. Breaking it down makes the process enjoyable and manageable.
1. The Foundation: Light and Airy Sponge Cake
The sponge cake layers are the backbone of our tiramisu. They need to be light enough to be delicate but sturdy enough to absorb the espresso syrup without becoming soggy. This recipe utilizes a classic sponge cake, known for its incredible airiness and ability to hold moisture.
Ingredients for Sponge Cake:
- 6 large eggs, at room temperature
- 1 cup (200 g) granulated sugar, divided (fine granulated or caster sugar preferred for quicker dissolving)
- 1 ½ cups (180 g) cake flour, sifted
- ½ teaspoon salt
- 1 teaspoon pure vanilla extract
- ¼ teaspoon almond extract
Instructions for Sponge Cake:
- Preheat your oven to 350°F (177°C). Prepare two 9-inch or 8-inch cake pans by lining the bottoms with parchment paper. There’s no need to grease the sides; the cake needs to cling to the pan for structure as it rises.
- Carefully separate the egg whites and yolks. This step is critical: ensure not even a tiny bit of egg yolk gets into the whites, as fat prevents whites from whipping properly. (Tip: Eggs are often easier to separate when cold, straight from the fridge.)
- In a large mixing bowl, using a whisk attachment, beat the egg yolks, half a cup of the granulated sugar, vanilla extract, and almond extract. Continue whisking until the mixture becomes pale in color and has tripled in volume, which usually takes about 5 minutes. This creates a rich and flavorful base.
- In a separate bowl, sift together the cake flour and salt. Sifting helps to aerate the flour and prevent lumps, ensuring a smooth cake batter.
- In another clean mixing bowl with a whisk attachment, begin beating the egg whites at a medium-low speed until they become foamy.
- Gradually add the remaining half cup of sugar, one tablespoon at a time, to the egg whites. Increase the speed to medium-high and continue whisking until stiff, glossy peaks form. This process typically takes 7-10 minutes. Stiff peaks mean the whites hold their shape firmly when the whisk is lifted.
- Using a spatula, gently fold one-third of the whipped egg whites into the egg yolk mixture. Mix until mostly smooth. Then, add the remaining whipped egg whites and continue to gently fold until the mixture is uniform and smooth. The goal is to retain as much air as possible.
- Incorporate the sifted flour into the batter in three stages. After each addition, gently fold the batter until just combined. Overmixing will deflate the air and result in a dense cake.
- Divide the batter evenly between the two prepared cake pans and gently smooth the tops with a spatula.
- Bake for 25-30 minutes, or until a toothpick inserted into the center comes out clean. It’s important not to open the oven door for at least the first 20 minutes to prevent the cake from collapsing.
- Allow the cakes to cool in their pans for about 5 minutes. Then, run a thin knife around the edges of the pans to loosen the cakes before inverting them onto a wire cooling rack to cool completely. Once fully cooled, wrap each cake tightly in plastic wrap and refrigerate for at least 2 hours, or preferably overnight. Chilled cakes are much easier to slice into even layers.
2. The Star: Luscious Mascarpone Cream Filling (Eggless)
This truly is the highlight of the Tiramisu Layer Cake. This cloud-like, not-overly-sweet, and wonderfully light filling is what makes this dessert so irresistible. Its delicate texture and rich flavor are best enjoyed when prepared fresh just before assembling the cake.
The beauty of this cream lies in its simplicity and the exquisite balance of mascarpone, sweetened condensed milk, and whipped heavy cream. It’s a testament to how few ingredients, when perfectly combined, can yield such an incredible result.
This delicate filling is best when it’s made right before assembling the cake to ensure maximum fluffiness.
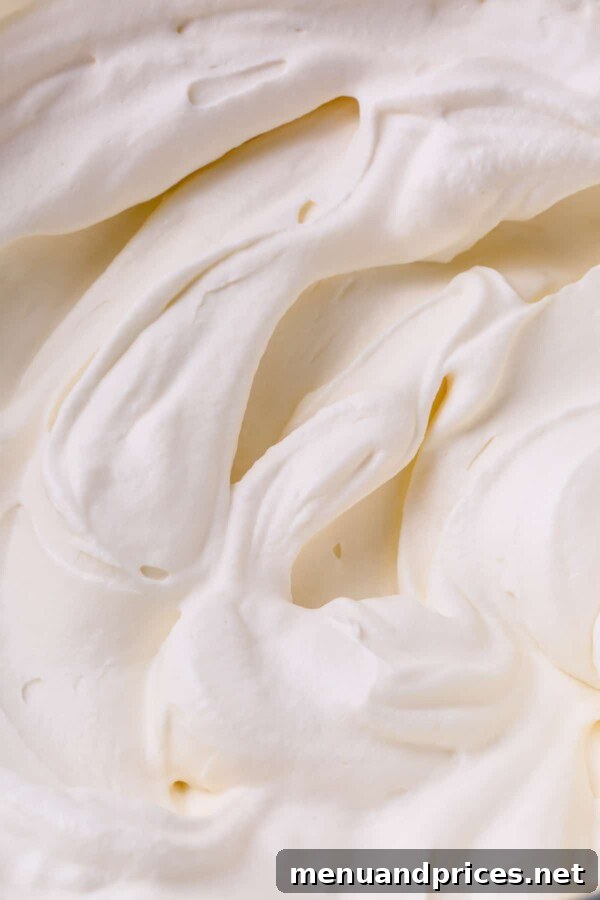
Ingredients for Tiramisu Cream:
- ½ cup (120 ml) sweetened condensed milk
- 8 oz (225 g) mascarpone cheese, softened to room temperature
- 1 teaspoon pure vanilla extract
- 2 cups (480 ml) heavy whipping cream, very cold
Instructions for Tiramisu Cream:
- In a large mixing bowl, combine the softened mascarpone cheese, sweetened condensed milk, and vanilla extract. Using a whisk attachment (or a hand mixer), beat the ingredients together until they are well combined and smooth, taking care not to overmix the mascarpone.
- In a separate, chilled bowl (this helps with whipping), whip the very cold heavy cream using a clean whisk attachment until stiff peaks form. The cream should hold its shape firmly.
- Gently fold half of the whipped cream into the mascarpone mixture using a rubber spatula. This lightens the mascarpone mixture. Then, add the remaining whipped cream and continue to gently fold until the entire mixture is smooth and evenly combined. Be careful not to deflate the cream. Refrigerate immediately until you are ready to assemble the cake.
3. The Essence: Aromatic Espresso Syrup
Though simply a mixture and not a traditional syrup, this espresso infusion is critical to the tiramisu flavor. It adds moisture, depth, and that unmistakable coffee kick that defines this dessert.
Ingredients for Espresso Syrup:
- ½ cup (120 ml) hot water
- 2 teaspoons instant espresso powder
- 3 tablespoons (45 ml) amaretto liqueur
Instructions for Espresso Syrup:
- In a small bowl, dissolve the instant espresso powder in ½ cup of hot water, stirring until no granules remain.
- Stir in the amaretto liqueur until thoroughly combined. Set aside to cool to room temperature before using.
4. The Grand Finale: Assembling Your Tiramisu Layer Cake
The assembly is where all your efforts come together. The beauty of this cake is that it benefits from resting, allowing the flavors to meld and deepen over time. You can assemble it a day or two before serving, making it perfect for entertaining.
Ingredients for Assembly (beyond those prepared):
- 1 tablespoon (5 g) unsweetened cocoa powder, for dusting (optional, but highly recommended)
- Optional: Shaved chocolate for in between layers
Instructions for Assembling:
- Once your sponge cakes are thoroughly chilled, carefully slice each cake horizontally into two even layers. This will give you a total of four cake layers. For best results, use a long serrated knife or a cake leveler.
- Place a small dollop of the mascarpone cream filling in the center of your cake board or serving platter. This acts as an anchor for the first cake layer. Place one sponge cake layer on top.
- Evenly drizzle approximately one-quarter of the cooled espresso mixture over the first cake layer. Ensure even saturation for consistent flavor.
- Spread a generous amount of the tiramisu cream filling (about 1 cup) over the espresso-soaked cake layer, smoothing it gently to the edges.
- Carefully place the next cake layer on top and repeat steps 3 and 4 (drizzling espresso and spreading cream) until all four cake layers are stacked.
- Once all layers are stacked, take about half of the remaining filling and use it to apply a thin “crumb coat” around the sides and top of the cake. This traps any loose crumbs and creates a smooth base for the final frosting. Refrigerate the cake for at least 1 hour to allow the crumb coat to firm up.
- After chilling, retrieve the cake and apply the remaining mascarpone cream filling to frost the cake. Since this filling is designed to be soft and fluffy, you won’t achieve a perfectly smooth, stiff frosting like buttercream. Embrace its rustic, cloud-like finish. You can use a spatula to create swirls or a piping bag with a large star tip (like Wilton 1M) for decorative borders if desired.
- For the quintessential tiramisu finish, generously dust the top of the cake with unsweetened cocoa powder just before serving. Refrigerate the cake until ready to serve.
Expert Tip
For an added layer of texture and decadent richness, consider sprinkling shaved chocolate in between some of the cream layers during assembly. It’s a wonderful, optional enhancement that takes this cake to the next level.
Tips & Notes for Tiramisu Layer Cake Success
To ensure your Tiramisu Layer Cake turns out perfectly every time, keep these valuable tips in mind:
- Sponge Cake Consistency: The success of the sponge cake relies on proper egg whipping. Ensure egg whites are whipped to stiff peaks and then folded gently into the yolk mixture to maintain maximum airiness. Do not overmix after adding flour.
- Sugar Type: Using fine granulated sugar or caster sugar for the sponge cake batter is ideal. These finer sugars dissolve more quickly, leading to a smoother batter and more stable meringue.
- Espresso Strength: The intensity of your coffee will directly impact the cake’s flavor. Don’t shy away from strong espresso powder or very concentrated coffee. This is where a significant portion of the tiramisu flavor comes from.
- Liqueur Options: While amaretto provides the classic nutty note, feel free to experiment with other liqueurs. Kahlua will enhance the coffee flavor, while a good quality dark rum can add a deeper, more complex warmth. For a family-friendly version, you can omit the alcohol entirely or use a few drops of rum extract or almond extract mixed into the espresso.
- Mascarpone Handling: Mascarpone cheese is delicate. When mixing it with sweetened condensed milk and vanilla, beat just until smooth and combined. Overmixing can cause it to break or become grainy. Ensure it’s at room temperature for optimal creaminess.
- Chilling is Key: Tiramisu, especially in layer cake form, absolutely benefits from extended chilling. This allows the sponge layers to fully absorb the espresso and the cream to set and firm up, ensuring clean slices and a more harmonious flavor profile. An overnight chill is highly recommended.
Make-Ahead Magic: Prepare in Advance!
This Tiramisu Layer Cake is a dream come true for hosts and busy bakers because it’s a fantastic make-ahead dessert. Planning ahead not only reduces stress but actually enhances the flavor:
- Sponge Cake: The baked sponge cake layers can be prepared well in advance. Once completely cooled, wrap them tightly in plastic wrap and they can be refrigerated for up to 1 week. For longer storage, freeze them for up to 1 month. Thaw in the refrigerator before use.
- Assembled Cake: The entire cake can be assembled 1 to 2 days prior to serving. Store it covered in the refrigerator. This allows ample time for the flavors to meld beautifully, making the cake even more delicious on serving day.
Tiramisu Layer Cake Recipe
Tiramisu Layer Cake
By Shinee Davaakhuu
Melt-in-your-mouth tender and light sponge cake layers are soaked with intense espresso and filled with fluffy eggless tiramisu cream.
Prep Time: 1 hr 30 mins
Cook Time: 30 mins
Chilling Time: 3 hrs (minimum)
Total Time: 5 hrs
Servings: 10 servings
Ingredients
For Sponge Cake:
- 6 large eggs, at room temperature
- 1 cup (200 g) granulated sugar, divided (Note 1)
- 1 ½ cups (180 g) cake flour, sifted
- ½ teaspoon salt
- 1 teaspoon pure vanilla extract
- ¼ teaspoon almond extract
For Coffee Syrup:
- ½ cup (120 ml) hot water
- 2 teaspoons instant espresso powder (Note 2)
- 3 tablespoons (45 ml) amaretto liqueur (Note 3)
For Tiramisu Cream:
- ½ cup (120 ml) sweetened condensed milk
- 8 oz (225 g) mascarpone cheese, softened (Note 4)
- 1 teaspoon pure vanilla extract
- 2 cups (480 ml) heavy whipping cream, cold
- 1 tablespoon (5 g) unsweetened cocoa powder, for dusting (optional)
Instructions
To make Sponge Cake:
- Preheat the oven to 350°F (177°C). Line the bottom of two 9 or 8-inch cake pans with parchment paper. No need to grease the sides of the pans.
- Separate egg whites and yolks, ensuring no egg yolk gets into the whites. (TIP: It’s easier to separate eggs when they’re cold.)
- In a mixing bowl, whisk together egg yolks, ½ cup of sugar, vanilla, and almond extracts until pale and tripled in volume, about 5 minutes.
- Meanwhile, sift cake flour and salt together.
- In another mixing bowl, beat egg whites at medium-low speed until foamy.
- Add the remaining ½ cup of sugar, 1 tablespoon at a time, and continue to whisk until stiff peaks form, gradually increasing the speed to medium-high (7-10 minutes).
- Using a spatula, gently fold 1/3 of the whipped egg whites into the egg yolk mixture until mostly smooth. Then, add the remaining egg whites and gently fold until smooth.
- Add the sifted flour into the batter in 3 stages, gently folding after each addition until just combined.
- Pour the batter into the prepared pans and smooth the top.
- Bake for 25-30 minutes, or until an inserted toothpick comes out clean. Avoid opening the oven for the first 20 minutes!
- Let the cake cool for 5 minutes in the pan. Run a knife around the edges and invert onto a cooling rack. Cool completely. Once cooled, wrap tightly with plastic wrap and refrigerate for at least 2 hours or preferably overnight. Chilled cake is easier to cut.
To make Espresso Syrup:
- Dissolve espresso powder in 1/2 cup of hot water. Then stir in amaretto liqueur. Allow to cool completely.
To make Tiramisu Cream Filling:
- In a mixing bowl, beat softened mascarpone cheese, sweetened condensed milk, and vanilla extract until combined and smooth. Do not overmix.
- In a separate, chilled bowl, whip the cold heavy cream until hard peaks form.
- Gently fold in half of the whipped cream into the mascarpone mixture. Then add the remaining whipped cream and mix until well combined and fluffy. Refrigerate until ready to use.
To assemble the Cake:
- Once the cake is completely cooled and chilled, slice each cake horizontally into 2 even layers, resulting in 4 layers total.
- Put a dollop of filling on a cake board or serving platter to anchor the cake, then place the first cake layer.
- Drizzle 1/4 of the cooled espresso mixture evenly all over the cake layer.
- Then, spread a generous amount of filling (about 1 cup) over the cake layer.
- Place the next cake layer and repeat steps 3 and 4 until all layers are stacked.
- Cover the entire cake with half of the remaining filling to create a thin crumb coat. Refrigerate for at least 1 hour to firm up.
- Then, frost the cake with the remaining filling and decorate as desired. (NOTE: Since the filling is super soft and fluffy, you won’t achieve perfectly smooth and hard frosting.)
- Dust the final cake generously with unsweetened cocoa powder. Refrigerate until ready to serve.
Nutrition Information (per slice)
Servings: 1 slice
Calories: 517 kcal
Carbohydrates: 46g
Protein: 9g
Fat: 32g
Sugar: 30g
Sodium: 206mg
Recipe Notes
Note 1: Fine granulated sugar or caster sugar is ideal for the sponge cake, as it dissolves quicker and contributes to a finer crumb.
Note 2: Instant espresso powder provides an intense coffee flavor and dissolves easily. A strong brewed coffee can be substituted if needed.
Note 3: Amaretto is a sweet, nutty liqueur that adds the signature tiramisu flavor. Disaronno is a recommended brand. Kahlua or dark rum can be alternatives, or for an alcohol-free version, use almond extract.
Note 4: Mascarpone is a soft Italian cheese with a unique, subtle flavor. While highly recommended, cream cheese can be substituted, but the flavor will be tangier.
I genuinely hope you embark on the delightful journey of making this Tiramisu Layer Cake. It’s a rewarding baking project that culminates in a dessert of unparalleled elegance and flavor. Enjoy every single, exquisite bite!
This recipe was originally published on June 17th, 2013, and has been updated for clarity, detail, and enhanced user experience.