
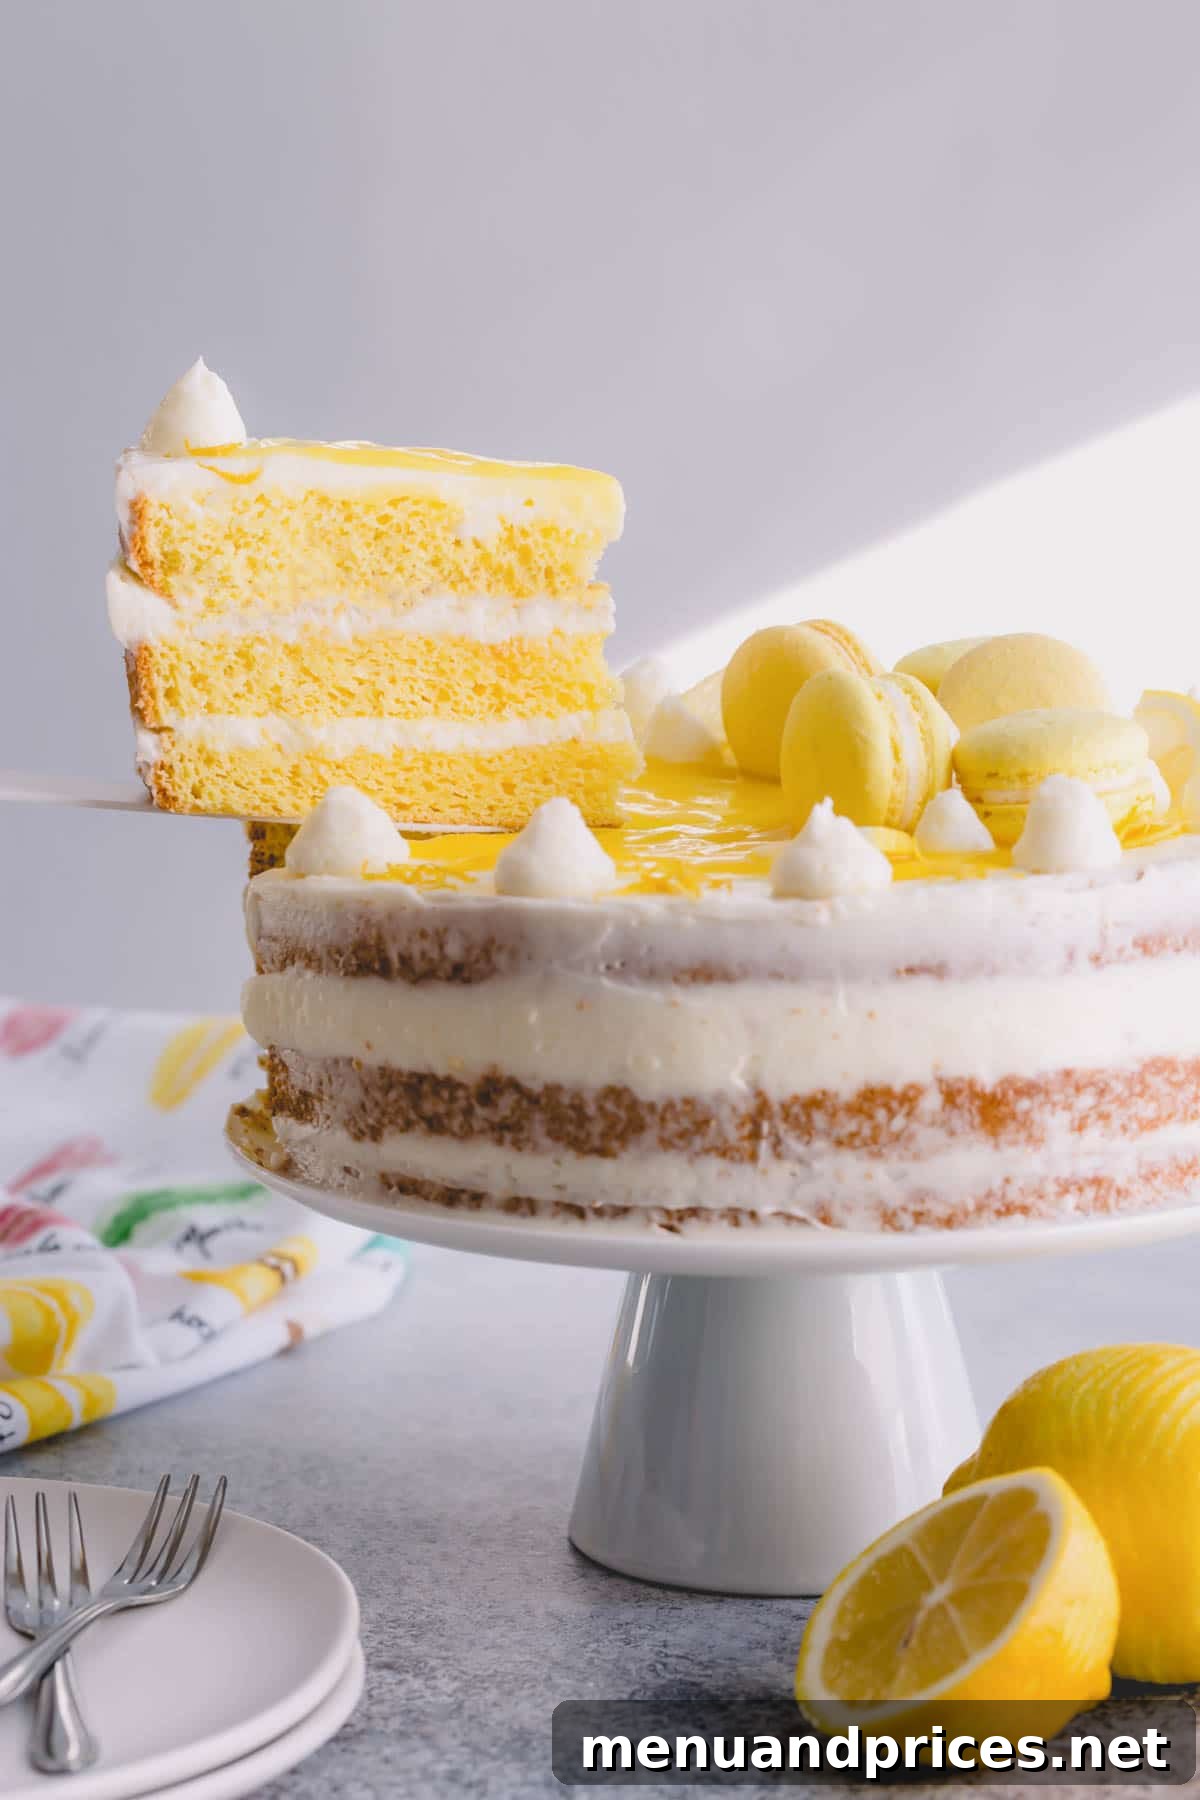
The Ultimate Zesty Lemon Layer Cake: Your Guide to a Citrus Masterpiece
Prepare to fall completely in love with this extraordinary lemon layer cake, a true celebration of citrus designed to deliver an intense burst of vibrant lemon flavor in every single bite. This exquisite dessert features incredibly soft, delicate sponge cake layers, generously soaked with a bright lemon simple syrup, then lavishly filled with luscious homemade lemon curd and finally enveloped in a dreamy, smooth lemon Swiss meringue buttercream frosting. It’s a perfect harmony of textures and tastes that will brighten any occasion and delight every palate, making it a guaranteed favorite amongst all lemon dessert enthusiasts.
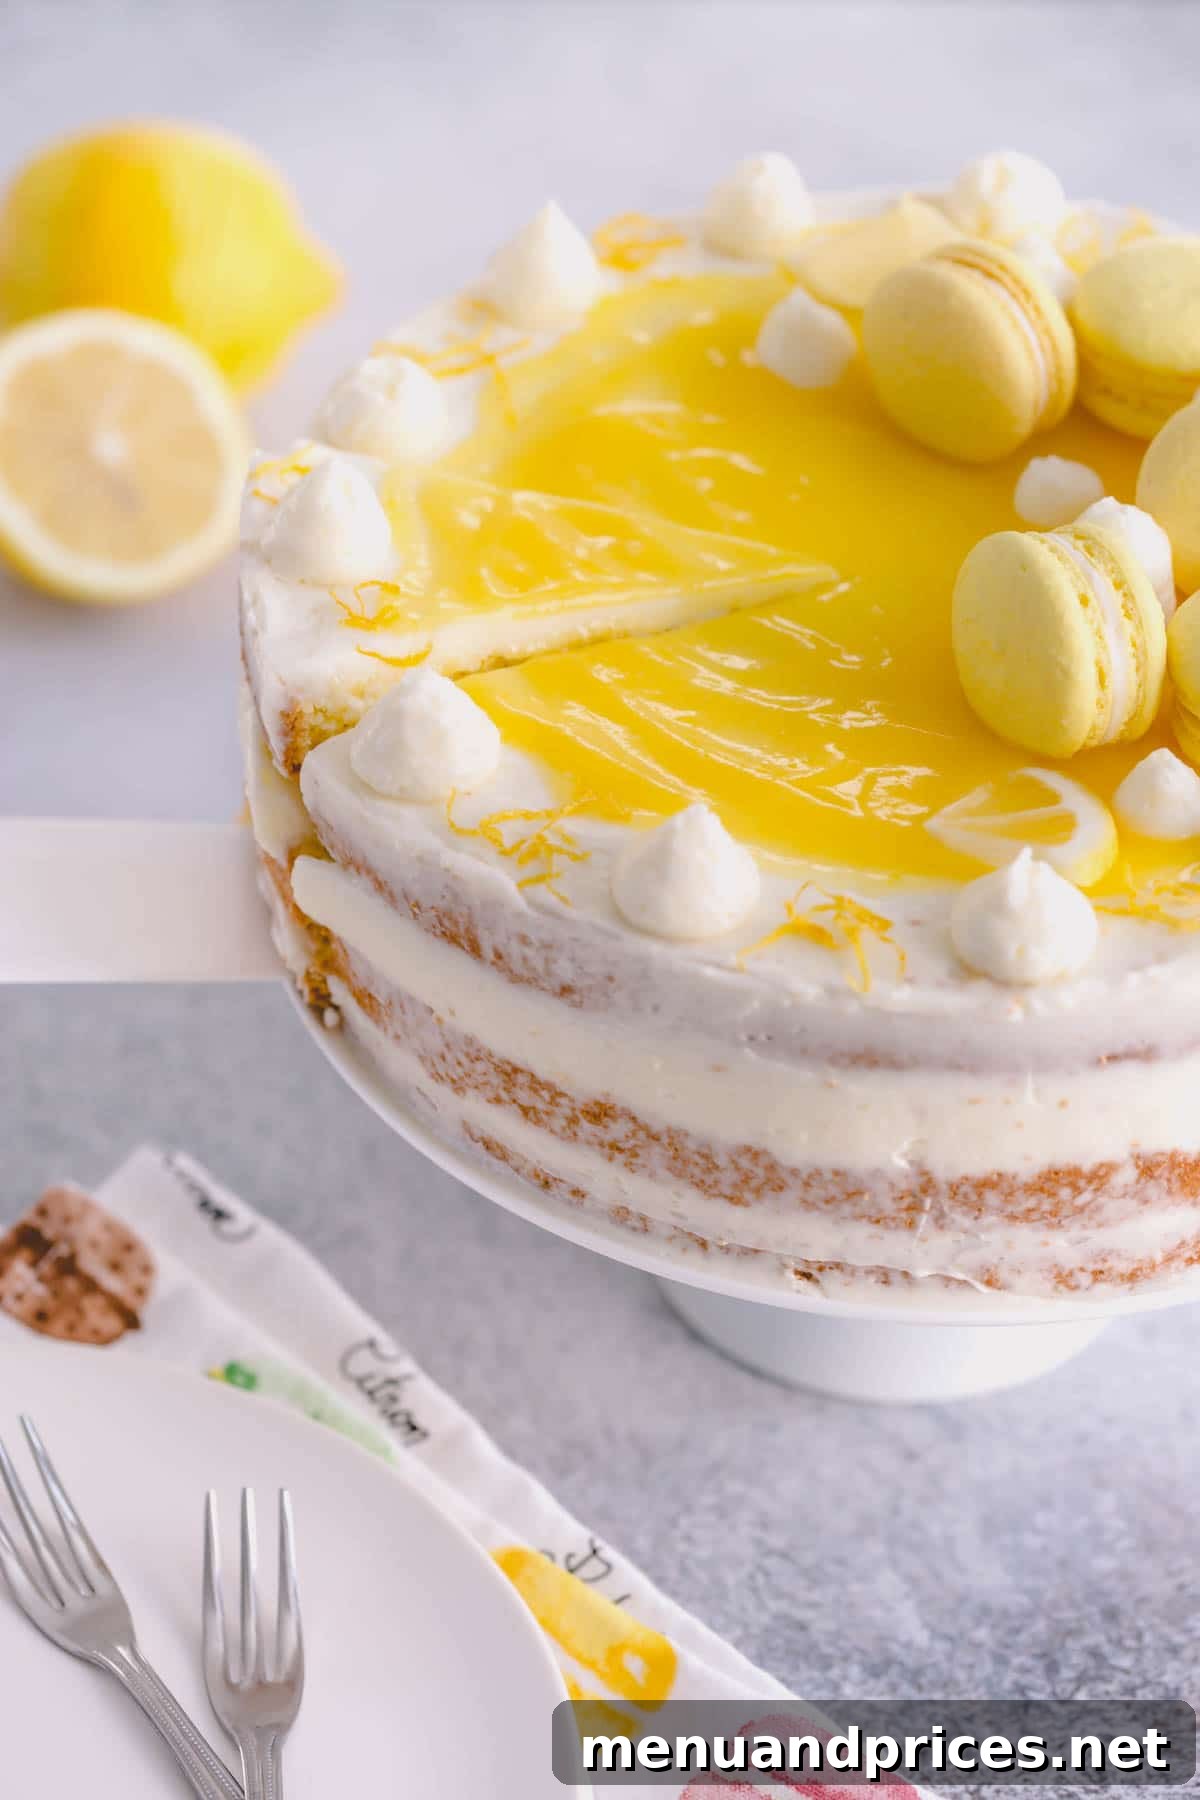
Why This Zesty Lemon Cake Will Become Your New Go-To Recipe
This isn’t just any lemon cake; it’s an experience, a symphony of zesty flavors and light textures that every citrus-lover dreams of. It stands out as one of the most beloved lemon desserts, guaranteed to impress both visually and gastronomically. If you’re searching for a dessert that truly captures the essence of fresh lemon, look no further. Here’s what makes this particular recipe so utterly irresistible and a must-try for your baking repertoire:
- Remarkably Moist Lemon-Infused Sponge: Our light and airy lemon sponge cake layers are deeply hydrated and flavored not only with fresh lemon zest and juice in the batter but also generously soaked with a homemade lemon simple syrup. This double infusion ensures an incredibly moist, tender, and melt-in-your-mouth experience with every forkful, preventing any dryness often associated with sponge cakes.
- Vibrant Homemade Lemon Curd: The true heart of this cake lies in its vibrant, tangy, and intensely fresh lemon curd filling. Far superior to any store-bought variety, this homemade curd provides a delightful contrast to the sweet cake and frosting, delivering a concentrated burst of authentic lemon flavor. It’s surprisingly easy to make and elevates the cake’s flavor profile significantly.
- Silky Smooth Lemon Swiss Meringue Buttercream: We’ve taken the classic Swiss meringue buttercream and transformed it into a citrusy dream. This frosting is renowned for its ethereal lightness, smooth texture, and balanced sweetness. It perfectly complements the intense lemon flavors, providing a luxurious finish without ever overwhelming the delicate cake layers. It’s stable, pipes beautifully, and has a rich, buttery feel that melts exquisitely.
This stunning cake is more than just a treat; its bright, uplifting flavors and cheerful appearance can instantly uplift spirits and bring a smile to anyone’s face, regardless of how gloomy the day might seem. Seriously, just one glance at this sunny confection, and you can’t help but feel a little happier, can you?
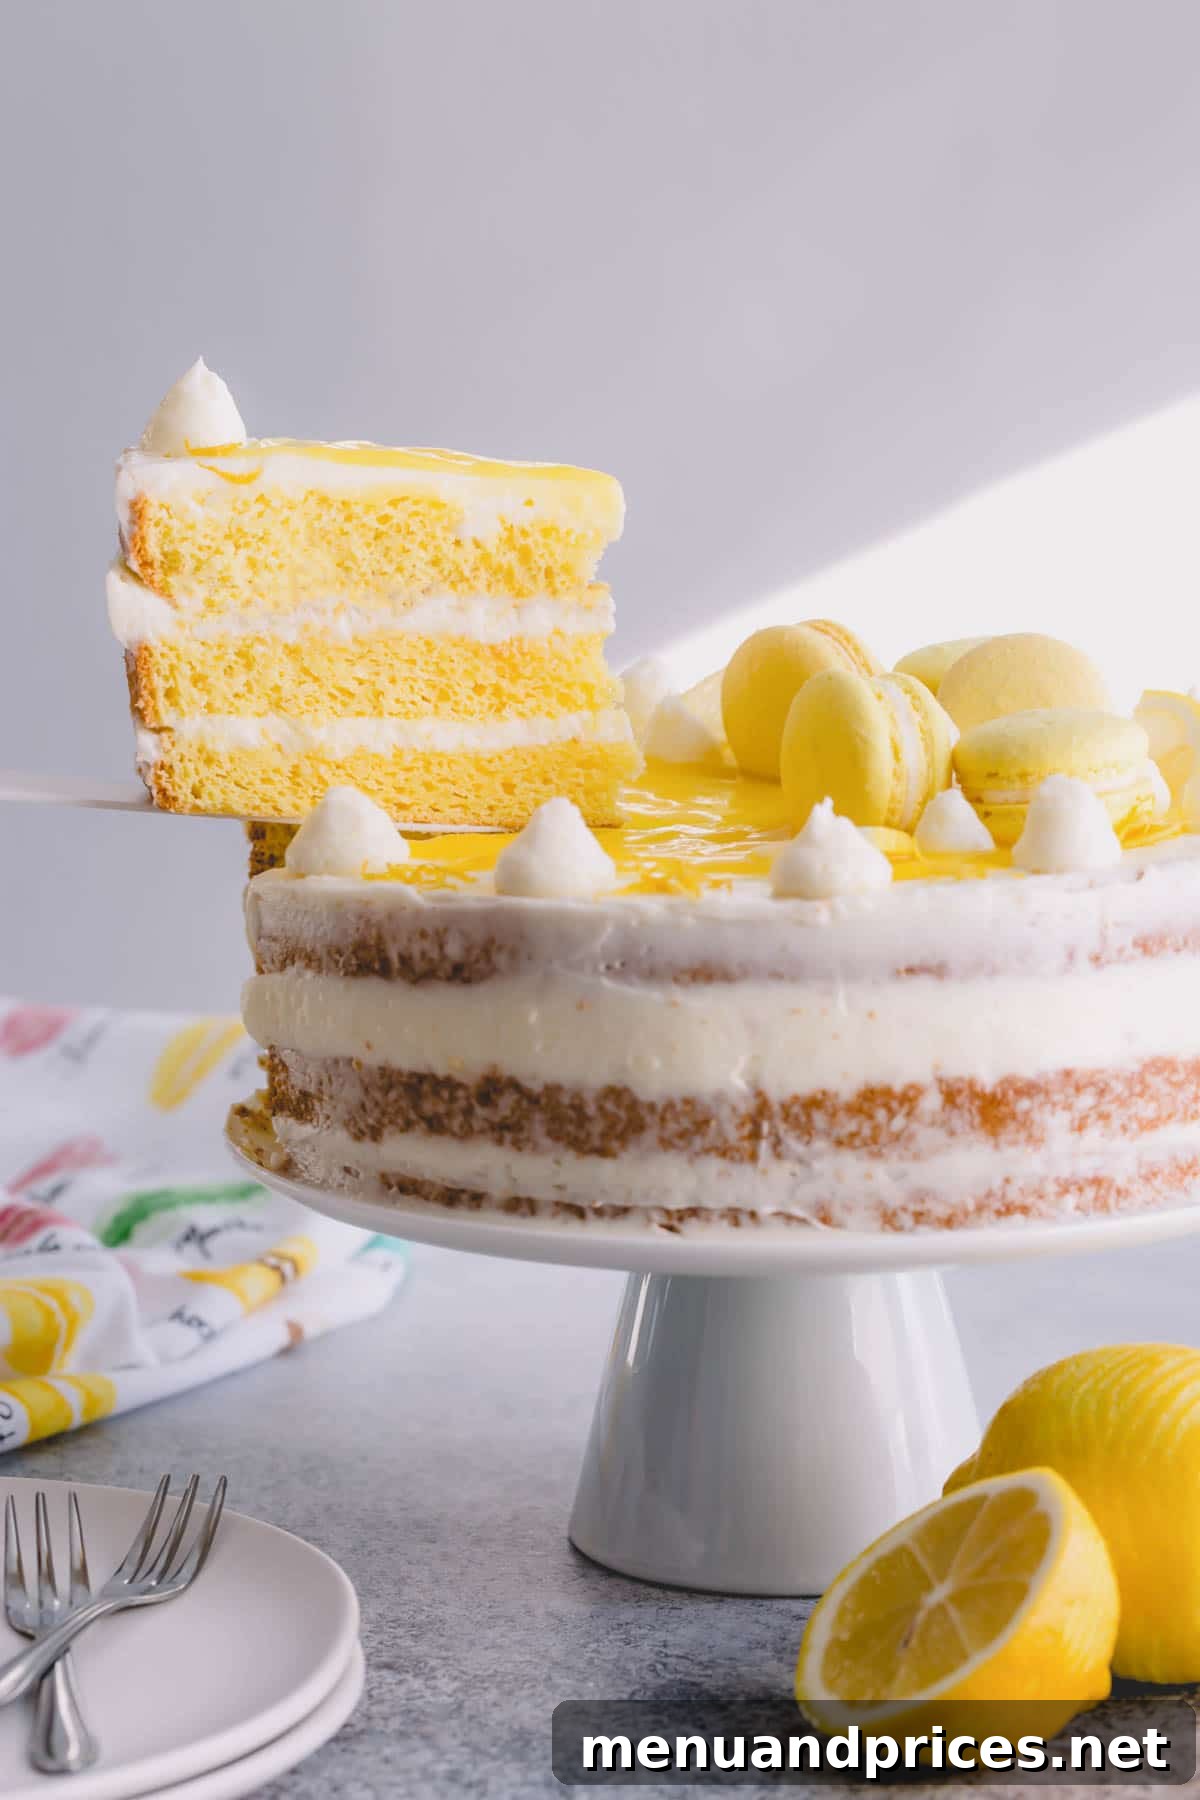
Understanding the Anatomy of This Exquisite Lemon Layer Cake
Crafting this magnificent lemon cake involves mastering four distinct yet perfectly harmonious components. Each element plays a crucial, complementary role in achieving the ideal balance of flavor, texture, and structural integrity that defines a truly exceptional layer cake:
- The Light and Fluffy Lemon Sponge Cake: This forms the foundational canvas of our dessert. Unlike heavier butter cakes, the sponge provides a delicate, airy, and incredibly tender structure that readily absorbs moisture and flavor. Our recipe carefully infuses it with subtle lemon notes from fresh zest and juice, creating a fragrant base for the subsequent layers. Its lightness ensures the cake never feels heavy or dense.
- The Zesty Lemon Simple Syrup: Often underestimated, this simple syrup is an absolute game-changer for sponge cakes. It’s the secret ingredient that transforms potentially dry cake layers into melt-in-your-mouth sponges, imparting unparalleled moisture and an extra layer of delicate lemon flavor. This step ensures every bite is incredibly tender and juicy, enhancing the overall sensory experience.
- The Bright Homemade Lemon Curd: This intensely zesty and creamy curd is the vibrant heart of our cake. It provides a powerful burst of fresh, tangy lemon that brilliantly cuts through the sweetness of the cake and frosting, creating a dynamic and exciting flavor profile. Easy to prepare and far superior in taste and texture to any store-bought alternative, it adds a luxurious, velvety richness to the filling.
- The Smooth Lemon Swiss Meringue Buttercream: This elegant buttercream serves multiple purposes. It not only binds all the components together with its sturdy yet light and airy consistency but also infuses the cake with a subtle, sophisticated lemon flavor. Renowned for its silky smooth finish and less-sweet profile compared to traditional buttercreams, it provides the perfect balance, ensuring the lemon’s brightness remains the star.
Your Comprehensive Step-by-Step Guide to Baking the Perfect Lemon Layer Cake
Embark on your baking journey with this detailed guide to creating a truly show-stopping lemon layer cake. While it involves several steps, each one is straightforward, and the final result is incredibly rewarding. We’ll walk you through each component, ensuring a successful and utterly delicious outcome.
1. Crafting the Light and Airy Lemon Sponge Cake Layers
Our lemon sponge cake recipe is a delightful adaptation of our reliable 3-ingredient classic sponge cake, elevated with the addition of fresh lemon juice and zest. This infusion imparts a delicate citrus aroma and a subtle yet distinct lemon flavor, making a truly irresistible foundation for our layered masterpiece. Sponge cakes are celebrated for their incredible lightness and ability to absorb flavors, which is exactly what we need for this recipe.
For more in-depth, step-by-step instructions on mastering the foundational sponge, we encourage you to refer to our classic sponge cake recipe. When making this lemon variation, simply ensure you incorporate the specified amounts of fresh lemon juice and zest into the batter as detailed in the ingredient list below.
- Baking Pan Flexibility: You have a couple of options for baking your cake layers. You can use two 8-inch cake pans, dividing the batter evenly between them, and then slice each baked cake horizontally into two layers to achieve a stunning four-layer cake. This method often yields slightly thinner, more elegant layers.
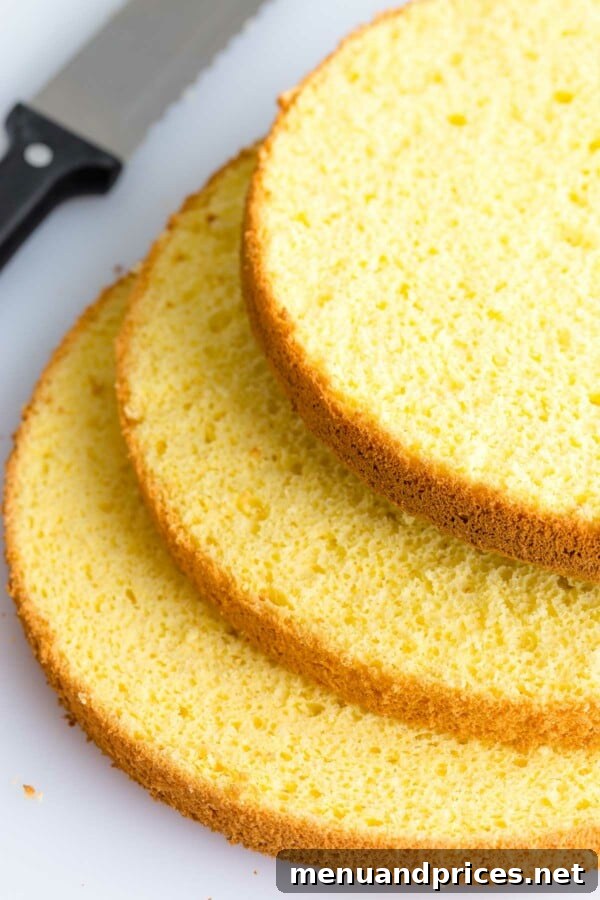
- Single Pan Method: Alternatively, for a slightly taller, more substantial cake, you can bake the entire batter in a single 9-inch cake pan. Once baked and cooled, you will then carefully slice this one cake into three even horizontal layers, as beautifully demonstrated in our accompanying visuals.
Expert Tip for Perfect Cake Slices
For cleaner, more precise, and frustration-free slices when dividing your cake into layers, it is absolutely essential to ensure your baked cake is fully chilled. Ideally, wrap the cooled cake tightly in plastic wrap and refrigerate it overnight. A thoroughly chilled cake is significantly firmer and less prone to crumbling or tearing than a fresh, warm cake, making the slicing process much easier and yielding perfectly even layers. Planning this crucial step ahead will save you a lot of time and effort!
2. Preparing the Irresistible Homemade Lemon Curd
Crafting your own lemon curd from scratch is not only incredibly simple but also yields a far superior, more vibrant, and intensely flavored result compared to any store-bought alternative. This zesty, creamy filling is a true highlight of the cake and can be prepared well in advance, streamlining your baking process and reducing stress on assembly day. The bright, tangy flavor of fresh lemon curd is absolutely essential for the cake’s balanced profile.
Here’s a quick and easy overview of how to create this silky, luxurious filling that will infuse your cake with incredible flavor:
- Combine Ingredients: In a medium saucepan, vigorously whisk together the eggs, granulated sugar, freshly squeezed lemon juice, and aromatic lemon zest until all ingredients are thoroughly combined and smooth. This ensures a consistent texture as it cooks.
- Gentle Cooking: Place the saucepan over low heat. Cook the mixture, stirring continuously with a whisk or rubber spatula, until it gradually thickens and reaches a temperature of 170°F (75°C). This typically takes about 8-10 minutes. The curd will visibly thicken and should coat the back of a spoon; you should be able to run your finger across the spoon and leave a clear trail.
- Enrich with Butter: Immediately remove the saucepan from the heat to stop the cooking process. Stir in the cold, unsalted butter, sliced into pieces, until it is completely melted and smoothly incorporated into the curd. The butter adds a luxurious richness and a beautiful, glossy finish to the curd.
- Achieve Silky Smoothness: For an exceptionally smooth and flawless texture, press the warm curd through a fine-mesh sieve set over a clean bowl. This step removes any tiny bits of cooked egg, lemon zest, or other impurities, resulting in a velvety-smooth curd that is a joy to eat.
Lemon Curd Storage Tip: Prevent a Film
To prevent an unsightly and unappetizing “skin” or film from forming on the surface of your cooling lemon curd, ensure you press a piece of plastic wrap directly onto the entire surface of the curd. The plastic wrap should be in full contact with the curd, eliminating any air pockets. This creates an effective barrier and keeps your curd perfectly smooth and fresh while it cools and chills.
3. Whipping Up the Silky Lemon Swiss Meringue Buttercream
For a cake of this caliber, only the lightest, fluffiest, and most stable frosting will do. That’s precisely why we opt for Swiss meringue buttercream – its ethereal texture, balanced sweetness, and incredible stability make it the perfect accompaniment to our vibrant lemon cake. While the process of making Swiss buttercream might seem a bit intimidating at first glance, we promise you it’s an incredibly rewarding technique, and the luxurious results are absolutely worth every bit of effort. The smooth, velvety consistency and delicate sweetness provide a perfect counterpoint to the cake’s zesty components.
We’ve meticulously laid out every intricate detail, along with helpful troubleshooting tips, in our dedicated Swiss meringue buttercream tutorial, which even includes a comprehensive video guide. For this specific lemon variation, we infuse it with fresh lemon juice during the initial heating process, ensuring a delicate citrus note throughout the frosting.
In essence, here’s how to achieve this dreamy lemon Swiss meringue buttercream that will elevate your cake:
- Heat Egg Whites and Sugar: In a clean, heatproof bowl (your stand mixer bowl is ideal), combine the egg whites, granulated sugar, and fresh lemon juice. Place this bowl over a saucepan of gently simmering water (creating a double boiler setup). Whisk the mixture gently and continuously until all the sugar has completely dissolved and the mixture reaches a temperature of 160°F (70°C).
- Whip the Meringue: Immediately remove the bowl from the heat and attach it to your stand mixer. Using the whisk attachment, begin whipping the egg white mixture on medium speed for about a minute, then gradually increase the speed to medium-high. Continue beating for approximately 10 minutes, or until stiff, glossy peaks form and the meringue feels completely cool to the touch. (Note: If using a hand-mixer, this step may take a little longer.)
- Incorporate Butter: Once the meringue has reached stiff peaks and cooled, stop the mixer and scrape down the sides of the bowl with a spatula. Turn the mixer back on to medium speed and begin adding the room-temperature unsalted butter, one tablespoon at a time. Ensure each addition of butter is fully incorporated into the meringue before adding the next piece. (Important Note: It is perfectly normal for the buttercream to appear curdled or separated halfway through this process. Do not panic! Just continue adding the butter and keep mixing; it will eventually come together.)
- Achieve Fluffy Smoothness: Continue whisking the buttercream for about 10 more minutes until it transforms into a smooth, light, and wonderfully fluffy consistency. Finally, switch to a paddle attachment, add a pinch of coarse kosher salt (which balances the sweetness), and beat the buttercream for another minute or so until it is perfectly smooth, airy, and uniform.
Buttercream Piping Tip: Simplify Your Frosting
For effortless frosting and assembly of your cake, a simple yet highly effective trick is to transfer your freshly prepared Swiss meringue buttercream into a large piping bag. You don’t even need a specific piping tip if you’re doing a basic crumb coat and final layer. This method makes creating neat borders, evenly distributing filling between layers, and applying a smooth outer coat significantly tidier, quicker, and much less messy than trying to spread it directly with a spatula.
4. Crafting the Essential Lemon Simple Syrup
This component is arguably the quickest and easiest part of the entire cake-making process, yet it plays a profoundly significant and often underestimated role in achieving that perfect, tender, and incredibly moist texture in a sponge cake. Sponge cakes, by their nature, can sometimes be a bit dry if not properly hydrated, and this lemon simple syrup is our secret weapon against dryness. Don’t be tempted to skip this crucial step, thinking it might make your cake overly sweet – it truly won’t! Instead, it infuses vital moisture and adds an extra, delicate layer of refreshing lemon flavor that elevates the entire cake.
- To prepare the syrup: In a small saucepan, simply bring water to a boil. Once it reaches a rolling boil, stir in the granulated sugar and freshly squeezed lemon juice until the sugar is completely dissolved. Remove the saucepan from the heat immediately after the sugar has dissolved and allow the syrup to cool entirely to room temperature before you use it. The cooled syrup should be thin, clear, and fragrant.
5. Expert Cake Assembly for a Professional and Stunning Finish
With all your delicious and carefully prepared components ready – your moist cake layers chilled, your zesty lemon curd cool, your silky buttercream at the perfect consistency, and your simple syrup cooled – it’s time for the exciting part: assembling your masterpiece! Before you begin, take a moment to organize all your ingredients and tools neatly on your work surface. Having everything within easy reach makes the assembly process smooth, efficient, and considerably more stress-free, ensuring a beautiful result.
Pro Assembly Tip: Secure Your Cake Base
Before you place your very first cake layer, take a small dollop of your prepared buttercream and spread it onto the center of your cake board or the serving plate you plan to use. This seemingly minor step is crucial: it acts as an edible adhesive, securely anchoring the first cake layer and preventing the entire cake from sliding around during the intricate assembly process, decorating, and even during transport. This ensures a stable foundation for your towering creation.
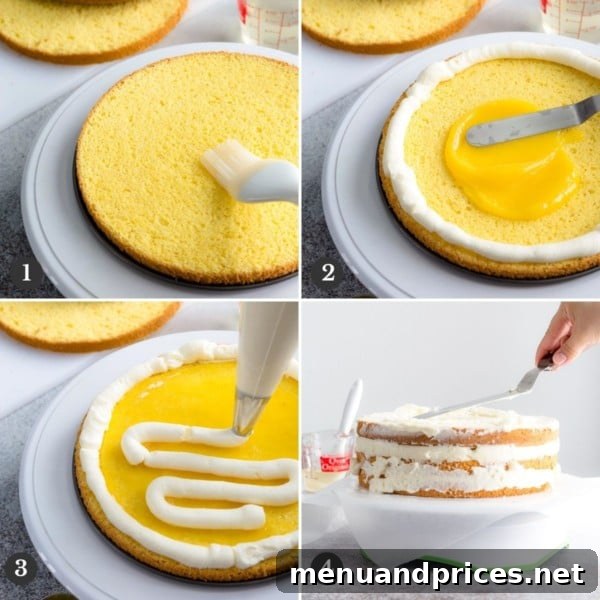
- Moisten the First Layer: Place your first thoroughly chilled cake layer onto the prepared and buttercreamed cake board. Using a pastry brush (or if you don’t have one, a clean regular spoon works well), generously brush the entire top surface of this cake layer with the cooled lemon simple syrup. Ensure every inch is moistened evenly; this is key for a tender cake.
- Create the Curd Dam: With your prepared buttercream in a piping bag, pipe a sturdy, even border around the outer edge of the cake layer. This creates a “dam” or “wall” which will effectively contain your luscious lemon curd filling. If you are constructing a three-layer cake, proceed to fill the middle of this buttercream border with half of your homemade lemon curd, spreading it evenly.
- Layer with Buttercream: Pipe another layer of buttercream directly over the lemon curd. Then, using an offset spatula, gently and carefully spread this frosting across the curd to create an even, smooth layer. Piping the buttercream first makes this step surprisingly simple and prevents the curd from mixing with the buttercream as you spread.
- Repeat Layers and Frost: Carefully place the next cake layer on top and repeat steps 1, 2, and 3. Continue this process until all your cake layers are assembled. For the final layer, consider placing the top cake layer upside down. This professional trick provides a perfectly flat, smooth top surface with sharp edges, making it much easier to frost and decorate. Once all layers are stacked, apply a thin “crumb coat” of frosting to the entire cake (sides and top) to seal in any loose crumbs. Chill the cake for 15-20 minutes, then apply a final, thicker, and perfectly smooth layer of frosting. For a trendy “naked-style” finish, a cake scraper is your best friend for achieving smooth, even sides where just a hint of the cake layers peeks through.
6. Adding the Perfect Finishing Touches for a Stunning Presentation
Decorating your cake is where your personal style can truly shine. Even a simple, elegant design can create an absolutely stunning effect, especially when the cake itself is so flavorful. For this exquisite lemon layer cake, we’ve opted for an elegant yet easy approach that beautifully highlights its fresh, vibrant character and ensures a delightful visual appeal:
- Lemon Curd Centerpiece: We reserved a small amount of the luscious homemade lemon curd and elegantly smeared it onto the very center of the top frosted layer. This creates a beautiful, glistening pool of bright yellow that immediately draws the eye and signals the lemon flavor within.
- Buttercream Dollops: Around this vibrant lemon curd centerpiece, we piped charming and perfectly formed dollops of the silky Swiss meringue buttercream. These add a lovely textural contrast and an element of refined decoration without requiring advanced piping skills.
- Fresh Lemon Zest Curls: To enhance both the presentation and the aromatic appeal, we generously sprinkled delicate curls of fresh lemon zest over the top of the cake. These add a vibrant splash of color and an irresistible fresh scent. For achieving these adorable, uniform curls, a specialized citrus zester tool works absolute wonders!
- The “Wow-Factor” with Macarons: And for that undeniable “wow-factor” that truly elevates the cake to a show-stopping dessert, what could be better than adorning the cake with a few homemade lemon macarons? Their crisp texture, intense lemon flavor, and elegant appearance perfectly complement the cake, making it an unforgettable centerpiece.
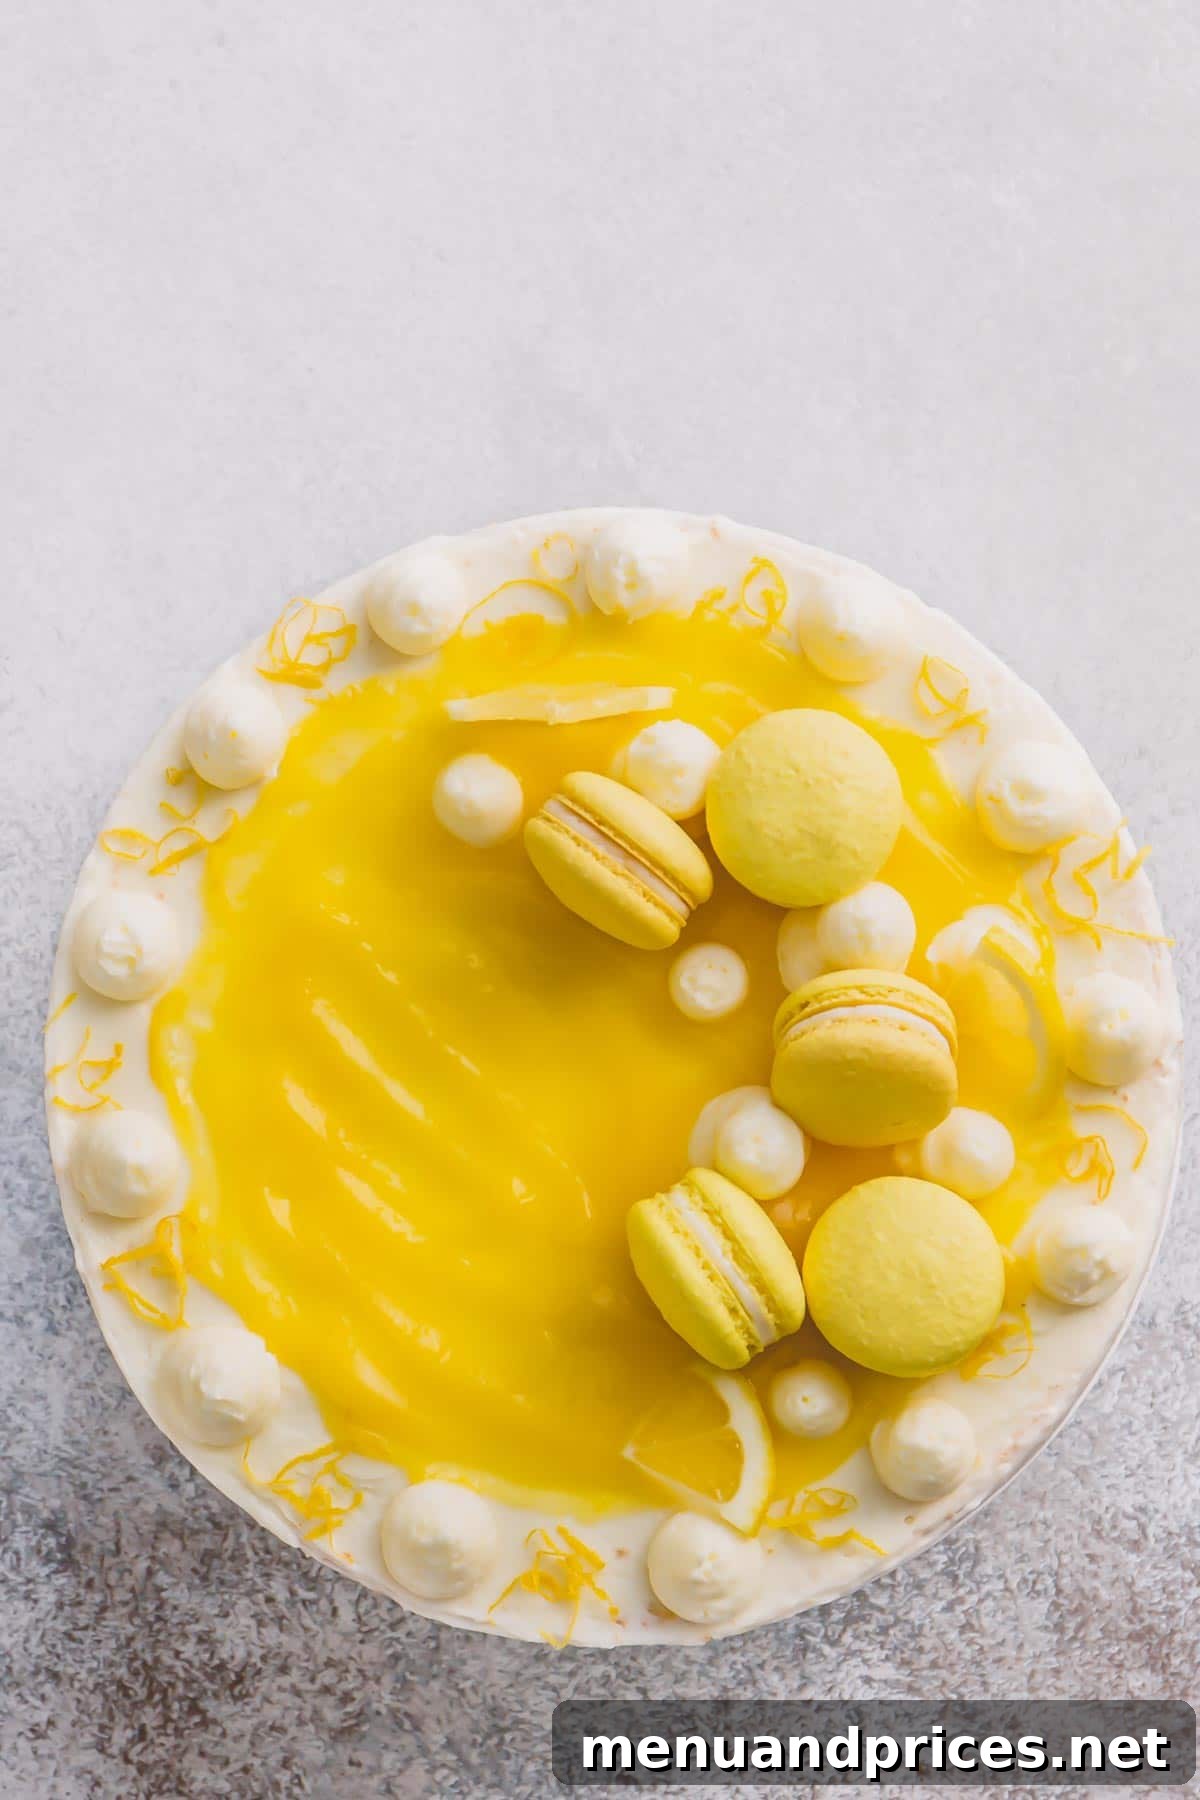
You might initially wonder if having “lemon everything” in one cake – lemon sponge, lemon syrup, lemon curd, and lemon buttercream – could possibly be an overkill. But rest assured, this meticulously crafted lemon cake achieves an absolutely harmonious and perfect balance of sweet and tangy flavors. It is remarkably refreshing, delightfully satisfying, and never overwhelming. Each lemon component is carefully calibrated to contribute to an overall vibrant, yet perfectly balanced, citrus experience. Now, after all that talk, how about a generous slice with a perfectly brewed cup of tea? (Just kidding, but it does pair wonderfully!)
Essential Expert Tips for a Flawless Lemon Layer Cake Every Time
Achieving baking perfection, especially with a layered cake, often comes down to understanding and implementing a few key insights. Keep these expert tips in mind throughout your process to ensure your lemon layer cake turns out spectacularly, not just delicious, but also beautifully structured, every single time:
- Always Prioritize Fresh Lemon Juice and Zest: This recipe hinges entirely on the bright, natural acidity and aromatic oils of fresh lemons. Bottled lemon juice, while convenient, simply cannot deliver the same vibrant, authentic flavor profile that makes this cake so special. You will need approximately 6 medium to large lemons in total to supply enough juice and zest for all the different components of this recipe (cake, curd, buttercream, and syrup).
- Strategically Plan Your Baking Ahead: This cake involves several distinct components, and attempting to prepare them all in one go can be quite demanding. Breaking down the preparation over the span of a few days can make the process significantly more enjoyable, manageable, and considerably less stressful. Consider adopting this phased baking schedule for optimal results and convenience:
- Day 1: Bake the lemon sponge cake layers. Once completely cooled, wrap them tightly in plastic wrap and either chill them overnight in the refrigerator or freeze them for longer storage (up to a month). Chilling makes slicing much easier.
- Day 2: Prepare the luscious Swiss meringue buttercream. Once made, it can be stored in an airtight container in the fridge for up to two weeks (and re-whipped before use) or frozen for several months.
- Day 3: Make the intensely flavored homemade lemon curd. After cooling, cover it directly with plastic wrap and refrigerate it until you’re ready for assembly. It keeps well for up to two weeks.
- Day 4: Prepare the simple lemon syrup. This is quick! Allow it to cool completely, then transfer to an airtight container and store in the fridge.
- Day 5: The grand finale! Assemble and meticulously decorate your stunning lemon layer cake. This phased approach allows for optimal chilling of components, develops flavors, and spreads out the workload, leading to a much more relaxed baking experience.
- Mastering Frosting with a Piping Bag: Even if you don’t consider yourself a master cake decorator, utilizing a large piping bag (even without a specific tip) for applying your prepared buttercream makes the frosting process significantly quicker, considerably cleaner, and much easier to achieve even layers and smooth sides. It helps create a consistent “dam” for the curd and ensures uniform coverage.
Smart Make-Ahead Strategies for Effortless Entertaining
This exquisite lemon layer cake is an ideal candidate for advance preparation, making it the perfect dessert for special celebrations, holidays, or any event where you need a showstopper without the last-minute kitchen rush. Its components are surprisingly stable and can be prepared well in advance, giving you ample time to enjoy the occasion. Here’s how you can strategically plan ahead:
- Individual Component Preparation: Each essential element of the cake – the baked sponge layers, the silky Swiss meringue buttercream, the tangy homemade lemon curd, and the refreshing lemon simple syrup – can be prepared up to one week in advance. Store each component separately in the refrigerator, ensuring they are tightly wrapped or covered in airtight containers to maintain their freshness and prevent absorption of other fridge odors.
- Assembling the Cake in Advance: For ultimate convenience, the entire cake can be assembled and fully frosted a day prior to your event. Once assembled and decorated, carefully store the cake in the refrigerator, covered loosely with plastic wrap or a cake dome to protect the delicate frosting and prevent it from drying out, until approximately one hour before you plan to serve it.
- Optimal Serving Temperature: For the absolute best flavor and most tender texture, it is highly recommended to allow the assembled and chilled cake to come to room temperature for about 1 hour before slicing and serving. This resting period softens the buttercream to its ideal silky consistency and allows the delicate lemon flavors to fully bloom, creating a more enjoyable culinary experience.
Storing Your Delicious Lemon Layer Cake for Lasting Freshness
To ensure your delectable lemon layer cake remains as fresh, moist, and delightful as possible, extending its enjoyment beyond the first slice, follow these comprehensive storage guidelines:
- Refrigeration for Leftovers: Due to the presence of fresh lemon curd and egg-based buttercream, it is crucial to store any leftover cake in an airtight container or covered securely with plastic wrap in the refrigerator. When properly stored, the cake will maintain its quality and freshness for up to 3 days. Always ensure it’s kept chilled.
- Freezing for Extended Enjoyment: This fantastic lemon layer cake, even with its creamy lemon curd filling, freezes wonderfully! This makes it perfect for portioning out leftovers or preparing ahead for future events. To freeze, wrap individual slices or the entire cake tightly in several layers of plastic wrap, followed by an additional layer of heavy-duty aluminum foil. Store the well-wrapped cake in a freezer-safe container or bag for up to 1-2 months for optimal flavor and texture.
- Thawing Frozen Cake: To properly thaw your frozen cake, simply transfer it from the freezer to the refrigerator and allow it to thaw slowly overnight. This gradual thawing process helps maintain the cake’s texture and prevents excessive moisture release. Once thawed, bring the cake to room temperature for about an hour before slicing and serving for the most enjoyable experience, allowing the buttercream to soften and flavors to meld.
Frequently Asked Questions About This Lemon Layer Cake
How do I ensure my sponge cake layers are consistently moist and tender?
Achieving a moist and tender sponge cake relies on two critical factors that work in tandem:
- Avoid Over-Baking at All Costs: Over-baking is the single quickest way to dry out any cake, especially a delicate sponge. Always keep a close eye on your oven and start checking for doneness a few minutes before the recipe’s recommended bake time. A wooden skewer or toothpick inserted into the center should come out clean, with no wet batter attached.
- Do Not Skip the Lemon Simple Syrup: This step is absolutely paramount for sponge cakes. Generously brushing the cooled cake layers with the lemon simple syrup not only infuses them with additional bright flavor but, more importantly, adds crucial moisture. This ensures a truly melt-in-your-mouth texture that is characteristic of a perfectly prepared sponge cake, preventing it from tasting dry or bland.
What is the role of lemon juice in a cake batter, and can adding too much be detrimental?
The role of lemon juice in cake batters can vary. In some cake recipes that rely heavily on chemical leaveners (such as baking soda or baking powder) for their rise, excessive acidity from a large amount of lemon juice can indeed interfere with the leavening agents, potentially preventing the cake from rising properly or affecting its tender crumb. However, for this specific lemon sponge cake recipe, you can add the specified amount of lemon juice without any concern! Our sponge cake primarily achieves its magnificent light and airy rise from perfectly whipped egg whites, rather than relying solely on chemical leaveners. This means the added lemon juice contributes only a wonderful, natural flavor and an element of moistness without compromising the cake’s delicate structure or rise.
Can I use store-bought lemon curd instead of making it from scratch?
While our homemade lemon curd offers an unparalleled fresh, zesty flavor, and exquisitely smooth texture that truly elevates this cake, we understand that time can sometimes be a constraint. Therefore, you can certainly use a good quality store-bought lemon curd if you’re short on time. Just be sure to choose a brand you trust for its flavor and consistency, as the lemon curd is a significant and central component of the cake’s overall taste profile. You might need to adjust the amount used slightly if the store-bought version is sweeter or more tart than anticipated, to maintain the perfect balance.
What kind of lemons should I use for the best results in this recipe?
For the most vibrant flavor and aromatic zest, always opt for fresh, ripe, and preferably organic lemons. Common varieties like Eureka or Lisbon lemons are excellent choices, as they are known for their abundant juice and fragrant zest. When selecting lemons, look for those that are firm, bright yellow, and feel heavy for their size – these indicators usually mean they are juicy and flavorful. Avoid lemons that are soft, discolored, or have dry, shriveled, or brittle skin, as they will yield less juice and less potent zest.
Lemon Layer Cake Recipe
By Shinee Davaakhuu
Indulge in this delightful lemon layer cake, featuring soft sponge layers soaked in lemon syrup, filled with tangy homemade lemon curd, and frosted with light Swiss meringue buttercream. A true citrus dream!

Prep Time: 35 minutes
Cook Time: 40 minutes
Cooling/Chilling Time: 2 hours 45 minutes (includes cake chilling and curd cooling)
Total Time: Approximately 4 hours (excluding passive chilling time)
Servings: 12 servings
Ingredients
For the Lemon Sponge Cake:
- 6 large eggs
- 1 cup (200 g) granulated sugar, divided (Note 1)
- 2 tablespoons (30 g) fresh lemon juice (Note 2)
- 1 tablespoon fresh lemon zest
- 1 ½ cups (180 g) cake flour, sifted (Note 3)
- ½ teaspoon coarse kosher salt
For the Lemon Swiss Meringue Buttercream:
- 6 large egg whites
- 1 ½ cups (300 g) granulated sugar
- 3 tablespoons (45 g) fresh lemon juice
- 1 ½ cups (340 g) unsalted butter, sliced and at room temperature (Note 4)
- ½ teaspoon coarse kosher salt
For the Lemon Curd:
- 3 large eggs
- 1 cup (200 g) granulated sugar
- 1 cup (240 ml) fresh lemon juice
- 1 tablespoon fresh lemon zest
- 5 tablespoons (70 g) unsalted butter, sliced and at room temperature
For the Lemon Simple Syrup:
- ¾ cup (150 g) granulated sugar
- 2 tablespoons (30 g) fresh lemon juice
Instructions
To make the Lemon Sponge Cake:
- Preheat your oven to 350°F (177°C). Prepare one 9-inch springform pan (ensure it’s at least 3 inches tall) by lining the bottom with parchment paper. Crucially, do NOT grease the sides of the pan; the cake batter needs to cling to the sides to rise properly and achieve its characteristic tall, airy structure.
- Carefully separate the egg whites from the yolks, being extremely meticulous to ensure absolutely no egg yolk mixes with the whites. Even a tiny speck of yolk can prevent the whites from whipping properly. (Tip: Eggs are often easier to separate cleanly when they are cold, straight from the refrigerator.)
- In a clean mixing bowl, preferably your stand mixer bowl fitted with a whisk attachment, vigorously whisk together the egg yolks, ½ cup of the granulated sugar, fresh lemon juice, and finely grated lemon zest. Beat for approximately 5 minutes until the mixture becomes pale yellow in color, thick, and has tripled in volume, becoming light and airy.
- In a separate, very clean mixing bowl (another stand mixer bowl or a large bowl for a hand mixer) with a whisk attachment, begin beating the egg whites on medium-low speed until they become foamy. Gradually add the remaining ½ cup of granulated sugar, one tablespoon at a time, while continuing to whisk. Slowly increase the speed to medium-high and continue beating for 7-10 minutes until stiff, glossy peaks form. The meringue should hold its shape firmly when the whisk is lifted.
- Using a rubber spatula, gently fold one-third of the whipped egg whites into the egg yolk mixture until mostly combined. Then, carefully add the remaining whipped egg whites and continue to fold gently until the mixture is smooth and no streaks of egg white remain. Be very careful not to overmix, as this will deflate the precious air incorporated into the batter.
- Sift the cake flour and salt directly into the batter in three separate stages. After each addition, gently whisk or fold the batter until just combined. Again, avoid overmixing, as excessive gluten development can lead to a tough, dense cake.
- Carefully pour the delicate batter into your prepared 9-inch springform pan and gently smooth the top surface with a spatula to ensure an even bake.
- Bake the cake for approximately 40 minutes, or until a wooden skewer or toothpick inserted into the exact center of the cake comes out completely clean. It is critically important not to open the oven door for at least the first 30 minutes of baking, as sudden temperature changes can cause the delicate sponge cake to collapse.
- Once baked, allow the cake to cool in the pan for exactly 5 minutes. Then, carefully run a thin, sharp knife around the inner edges of the pan to release the cake before inverting it onto a wire cooling rack to cool completely. For significantly easier and cleaner slicing into even layers, wrap the thoroughly cooled cake tightly in plastic wrap and refrigerate it. Ideally, chill it overnight, or for a minimum of 4 hours.
To make the Lemon Swiss Meringue Buttercream:
- In a small saucepan, bring a small amount of water to a gentle simmer. This will serve as the base for your double boiler setup.
- In a medium heat-proof bowl (your stand mixer bowl is perfect for this), combine the egg whites, granulated sugar, and fresh lemon juice. Place this bowl over the simmering saucepan, ensuring that the bottom of the bowl does not directly touch the simmering water.
- Cook the egg white mixture over the simmering water, stirring continuously with a whisk, until all the granulated sugar has completely dissolved and the mixture reaches a temperature of 160°F (70°C). A reliable food thermometer is highly recommended for accuracy at this crucial stage. This pasteurization step makes the meringue safe to eat.
- Immediately remove the bowl with the egg white mixture from the heat. Attach the bowl to your stand mixer and, using the whisk attachment, begin whisking on medium speed for about one minute. Then, slowly increase the speed to medium-high and continue beating for approximately 10 minutes, or until stiff, glossy peaks form and the meringue feels completely cool to the touch when you briefly touch the outside of the bowl. (Please note: If you are using a hand-mixer, this whipping process may require a little more time.)
- Once the meringue has reached stiff peaks, stop the mixer and thoroughly scrape down the sides of the bowl with a rubber spatula to ensure all the meringue is incorporated.
- With the mixer running on medium speed, gradually begin adding the unsalted butter, one tablespoon at a time. Ensure that each piece of butter is fully incorporated into the meringue before adding the next piece. (Important Note: It is a very common occurrence for the buttercream to appear curdled, soupy, or separated halfway through the butter addition. Do not panic! This is normal. Simply continue adding the butter and keep mixing; it will eventually come together and become smooth.)
- Continue whisking the buttercream for about 10 more minutes until it transforms into a smooth, light, and wonderfully fluffy consistency that is easily spreadable.
- Finally, switch from the whisk attachment to a paddle attachment and add the coarse kosher salt. Beat the buttercream for about a minute until the salt is well combined and the buttercream is perfectly smooth, airy, and uniform. This step also helps remove any trapped air bubbles.
- Transfer the finished lemon Swiss meringue buttercream into a large piping bag for easy and neat application during cake assembly. A round piping tip is optional but can be helpful for creating precise borders.
To make the Lemon Curd:
- In a medium, non-reactive saucepan, whisk together the eggs, granulated sugar, fresh lemon juice, and finely grated lemon zest for about one minute until all ingredients are thoroughly combined and smooth.
- Turn the heat to low and cook the mixture, whisking constantly with a whisk or rubber spatula. Continue cooking until the mixture visibly thickens and reaches a temperature of 170°F (75°C). This process typically takes 8-10 minutes. The curd should be thick enough to coat the back of a spoon and leave a distinct trail when you run your finger across it.
- Immediately remove the saucepan from the heat to prevent overcooking. Stir in the sliced, room-temperature unsalted butter until it is completely melted and smoothly incorporated into the warm curd. The butter adds richness and a beautiful, glossy sheen.
- For an impeccably silky smooth lemon curd, place a fine-mesh sieve over a clean bowl and carefully pass the warm curd through it. This crucial step removes any tiny bits of cooked egg or larger pieces of lemon zest, resulting in a perfectly velvety-smooth consistency.
- Cover the surface of the curd directly with plastic wrap, ensuring the wrap presses down to touch the entire surface. This is essential to prevent an unsightly “skin” or film from forming as it cools. Allow the curd to cool completely at room temperature, then transfer it to the refrigerator until thoroughly chilled and ready to use, which can take several hours.
To make the Lemon Simple Syrup:
- In a small saucepan, bring 1 cup of water to a rolling boil.
- Once boiling, stir in the granulated sugar and fresh lemon juice until the sugar is completely dissolved. Continue stirring until the mixture is clear.
- Immediately remove the saucepan from the heat and allow the syrup to cool completely to room temperature before using it on your cake layers.
To assemble the cake:
- Once your baked cake is thoroughly chilled (preferably overnight), carefully slice it into three even horizontal layers. A cake leveler can be an extremely helpful tool for achieving perfectly uniform layers, which is key for a professional-looking cake.
- To secure your cake and prevent it from shifting, spread a small dollop of buttercream in the center of a cake board or your chosen serving platter. Then, carefully place your first cake layer directly on top, pressing down gently to adhere it.
- Using a pastry brush (or a clean spoon if you don’t have one), generously brush the entire top surface of this first cake layer with the cooled lemon simple syrup. Ensure every inch is moistened, as this greatly contributes to the cake’s tender texture.
- With your buttercream in a piping bag, pipe a sturdy border around the outer edge of the cake layer. This “buttercream dam” will contain the filling. Fill the center of this border with half of your homemade lemon curd, spreading it evenly within the dam.
- Pipe another layer of buttercream directly over the lemon curd. Then, use an offset spatula to gently spread and level the frosting evenly across the curd. Piping the buttercream first makes this step much easier and prevents the curd from mixing with the buttercream as you spread.
- Carefully place the second cake layer on top and repeat steps 3, 4, and 5. For the final layer, a professional trick is to place the third cake layer upside down. This provides a perfectly flat, smooth top surface with sharp edges, making it significantly easier to frost and achieve a professional finish.
- Now, apply a thin “crumb coat” of the remaining frosting to the entire cake (sides and top) to seal in any loose crumbs and create a smooth base. Chill the cake in the refrigerator for 15-20 minutes to set the crumb coat. After chilling, apply a final, thicker, and perfectly smooth layer of frosting. For a trendy “naked-style” finish, run a cake scraper along the sides to create smooth, partially exposed layers.
- Decorate your cake as desired! For a vibrant and elegant look, we recommend smearing a little extra lemon curd on top, piping elegant dollops of buttercream around it, and generously sprinkling fresh lemon zest curls. A citrus zester tool is excellent for making those beautiful, delicate zest curls. For an ultimate “wow-factor,” consider adorning your cake with homemade lemon macarons!
⭐️ Loved this recipe? Please leave a review and share your experience with us! Your feedback is greatly appreciated.
Tips & Notes
- Note 1 (Sugar for Cake): For the most delicate sponge cake texture, fine granulated sugar or caster sugar is highly recommended. These finer sugars dissolve more quickly and evenly into the egg mixture, ensuring a smoother batter and a finer crumb.
- Note 2 (Lemons Quantity): You will need approximately 6 medium to large fresh lemons in total to provide enough juice and zest for all components of this entire recipe (cake batter, lemon curd, Swiss meringue buttercream, and lemon simple syrup).
- Note 3 (Cake Flour Substitute): Cake flour is specifically called for to achieve the signature light and airy texture of this sponge cake. If you don’t have cake flour, you can easily create a DIY substitute: for every 1.5 cups of cake flour required, measure 1.5 cups of all-purpose flour. Then, remove 3 tablespoons of the all-purpose flour and replace it with 3 tablespoons of cornstarch. Sift this mixture thoroughly together (ideally twice) before incorporating it into your batter to ensure it’s well combined and aerated.
- Note 4 (Butter for Buttercream Temperature): The temperature of your unsalted butter for the Swiss meringue buttercream is crucial for success. It should be at the correct room temperature – meaning it should be cool to the touch but yield slightly when pressed gently with a finger, offering some resistance. If the butter is too soft (mushy), the buttercream may not emulsify correctly and could end up soupy or greasy. If it’s too cold, it won’t combine smoothly.
- Comprehensive Make-Ahead Tip: This layered cake is wonderfully versatile for advance preparation, making it perfect for special events! All individual components of the cake can be made up to 1 week ahead of time.
- The baked Sponge Cake layers can be wrapped tightly and frozen for up to a month in advance (thaw overnight in the fridge before use) or refrigerated for up to a week.
- The Swiss Meringue Buttercream can also be prepared and frozen for up to 3 months (thaw overnight on the counter, then re-whip until smooth and fluffy before using) or refrigerated for up to 2 weeks.
- The Lemon Curd keeps beautifully in the freezer for up to 2 months or in the refrigerator for up to 2 weeks.
- The Lemon Simple Syrup is very stable and can be made a week in advance; simply refrigerate it until you’re ready to use.
For the ultimate convenience, you can assemble the entire cake up to 1 day in advance. Store it covered in the fridge, and remember to bring it out to room temperature for approximately 1 hour prior to serving for the best flavor and texture.
Nutrition
| Nutritional Information (per serving) | |
|---|---|
| Calories: | 636 kcal |
| Carbohydrates: | 84 g |
| Protein: | 8 g |
| Fat: | 31 g |
| Sugar: | 72 g |
| Sodium: | 174 mg |
Course & Cuisine
- Course: Dessert
- Cuisine: American

Did you make this amazing lemon cake?
We’d love to hear from you! Please consider leaving a rating and sharing your feedback. Your experience helps fellow bakers!