
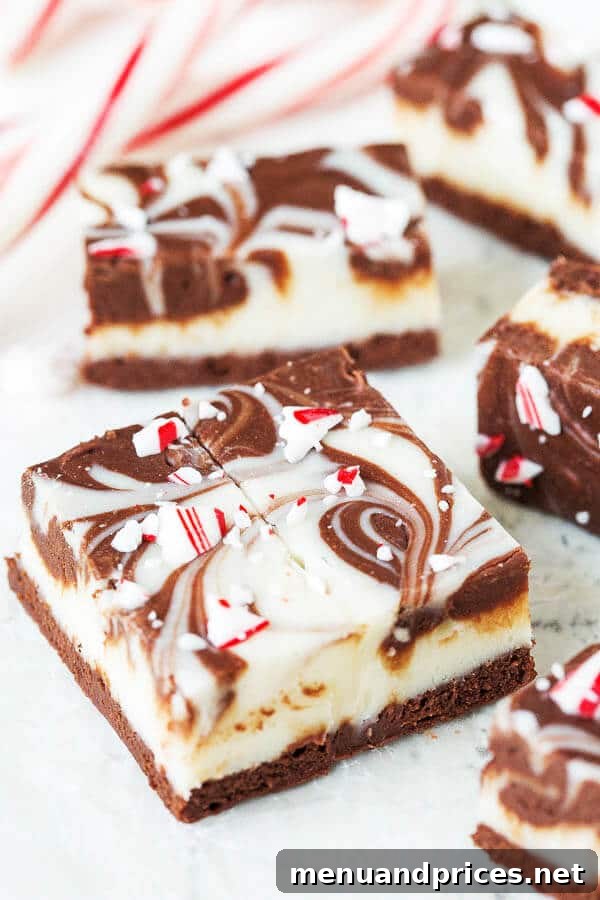
Ultimate Double Chocolate Peppermint Fudge: Your New Favorite Holiday Treat
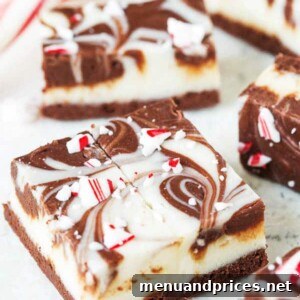
The holiday season calls for something truly special, and few treats capture the festive spirit quite like a rich, homemade fudge. This Double Chocolate Peppermint Fudge recipe is not just a dessert; it’s an experience. Imagine dense, velvety chocolate infused with a cool, minty kick, beautifully swirled with creamy white chocolate, and crowned with crunchy peppermint candy pieces. It’s the kind of treat that instantly transports you to a winter wonderland, making it an ideal edible gift to share with loved ones or a decadent addition to your own holiday spread.
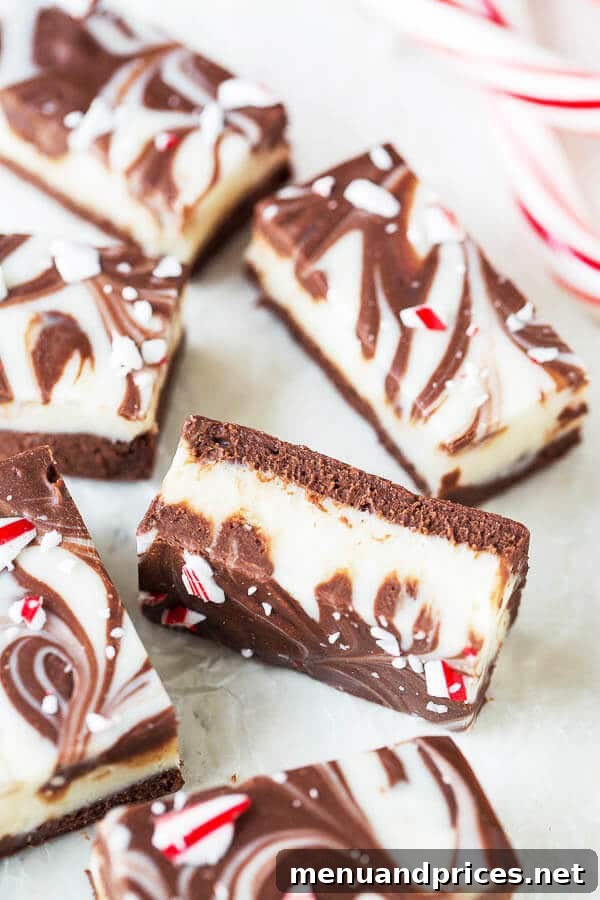
I am absolutely thrilled to share this show-stopping recipe with you. From the moment you begin to melt the chocolates and marshmallows, your kitchen will be filled with an intoxicating aroma that promises pure indulgence. Each bite of this fudge is a harmonious blend of intense chocolate, sweet creaminess, and a refreshing burst of peppermint, leaving you craving just one more piece – if you can manage to stop! Seriously, these rich bites are so incredibly decadent, you might find it challenging to eat an entire batch by yourself. And that’s perfectly fine, because they are truly meant for sharing! Whether you’re planning a festive party, searching for a thoughtful homemade gift, or simply indulging in a cozy night in, this fudge is guaranteed to be a crowd-pleaser and a highlight of your holiday baking.
Why This Double Chocolate Peppermint Fudge is a Must-Make This Season
This recipe isn’t just another fudge; it’s a celebration of flavors and textures designed to impress with minimal effort. Here’s what makes our Double Chocolate Peppermint Fudge truly stand out:
- Unbelievably Rich Flavor: We’re talking about a double dose of chocolate – deep, bittersweet chocolate paired with smooth, sweet white chocolate. This combination creates a complex flavor profile that satisfies even the most discerning chocolate lover. The bittersweet chocolate provides a robust base, perfectly balancing the sweetness from the marshmallows and condensed milk, while the white chocolate adds a creamy, gentle sweetness that harmonizes beautifully.
- Perfectly Balanced Peppermint: The inclusion of peppermint extract and crushed candy canes adds a vibrant, cooling sensation that perfectly complements the rich chocolate without overpowering it. It’s the quintessential holiday flavor, evoking memories of festive joy and warmth. The subtle minty freshness cuts through the richness, creating an addictive contrast that makes each bite a delight.
- Decadently Smooth Texture: Thanks to the magical combination of mini marshmallows and sweetened condensed milk, this fudge boasts a wonderfully creamy, melt-in-your-mouth texture that’s simply irresistible. It’s not grainy or crumbly; instead, it offers a silky-smooth mouthfeel that makes it truly luxurious.
- Eye-Catching Swirl Design: The two distinct chocolate layers, artfully swirled together, create a stunning visual effect that makes this fudge look incredibly professional and gourmet. It’s a beautiful addition to any dessert platter and significantly enhances its appeal as a gift, proving that homemade treats can be both delicious and visually spectacular.
- Surprisingly Easy to Make: Despite its impressive appearance and gourmet taste, this fudge is incredibly straightforward and foolproof. With a few key ingredients and the simple technique of a double boiler, you’ll be on your way to fudge perfection in under an hour of active preparation time. It requires no baking, making it a stress-free option for busy holiday schedules.
- Ideal for Gifting: Homemade fudge is one of the most cherished holiday gifts. These festive bites are easy to package beautifully in decorative boxes or tins and shared with friends, family, neighbors, and colleagues. They are a thoughtful, personal, and undeniably delicious gesture that everyone will appreciate and remember.
While the recipe is pretty straightforward, there is one crucial step to master for the most beautiful outcome: working quickly when layering the chocolates. To achieve that stunning swirled look, you’ll want to pour the white chocolate layer over the dark chocolate layer before it fully sets. It might feel like an extra step, and a bit of a race against time, but trust me, the resulting marbled effect is absolutely worth the minor rush! As someone who appreciates beautiful food as much as delicious food, those elegant swirls are definitely a highlight for me. Just like a beautiful painting, food that looks good often tastes even better, adding an extra layer of enjoyment to your culinary creations.
And let’s not forget those crushed peppermint candy canes on top! They’re not just a garnish; they add a delightful textural contrast that elevates the entire experience. Many people wonder if sharp candies like these are truly enjoyable with soft, creamy confections. I often had the same thought! They seem so sharp, right? But I can assure you, they not only melt beautifully in your mouth but also add a pleasant, subtle crunch to each bite, without being unpleasantly sharp. The vibrant red and white bits also contribute to the overall festive aesthetic, making each piece a tiny work of art.
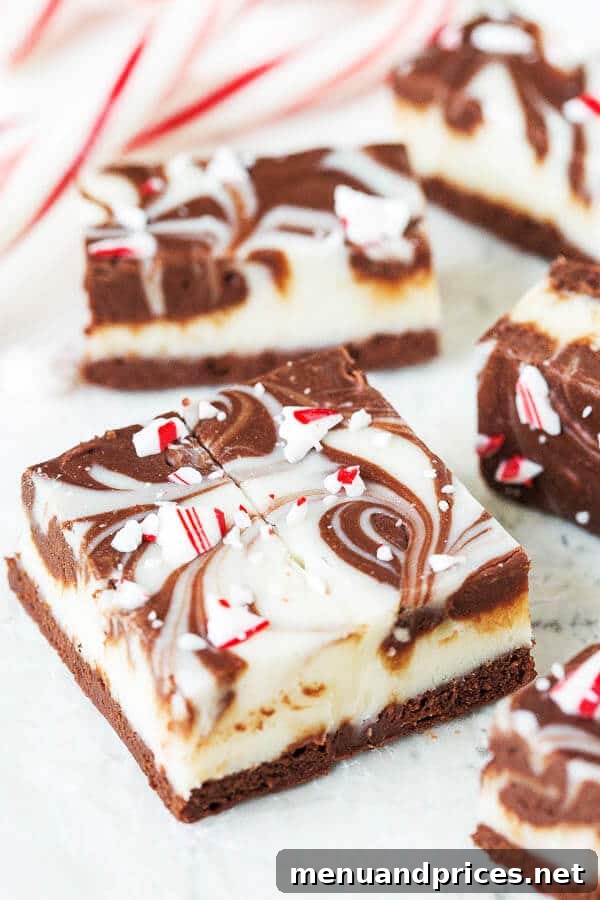
Ingredients You’ll Need for This Indulgent Fudge
Gathering your ingredients is the first step to creating this magical holiday fudge. Each component plays a vital role in achieving the perfect flavor and texture. For the best results, use good quality ingredients.
Double Chocolate Peppermint Fudge
Shinee Davaakhuu
30
10
2 40
32 pieces
Comment
Print Recipe
Ingredients
- 1 tablespoon unsalted butter for greasing the pan
- 1-2 peppermint candy canes crushed, for topping
- 2 cups mini marshmallows (approximately 120gr)
- 1 can sweetened condensed milk (14oz/400gr)
- 1 teaspoon pure vanilla extract
- 6 oz bittersweet chocolate (170gr), finely chopped
- 6 oz white chocolate (170gr), finely chopped
- ½ teaspoon peppermint extract
Step-by-Step Instructions to Craft Your Peppermint Fudge
Creating this stunning fudge is a delightful process. Follow these steps carefully for the best results, paying special attention to the timing for the perfect swirl. Gather all your ingredients and equipment before you begin, as the process requires efficiency.
Instructions
-
Prepare Your Pan: Line an 8×8 inch (20×20 cm) baking pan with aluminum foil, ensuring enough overhang on all four sides to easily lift the fudge out later. Generously butter the bottom and sides of the foil-lined pan. This crucial step prevents sticking and makes for effortless removal and clean-up.
-
Crush Peppermint Candy Canes: Place the peppermint candy canes into a sturdy ziplock bag. Using a rolling pin, the bottom of a heavy pan, or the flat side of a meat mallet, gently but firmly crush the candies into small, uneven pieces. Avoid pulverizing them into a powder; aim for small, delightful chunks. Set these aside for garnishing at the very end.
-
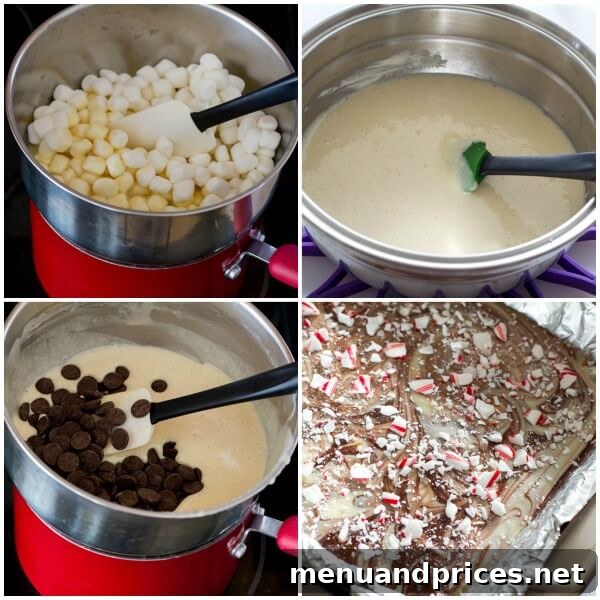
Set Up Double Boiler: Prepare a double boiler: Fill a medium-sized saucepan with about an inch or two of water and bring it to a gentle simmer over medium-low heat. Place a large, heat-proof bowl over the simmering water, ensuring the bottom of the bowl does not touch the water.
-
Melt Base Ingredients: In the top bowl of your double boiler, combine the mini marshmallows, sweetened condensed milk, and pure vanilla extract. Allow these ingredients to warm and begin melting over the simmering water, stirring frequently with a heat-proof spatula or whisk. Continue stirring until the mixture is completely smooth and well combined, which should take approximately 10 minutes. The consistency should be thick, glossy, and free of any lumps.
-
Divide for White Chocolate: Once the marshmallow base is perfectly smooth and uniformly melted, carefully remove the bowl from the double boiler. Immediately pour about half of this hot mixture into a separate heat-proof bowl. To this half, add the finely chopped white chocolate. Do not stir yet; simply set this bowl aside while you work on the dark chocolate layer.
-
Create Dark Chocolate Layer: Return the remaining half of the marshmallow mixture (still in its original bowl) back over the double boiler. Add the finely chopped bittersweet chocolate to this mixture. Stir continuously with your spatula until the bittersweet chocolate is fully melted and thoroughly incorporated, resulting in a smooth, rich, dark chocolate mixture. Remove from heat immediately once smooth.
-
Pour Dark Chocolate Base: Quickly pour most of the dark chocolate mixture into your prepared 8×8 inch baking pan, spreading it evenly with your spatula to form the base layer. Work efficiently, as the fudge will begin to set as it cools. Reserve a few tablespoonfuls of this dark chocolate mixture in a small bowl for the swirling effect later.
-
Prepare White Chocolate Peppermint Layer: Now, quickly place the bowl containing the reserved marshmallow mixture and white chocolate (from step 5) back over the double boiler. Add the peppermint extract. Stir continuously until the white chocolate is completely melted and the mixture is smooth and glossy. The refreshing peppermint aroma will fill your kitchen!
-
Layer White Chocolate: Immediately and carefully pour the warm white chocolate peppermint mixture over the dark chocolate layer in the pan. Distribute it as evenly as possible using your spatula, ensuring it covers the dark chocolate layer.
-
Add Reserved Dark Chocolate Drops: Take the few reserved tablespoonfuls of dark chocolate mixture (from step 7) and drop small dollops strategically over the white chocolate layer. These will be the contrasting elements for your swirl.
-
Create the Swirl: Using a toothpick, butter knife, or a thin skewer, gently swirl the dark and white chocolate mixtures together. Drag your tool through the layers in a figure-eight or circular motion to create elegant patterns. Be careful not to overmix, or the colors will blend too much, losing the distinct swirl effect. Aim for a beautiful marbled design.
-
Garnish and Set: Generously sprinkle the crushed peppermint candy canes evenly over the entire surface of the swirled fudge. Lightly press them into the surface with your hand or the back of a spoon to ensure they adhere and don’t fall off when cut.
-
Cool and Serve: Let the fudge cool completely at room temperature for several hours, allowing it to firm up. For best results and the cleanest cuts, ideally chill it in the refrigerator overnight until fully set and firm. Once firm, use the foil overhang to carefully lift the fudge from the pan. Peel away the foil, and with a sharp, warm knife, cut the fudge into small, bite-sized pieces. Serve and enjoy this festive treat!
Expert Tips for Fudge Perfection
To ensure your Double Chocolate Peppermint Fudge turns out absolutely perfect every time, keep these helpful tips in mind:
- Quality Ingredients Matter: While this recipe is forgiving, using good quality chocolate (both bittersweet and white) will significantly enhance the overall flavor and texture of your fudge. High-quality chocolate melts smoother and provides a richer taste.
- Double Boiler is Key: Melting chocolate and marshmallows gently over a double boiler prevents scorching and ensures a smooth, lump-free consistency. If you don’t have a traditional double boiler, you can easily create a makeshift one by placing a heatproof bowl snugly over a pot of simmering water, ensuring the bowl’s bottom does not touch the water.
- Work Quickly for Swirls: The most important tip for achieving that stunning marbled effect is speed. Have all your ingredients prepped, measured, and ready to go. Once you start melting the base mixture, move efficiently between creating the dark and white chocolate layers before they begin to set too much.
- Don’t Overmix the Swirls: A few gentle passes with a toothpick or knife are usually enough to create beautiful swirls. Too much mixing will cause the colors to blend completely into a less appealing, muddy brown or off-white. Less is often more for elegant marbling.
- Achieving Clean Cuts: For perfectly neat squares, ensure your fudge is thoroughly chilled and firm before cutting. Use a very sharp knife that has been run under hot water and wiped clean between each cut. This technique helps to prevent sticking and yields clean, professional-looking pieces.
- Adjust Peppermint to Taste: The recipe calls for ½ teaspoon of peppermint extract, which provides a refreshing kick that complements the chocolate. However, if you prefer a milder or a stronger mint flavor, you can adjust the amount slightly to suit your preference. Always taste a tiny bit of the peppermint mixture before adding it to the full batch if you’re experimenting.
How to Store Your Delicious Peppermint Fudge
This fudge keeps beautifully, making it an excellent make-ahead treat for the busy holiday season. Proper storage will ensure it stays fresh and delicious for an extended period:
- Room Temperature: For immediate enjoyment, store your fudge in an airtight container at cool room temperature for up to one week. If stacking layers, place parchment paper or wax paper between them to prevent sticking. Keep it away from direct sunlight or heat sources.
- Refrigerator: For longer storage, keep the fudge in an airtight container in the refrigerator for up to 2-3 weeks. Chilling the fudge helps it maintain its firmness and extends its shelf life. For the best texture, allow it to come to room temperature for about 15-20 minutes before serving.
- Freezer: Fudge freezes exceptionally well, making it perfect for preparing far in advance. Wrap individual pieces or blocks tightly in plastic wrap, then place them in a freezer-safe airtight container or heavy-duty freezer bag. It can be frozen for up to 3 months. Thaw frozen fudge in the refrigerator overnight or at room temperature for a few hours before serving.
Variations to Try
While this Double Chocolate Peppermint Fudge recipe is perfect as is, feel free to unleash your creativity with these delicious variations and additions:
- Chocolate Chip Swirl: Instead of using bittersweet chocolate bars, you can substitute them with good quality milk chocolate or semi-sweet chocolate chips for a slightly milder or sweeter chocolate flavor. Ensure they are finely chopped or melt well.
- Add Nuts: For an added layer of texture and a nutty depth, fold in about ½ cup of toasted chopped pecans or walnuts into the dark chocolate layer before pouring it into the pan.
- Dark Chocolate Only: If you prefer a more intense, singular chocolate experience, you can omit the white chocolate layer entirely. Simply double the amount of bittersweet chocolate and peppermint extract for a robust dark chocolate peppermint fudge.
- Colorful Sprinkles: For an even more whimsical and festive look, consider adding some holiday-themed sprinkles (like red, green, and white nonpareils or jimmies) along with the crushed candy canes. This is especially fun for treats made with children.
- Other Extracts: If peppermint isn’t your favorite, or you want to try something new, experiment with other extracts. Almond extract for an almond chocolate fudge, orange extract for a chocolate orange twist, or even a touch of rum extract can create entirely different, yet equally delicious, flavor profiles.
Frequently Asked Questions (FAQ)
- Can I use chocolate chips instead of chopped chocolate bars?
- Yes, you can certainly use chocolate chips! Just make sure to use good quality chocolate chips for the best melting and flavor. Keep in mind that chocolate chips sometimes contain stabilizers that can make them melt a bit differently than chopped bar chocolate, but they will still work well for this fudge recipe.
- My fudge didn’t set properly. What might have gone wrong?
- The most common reasons for fudge not setting are incorrect ingredient measurements or not heating the marshmallow and condensed milk mixture long enough. Ensure you use the exact amounts specified in the recipe, and stir the base mixture until it is thoroughly smooth, thick, and well combined before adding the chocolates.
- How do I achieve a clean, distinct swirl effect?
- The key to a beautiful swirl is to work quickly once both chocolate layers are ready. Pour one layer, then the other, and immediately drop the reserved contrasting chocolate. Then, use a thin utensil like a chopstick, skewer, or the tip of a butter knife to gently drag through the layers a few times. Avoid overmixing; you want distinct ribbons, not a fully blended color.
- Can I make this fudge in a larger pan?
- Yes, you can absolutely make this fudge in a 9×13 inch pan if you prefer. Using a larger pan will result in thinner fudge pieces, which some people prefer. Just be aware that the setting time might be slightly adjusted due to the reduced thickness, possibly firming up a bit faster.
- Is this fudge truly considered “no-bake”?
- Technically, since the ingredients are melted over a double boiler, it involves a heat source, so it’s not strictly “no-bake” in the sense of requiring no heat at all. However, it doesn’t require an oven for baking, making it a much simpler and quicker alternative to traditional baked goods, often referred to as a “stovetop no-bake” dessert.
⭐️ Loved this recipe?
Please leave a review and let us know how you liked it! Your feedback helps others discover delicious treats.
Tips & Notes
Nutrition Information (per piece, based on 32 servings)
80kcal
10g
1g
4g
8g
9mg
Dessert, Sweet Treat, Holiday Sweet
American
Christmas, Holidays, Winter Gatherings

Did you make this?
Leave a rating and your feedback. Thank you!
Conclusion: Sweeten Your Season with Homemade Fudge
I truly hope I’ve convinced you to make this spectacular Double Chocolate Peppermint Fudge for your upcoming holiday treat tray. It’s a recipe that promises joy, deliciousness, and a touch of homemade magic that will impress everyone who tries it. Whether you’re a seasoned baker looking for a new festive favorite or a beginner eager to create something impressive with minimal fuss, you’ll find this recipe surprisingly easy and incredibly rewarding. The harmonious blend of rich chocolate, refreshing peppermint, and that gorgeous visual swirl make it an unforgettable treat that will undoubtedly be a hit with everyone who samples it. It’s a perfect way to celebrate the season, share some sweetness, and create lasting memories.
So, gather your ingredients, set aside a little time in your kitchen, and treat yourself and your loved ones to the ultimate festive indulgence. You truly won’t regret the effort once you taste these delightful, melt-in-your-mouth pieces of holiday cheer! Have a wonderful season filled with delicious treats and cherished moments. Thanks for stopping by and happy baking!
This recipe was originally published on December 5th, 2014, and has been updated for clarity, SEO, and an enhanced user experience.