

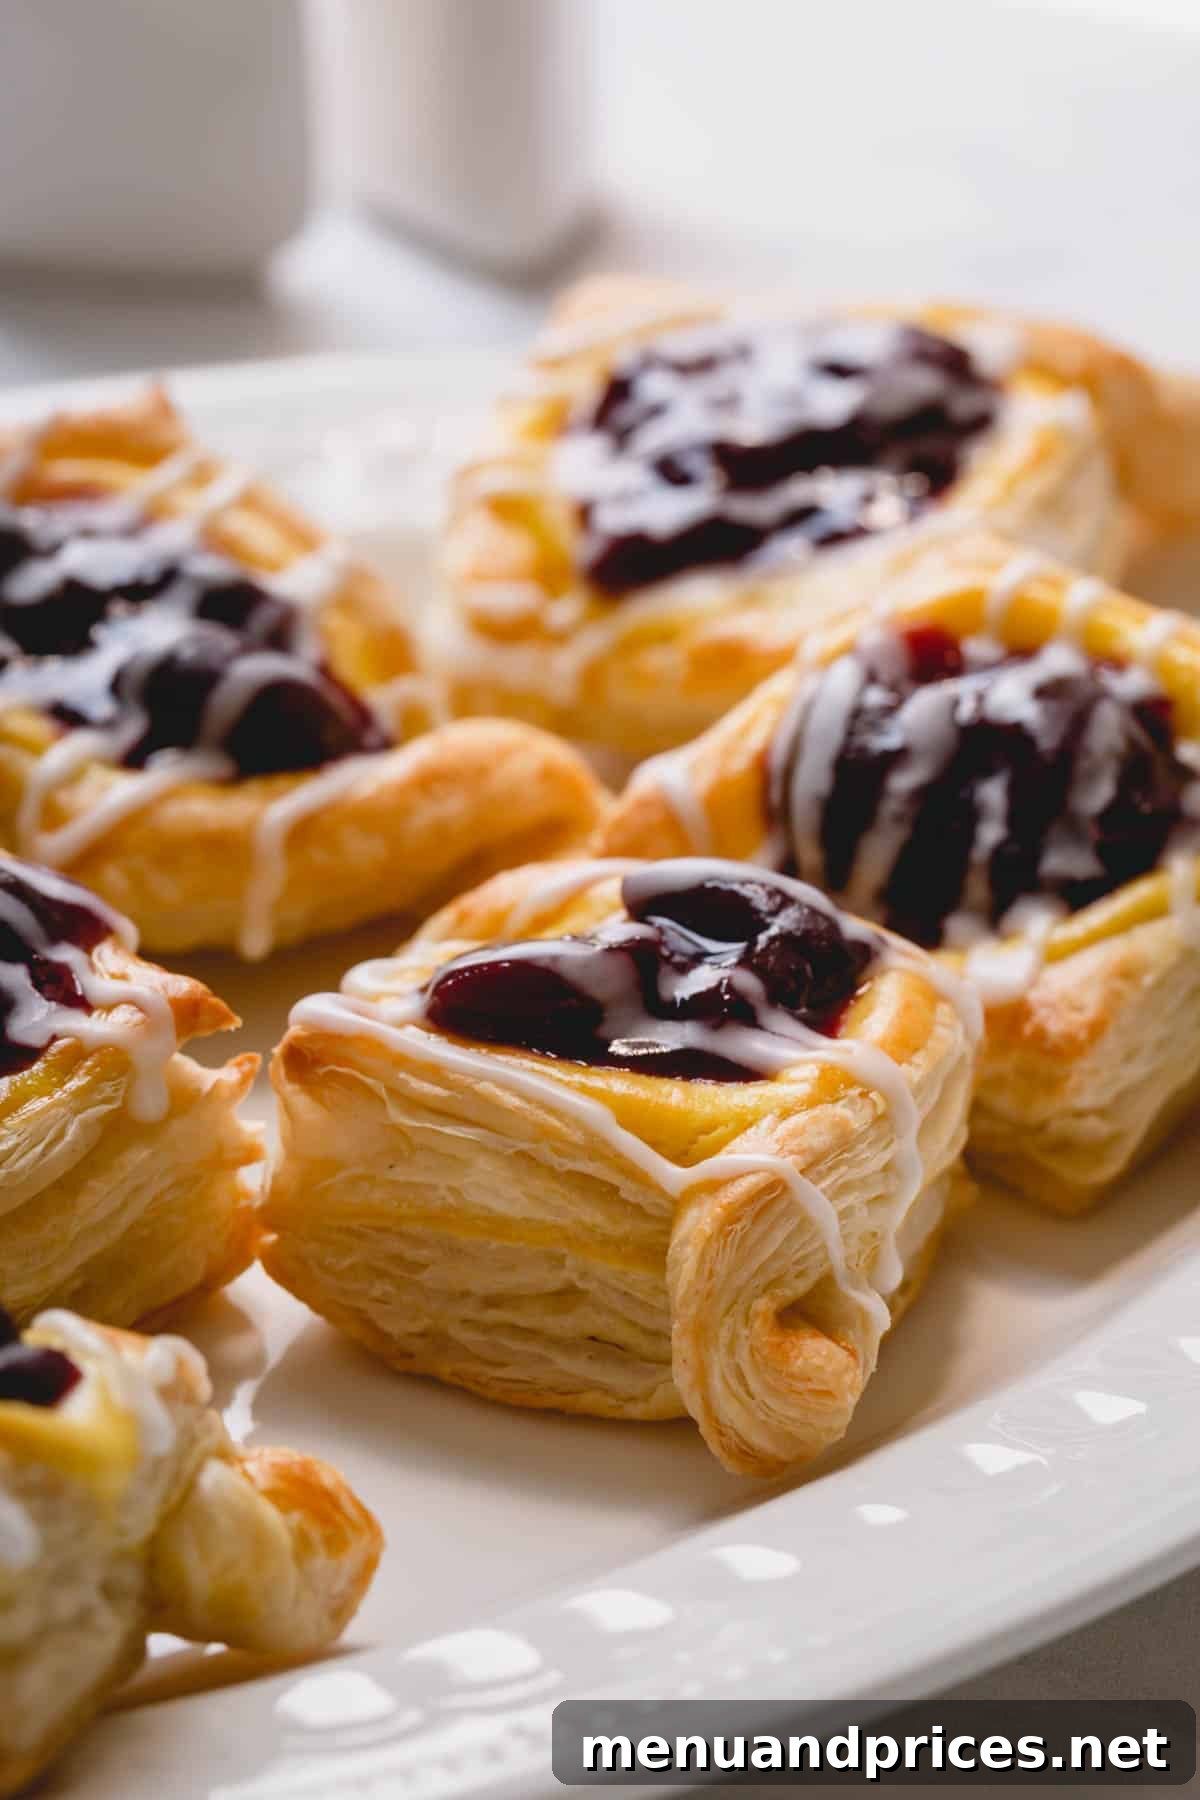
Unlock the secret to making mouth-watering, bakery-worthy cherry cheese danishes right in your own kitchen! With just nine simple ingredients and an active preparation time of about 30 minutes, you can create these delightful pastries that are sure to impress. Featuring a golden, flaky puff pastry crust, a rich and tangy cream cheese filling, and a luscious cherry pie topping, all finished with a sweet sugar glaze, these danishes offer a perfect balance of textures and flavors. Get ready to indulge in a treat that will leave everyone asking for more!

Why You’ll Fall in Love with This Easy Cherry Danish Recipe
There’s something truly special about a freshly baked danish – the irresistible aroma, the delicate layers, and the burst of sweet and tangy flavors. While many associate danishes with intricate bakery creations, this recipe proves that a homemade version can be just as magnificent, and surprisingly simple to achieve. As a fan of all things cherry-flavored, from chocolate cherry dump cake to classic cherry pie and elegant cherry chocolate pavlova, I can confidently say that these cherry cheese danishes offer one of the most delightful ways to enjoy this vibrant summer fruit. They seamlessly transition from a sophisticated breakfast pastry, perfect with a cup of coffee or tea, to an exquisite dessert that satisfies any sweet craving.
Beyond their incredible taste, here’s why this particular homemade cherry cheese danish recipe stands out:
- Effortlessly Quick: From start to finish, this recipe comes together in approximately 30 minutes of active prep time. This efficiency makes it ideal for busy mornings, last-minute brunch preparations, or when you simply need a quick, impressive dessert. You’ll spend more time anticipating than actual hands-on cooking!
- Remarkably Easy: The secret to its simplicity lies in using pre-made puff pastry. This clever shortcut eliminates the arduous process of making dough from scratch, transforming a seemingly complex pastry into a breeze for even novice bakers. If you can cut, fold, and fill, you can make these danishes!
- Irresistible Texture: Prepare for a sensory delight! Each danish boasts a wonderfully crisp and flaky exterior that shatters with every bite, revealing a soft, creamy center. The sweet, smooth glaze melts delicately on your tongue, adding another layer of indulgence that contrasts beautifully with the tart cherries.
- Generous Yield: Each batch of this recipe yields a substantial 18 cherry danishes. This generous quantity makes it perfect for feeding a hungry crowd at family gatherings, contributing to bake sales, hosting brunches, or simply ensuring you have enough to savor throughout the week (if they last that long!).
- Versatile Delight: While traditionally served as a breakfast or brunch item, their sweet and luxurious profile makes them equally suitable as an elegant dessert. Pair them with fresh fruit, a dollop of whipped cream, or a scoop of vanilla ice cream for an elevated experience that will impress any guest.
Whether you’re looking for a delightful morning treat or a simple yet impressive dessert, these homemade cherry cheese danishes are a guaranteed crowd-pleaser that delivers on both flavor and convenience.
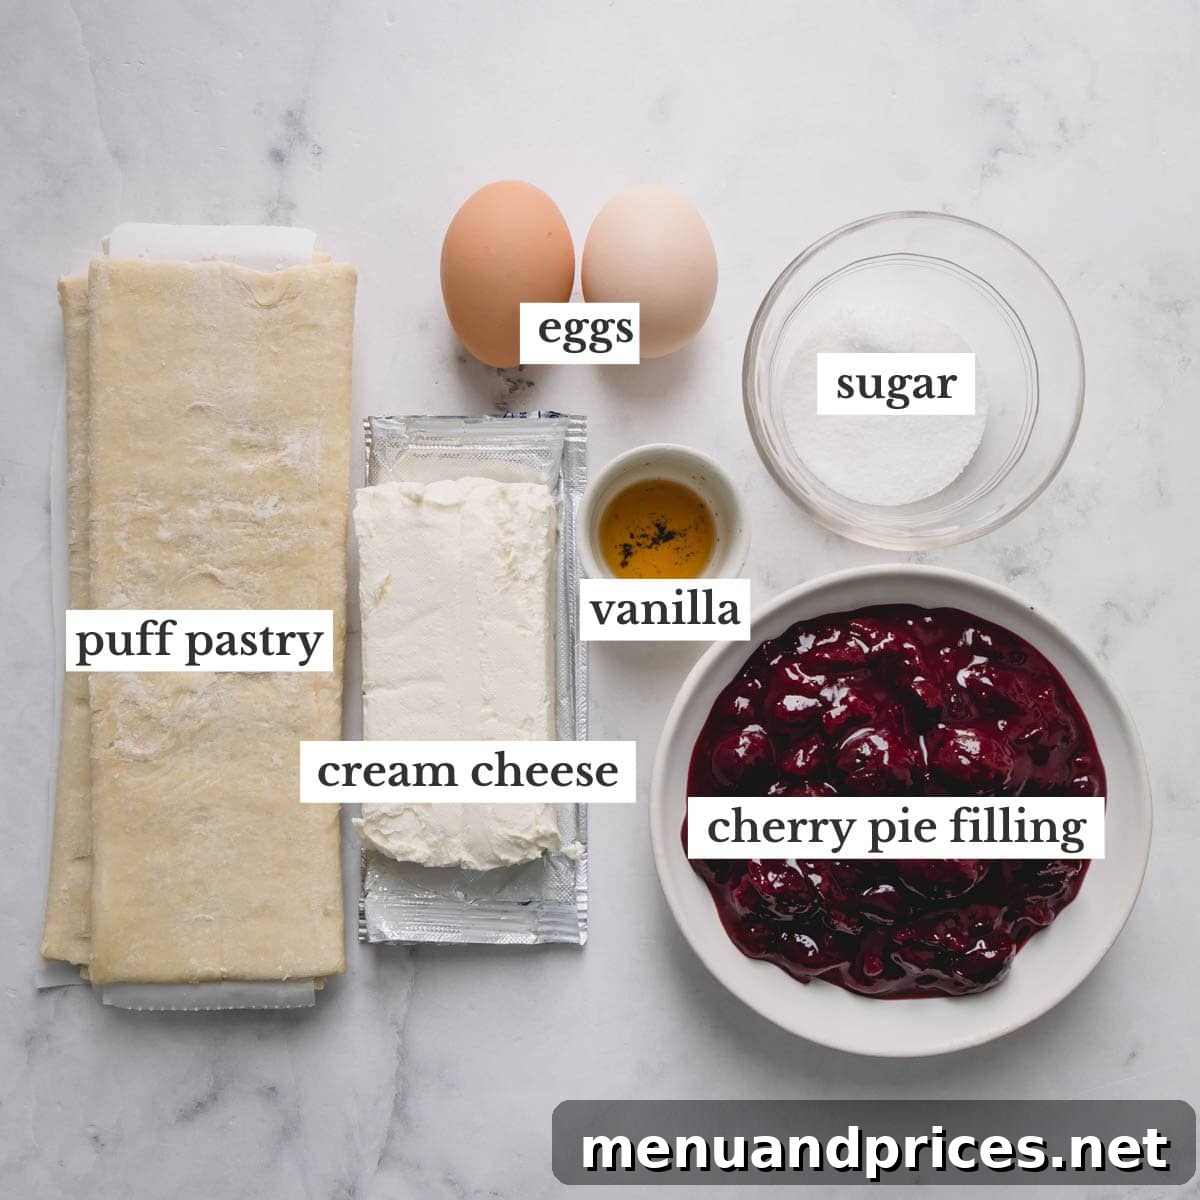
Key Ingredients for Your Perfect Cherry Cheese Danish
Crafting exceptional cherry cheese danishes starts with understanding the role of each key ingredient. While the list is short and sweet, each component plays a vital part in achieving that iconic bakery-quality taste and texture. Here’s a closer look at what you’ll need to gather:
- Cream Cheese: This is the heart of your rich, tangy, and smooth filling. For the best results, always opt for full-fat, brick-style cream cheese. It’s absolutely essential that it’s softened to room temperature before mixing; this ensures a perfectly smooth, lump-free consistency that holds its shape beautifully during baking. Avoid low-fat or whipped cream cheese, as they will not provide the desired structure or richness.
- Puff Pastry: The magic behind the flaky, golden layers of your danish! You can find this convenient ingredient in the frozen dessert or freezer aisle of most grocery stores. Using pre-made puff pastry is the ultimate shortcut, transforming a potentially time-consuming recipe into an incredibly quick and easy one. Ensure it’s properly thawed before use, but kept cold enough to handle without becoming sticky.
- Cherry Pie Filling: This provides the vibrant fruit component and sweet-tart flavor that complements the cream cheese so well. Store-bought cherry pie filling is perfectly acceptable for convenience and consistent results. However, if you’re feeling ambitious and have fresh cherries on hand, you can absolutely make your own cherry filling from scratch. Adjust the sweetness to your preference if preparing it homemade.
- Powdered Sugar: Crucial for the delicate, drizzly sugar glaze that adds the final touch of sweetness and an elegant finish. Also known as confectioners’ sugar, powdered sugar dissolves easily and creates that smooth, non-gritty consistency required for a perfect glaze. Do not substitute with granulated sugar for the glaze, as it will remain grainy.
- Eggs: You’ll need two large eggs, divided for different purposes in this recipe. One egg is incorporated into the cream cheese filling to add richness and help the filling set during baking. The remaining egg, whisked with a little water, forms the egg wash. This egg wash is vital for giving the puff pastry its beautiful golden sheen and helping the folded edges seal and adhere, ensuring your danishes maintain their elegant shape and don’t unravel.
- Granulated Sugar: A small but important amount of granulated sugar is used to sweeten the cream cheese filling. It balances the natural tanginess of the cream cheese and complements the sweetness from the cherry topping, creating a harmonious flavor profile.
- Pure Vanilla Extract: A touch of high-quality pure vanilla extract enhances the overall flavor profile of the cream cheese filling, adding a warm, aromatic depth that pairs wonderfully with both the cherry and the buttery pastry. It’s a subtle but essential ingredient for that bakery-quality taste.
- Coarse Kosher Salt: Just a pinch of coarse kosher salt in the cream cheese filling is a flavor enhancer. It helps to brighten and balance all the other flavors, preventing the danish from tasting overly sweet and instead bringing out the best qualities in each ingredient.
Pro Tip for Customization
While cherry pie filling is a timeless and beloved choice for danishes, feel free to unleash your culinary creativity! This recipe is incredibly versatile and works wonderfully with virtually any other fruit pie filling you enjoy. Imagine the delightful possibilities with vibrant strawberry, sweet blueberry, classic apple, or even a summery peach pie filling. Don’t hesitate to experiment with your favorite fruit combinations to discover your signature danish flavor!
Step-by-Step Guide: How to Make Homemade Cherry Cheese Danishes
Creating these impressive cherry cheese danishes is easier than you might think, thanks to the convenience of store-bought puff pastry. Follow these detailed steps precisely to ensure a perfect, flaky, and deliciously filled result every single time. It’s always a good practice to read through all instructions before you begin your baking journey!
1. Prepare the Cream Cheese Filling and Puff Pastry
- Preheat and Prep Your Baking Area: Begin by preheating your oven to a precise 375°F (190°C). This crucial step ensures the puff pastry bakes correctly and puffs up beautifully. As the oven heats, line two large baking sheets with parchment paper. This simple step prevents sticking and makes cleanup an absolute breeze after baking.
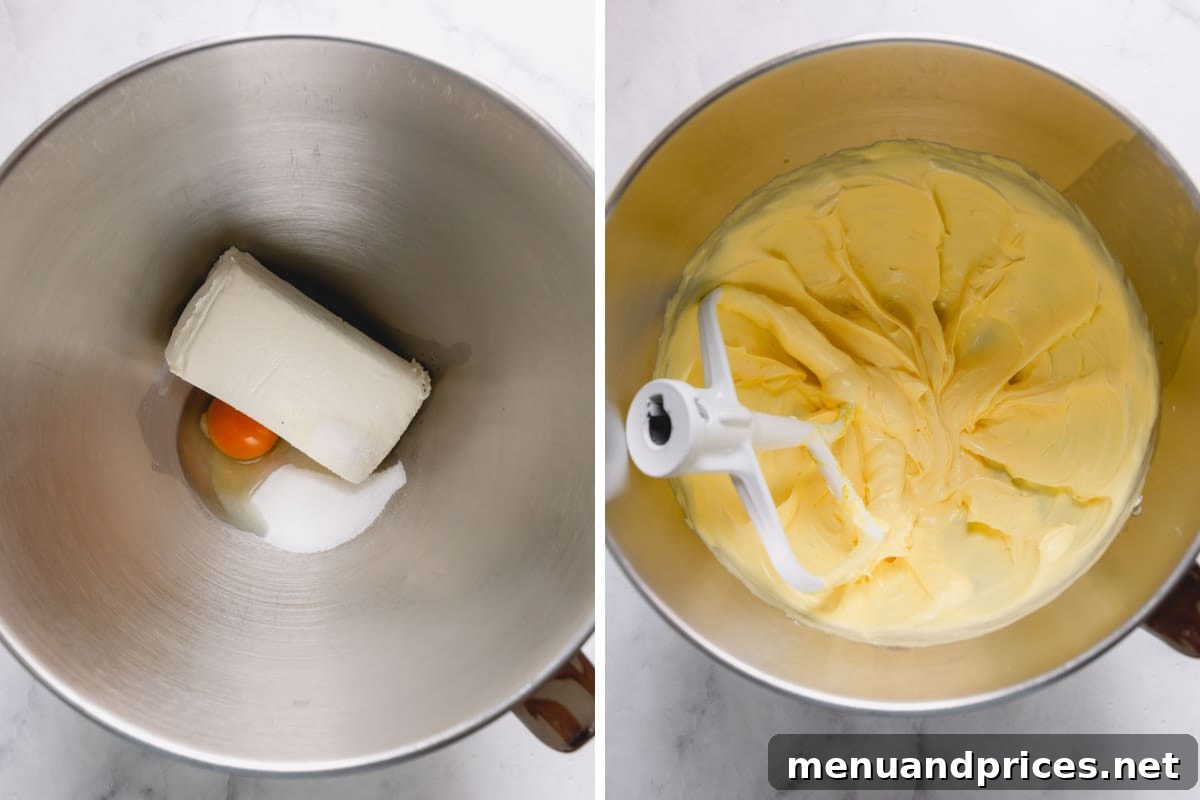
- Craft the Cream Cheese Filling: In a spacious mixing bowl, combine the softened, room-temperature cream cheese, granulated sugar, one of the large eggs, pure vanilla extract, and coarse kosher salt. If you have a stand mixer, use it with a paddle attachment for optimal results. Alternatively, a hand mixer works just as well. Beat these ingredients together on medium speed for about 30 seconds, or until the mixture is completely smooth, creamy, and free of any lumps. Remember to pause and scrape down the sides of the bowl as needed to ensure all ingredients are thoroughly incorporated.
- Prepare the Egg Wash: In a separate, small bowl, crack the remaining large egg and whisk it vigorously with ½ tablespoon of water until well combined. This mixture forms your essential egg wash, which will give the puff pastry its beautiful golden-brown color and a subtle shine, as well as acting as an adhesive for folding.
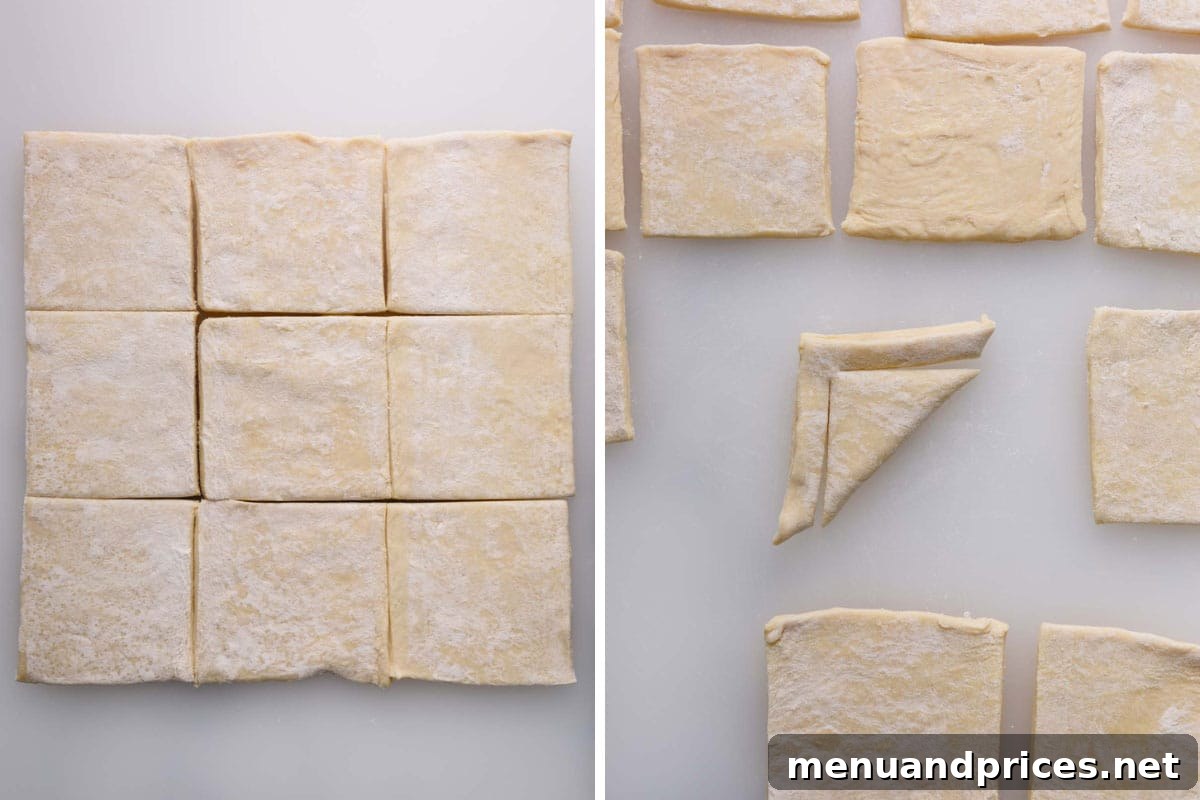
- Cut the Puff Pastry Squares: Carefully unroll each sheet of thawed puff pastry onto a lightly floured surface or a piece of parchment paper. Using a sharp knife or a pizza cutter, cut each puff pastry sheet into 9 equal squares. From the two sheets, you should now have a total of 18 perfectly sized squares, ready for shaping.
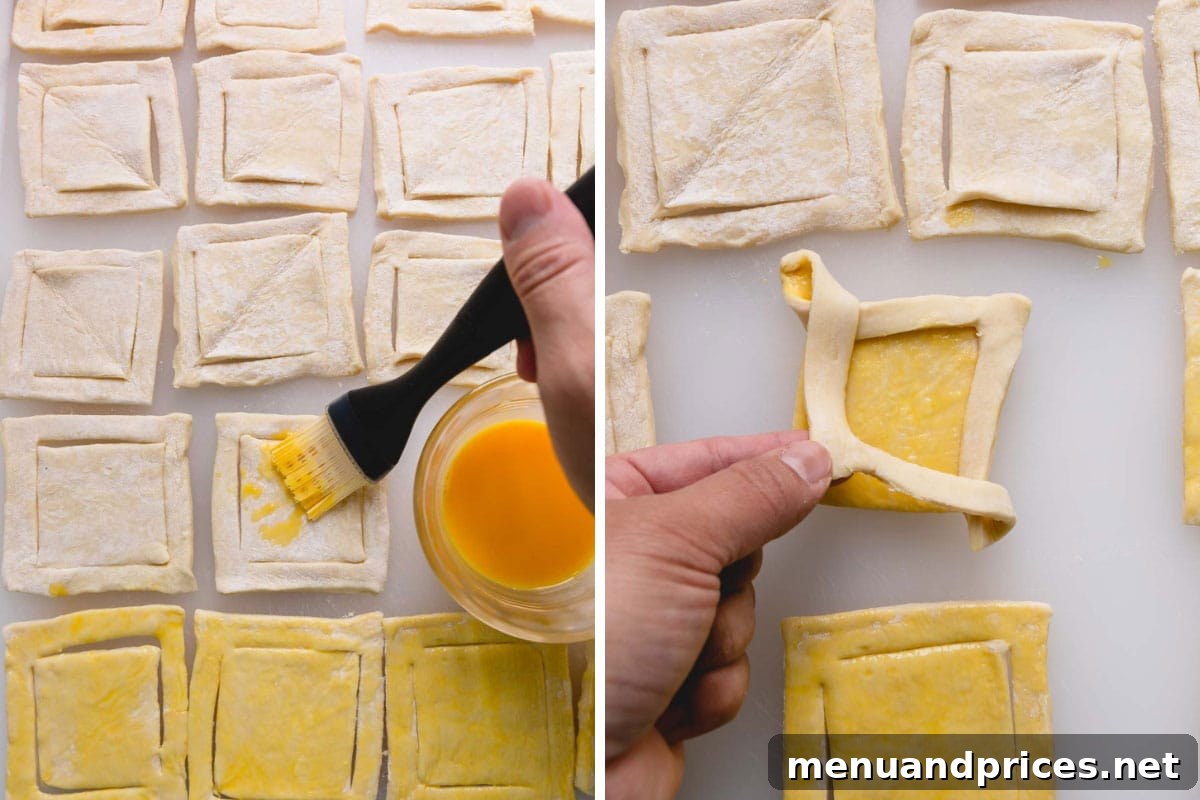
- Shape the Danish Base: This is a key step for creating the classic danish shape. Take each puff pastry square and fold it in half diagonally to form a neat triangle. Along the two open (uncut) sides of this triangle, make ½-inch cuts inwards from the edges. It is critically important to stop your cuts just before you reach the very top corner (the folded point) of the triangle. You must leave this corner attached; otherwise, your danishes will fall apart during the folding and baking process.
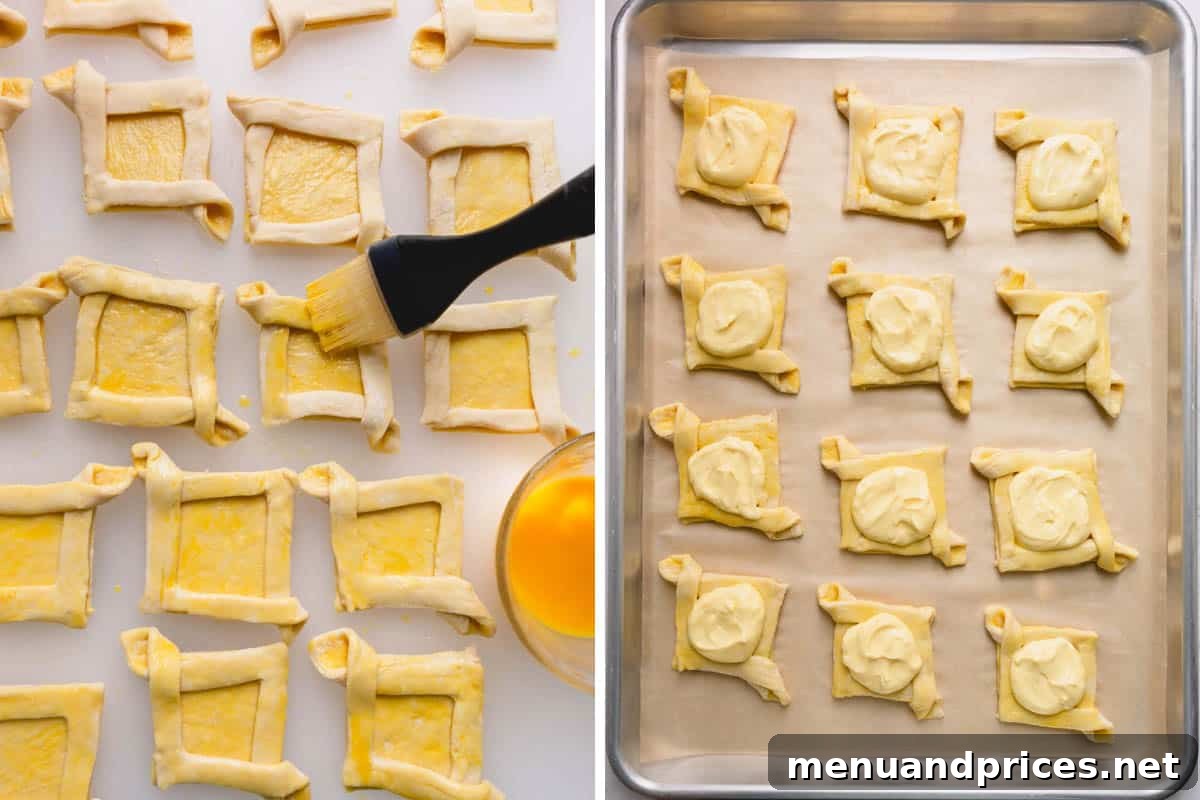
- Brush and Fold the Pastry: Gently unfold each pastry square back into its original square shape. Using a pastry brush, generously coat the entire surface of each square with the prepared egg wash. Now, carefully take the two cut corners (which are diagonally opposite each other) and fold them inwards, overlapping slightly in the center. Gently press them down to adhere firmly. Brush a little more egg wash over these newly folded edges to help them seal securely. This technique creates a beautiful raised border around the center of each danish, forming a perfect pocket to hold your delicious filling.
- Fill the Pastries with Cream Cheese: Carefully arrange your newly shaped pastries onto the prepared baking sheets, ensuring you leave ample space between each danish for expansion during baking. Next, evenly divide the smooth cream cheese mixture, dolloping approximately 2 tablespoons into the center of each pastry square. It’s crucial not to overfill, as this can cause the rich filling to bubble over and potentially burn during baking. Aim for a level, contained mound of cream cheese.
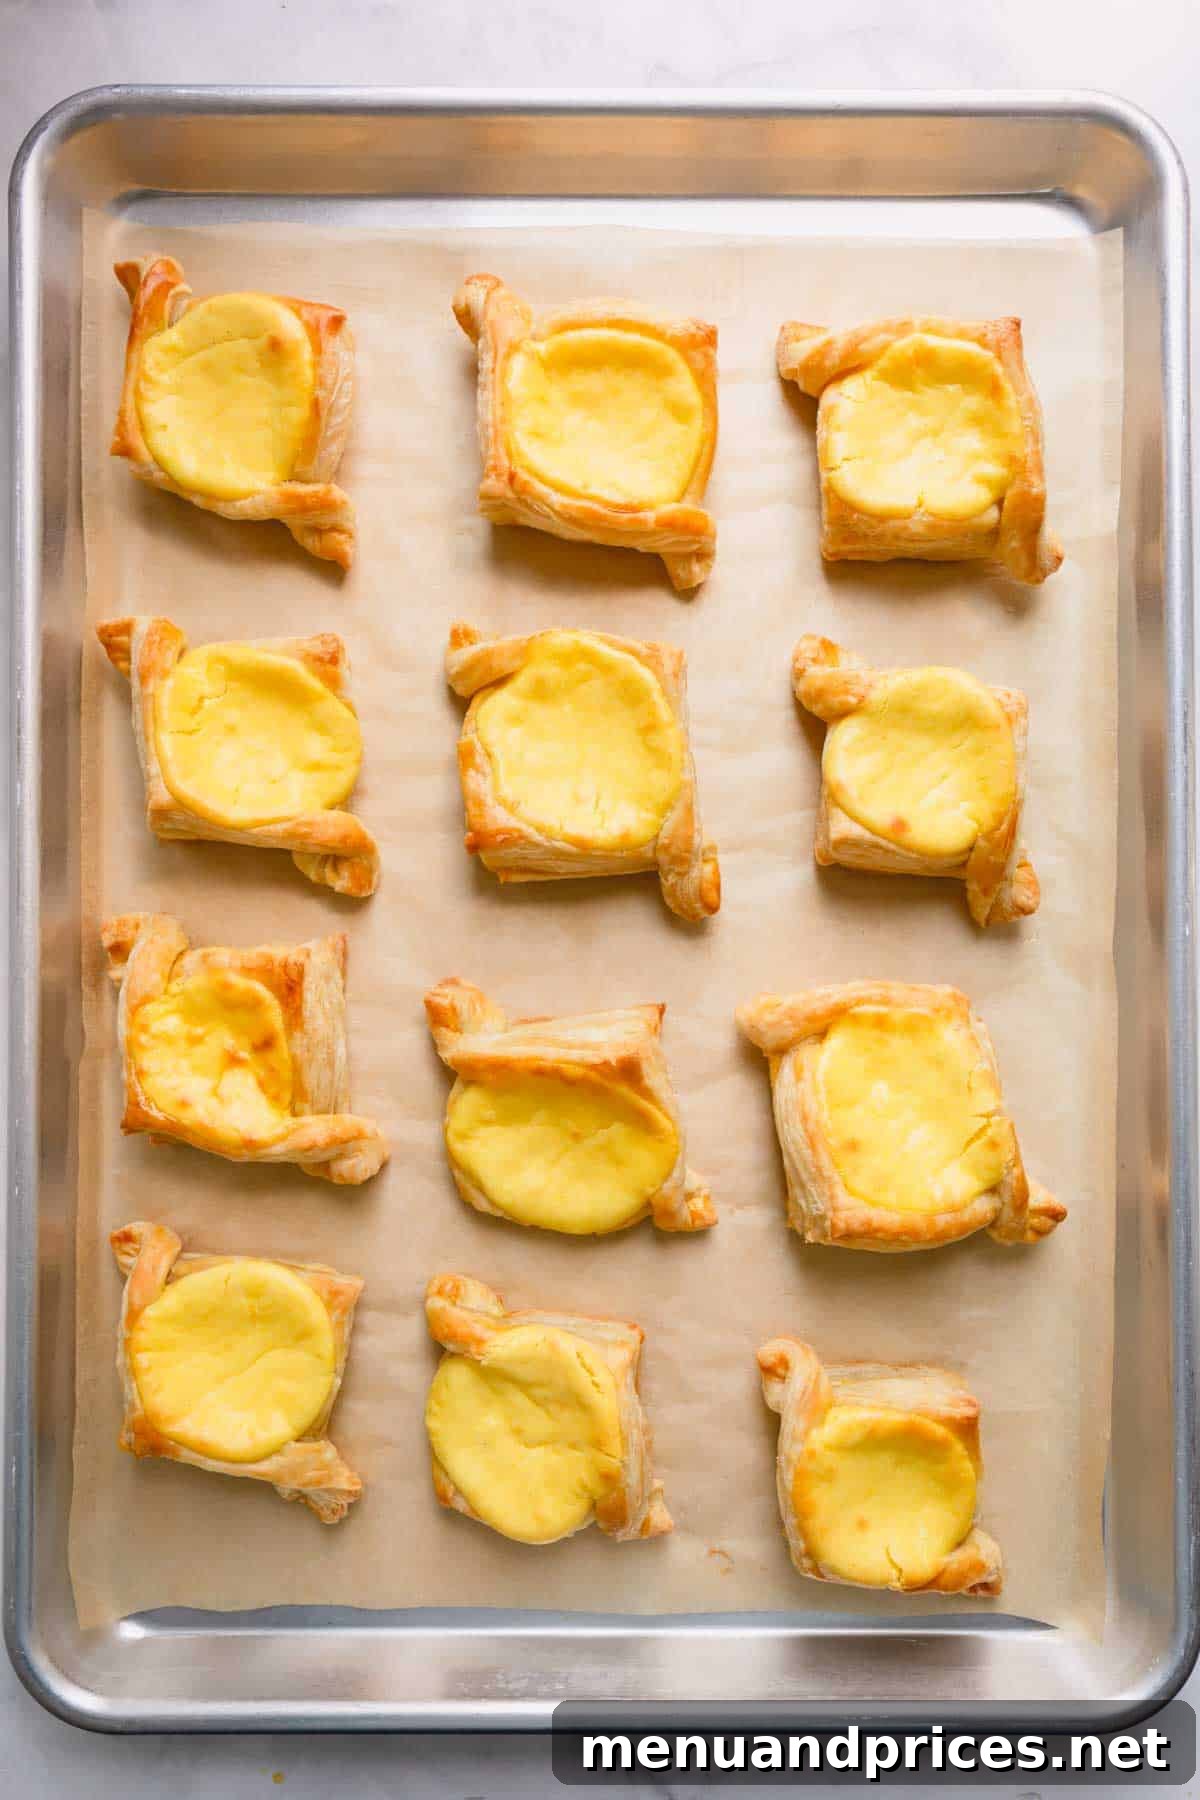
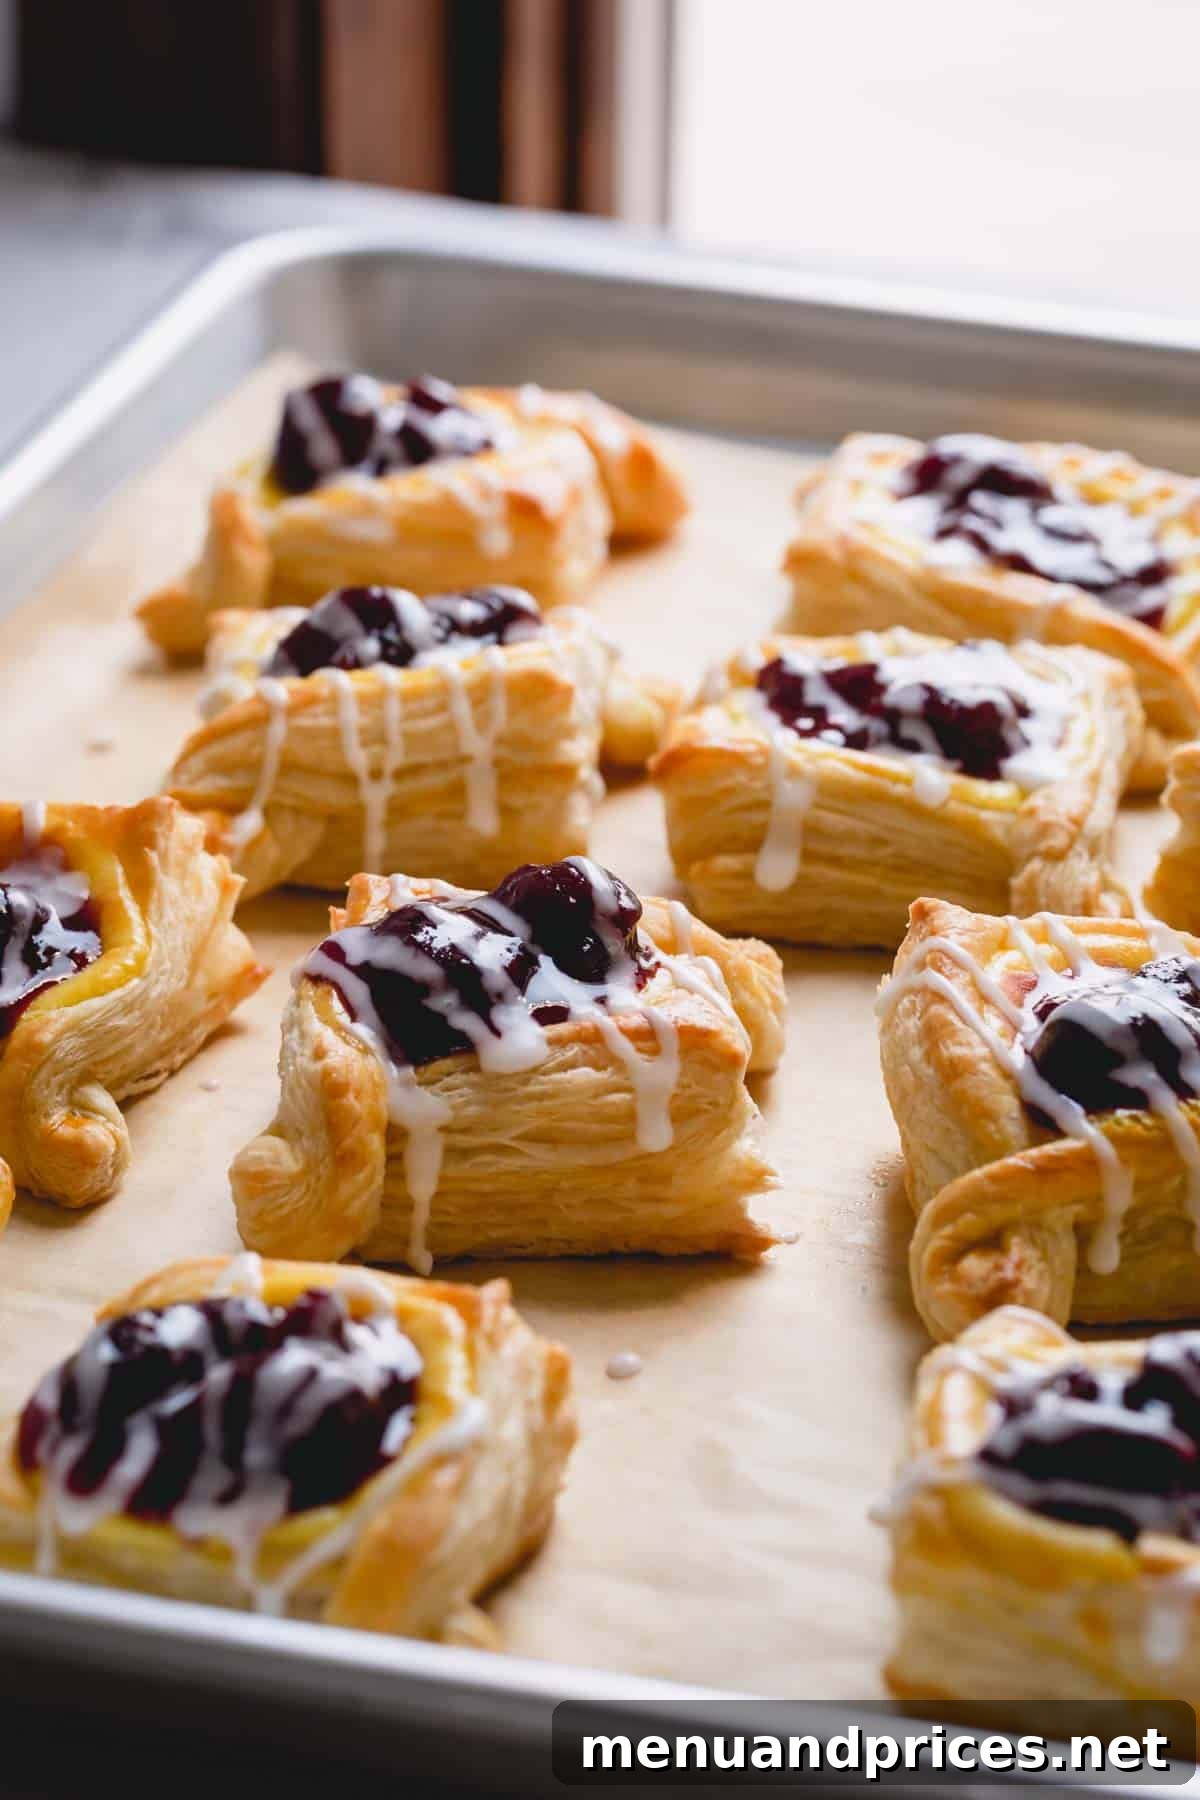
- Bake to Golden Perfection: Carefully transfer the baking sheets to your preheated oven. Bake for approximately 18-20 minutes, or until the puff pastry is beautifully puffed up, wonderfully golden brown, and delightfully crisp around the edges. Keep a close eye on them, as oven temperatures can vary slightly. Once baked, remove the danishes from the oven and carefully transfer them to a wire rack to cool slightly. They don’t need to be completely cold before the final assembly, just cool enough to handle comfortably.
2. Prepare the Sweet Glaze
- Whip Up the Powdered Sugar Glaze: In another small, clean bowl, combine the powdered sugar with the milk (or water, if you prefer a dairy-free option). Whisk these two ingredients vigorously and consistently until the mixture is completely smooth, lump-free, and forms a thin, drizzly glaze. If the glaze appears too thick to drizzle, add a tiny bit more liquid (a quarter teaspoon at a time) until you reach the desired consistency. Conversely, if it’s too thin, sift in a little more powdered sugar until it thickens appropriately.
3. Assemble and Enjoy Your Cherry Cheese Danishes
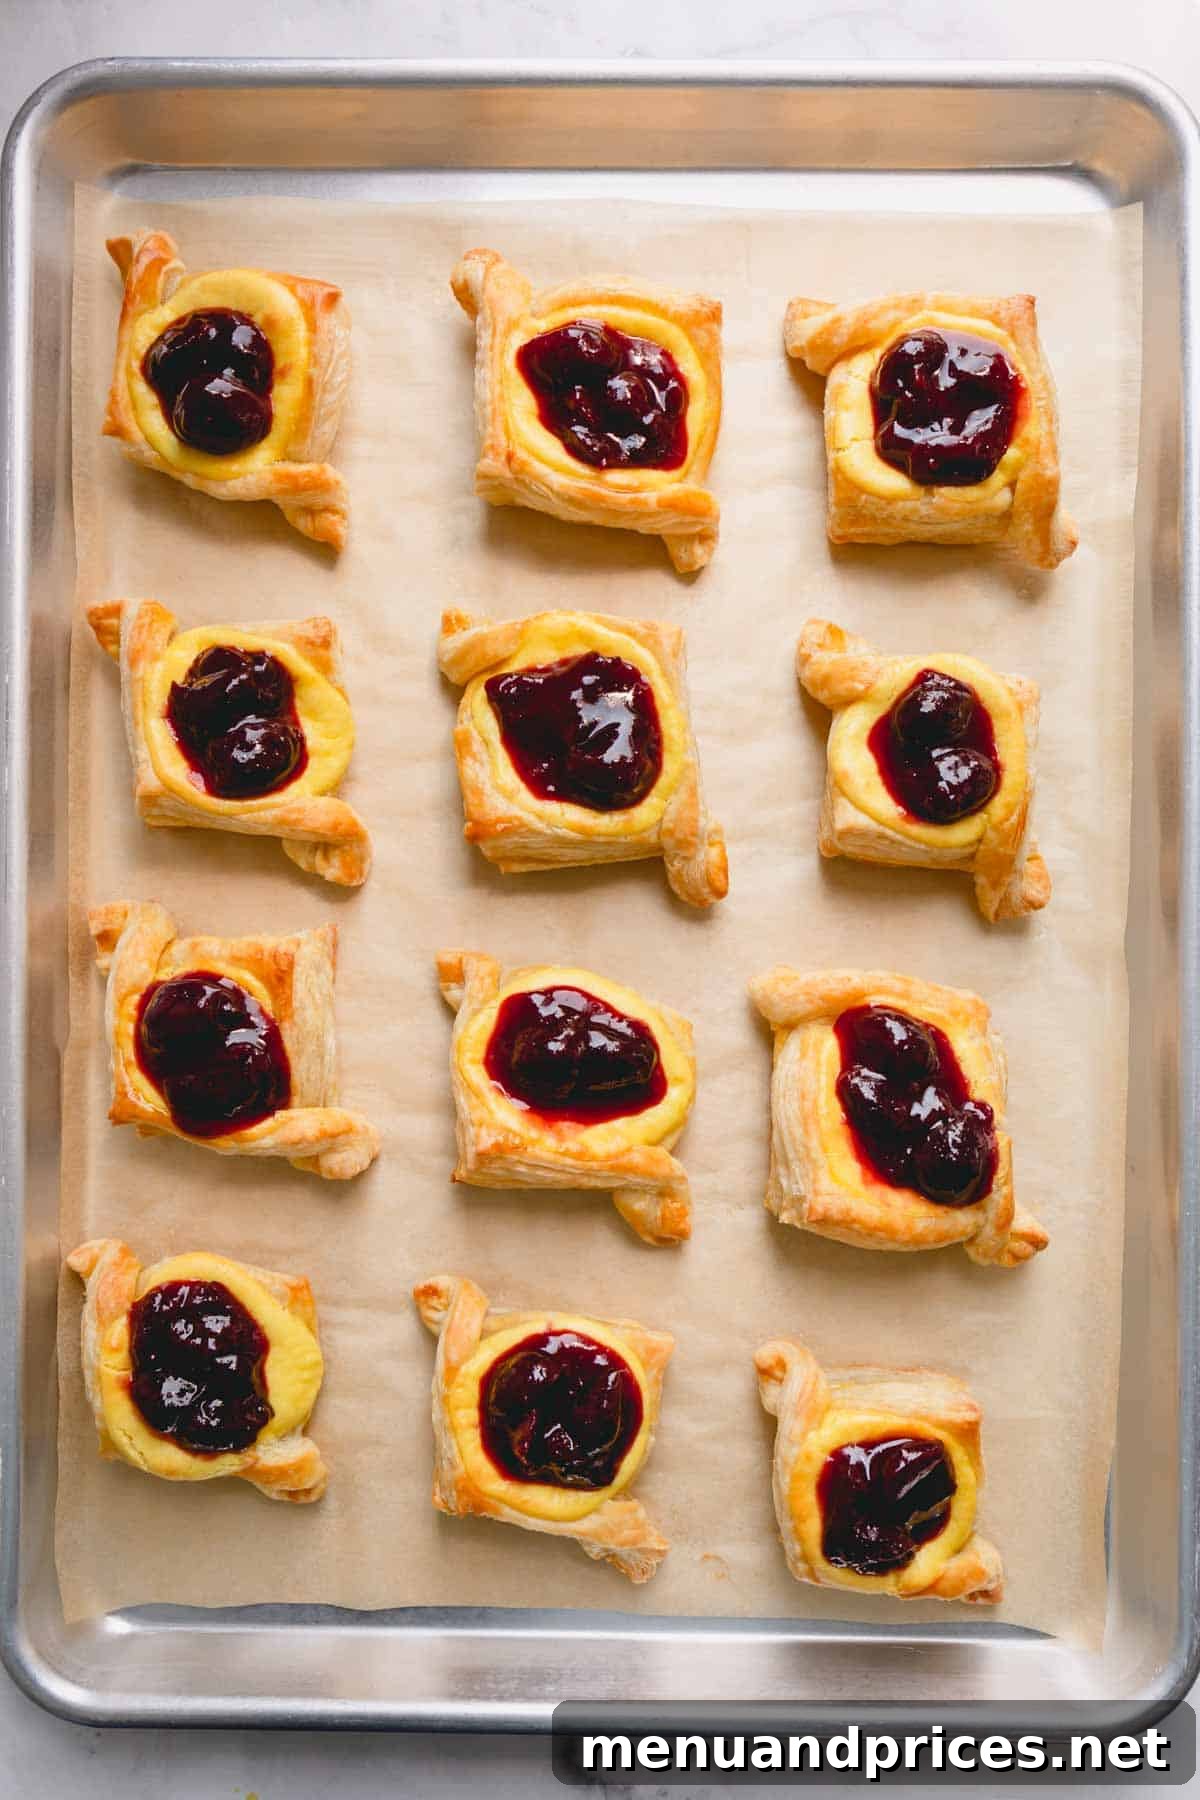
- Add Cherry Filling: Once the baked danishes have cooled for a few minutes (they don’t need to be completely cold, just not piping hot), carefully spoon about 1.5 tablespoons of the cherry pie filling into the center of each danish. Gently spread it over the cream cheese filling within the pastry border. The bright red cherries will add a beautiful visual appeal and a burst of fruity flavor.
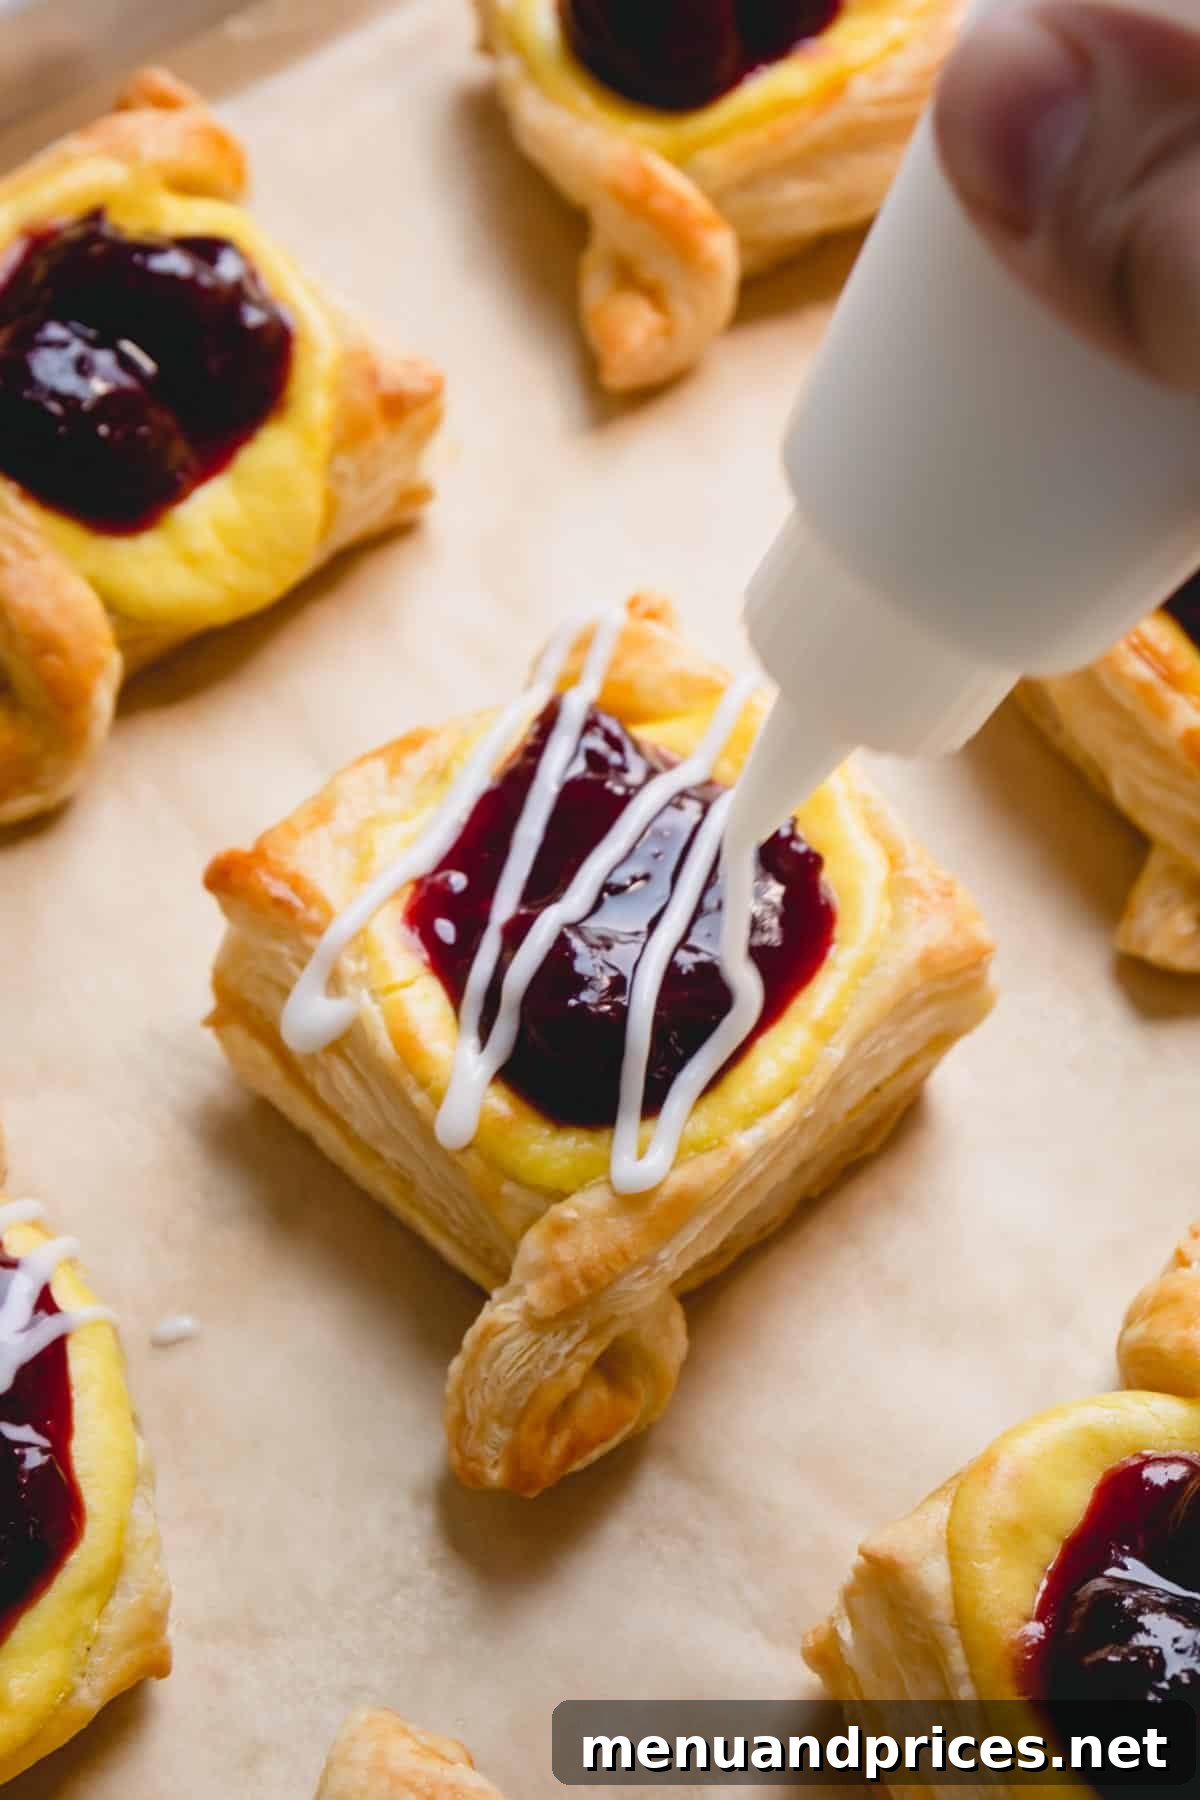
- Drizzle and Serve: Finally, with an artistic flourish, drizzle as much or as little of the prepared powdered sugar glaze as you like over the cherry filling and pastry. The danishes are absolutely best enjoyed warm, so serve them fresh from the oven, or after they’ve cooled just enough to handle comfortably. Prepare for an explosion of complementary flavors and delightful textures!
Expert Tips for Danish-Making Success
Achieving perfectly flaky and delicious cherry cheese danishes is simple with a few insider tips. Pay attention to these details, and you’ll be baking like a seasoned pro in no time, ensuring every danish is a masterpiece:
- Proper Oven Temperature is Key: Always allow your oven ample time to fully preheat to the specified 375°F (190°C). This crucial step is non-negotiable for puff pastry. Puff pastry relies on high, consistent heat to puff up quickly and create those desired airy, flaky layers. If the oven isn’t hot enough, the butter in the pastry can melt too slowly, causing the layers to collapse and resulting in a less airy, dense, and potentially tough texture.
- Thaw Puff Pastry Gently and Correctly: For optimal pliability and to prevent any tearing or cracking, the best method is to transfer your frozen puff pastry sheets from the freezer to the refrigerator the night before you plan to bake. This allows for a slow, even thaw. If you’re short on time, you can carefully thaw it at room temperature for about 30-40 minutes, but be vigilant not to let it get too warm and soft, as this will affect its flakiness.
- Keep the Dough Cold (Crucial for Flakiness): Puff pastry is essentially an intricate structure of alternating layers of dough and butter. The signature flakiness is created when the butter melts rapidly in the hot oven and releases steam, which then separates these delicate layers. To ensure this process works effectively, it’s absolutely crucial to keep your puff pastry dough as cold as possible before it goes into the oven. Work quickly when cutting and shaping, and if your kitchen is particularly warm, you might even pop the shaped, unfilled pastries back into the fridge for 10-15 minutes before baking to chill them thoroughly.
- Avoid Overfilling Your Pastries: It can be tempting to load up each danish with as much rich cream cheese filling as possible, but resist this urge! Overfilling will almost certainly lead to the filling bubbling over the pastry’s edges, potentially burning on your baking sheet, and creating a messy outcome. Aim for about 2 tablespoons of cream cheese mixture per danish, ensuring it stays neatly within the created border of the pastry. Remember, the cherry pie filling is added *after* baking, so it doesn’t contribute to the risk of overflow during the oven phase.
- Utilize a Stand Mixer (or Hand Mixer) for Smoothness: While not strictly essential, using a stand mixer with a paddle attachment will make combining the cream cheese mixture incredibly quick and effortless, ensuring a perfectly smooth, uniform consistency that’s delightful to bite into. A hand mixer also works wonderfully and is a great alternative, though it may require a little more arm work and scraping down the bowl manually to ensure everything is well blended. If mixing by hand, make sure your cream cheese is very soft for easier incorporation.
- Watch for Doneness, Don’t Overbake: This cherry danish recipe cooks relatively quickly due to the delicate nature of puff pastry. Therefore, it’s vital to keep a close eye on your pastries while they bake. Remove them from the oven as soon as they have visibly puffed up, turned a beautiful light golden brown in color, and appear crisp. Don’t worry if they look ever-so-slightly underdone in the center; puff pastry continues to cook and crisp up a bit as it cools and sets on the wire rack. Overbaking can lead to dry, tough danishes that lack their signature tenderness.
- Consider Creative Flavor Variations: While the classic cherry and cream cheese combination is undeniably delicious, don’t shy away from adding your own creative twist! A small pinch of fresh lemon zest added to the cream cheese filling can introduce a bright, fresh note that cuts through the sweetness beautifully. A dash of almond extract, either in the cream cheese filling or the powdered sugar glaze, can complement the cherry flavor wonderfully. As mentioned earlier, experimenting with different fruit pie fillings like strawberry, blueberry, or even apple can open up a world of new danish possibilities.
Make-Ahead Strategies for Ultimate Convenience
Planning ahead can make baking these impressive danishes even more enjoyable and significantly reduce stress, especially if you’re preparing for a brunch or special occasion. Here are some smart tips for preparing components in advance:
- Cream Cheese Filling Preparation: The versatile and flavorful cream cheese filling is an excellent component to prepare in advance. It can be made up to 3 days ahead of time and stored securely in an airtight container in the refrigerator. For even longer storage, the filling can be frozen for up to 1 month.
- Thawing Frozen Filling: If you’ve opted to freeze the cream cheese filling, remember to transfer it to the refrigerator the night before you plan to use it. This allows it ample time to thaw thoroughly and gradually.
- Bringing to Room Temperature: Regardless of whether the filling was refrigerated or frozen, it’s crucial to ensure it comes back to room temperature before you attempt to fill the pastries. A cold, stiff filling will be difficult to work with and spread evenly.
- Pre-shaped Pastries (Unbaked): For a truly quick morning bake, you can also shape the puff pastry squares and fill them with the cream cheese mixture (but no cherry topping or glaze yet). Arrange them on parchment-lined baking sheets, lightly cover them with plastic wrap, and refrigerate for up to 12-24 hours. When ready to bake, place them directly into the preheated oven from the fridge, adding a few extra minutes to the baking time if needed. You’ll add the cherry filling and glaze after baking.
Storing and Reheating Your Delicious Danishes
While these cherry cheese danishes are undoubtedly at their peak freshness, warmth, and flakiness when enjoyed straight out of the oven, any delightful leftovers can still be savored. Proper storage and reheating techniques will help maintain their wonderful texture and flavor.
- Immediate Enjoyment: For the most exquisite experience, this cherry danish recipe is truly best enjoyed fresh, while the pastry is still warm and exquisitely flaky, and the glaze is just set.
- Room Temperature Storage: If you plan to consume your leftover danishes within the first day of baking, you can store them loosely covered at room temperature. However, for maximum freshness and safety, refrigeration is generally recommended.
- Refrigeration for Longevity: Due to the cream cheese filling, it is highly recommended to transfer any remaining danishes to an airtight container and store them in the refrigerator for 3-5 days. This prevents the cream cheese from spoiling and helps maintain the pastries’ quality.
- Reheating for Freshness: To revive the crispness of the puff pastry and warm the luscious filling, place leftovers in an air fryer set to 400°F (200°C) for just a few minutes, or in a conventional oven at the same temperature, until they are warmed through and the pastry has re-crisped. Be careful not to overheat and dry them out, as this can make the pastry tough.
- Freezing Baked Danishes: While freezing raw puff pastry with filling is generally not recommended (as the texture can change significantly), baked danishes *without* the cherry topping and glaze can be frozen successfully for up to 1 month. Wrap them individually in plastic wrap, then place them in a freezer-safe bag or container. Thaw them overnight in the refrigerator, then reheat as described above, and add fresh cherry topping and glaze just before serving.

Frequently Asked Questions About Cherry Cheese Danishes
Here are answers to some common questions you might have about making, storing, and enjoying these delightful cherry cheese danishes, ensuring your baking experience is as smooth as your cream cheese filling:
Can you freeze this recipe?
I generally do not recommend freezing fully assembled and glazed cherry danishes, as the delicate texture of the puff pastry and the creaminess of the cream cheese filling tend to suffer upon thawing, becoming soggy or rubbery. However, as noted in the “Storing Tips” section, you can successfully freeze the cream cheese filling on its own for up to a month, or freeze *unadorned* baked danishes (without the cherry topping and glaze) for better results when reheating.
Should cherry cheese danishes be refrigerated?
Yes, due to the presence of a cream cheese filling, it is highly recommended to refrigerate cherry cheese danishes if you don’t plan on eating them within the first day of baking. Storing them in an airtight container in the refrigerator will help prevent the cream cheese from spoiling and maintain the freshness and safety of your pastries for several days.
What is a Danish breakfast pastry called?
Danish pastries, known for their sweet fillings and characteristic flaky layers, go by various names depending on their specific shapes, sizes, and fillings. However, the most common traditional name for them, especially in their country of origin, Denmark, is “wienerbrød,” which literally translates to “Vienna bread.” This name reflects their Austrian origins and the technique brought to Denmark in the mid-19th century.
Can I use fresh cherries instead of canned pie filling?
Absolutely! Using fresh cherries can add an exquisite, vibrant flavor to your danishes. If you choose to use fresh cherries, you’ll need to create your own cherry compote or filling. Pit and halve fresh cherries, then gently cook them down with a little granulated sugar, a squeeze of fresh lemon juice, and perhaps a touch of cornstarch or arrowroot powder to thicken the mixture to a jam-like consistency. Ensure the homemade cherry filling is completely cooled before spooning it onto the baked danishes.
Why isn’t my puff pastry flaky?
Several factors can affect the desired flakiness of puff pastry. The most common reasons for less-than-flaky results include the dough getting too warm during preparation (causing the butter layers to melt into the dough prematurely), overworking the dough (which can develop gluten and make it tough rather than tender), or an oven that isn’t hot enough (preventing the rapid steam expansion needed for layer separation). To ensure maximum flakiness, always make sure your dough stays cold, handle it minimally and gently, and ensure your oven is fully preheated to the correct temperature.
Explore More Delicious Cherry Recipes
If you’ve thoroughly enjoyed the delightful flavors and simple elegance of these cherry cheese danishes, you’re in for a treat! Cherries are an incredibly versatile fruit that shines in a wide array of baked goods, desserts, and even savory dishes. Expand your culinary horizons with these other fantastic cherry-inspired recipes that are sure to tantalize your taste buds and add a burst of fruity goodness to your kitchen:
- Easy Chocolate Cherry Muffins
- Cherry Cheesecake Pie
- Black Forest Smoothie Bowl
- Black Forest Cake
Cherry Cheese Danish Recipe Card

Cherry Cheese Danish
By Shinee Davaakhuu
Make this bakery-worthy cherry danish recipe with nine ingredients and 30 minutes for a crowd-pleasing breakfast or dessert!
Prep Time: 30 mins
Cook Time: 20 mins
Total Time: 1 hr
Yields: 18 servings
Ingredients
For the Danishes:
- 8 oz (225 g) cream cheese, at room temperature
- 2 tablespoons (30 g) granulated sugar
- 2 large eggs, divided (1 for filling, 1 for egg wash)
- 1 teaspoon pure vanilla extract
- ¼ teaspoon coarse kosher salt
- 2 sheets puff pastry, thawed
- 1 ½ cups (360 g) cherry pie filling (Note 1)
For the Powdered Sugar Glaze (Optional):
- ½ cup (60 g) powdered sugar
- 3 teaspoons (15 g) milk or water
Equipment
- 2 baking sheets
- Parchment paper
- 1 large mixing bowl
- 2 small bowls
- 1 sharp knife
- 1 pastry brush
- Stand mixer with paddle attachment (recommended, or hand mixer)
Instructions
To make the Cheese Danishes:
- Preheat the oven to 375°F (190°C). Line 2 baking sheets with parchment paper.
- In a large mixing bowl with a paddle attachment, beat the room temperature cream cheese, granulated sugar, 1 egg, vanilla extract, and salt until smooth, about 30 seconds. Scrape down the sides of the bowl to ensure consistency.
- In a small bowl, whisk the remaining egg with ½ tablespoon of water to create an egg wash.
- Carefully unroll each puff pastry sheet and cut each into 9 squares.
- Fold each pastry square in half to form a triangle. Make a ½-inch cut from the edges along the two open sides, ensuring the top corner (the folded point) remains attached.
- Unfold the pastry squares. Brush the entire surface of each square with the egg wash. Fold the two cut corners onto the opposite side, overlapping slightly in the center, and gently press to secure. Brush more egg wash over these folded edges to help seal them.
- Arrange the shaped pastries on the prepared baking sheets, leaving space between them.
- Divide the cream cheese mixture evenly into the center of each pastry square, using approximately 2 tablespoons per danish. Do not overfill.
- Bake for 18-20 minutes, or until the puff pastry is puffed and light golden brown. Cool slightly on a wire rack.
To make the Glaze:
- In a small bowl, combine the powdered sugar and milk (or water) until smooth and drizzly. Adjust liquid/sugar for desired consistency.
To assemble the Danishes:
- Top the slightly cooled danishes with about 1.5 tablespoons of cherry pie filling each.
- Drizzle with the prepared powdered sugar glaze, serve warm, and enjoy!
⭐️ Did you make this recipe? Please leave a review and let us know how you liked it!
Tips & Notes
Yields: 18 danishes
Note 1: The cherry pie filling is versatile and can be replaced with any other fruit pie filling you prefer, such as strawberry, blueberry, or apple pie filling.
Storing Tips:
- The cream cheese filling can be made ahead of time and stored in an airtight container in the fridge for up to 3 days, or in the freezer for up to 1 month. Thaw in the fridge overnight and bring to room temperature before use.
- This cherry danish recipe is best enjoyed fresh while still warm for optimal flakiness.
- Leftovers can be stored at room temperature for 1 day or in the fridge for 3-5 days in an airtight container.
- To reheat, warm the pastries in an air fryer or oven at 400°F (200°C) for a few minutes until warmed through and the pastry crisps up again.
Nutrition Facts (per serving)
These values are approximate and may vary based on ingredients used.
- Servings: 1 danish (based on 18 total)
- Calories: 205 kcal
- Carbohydrates: 20 g
- Protein: 3 g
- Fat: 13 g
- Sugar: 5 g
- Sodium: 134 mg
Course: Dessert, Breakfast, Brunch
Cuisine: European (French, German influenced)

Did you make this? Leave a rating and your feedback. Thank you!