
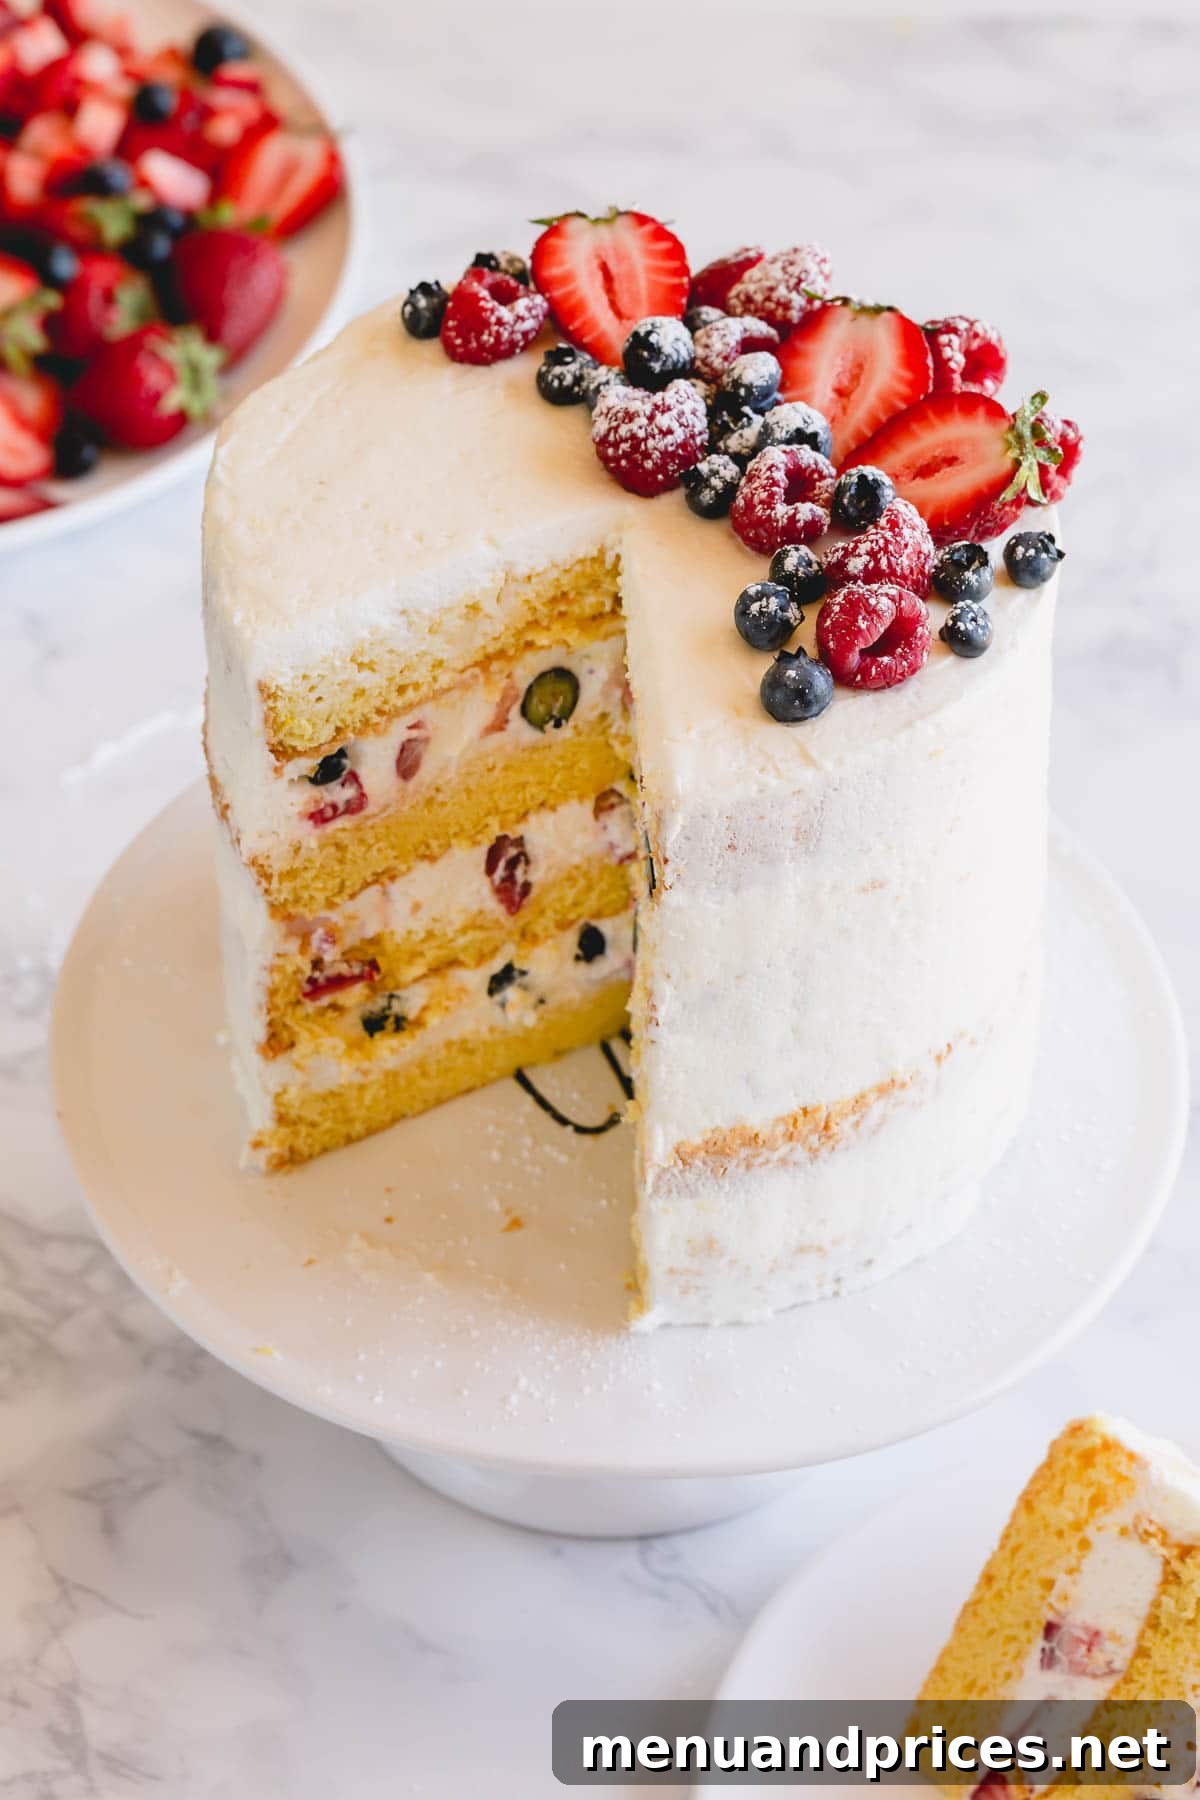
Prepare to be enchanted by the Berry Chantilly Cake, a dessert that masterfully combines layers of delicate sponge cake with a luscious Chantilly cream frosting and an generous scattering of fresh, vibrant berries. This cake is renowned for its incredibly light texture and irresistible burst of fresh fruit flavor, making it an ideal choice for any celebration or a delightful treat to brighten your day. Whether you’re a seasoned baker or new to the kitchen, our comprehensive guide will help you create a stunning and delicious masterpiece that’s sure to impress.
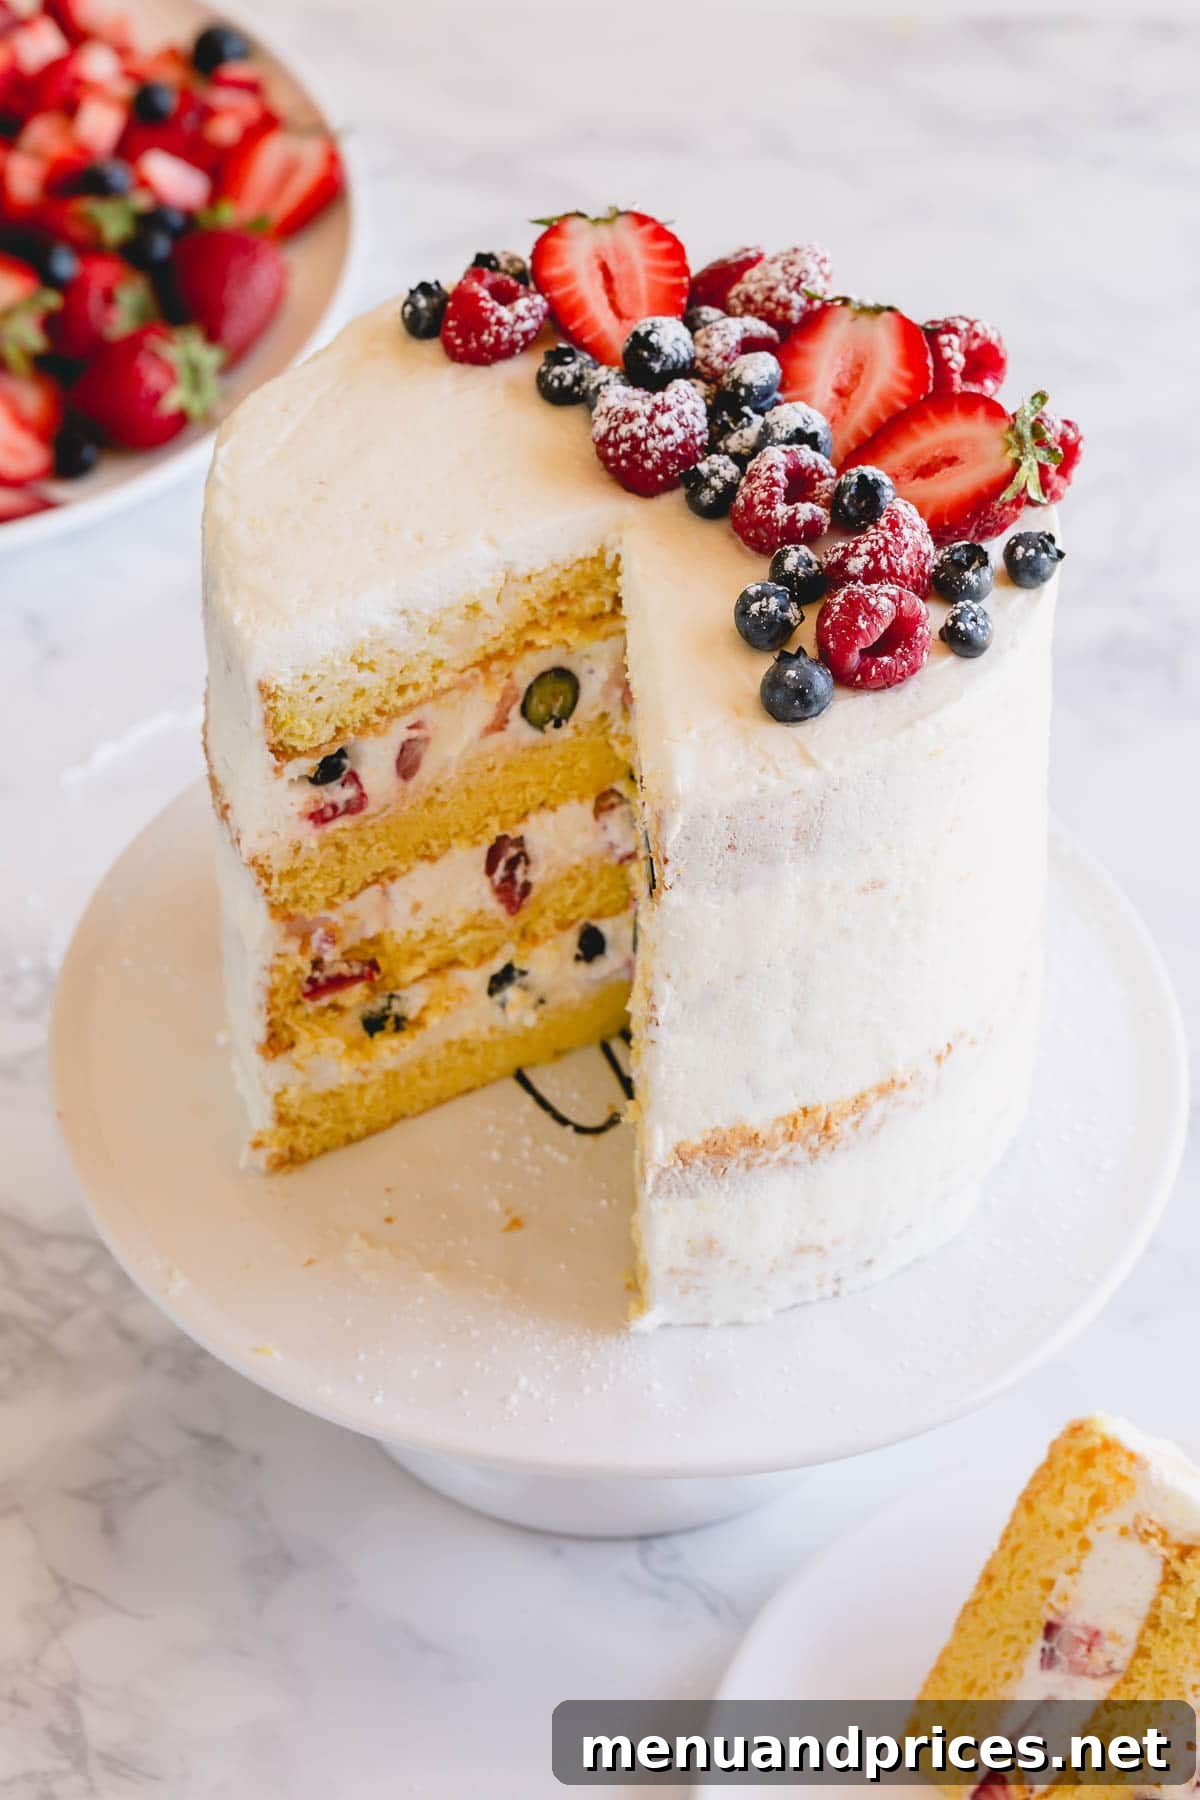
What Exactly is Chantilly Cake? Unpacking the Sweet Legacy
The name “Chantilly cake” can surprisingly refer to two distinct and beloved desserts, depending on your geographic location. Understanding this distinction is key to appreciating the unique qualities of each.
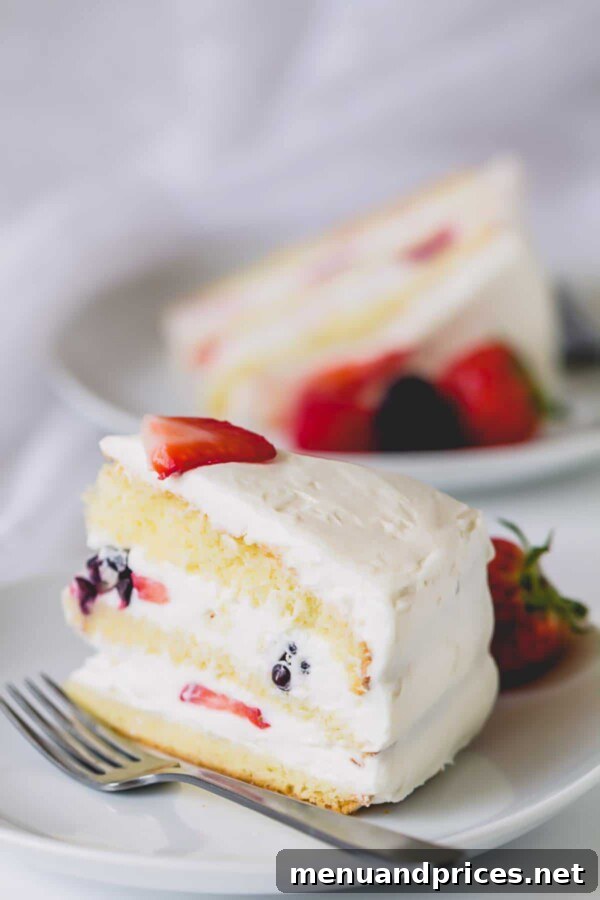
- **The Southern Chantilly Cake:** Predominantly celebrated in the American South, this version is a classic vanilla cake generously filled and frosted with a light, fluffy whipped cream-based topping. This is the delightful and airy interpretation we will be creating in this recipe, emphasizing fresh berries and a delicate cake base. It’s a hallmark of Southern hospitality and celebration.
- **The Hawaiian Chantilly Cake:** A fascinating contrast, the Hawaiian Chantilly cake is typically a rich chocolate cake adorned with a distinct coconut frosting. This unique take often surprises those expecting the Southern variant. I vividly recall the delightful surprise of ordering a slice in Hawaii, only to be met with a chocolate creation – a testament to the diverse culinary interpretations of a single name!
For this recipe, we embrace the Southern tradition, focusing on a vanilla sponge cake with a creamy, berry-laden Chantilly frosting that promises to be a true showstopper.
The Elegance of Crème Chantilly: More Than Just Whipped Cream
Don’t let the sophisticated name fool you; Chantilly cream, or more accurately crème Chantilly, is essentially a sweetened whipped cream. Its origins trace back to the quaint town of Chantilly, France, where it was perfected as a luxurious topping. What elevates it beyond simple whipped cream is its smooth, stable consistency and often a subtle hint of vanilla or other delicate flavorings, making it perfect for frosting cakes and pastries.
Our rendition of Chantilly cream takes this classic a step further by incorporating cream cheese and a touch of orange liqueur. The cream cheese adds an incredible depth of flavor and crucial stability, preventing the frosting from weeping or deflating, which is a common challenge with pure whipped cream. The orange liqueur introduces a bright, zesty note that beautifully complements the sweetness of the berries, transforming a simple whipped cream into an opulent, yet remarkably light and flavorful, frosting that truly makes this cake shine.
Why This Berry Chantilly Cake Recipe Will Be Your New Favorite
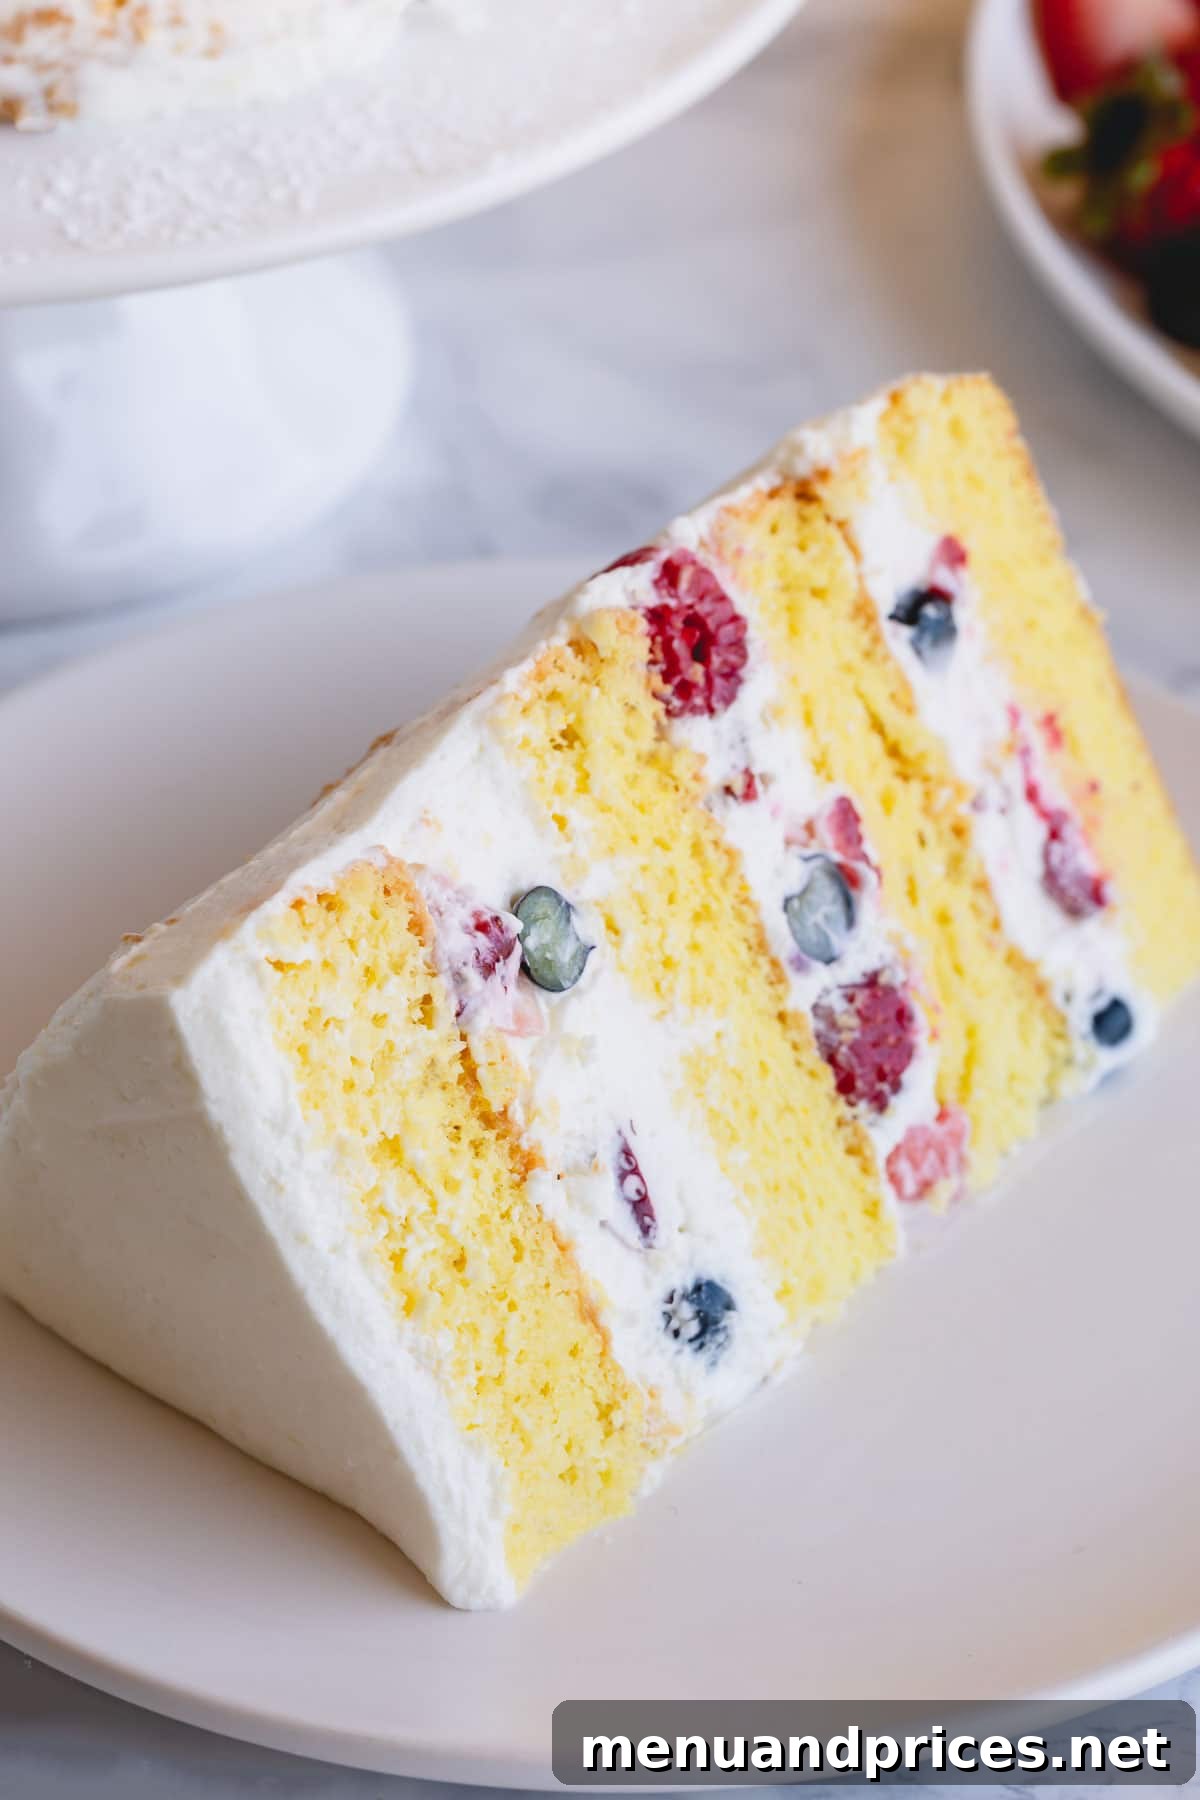
This Berry Chantilly Cake is more than just a dessert; it’s an experience. My perfected recipe features exceptionally light and airy sponge cake layers, each gently drizzled with a homemade simple syrup (or a vibrant pineapple juice for an added tropical twist). These moist layers are then generously enrobed with our lusciously fluffy and stable Chantilly cream, and finally, loaded with an abundance of fresh, juicy berries.
You’ll fall in love with this recipe for several compelling reasons:
- **Unrivaled Lightness:** Unlike heavier cakes, this Berry Chantilly Cake is remarkably light, making it perfect for any occasion, especially warmer months. It’s a dessert you can truly enjoy without feeling overwhelmed.
- **Bursting Berry Flavor:** With fresh berries in every layer, each bite offers a delightful explosion of natural sweetness and a subtle tang that perfectly balances the rich cream and delicate cake.
- **Make-Ahead Friendly:** Many components of this cake can be prepared in advance, making the assembly process smooth and stress-free, especially for entertaining.
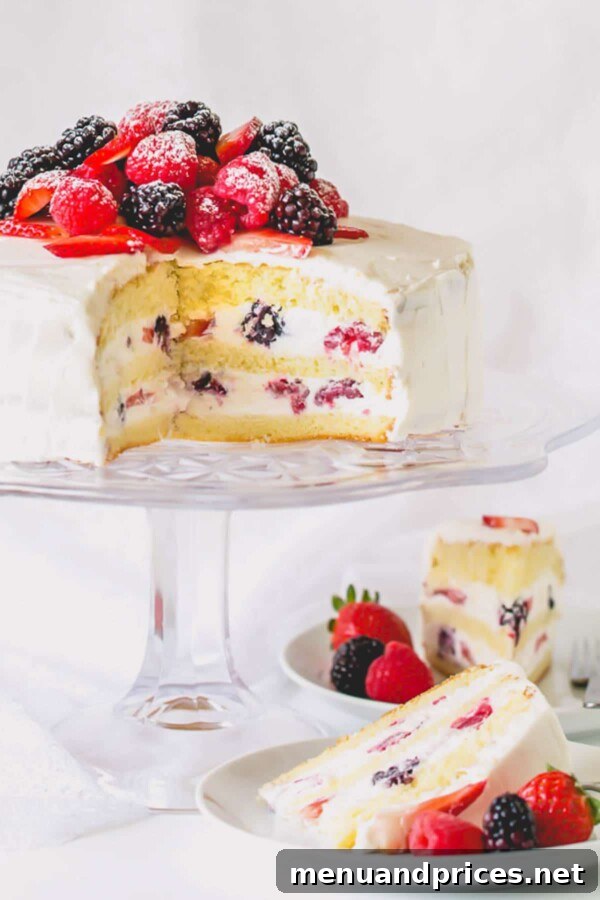
- **Stunning Presentation:** The vibrant colors of the berries against the white cream and golden cake make for an absolutely breathtaking presentation, guaranteed to be the centerpiece of your dessert table.
- **Perfect for All Occasions:** From summer picnics and garden parties to festive holidays and birthdays, this cake adapts beautifully to any celebration, offering a touch of elegance and joy.
It’s an incredibly light cake with a burst of fresh berries in every single bite – prepare for rave reviews!
Essential Ingredient Notes for a Perfect Berry Chantilly Cake
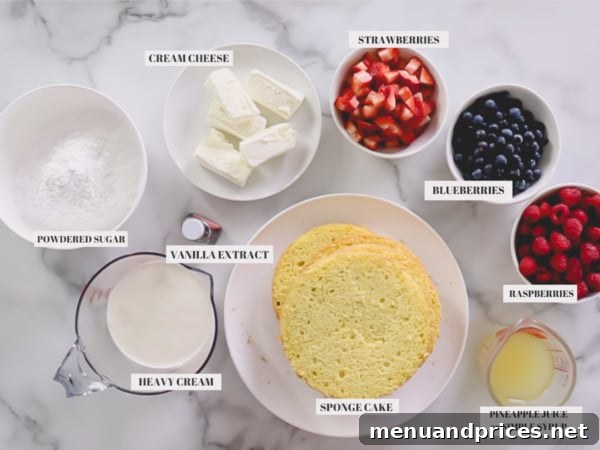
Success in baking often lies in understanding your ingredients. Here’s a detailed look at the key components for this Berry Chantilly Cake and why each element is crucial:
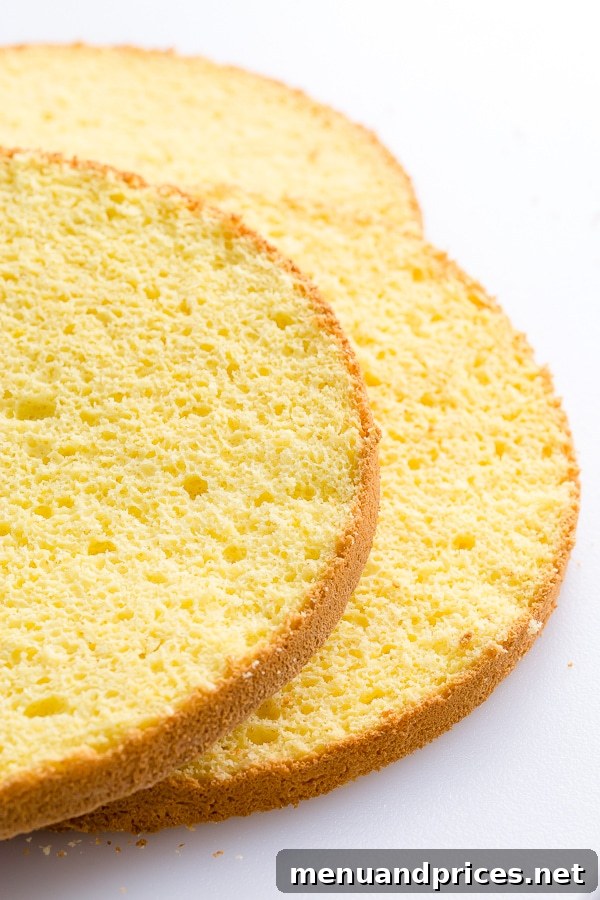
- Sponge Cake: The foundation of our cake. This delicate, airy cake only requires three primary ingredients. For a truly authentic and detailed guide, please refer to my classic sponge cake tutorial, which provides comprehensive directions and invaluable tips for achieving a perfect texture. The beauty of sponge cake is its versatility – it can be baked well in advance, saving you time on assembly day.
- Simple Syrup: This often-overlooked step is a game-changer for sponge cakes. We generously soak each cake layer with simple syrup to ensure an incredibly moist, tender, and flavorful crumb. Sponge cakes, by nature, can be a bit drier, and this syrup infusion prevents that. Alternatively, for a delightful twist, you can use canned pineapple juice, as demonstrated in my video tutorial, which adds a subtle tropical sweetness.
- Berries: Fresh berries are paramount for this recipe. While frozen berries might seem convenient, they tend to release excess water and lose their vibrant appearance and firm texture once thawed, which can compromise the cake’s integrity and visual appeal. Opt for a colorful assortment of fresh strawberries, raspberries, and blackberries for the best flavor and presentation.
- Cream Cheese: Crucial for the stability and rich flavor of our Chantilly cream. Always use full-fat, plain block cream cheese. Avoid using cream cheese spreads or low-fat versions, as they have a higher water content and won’t whip up to the desired firm, silky-smooth consistency. Bringing the cream cheese to room temperature before whipping is essential to prevent lumps and achieve that perfectly smooth, airy texture.
- Heavy Whipping Cream: This is the backbone of whipped cream. It is absolutely crucial to use heavy whipping cream (or heavy cream) with a milk fat content of at least 33% (preferably 36% or higher). Cream with lower fat content will not whip into stiff peaks, resulting in a loose and unstable frosting. Always use cold heavy cream, straight from the fridge, as cold fat molecules stabilize more efficiently, allowing the cream to whip faster and hold its shape better.
Mastering the Art of Berry Chantilly Cake: A Step-by-Step Guide
While this entire cake can certainly be made in a single day, I highly recommend breaking the process into manageable steps over two days. This approach not only makes the project feel effortless but also ensures each component is perfectly prepared, leading to a superior final product.
- Day 1: Preparing Your Foundation. Dedicate the first day to baking the sponge cake layers and preparing the simple syrup. These components can be made up to a week in advance and stored properly, significantly reducing your workload on assembly day.
- Day 2: Crafting and Assembling. On the second day, focus on making the decadent Chantilly cream and bringing all the elements together to assemble your beautiful cake. This phased approach transforms what might seem like a daunting task into a delightful baking experience.
Step 1. Bake the Perfect Sponge Cake Layers
The foundation of an exceptional Berry Chantilly Cake lies in its light, airy sponge cake. This classic cake requires only three ingredients and a bit of careful technique to achieve its characteristic delicate texture. For an in-depth, step-by-step tutorial with photos, please refer to my dedicated post on classic sponge cake.
- You can either bake one 9-inch cake and meticulously slice it into three even layers, or opt for two 7-inch cakes which can then be sliced into four thinner layers for a taller, more impressive presentation.
- **Cooling is Crucial:** Allow the sponge cake layers to cool completely before attempting to slice them. Warm sponge cake is notoriously fragile and prone to tearing. Thorough chilling (1-2 hours or overnight in the refrigerator) will make slicing much easier and cleaner, resulting in beautiful, even layers.
Baker’s Tip
Sponge cake is an excellent make-ahead component. Feel free to bake your layers up to one week in advance. Wrap them tightly in plastic wrap once cooled and store them in the refrigerator. For longer storage, sponge cake freezes beautifully for up to three months. Thaw overnight in the refrigerator before use.
Step 2. Prepare the Flavor-Infusing Simple Syrup
Simple syrup is your secret weapon for preventing a dry cake. Soaking each sponge cake layer with this liquid gold ensures a melt-in-your-mouth tender and wonderfully moist texture. Since sponge cake is naturally light and airy, it readily absorbs moisture, and simple syrup not only adds tenderness but also enhances flavor.
Making simple syrup is incredibly straightforward and a task that can be accomplished well in advance – up to a month, in fact!
- In a small saucepan, bring one cup of water to a boil. Once boiling, remove from heat, add one cup of granulated sugar, and stir vigorously until the sugar is completely dissolved. Allow the syrup to cool completely to room temperature before transferring it to an airtight container and chilling in the refrigerator. Cold syrup is crucial for chilling cake layers without making them soggy.
Flavor Variation Tip
For a delightful tropical nuance that pairs beautifully with berries, you can substitute canned pineapple juice for the simple syrup. Ensure you use 100% pure pineapple juice, not a syrup or concentrate, for the best results. This variation adds a subtle tang and sweetness that I personally adore, and it’s featured in my video tutorial.
Step 3. Craft the Luxurious Chantilly Cream Frosting
Our Chantilly cream frosting is designed for both flavor and stability. By incorporating cream cheese and a splash of orange liqueur, we create a richer, sturdier, and more exquisitely flavored frosting than traditional whipped cream. This combination is truly a frosting heaven, providing the perfect counterpoint to the delicate sponge and fresh berries!
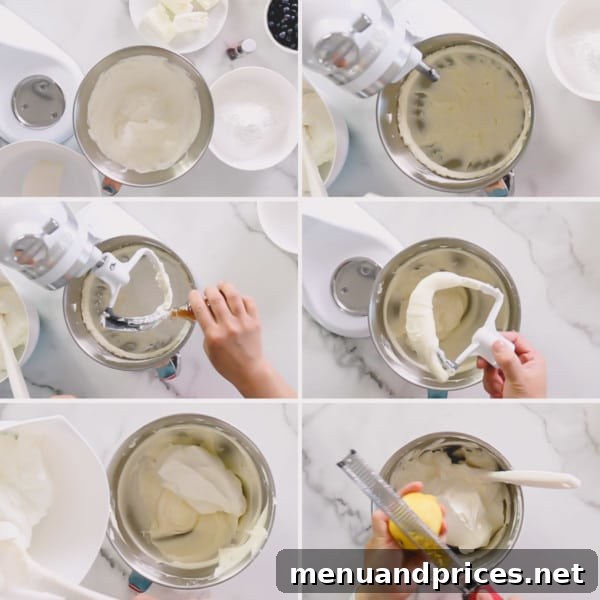
- In a large mixing bowl fitted with a whisk attachment, whip the very cold heavy whipping cream until stiff peaks form. This usually takes 2-3 minutes on medium-high speed. Be careful not to over-whip, which can turn it grainy. Transfer the whipped cream to a separate bowl and set aside.
- In the same (or a clean) mixing bowl, beat the softened cream cheese on medium speed until it is light, fluffy, and completely smooth, about 1 minute. Scrape down the sides of the bowl as needed.
- Gradually add the powdered sugar to the cream cheese, beating until well combined. Then, mix in the pure vanilla extract and orange liqueur (if using). Continue to beat until the mixture is smooth and luscious, another 2-3 minutes.
- Now, gently fold about half of the reserved whipped cream into the cream cheese mixture using a spatula. Mix until just combined. Then, add the remaining whipped cream and fold very gently until everything is fully incorporated and the frosting is uniformly light and airy. The key is to be gentle to avoid deflating the whipped cream, preserving its fluffy texture.
Pro Frosting Tip
Ensure your cream cheese is at true room temperature before you start beating it. Cold cream cheese will result in a lumpy frosting, no matter how long you beat it. Taking it out of the fridge an hour or two beforehand will make a significant difference in achieving a silky smooth, lump-free Chantilly cream.
Step 4. Elegantly Assemble Your Berry Chantilly Masterpiece
The assembly stage is where all your hard work comes together to create a stunning Berry Chantilly Cake. This cake can be assembled on the same day it’s served, or for convenience and enhanced flavor, you can assemble it a day in advance to allow the flavors to meld beautifully.
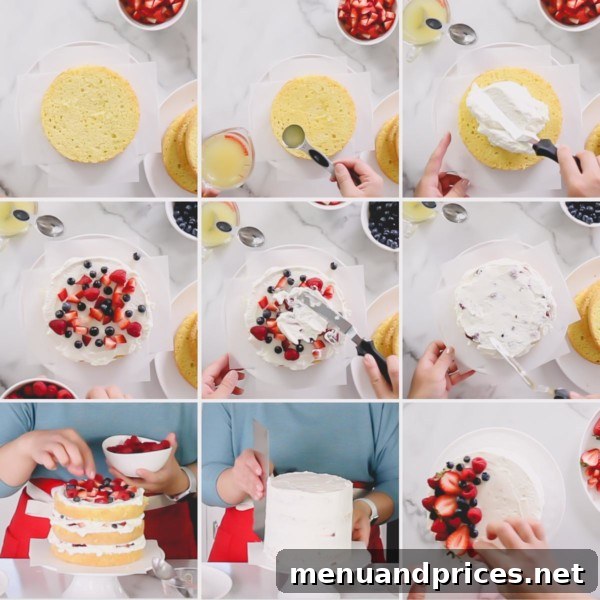
- Place your first sponge cake layer onto your chosen serving platter or cake stand. If using a turntable, this is a great time to utilize it for easier frosting.
- Generously drizzle about 5-6 tablespoons of the cooled simple syrup (or pineapple juice) evenly all over the cake layer. Ensure good coverage, especially towards the edges.
- Spread an even layer of Chantilly cream over the soaked cake layer, extending almost to the edges. A small offset spatula works wonders here for smooth application.
- Artfully arrange a single layer of your fresh berries on top of the frosting. Try to cover as much of the surface as possible. Then, gently cover the berries with a slightly thinner layer of Chantilly cream to secure them and provide a base for the next cake layer.
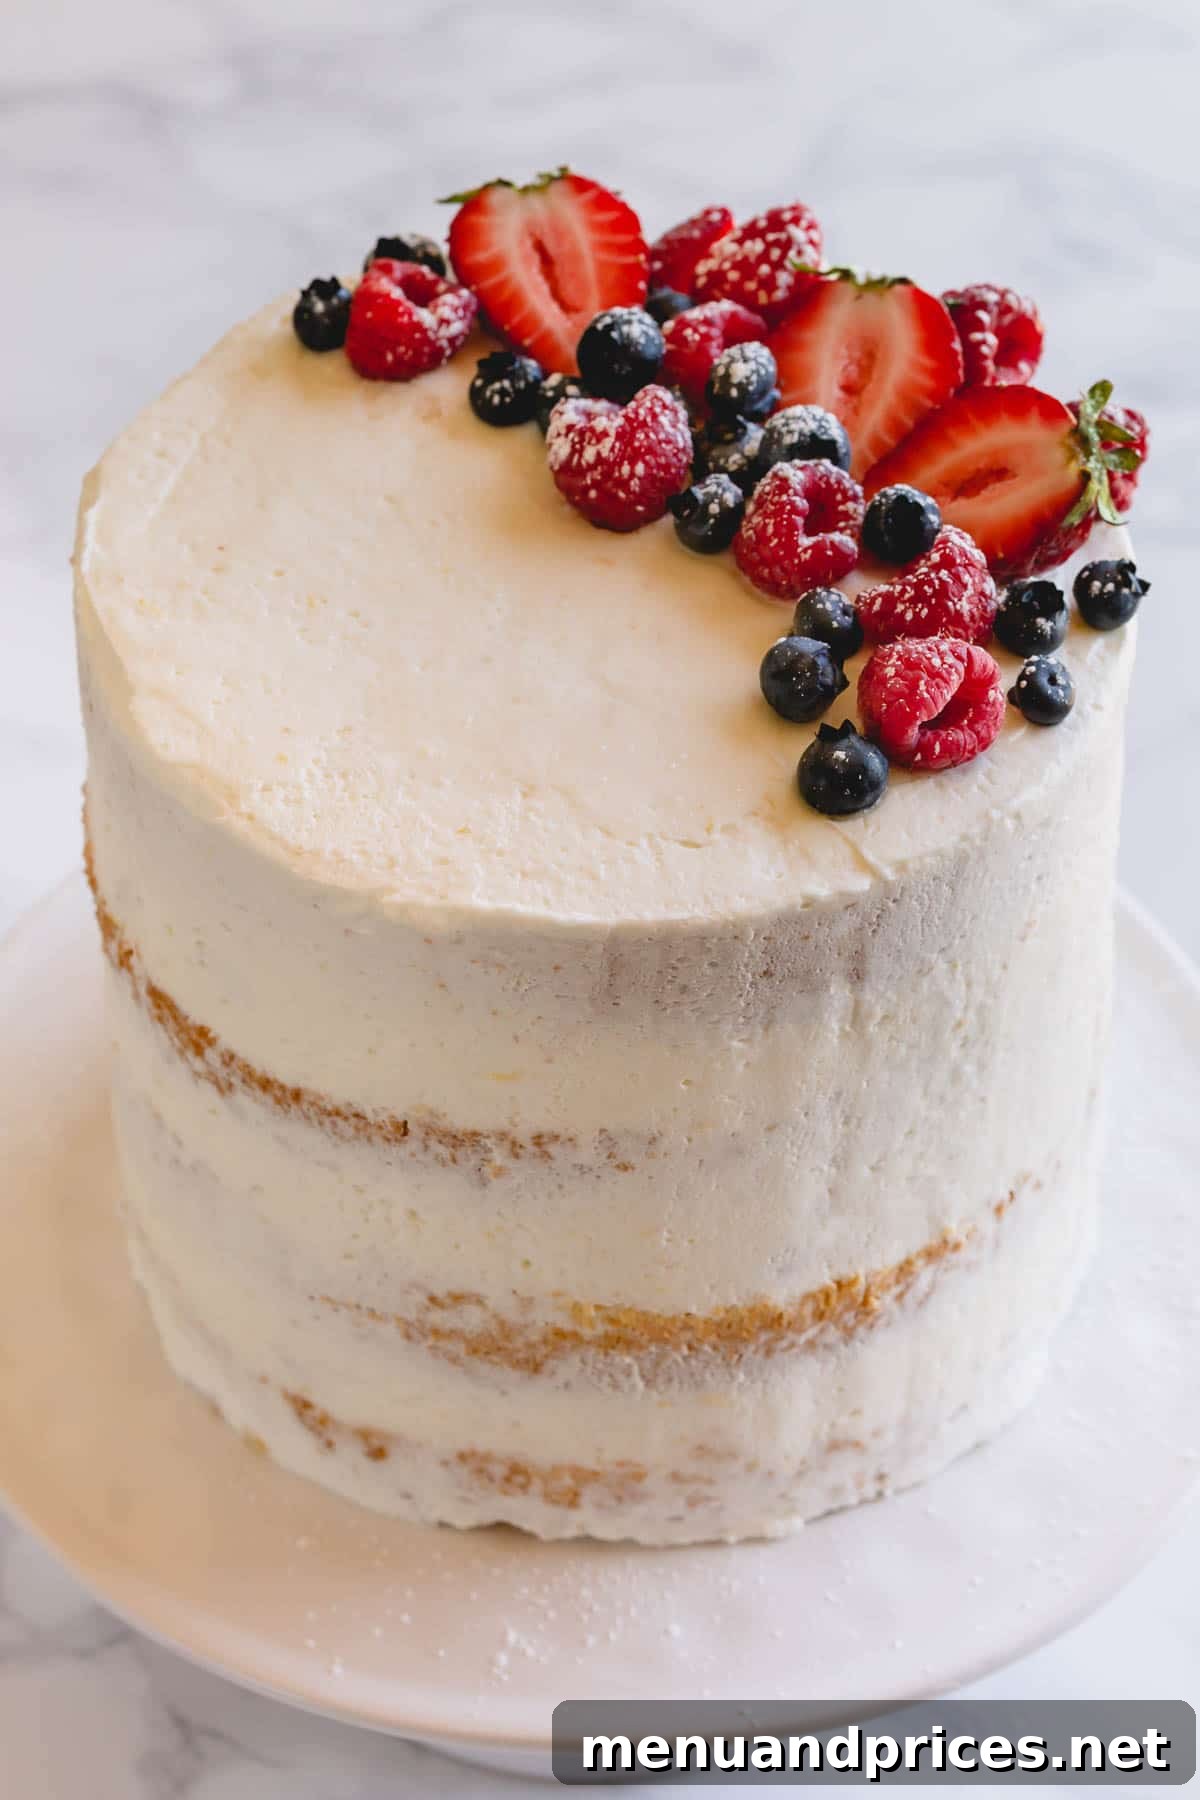
- Repeat steps 2-4 with the remaining cake layers, syrup, frosting, and berries. Once all layers are stacked, use the remaining Chantilly cream to frost the entire cake – the top and all sides – achieving a smooth finish or a rustic look, as preferred.
- Finally, adorn the top of the cake with an abundant and beautiful display of fresh, whole, or artfully sliced berries. This adds both visual appeal and a final burst of fresh flavor. Serve chilled and enjoy the fruits of your labor!
Storing Your Berry Chantilly Cake for Lasting Freshness
Proper storage is essential to maintain the freshness and quality of your Berry Chantilly Cake, especially given its fresh ingredients and delicate frosting.
- **Refrigeration:** Always store the assembled cake in the refrigerator until you are ready to serve it. Leftovers should also be promptly refrigerated, covered tightly with plastic wrap or in an airtight cake dome, for up to 5 days. This keeps the cream firm and the berries fresh.
- **Freezing the Assembled Cake (Not Recommended):** It is generally not recommended to freeze an entire assembled Berry Chantilly Cake. The high moisture content of the berries can become mushy upon thawing, and the whipped cream frosting may lose its airy texture and weep.
- **Freezing Components:** However, you can brilliantly bake the sponge cake layers in advance and freeze them for up to 3 months. Wrap them tightly in several layers of plastic wrap and then a layer of aluminum foil. Thaw frozen cake layers in the refrigerator overnight before soaking with syrup and assembling. The simple syrup can also be made weeks ahead and stored in the fridge.
Watch Our Berry Chantilly Cake Video Tutorial
Sometimes, seeing is believing! For a visual guide to crafting this stunning Berry Chantilly Cake, watch our detailed video tutorial below. It walks you through each step of the process, from baking the sponge to assembling the layers and decorating with fresh berries, ensuring you achieve perfect results every time.
Berry Chantilly Cake Recipe
Shinee Davaakhuu
1 hr 30 mins
30 mins
2 hrs
12 servings
Comment
Print Recipe
Ingredients
For the Sponge Cake:
- 6 large eggs, at room temperature
- 1 cup (200g) granulated sugar, divided (Note 1)
- 1 ½ cups (180g) cake flour (Note 2)
- ½ teaspoon salt (optional)
For the Simple Syrup:
- 1 cup water
- 1 cup (200g) granulated sugar
For the Chantilly Cream Frosting:
- 1 ½ cups (360ml) heavy whipping cream (cold)
- 8 oz (225g) cream cheese, softened
- 1 ½ cups (190g) powdered sugar
- 2 teaspoons pure vanilla extract
- 1 tablespoon orange liquor (e.g., Grand Marnier) (Note 4)
For the Berry Filling and Decoration:
- 2 cups (265g) fresh strawberries, chopped
- 6 oz (170g) fresh raspberries
- 6 oz (170g) fresh blackberries (or blueberries)
Instructions
To make the Sponge Cake:
- Preheat your oven to 350°F (177°C). Line the bottom of two 8-inch or 7-inch cake pans with parchment paper. There’s no need to grease the sides of the pan, as the cake needs to cling to the sides to rise properly.
- Carefully separate the egg whites and yolks. Ensure that not even a tiny bit of egg yolk gets into the whites, as this will prevent them from whipping properly. (TIP: It’s often easier to separate cold eggs directly from the fridge.)
- In a large mixing bowl with a whisk attachment, whisk together the egg yolks and ½ cup of the granulated sugar until the mixture becomes pale yellow and triples in volume, which usually takes about 5 minutes. This creates a fluffy base for the yolks.
- Meanwhile, in a separate bowl, sift together the cake flour and salt (if using). Sifting ensures a lighter cake texture.
- In another clean mixing bowl with a whisk attachment, begin beating the egg whites at medium-low speed until they become foamy.
- Gradually add the remaining ½ cup of sugar, one tablespoon at a time, to the egg whites. Continue to whisk, gradually increasing the speed to medium-high, until stiff, glossy peaks form. This can take between 7-10 minutes.
- Using a rubber spatula, gently fold about one-third of the whipped egg whites into the egg yolk mixture until mostly combined. Then, carefully add the remaining egg whites and continue to fold gently until the mixture is smooth and fully incorporated, being careful not to deflate the air.
- Add the sifted flour into the batter in three stages, folding gently after each addition until just combined. Overmixing will develop gluten and result in a tough cake.
- Pour the delicate batter evenly into your prepared cake pans and gently smooth the tops with a spatula.
- Bake the cakes for 25-30 minutes, or until a wooden skewer or toothpick inserted into the center comes out clean. **Important:** Avoid opening the oven door for at least the first 20-25 minutes, as this can cause the delicate sponge to collapse.
- Allow the cakes to cool in their pans for about 5 minutes. Then, carefully run a thin knife around the edges of the pan and invert the cakes onto a wire cooling rack to cool completely. Once thoroughly cooled, wrap each cake layer in plastic wrap and refrigerate for 1-2 hours, or preferably overnight. Chilling the cake makes it much easier to slice into even layers.
To make the Simple Syrup:
- In a small saucepan, bring 1 cup of water to a boil. Once boiling, remove from heat and add 1 cup of granulated sugar. Stir continuously until the sugar is completely dissolved. Allow the syrup to cool completely to room temperature, then transfer it to an airtight container and chill it in the fridge until ready to use.
To make the Chantilly Cream Frosting:
- In a large mixing bowl with a whisk attachment, whip the very cold heavy whipping cream on medium-high speed until hard peaks form (when you lift the whisk, the peaks stand straight up). This should take 2-3 minutes. Transfer the whipped cream to another bowl and set aside.
- In the now empty (or a separate clean) mixing bowl with the whisk attachment, place the softened cream cheese and beat it on medium speed until it is smooth and fluffy, about 1 minute. Scrape down the sides of the bowl as needed.
- Add the powdered sugar, pure vanilla extract, and orange liquor (if using) to the cream cheese. Beat on medium speed until the mixture is perfectly smooth and creamy, about 2-3 minutes, ensuring no lumps remain.
- Gently fold about half of the whipped cream into the cream cheese mixture using a rubber spatula until just combined. Then, add the remaining whipped cream and continue to fold very gently until the frosting is homogenous and airy. Be extremely gentle during this step to avoid deflating the whipped cream, which is crucial for a light and fluffy frosting.
To Assemble the Cake:
- If you baked two 7-inch cakes, slice each cake horizontally into two even layers (for a total of four layers). If you baked one 9-inch cake, slice it into three even layers. Place your first cake layer on your chosen serving platter or cake stand.
- Generously drizzle 5-6 tablespoons of the chilled simple syrup (or canned pineapple juice) evenly over the first cake layer.
- Spread an even, generous layer of Chantilly cream over the soaked cake layer, extending almost to the edges.
- Arrange a single layer of your mixed fresh berries (chopped strawberries, raspberries, blackberries) neatly on top of the frosting. Gently cover the berries with a slightly thinner layer of Chantilly cream to secure them and prepare for the next cake layer.
- Repeat steps 2-4 with the remaining cake layers, simple syrup, Chantilly cream, and fresh berries. Once all layers are stacked, use the remaining Chantilly cream to frost the entire cake – covering the top and all sides smoothly or with a desired decorative texture.
- Finally, decorate the top of the cake with an artful arrangement of fresh berries. For an extra touch, you can pipe small dollops of frosting around the edges. Refrigerate until ready to serve. Enjoy your stunning homemade Berry Chantilly Cake!
⭐️ Did you make this recipe?
Please leave a review and let us know how you liked it!
Video Tutorial
Tips & Notes for Success
Note 2: DIY Cake Flour. If you don’t have cake flour on hand, you can easily make your own. For 1 ½ cups of cake flour: Measure out 1 ½ cups of all-purpose flour, then remove 3 tablespoons of that flour. Replace the removed 3 tablespoons with 3 tablespoons of cornstarch. Sift this mixture together thoroughly to ensure it’s well combined and aerated. You’ve now got homemade cake flour!
Note 3a: Simple Syrup Prep. The simple syrup can be prepared up to 3 weeks in advance. Store it in an airtight container in the refrigerator. Ensure it’s cold before use.
Note 3b: Pineapple Juice Alternative. You can effectively substitute a can of 100% pure pineapple juice for the simple syrup. Be sure it is pure juice and not a syrup or juice cocktail to avoid unwanted additives and excessive sweetness.
Note 4: Orange Liqueur. I personally love using Grand Marnier for its complex orange flavor, which adds depth to the Chantilly cream. If you prefer to omit alcohol, you can substitute fresh lemon or orange zest (about 1-2 teaspoons). I find that a burst of citrus is key to preventing the frosting from tasting flat and beautifully complements the berries.
Storing Tips Summary:
1. The assembled cake can be prepared and refrigerated 1 day in advance of serving.
2. Always keep the cake refrigerated until ready to serve. Any leftovers should be covered and refrigerated for up to 5 days.
3. Freezing an assembled Berry Chantilly Cake is not recommended due to the fresh berries and delicate whipped cream. However, you can bake and freeze the sponge cake layers for up to 3 months for future use.
Nutrition Information
1 slice
468kcal
67g
7g
20g
52g
203mg
Dessert
American

Did you make this?
Leave a rating and your feedback. Thank you!
This recipe was originally published on May 4th, 2015, and has been updated for clarity and enhanced instructions.
Reader Comments & Reviews
We’d love to hear about your experience making this Berry Chantilly Cake! Share your thoughts, tips, and photos in the comments section below. Your feedback helps our community of bakers, and we’re always excited to see your creations.
Happy Baking!