
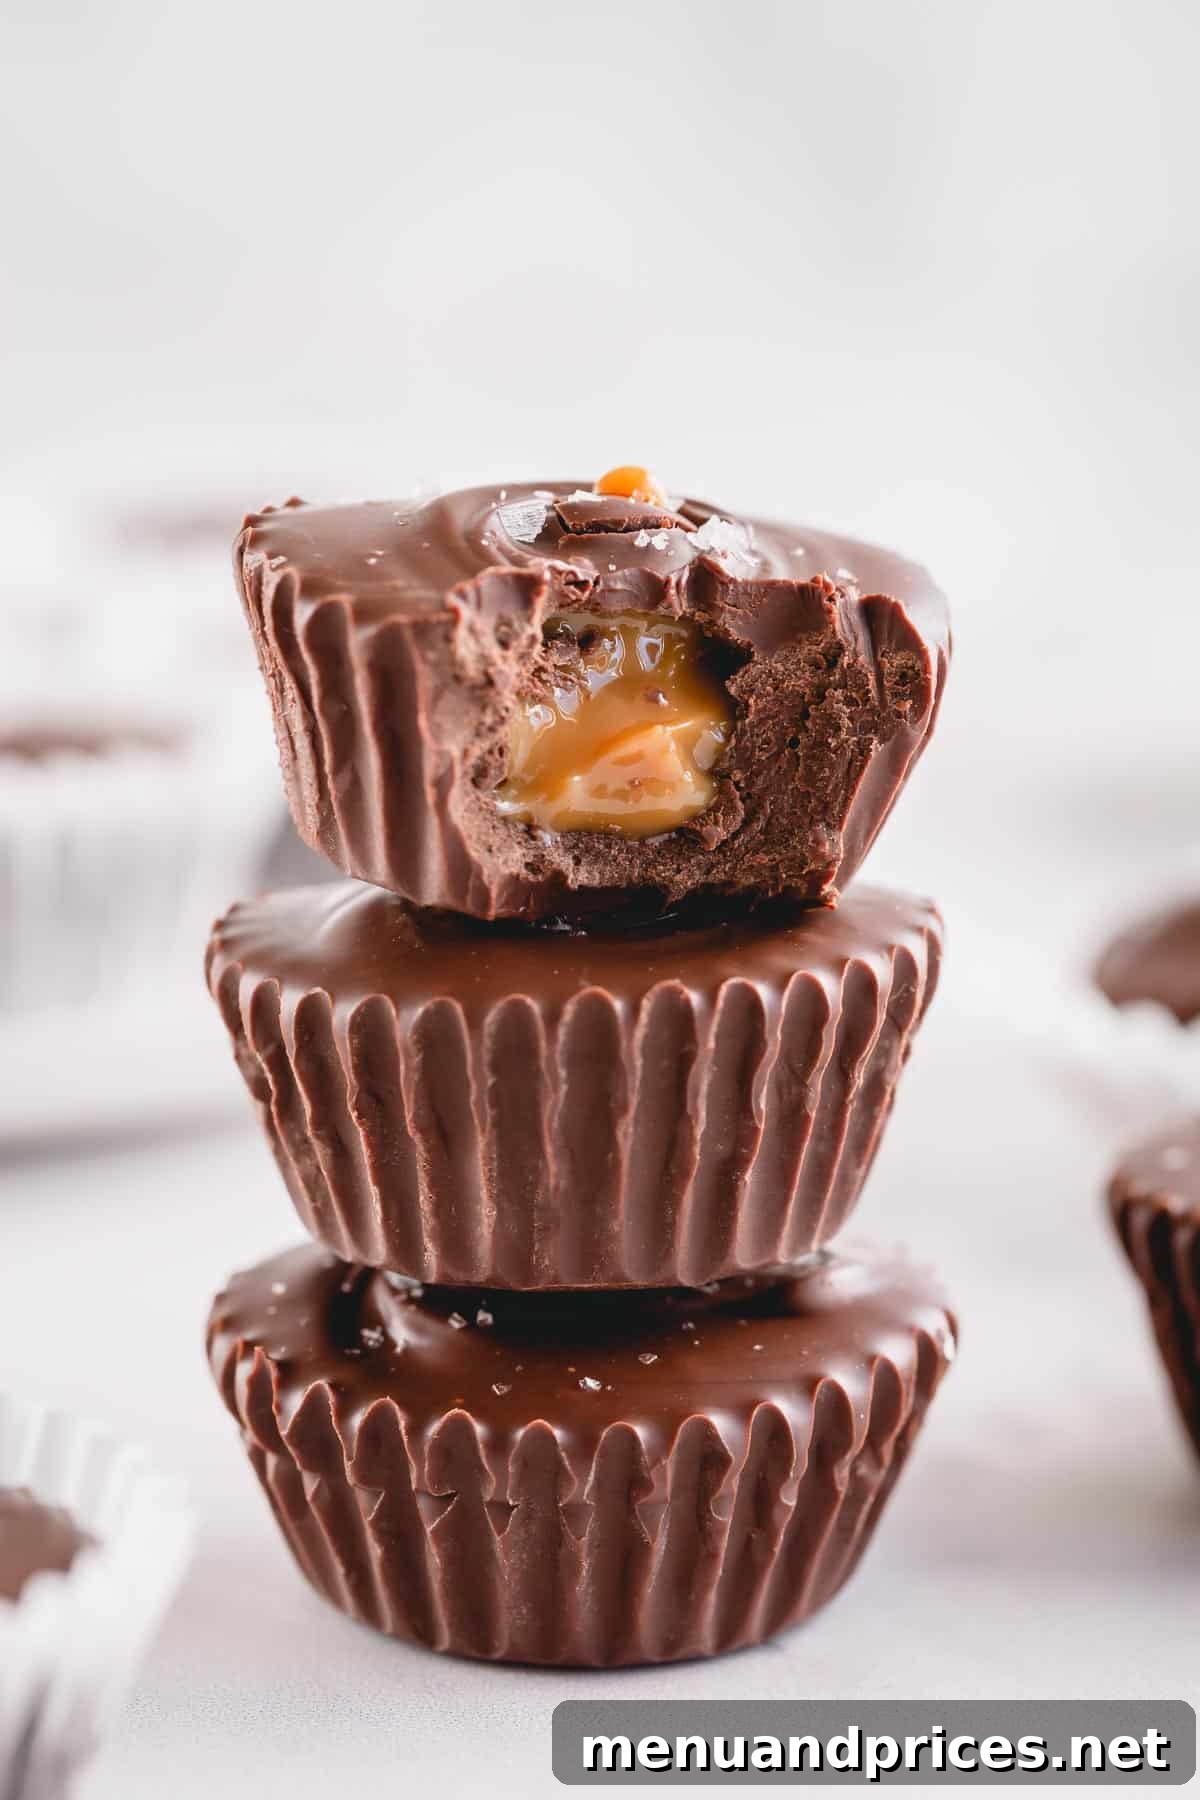
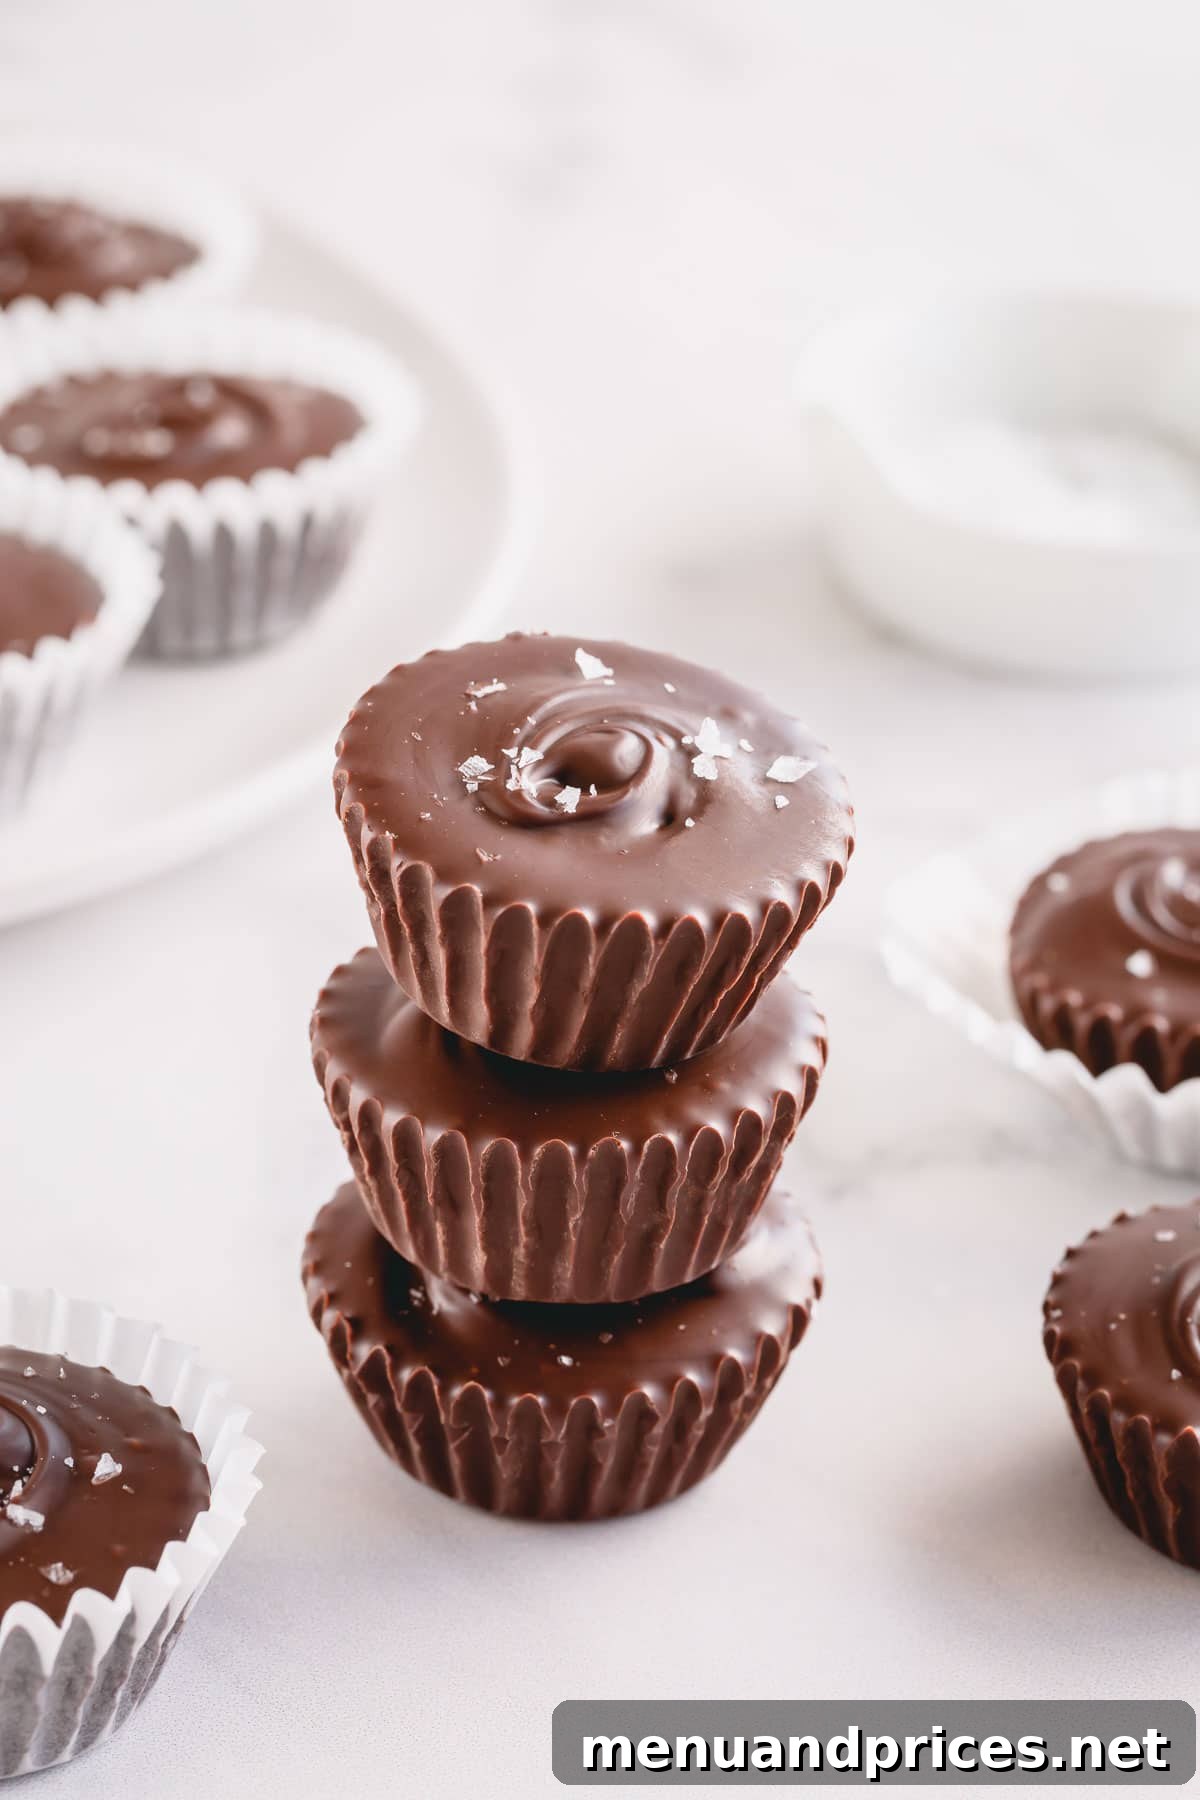
Prepare to be amazed by these incredibly simple yet utterly luxurious homemade chocolate cups! Filled with rich, creamy dulce de leche and crowned with a delicate sprinkle of flaky sea salt, these bite-sized treats offer an irresistible blend of sweet and salty flavors with a delightful textural contrast. Forget complicated desserts; these indulgent delights come together with minimal effort and just a handful of quality ingredients, making them perfect for any occasion – from a quick craving fix to an elegant dessert platter.
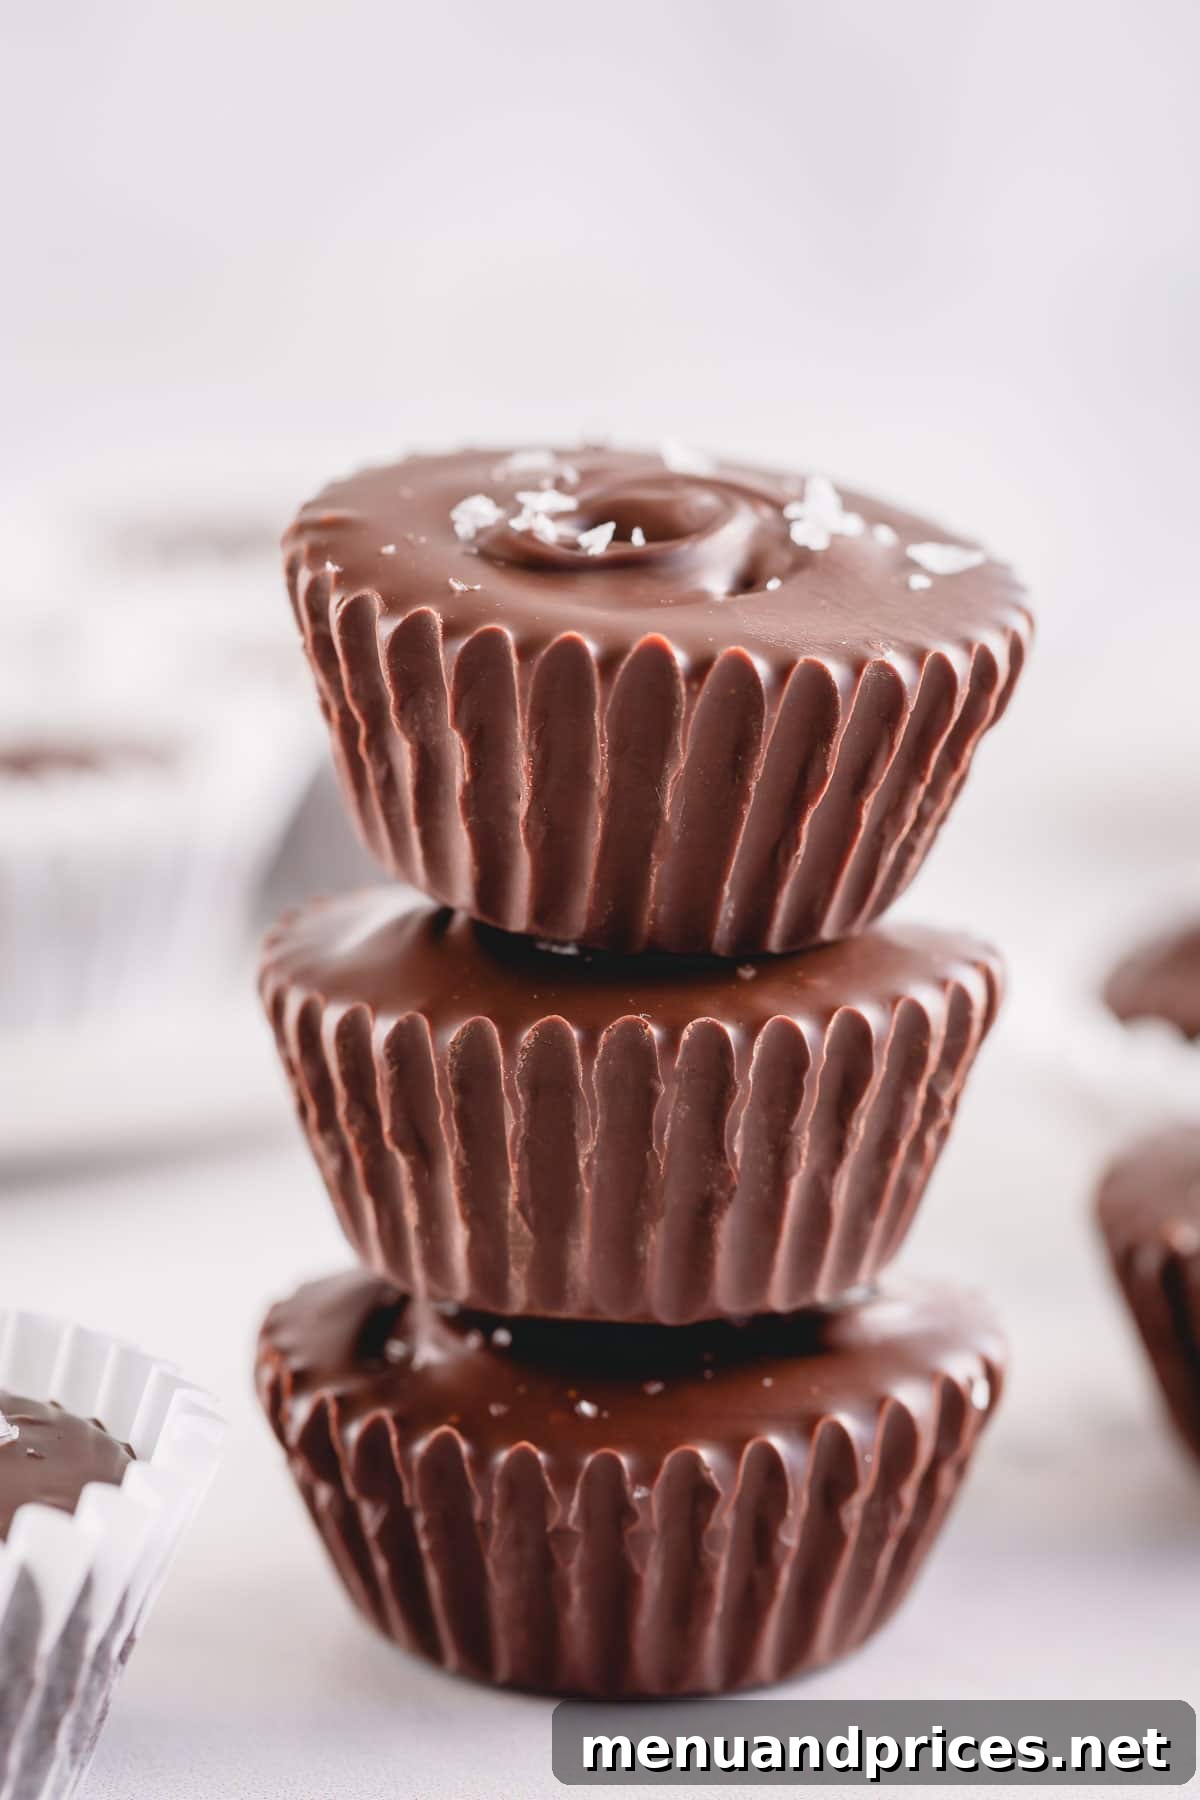
Irresistible Dulce de Leche Chocolate Cups: Your Easy Sweet & Salty Treat
Discover the magic of homemade gourmet chocolate cups. These decadent delights combine the rich intensity of chocolate with the creamy sweetness of dulce de leche, all balanced by a surprising touch of flaky sea salt. Perfect for dessert lovers, these easy-to-make treats promise an explosion of flavors and textures in every bite.
Why You’ll Fall in Love with These Dulce de Leche Chocolate Cups:
If you’re a connoisseur of the classic chocolate and caramel pairing, then these sensational chocolate caramel cups are destined to become your new obsession. They transcend ordinary sweets, offering a gourmet experience that is both intensely satisfying and surprisingly effortless to achieve. Here’s why these treats will earn a permanent spot in your recipe collection:
- Harmonious Flavor Profile: The genius of these cups lies in their sweet and salty balance. The deep, often slightly bitter notes of dark chocolate perfectly complement the milky sweetness of dulce de leche, while the coarse sea salt crystals provide a delightful counterpoint, enhancing all the flavors.
- Irresistible Texture Contrast: Imagine sinking your teeth into a crisp shell of perfectly tempered chocolate, followed by a luxuriously smooth, creamy dulce de leche filling. The subtle crunch from the salt flakes adds another layer of sensory pleasure, making each bite a journey of textures.
- Remarkably Easy to Make: Despite their elegant appearance, these chocolate cups require minimal culinary expertise. With just four key ingredients and straightforward steps, even novice bakers can create impressive, bakery-quality confections at home.
- Perfect for Any Occasion: Whether you’re seeking a quick indulgence, a charming homemade gift, or a show-stopping dessert for a dinner party, these treats fit the bill. Their small size makes them ideal for portion control and easy sharing.
- Customizable Potential: While phenomenal as is, these cups are also a fantastic canvas for creativity. Explore different types of chocolate, add nuts, or infuse your dulce de leche for endless variations tailored to your taste.
These sweet and salty bites are more than just a dessert; they’re an experience. Get ready to impress yourself and everyone else with these delightful chocolate dulce de leche cups!
Key Ingredients for Perfect Chocolate Dulce de Leche Cups:
The beauty of this recipe lies in its simplicity and reliance on high-quality ingredients. Each component plays a vital role in achieving the exquisite balance of flavor and texture. Don’t skimp on quality here; it truly makes all the difference in the final product!
-
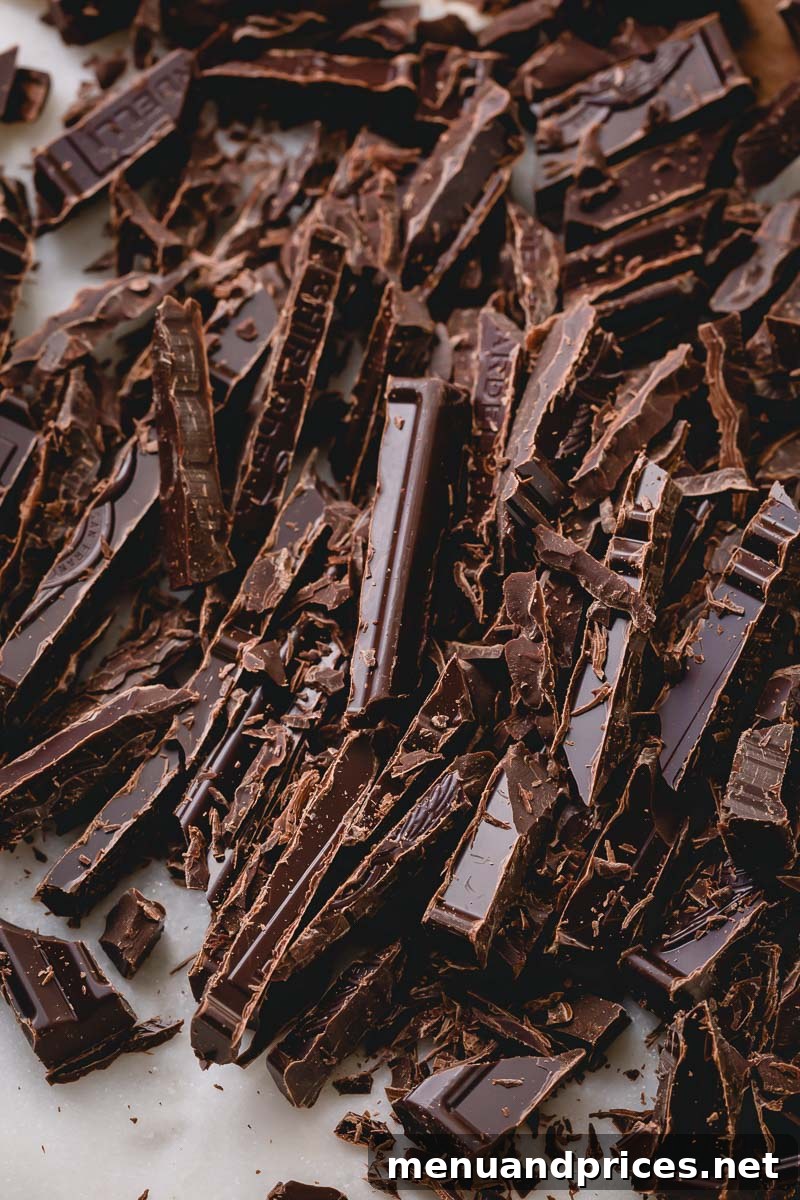
Premium Chocolate: This is the foundation of your chocolate cups, so choose wisely.
- Type: While you can use semi-sweet or even milk chocolate, I highly recommend using a good quality dark chocolate (bittersweet or semi-sweet with a cocoa percentage of 60-75%). Its inherent bitterness beautifully contrasts with the intense sweetness of dulce de leche, creating a more sophisticated flavor profile.
- Quality Over Quantity: Opt for a high-quality chocolate bar designed for baking rather than standard chocolate chips. Baking chocolate melts more smoothly and holds its temper better, resulting in a shiny, snap-able shell. Chocolate chips often contain stabilizers that prevent them from melting as fluidly.
- Flavor Depth: Higher quality chocolate will offer more complex flavor notes, elevating your homemade treats to gourmet status.
-
Creamy Dulce de Leche (or Caramel): The luscious heart of these cups.
- Dulce de Leche: This rich, caramelized sweetened milk is my preferred choice. Its thick, spoonable consistency and deep, milky caramel flavor are divine. I often keep a can of homemade dulce de leche on hand, which is incredibly satisfying to make from scratch.
- Caramel Sauce: If dulce de leche isn’t readily available, a good quality homemade caramel sauce can be used as a substitute. Just ensure it’s cooled completely and has a thick, spoonable consistency before filling the cups. A thinner caramel might leak or not hold its shape as well.
-
A Touch of Coconut Oil (or other neutral oil): For perfect chocolate texture.
- Purpose: A small amount of coconut oil is crucial for achieving that desirable smooth, soft-to-bite chocolate shell. Without it, the chocolate can become too hard and brittle once set, making it less pleasant to eat.
- Function: It helps the chocolate melt more fluidly and prevents it from seizing, contributing to a glossy finish.
- Alternatives: You can use a neutral-flavored vegetable oil, like refined avocado oil, or even a tiny pat of butter (though butter can introduce water, so use sparingly and carefully). While optional, I strongly recommend including it for the best results.
-
Flaky Sea Salt (e.g., Fleur de Sel or Maldon): The essential finishing touch.
- Flavor Enhancer: A sprinkle of sea salt flakes isn’t just for decoration; it’s a flavor powerhouse. The salt crystals burst on the tongue, creating pockets of salinity that beautifully cut through and enhance the sweetness of the chocolate and dulce de leche.
- Texture: Flaky sea salt, like Maldon sea salt flakes, has a distinct texture that regular table salt cannot replicate. Its delicate, irregular crystals provide a pleasant crunch without being overpowering.
- Aesthetic Appeal: Visually, the salt flakes add a sophisticated, artisanal touch to your homemade chocolate cups.
By investing in these quality ingredients, you’re setting yourself up for an incredibly delicious and professional-looking treat that tastes far more complex than its humble components suggest.
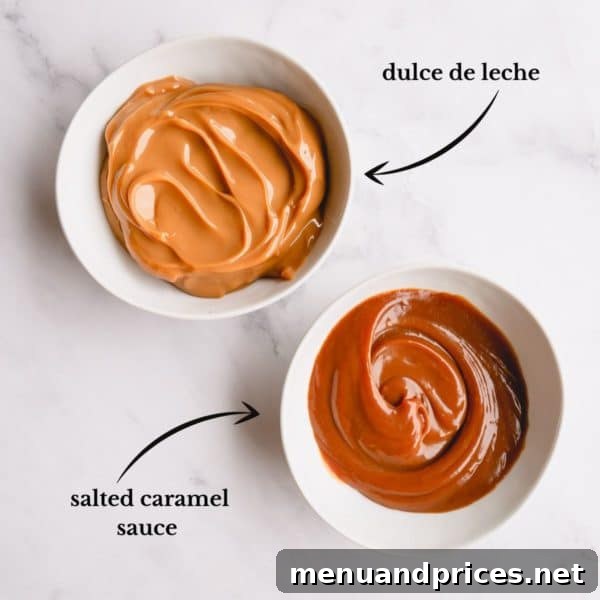
Caramel vs. Dulce de Leche: What’s the Difference?
While both caramel and dulce de leche are rich, sweet, and wonderfully creamy, they are distinct confections with unique origins, preparation methods, and flavor nuances. Understanding these differences can help you appreciate their individual characteristics, though in this recipe, they can often be used interchangeably for convenience.
-
Caramel: At its core, caramel is essentially caramelized sugar. It’s made by heating various types of sugar (granulated sugar, brown sugar) until it melts and transforms into a golden-brown liquid.
- Composition: Traditionally, caramel doesn’t require dairy, though most recipes for caramel *sauce* or *candy* incorporate heavy cream, butter, and sometimes vanilla after the sugar has caramelized to create a richer, smoother, and more pliable product.
- Flavor Profile: Caramel often has a slightly more pronounced, sometimes sharper, burnt sugar taste. The flavor can range from light and buttery to deep and smoky, depending on how dark the sugar is cooked.
- Texture: Caramel sauce can vary from thin and pourable to thick and chewy, depending on its ingredients and cooking time.
- Origins: Caramelization is a chemical process that has been utilized in cooking for centuries across many cultures.
-
Dulce de Leche: Meaning “sweet milk” in Spanish, dulce de leche is a confection primarily made from sweetened milk.
- Composition: It is traditionally prepared by slowly heating sweetened cow’s milk (often with a touch of baking soda to aid in the browning and prevent curdling) for an extended period, allowing the sugars and proteins in the milk to undergo a Maillard reaction.
- Flavor Profile: Dulce de leche boasts a unique, deeply milky, and nutty caramel flavor that is less about burnt sugar and more about the rich, cooked milk solids. It’s generally considered to have a more mellow, complex, and comforting sweetness.
- Texture: It typically has a thick, spoonable, and incredibly smooth, creamy consistency, similar to a thick spread or a very soft caramel candy.
- Origins: Originating in Latin America, dulce de leche is a staple in many cuisines, used in pastries, desserts, and as a spread.
While both offer a delightful sweetness to these chocolate cups, dulce de leche’s distinct milky notes and smoother texture often make it a truly exceptional choice, creating a filling that melts in your mouth.
Essential Equipment for Your Chocolate Cups:
Gathering your tools before you start ensures a smooth and enjoyable process for making these delectable chocolate cups.
- Mini Muffin Pan: The perfect mold for bite-sized treats.
- Mini Cupcake Liners: Essential for easy removal and serving, especially if you plan to share or gift them. Alternatively, you can use mini silicone baking cups, which are reusable and make de-molding even simpler.
- Microwave-Safe Bowl (Silicone or Plastic): Ideal for gently melting chocolate.
- Spatula or Spoon: For stirring chocolate and mixing ingredients.
- Piping Bags: Great for neat and controlled chocolate and dulce de leche dispensing. If you don’t have piping bags, a sturdy ziplock bag with a corner snipped off works perfectly.
- Small Cookie Scoop (Optional): Useful for portioning chocolate if you prefer not to use a piping bag.
How to Make These Decadent Chocolate Dulce de Leche Chocolate Cups:
Creating these gourmet chocolate cups is a straightforward process, but paying attention to a few key details will ensure your treats are picture-perfect and deliciously smooth.
1. Gently Melt the Chocolate
The secret to a beautifully shiny and crisp chocolate shell that doesn’t melt instantly in your hands is proper melting, or “tempering.” We aim to melt the chocolate gently to maintain its tempered state as much as possible, preventing “chocolate bloom” (unappealing white streaks) and ensuring a satisfying snap.
- Begin by finely chopping your quality chocolate bar into small, uniform pieces. Smaller pieces melt faster and more evenly, reducing the risk of overheating.
- Place the chopped chocolate and the coconut oil into a medium-sized silicone or plastic microwave-safe bowl.
- Microwave for 30 seconds at 50% power (this power setting is crucial for gentle heating).
- Remove the bowl and stir the chocolate thoroughly with a spatula, even if it doesn’t appear fully melted. The residual heat will continue to melt the chocolate.
- Return the bowl to the microwave for another 15 seconds at 50% power. Stir well again.
- Continue this process, microwaving in 15-second intervals at 50% power, stirring vigorously after each interval, until the chocolate is smooth and fully melted with no lumps. Be patient; this gentle approach is key to success. The chocolate should be fluid but not excessively hot (ideally not exceeding 90°F / 32°C).
Tip for Melting Chocolate:
Finely chopping the chocolate into small pieces significantly aids in faster and more even melting, reducing the chances of overheating and maintaining the chocolate’s temper for a beautiful, glossy finish.
Patience is a virtue in chocolate making! By carefully controlling the temperature and not allowing the chocolate to get too hot (ideally below 90°F / 32°C), you help maintain its crystalline structure, known as temper. This ensures your chocolate cups will set quickly, boast a beautiful shiny finish, have a satisfying snap when bitten, and resist melting too easily in your hands. It also prevents the formation of “chocolate bloom,” those undesirable white streaks that can appear on untempered or improperly melted chocolate.
2. Assemble Your Chocolate Dulce de Leche Cups
Now for the fun part: bringing all the elements together to create your charming chocolate cups!
- Prepare Your Muffin Pan: Line a mini muffin pan with mini cupcake liners. This step is crucial for easy removal and a clean presentation. If using mini silicone cups, no liners are needed.
- First Chocolate Layer: Transfer your gently melted chocolate into a piping bag (or a sturdy ziplock bag with a small corner snipped off). Alternatively, a small cookie scoop works well for portioning. Fill each mini cupcake liner about one-third to halfway with the melted chocolate, creating a base layer.
- Add the Dulce de Leche: If your dulce de leche is very thick, you might gently warm it slightly to make it more pliable for piping (but don’t make it hot!). Place the dulce de leche in a separate piping bag (or ziplock bag). Pipe about a teaspoon of dulce de leche directly into the center of each chocolate-filled cup, making sure it doesn’t touch the sides of the liner.
- Top with More Chocolate: Carefully pipe or spoon the remaining melted chocolate over the dulce de leche filling, completely covering it and filling the cup to the top (or just below the rim of the liner).
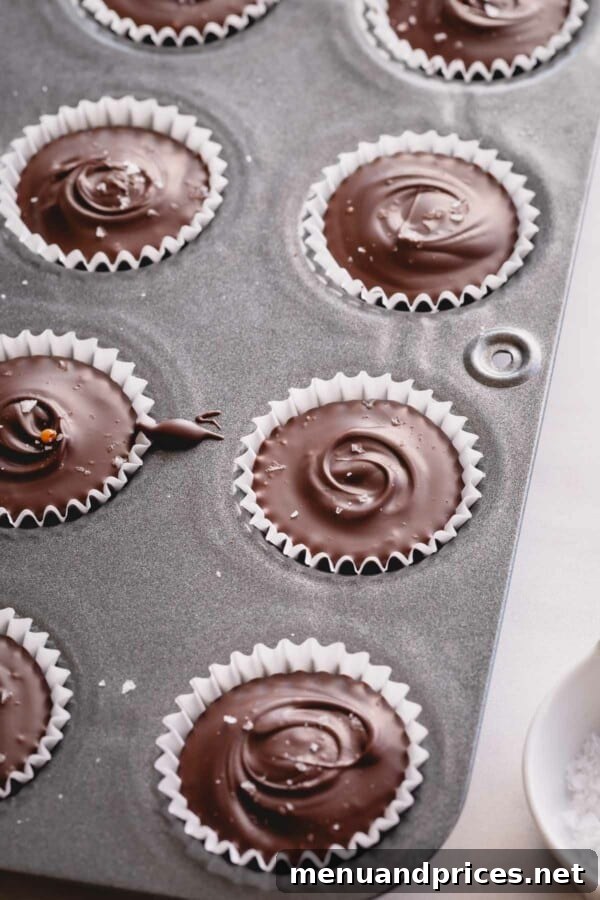
- Smooth and Settle: Gently tap the muffin pan on your counter a few times. This helps to release any air bubbles, settle the chocolate, and create a smooth, even top surface for your cups.
- Sprinkle Sea Salt: Immediately after tapping, while the chocolate is still wet, sprinkle a generous pinch of flaky sea salt over the top of each chocolate cup. The salt will adhere as the chocolate sets.
- Allow to Set: Let the chocolate cups set at room temperature for approximately 30-60 minutes, or until the chocolate is firm to the touch. Avoid refrigerating, as rapid cooling can sometimes dull the chocolate’s shine and alter its texture. Once set, gently peel away the liners and enjoy!
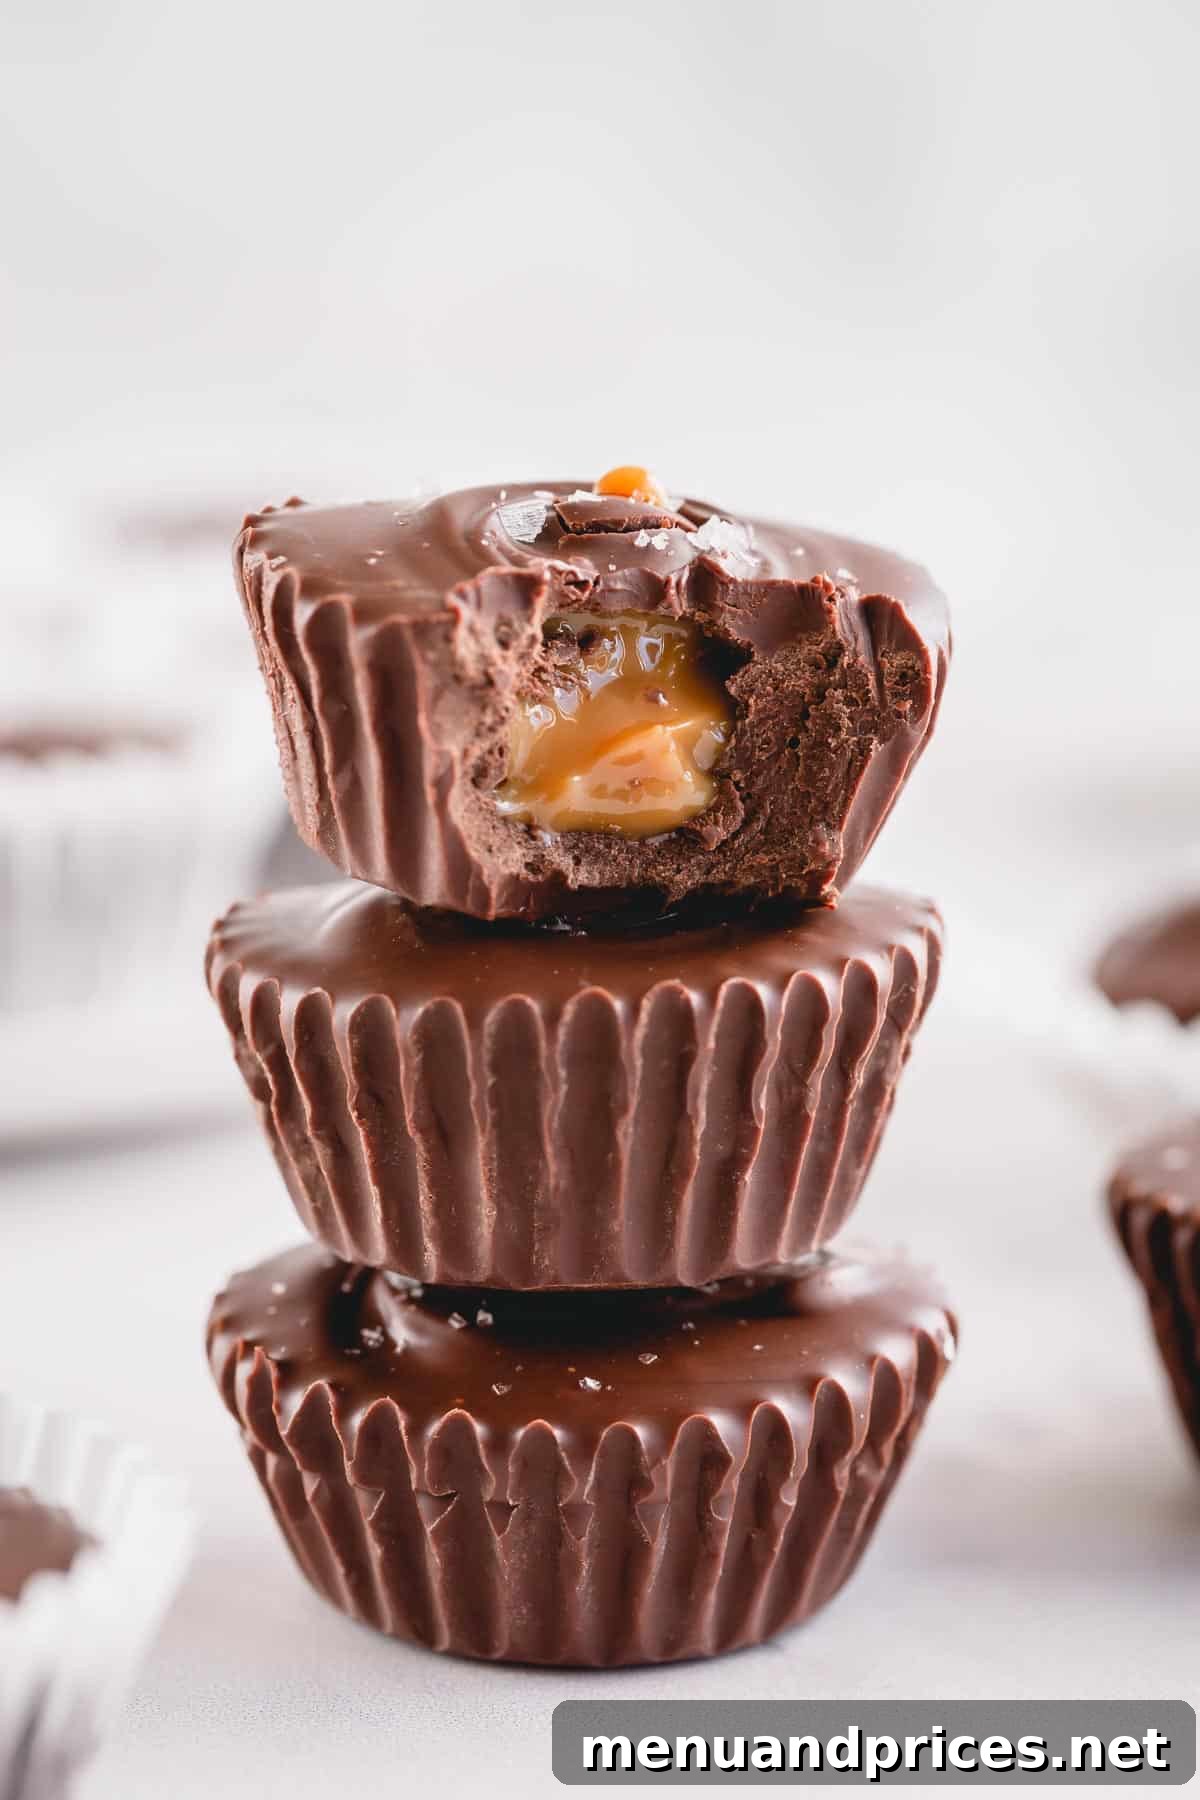
There you have it – incredibly delicious, sweet, and salty chocolate dulce de leche cups, ready to delight your taste buds! We sincerely hope you love these simple yet sophisticated treats. Thank you for joining us on this culinary adventure!
Chocolate Dulce de Leche Cups
Shinee Davaakhuu
These indulgent homemade chocolate cups, filled with rich dulce de leche and a hint of sea salt, are surprisingly easy to make and incredibly delicious!
15 mins
45 mins
12 mini cups
Ingredients
- 8 oz dark chocolate bar (Note 1)
- ½ tablespoon coconut oil (Note 2)
- ¼ cup dulce de leche (Note 3)
- Sea salt flakes
Instructions
-
Line a mini muffin pan with paper liners. Or you can use mini silicone cups.
-
Place dulce de leche in a piping bag, or a ziplock bag with one corner cut, ready for use.
-
To melt the chocolate, place the chopped chocolate and coconut oil in a medium silicone (or plastic) bowl.
-
Microwave for 30 seconds at 50% power. Then stir well and put it back for 15 seconds at 50% power. Stir well again and continue microwaving in 15-second increments at 50% power until the chocolate is fully melted and smooth, stirring well in between each interval.
-
Place the melted chocolate in a piping bag, or using a small cookie scoop, pour about 1 tablespoon of chocolate into each prepared cup to form the base layer.
-
Then, pipe about 1 teaspoon of dulce de leche into the center of each chocolate cup.
-
Top with the remaining melted chocolate, ensuring the filling is completely covered. Gently tap the muffin pan on the counter a few times to smooth out the top surface of the chocolate.
-
Sprinkle the sea salt flakes over the chocolate cups while the chocolate is still wet. Let the chocolate set at room temperature for at least 30 minutes, or until fully firm.
-
Store the finished chocolate cups in an airtight container at room temperature for up to 1 week.
⭐️ Did you make this recipe?
Please consider leaving a review and letting us know how you liked it!
Tips & Notes
Note 1: Chocolate Quality: Always opt for a high-quality dark chocolate bar for the best flavor and texture. Avoid chocolate chips as they don’t melt as smoothly or achieve the same glossy finish due to added stabilizers. Bittersweet chocolate (60-75% cocoa) pairs wonderfully with the sweet filling, but semi-sweet or even milk chocolate can be used if preferred.
Note 2: Dulce de Leche vs. Caramel: While a homemade caramel sauce can work, I highly recommend using dulce de leche for its rich, milky caramel flavor and thicker, creamier texture. Homemade dulce de leche is fantastic, but store-bought is also convenient. Ensure your chosen filling is cool and thick before use.
Note 3: The Role of Coconut Oil: A small amount of coconut oil is added to the chocolate to help it melt smoothly and ensure the finished chocolate shell is soft enough to bite into, rather than being too hard or brittle. It can be omitted, but the texture will be firmer.
Note 4: Flaky Sea Salt: The sprinkle of flaky sea salt is not just for garnish; it’s a critical component that elevates the flavor profile by balancing the sweetness. Maldon sea salt flakes are highly recommended for their excellent texture and mild salinity.
Nutrition
1 mini chocolate cup
118kcal
9g
1g
9g
5g
4mg
Dessert
American
Did you make this? We’d love to hear your thoughts! Share your experience by leaving a comment and rating.
This recipe was originally published on July 26th, 2016, and has been updated for clarity and comprehensive detail.