
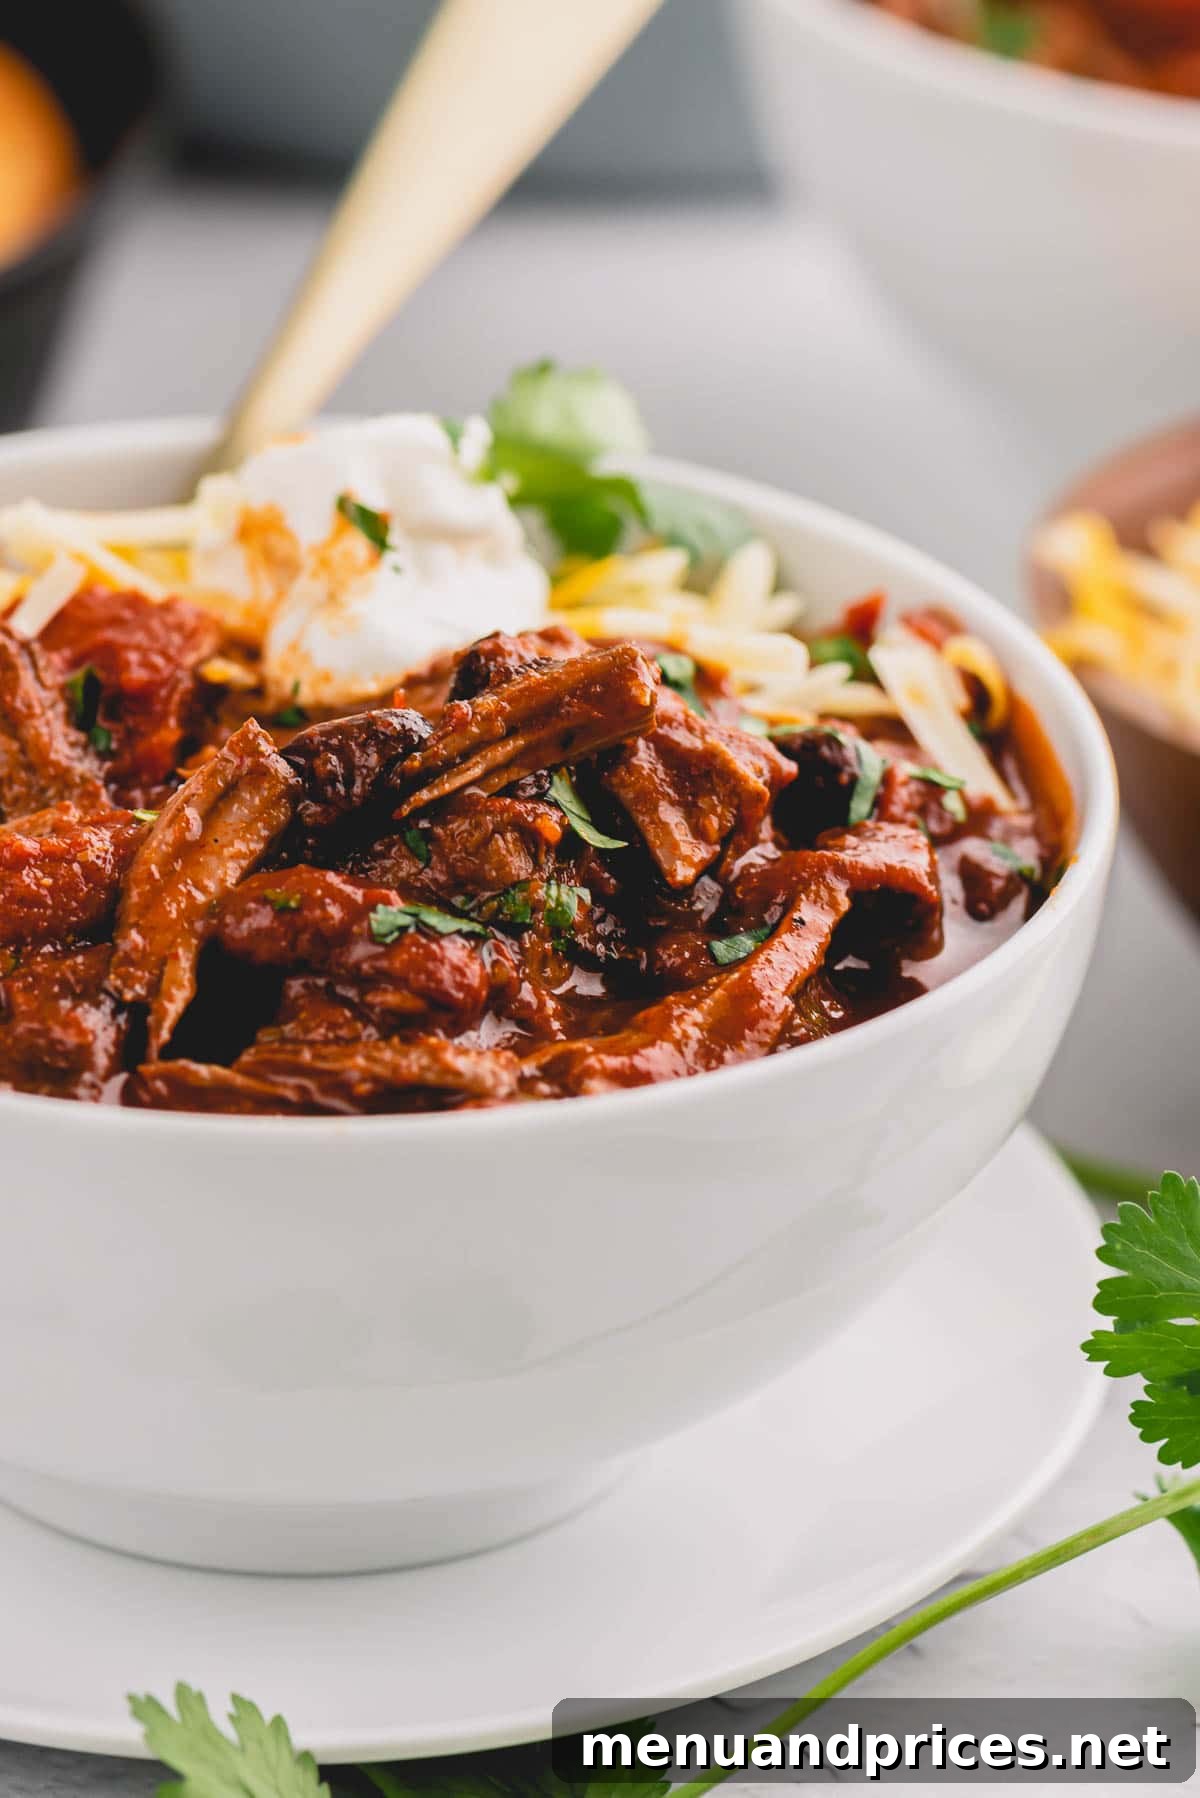
Dive into a bowl of the ultimate chunky beef chili, a hearty and satisfying meal that promises warmth and robust flavor. This recipe stands out with its caramelized stew meat, slow-simmered in a Dutch oven until incredibly tender and infused with deep, complex notes. Rich, thick, and undeniably comforting, this Dutch oven chili is designed to be a true crowd-pleaser, perfect for game days, chilly evenings, or stress-free entertaining. Forget thin, watery chilis – this is a substantial stew that truly sticks to your ribs and leaves everyone asking for more.
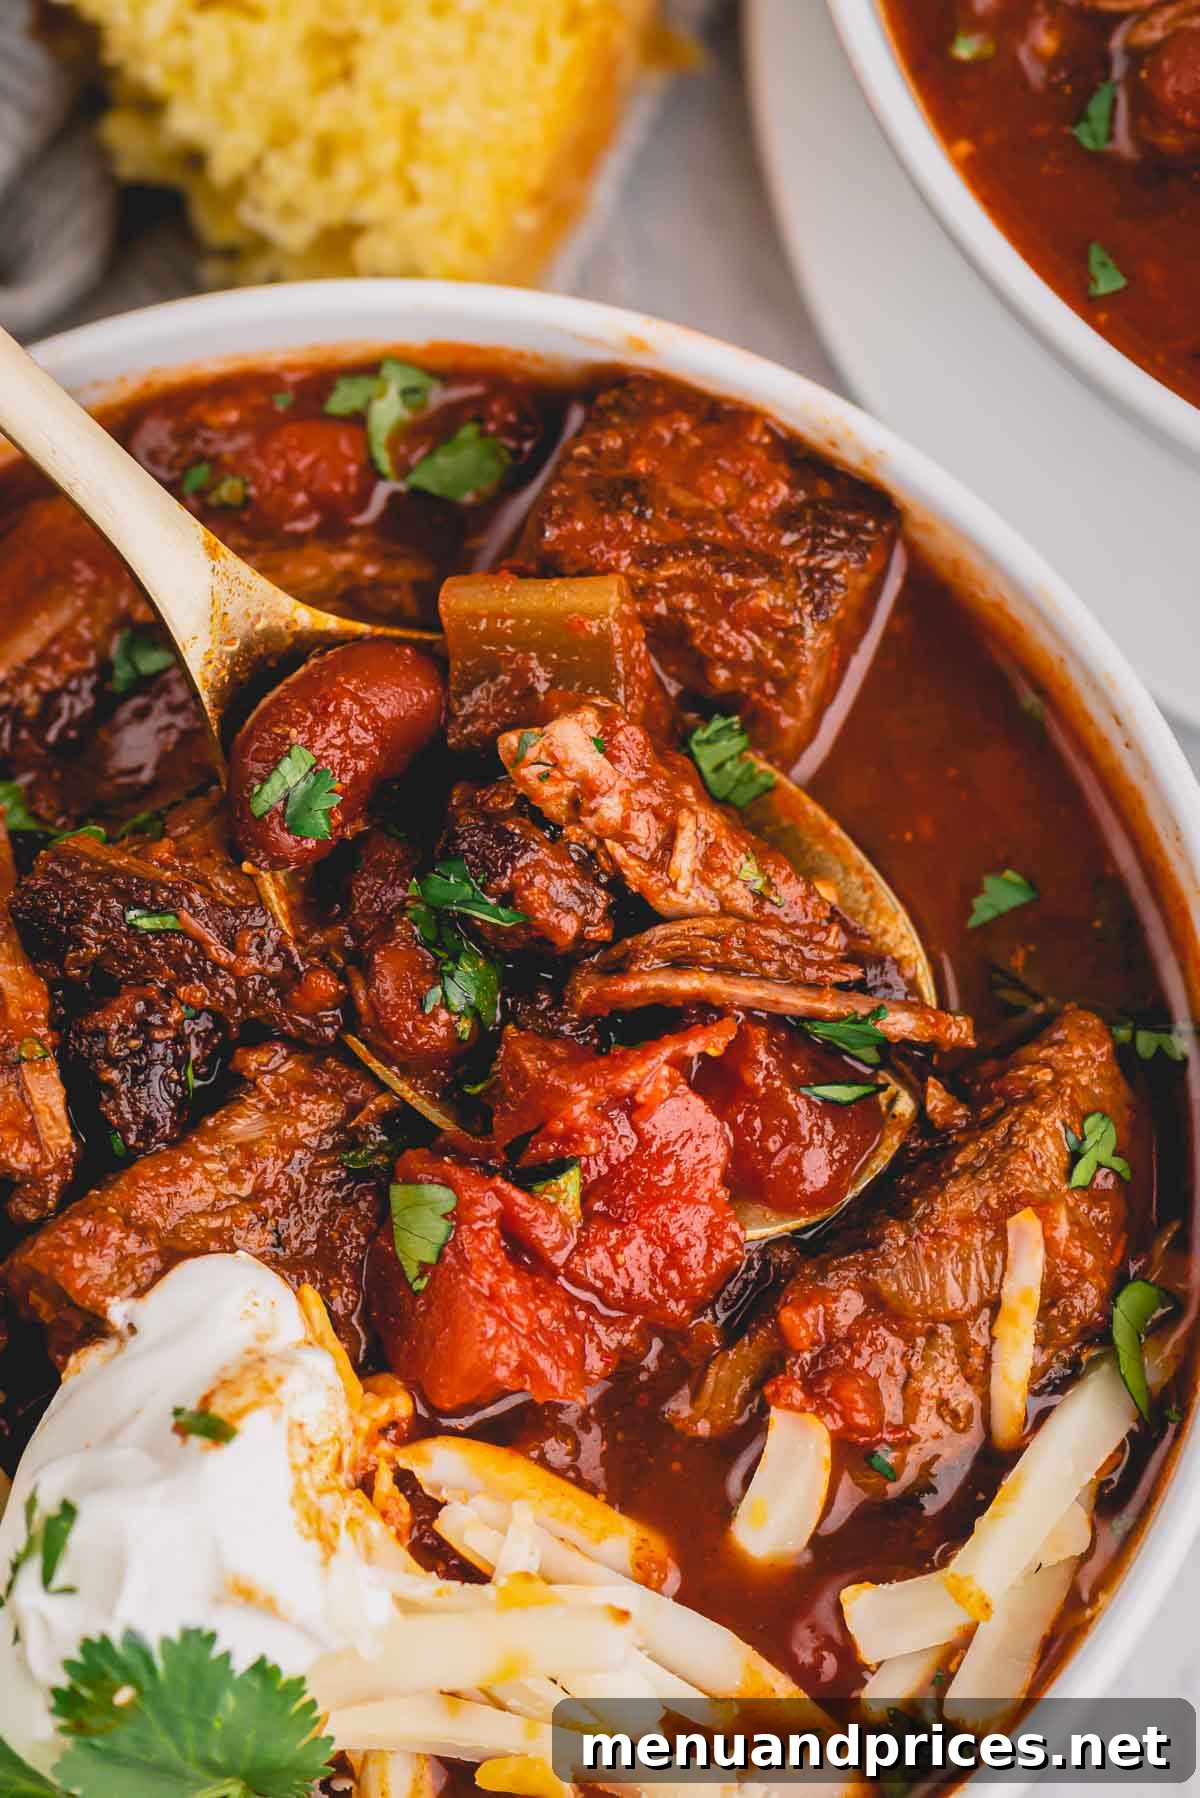
Why This Chunky Chili Recipe Will Become Your Favorite
While varieties like Texas chili and chili con carne abound, none quite capture the comforting depth and satisfying texture of this Dutch oven masterpiece. Here’s why this simple yet profoundly flavorful stew is about to become a staple in your culinary repertoire:
- Effortless Preparation: Despite its rich flavor, this recipe calls for simple, accessible ingredients and minimal active prep time, making it ideal for home cooks of all skill levels. Most of the magic happens as it slowly simmers.
- Unbeatably Hearty and Satisfying: This isn’t just chili; it’s a meal. Loaded with fork-tender chunks of beef and wholesome beans, it’s designed to be substantial and deeply satisfying, providing lasting warmth and energy.
- Feeds a Crowd (and More!): With generous servings, this chili is perfect for family gatherings, potlucks, or entertaining guests. It’s easily scalable, ensuring you always have enough to go around.
- Freezer-Friendly Convenience: This chili freezes beautifully, making it an excellent choice for meal prepping. Enjoy a delicious, homemade dinner on busy weeknights without any fuss – simply thaw and reheat.
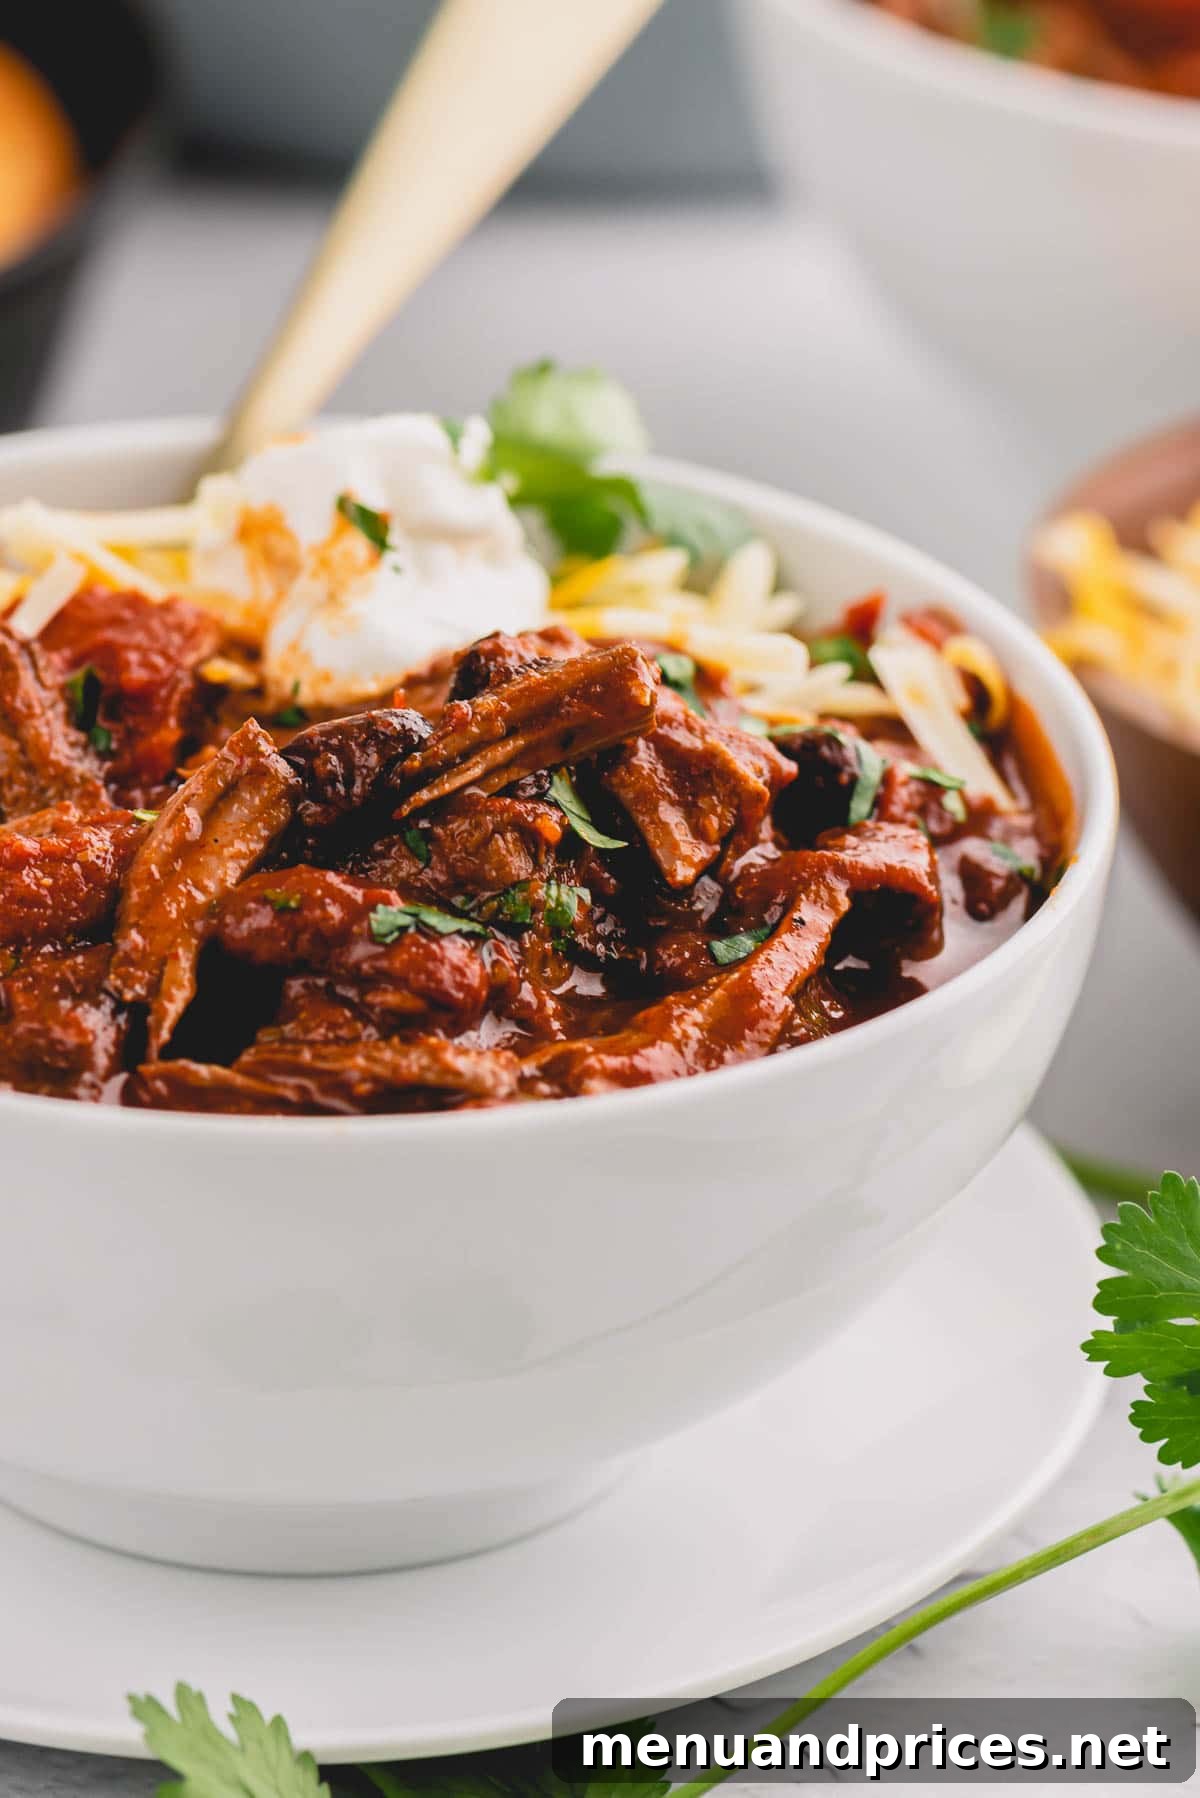
Elevate your chili experience by topping this hearty dish with a medley of fresh ingredients like shredded cheddar cheese, vibrant fresh cilantro, creamy sliced avocado, and crunchy corn chips. For an even more spectacular meal, pair it with a side of warm, fluffy homemade cornbread – a match made in culinary heaven!
Planning ahead? This recipe is incredibly versatile. Double the batch to stock your freezer with convenient, ready-to-eat meals, or prepare it a day or two in advance for a truly impressive yet stress-free entertaining option. We believe in making delicious home-cooked meals accessible, and this chili perfectly embodies our philosophy of easy dinner ideas that never compromise on flavor.
Mastering Flavor: Essential Ingredient Insights for Your Chili
Don’t be intimidated by the ingredient list; many of these are likely already in your pantry! This recipe relies on a harmonious blend of foundational ingredients and a rich array of spices to achieve its signature depth. Let’s delve into the key components that bring this chunky chili to life:
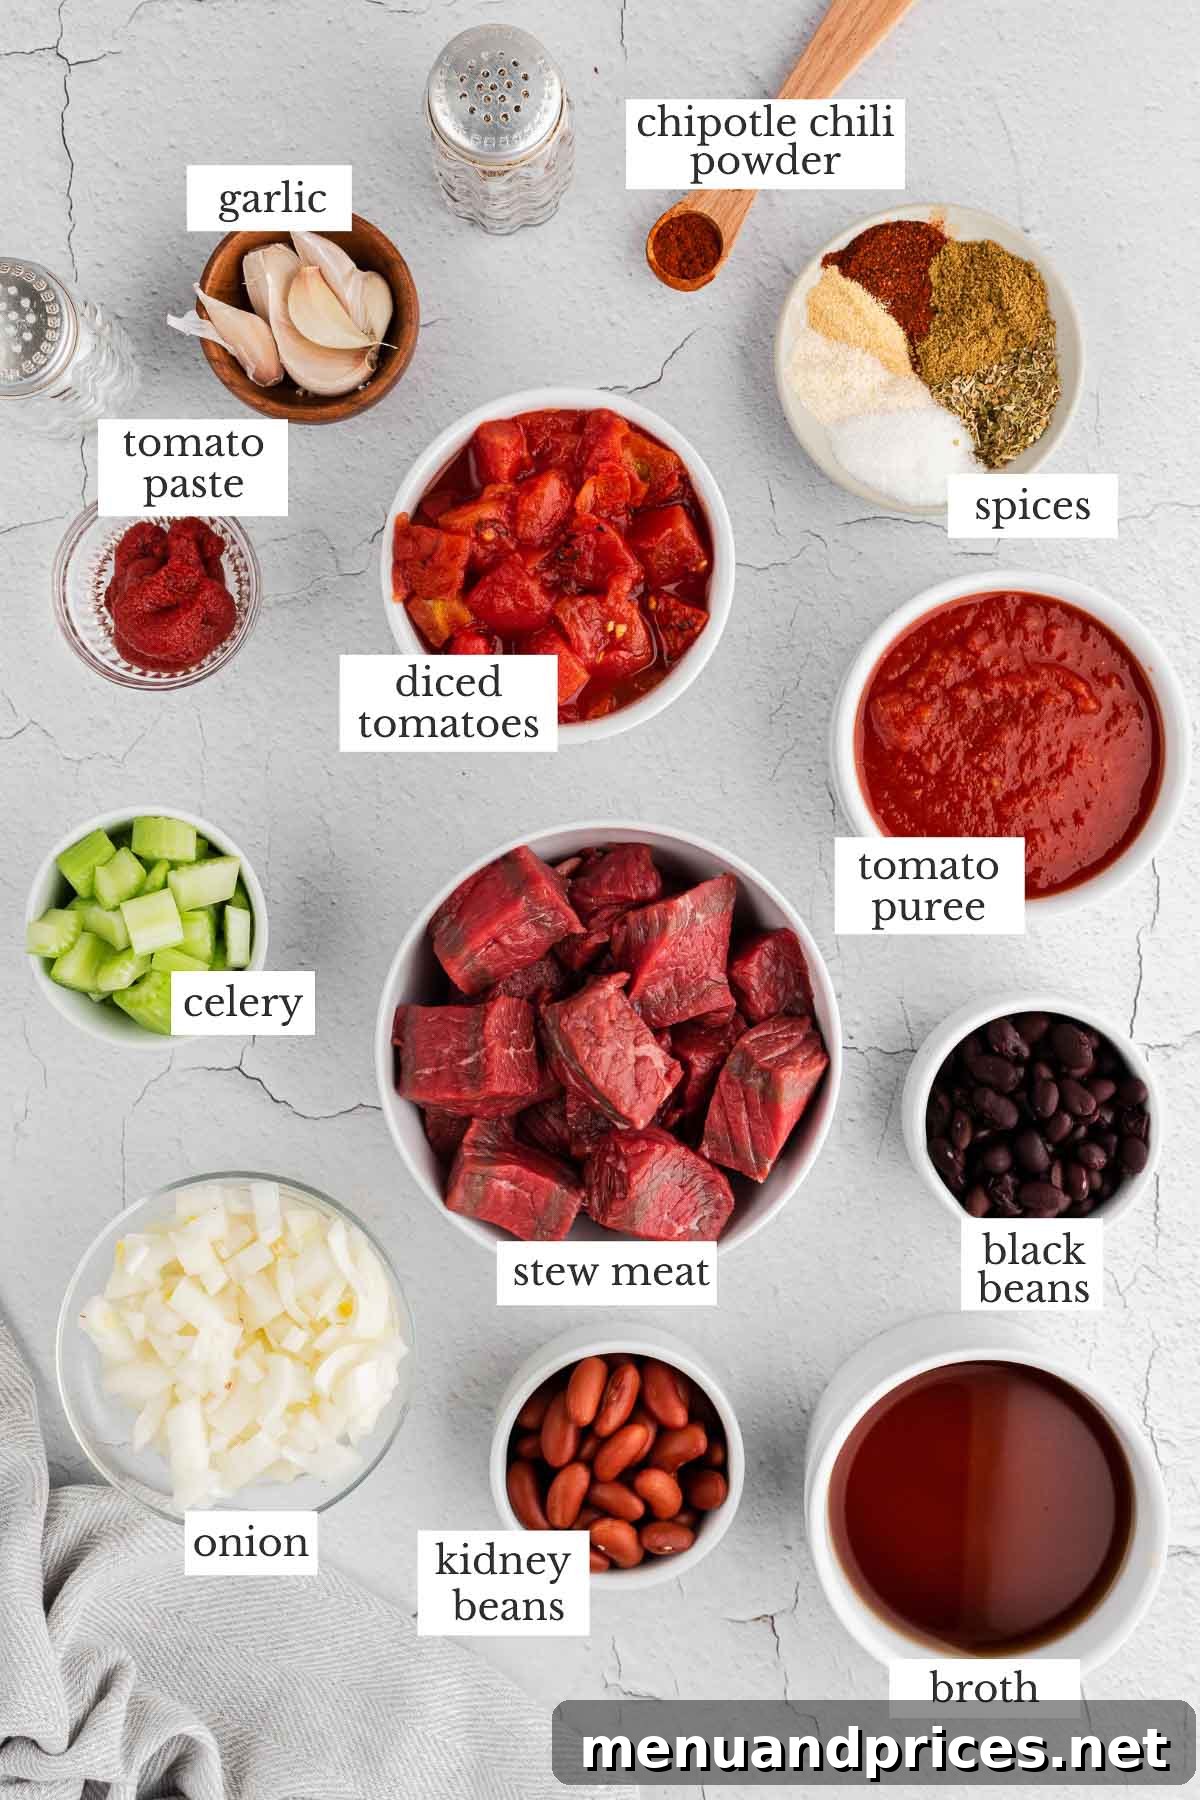
- Stew Meat: The star of our chili! Precut stew meat is a convenient and economical choice. Alternatively, you can opt for a beef chuck roast, cutting it into 1-inch cubes and trimming any excess fat. Chuck roast is ideal for slow cooking; its tough connective tissues break down over time, transforming into incredibly soft and tender morsels that melt in your mouth. This slow rendering process also enriches the chili’s overall texture and flavor.
- Aromatics: The foundation of any great stew, sautéed onions, celery, and garlic provide an aromatic base that builds immense flavor. Any onion variety you prefer will work beautifully here. For an added layer of flavor and color, consider sautéing diced bell peppers alongside your onions and celery. These ingredients sweat down and release their sweet, savory essences, creating a robust start to your chili.
- Tomatoes, Paste, & Puree: Tomato paste is a powerhouse ingredient, acting as both a thickening agent and a concentrated flavor booster. It adds a deep, umami richness. For a chili with more texture and rustic appeal, substitute the 28oz can of tomato puree with a can of diced tomatoes. The combination of different tomato forms provides complexity and body.
- Beans: This recipe utilizes kidney and black beans for a classic chili profile. However, chili is incredibly forgiving – feel free to incorporate your favorite legumes! Pinto beans, cannellini beans, or even a mix of different beans would be delicious additions, adding varied textures and nutritional value. Remember to drain and rinse canned beans thoroughly to remove excess sodium and improve digestibility.
- Beef Broth: The flavorful liquid base that brings all the ingredients together. We recommend using reduced-sodium beef broth to maintain control over the overall saltiness of your chili. High-quality store-bought broth works well, but for an unparalleled depth of flavor, consider using homemade beef bone broth. Its rich collagen content also adds a wonderful mouthfeel.
- Spices: A truly exceptional chili is defined by its spice blend. Our homemade seasoning combines chili powder, earthy cumin, pungent garlic powder, savory onion powder, aromatic oregano, and a touch of smoky chipotle powder. This carefully balanced mix creates a warm, inviting aroma and a complex flavor profile that is both comforting and exciting. Chipotle powder adds a subtle smoky heat, which can be adjusted to your preference.
- Sugar: A small but crucial addition. A touch of sugar helps to balance the acidity from the tomatoes, rounding out the flavors and preventing the chili from tasting too sharp or tart. It subtly enhances the savory notes without making the chili sweet.
- Salt and Pepper: Essential seasonings that elevate all the other flavors. Adjust to taste throughout the cooking process, remembering that flavors will concentrate as the chili simmers.
Crafting the Perfect Dutch Oven Chunky Chili: Step-by-Step Guide
Creating this rich and hearty chili is a rewarding process, largely thanks to the Dutch oven which excels at slow, even cooking. Follow these steps to achieve tender meat and a deeply flavorful sauce:
Step 1: Prepare and Sear the Beef
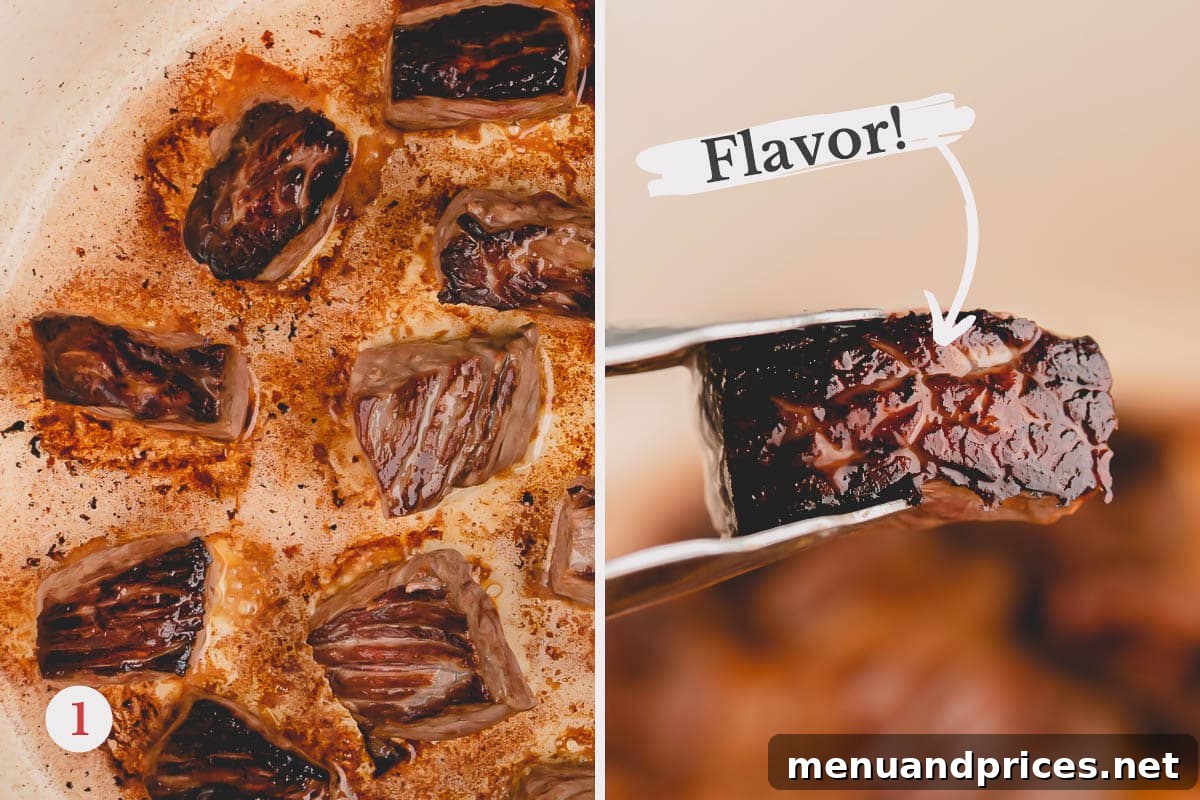
First, begin by preheating your oven to 350°F (175°C) and arranging the racks to comfortably accommodate your Dutch oven in the center. Pat the stew meat thoroughly dry with paper towels; this crucial step ensures a superior sear. Heat a large 6-8 quart cast iron Dutch oven over medium-high heat for about 3 minutes, then add a drizzle of canola oil or a tablespoon of bacon grease. Once the oil is shimmering, add the beef chunks in a single layer, ensuring not to overcrowd the pot. Sear until beautifully browned on two sides, approximately 3 minutes per side. Resist the urge to disturb the meat; letting it sit undisturbed against the hot pan promotes the development of a rich, caramelized crust. Don’t fear a dark brown sear—this “fond” is packed with flavor and will contribute significantly to the chili’s depth. If the beef is browning too quickly, reduce the heat to medium. Once all the beef is seared in batches, transfer the browned pieces onto a clean plate, reserving any accumulated juices.
Pro Tips for Searing
- Dry Your Meat: Always thoroughly pat the meat dry with paper towels. Moisture on the surface creates steam, which prevents browning and crust formation.
- Avoid Overcrowding: Give the beef chunks ample space in the pot. Overcrowding lowers the pan’s temperature and causes the meat to steam rather than sear, leading to excess moisture and less browning.
Step 2: Build the Flavor Base
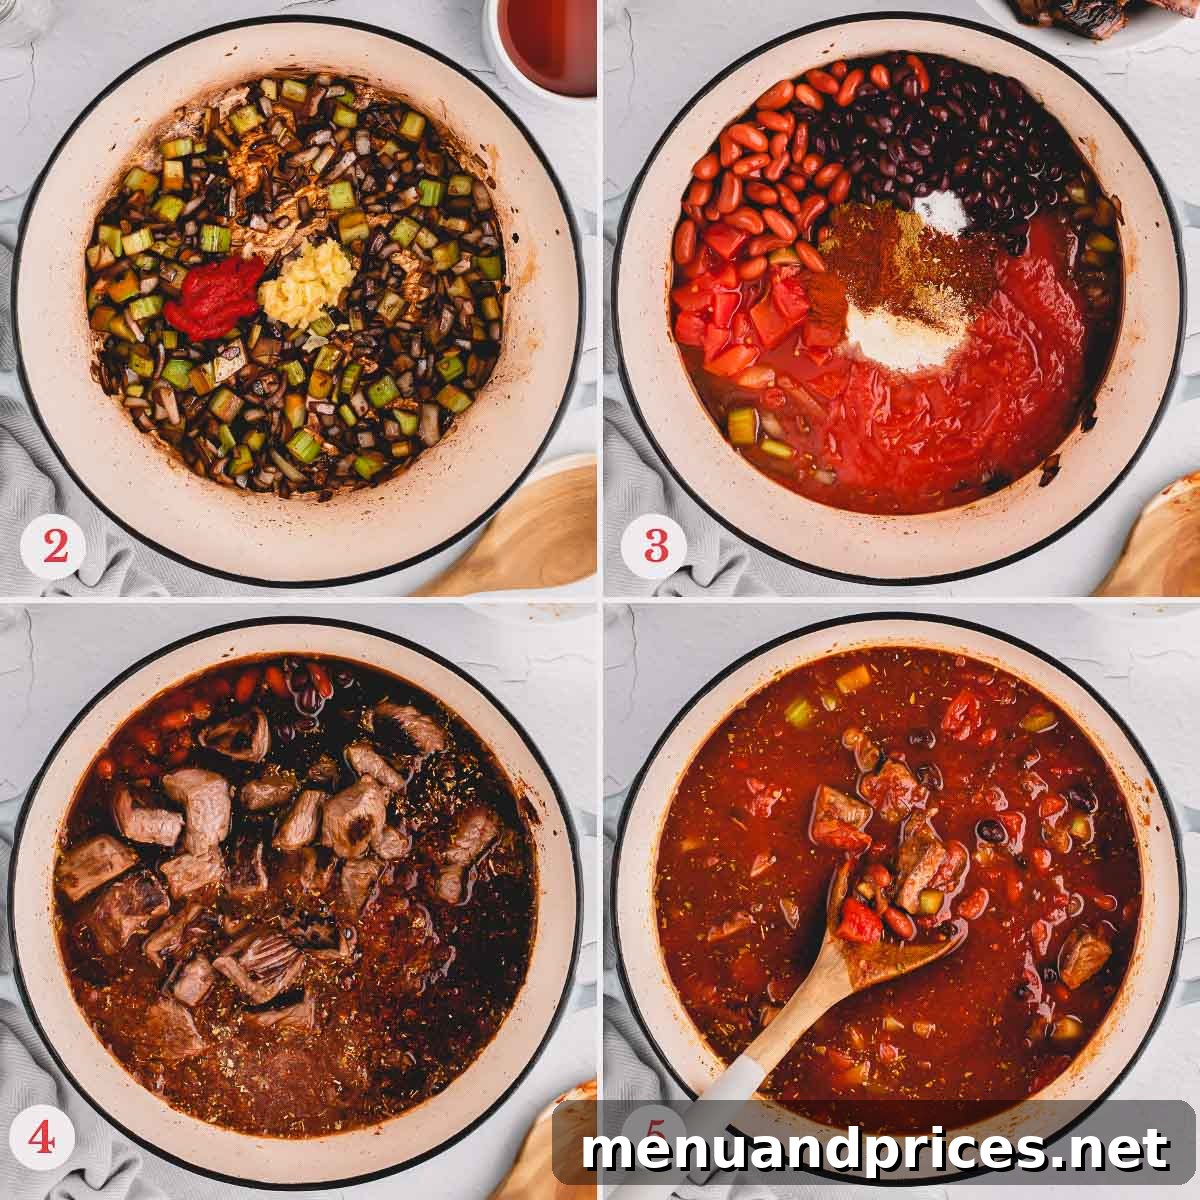
In the now-empty Dutch oven (don’t clean it, those browned bits are flavor!), add the chopped onions and celery. Sauté over medium heat until the onions become translucent, which typically takes about 3-5 minutes. Then, stir in the tomato paste and minced garlic, cooking for another minute until fragrant. The tomato paste will deepen in color, indicating it’s developing a richer flavor. Add a splash (about ¼ cup) of beef broth to deglaze the pot, using a wooden spatula to scrape up all the delicious brown bits, known as “fond,” from the bottom of the pan. This fond is a concentrated source of umami and is essential for a deeply flavored chili.
Step 3: Combine and Simmer
Return the browned beef chunks and any accumulated juices to the pot. Add half of the remaining beef broth, the tomato puree (or diced tomatoes), all the spices (chili powder, cumin, garlic powder, onion powder, oregano, chipotle powder, salt, and pepper), the sugar, and both the black and kidney beans. Stir everything gently to combine, ensuring all ingredients are well distributed. If the beef and other ingredients aren’t completely submerged in the liquid, add more beef broth until they are adequately covered.
Step 4: Slow Cook to Perfection
Cover the Dutch oven with its lid and carefully transfer it to your preheated 350°F (175°C) oven. Allow the chili to simmer slowly until it becomes thick, rich, and the beef is incredibly fork-tender, a process that usually takes about 2 to 3 hours. This slow cooking method in the oven allows the flavors to meld beautifully and the meat to break down to perfection.
Simmering Insight
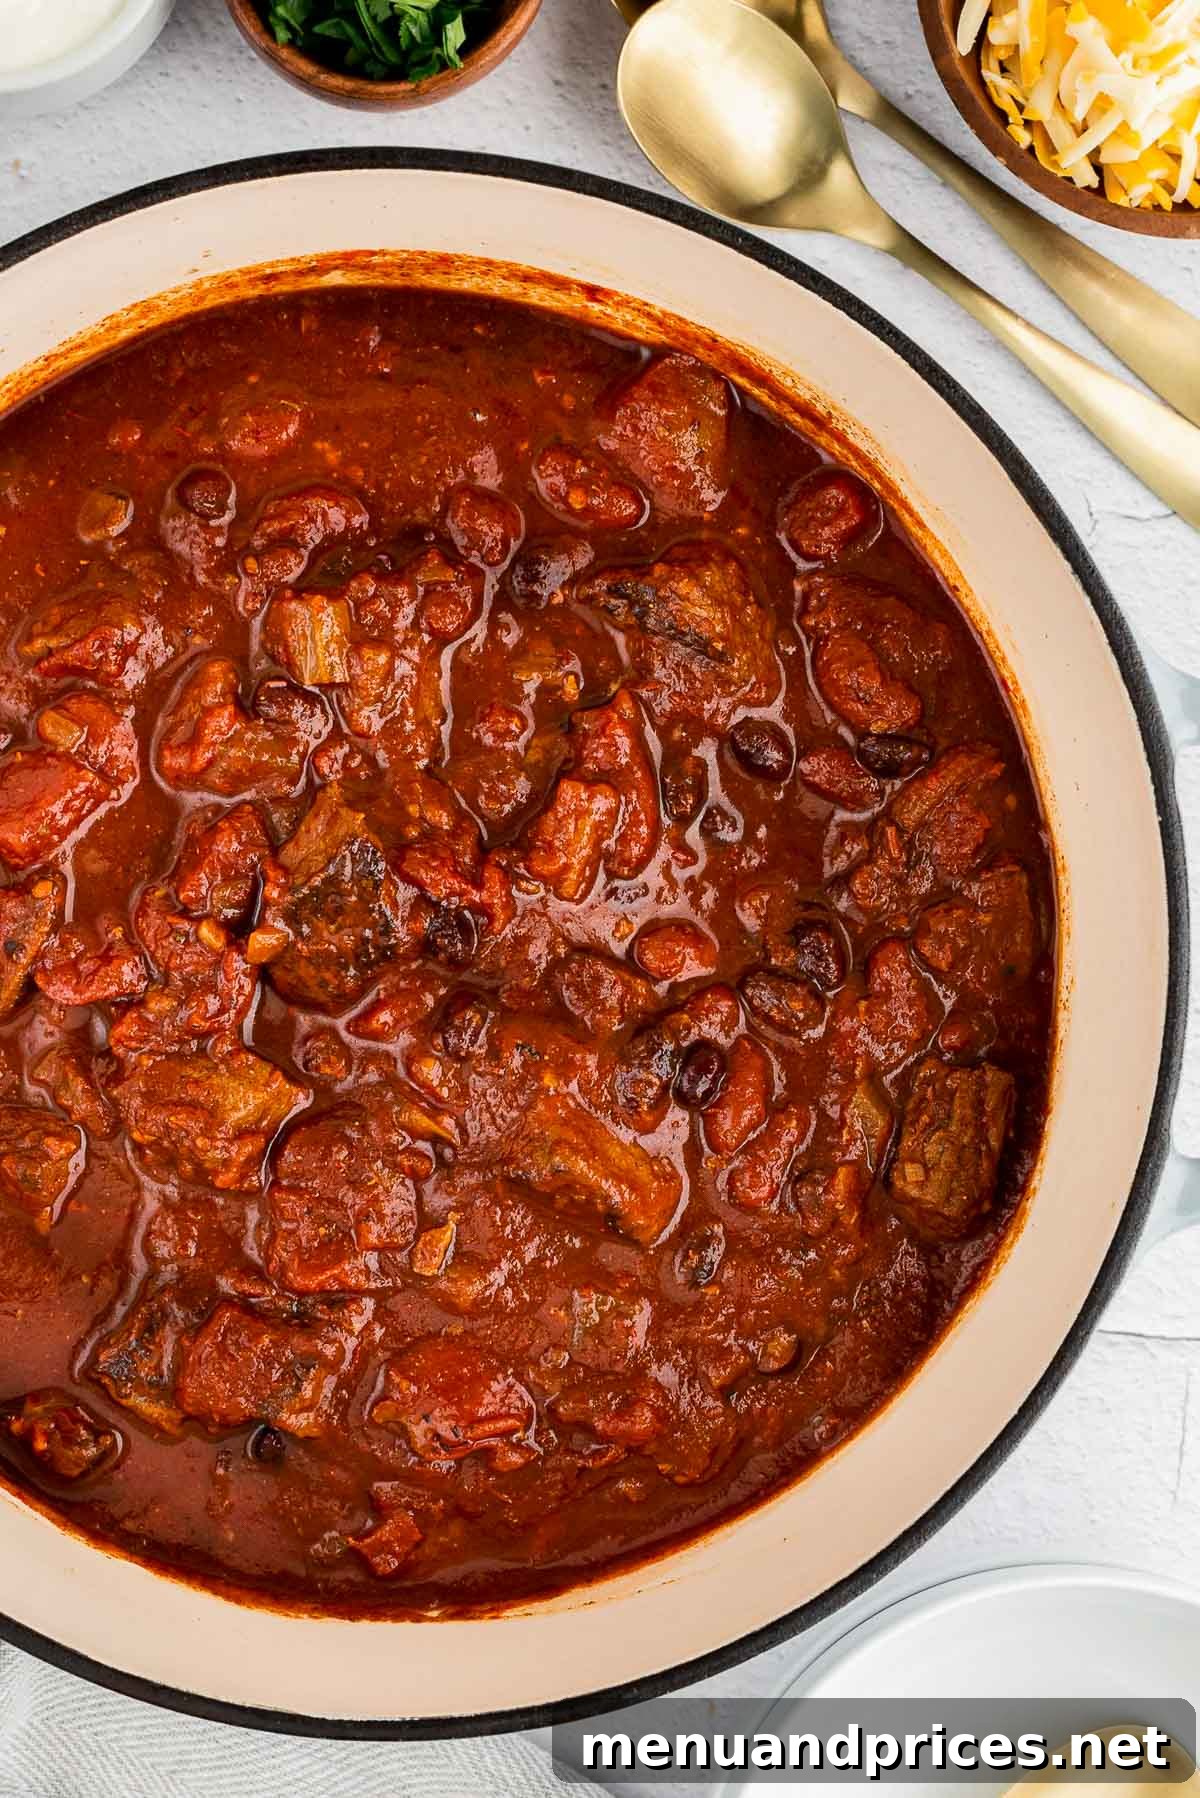
Check the broth level approximately every hour. If the chili appears too thick or the liquid is evaporating too quickly, add a little more broth or water. The chili is ready when it has achieved a satisfyingly thick consistency and the stew meat yields easily to a fork, indicating ultimate tenderness. Garnish generously and serve hot.
Chili Tips for Success: Elevating Your Recipe
Achieving chili perfection involves a few key techniques and adjustments. Here are some expert tips to ensure your chunky beef chili is always a triumph:
- Boosting the Heat: For those who crave a fiery kick, incorporate a can of chopped green chiles when you add the beans and tomatoes. You can also increase the amount of chipotle powder or add a pinch of cayenne pepper.
- Mellowing the Heat: If you prefer a milder chili, simply omit the chipotle powder entirely. You can also reduce the chili powder to just one tablespoon. Always taste and adjust spice levels to your personal preference.
- The Power of Dry Meat: As emphasized in the searing step, ensuring your stew meat is thoroughly dry is paramount. This allows for that beautiful, dark, crusty exterior during searing, which translates into layers of rich, complex flavor in your final chili.
- Patience During Searing: If the stew meat seems stuck to the bottom of the pan, it’s a sign it’s not ready to be flipped. Allow it to continue searing undisturbed. The meat will naturally release itself from the pan when it has developed a proper crust and is ready to turn, requiring only a gentle tug.
- Balancing Acidity: The acidity of canned tomatoes can vary. If your chili tastes a bit too tart or acidic after simmering, you have a couple of simple solutions. Stir in 1/2 teaspoon of baking soda (it will fizz briefly, neutralizing acidity) or a tablespoon of sugar or butter. Both will effectively mellow the flavor, creating a more harmonious and balanced taste.
- Stovetop Simmering Option: While the oven provides consistent, gentle heat, you can absolutely simmer this chili on the stovetop. After combining all ingredients, cover the pot and cook on low heat for approximately 2 to 3 hours, stirring occasionally to prevent sticking and ensure even cooking. Be diligent about keeping the heat low to avoid burning the bottom of the pot.
- Seasoning as You Go: Taste your chili periodically throughout the simmering process. This allows you to adjust salt, pepper, and other spices, ensuring the flavors are perfectly calibrated by the time it’s ready to serve.
Smart Make-Ahead and Freezing Strategies for Chili Lovers
One of the best qualities of Dutch oven chili is its uncanny ability to taste even better the next day! The flavors have more time to mingle and deepen, making it an ideal make-ahead meal for various occasions. Harness the power of meal prepping with these convenient tips:
- Refrigeration: Cooked chili can be stored in an airtight container in the refrigerator for up to 4 days. Allow it to cool completely before transferring to storage. Preparing it a day or two in advance ensures maximum flavor development, perfect for an easy dinner party or a leisurely Sunday supper that requires minimal effort on serving day.
- Freezing for Future Feasts: This homemade chili recipe is exceptionally freezer-friendly, making it a lifesaver for busy schedules. We highly recommend doubling the recipe and freezing half for later enjoyment. All you’ll need to do is thaw, reheat, and add your favorite toppings – a delicious, wholesome meal ready in minutes!
Optimal Freezing and Storing for Your Chunky Chili
Proper storage is key to enjoying your homemade chili for weeks or even months to come. Follow these tips to maintain its quality and flavor when freezing:
- Portioning for Convenience: Freeze your homemade chili in quart-sized freezer bags or individual airtight containers. This allows for quick and easy access to single servings or smaller portions as needed, preventing waste.
- Thawing and Reheating: To thaw frozen chili in a bag, simply submerge the sealed bag in a bowl of hot water until it loosens. Once thawed, reheat the chili gently in a covered saucepan over medium-low heat, stirring occasionally, or warm it up in the microwave until piping hot. If reheating multiple portions, combining them in a saucepan is often more efficient.
- Longevity: For the best quality and flavor, aim to use your frozen chili within 4 months. To help you keep track, always label your freezer bags or containers with the date of preparation.
- Allow for Expansion: Remember that liquids expand when they freeze. When freezing chili in bags or containers, be sure to leave at least an inch or two of headspace at the top to accommodate this expansion and prevent containers from bursting or bags from splitting.

Creative Ways to Reinvent Leftover Chunky Chili
Don’t let leftover chili go to waste! Its robust flavor and hearty texture make it incredibly versatile for transforming into exciting new meals. If you’re looking to change things up and enjoy your chili in fresh ways, try one of these delicious ideas:
- Hearty Shepherd’s Pie: Stir in a cup of frozen peas to your chili, then transfer it to a baking dish. Top generously with a layer of creamy mashed potatoes and bake until golden brown and bubbly, creating a comforting and complete meal.
- Chili Baked Potatoes: A classic comfort food pairing! Spoon warm chili over fluffy baked potatoes, then customize with your favorite toppings like shredded cheese, a dollop of sour cream, or chopped green onions for a satisfying lunch or dinner.
- Ultimate Chili Mac: Combine two beloved comfort dishes into one! Stir hot chili into a batch of creamy macaroni and cheese for an incredibly decadent and satisfying meal that’s sure to be a family favorite.
- Savory Shakshuka: For a unique breakfast or brunch, transfer your chili to an oven-safe skillet. Make three small wells in the chili and crack an egg into each. Bake until the egg whites are set and the yolks are still wonderfully runny. Serve with crusty bread for dipping.
- Stuffed Peppers: Transform bell peppers into edible bowls by stuffing them with a mixture of chili, cooked rice, and a generous sprinkle of cheese. Bake until the peppers are tender and the filling is hot and bubbly.
- Chili Dogs or Burgers: A timeless favorite! Spoon your chunky chili over hot dogs or use it as a topping for juicy burgers for an instant upgrade. Add chopped onions and cheese for the full experience.
Frequently Asked Questions About Chunky Chili
The beauty of chili lies in its customizable toppings! Classic choices include shredded cheddar cheese, a dollop of cool sour cream, and diced raw onions for a sharp bite. For fresh elements, consider sliced avocado, shredded lettuce, and vibrant fresh cilantro. Pickled jalapeños add a tangy heat, while crunchy corn chips or tortilla chips provide texture. Crumbled bacon and sliced scallions (green onions) offer savory depth, and a dash of your favorite hot sauce can always elevate the spice level. Mix and match to create your perfect chili bowl!
While this hearty chili is substantial enough to be a meal on its own, certain accompaniments truly complete the experience. A warm, fluffy slice of cornbread is almost a mandatory pairing for many chili enthusiasts. Other excellent options include simple baked potatoes, fluffy white rice, crusty homemade breadsticks, or a refreshing mixed greens salad to cut through the richness. Freshly baked rolls or even a simple side of plain crackers are also wonderful for soaking up every last bit of that delicious sauce.
It’s common for simmering stews like chili to leave behind stubborn stains in a Dutch oven over time, especially with acidic ingredients. However, restoring that like-new finish is surprisingly easy! A common method involves filling the pot with water and a few tablespoons of baking soda, bringing it to a simmer, and then letting it soak. You can also add a small amount of dish soap. For a comprehensive guide, check out this easy tutorial on how to clean a Dutch oven.

Rated 5 out of 5 stars by 1 vote
Chunky Beef Chili
Shinee Davaakhuu
This chunky chili gets its hearty flavor from the caramelized stew meat, simmered in a Dutch oven until fork tender. Thick and rich, this lazy chili is truly a crowd-pleaser!
Print Recipe
Ingredients
- 2 ½ lb stew meat (Note 1)
- 1 cup chopped onion
- 2 celery stalks, chopped
- 5 garlic cloves, minced
- 2 tablespoons tomato paste
- 1 can (28oz) tomato puree (Note 2)
- 1 can (14.4oz) fire roasted diced tomatoes
- 1 can (15oz) black beans, drained and rinsed
- 1 can (15oz) light kidney beans, drained and rinsed
- 32 oz low sodium beef broth
- 2 tablespoons chili powder
- 1 tablespoon cumin
- 1 teaspoon garlic powder
- 1 teaspoon onion powder
- 1 teaspoon oregano
- ¼ teaspoon chipotle chili powder (more or less to taste)
- 1 tablespoon sugar (Note 3)
- 1 teaspoon table salt
- 1 teaspoon black pepper
Garnish options
- Sour cream
- Shredded cheddar
- Chopped fresh cilantro
- Fritos
- Saltine crackers
- Avocado
- Lime wedges
Equipment
- Dutch oven
- Liquid measuring cup
- Measuring spoons
- Wooden spoon
Instructions
- Preheat oven to 350℉ (175°C), arrange racks to accommodate Dutch oven in the center of the oven. Pat beef dry with a clean paper towel.
- Heat a 6-8 quart cast iron Dutch oven over medium-high heat, about 3 minutes, then swirl with a drizzle of canola oil or bacon grease. Working in batches, brown the beef on two sides per chunk, about 3 minutes per side. Leave at least 1” of space between each piece; do not crowd the bottom of the pot. Reduce heat to medium if the beef is getting too dark too quickly. Set browned beef aside in a medium bowl.
- Over medium heat, sauté onions and celery until onions begin to turn translucent, about 3 minutes. Add tomato paste and garlic, cook for an additional minute. Add a splash of the beef broth to deglaze the pot, scrape the brown bits off the bottom of the pot with a wooden spoon.
- Add half of the beef broth, the tomatoes, spices & sugar, beef chunks with any juices, and beans. If everything isn’t completely submerged, add more broth. Secure the lid on the pot and place in the oven for about 2 to 3 hours, checking the broth level every hour. The chili should be fairly thick when it’s ready, and the meat will be fork tender. Garnish and serve.
⭐️ Did you make this recipe?
Please leave a review and let us know how you liked it!
Tips & Notes
Note 1: You may substitute a beef chuck roast for stew meat. Simply cut it up into 1-inch cubes and trim the excess fat.
Note 2: For more texture, you may use a 28oz can of diced tomatoes in place of the puree.
Note 3: A small amount of sugar balances out the acidity of the tomatoes. Alternatively, you can add 1/2 teaspoon of baking soda or butter to mellow the flavor a bit.
Storing Tips:
– Leftover chili lasts for up to 4 days in the refrigerator. Let it cool and then transfer it to an airtight container.
– Freeze the homemade chili in quart size bags for a quick meal for up to 4 months. Thaw in hot water to release it from the bag then reheat in a covered saucepan or in the microwave. For more servings, thaw and reheat multiple bags.
– Chili expands when it freezes so be sure to leave a gap in the top of the bag or container you freeze it in.
Nutrition
Calories: 340 kcal
Carbohydrates: 34 g
Protein: 37 g
Fat: 7 g
Sugar: 8 g
Sodium: 377 mg

Did you make this? Leave a rating and your feedback. Thank you!