
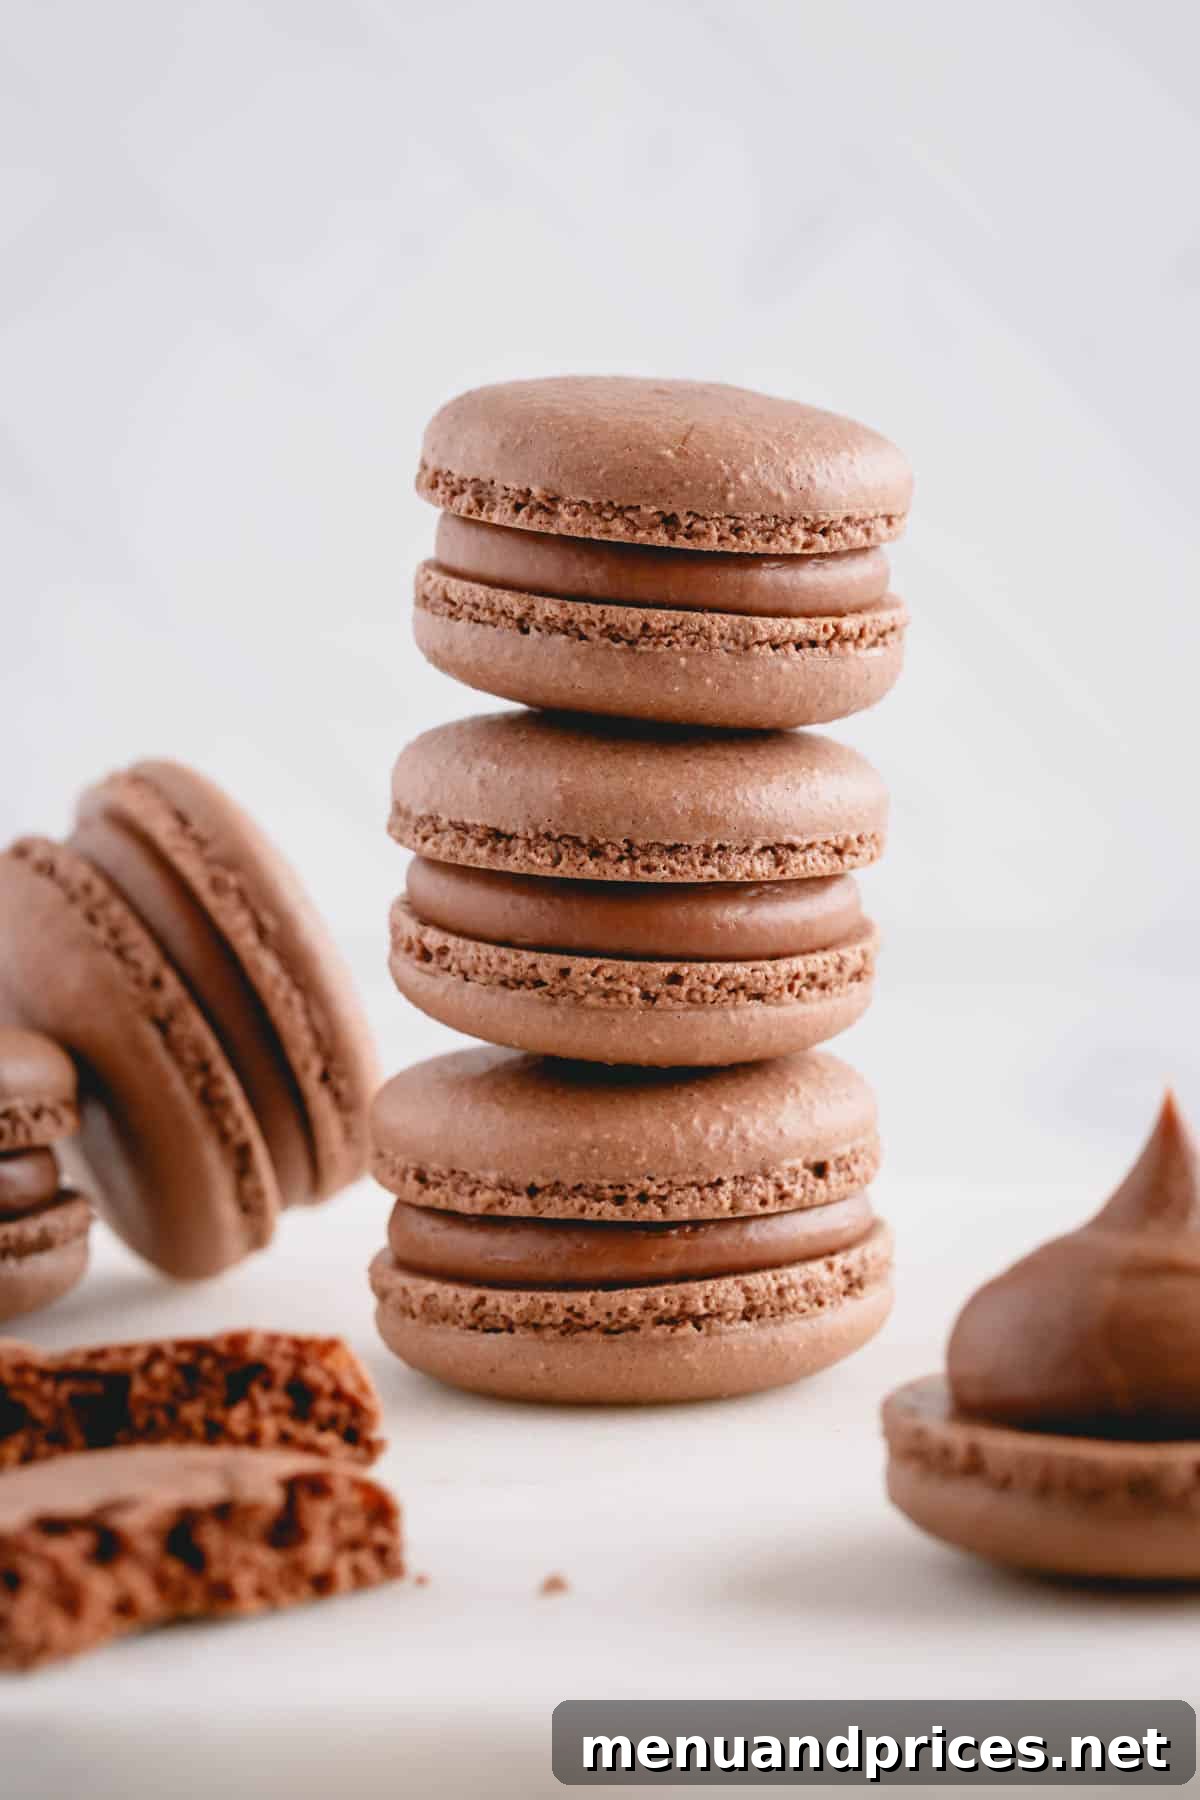
Welcome to the ultimate guide for crafting exquisite chocolate macarons! This comprehensive recipe delves deep into every aspect of these delicate French treats, from understanding the nuances of various cocoa powders to mastering the intricate techniques required for perfection. Prepare to uncover invaluable tips that will elevate your macaron-making journey, ensuring consistently beautiful shells and intensely rich flavors.
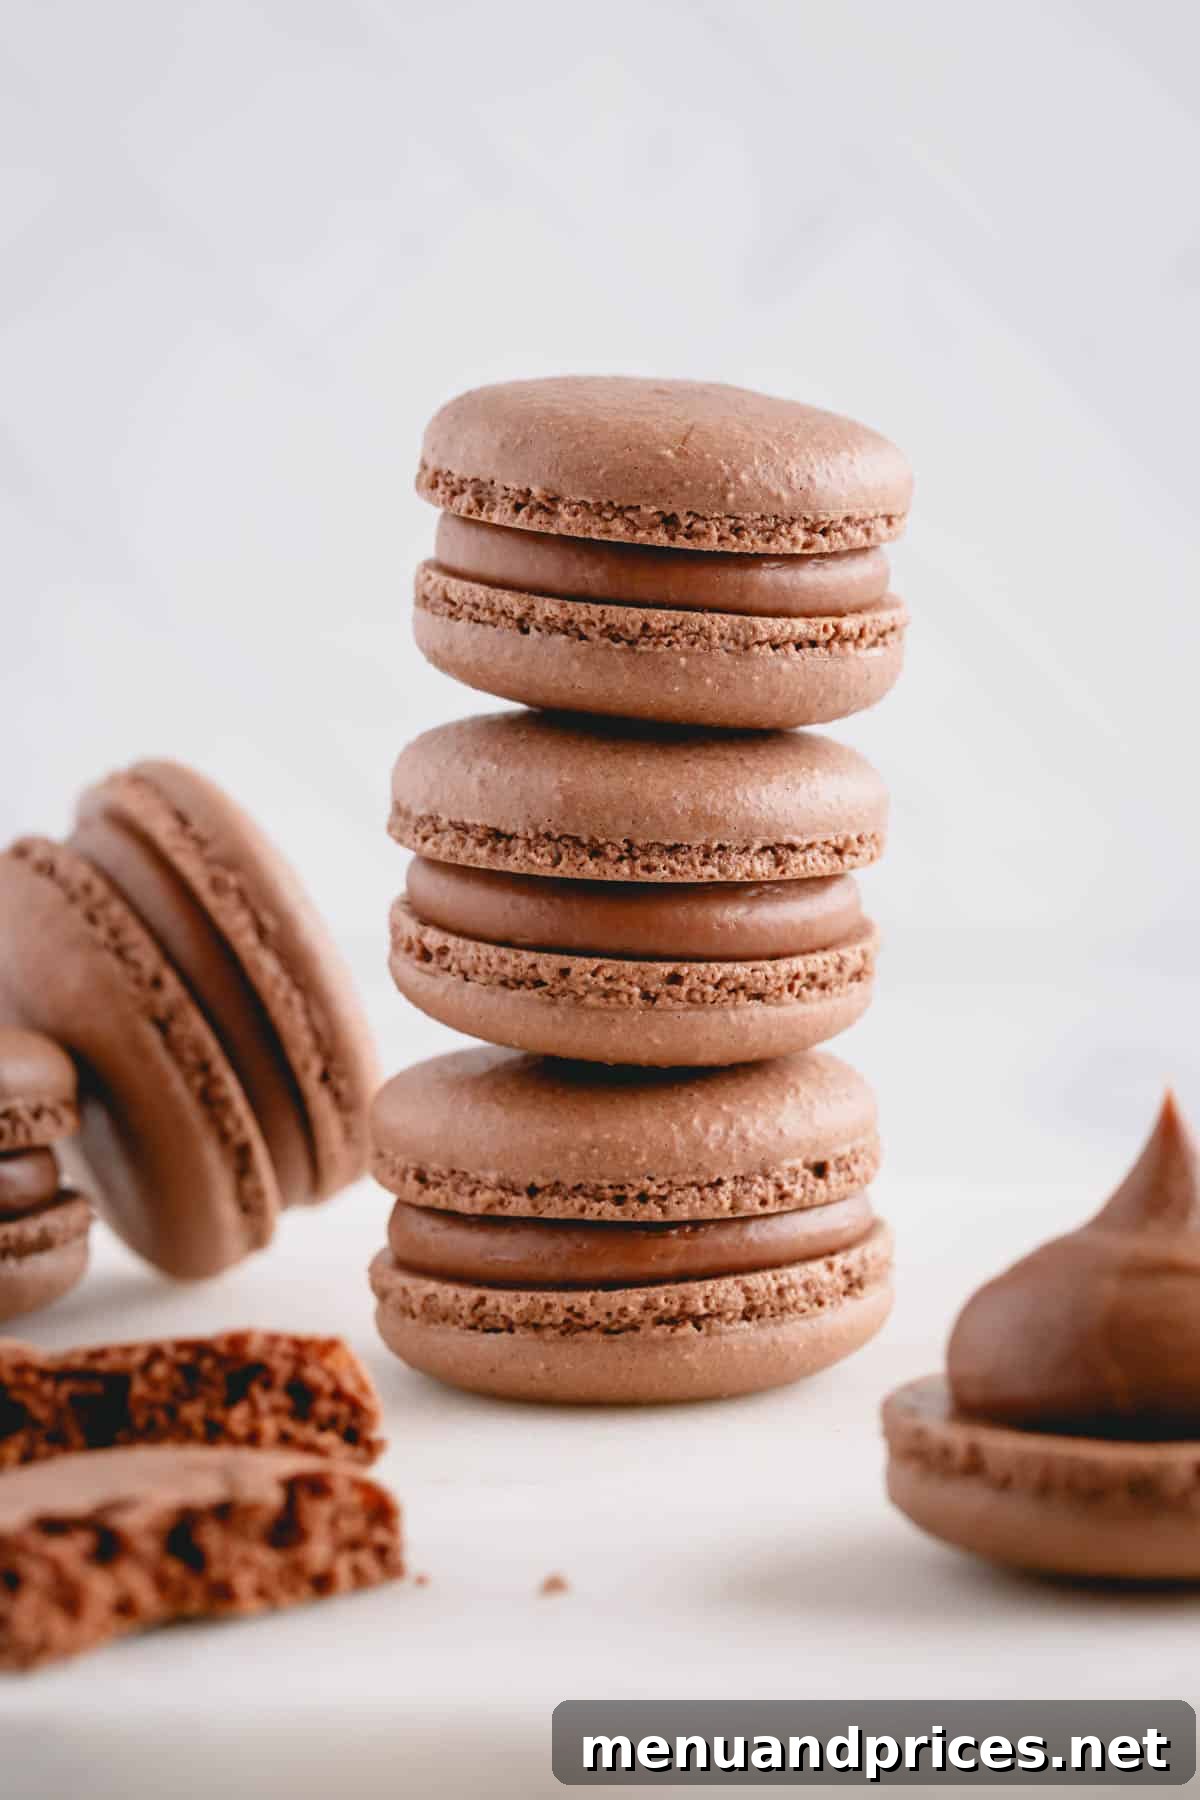
Don’t lose this recipe! Pin it for later reference.
Pin This Recipe
Mastering Macarons: A Challenge Worth Taking
Perhaps you’ve already mastered the foundational techniques of basic French macarons and are ready to embark on a new, more advanced baking adventure. Or maybe you’re just starting your macaron journey and feeling ambitious! While plain macarons can present their own set of complexities, venturing into the chocolate version introduces unique challenges that seasoned bakers know well.
My intention isn’t to discourage you, but rather to provide a realistic understanding of what to expect and, more importantly, to equip you with all the knowledge needed to succeed. If you haven’t yet perfected crucial macaron techniques – such as achieving a stable meringue, understanding the delicate art of macaronage, or finding the ‘sweet spot’ in your oven’s temperature – then the path to flawless chocolate macarons might feel steeper than necessary. This is because the addition of cocoa powder fundamentally alters the batter’s consistency and behavior, throwing a delightful, albeit tricky, curveball into the process.
Cocoa powder, by its very nature, absorbs moisture differently than almond flour, making the batter denser and more prone to drying out or becoming too thick. This demands a more precise approach to macaronage and a keen eye during baking. However, there’s no need to worry! I’ve poured years of experience and countless experiments into this guide, sharing all the essential tips and tricks I’ve gathered to help you navigate these specific challenges and achieve stunning results.
Why This Chocolate Macaron Recipe Will Become Your Favorite
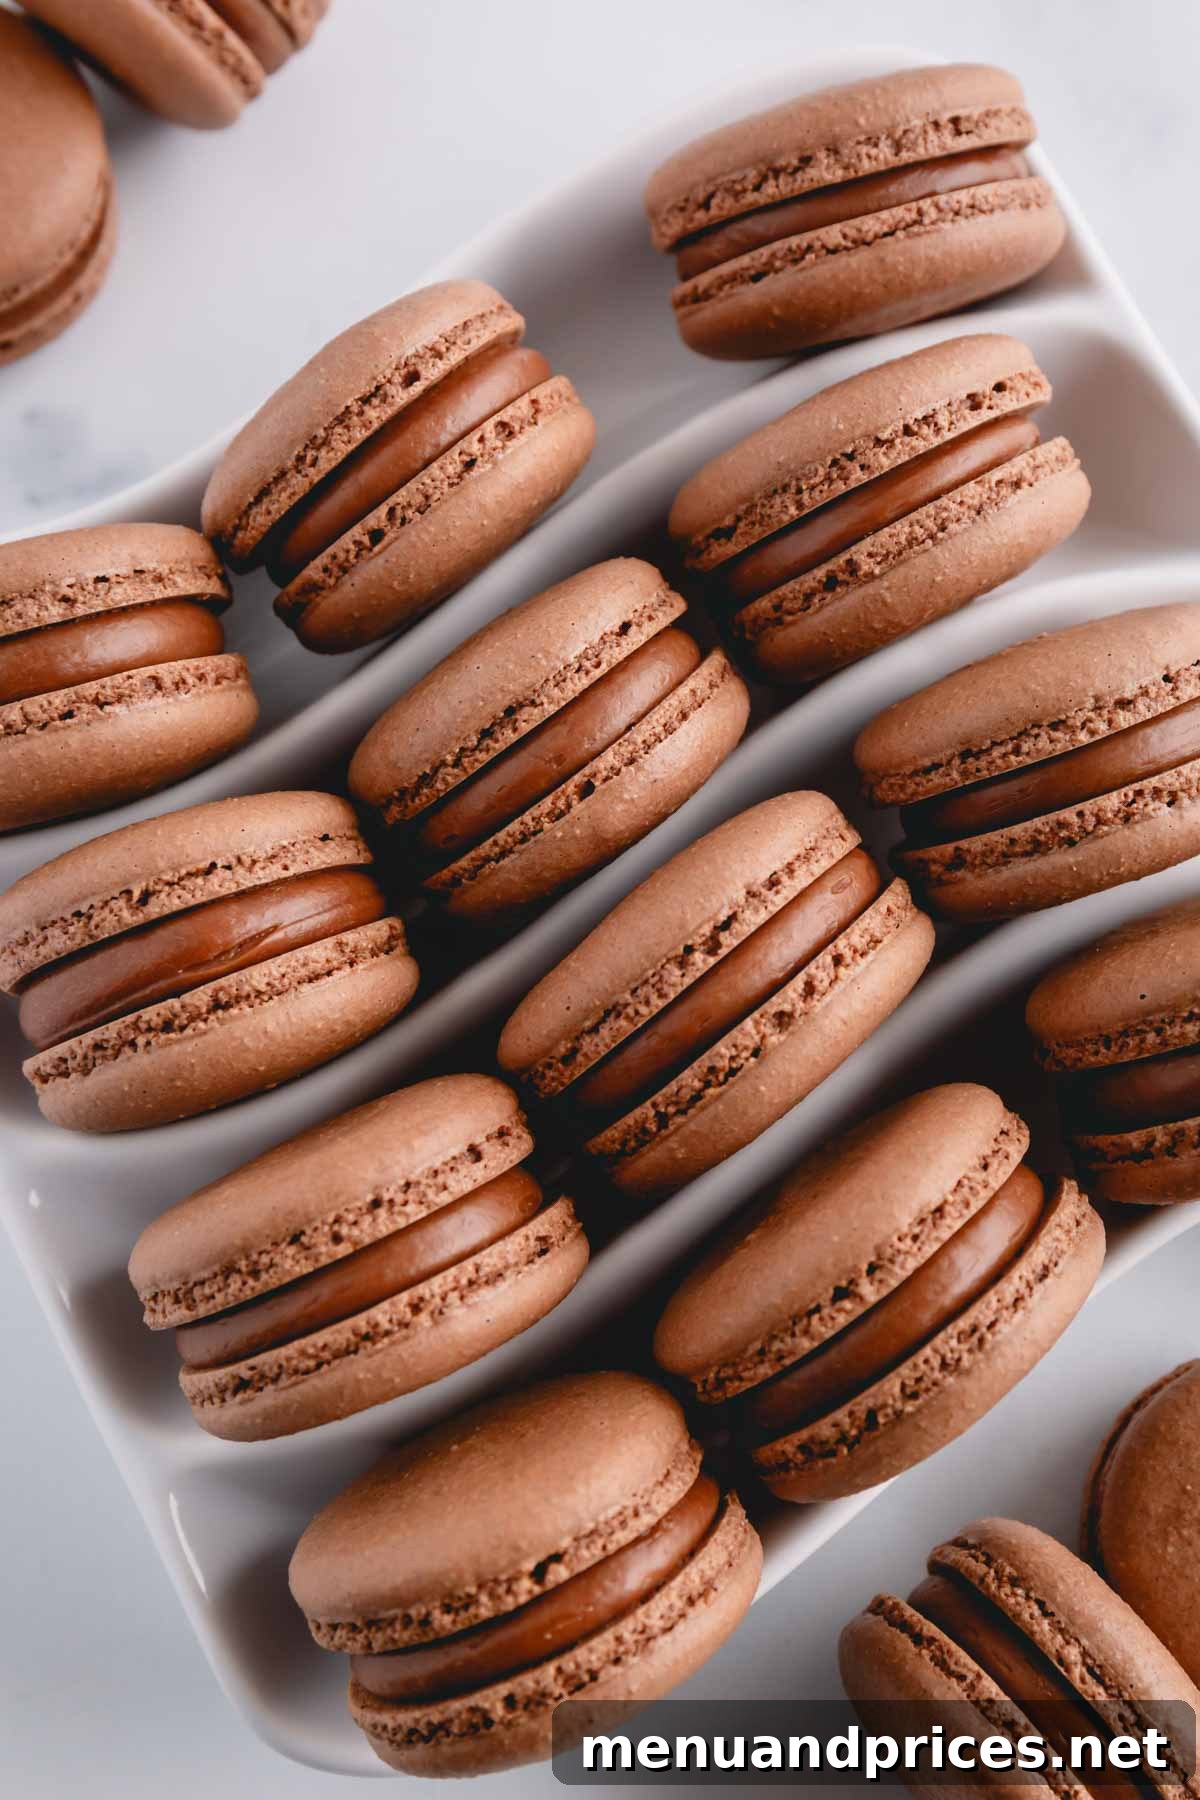
These chocolate macarons are an unparalleled indulgence, offering a deep, rich chocolate flavor that is utterly addicting. With their characteristic crisp shells yielding to a wonderfully chewy interior, you’ll find it impossible to stop at just one! Even those ‘imperfect’ shells are supremely delicious, making every batch a delightful experience.
Let’s be honest: there’s no such thing as a truly “foolproof” macaron recipe, and this chocolate version is no exception. The journey to macaron perfection is often one of experimentation and learning your specific oven and ingredients. My primary goal here is to equip you with an arsenal of knowledge, tips, and techniques designed to minimize trial and error. This guide aims to demystify the process, providing clarity on common issues and empowering you with the confidence to consistently create these decadent treats. You’ll not only bake delicious macarons but also understand the ‘why’ behind each step, transforming you into a more intuitive and successful baker.
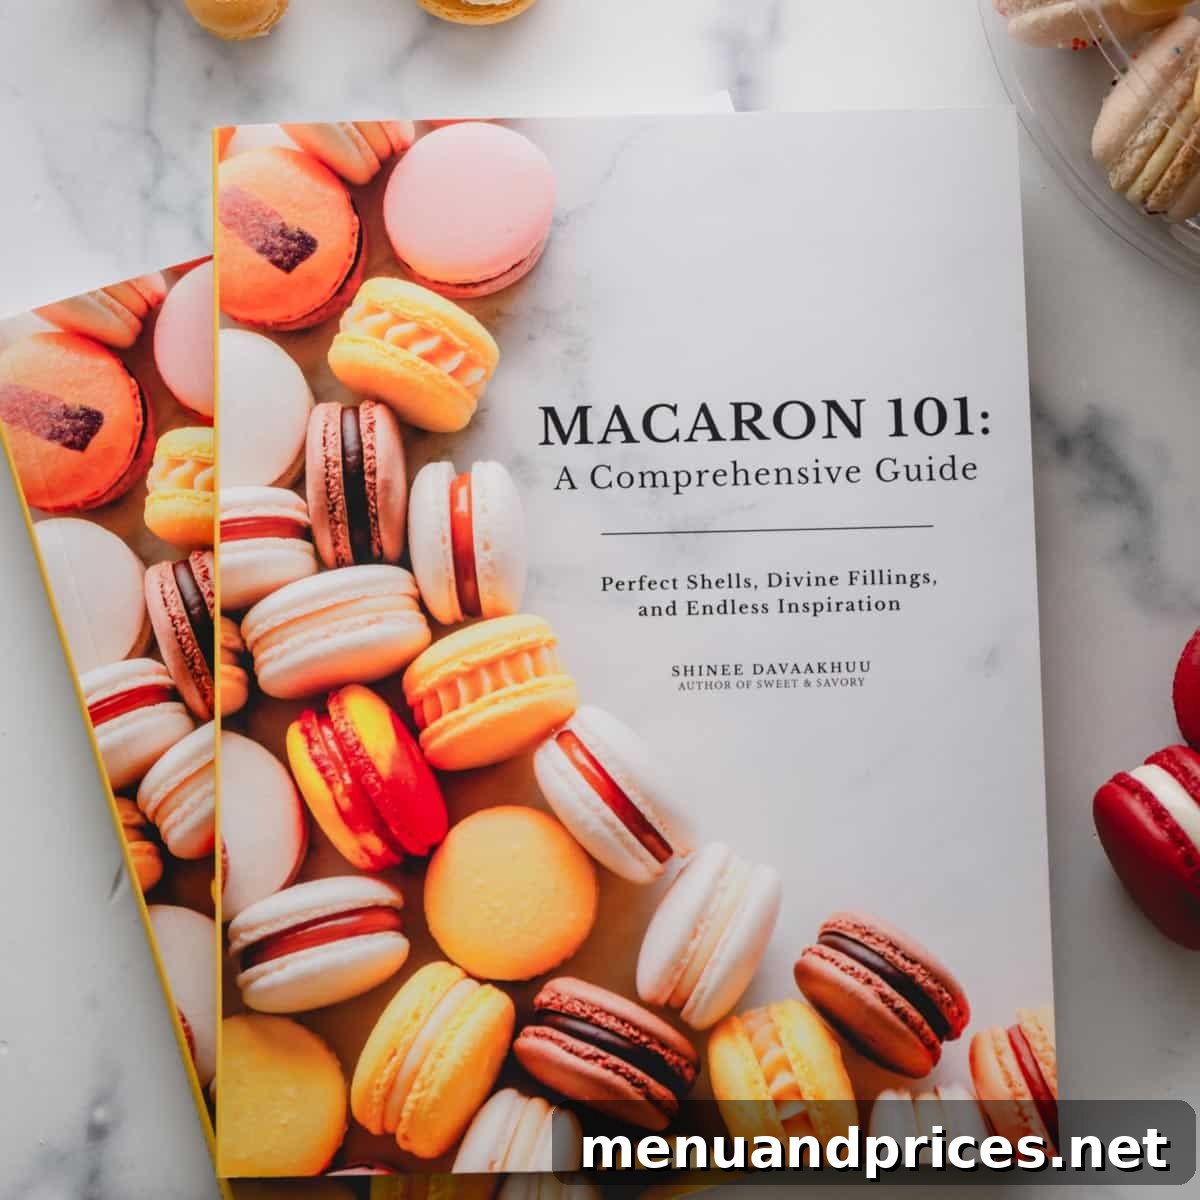
Macaron 101: Your Comprehensive Guide
Ready to dive deeper? Master the intricate art of French macarons and unlock your creativity to develop your unique signature flavors!
Key Ingredients for Perfect Chocolate Macarons
Understanding the role of each ingredient is crucial for macaron success. Here’s a detailed breakdown:
- Egg whites – Achieving a stable meringue starts with properly prepared egg whites. It’s paramount to separate them meticulously from the yolks, as even a speck of fat can prevent proper whipping. Using room temperature egg whites is vital; they whip faster and achieve significantly better volume and stability, leading to lighter, airier shells.
- Almond flour – The quality of your almond flour directly impacts the texture and appearance of your macaron shells. Always opt for super-fine almond flour with a light beige color and a fluffy, powdery consistency. Coarse almond flour can lead to bumpy shells and a less refined texture. Sifting thoroughly is a non-negotiable step to remove any larger almond bits.
- Powdered sugar – Also known as confectioners’ sugar, this ingredient is absolutely essential for macarons. It not only adds sweetness but also contributes to the smooth texture of the shells and helps absorb moisture. Commercial powdered sugar often contains a small amount of cornstarch, which can be beneficial in stabilizing the macaron batter.
- Granulated sugar – For the meringue, use fine granulated sugar, often called caster sugar or baker’s sugar. Its finer crystals dissolve more quickly and completely into the egg whites, preventing a grainy meringue and ensuring a smooth, glossy finish.
- Cream of tartar – While optional, adding cream of tartar is a fantastic “insurance policy” for your meringue. It’s an acidic powder that helps stabilize the egg whites, allowing them to whip up faster, achieve greater volume, and form a sturdier meringue that is less prone to deflating. A small amount can make a significant difference, especially if you’re working in humid conditions.
- Cocoa powder – This is the star of our chocolate macarons, and its type truly matters! You can use either unsweetened natural cocoa powder or Dutch-processed cocoa powder, but they behave differently. Not all cocoa powders are created equal, and their fat content and acidity can dramatically influence the macaron shell’s texture, color, and stability. We’ll dive into the specifics below to help you choose the best one for your baking.
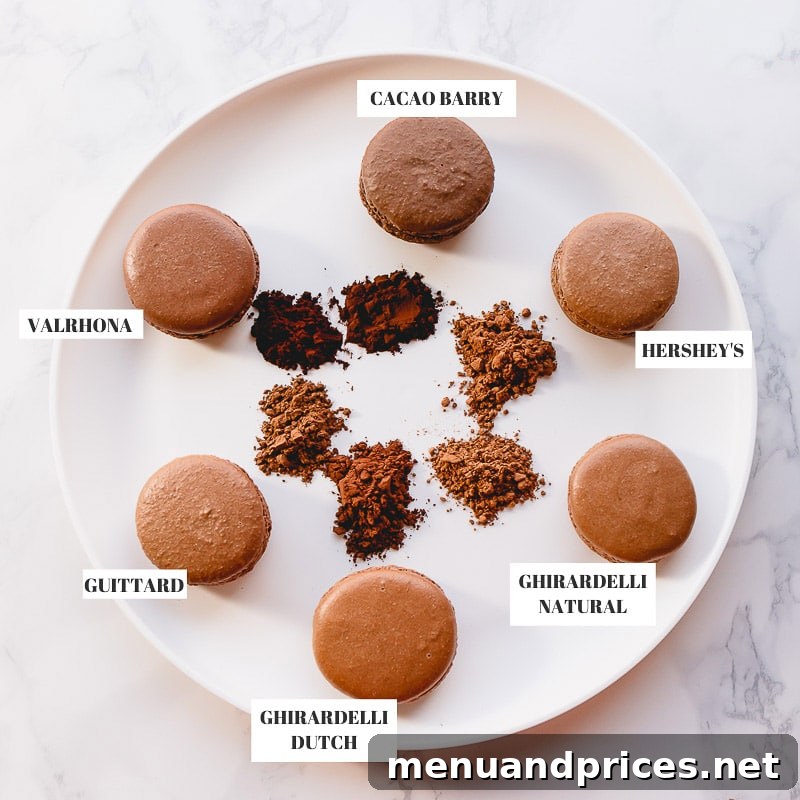
Choosing the Best Cocoa Powder for Chocolate Macarons: An In-Depth Look
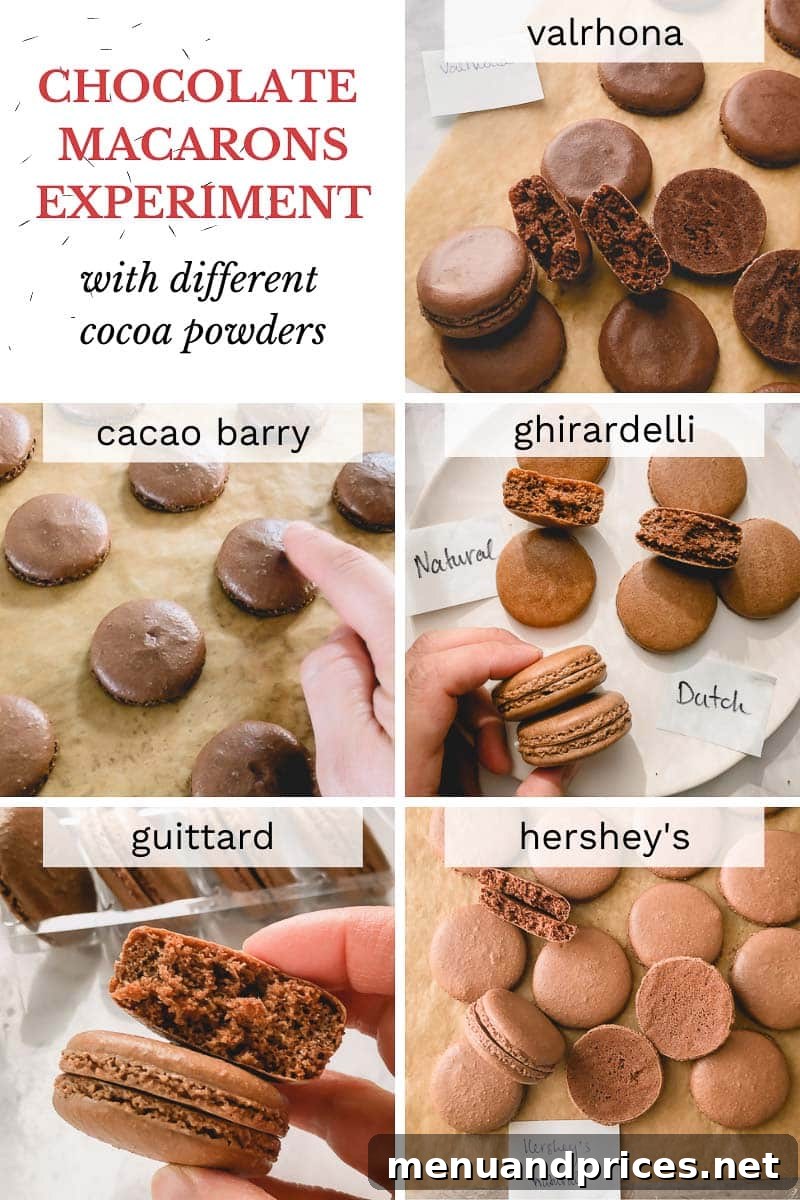
Does the type of cocoa powder truly impact the outcome of your chocolate macarons? The answer, surprisingly, is “yes, no, and maybe!” The science behind cocoa powder’s effect on macarons is fascinating. Cocoa powder, unlike almond flour, is hydrophilic, meaning it loves to absorb water. It also contains fat, which can be detrimental to meringue stability and macaron foot development. We rigorously tested six different cocoa powders with the exact same recipe to give you clear insights.
Cacao Barry Extra Brut Cocoa Powder
These macarons boasted a wonderfully dark and rich color, which was highly appealing. Initially, the shells felt slightly soft, indicating a potential fragility on the top layer. However, by simply extending the baking time by a minute or two, this issue was resolved. After filling and allowing them to mature, they achieved the perfect balance of crispness and chewiness.
Valrhona Cocoa Powder
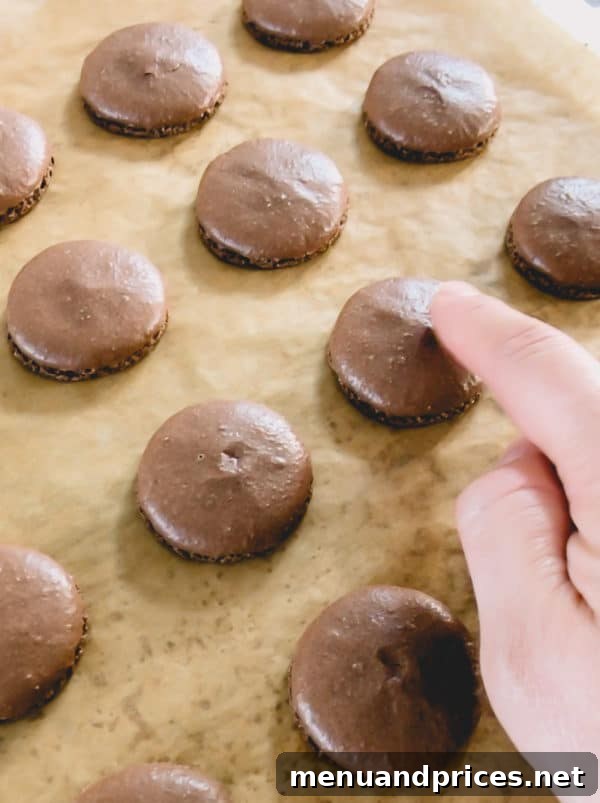
Valrhona cocoa powder yielded macarons with an excellent dark hue and a pronounced, rich chocolate flavor. A notable observation with this brand was that some of the macaron tops exhibited a slightly wavy texture, though not entirely wrinkled. This effect is likely attributable to Valrhona’s generally higher fat content, which can sometimes interfere with the smooth surface development of macaron shells.
Guittard Rich Dutched Cocoa Powder
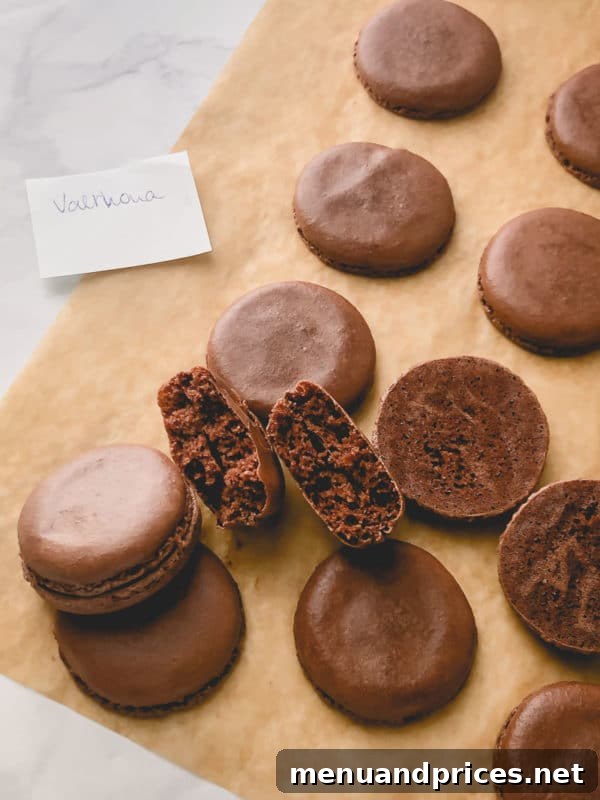
The chocolate macarons made with Guittard Rich Dutched cocoa powder were consistently perfect. They featured beautiful shells with a delightful crisp outer layer and a full, meaty interior, all complemented by an excellent chocolate flavor. Their shade of brown was slightly darker than those made with Hershey’s natural cocoa powder, offering a more intense visual appeal.
Ghirardelli Natural and Dutched Cocoa Powders
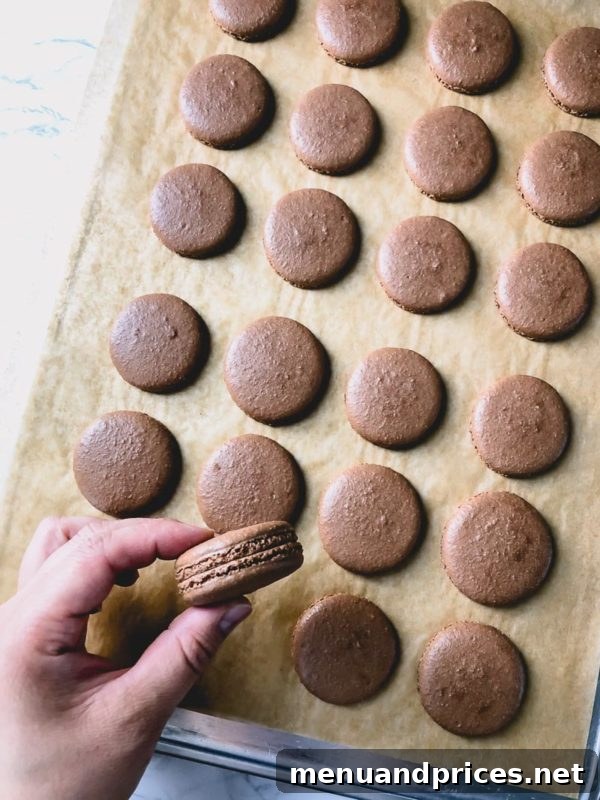
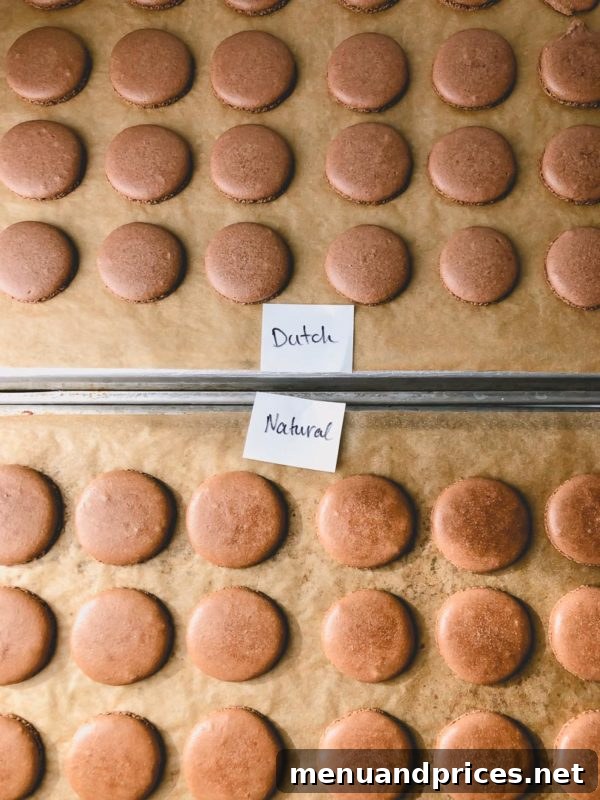
I was genuinely surprised by the striking similarity between macarons made with Ghirardelli’s natural and Dutched cocoa powders. Despite the cocoa powders themselves having distinct shades, the finished macarons were virtually identical in color. Regardless, both yielded perfect macarons with wonderfully smooth tops and fully developed interiors, demonstrating their reliability.
Hershey’s Natural Cocoa Powder
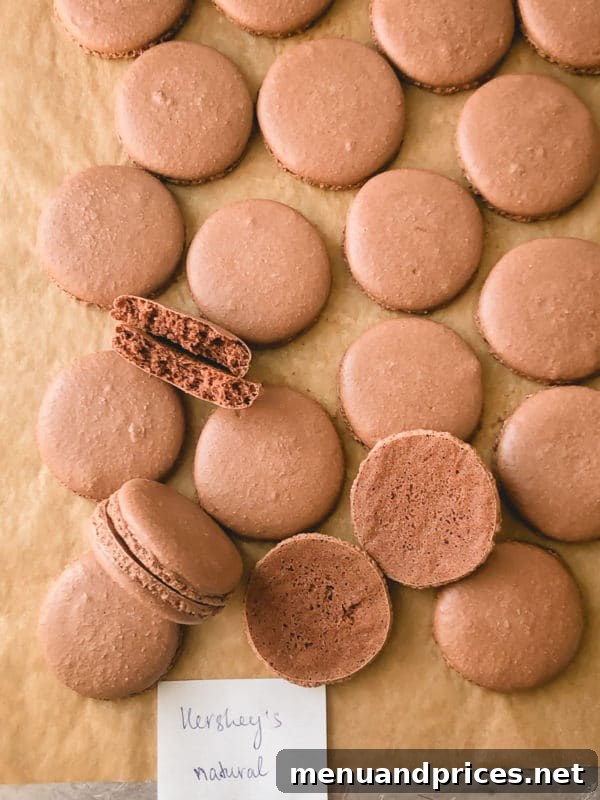
Macarons prepared with Hershey’s natural cocoa powder consistently delivered perfect results in every trial! They boasted crisp outer skins, full and substantial interiors, beautifully smooth tops, and a delightful chocolatey flavor. The only minor drawback is their lighter brown color, which, in my opinion, is negligible. If a richer, darker brown is desired, simply incorporate a small amount of brown gel food coloring into the batter.
Cocoa Powder Conclusion: Simplification is Key
Our extensive testing reveals a key insight: higher-end cocoa powders often have a greater percentage of fat. While this might be desirable for certain baking applications, it is generally not ideal for macarons. The increased fat content can destabilize the meringue and interfere with the formation of the signature ‘feet’, leading to inconsistent results.
Therefore, for consistently perfect chocolate macarons, we confidently recommend sticking to more commonly available brands. Both Hershey’s Natural Cocoa Powder and Ghirardelli Cocoa Powders (natural or Dutched) perform exceptionally well. They provide excellent flavor and structure without the challenges posed by higher fat content. Don’t feel pressured to buy expensive, specialty cocoa powders; often, the best results are achieved with accessible, reliable brands.
How to Make Chocolate Macarons: A Step-by-Step Guide
With our insights on cocoa powder clear, let’s now walk through the process of creating these exquisite chocolate macarons. Precision and patience are your best tools!
Step 1: Prepare the Meringue and Sift Dry Ingredients
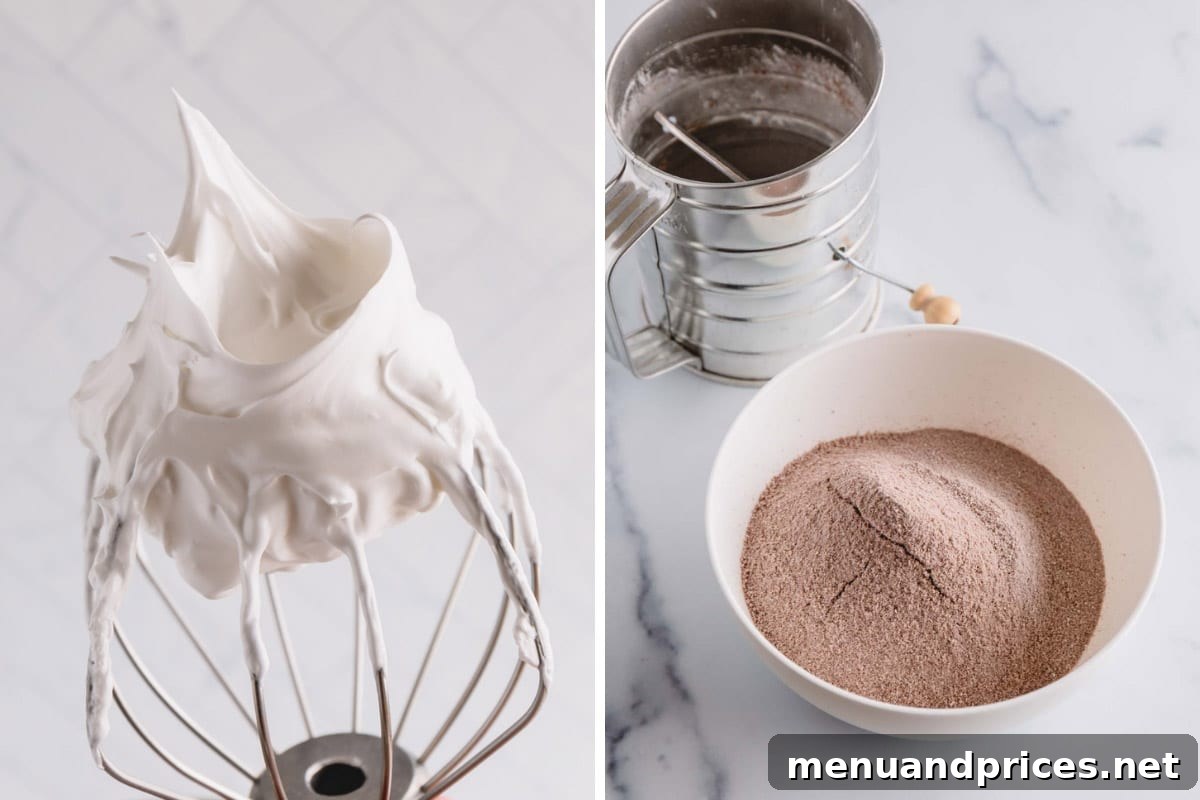
- Crafting the Meringue: In a meticulously clean mixing bowl (ensure no grease or residue!), combine your room temperature egg whites, fine granulated sugar, salt, and cream of tartar (if using). Begin whisking the egg whites on a consistent medium speed. The goal here is to incorporate air gradually, creating tiny, stable air bubbles. This process can take anywhere from 20 to 40 minutes, depending on your mixer and specific conditions. Resist the urge to rush by increasing the speed too quickly, as a slow, steady whip creates a much more robust and stable meringue. Continue beating until stiff peaks form. You’ll know it’s ready when the meringue forms nice, sharp ribs on the whisk and holds a pointy, uncurled peak when the whisk is lifted.
- Sifting Dry Ingredients: This step is non-negotiable and requires diligence. Combine your super-fine almond flour, powdered sugar, and cocoa powder. Sift this mixture not once, but twice. The first sift helps combine the ingredients and break up initial clumps. The second sift ensures a truly uniform, airy mixture, removing any remaining almond flour lumps or cocoa powder bits. This aeration is crucial for achieving those coveted smooth macaron tops and a perfectly full interior. Discard any stubborn chunky bits left in the sifter.
Step 2: The Art of Macaronage – Mixing the Batter
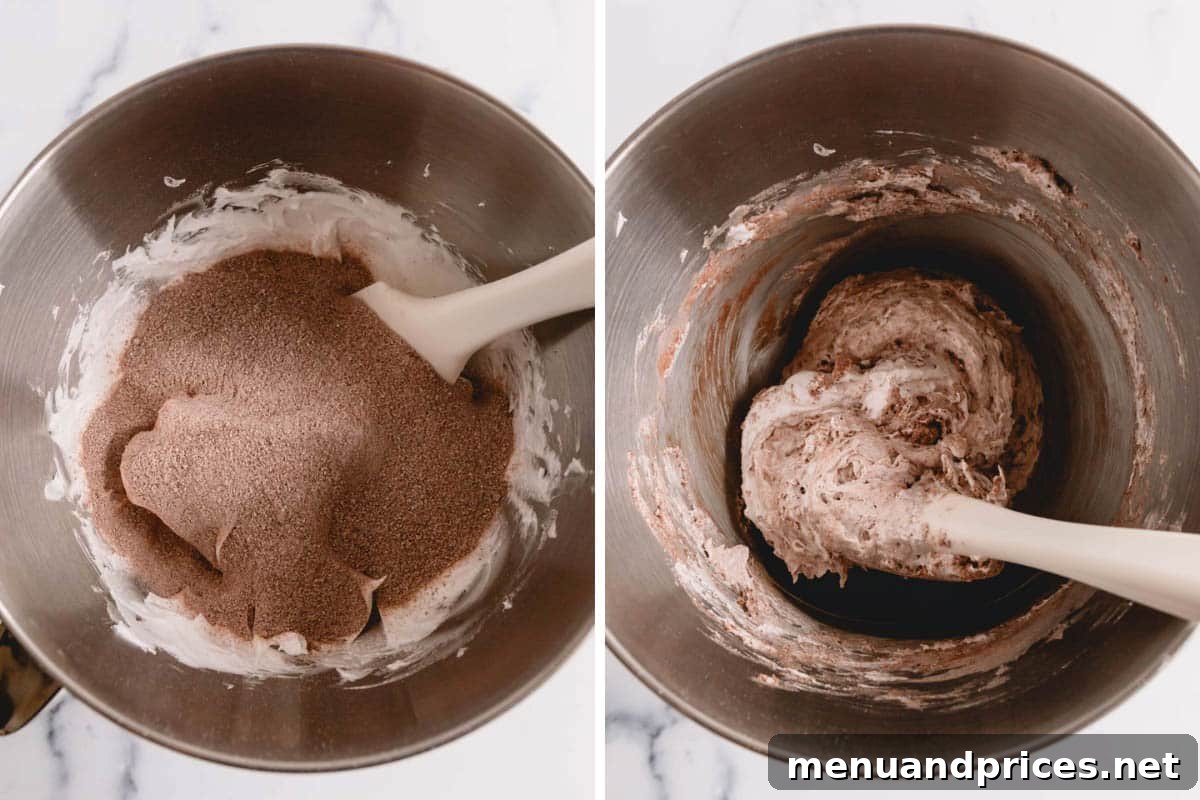
- Incorporating Dry into Wet: Gently sift the prepared almond flour, powdered sugar, and cocoa powder mixture directly into your stiff meringue.
- Folding the Batter: Using a large, flexible silicone spatula, begin folding the dry ingredients into the meringue. The technique is a continuous motion: scrape down the sides of the bowl, then cut through the center of the batter, and fold it over. Rotate the bowl as you go. Continue this delicate folding until the batter reaches a “lava-like” consistency. This means it should be thick, yet fluid enough to slowly ribbon off your spatula in a continuous stream.
For a visual demonstration of this critical stage, be sure to WATCH MY REAL-TIME MACARONAGE VIDEO.
Testing for Perfect Consistency: The Ribbon Test
To accurately gauge the readiness of your batter, perform the “ribbon test.” Scoop a generous amount of batter with your spatula and let it slowly drop back into the bowl. Observe the “ribbon” of batter that forms. Then, gently tilt the bowl slightly and count to ten. If the edges of the batter ribbon gradually dissolve back into the main mixture within approximately 10 seconds, your batter is perfectly mixed and ready for piping!
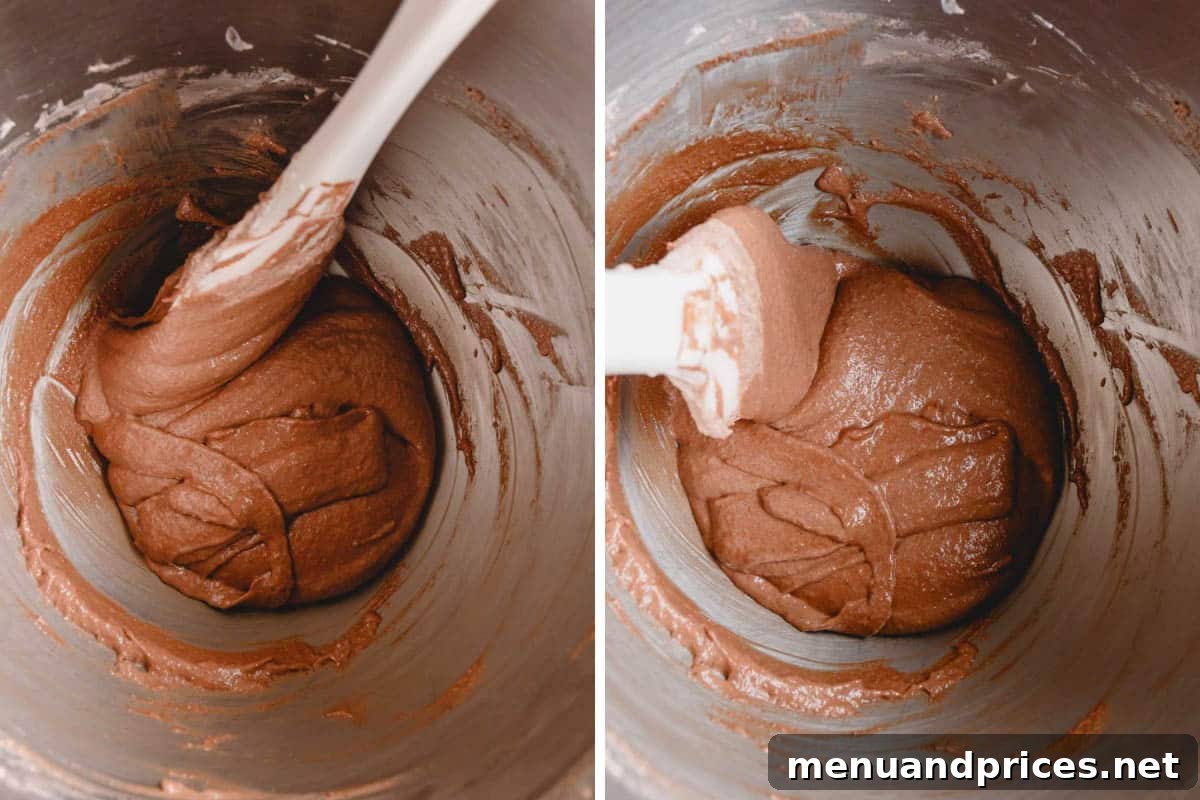
Special Note on Chocolate Macaron Batter Consistency
A crucial observation, popularized by expert macaron artist Phay Shing, is that chocolate macaron batter tends to be inherently thicker and denser due to the cocoa powder’s moisture absorption. This means it might not ‘melt back’ into the main batter as readily or quickly as a plain macaron batter during the ribbon test. Exercise caution: it’s incredibly easy to over-mix chocolate macaron batter. Trust the visual cues and stop folding just as it achieves that lava-like flow, even if it feels slightly thicker than your usual plain batter.
Step 3: Piping and Baking Your Macarons
- Piping the Shells: Transfer your perfectly mixed macaron batter into a pastry bag fitted with a round tip (I highly recommend a Wilton 2A tip for consistent 1.5-inch rounds). Hold the pastry bag vertically, at a straight 90° angle to your baking sheet. Pipe uniform 1.5-inch rounds, ensuring they are spaced about an inch apart on two baking sheets lined with either Teflon sheets or parchment paper. If you’re a beginner, a macaron template placed under your parchment paper can be incredibly helpful for achieving consistent sizes.
- Removing Air Bubbles & Resting: Once piped, firmly tap the baking sheets a few times on your counter. This crucial step helps release any trapped air bubbles within the batter, which, if left untouched, can lead to hollow shells or cracks. You can also use a toothpick to gently pop any visible larger air bubbles. Then, allow the piped macaron shells to “rest” on the counter for at least 15 minutes, or longer depending on your kitchen’s humidity. This resting period allows a thin skin to form on the surface of the shells, which is essential for developing those signature ‘feet’ during baking and preventing cracking.
- Baking to Perfection: Preheat your oven to 300°F (150°C). Bake the macaron shells for 18-20 minutes, one baking sheet at a time, on the middle rack. Baking time may vary slightly for larger macarons or different ovens. To test for doneness, gently touch a macaron shell; if it feels firm and doesn’t wobble or slide when lightly nudged, it’s ready. If it’s still soft, bake for another minute or two. Remember, it’s always better to slightly over-bake macarons than to under-bake them, which can lead to sticky bottoms or fragile shells.
- Cooling: Allow the macaron shells to cool completely on the baking sheets before attempting to peel them off. Trying to remove them while warm can result in broken shells or the bottom sticking to the baking surface.
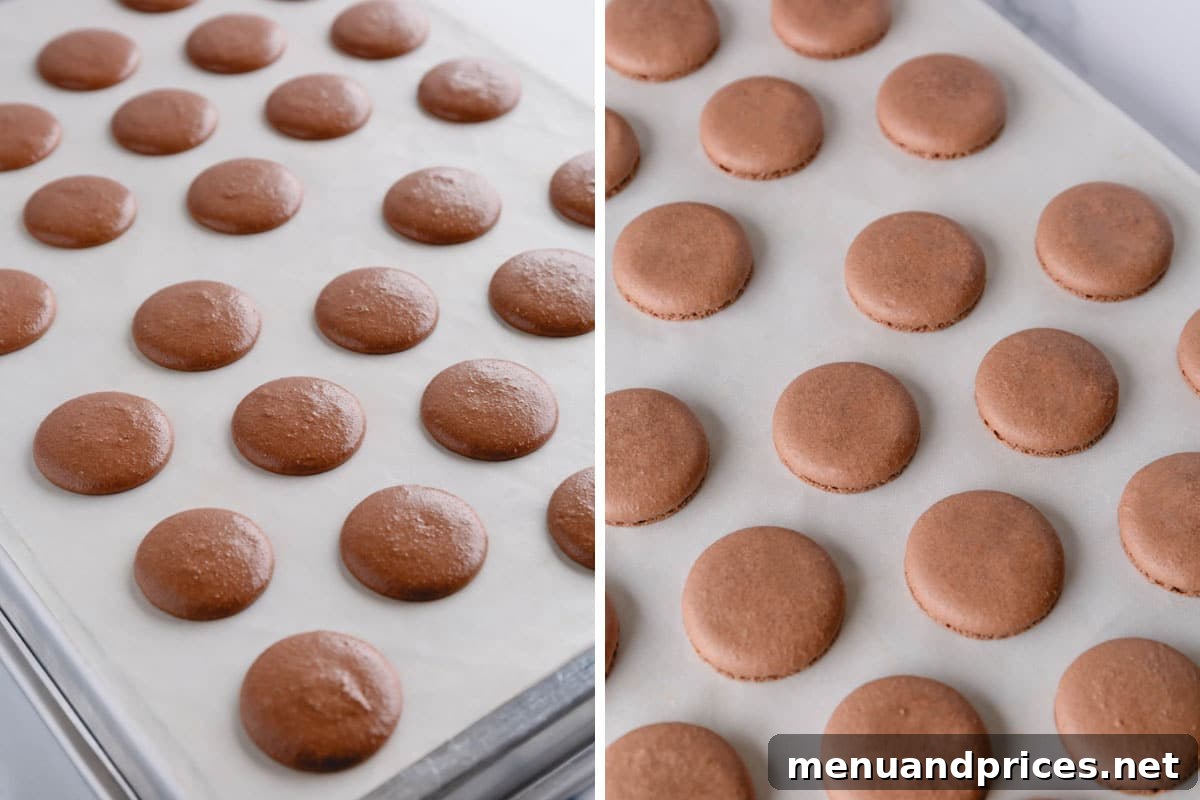
NEED HELP WITH COMMON ISSUES? Explore our visual Macaron Troubleshooting Guide for expert tips and tricks to prevent or fix common macaron dilemmas!
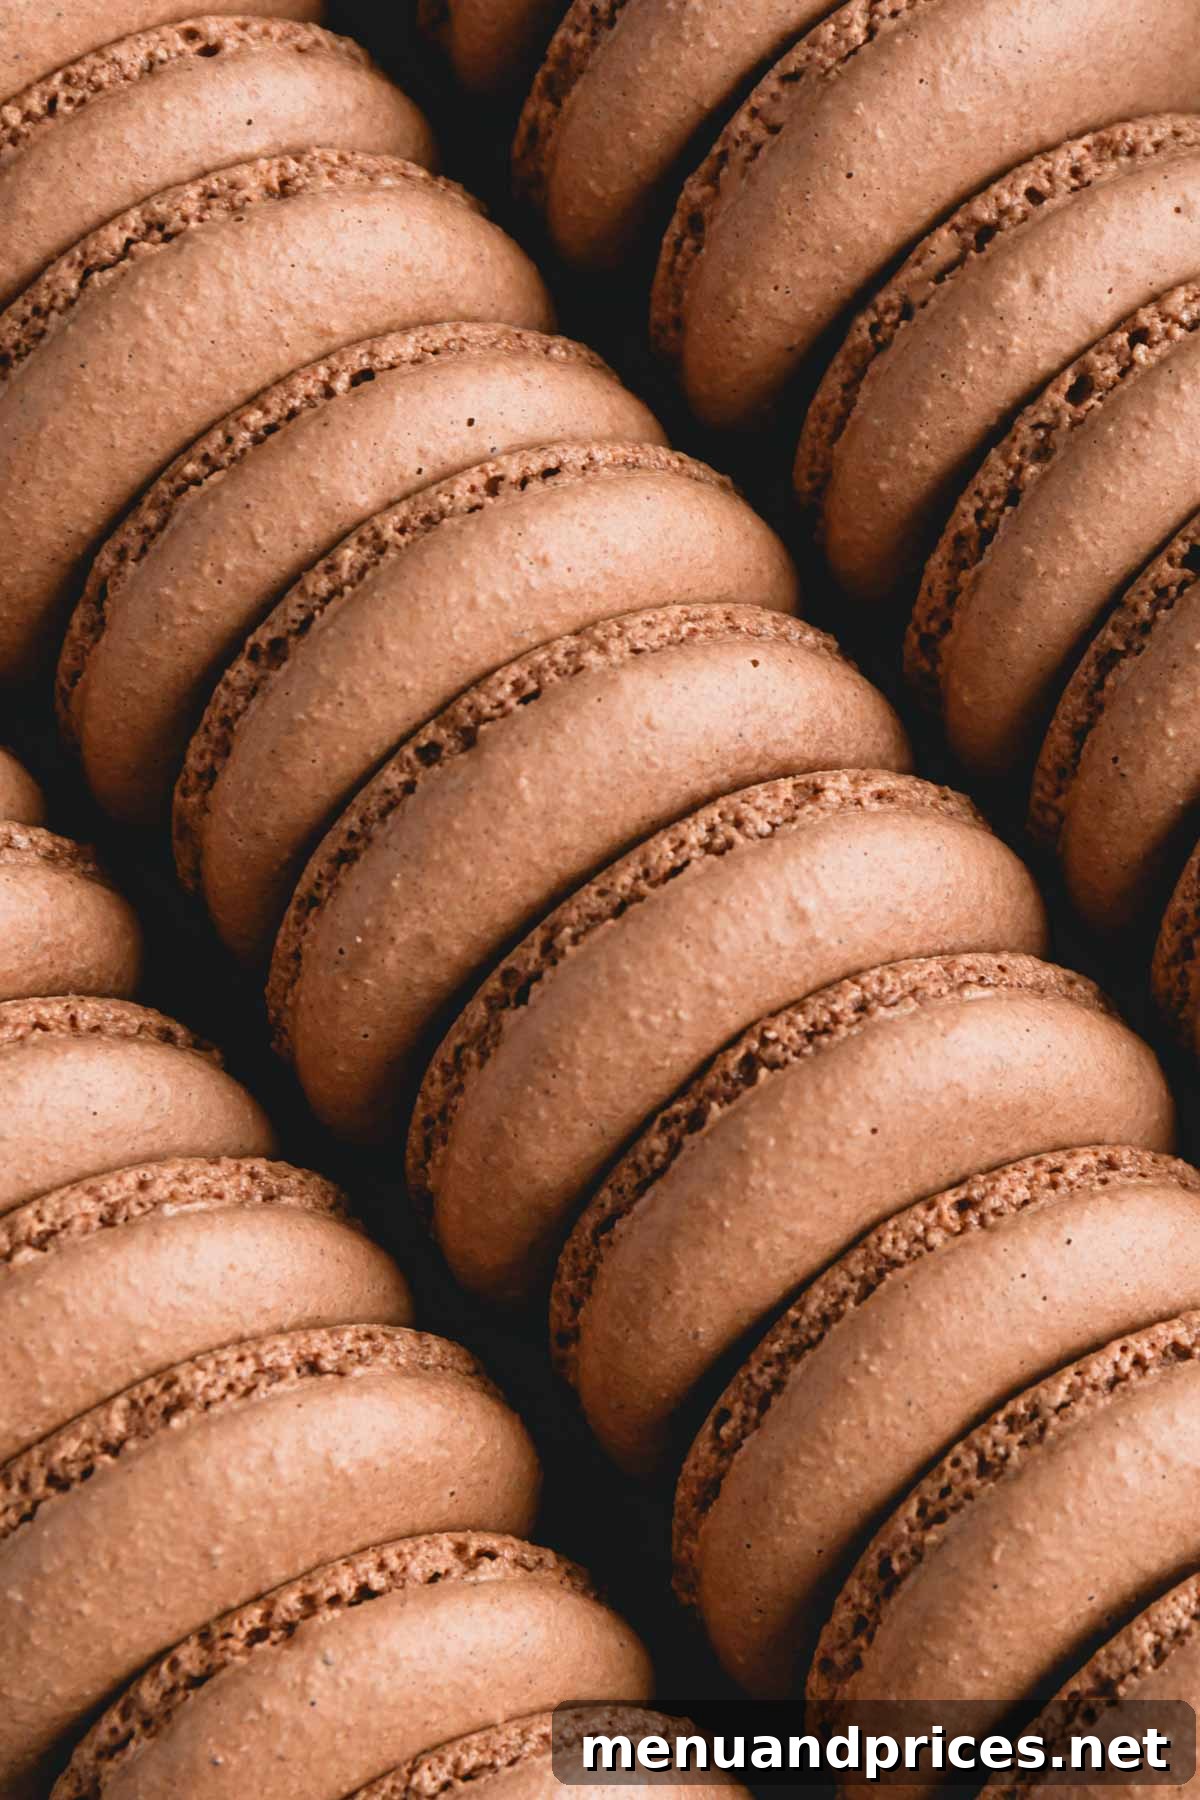
Step 4: Assembling and Maturing Your Chocolate Macarons
- Removing Shells: Once completely cool, carefully remove the macaron shells from your baking surface. If any shells are resistant, it’s a sign they might be slightly underbaked, or they simply need a bit more cooling time. Patience here prevents breakage.
- Pairing Shells: Arrange the cooled shells on a baking sheet or wire rack. The key is to pair them by size, placing one shell bottom-side up, ready for filling. This ensures a consistent and aesthetically pleasing final product.
- Piping Filling: Pipe a generous dollop of your chosen filling onto the upturned bottom shells.
- Completing the Sandwich: Gently place the corresponding top shell over the filling and press lightly, allowing the filling to spread evenly to the edges.
- The Maturing Process: This is a critical, often overlooked step! Place your filled macarons in an airtight container and refrigerate them for a minimum of 8 hours, though 24 hours is highly recommended for optimal results. This process, known as maturing, allows the moisture from the filling to slowly soften the macaron shells, transforming their initial crispness into the delightful, chewy texture that macarons are famous for. It also allows the flavors of the filling and shells to meld beautifully, creating a more harmonious and decadent treat.
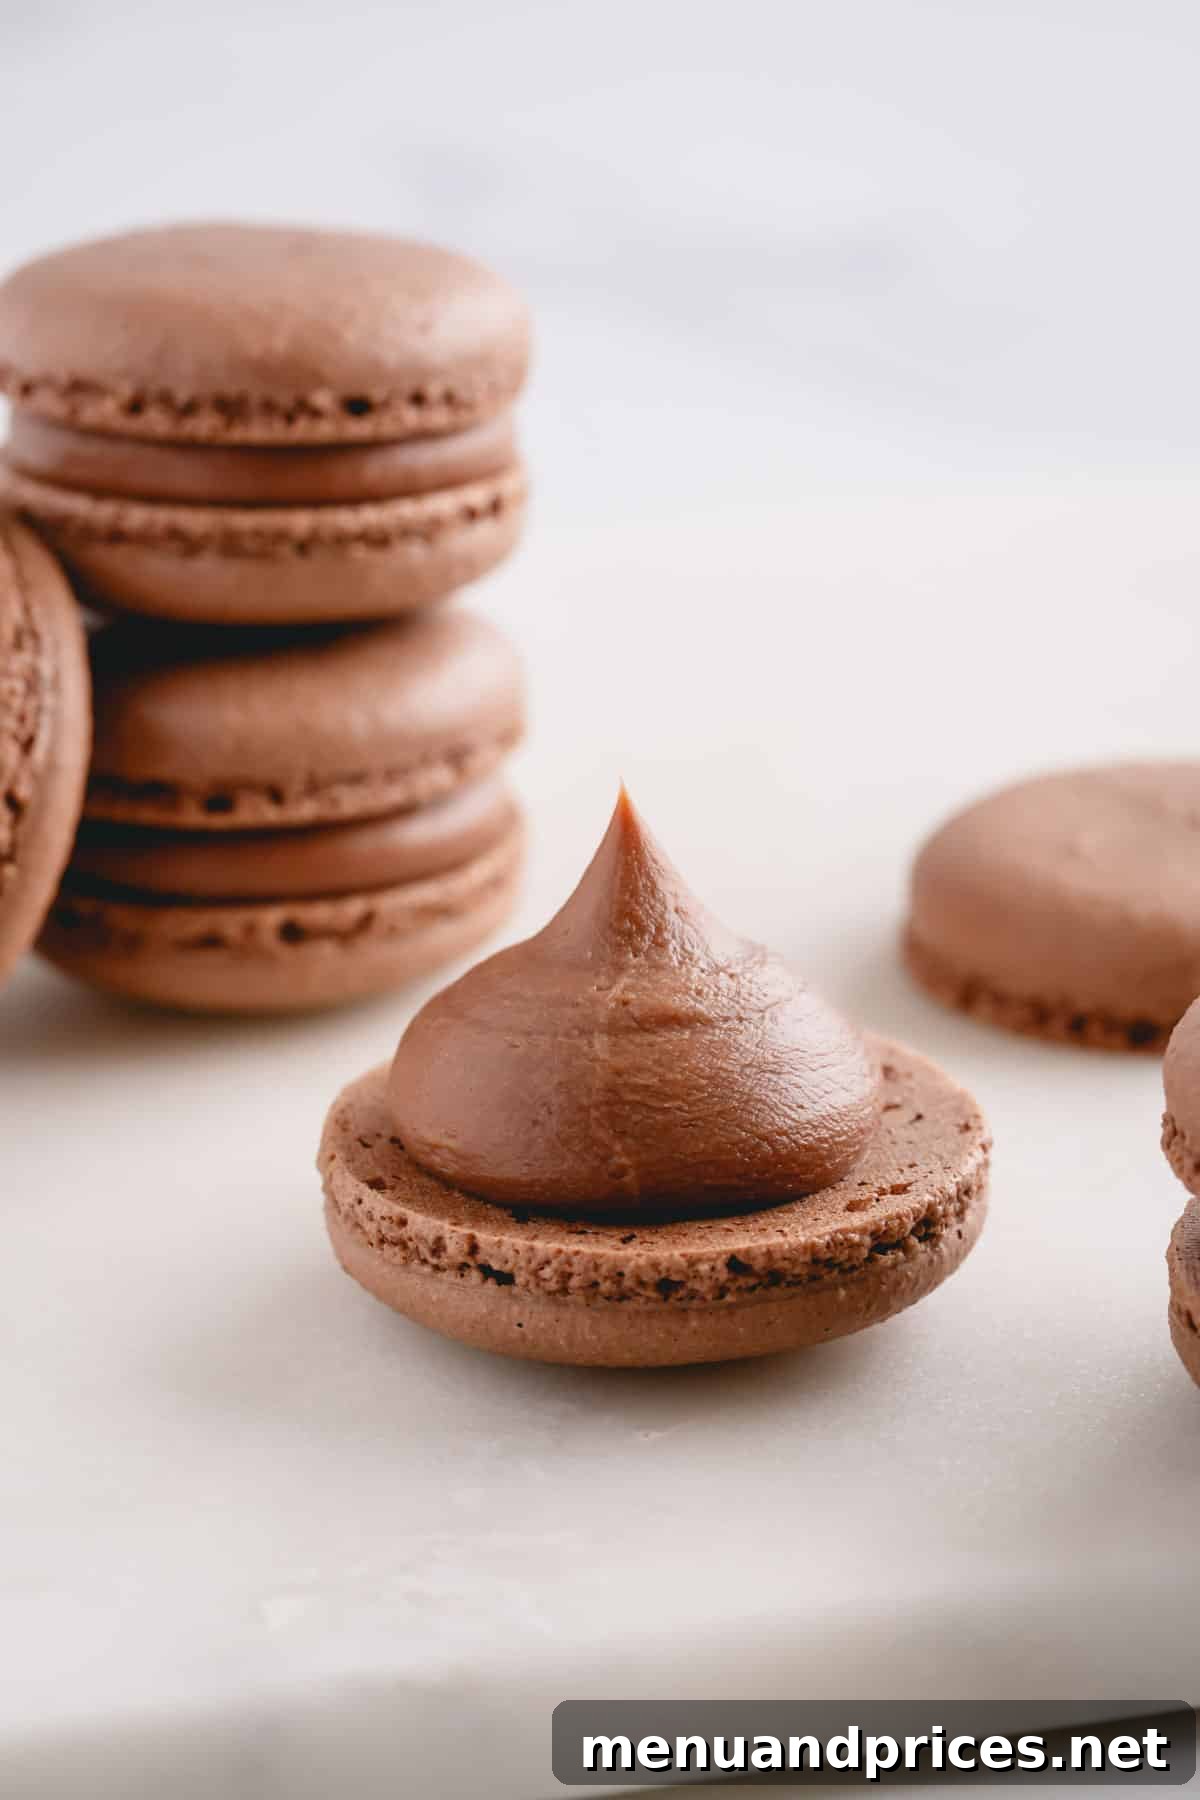
Irresistible Chocolate Macarons Filling Ideas
Chocolate macarons are incredibly versatile, serving as a perfect canvas for a wide array of fillings. Their rich base complements almost any flavor profile. Here are some of my favorite and most popular filling ideas to truly elevate your chocolate macarons:
- Simple Chocolate Ganache: A classic for a reason! Its smooth, rich, and intense chocolate flavor perfectly enhances the macaron shells, creating a deeply satisfying treat.
- Chocolate Swiss Meringue Buttercream: Light, airy, and incredibly silky, this buttercream offers a luxurious mouthfeel and a delicate chocolate taste that balances the intensity of the shells.
- Easy Peanut Butter Buttercream: For those who adore the chocolate and peanut butter combination, this creamy, nutty filling provides a delightful contrast and addictive flavor pairing.
- Chocolate Swiss Buttercream with Salted Caramel Center: Elevate your macarons by piping chocolate Swiss buttercream around the edge and filling the center with a luscious salted caramel. The sweet and salty notes are simply divine.
- Straight-Up Nutella: The ultimate effortless indulgence! If you’re short on time but crave incredible flavor, a dollop of Nutella provides instant hazelnut-chocolate bliss.
- Raspberry Ganache: A vibrant and fruity option, a raspberry-infused ganache offers a beautiful tang that cuts through the richness of the chocolate shells, creating a sophisticated flavor profile.
- Coffee Buttercream: For coffee lovers, a robust coffee-flavored buttercream pairs exquisitely with chocolate, creating a mocha-inspired macaron that is both sophisticated and comforting.
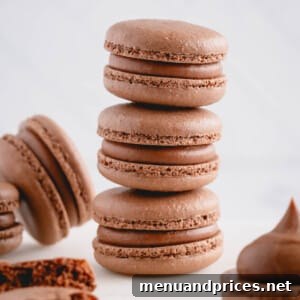
Chocolate Macarons
Shinee Davaakhuu
20 filled macarons
Comment
Print Recipe
Ingredients
For macaron shells:
-
100 g
finely ground almond flour Note 1 -
65 g
powdered sugar Note 2 -
10 g
cocoa powder Note 3 -
75 g
egg whites at room temperature Note 4 -
75 g
fine granulated sugar Note 5 -
¼ teaspoon
cream of tartar Note 6 -
¼ teaspoon
coarse kosher salt
For filling of your choice:
- Chocolate ganache 1/3 of the linked recipe
- Chocolate Swiss meringue buttercream 1/2 of the linked recipe
- Salted caramel for the center
Instructions
To make chocolate macaron shells:
- Preheat the oven to 300°F (150°C). Line 2 baking sheets with parchment paper, Teflon sheets, or silicone mats. (TIP: For even air circulation and baking, consider flipping your baking sheets upside down.)
- To prepare dry ingredients, sift together almond flour, powdered sugar, and cocoa powder twice. This ensures a fine, lump-free, and aerated mixture. (Note: If you have up to 2 tablespoons of chunky dry ingredients left in the sifter, it’s acceptable to discard them without replacement.)
- To make meringue, in a spotlessly clean mixing bowl with a whisk attachment, combine egg whites, granulated sugar, cream of tartar, and salt. Beat the mixture on consistent medium speed until soft peaks form. (On a KitchenAid stand mixer, speed 4 is ideal. This process can take 30-40 minutes; do not rush, as a slow whip produces a more stable meringue vital for full shells.)
- Continue beating the egg whites on the same medium-low speed until hard peaks form. Visual cues: The meringue should gather inside the whisk, and when lifted, it should hold a pointy, uncurled end with sharp, defined ribs. (Refer to the pictures above or watch this meringue video for detailed visual guidance.)
- To make batter (Macaronage), gently sift the prepared almond flour mixture into the stiff meringue. Using a large silicone spatula, meticulously fold the dry ingredients into the meringue until fully incorporated. Continue to fold the batter until it reaches a “lava-like” consistency, flowing smoothly enough to form a figure eight when dropped from the spatula. To test, take a small amount of batter and drop it into the bowl. If the small peaks gradually dissolve into the batter on their own in about 10 seconds, the batter is ready. If not, perform a couple more folds and test again. Be extremely careful not to over-fold the batter, especially chocolate batter which is denser. (TIP: French macaron success hinges on technique. For beginners, counting your folds can be helpful; roughly 50 folds often bring it to the right consistency. After 50 folds, start testing after every few folds.)
- To pipe macaron shells, transfer the batter into a pastry bag fitted with a round tip. (I usethis Wilton 2A tip.)
- Hold the pastry bag at a straight 90° angle and pipe uniform 1.5-inch rounds, spaced approximately an inch apart, onto your prepared baking sheets. (TIP 2: Download my free macaron template to easily pipe batter within the inner circle guides.)
- Firmly tap the baking sheets several times on the counter (or slap the bottom with your hand) to release any trapped air bubbles. Use a toothpick to burst any large visible bubbles. This critical step ensures smooth, crater-free tops.
- Allow the macarons to rest on the counter for 15 minutes to 1 hour (depending on humidity) before baking. This resting period allows a skin to form, promoting the characteristic ‘feet’.
- To bake, bake the macarons for 18-20 minutes, one baking sheet at a time, on the middle rack. Larger macarons may require a slightly longer baking time. To test for doneness, gently touch a macaron; if it feels firm and doesn’t slide or wobble, it’s baked through. The base should also feel firm. (TIP: It’s always preferable to slightly over-bake macarons than to under-bake them to avoid hollows and sticking.)
- Cool the macarons completely on the baking sheets before removing the shells. (TIP: Do not attempt to remove shells while warm, as they are fragile and prone to breaking or sticking to the surface.)
To assemble macarons:
- Pair the cooled macaron shells by size. Arrange them on a wire rack or baking sheet, ensuring one shell is bottom-side up.
- Pipe a dollop of your desired filling onto the upturned bottom shells. Place the corresponding top shell over the filling and press lightly so the filling spreads evenly to the edges.
- Store the filled macarons in an airtight container in the fridge for at least 24 hours to mature. This critical process allows the filling to soften the shells and blend flavors beautifully, resulting in the perfect chewy texture.
- To serve, remove the macarons from the fridge about 30 minutes prior to serving to allow them to come to room temperature, enhancing their flavor and texture.
⭐️ Did you make this recipe?
Please leave a review and let us know how you liked it!
Video Tutorial
Tips & Notes
Note 1: Always weigh your ingredients precisely before sifting, and use super-fine almond flour for the smoothest shells.
Note 2: It’s best to use commercial powdered sugar, which typically contains cornstarch. This helps stabilize the macaron batter and improves cookie texture. Homemade powdered sugar often lacks this beneficial starch.
Note 3: While Hershey’s natural cocoa powder is highly recommended for consistent results, feel free to use any brand or type, including Dutched cocoa. If you encounter issues like wrinkly macarons or overly thick batter on your first attempt with a different cocoa, try reducing the almond flour by 1-2 tablespoons on your next batch.
Note 4: For convenience, carton egg whites (such as Bob Evans brand) can be successfully used. You will need approximately 1/3 cup (75g) of egg whites.
Note 5: Using fine granulated sugar (caster sugar or baker’s sugar) is important for the meringue, as its smaller crystals dissolve more quickly and completely, preventing a gritty texture.
Note 6: Cream of tartar is an optional but highly recommended ingredient. It acts as a stabilizer for egg whites, helping to create a stronger, sturdier meringue, serving as an excellent “extra insurance” for macaron success.
Batch Size: This macaron recipe can be easily doubled if you wish to make a larger quantity.
Macaron Troubleshooting: If you encounter any difficulties, refer to my comprehensive visual troubleshooting guide and Macaron 101 post for solutions to common macaron problems.
Nutrition
1 plain shell
29kcal
4g
1g
1g
4g
18mg
Dessert
French
Did you make this?
Leave a rating and your feedback. Thank you!
Storage and Shelf Life
Once your chocolate macarons are assembled and have had adequate time to mature, proper storage is key to maintaining their delightful texture and flavor. Store filled macarons in an airtight container in the refrigerator for up to 5-7 days. The airtight seal prevents them from drying out or absorbing unwanted odors from the fridge. For longer storage, macarons freeze beautifully!
To Freeze: Place filled macarons in a single layer in an airtight container. You can layer them with parchment paper in between. Freeze for up to 1-2 months. When you’re ready to enjoy them, simply transfer them from the freezer to the refrigerator the night before, or allow them to thaw at room temperature for about 30-60 minutes before serving. Bringing them to room temperature enhances their texture and flavor, just as it does after initial maturation.
This comprehensive chocolate macarons recipe was originally published on November 21st, 2014, and has been meticulously updated and expanded to provide the most current and detailed guidance for your baking success.