
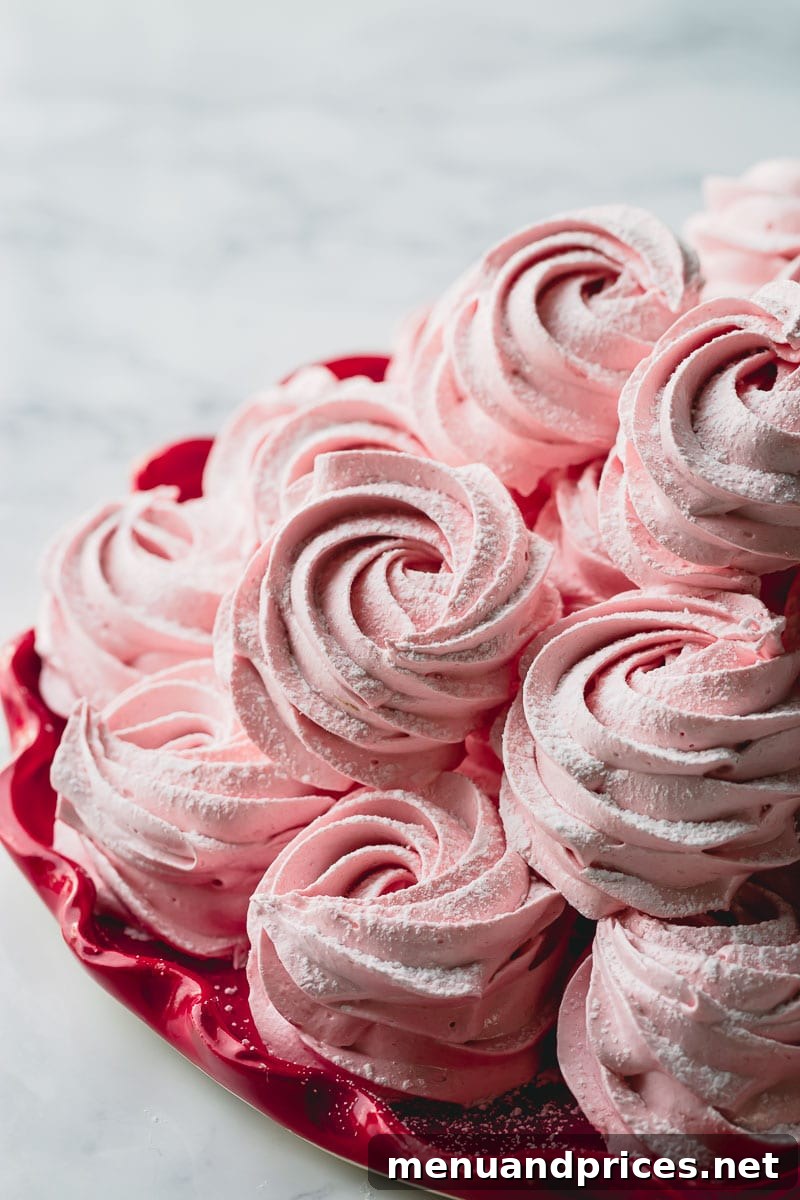
Prepare to be enchanted by these unbelievably light, airy, and delicately flavored homemade marshmallows, known as Zefir in Russian cuisine. Far from your typical store-bought variety, these stunning dessert rosettes are surprisingly easy to create in your own kitchen. I’m excited to share all my expert tips and a comprehensive guide so you can master the art of making these delightful treats!
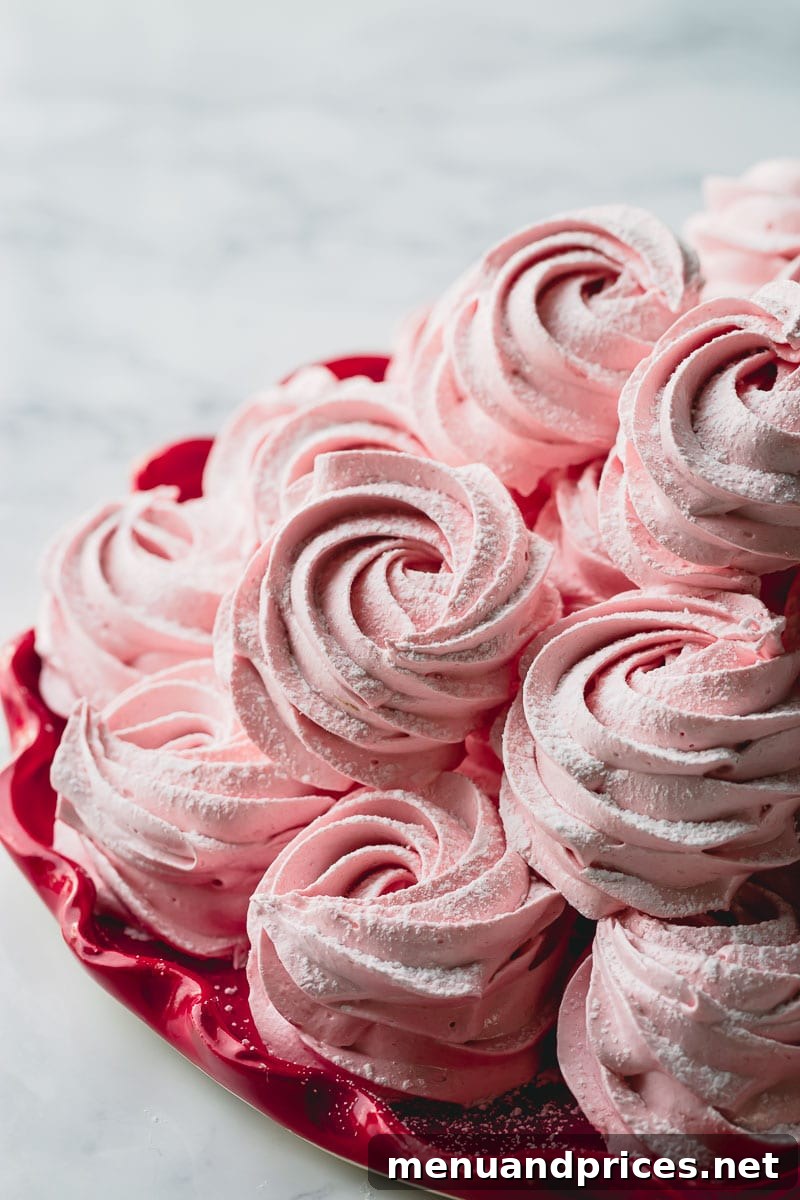
How impressive are these beautiful homemade Russian marshmallows? Beyond their captivating appearance, they boast an incredibly delicate texture that simply melts in your mouth, leaving a whisper of fruity sweetness. Each bite is a testament to their unique charm, making them a truly special dessert.
For me, these exquisite marshmallow rosettes (zefir, as they are called in Russian) evoke a deep sense of nostalgia. Growing up, Russian cuisine held a significant place in my heart, shaping many cherished childhood memories. It’s a culinary heritage I hold dear, and today, I’m thrilled to unveil one of my absolute favorite childhood sweets – authentic Russian Zefir.
Unlike the chewy, dense marshmallows you might be familiar with, Zefir offers a cloud-like consistency and a more refined, less sugary taste. They are often infused with natural fruit flavors, which contributes to their distinctive profile and makes them a healthier, more wholesome alternative to their American counterparts. This recipe isn’t just about making a dessert; it’s about recreating a piece of culinary history and sharing a truly unforgettable taste experience.

Why You’ll Fall in Love with This Zefir Recipe
This Zefir recipe stands apart from traditional American marshmallows, primarily due to its unique combination of fruit puree, egg white, and agar agar. This distinct ingredient list is key to achieving its characteristic texture and flavor. Let’s delve into why these homemade Russian marshmallows will become your new favorite:
- Unbelievably Light and Airy: Forget dense, sticky marshmallows. Our Zefir boasts an ethereal, cloud-like consistency that dissolves beautifully in your mouth, leaving a delicate sweetness. Each rosette is a tiny, soft pillow of joy.
- Delicate Fruit Flavor: Infused with real fruit puree, these marshmallows offer a subtle yet vibrant berry essence. This natural fruitiness elevates the flavor profile, making them far more sophisticated than artificial alternatives.
- Perfectly Balanced Sweetness: We’ve carefully crafted this recipe to avoid being cloyingly sweet. A judicious pinch of salt works wonders to balance the sugar, creating a harmonious taste that will leave you wanting more without feeling overwhelmed.
- Effortlessly Elegant: Despite their gourmet appearance, these Zefir are surprisingly straightforward to make and pipe into stunning various designs. With a few simple tools and a little practice, you’ll be creating bakery-worthy desserts in no time. They are perfect for gifting, party platters, or simply indulging yourself.
- Unique Culinary Experience: Dive into the rich tradition of Russian confectionery. Zefir is not just a dessert; it’s a cultural delight, offering a taste of Eastern European charm. It’s a fantastic recipe to expand your baking repertoire and impress your friends and family with something truly unique.
Key Ingredients for Perfect Zefir
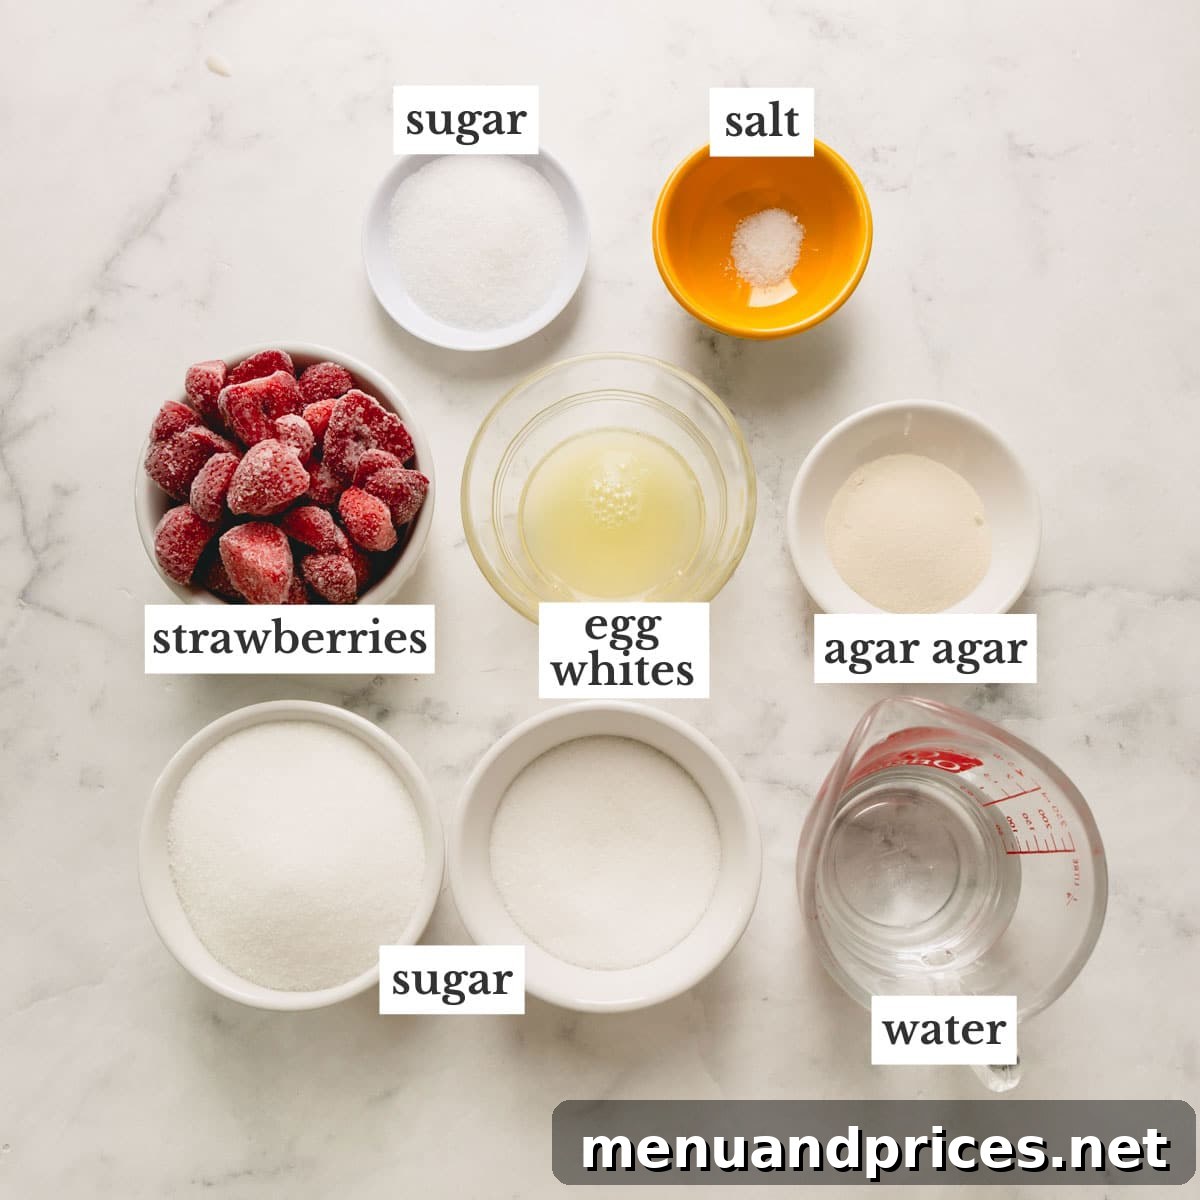
Beyond one special setting agent, agar agar, you’ll find that most of the ingredients for this Zefir recipe are basic pantry staples. Understanding the role of each component is crucial for successful marshmallow making. Let’s break them down:
- Fruit Puree: This is the heart of your Zefir’s flavor and color. You have complete flexibility here – almost any kind of fruit puree will work! I often prepare it by cooking fresh or frozen berries (strawberries, blueberries, or blackberries are fantastic choices) with a small amount of sugar, then straining it to achieve a silky-smooth texture. Unsweetened applesauce or apple butter are also excellent, especially green apple puree for a classic zefir flavor, as their acidity helps with setting. You’ll need approximately 150g of a thick, concentrated puree for this recipe to ensure proper structure and intense flavor.
- Egg Whites: The magic behind the incredibly light and airy structure of Zefir. Whipped egg whites create the delicate meringue that forms the base of these marshmallows, making the batter easy to manage and pipe into intricate designs. Don’t worry about using fresh eggs; carton egg whites work just as wonderfully and can save you time.
- Granulated Sugar: Essential for both sweetness and structure. While it might seem like a lot, please resist the temptation to significantly reduce the sugar amount. Sugar plays a vital role in the chemical reactions that allow the marshmallows to set properly and maintain their shape. It also contributes to the glossy finish and helps preserve the Zefir.
- Agar Agar: The star ingredient that sets Zefir apart! Agar agar is a powerful gelling agent, similar in function to gelatin, but with a significant difference: it’s plant-derived, making this recipe suitable for vegan diets if you substitute the egg whites with a vegan meringue alternative. I highly recommend using agar powder, as it dissolves readily and is the easiest form to work with for consistent results. We’ll explore more about agar agar in detail shortly.
- Water: Used to dissolve the agar agar and sugar, forming the crucial syrup that will stabilize our meringue.
- Coarse Kosher Salt: A small but mighty ingredient! A pinch of salt is vital for balancing the sweetness of the marshmallows, enhancing the fruit flavors, and preventing them from tasting overly sugary.
Pro Tip: Choosing Your Fruit Puree
For the best setting and flavor, it’s highly recommended to use fruit puree made with acidic fruits. Green apple sauce is a classic choice for traditional Zefir, known for its pectin content and tartness. However, cranberry, raspberry, blueberry, and blackberry purees also work exceptionally well, adding beautiful color and tang.
The key is to ensure your puree is nice and thick, with as much excess moisture cooked off as possible. A runny puree can prevent your Zefir from setting correctly, resulting in a sticky, soft texture.
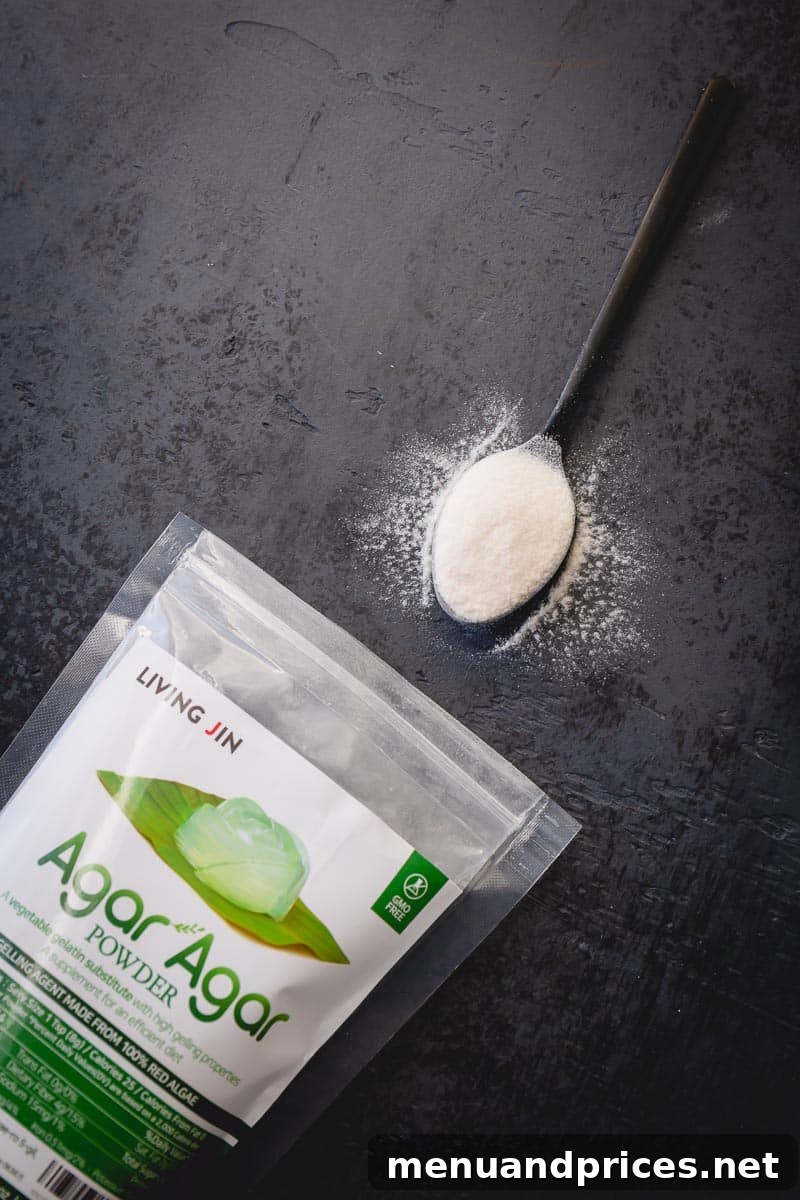
What Exactly is Agar Agar?
Agar agar, often simply called agar, is a fascinating plant-derived gelling agent. It’s extracted from red algae and has been a staple in Asian cuisine for centuries. Its plant-based origin makes it an excellent vegan-friendly and vegetarian alternative to gelatin, which is derived from animal collagen. This is a crucial distinction for many bakers and consumers!
Agar agar comes in various forms to suit different culinary needs, including powder, flakes, strands, and even solid bars. For home baking and confectionery, agar powder is by far the easiest and most convenient form to work with. It dissolves quickly and completely in hot liquids, offering reliable and consistent results.
The magic of agar activates when it’s fully dissolved in a liquid and then brought to a boil. It typically begins to set as it cools, often at temperatures around 100°F to 110°F (38°C to 43°C), creating a firm, jelly-like texture. Unlike gelatin, agar sets at room temperature and remains stable even in warmer conditions, which is a significant advantage when making delicate desserts like Zefir.
It’s important to note that different brands of agar agar can have varying strengths. This is measured in g/cm² (grams per square centimeter), indicating its gelling power. For this Zefir recipe, you’ll achieve the best results with agar agar powder that has a strength of 700-900g/cm². Using a weaker agar might result in softer, less stable marshmallows, while a much stronger one could make them too firm. Always check the packaging of your agar agar for its strength, or use a trusted brand known for its consistency.
Agar agar is also flavorless and odorless, meaning it won’t interfere with the delicate fruit flavors of your Zefir. It’s a truly versatile ingredient that offers a clean, crisp set, making it indispensable for authentic Russian marshmallows.
General Guideline for Agar Agar Usage
A good rule of thumb for many recipes is to use 1 teaspoon of agar agar powder for every 1 cup of liquid. However, for Zefir, we need a stronger set to create that signature stable, airy texture, which is why our recipe may call for a slightly higher proportion, especially considering the fruit puree’s moisture content.
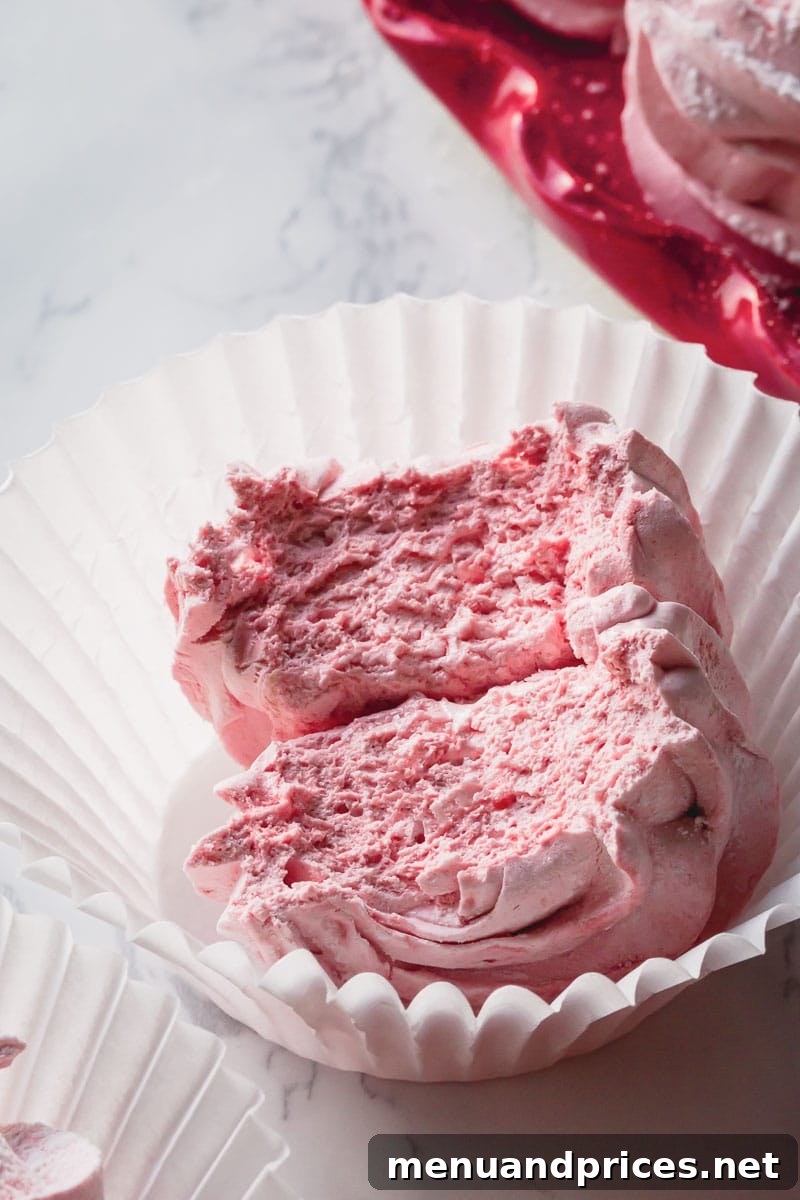
Crafting Homemade Zefir: A Step-by-Step Guide
Making homemade Zefir is a rewarding experience, but timing and preparation are key. The process moves quite quickly once you start, so having everything ready beforehand is crucial for success.
Before You Begin: Mise en Place is Your Best Friend!
Gather all your ingredients, measure them precisely, and have all your tools within arm’s reach. This includes your stand mixer with a whisk attachment, a reliable candy thermometer, the correct size saucepans, and your piping bags fitted with decorative tips. It’s also vital to prepare your baking sheets – line them with parchment paper or silicone mats, as you’ll need to start piping the marshmallow batter as soon as it’s ready. Any delay can cause the mixture to set prematurely in the bowl or piping bag, making it difficult to work with.
This careful preparation will ensure a smooth and enjoyable baking process, leading to beautifully formed Zefir rosettes.
1. The Foundation: Prepare Your Fruit Puree
- In a 1.5-quart saucepan, combine your chosen fresh or frozen fruits (strawberries, blueberries, or blackberries are excellent) and cook them over medium-high heat. Allow the fruits to come to a rolling boil.
- Once boiling, add the specified amount of sugar (1 tablespoon) to the fruits. Continue to cook for approximately 10-15 minutes, or until the fruits have softened considerably and much of their liquid has evaporated. As they cook, actively mash the fruits with a spoon or potato masher to help break them down and release their juices.
- For a perfectly smooth and refined Zefir, pass the cooked fruit mixture through a fine-mesh sieve. Press down firmly on the solids to extract as much of the thick puree as possible. Discard the remaining pulp and seeds. You should aim for about 150g of rich, concentrated fruit puree. Let this puree cool completely before using. For best results, chill it in the refrigerator for at least 1-2 hours, or even better, prepare it a day in advance and store it covered in the fridge overnight. This ensures it’s thick and cold, which is important for the meringue.
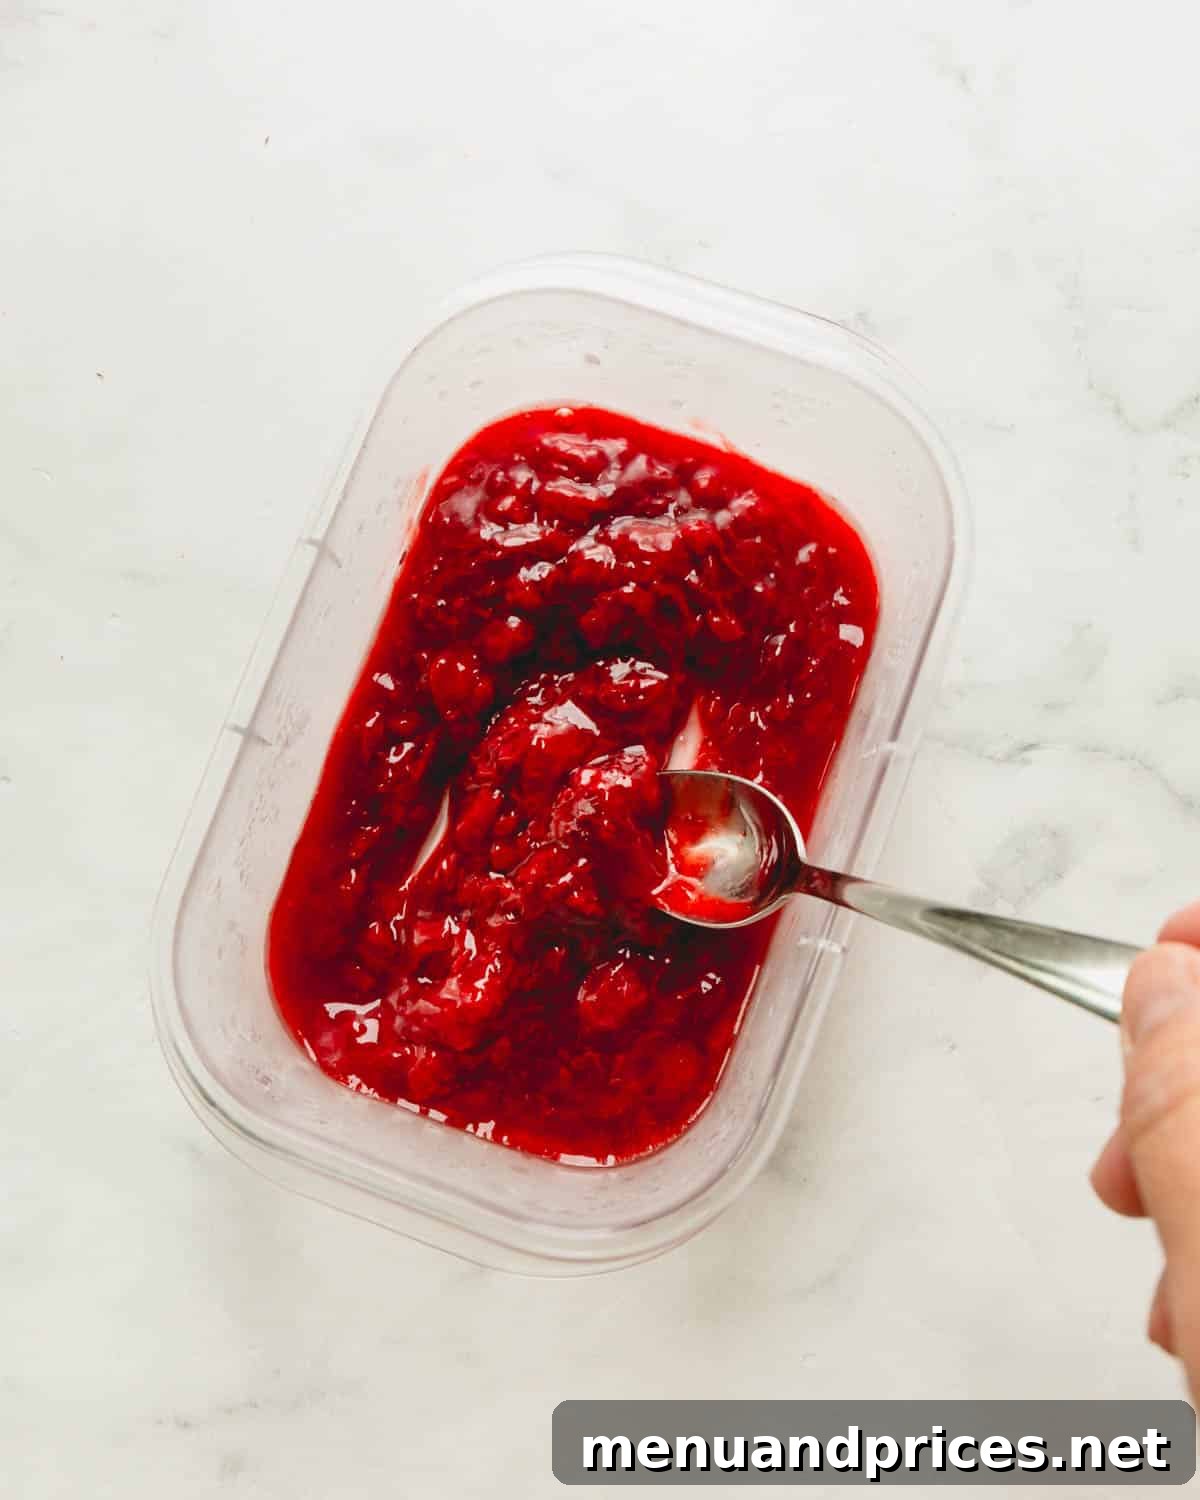
Puree Perfection: Essential Tips
It is paramount to cook off as much excess moisture from the fruit as possible. You are striving for a very thick, almost jam-like puree, not a watery sauce. A concentrated puree is essential for the Zefir to set correctly and maintain its airy structure.
As mentioned, you can make this fruit puree 1-2 days in advance. Store it in an airtight container in the refrigerator to save time on baking day.
2. Building the Cloud: Preparing the Meringue
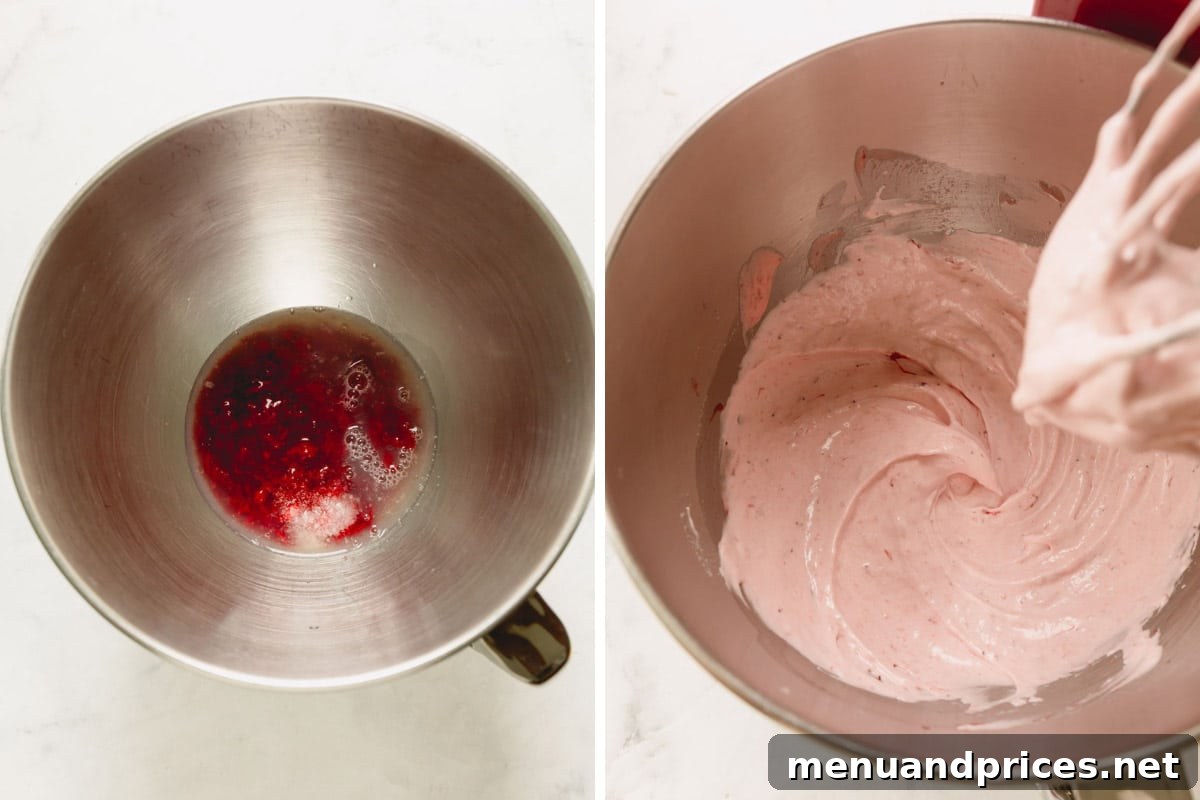
- In the bowl of a stand mixer fitted with a whisk attachment, combine the chilled fruit puree with the egg whites and a pinch of coarse kosher salt. Begin whisking the mixture on a low speed until it becomes visibly foamy and light.
- Once the mixture is foamy and has turned a pale, even color, increase the mixer speed to medium-low. Gradually start adding the remaining granulated sugar (100g) one tablespoon at a time. Continue to beat the mixture consistently until soft peaks begin to form. The meringue should be glossy and hold its shape briefly before gently falling. This stage requires patience, but it’s crucial for the final texture of your Zefir.
3. The Sweet Stabilizer: Creating the Sugar Syrup
- In a medium-sized saucepan (at least 2 quarts to accommodate vigorous bubbling), combine the water, 200g of granulated sugar, and the agar agar powder. Stir all the ingredients thoroughly until the agar agar and sugar are well combined and dissolved in the water.
- Place the saucepan over medium-low heat. Continue stirring frequently during the initial heating phase to ensure all the sugar dissolves completely. Once the sugar is fully dissolved and the mixture begins to simmer, stop stirring and increase the heat to medium.
- Cook the mixture, monitoring the temperature with a candy thermometer. You want the syrup to reach precisely 240°F (115°C). This process will take approximately 10 minutes. A crucial timing tip: when your sugar syrup reaches around 200°F (93°C), it’s time to begin whipping your meringue (as described in step 2), so both components are ready simultaneously.
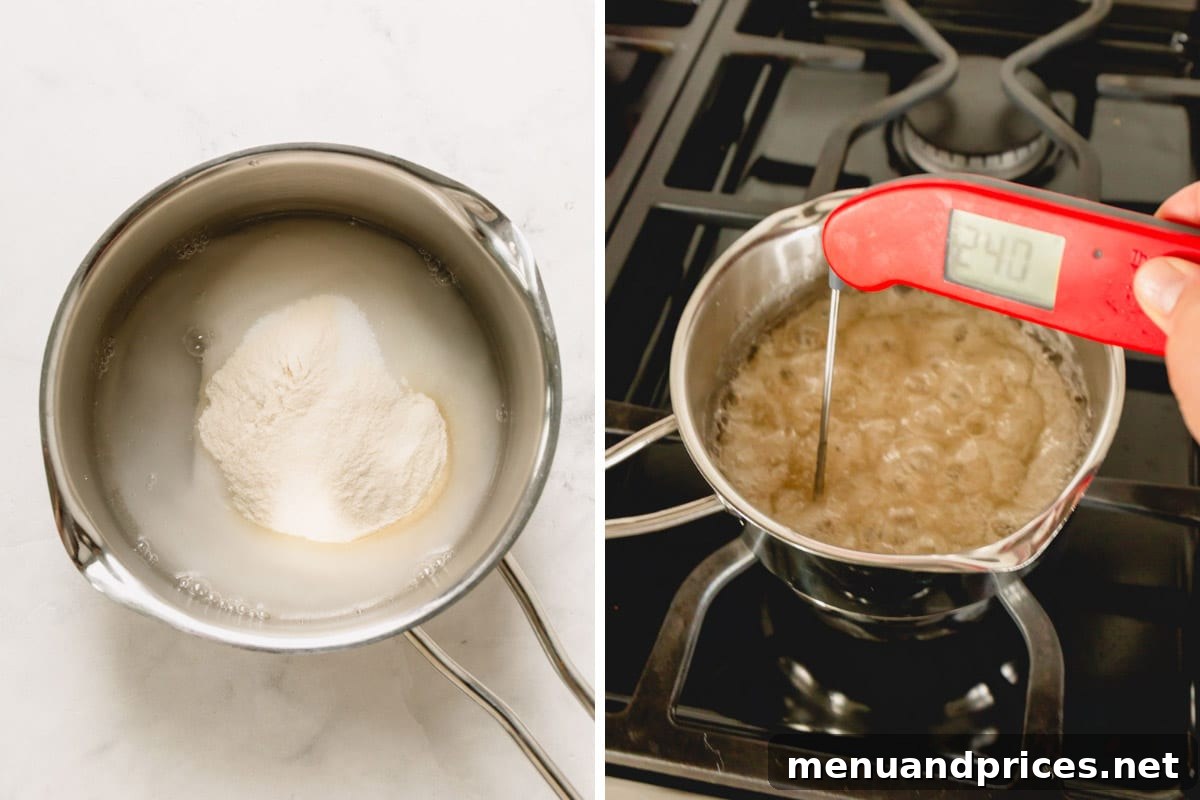
Sugar Syrup Secrets for Success
Be aware that the sugar syrup will bubble up quite vigorously as it cooks, especially as it approaches the target temperature. This is why using an adequately sized saucepan (at least 2 quarts) is essential to prevent boil-overs and messy cleanups.
Resist the urge to cook the sugar syrup on high heat. While it might seem faster, high heat can cause the syrup to overcook rapidly, leading to issues like crystallization in your marshmallows, resulting in a grainy texture instead of the desired smooth, airy consistency.
Do NOT stir the syrup after the initial dissolve. Stirring can introduce sugar crystals back into the mixture, leading to grainy Zefir. Let it boil undisturbed until it reaches the target temperature.
4. The Final Blend: Creating the Zefir Batter
- Once your sugar syrup reaches 240°F (115°C), immediately remove it from the heat. Allow the vigorous bubbles to subside for no more than half a minute. With your stand mixer running on medium-high speed, slowly and steadily pour the hot sugar syrup into the prepared meringue. It is crucial to aim the stream of syrup towards the side of the mixing bowl, rather than directly onto the whisk. This prevents the syrup from splattering and ensures even incorporation into the meringue. Do not scrape the saucepan for any remaining syrup, as this could introduce crystallization.
- After all the hot syrup has been added, increase the mixer speed to medium-high. Continue to beat the mixture vigorously for 3-5 minutes, or until hard peaks form. The batter will become noticeably thicker, glossy, and increase in volume. It should be firm enough to hold its shape perfectly when the whisk is lifted, and the bowl should feel cool to the touch. This intense whipping cools the mixture and incorporates maximum air, creating the signature light texture of Zefir.
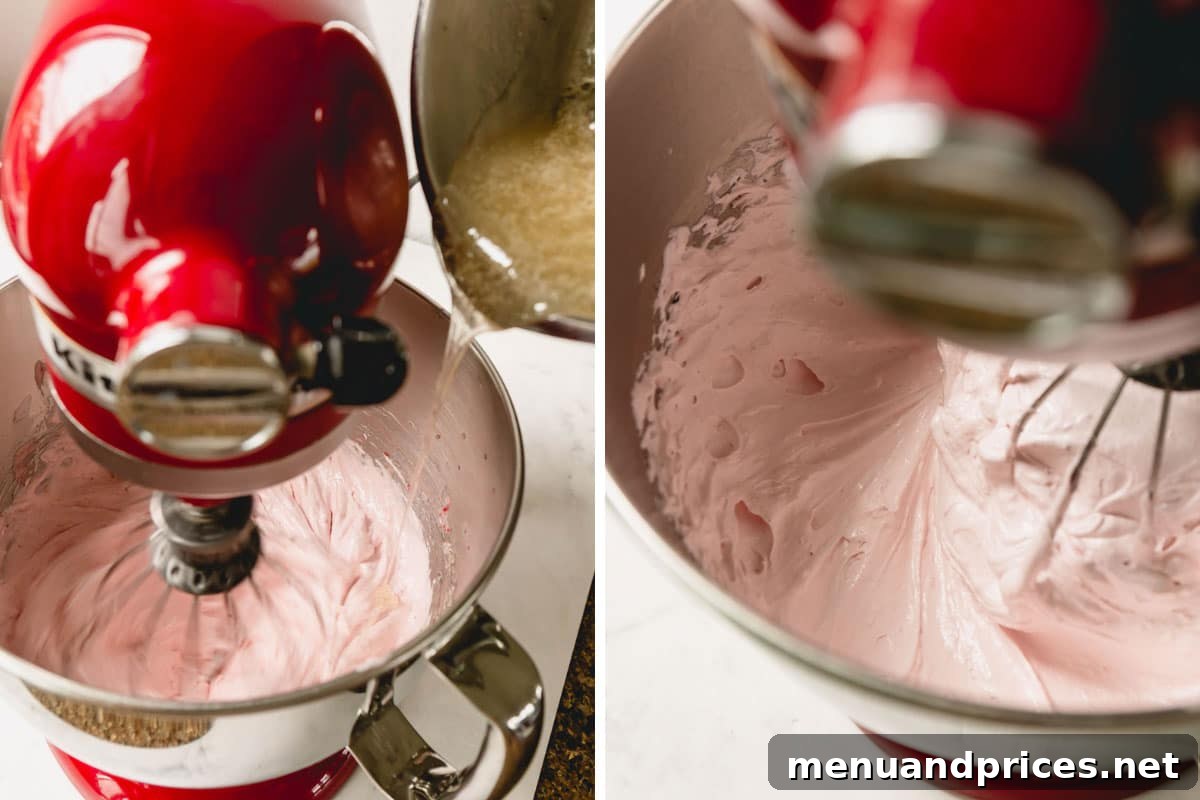
5. The Artistic Touch: Piping and Setting Your Zefir
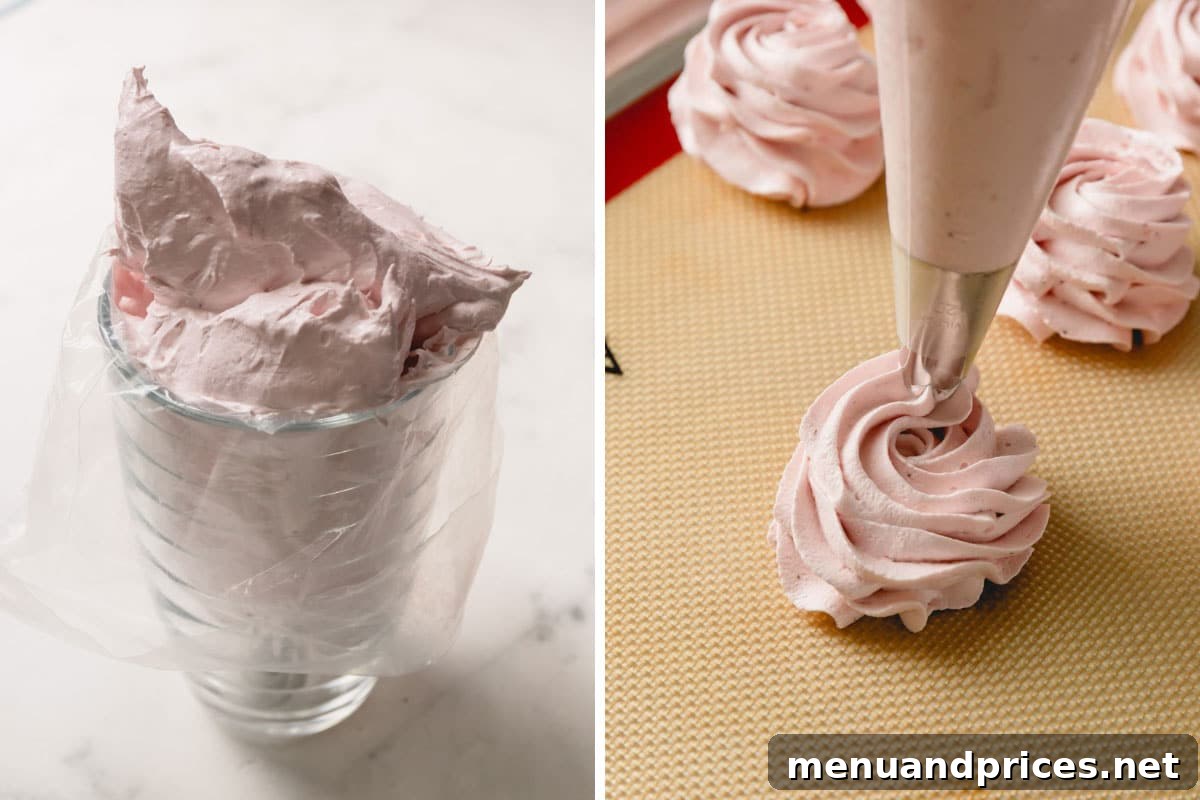
- Time is of the essence here! As soon as the Zefir batter reaches the hard peak stage, immediately transfer it into a prepared piping bag fitted with your chosen decorative tip (a Wilton 1M tip is excellent for classic rosettes). Work quickly but carefully, as the mixture will begin to set as it cools.
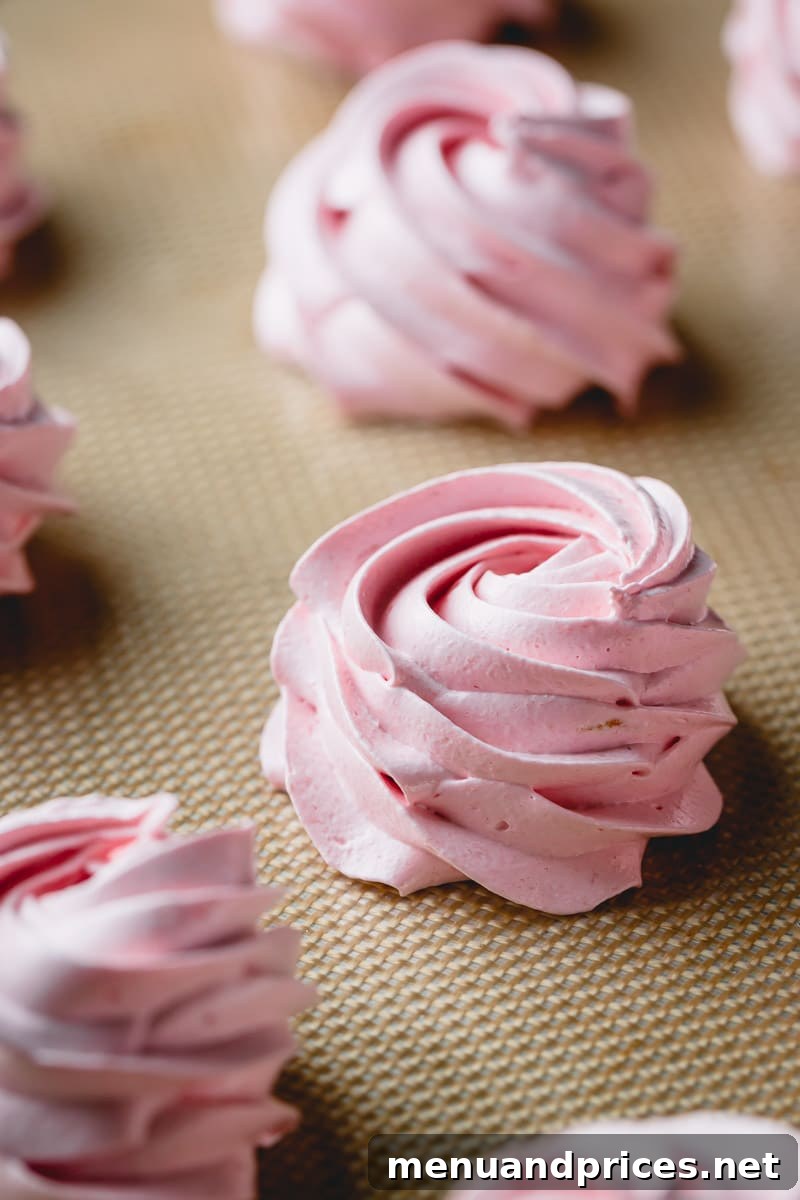
- Pipe 2-inch round rosettes, about 1 inch tall, onto your prepared baking sheets lined with parchment paper or silicone mats. You can create various shapes and sizes, but consistency will help them set evenly.
- Once piped, gently place the baking sheets in a cool, dry area of your kitchen. Let the Zefir rosettes rest and set for a minimum of 8-12 hours. I often prepare them in the evening and allow them to set overnight. This crucial drying time allows the agar agar to fully firm up and the Zefir to develop its characteristic outer crust, preventing stickiness.
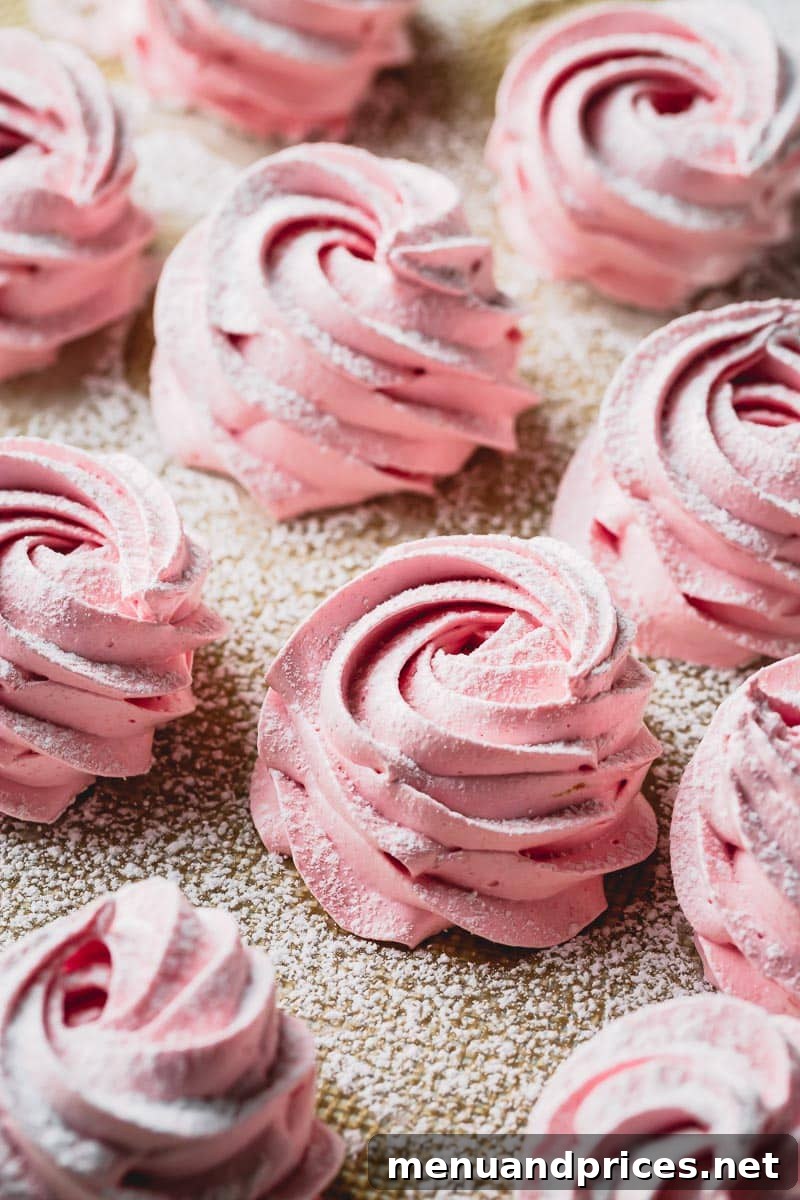
- After the setting period, generously dust the homemade marshmallows with plenty of powdered sugar. This final step not only adds a touch more sweetness but also helps to prevent them from sticking together. Now, your beautiful Zefir are ready to be enjoyed!
Storing Your Homemade Zefir
Once your homemade Zefir have fully dried for 8-12 hours and been dusted with powdered sugar, proper storage is essential to maintain their delicate texture and freshness. Transfer the finished marshmallows into an airtight container. They can then be refrigerated for up to a week, where they will retain their light and airy consistency.
It’s important to note that Zefir does not freeze well. Unlike traditional marshmallows, the unique composition of Zefir, particularly due to the agar agar, causes them to become gummy and develop an undesirable texture after freezing and thawing. Therefore, it’s best to enjoy them fresh within their refrigerated shelf life.
Troubleshooting Common Zefir Issues
Even experienced bakers can encounter challenges. Here’s a guide to help you troubleshoot common issues when making homemade Zefir:
Why aren’t my marshmallows holding their shape?
If your Zefir rosettes collapse or don’t maintain their piped shape, the most likely culprit is that the meringue was not whipped to sufficiently hard peaks before the syrup was incorporated. Hard peaks are crucial for providing the structural integrity needed for the marshmallows to stand tall and firm.
Why is my marshmallow batter separating or has liquid in the bowl?
Marshmallow batter separation, often indicated by a liquid pooling at the bottom of the bowl, can be attributed to a few key factors:
- Under-whipped Meringue: If the meringue wasn’t whipped enough when the syrup was added, it won’t be stable enough to fully incorporate the hot syrup.
- Over-beaten Meringue (before syrup): While less common, an over-beaten meringue can become dry and brittle, also leading to poor syrup incorporation.
- Over-beaten Marshmallow Batter (after syrup): Whipping the batter for too long after adding the syrup can cause it to break down and separate. The goal is hard peaks, then stop.
Why are my marshmallows still soft and sticky after 8-10 hours?
Soft and sticky Zefir, even after the recommended setting time, often points to issues with moisture or agar activation:
- Excess Moisture in Fruit Puree: If your fruit puree had too much water content, it can prevent the marshmallows from setting properly. Ensure your puree is thick and concentrated.
- Under-cooked Sugar Syrup: Most likely, the sugar syrup wasn’t cooked long enough to reach the precise temperature of 240°F (115°C). The agar agar needs this specific temperature to fully activate and provide the necessary gelling strength.
- Syrup Poured Too Fast: Pouring the hot syrup into the meringue too quickly can shock the egg whites and prevent proper emulsification and setting. A slow, steady stream is essential.
Why did my marshmallows get wet on the bottom after setting?
A wet bottom on your Zefir can be due to:
- Runny Fruit Puree: Again, excessive moisture in the puree is a common culprit.
- Insufficient Whipping/Cooling: The marshmallow mixture needs to be whipped long enough after adding the syrup for it to cool down significantly. If it’s piped while still too warm, condensation can form underneath as it sets and cools, leading to a wet base.


Homemade Marshmallows (Zefir)
Shinee Davaakhuu
These unbelievably light and airy homemade Russian marshmallows (Zefir) are surprisingly easy to make. This recipe shares all the tips for you to create these stunning, melt-in-your-mouth dessert rosettes on your own!
Ingredients
For the Strawberry Puree:
- 7 oz (200 g) strawberries, frozen or fresh
- 1 tablespoon (15 g) granulated sugar
For the Zefir Marshmallows:
- 1 large (35-40 g) egg white (Note 1)
- ¼ teaspoon coarse kosher salt
- 1 ½ cup (300 g) granulated sugar, divided
- ½ cup (120 ml) water
- 3 teaspoons agar agar powder (Note 2)
Equipment
- Stand mixer with whisk attachment
- Candy thermometer
- 1.5-qt saucepan (for puree)
- 2-qt saucepan (for syrup)
- 18″ Pastry bag
- Piping tip (Wilton 1M recommended)
- 2 baking sheets
- Parchment paper or silicone mats
- Fine-mesh sieve
Instructions
- Prepare Strawberry Puree: In a 1.5-qt saucepan, combine fresh or frozen strawberries with 1 tablespoon of sugar. Cook over medium-high heat for 10-15 minutes (15 minutes for frozen berries), mashing the fruits as they cook, until much of the moisture has evaporated and the mixture is thick.
- Pass the cooked fruit mixture through a fine-mesh sieve to achieve a smooth puree. You should yield about 150g of puree. Let it cool completely, then refrigerate for at least 1-2 hours, or ideally, overnight.
- Prepare Your Workspace: Set up your piping bag with the decorative tip in a tall glass for easy filling. Line 2 baking sheets with parchment paper or silicone mats. Have all measured ingredients ready.
- Make Sugar Syrup: In a 2-qt saucepan, combine 200g of sugar, agar agar powder, and water. Stir well to dissolve the agar and sugar. Cook over medium heat, without stirring once boiling, until the syrup reaches precisely 240°F (115°C). This will take approximately 10 minutes.
- Start Meringue (Timing is Key): When the sugar syrup reaches around 200°F (93°C), begin preparing the meringue. In the bowl of your stand mixer, combine the chilled strawberry puree, egg white, and salt. Beat on low speed until foamy.
- Increase mixer speed to medium and gradually add the remaining 100g of sugar, one tablespoon at a time. Continue to whip until soft peaks form – the meringue should be glossy and hold its shape before gently slumping.
- Combine & Finish Batter: Once the sugar syrup reaches 240°F (115°C), remove it from heat and let the bubbles subside for about 30 seconds. With the mixer running on medium-high speed, slowly pour the hot syrup down the side of the bowl into the meringue. Do not pour directly onto the whisk or scrape the saucepan.
- After all syrup is added, increase speed to medium-high and whip for 3-5 minutes, until very stiff, glossy peaks form and the bowl feels cool to the touch. The batter will be thick and voluminous.
- Pipe Zefir: Immediately transfer the warm marshmallow mixture into the prepared piping bag with the decorative tip. Working quickly, pipe 2-inch round rosettes (about 1 inch tall) onto your lined baking sheets.
- Set & Serve: Let the piped Zefir set undisturbed in a cool, dry place for at least 8-12 hours, preferably overnight. Once fully set, generously dust them with powdered sugar. Enjoy!
⭐️ Did you make this recipe?
Please consider leaving a review and sharing your feedback! We’d love to hear how you liked it!
Tips & Notes
Yield: This recipe typically yields about 3 dozen rosettes, depending on the size and height you pipe them.
Note 1 (Egg Whites): Carton egg whites are perfectly suitable for this recipe. You’ll need approximately 35-40g of egg whites, which is typically one large egg white.
Note 2 (Agar Agar): The effectiveness of agar agar can vary by brand. For this recipe, I recommend using agar agar with a strength of 700-900g/cm². A reliable source is this agar agar from Amazon.com.
Work Quickly: Remember, agar agar sets as it cools. Once the marshmallow batter is ready, pipe it immediately to ensure smooth, well-defined rosettes before the mixture begins to firm up in the bowl or piping bag.
Clean Tools: Ensure all your mixing bowls and whisk attachments are immaculately clean and grease-free. Any residual fat can prevent the egg whites from whipping properly.
Room Temperature: The best place to let your Zefir set is in a cool, dry room. Avoid humid environments, as they can hinder the drying process and lead to sticky marshmallows.
Nutrition Facts (per 3 rosettes)
Calories: 107 kcal
Carbohydrates: 27 g
Protein: 1 g
Fat: 1 g
Sugar: 27 g
Sodium: 54 mg
If you made this delicious Zefir, we’d love for you to leave a rating and share your feedback. Your experience helps fellow bakers!