
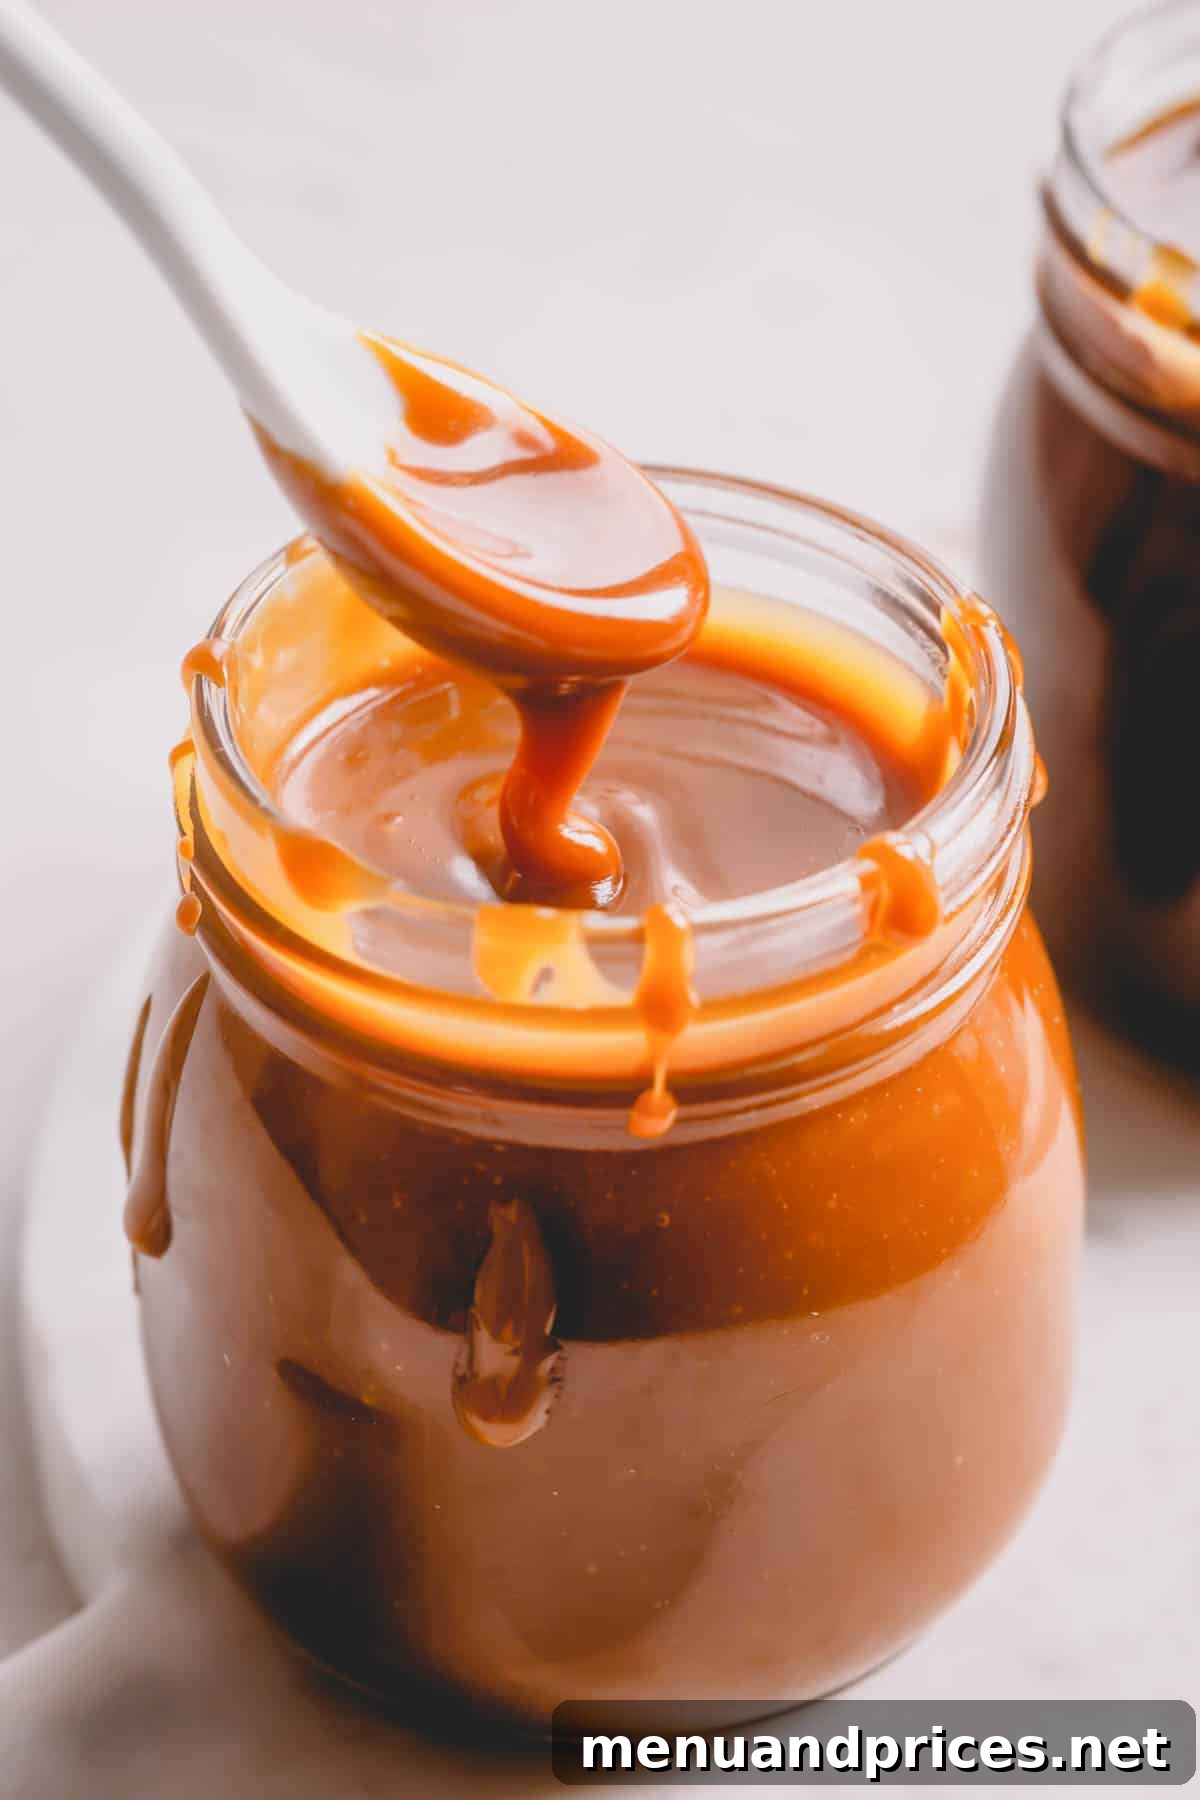
Homemade Caramel Sauce: Your Ultimate Guide to a Fail-Proof Dry Method Recipe
Unlock the secret to crafting exquisite caramel sauce right in your own kitchen! This comprehensive guide will teach you how to make a luscious, sweet, and perfectly salted caramel using only four basic ingredients and my signature fail-proof dry caramel method. In just about 15 minutes, you’ll have a rich, golden sauce that’s ideal for dipping fresh fruit, drizzling over your favorite desserts, or adding a gourmet touch to your morning coffee. Prepare to impress yourself and everyone you share it with!
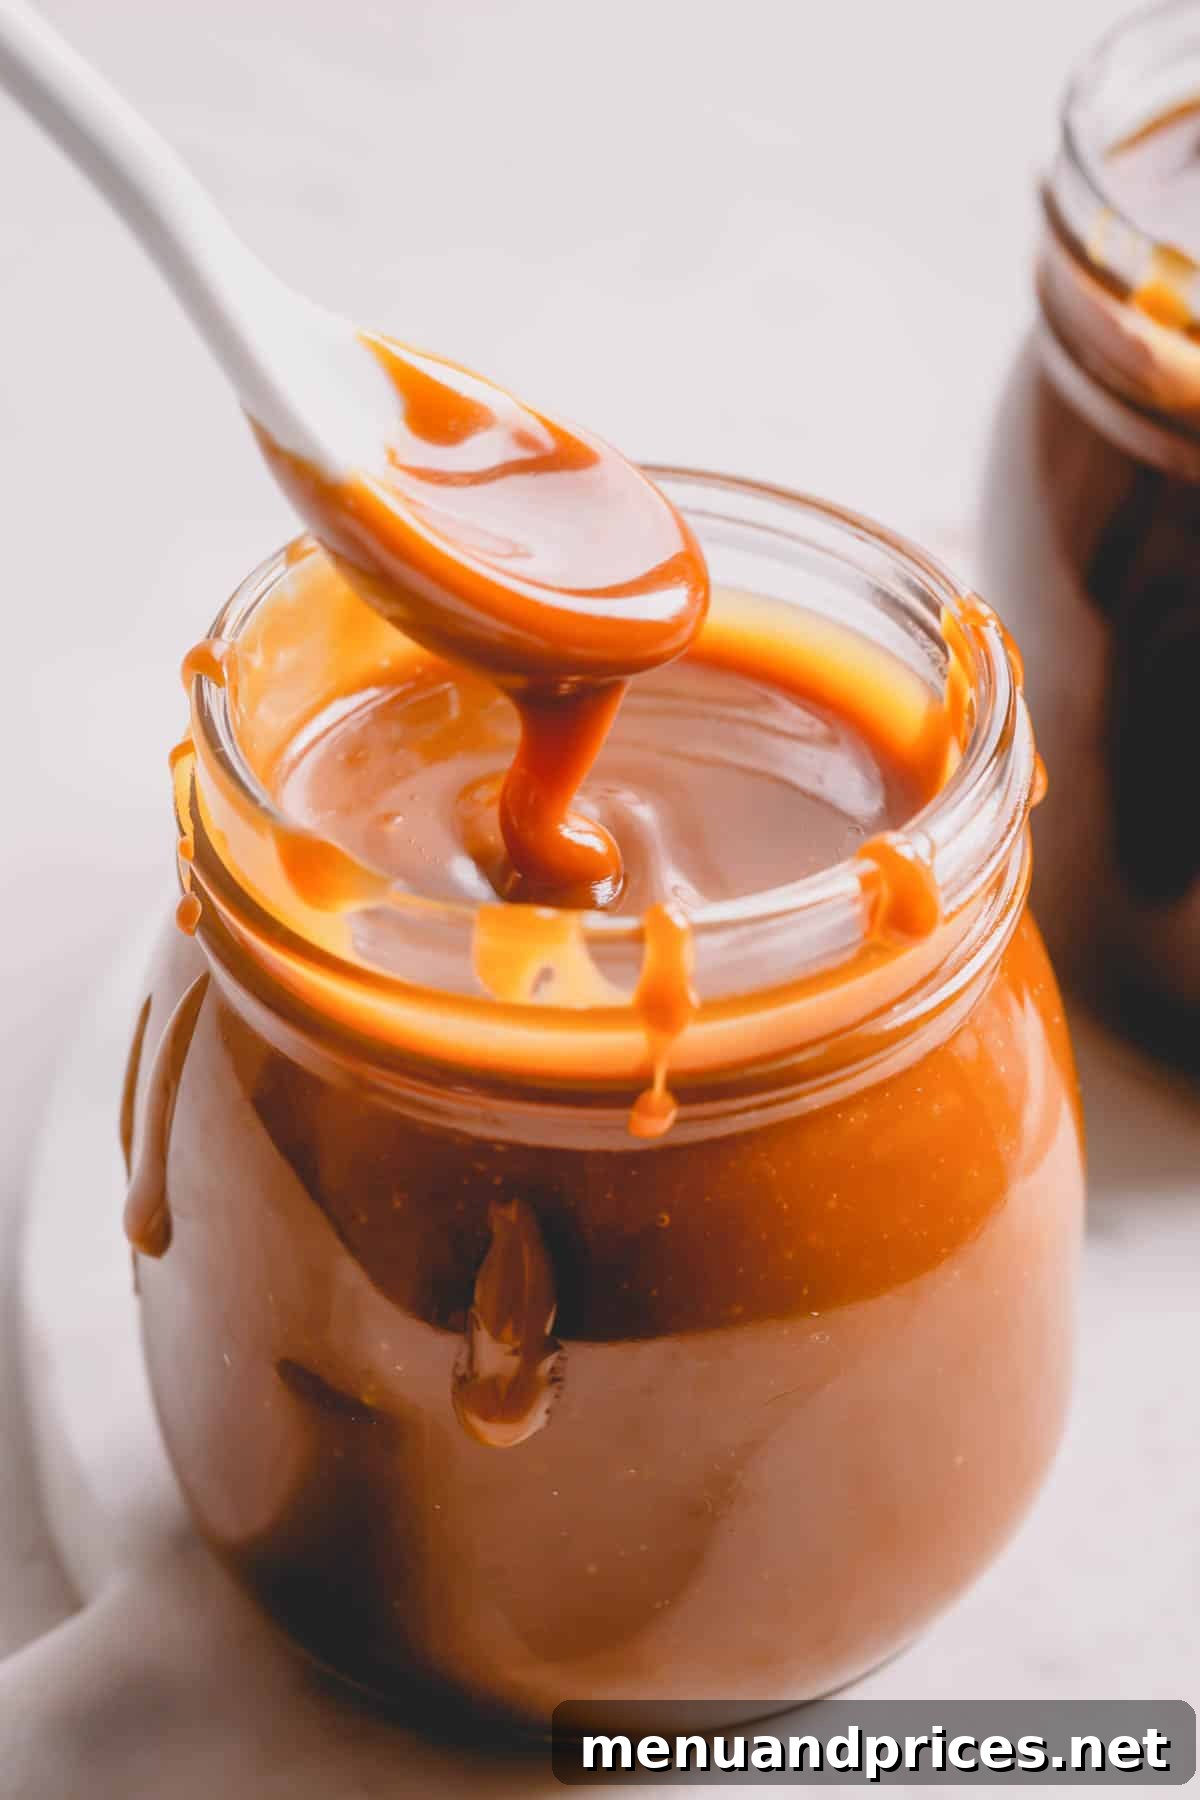
Pin this now to find it later
Pin It
Why You’ll Adore This Homemade Caramel Sauce Recipe
Caramel holds a special place in my heart, rivaled only by chocolate, of course! It’s a flavor profile I adore, incorporating it into countless creations like my salted caramel chocolate chip cookie bars and luscious salted caramel buttercream frosting. The sweet, rich, and slightly savory notes of a perfectly made caramel are simply irresistible. While I love the flavor, I’m often disappointed by the artificial taste and texture of store-bought caramel options. That’s precisely why mastering homemade caramel sauce became a mission!
This recipe isn’t just another caramel recipe; it’s a game-changer. Here’s why you’ll fall in love with it:
- Effortlessly Simple Ingredients: You might be surprised to learn that this gourmet-quality caramel requires only four fundamental ingredients. Chances are, you already have them stocked in your pantry and refrigerator, making an impromptu caramel craving easily satisfied! No fancy extracts or obscure thickeners needed.
- Remarkably Fast Preparation: Compared to the traditional “wet method” of making caramel, our dry method is significantly quicker. You’ll be amazed at how rapidly the sugar transforms into a golden elixir, allowing you to enjoy your homemade treat in a fraction of the time. This speed doesn’t compromise quality; it enhances efficiency.
- Guaranteed No Crystallization: This is arguably the biggest advantage of the dry method and a common fear for many home cooks. Unlike the wet method, where sugar crystals can form and ruin your batch, the dry method virtually eliminates this risk. This makes the cooking process incredibly forgiving and almost fail-proof, building confidence even for beginners.
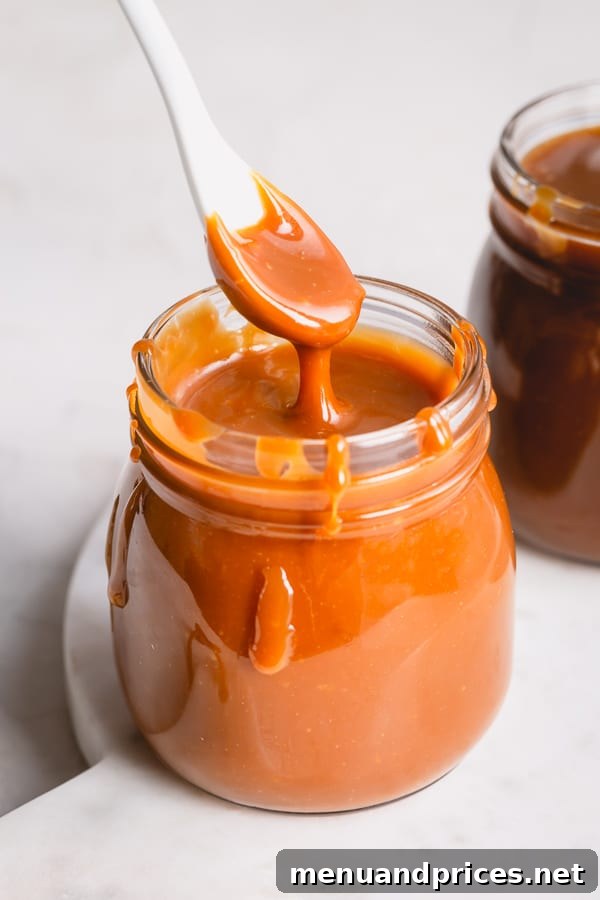
- Luxurious Texture and Flavor: Prepare for a caramel sauce that is perfectly thick, velvety smooth, and exquisitely luscious. Its rich, deep caramelized sugar flavor, balanced with a hint of salt, is so utterly delicious that you’ll be hard-pressed not to eat it straight from the spoon. It pours beautifully and holds its shape, making it ideal for various applications.
Once you experience the sublime taste and straightforward process of this homemade caramel sauce, you’ll undoubtedly bid farewell to commercial alternatives forever. Get ready to elevate all your favorite desserts and treats with this truly spectacular addition!
Key Ingredient Notes for Perfect Caramel
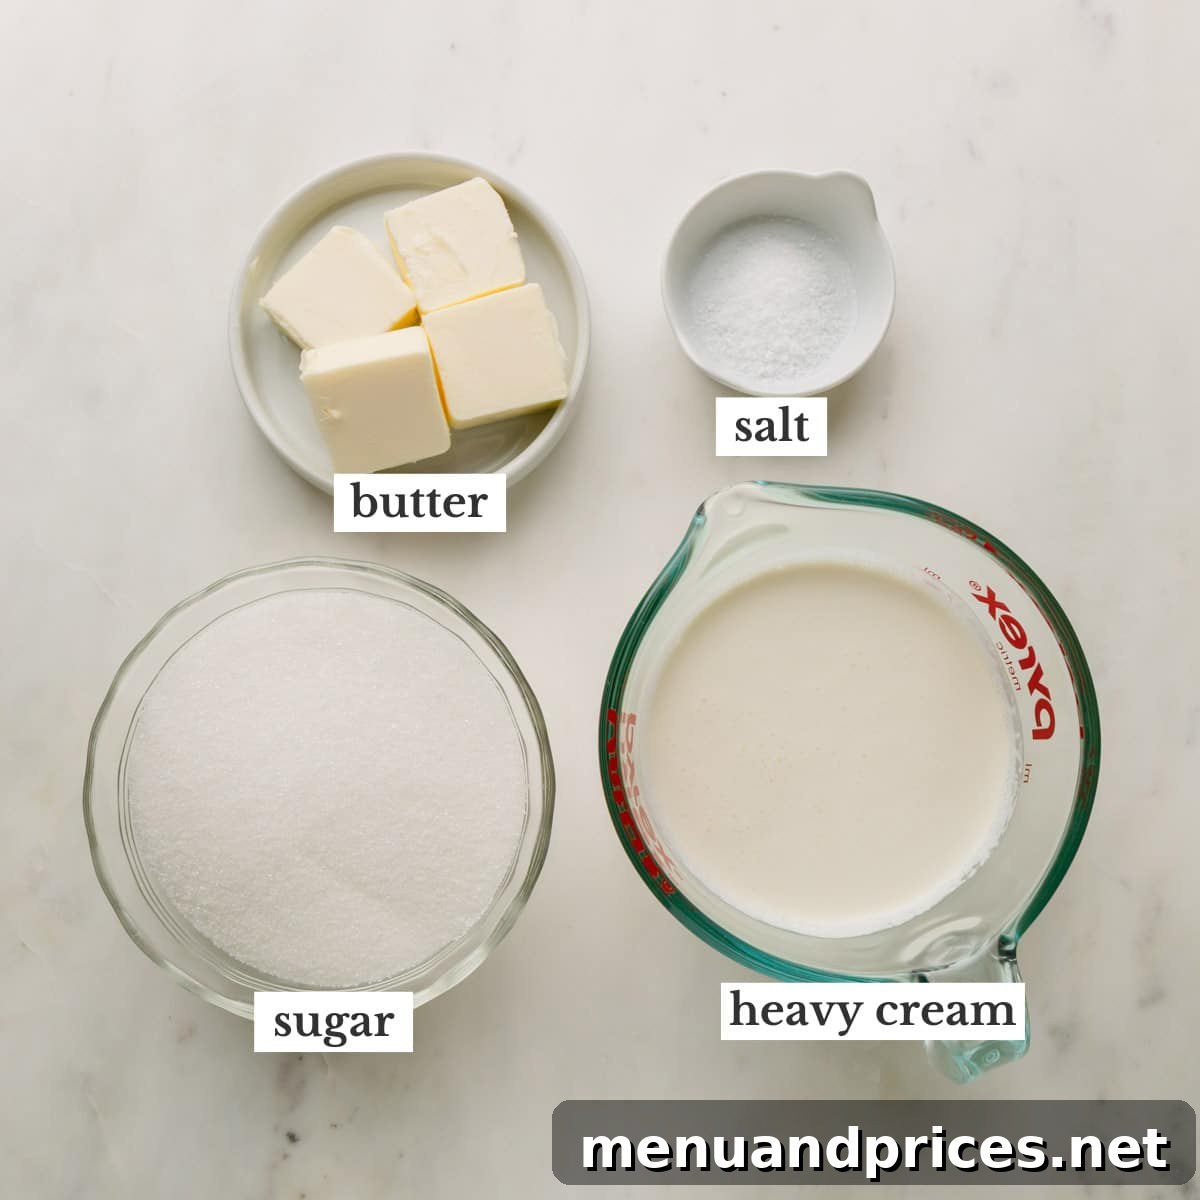
Crafting exceptional caramel starts with understanding the role of each ingredient. While the list is short, quality and preparation are paramount:
- Granulated Sugar: This is the foundation of your caramel. Always opt for pure cane granulated sugar. Its fine crystals melt evenly and caramelize beautifully, developing the signature rich, sweet, and slightly nutty flavor we crave. The quality of your sugar directly impacts the depth of flavor in your final sauce. For a deeper understanding of various types of sugar and their culinary applications, explore further!
- Heavy Whipping Cream (Heated): This ingredient is crucial for achieving a creamy, pourable caramel sauce. The “heavy” fat content contributes to the sauce’s luxurious texture and prevents it from becoming overly sticky or hard. Critically, the cream must be heated before adding it to the molten sugar. Adding cold cream will cause the sugar to seize instantly, turning into a hard, crystalline mass. Heating it ensures a smooth, controlled emulsification and a consistently silky finish.
- Unsalted Butter (Room Temperature): Butter adds richness, depth of flavor, and a beautiful sheen to your caramel. I highly recommend using unsalted butter so you can precisely control the saltiness of your finished sauce. Bringing the butter to room temperature before incorporating it allows it to melt smoothly and integrate seamlessly into the warm caramel, preventing clumps and promoting a homogenous texture.
- Coarse Sea Salt: A touch of coarse sea salt is what truly elevates this caramel from merely sweet to exquisitely balanced “salted caramel.” The salt cuts through the sweetness, enhances the other flavors, and adds a delightful counterpoint. While any coarse sea salt will work, I particularly enjoy using Maldon sea salt flakes for their delicate crunch and superior flavor. Feel free to adjust the amount to your personal preference for saltiness.
Dry vs. Wet Methods: Why the Dry Method Reigns Supreme
When embarking on the journey of homemade caramel, you’ll generally encounter two primary approaches: the wet method and the dry method. Understanding the distinctions between these techniques is key to choosing the right path for a perfect batch.
- The wet method involves dissolving sugar in water, then simmering the mixture until the water evaporates and the sugar caramelizes.
- The dry method, which we’ll master today, focuses on melting sugar alone, slowly and directly over heat, without any added water.
Many online recipes tend to favor the wet method, often citing it as a “safer” option because the water helps to distribute heat more evenly, theoretically reducing the risk of burning the sugar. However, this perceived safety comes with its own set of challenges and drawbacks. The main issue with the wet method is its extended cooking time; all the water must completely evaporate before the sugar can begin to caramelize. This adds a significant waiting period and can sometimes make it harder to control the final color and flavor intensity.
Furthermore, the wet method is more susceptible to sugar crystallization. If even a tiny sugar crystal remains on the side of the pan or is introduced into the mixture, it can act as a seed, causing the entire batch to crystallize into a grainy, unusable mess. This often requires meticulous brushing down the sides of the pan with a wet pastry brush, an extra step that can be tedious and doesn’t guarantee success.
In contrast, the dry method, in my experience, is both quicker and undeniably easier to execute. Instead of attempting to melt all the sugar simultaneously, we’ll gradually introduce and melt it in small portions. While this might sound like a more involved process, it actually allows for superior control over the caramelization, making it faster and more forgiving than dealing with a large quantity of sugar at once. This incremental approach gives you precise command over the sugar’s transformation, enabling you to achieve your desired shade of golden-amber with confidence.
Perhaps most importantly, with the dry method, you completely bypass the common pitfalls of the wet method. There’s no need to fret about pesky sugar crystals, no endless waiting for water to evaporate, and no scrubbing down pan sides. It’s a cleaner, more direct, and ultimately more reliable path to consistently beautiful, smooth caramel.
How to Make Caramel Sauce from Scratch: The Dry Method Explained
Creating homemade caramel can seem intimidating, but with this dry method, it’s surprisingly straightforward. Follow these steps carefully, and you’ll be rewarded with a rich, velvety sauce.
1. Gradually Melt the Sugar to Golden Perfection
- Prepare Your Pan: Begin by heating a large, heavy-bottomed 2.5-quart saucepan over medium heat. A heavy bottom is essential for even heat distribution, preventing hot spots that can burn the sugar.
- First Sugar Addition: Sprinkle just ¼ cup of granulated sugar evenly across the bottom of the warm pan. Allow this sugar to melt slowly and patiently. This initial stage can feel like it takes a long time, as the sugar crystals sit still, but resist the urge to increase the heat! High heat at this stage can lead to burning rather than caramelization.
- Gentle Swirling: As the sugar crystals along the edges of the pan begin to melt and liquefy, gently swirl the pan. This motion helps to distribute the heat, encouraging more even melting and preventing any single area from getting too hot and burning.
- Continue Adding Sugar: Once the first ¼ cup of sugar is mostly melted and has started to turn a light amber color, add another ¼ cup of sugar to the pan. Continue to melt this new addition over medium heat, swirling gently. You’ll observe the mixture gradually deepening in color to a beautiful light amber. If you notice it’s browning too quickly, slightly reduce the heat to medium-low to maintain control.
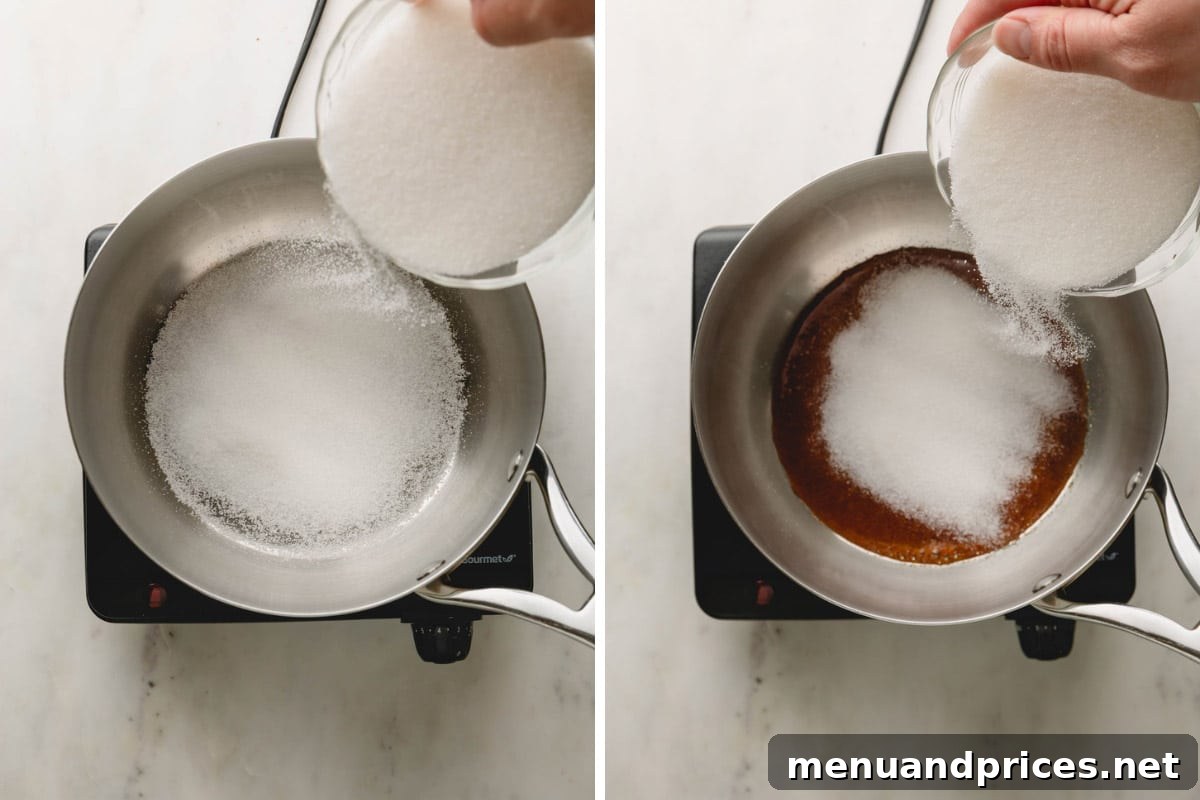
- Melting Remaining Sugar: Systematically continue adding the remaining sugar, ¼ cup at a time, allowing each addition to melt and integrate. As more sugar melts and the pan retains heat, the process will become progressively faster, requiring your undivided attention. Keep a very close eye on the pan to prevent over-browning!
- Assisted Melting (If Needed): Continue gently swirling the pan to keep the sugar moving and promote faster, more uniform melting. If you find that more than half of your sugar has melted and you want to speed things up or ensure consistency, you can carefully use a heat-resistant spatula or a whisk to gently mix the dry sugar into the molten caramel. This technique helps to break up any stubborn clumps and encourages even caramelization.
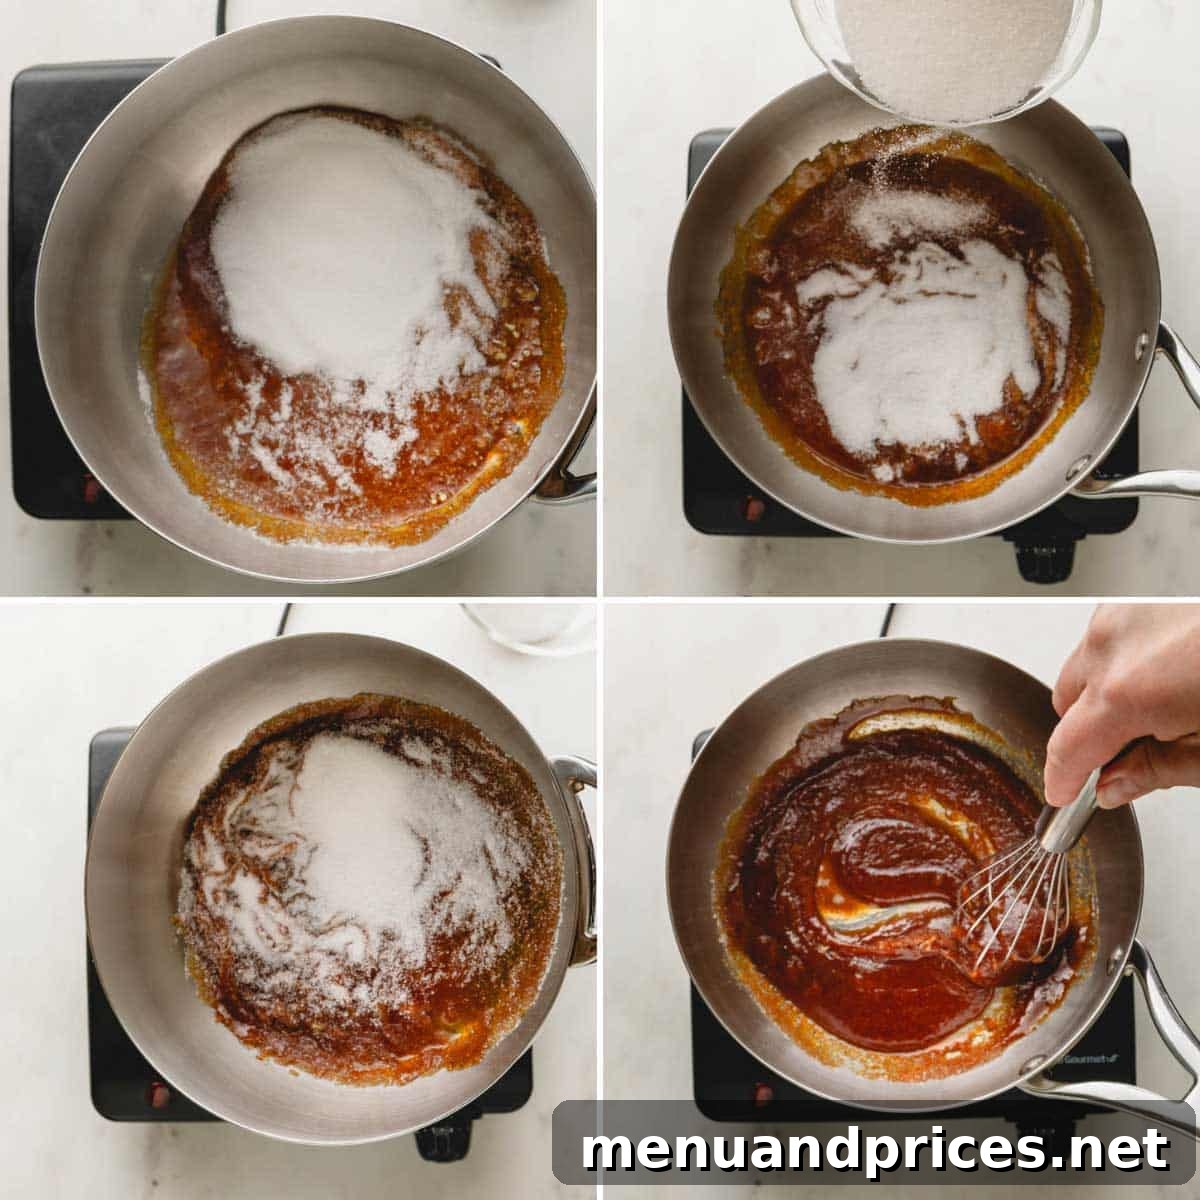
Pro Tip: Slowing Down the Caramelization Process
If you observe your sugar rapidly darkening and approaching a burnt stage before it has fully melted, swiftly remove the pan from the heat. Immediately stir the sugar vigorously with a heat-resistant silicone spatula, a sturdy wooden spoon, or a whisk. This action helps to dissipate the residual heat and momentarily halts the cooking, giving you precious seconds to prevent burning. Once the heat has stabilized, you can carefully return it to low heat if further melting is required.
2. Incorporate the Hot Cream
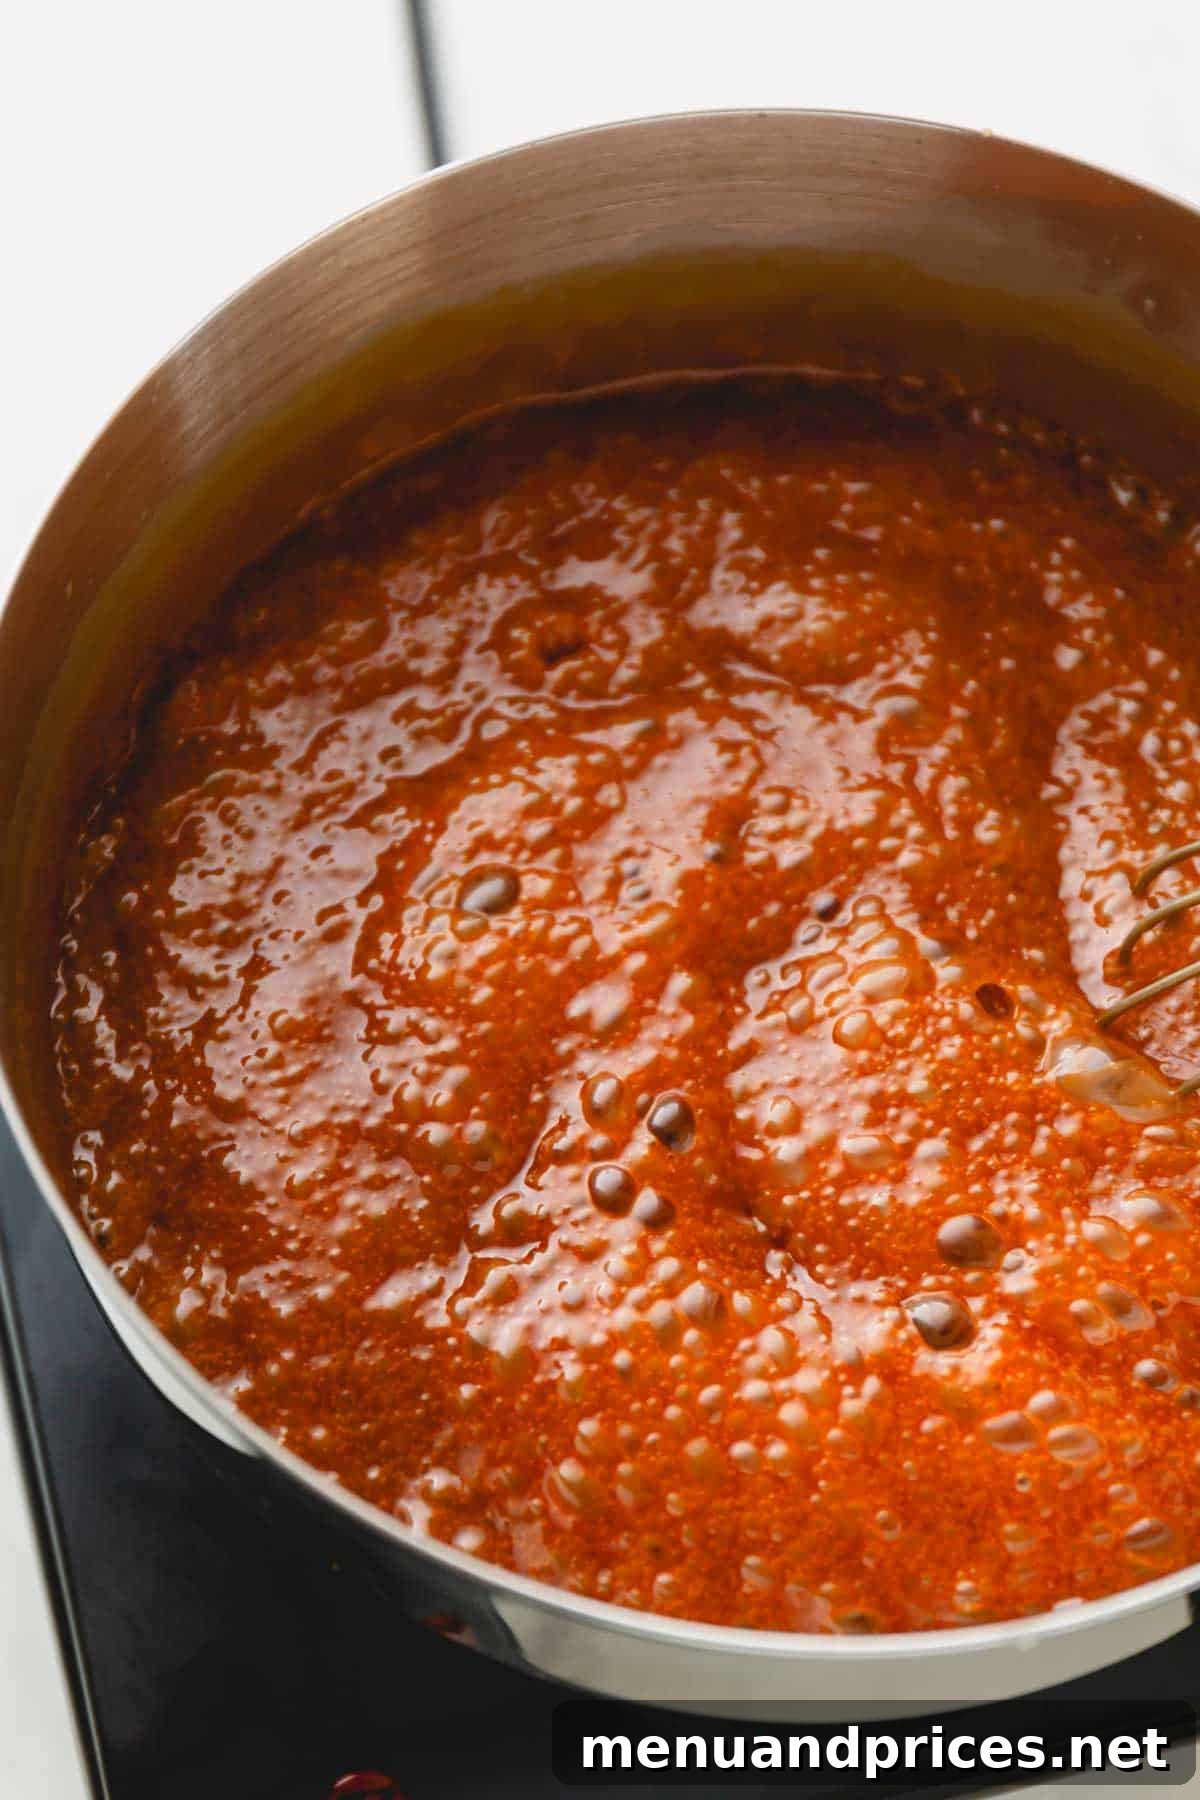
- Careful Addition: Once all the sugar has melted into a dark, rich amber liquid – indicating perfect caramelization – immediately remove the pan from the heat source. Very slowly and carefully pour in the pre-heated heavy cream while whisking continuously and gently. Be extremely cautious during this step, as the hot caramel will react vigorously with the cream, bubbling up and releasing steam. Pouring slowly and whisking steadily helps to mitigate the intense bubbling and ensures a smooth, lump-free mixture.
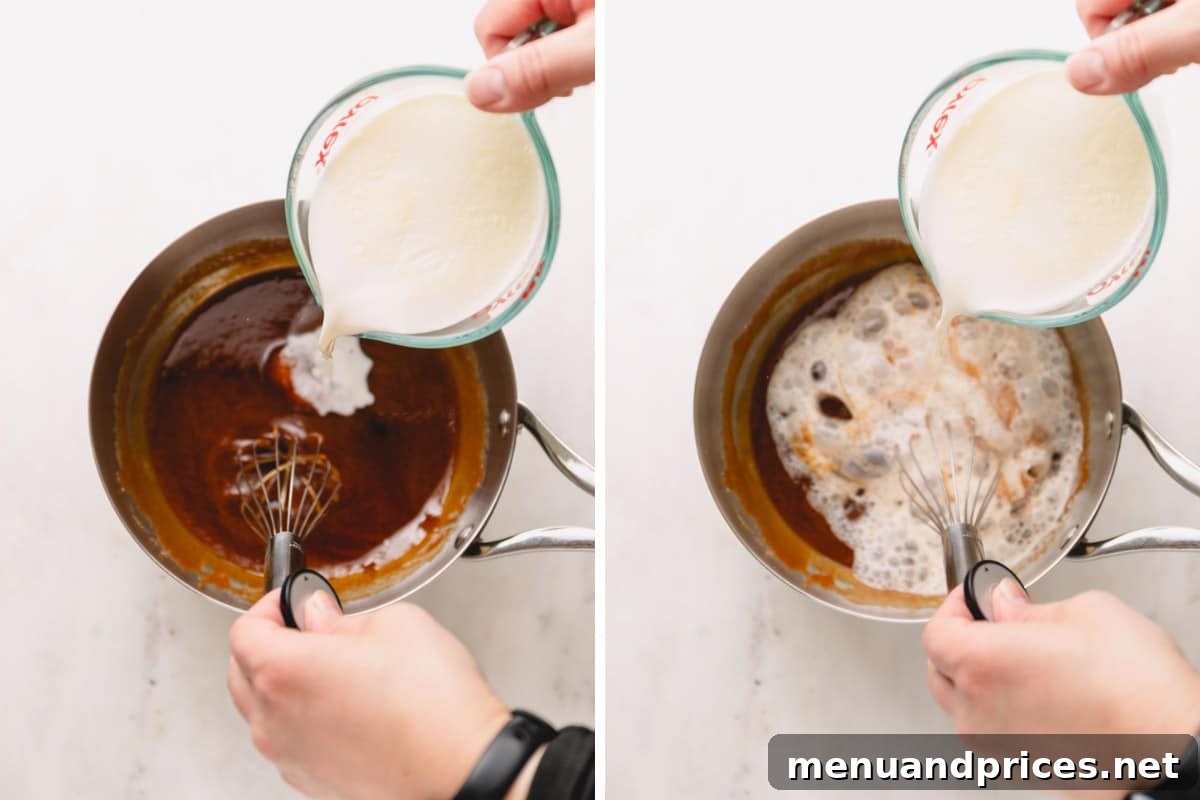
Vital Tip: Always Use Hot Cream
This step is non-negotiable for smooth caramel. Ensure your heavy cream is thoroughly heated (either gently on the stovetop or in the microwave) before introducing it to the melted sugar. Adding cold cream will cause the hot sugar to seize instantly, forming hard, unmanageable lumps. Should this unfortunate event occur, don’t despair! Simply return the seized mixture to very low heat on the stove, and continue to stir gently until the sugar crystals fully dissolve back into a smooth sauce. Patience is key here.
3. Finish with Butter and Salt
- Initial Cooling: After incorporating the cream, allow the caramel sauce to cool for approximately 30 minutes. This allows the mixture to settle slightly and ensures the butter melts beautifully without separating or making the caramel greasy.
- Flavor Enhancers: Once partially cooled, add the room-temperature unsalted butter and the coarse sea salt to the caramel mixture.
- Final Whisk: Whisk the mixture continuously until the butter is completely melted and fully integrated into the caramel. This final whisk creates a perfectly emulsified, glossy, and incredibly smooth sauce.
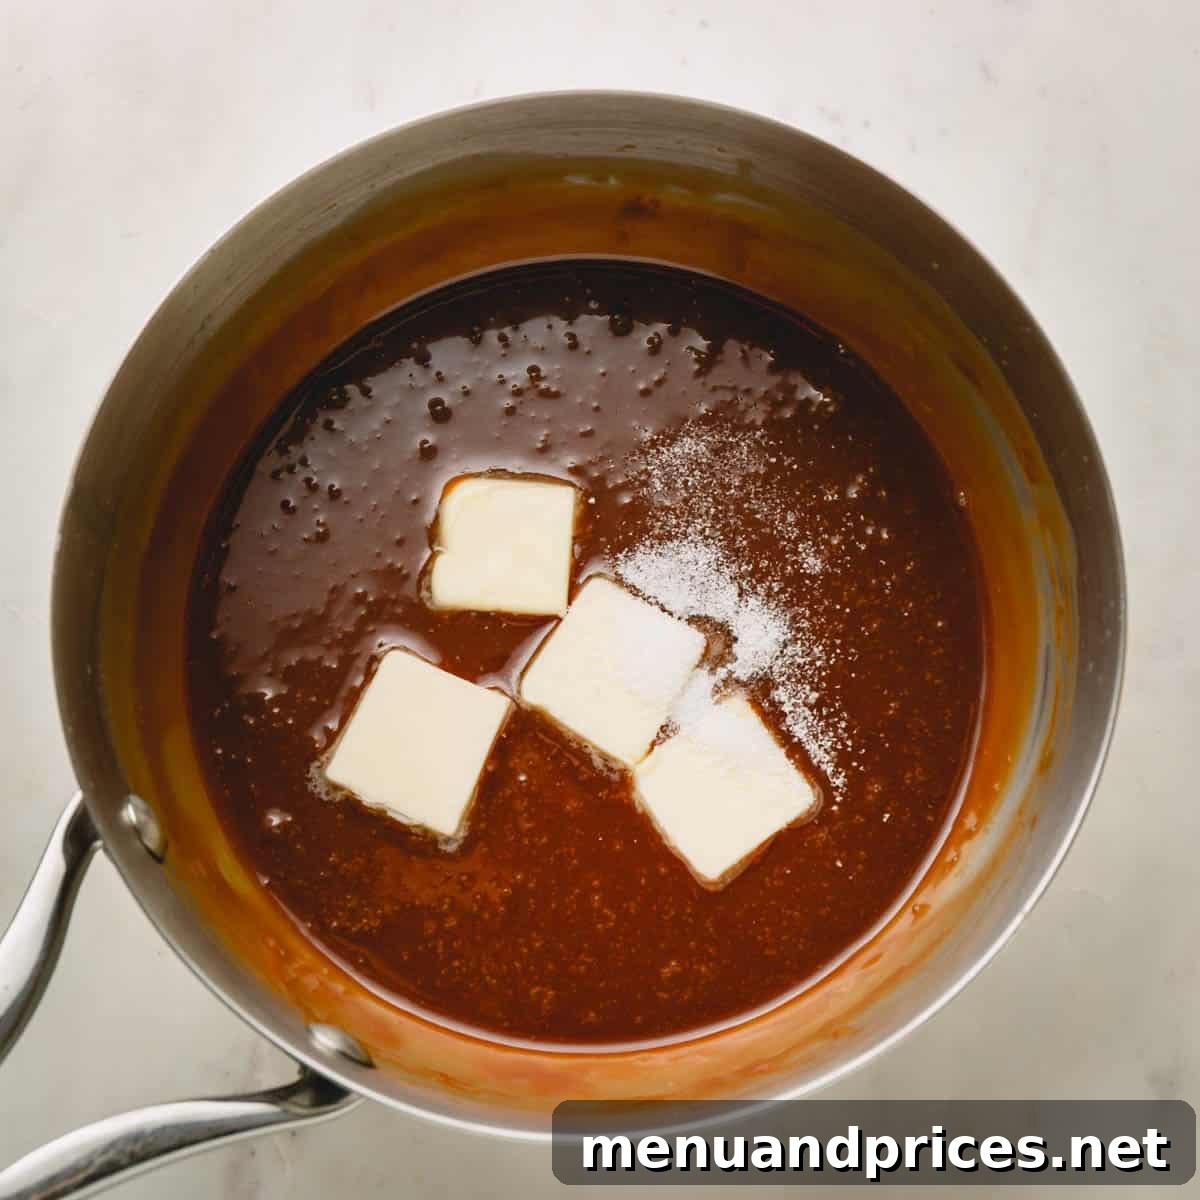
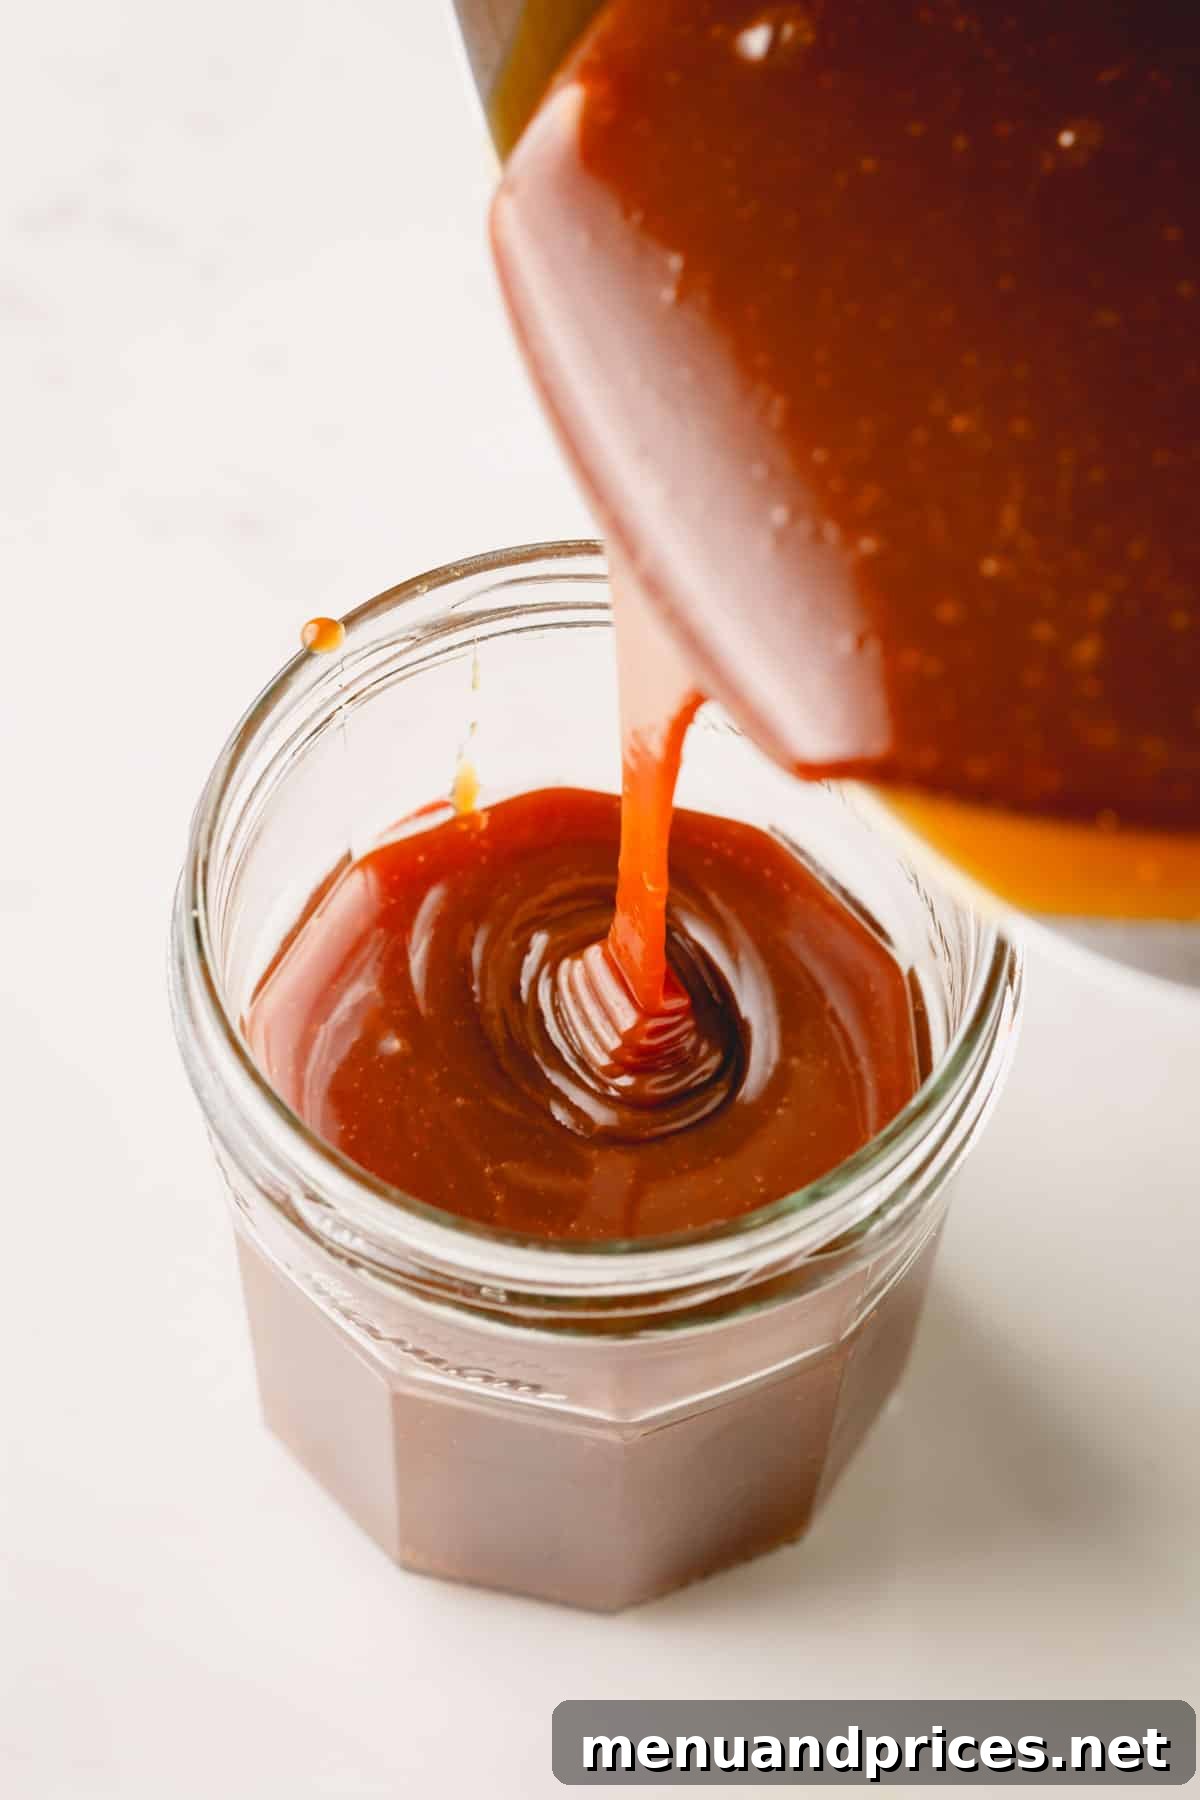
- Storage: Carefully transfer your freshly made caramel sauce into a clean, sterile jar or airtight container. You can use it immediately while warm for an irresistible treat, or let it cool completely to room temperature before storing it for later enjoyment.
Essential Tips for Caramel Sauce Success
Achieving perfect caramel sauce every time is easier with these expert tips and tricks:
- Invest in a Large, Heavy-Bottomed Saucepan: This is perhaps the most critical piece of equipment. A heavy-bottomed pan ensures that heat is distributed evenly across the base, preventing the sugar from scorching in one area while remaining unmelted in another. Furthermore, using a pan that is at least 2.5 quarts (or larger) is vital. The caramel will bubble up aggressively when the hot cream is added, and a larger pan provides ample space, preventing messy overflows and potential burns.
- Opt for Stainless Steel or Light-Colored Cookware: The color of your pan significantly impacts your ability to monitor the caramelization process. A light-colored or stainless steel pan allows you to clearly see the sugar’s color transformation, from clear crystals to light amber, then deep golden, and finally to a rich, dark amber. Darker pans can mask these crucial color changes, making it harder to judge when the caramel is perfectly done or on the verge of burning.
- “Mise en Place” – Prepare All Ingredients in Advance: Caramel making is a fast-paced process once the sugar starts to melt. There will be no time to measure cream, slice butter, or locate your salt once you begin. Have all your ingredients measured and ready to go (your “mise en place”) before you even turn on the stove. This streamlined approach minimizes stress and helps ensure smooth execution.
- Swirl Gently, Avoid Early Stirring: In the initial stages of melting the sugar, resist the temptation to stir with a utensil. Stirring can introduce air and encourage crystallization. Instead, gently swirl the pan to help distribute the heat and move the melting sugar around. This technique is much more effective for encouraging even melting without interference.
- Introduce a Utensil Only When Necessary: Once more than half of the sugar has visibly melted and a good portion has liquified, you can cautiously use a heat-resistant silicone spatula, a wooden spoon, or a whisk. Use it gently to incorporate any remaining dry sugar into the molten caramel. This helps to accelerate the melting of stubborn crystals and ensures a smooth consistency without overworking the mixture.
- Pre-heat Your Cream: As mentioned, heating your heavy cream before adding it to the hot, melted sugar is crucial. Cold cream will shock the hot caramel, causing it to seize into a hard block. Warm cream allows for a smooth, gradual emulsification, resulting in a perfectly creamy sauce.
- Always Remove from Heat Before Adding Cream: For safety and optimal results, take the pan off the burner entirely before slowly pouring in the hot cream. This helps to manage the vigorous bubbling and splattering that occurs when the two hot liquids combine. Pouring warm liquid into the caramel while it’s off the heat minimizes thermal shock and further reduces the risk of seizing.
- Don’t Panic if Caramel Seizes: It happens to the best of us! If your caramel does seize up into a hard lump after adding the cream, don’t throw it out. Simply return the pan to very low heat and continue to stir patiently. The gentle heat will gradually remelt the sugar crystals, transforming the mixture back into a smooth, flowing caramel sauce.
- Cool Before Adding Butter for Creaminess: For the creamiest, most stable caramel sauce, allow the mixture to cool for about 30 minutes after adding the cream, but before incorporating the butter. This slight cooling period helps the butter emulsify better, leading to a richer, glossier, and more velvety texture in your finished sauce.
Delightful Ways to Use Your Homemade Caramel Sauce
This exquisite homemade caramel sauce is so incredibly delicious, I wouldn’t blame you if you found yourself simply eating it by the spoonful! However, its versatility shines when incorporated into a myriad of sweet applications. I particularly love using it to craft decadent chocolate caramel cups, elevate my salted caramel Swiss meringue buttercream, and as a key component in my adorable salted caramel mini layer cakes.
Beyond these specific recipes, it’s absolutely fabulous as a topping or dip with a wide array of treats:
- Fresh Fruit: Especially crisp apple slices, pear wedges, or banana pieces – the natural sweetness and tartness are beautifully complemented by the rich caramel.
- Ice Cream: Drizzle generously over homemade vanilla bean ice cream, chocolate, or even a nutty flavor for an instant upgrade.
- Breakfast Delights: Transform ordinary waffles or fluffy buttermilk pancakes into a gourmet brunch experience.
- Coffee & Lattes: Stir a spoonful into your morning coffee or create your own barista-style caramel latte at home.
- Cheesecakes & Pies: A decadent topping for plain cheesecakes or a luscious filling in various pie recipes, like these creative chai latte no-bake mini cheesecakes.
- Brownies & Bars: Swirl into brownie batter before baking, or drizzle over cooled brownies and dessert bars for an extra layer of indulgence.
- Milkshakes & Smoothies: Blend into milkshakes for a caramel-infused drink, or even add a touch to a dessert smoothie.
The possibilities are truly endless! Let your culinary creativity flow and enjoy this versatile sauce in countless ways.
Storing Your Homemade Caramel Sauce for Freshness
Proper storage is essential to keep your homemade caramel sauce delicious and safe for extended periods. Here’s how to ensure it lasts:
- Refrigeration for Up to a Month: Once your caramel sauce has completely cooled to room temperature, transfer it into an airtight container or a canning jar with a secure lid. Store this in the refrigerator, where it will remain fresh and delightful for up to one month. The cooler temperature helps prevent spoilage and maintains its quality.
- Freezing for Long-Term Storage: For even longer preservation, caramel sauce freezes beautifully! Pour the cooled sauce into a freezer-safe container, leaving a little headspace as it might expand slightly. It can be safely stored in the freezer for up to three months without any significant loss of flavor or texture.
- How to Thaw Frozen Caramel: When you’re ready to use your frozen caramel, simply transfer the freezer-safe container from the freezer to the refrigerator. Allow it to thaw slowly overnight. This gradual thawing process helps maintain the sauce’s smooth consistency.
- Reheating Your Caramel: To bring your chilled or thawed caramel back to its pourable consistency, you have a couple of easy options. You can gently reheat it in the microwave in short bursts (15-30 seconds), stirring after each interval, until it reaches your desired warmth and flow. Alternatively, you can reheat it over medium-low heat on the stovetop, stirring frequently, until it’s smooth and warm. Be careful not to overheat it, which can cause it to thicken too much.
Frequently Asked Questions About Homemade Caramel Sauce
While caramel and dulce de leche share similarities in their sweet, cooked sugar base, they are fundamentally different products. Dulce de leche is traditionally made by slowly cooking milk and sugar together (often with baking soda) until the milk sugars caramelize, resulting in a thick, creamy, spreadable condiment with a rich, milky flavor. Caramel, on the other hand, is primarily made from caramelized granulated sugar. While a caramel sauce recipe will typically include heavy cream and butter to achieve its characteristic consistency and richness, the core flavor comes from the direct caramelization of sugar, which results in a deeper, often more complex flavor profile than dulce de leche.
The primary thickening agents in homemade caramel sauce are heat and fat. As granulated sugar melts and cooks, it undergoes a complex chemical transformation known as caramelization. During this process, water molecules are released, and the sugar polymers rearrange into larger, thicker structures, naturally increasing the viscosity of the liquid. Beyond the sugar itself, the addition of heavy cream (with its high-fat content) and butter significantly contributes to the sauce’s luscious, thick consistency. The fat from these dairy products creates an emulsion, resulting in a smooth, rich, and stable sauce that thickens further as it cools.
Technically, you *could* attempt to use milk in place of heavy cream in a caramel sauce recipe, but I strongly advise against it for optimal results! Milk has a significantly lower fat content compared to heavy cream. The fat in heavy cream is crucial for creating the rich, velvety texture and stable emulsion that characterizes a superior caramel sauce. Substituting milk would likely result in a much thinner, less creamy, and potentially grainier sauce that lacks the desired body and luxurious mouthfeel. It could also increase the risk of the sauce separating. For a truly indulgent and reliable homemade caramel, heavy whipping cream is the undisputed choice.
Explore More Delicious Sweet Sauce Recipes
If you’ve enjoyed mastering this caramel sauce, you might be interested in expanding your repertoire of homemade sweet sauces:
- Vibrant Strawberry Sauce
- Classic Butterscotch Sauce
- Smooth Seedless Raspberry Sauce
- Festive Orange Cranberry Sauce
How to Make Caramel Sauce
Shinee Davaakhuu
5 minutes
15 minutes
20 minutes
16 servings
1 cup
Comment
Print Recipe
Ingredients
For Salted Caramel Sauce:
- 1 cup (200 g) granulated sugar
- 1 cup (240 ml) heavy whipping cream heated
- 4 tablespoons (55 g) unsalted butter at room temperature
- ½ teaspoon coarse sea salt I like Maldon sea salt flakes
Instructions
-
Heat a large, heavy-bottomed pan (at least 2.5 quarts) over medium heat. This ensures even heat distribution, critical for melting sugar without burning.
-
Evenly sprinkle ¼ cup of granulated sugar across the bottom of the warm pan. Allow the sugar to melt slowly over medium heat. Be patient during this initial phase; rushing it by increasing heat can lead to burnt sugar.
-
As the sugar crystals around the edges begin to melt and liquefy, gently swirl the pan to encourage even melting and prevent hot spots.
-
Once the initial sugar is mostly melted and starts to develop a light amber hue, add another ¼ cup of sugar. Continue to melt this new addition over medium heat, observing the color deepen. NOTE: If the caramel appears to be browning too quickly before fully melting, remove the pan from the heat briefly and stir with a heat-resistant silicone spatula or wooden spoon to slow down the cooking process.
-
If needed, slightly reduce the heat to medium-low to maintain optimal control over the caramelization.
-
Continue adding the remaining sugar, ¼ cup at a time, allowing each portion to melt and integrate until all the sugar is completely liquified and has reached a rich, dark amber color. The melting process will accelerate as more sugar melts, so stay vigilant! Keep swirling the pan or use a spatula/wooden spoon to keep the sugar moving and melting uniformly. Refer to the step-by-step photos above for visual guidance.
-
Meanwhile, ensure your heavy cream is pre-heated. You can do this gently in a microwave or a separate small saucepan until it is hot but not boiling.
-
Once the caramel reaches its desired dark amber color, immediately remove the pan from the stove. Slowly and carefully pour the hot cream into the molten sugar while continuously whisking to manage the intense bubbling and steam. Exercise extreme caution, as the mixture will bubble up furiously. Pouring slowly and using a sufficiently large pan are crucial safety measures. IMPORTANT TIP: Ensure the cream is hot before adding it to prevent the caramel from seizing. If seizing occurs, return the pan to very low heat and stir until the sugar crystals fully dissolve.
-
Allow the caramel sauce to cool and settle for approximately 30 minutes. This partial cooling helps to integrate the butter smoothly later.
-
Add the room-temperature unsalted butter and coarse sea salt to the cooled caramel mixture, then whisk until the butter is completely melted and fully incorporated, creating a glossy, smooth sauce.
-
Transfer the finished sauce into a clean jar or airtight container. Let it cool completely to room temperature before serving or storing.
⭐️ Did you make this recipe?
Please leave a review and let us know how you liked it!
Video
Tips & Notes
– Store the caramel sauce in an airtight container, or a canning jar with a lid in the fridge for up to 1 month.
– You can also freeze it in a freezer-safe container for up to 3 months!
– To thaw, transfer the frozen caramel sauce to the fridge, and thaw overnight.
– To reheat the sauce, microwave it or reheat over medium heat on the stovetop.
Nutrition
Condiments, Dessert Topping
American
Did you make this?Leave a rating and your feedback. Thank you!
This recipe was originally published on December 11, 2019, and has been updated for clarity, comprehensiveness, and enhanced user experience.