
Unlock the secrets to perfectly decorated treats with this comprehensive guide to mastering royal icing. Featuring step-by-step instructions, essential tips for achieving ideal consistency, and stunning visual aids, this tutorial will transform your baking projects. Our tried-and-true 4-ingredient royal icing recipe yields a beautifully fluffy, bright white icing that sets with a delightful soft bite, making it perfect for elegant and durable decorations on cookies, cakes, and gingerbread masterpieces. Dive in and discover how easy it is to create professional-looking desserts right in your own kitchen.

What Exactly is Royal Icing?
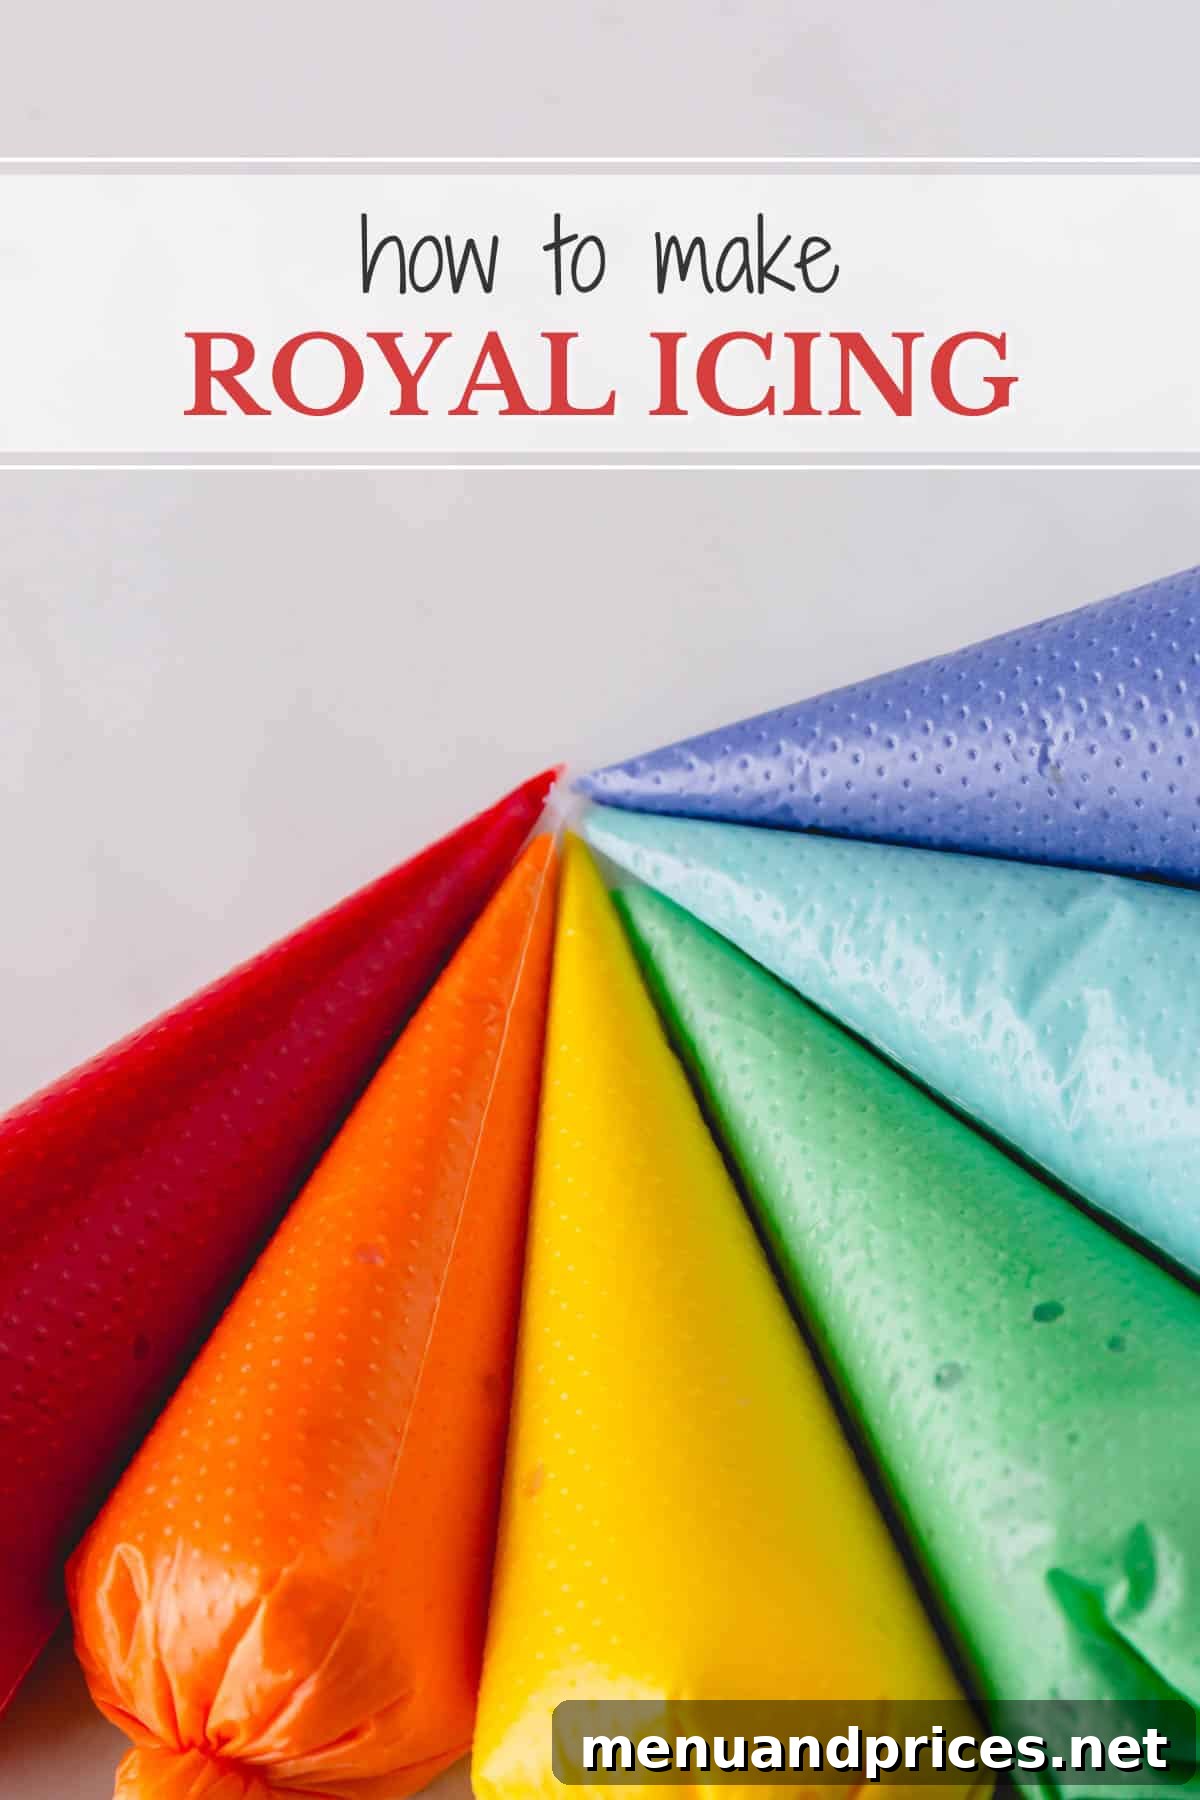
Royal icing stands apart from other frostings due to its unique characteristic: it hardens completely as it dries. This distinctive quality makes it the ultimate choice for intricate, durable, and transport-friendly edible decorations. At its core, royal icing is a simple yet magical blend of whipped egg whites (or a convenient meringue powder substitute) and finely powdered sugar. The rigorous whipping process incorporates air, transforming these basic ingredients into a light, glossy, and brilliantly white concoction. This firm-setting nature makes it indispensable for creating exquisitely detailed decorations on sugar cookies, constructing sturdy gingerbread houses, piping delicate lace patterns on cakes, or crafting edible floral arrangements. Beyond its structural integrity, royal icing is a canvas for creativity. It readily accepts food coloring, allowing you to achieve a spectrum of festive and vibrant shades, perfect for bringing elaborate and imaginative designs to life.
Essential Royal Icing Ingredients:
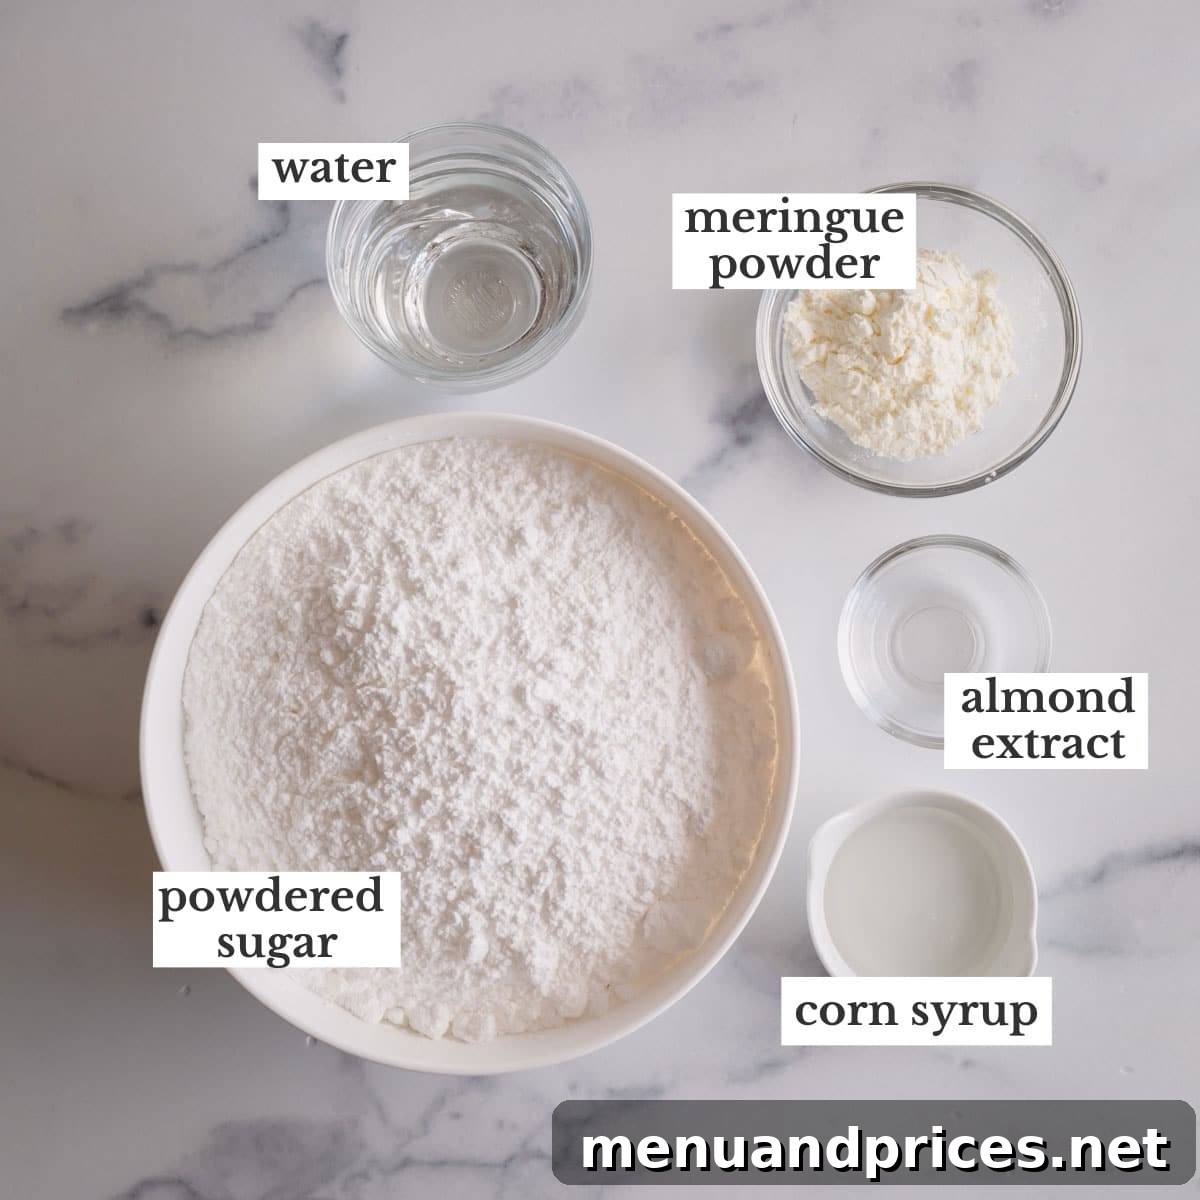
Crafting perfect royal icing starts with selecting the right ingredients. This recipe focuses on a minimal yet highly effective list to achieve superior results:
- Meringue Powder: This dry, powdered ingredient is a marvel in the world of baking. It serves as a fantastic, safer alternative to raw egg whites, significantly reducing the risk of foodborne illnesses commonly associated with consuming raw eggs. Meringue powder ensures consistent results every time and offers a much longer shelf life than fresh egg whites. Our top recommendation is Genie’s Dream meringue powder for its reliability and excellent performance. You can typically find meringue powder in the cake decorating aisle of most local craft stores or specialty baking shops.
- Water: Water plays a dual role in this recipe. First, it’s essential for rehydrating and activating the meringue powder, transforming it into a stable meringue. Second, it’s crucial for carefully thinning out the icing to achieve the perfect consistency for piping and flooding. Remember that royal icing naturally thickens as it is whipped, so having extra water on hand for precise adjustments is key.
- Powdered Sugar (Confectioners’ Sugar): For that velvety smooth, lump-free royal icing texture, high-quality powdered sugar is non-negotiable. Also known as confectioners’ sugar, its fine particle size dissolves readily, contributing to the icing’s luxurious mouthfeel and preventing a gritty finish. Always ensure your powdered sugar is sifted before use to eliminate any potential lumps, which can clog piping tips and compromise the smoothness of your final decoration.
- Corn Syrup (Optional but Recommended): While not strictly mandatory, a single tablespoon of corn syrup can elevate your royal icing from great to extraordinary. Its inclusion imparts a beautiful, subtle sheen to the dried icing, making your decorations truly pop. More importantly, corn syrup helps to create a “soft bite” texture, preventing the icing from becoming overly brittle and hard once set. This makes your decorated cookies more enjoyable to eat without compromising the structural integrity of your designs.
- Almond Extract: This extract provides a classic, delicate flavor profile that beautifully complements most baked goods. However, if almond is not to your taste, feel free to substitute it with an equal amount of vanilla extract or any other flavoring of your choice. Lemon, peppermint, or even clear butter extracts are popular alternatives that allow you to customize the flavor to match your dessert.
Meringue Powder vs. Powdered Egg Whites: Understanding the Difference
While often confused, meringue powder and powdered egg whites are distinct products with different applications, particularly in royal icing. Both are derived from dried egg whites, but their compositions set them apart. Meringue powder is a specially formulated blend that typically includes cornstarch, sugar, and an acid such as cream of tartar, in addition to dried egg whites. These supplementary ingredients are crucial for creating a highly stable, voluminous, and light meringue that holds its shape beautifully and dries quickly. The cornstarch helps with consistency, the sugar contributes to structure and taste, and the acid stabilizes the egg white proteins, allowing them to whip up into a firm foam. Conversely, powdered egg whites are, as the name suggests, simply dried egg whites without these extra stabilizers. While they can be rehydrated and used in some recipes that call for fresh egg whites, they lack the specific additives that make meringue powder superior for achieving the desired structure, stability, and drying properties essential for perfect royal icing.
Indispensable Tools for Royal Icing Success:
While the process of making royal icing is straightforward, having a few specialized tools on hand will significantly simplify the task and ensure a smooth, professional finish:
- Electric Mixer: Attempting to whip egg whites by hand for royal icing is an arduous and often inconsistent endeavor. An electric mixer is truly a game-changer. Both a stand mixer with a whisk and paddle attachment or a robust electric hand mixer will yield exceptional results, efficiently incorporating air and developing the necessary protein structure for stable icing.
- Tipless Piping Bags: These versatile bags are a decorator’s best friend. I highly recommend purchasing them online for convenience, but disposable piping bags are also available at most craft stores. Alternatively, you can craft your own cones from parchment paper for smaller, intricate details. Tipless bags are particularly advantageous for royal icing as they allow for incredibly fine lines and precise control without the need for additional tips and couplers, which can sometimes hinder detailed work.
- Gel Food Coloring: When it comes to coloring royal icing, gel food coloring is the superior choice. Unlike liquid food colorings, which can dilute your icing and alter its consistency, gel colors are highly concentrated. Their thick gel base ensures vibrant, rich hues without adding excess moisture. Gel colors are available in an extensive palette, allowing for endless creative possibilities. For delicate pastel shades, a tiny amount — applied with a toothpick or a scriber — is all you need. Always remember that royal icing tends to dry a shade or two darker than its wet appearance, much like paint, so plan accordingly.
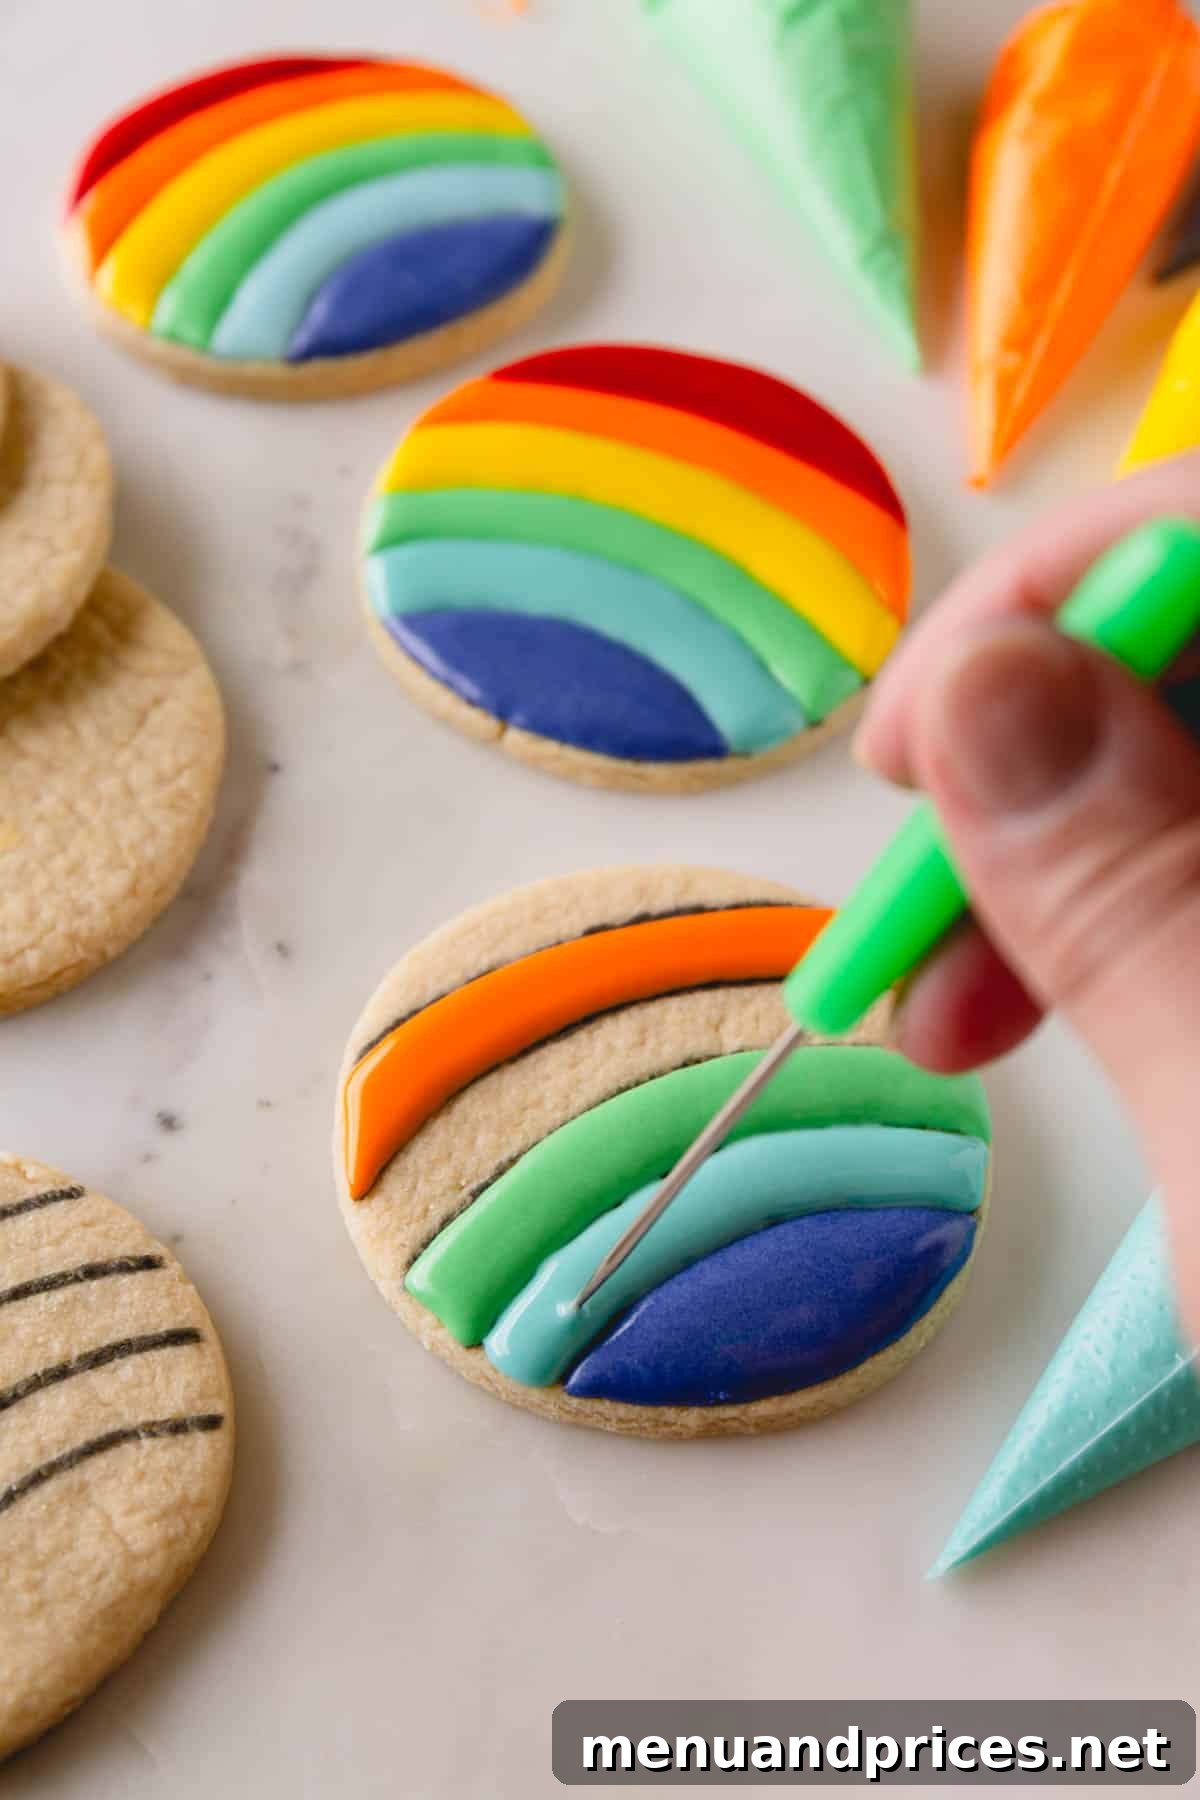
- Scriber Tool: This incredibly handy tool resembles a pen with a sharp, needle-like tip. Scribers are readily available at craft stores or online (often included with sets of tipless piping bags). A scriber is invaluable for meticulously guiding royal icing into tight corners, smoothing out flooded areas, popping annoying air bubbles, and creating intricate designs like marbling. While a toothpick can serve as a makeshift alternative in a pinch, a dedicated scriber offers far greater precision and control.
The Art of Making Royal Icing: A Step-by-Step Guide
Follow these instructions carefully to create flawless royal icing with the perfect consistency:
1. Preparing the Meringue Base
The foundation of stable royal icing lies in a well-prepared meringue:
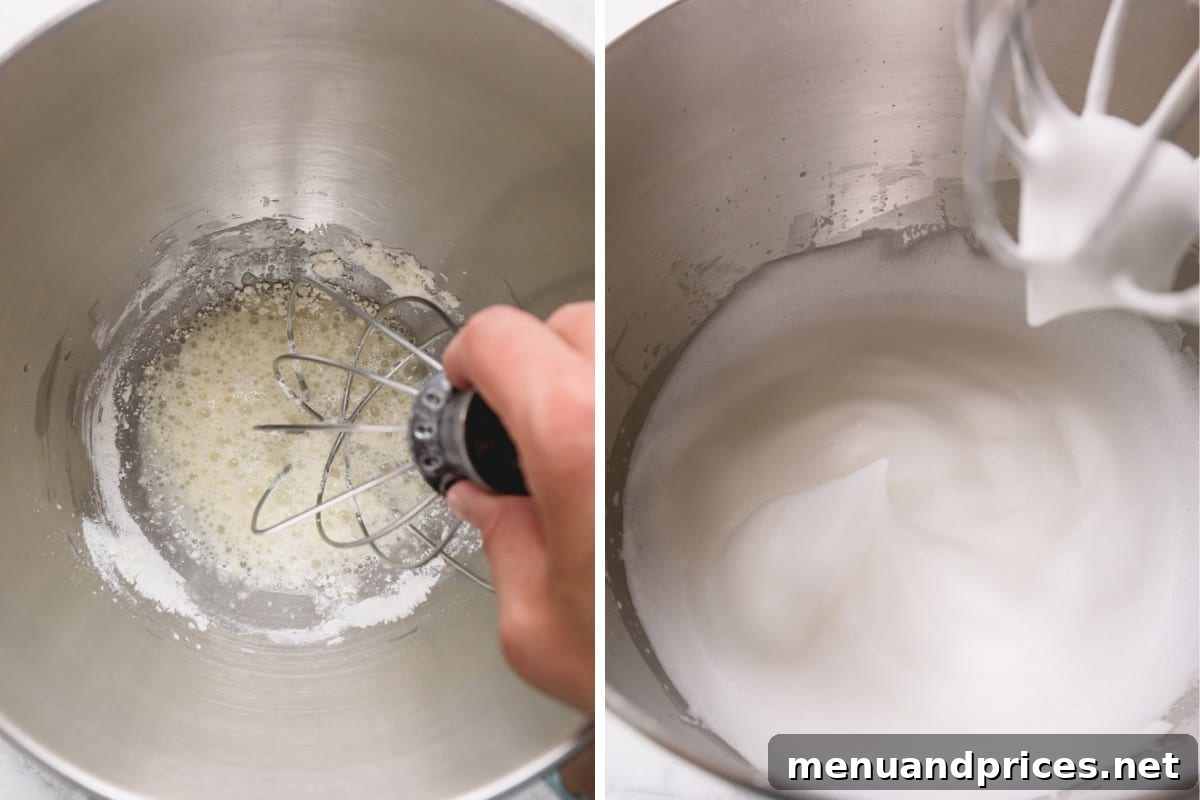
- In the clean bowl of your stand mixer, equipped with the whisk attachment, hand mix the meringue powder and water thoroughly until the mixture becomes frothy. This initial manual mixing helps to fully dissolve the meringue powder and prevent it from flying out of the bowl when you start the mixer. Once frothy, allow the mixture to sit undisturbed for approximately 5 minutes. This brief resting period allows the meringue powder to fully hydrate, ensuring optimal performance.
- Next, secure the bowl to your stand mixer and whisk the mixture on medium speed. Continue whisking until soft peaks begin to form, a process that typically takes around 2 minutes. You’ll know soft peaks are achieved when you lift the whisk and the peaks gently flop over and curl downwards, resembling a soft, billowy cloud. Be vigilant during this step, as over-whipping at this stage can lead to a less stable meringue, which can cause issues with your final icing.
2. Crafting the Royal Icing
With your meringue base ready, it’s time to transform it into rich royal icing:
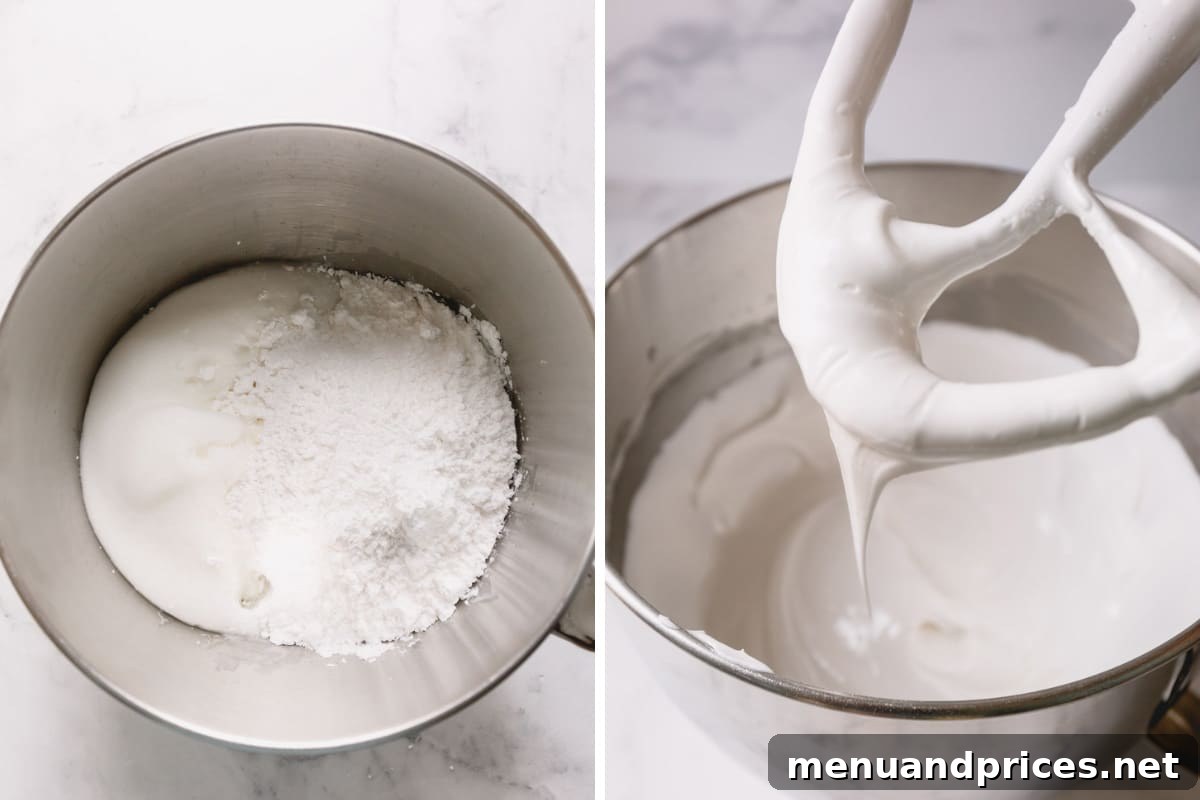
- Carefully add the sifted powdered sugar, corn syrup, and almond extract (or your chosen flavoring) directly into the meringue mixture in the stand mixer bowl.
- Switch from the whisk attachment to the paddle attachment. This is important as the paddle attachment is designed to mix thick batters and icings without incorporating too much air, which can lead to brittle icing. Whip the icing on a low speed (typically speed 2 on most stand mixers) until it becomes beautifully smooth and uniform in texture. This step should take approximately 1 minute. Observe as the icing thickens, but be extremely cautious not to over-whip it. Over-whipping can introduce too much air and weaken the protein structure, leading to problems like a brittle or slow-drying icing.
At this specific stage, I intentionally aim for a thicker royal icing, roughly akin to the consistency of toothpaste. This deliberate thickness provides a versatile base, allowing for meticulous adjustments to consistency later on. By making a thicker base, you have greater control when dividing the icing into smaller batches and incorporating different food colorings, ensuring each color achieves its ideal piping or flooding consistency without becoming too thin prematurely.
3. Adding Vibrant Food Coloring
Once your basic royal icing is prepared, the fun begins with coloring:
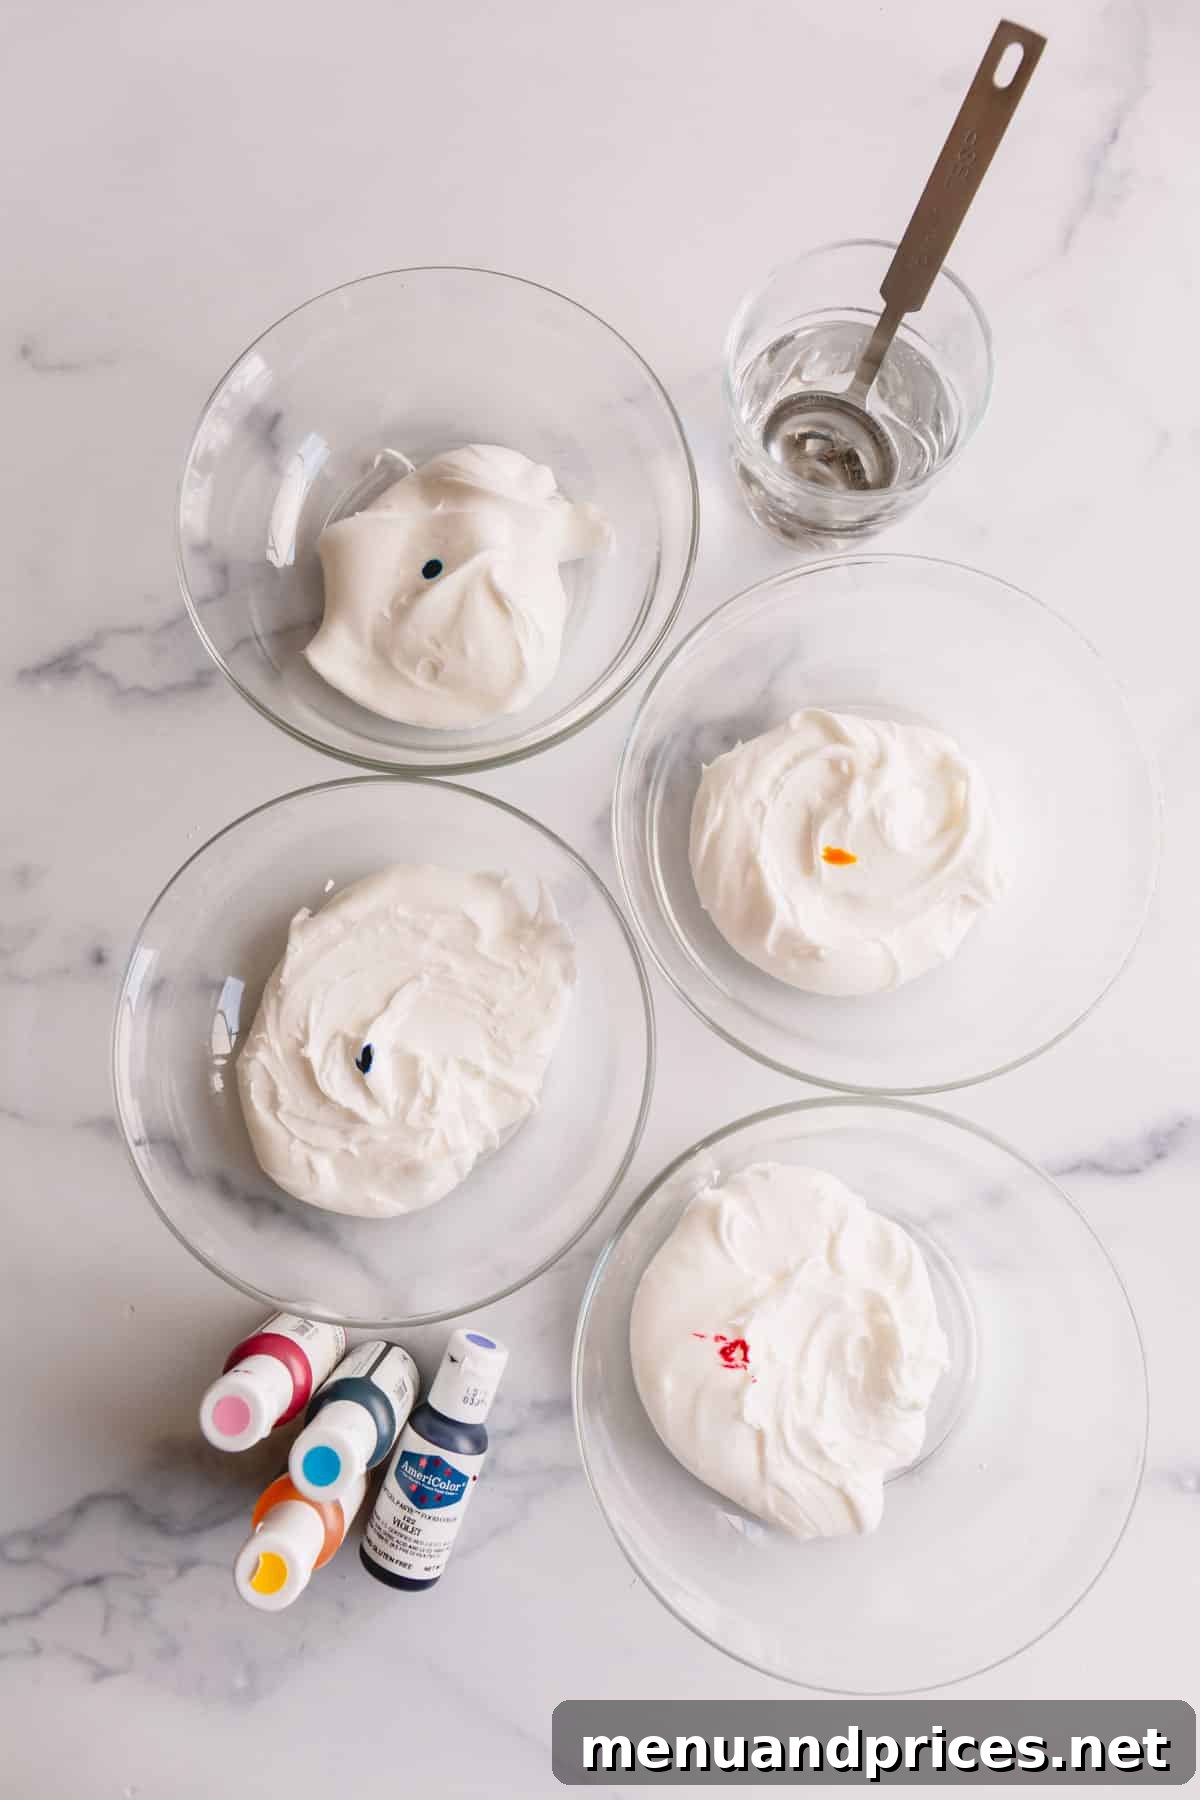
- The initial, uncolored royal icing serves as your base. Divide this icing into separate bowls, one for each color you wish to create. This allows you to individually color and fine-tune the consistency of each batch. TIP: Always remember to generously cover each bowl of icing with plastic wrap, pressing it directly onto the surface of the icing to prevent a crust from forming and drying out.
- For lovely pastel colors, a very small amount of gel food coloring is sufficient. Use a toothpick (or your scribe tool) to swipe a tiny bit of color and mix it into the icing. Start with a minuscule amount, as gel colors are highly concentrated, and you can always add more.
- For richer, deeper colors, especially shades like vibrant red or deep blue, patience is key. After mixing in the desired amount of food coloring, be sure to let the icing rest for a minimum of 10-15 minutes, or even better, overnight. This resting period allows the colors to fully develop and intensify, resulting in a much more profound hue. This technique is precisely how I achieve my bright red royal icing, ensuring maximum vibrancy.
The Efficient One-Bowl Coloring Method
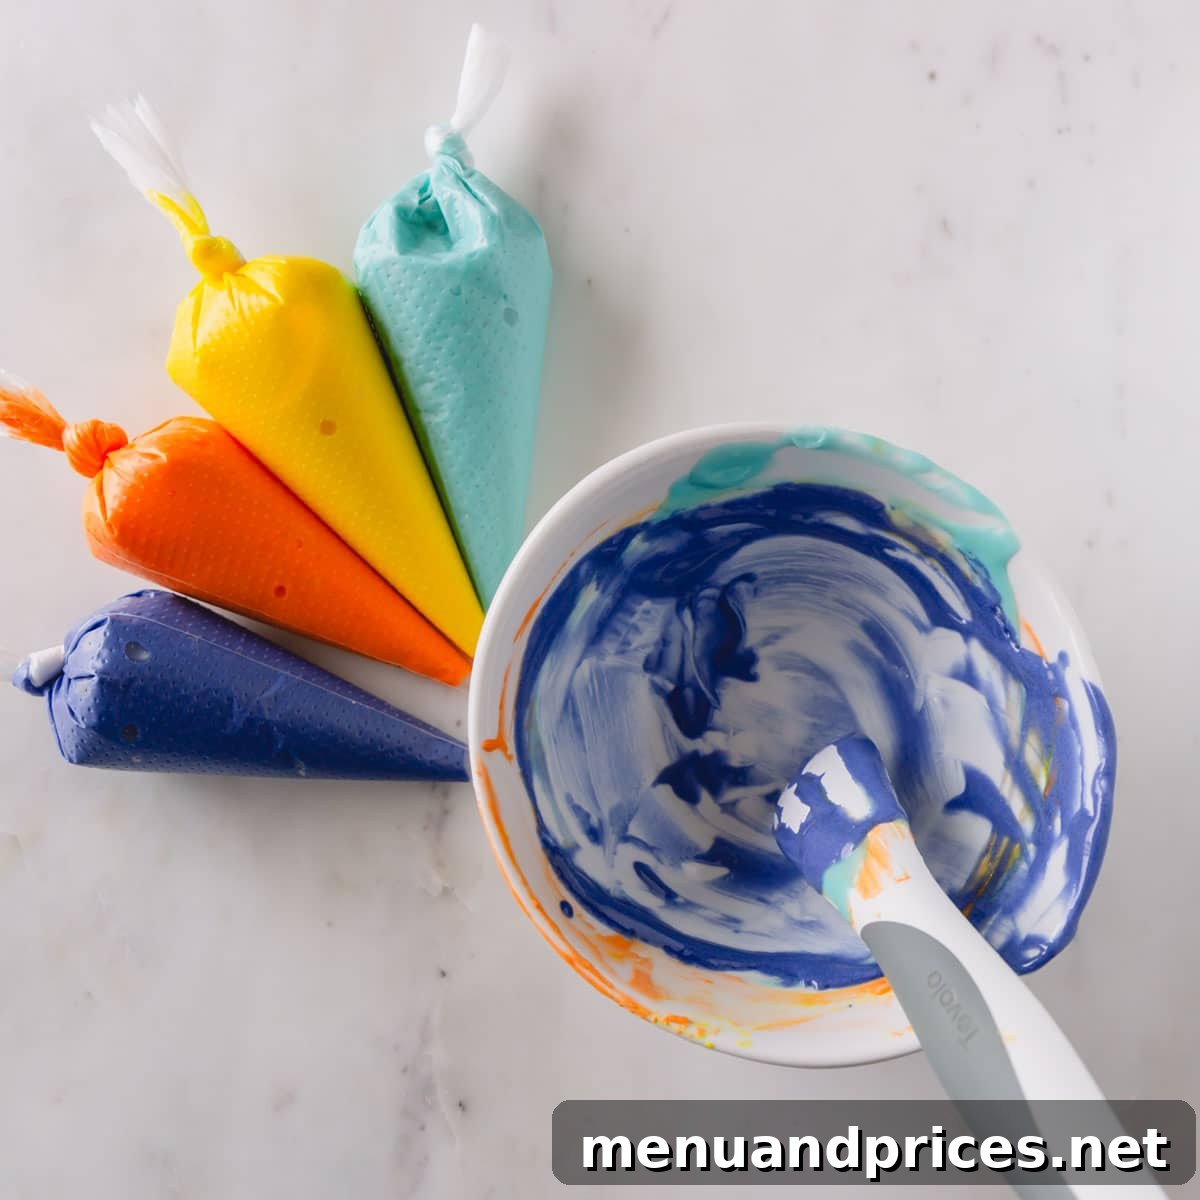
For decorators looking to save on dishwashing, the “one-bowl method” is a clever technique for mixing multiple colors of royal icing. Simply start with the lightest color first, mix it thoroughly, and then scrape the bowl exceptionally well with a silicone spatula, removing as much of the previous color as possible. Then, proceed to the next lightest color. For example, if you’re making rainbow colors, you might start with yellow, then orange, followed by blue, and finally purple icing in the same bowl. This method minimizes cleanup while still allowing for distinct color batches, provided you clean the bowl thoroughly between each shade.
Understanding Royal Icing Consistency: The Key to Flawless Decorating
Achieving the correct consistency is arguably the most crucial aspect of royal icing decoration. It dictates how your icing flows, holds its shape, and ultimately impacts the success of your designs. There are typically two fundamental consistencies:
Outline vs. Flood Consistency: Traditional Approaches
- Outline Consistency: This is a notably thicker royal icing, often compared to the texture of toothpaste or a very thick honey. Its primary function is to create precise, defined borders around the edges of cookies or other baked goods. This robust consistency forms a barrier that holds thinner “flood” icing in place. Beyond outlining, this consistency is ideal for piping intricate details, creating delicate lace patterns, adding text, or crafting small decorative elements that require structural integrity.
- How to Test: To assess outline consistency, scoop some icing with a spoon or spatula and let it fold back onto itself in the bowl. If the icing holds its shape without melting back into the main batch on its own, it’s a good indication. Only when you give the bowl a firm shake should the surface slowly smooth out. This resilience ensures your piped lines will remain crisp and defined.
- Flood Consistency: In contrast, flood consistency is a thinner royal icing, designed to smoothly fill in the areas enclosed by the outline. Its liquid-like nature allows it to spread evenly, creating a perfectly flat and uniform surface once dry. This consistency is essential for covering large areas, creating a smooth base for subsequent decorations, or achieving ombre and marbling effects.
- How to Test: To test flood consistency, scoop a spoonful of icing and let it slowly drip off the spatula back into the bowl. Observe the stream. If the icing slowly runs off in a continuous, unbroken ribbon and melts back into the surface of the main batch within 10-15 seconds (often referred to as ’10-second icing’), it’s perfect. If the icing drops in distinct chunks or takes longer than 15 seconds to smooth out, it’s too thick – add a tiny amount of water (1/4 teaspoon at a time) and mix until the desired flow is achieved. If it’s too runny, add a bit more powdered sugar.
The Versatility of Hybrid Consistency: A Streamlined Approach
While the traditional outline and flood consistencies are effective, I often find the process of mixing and managing two different consistencies for each color of royal icing to be cumbersome and time-consuming, especially when decorating a large batch of cookies. This is where the beauty of a hybrid royal icing consistency shines.
A hybrid consistency offers the best of both worlds: it’s sufficiently thick to pipe a clean, defined outline and simultaneously thin enough to effortlessly fill in the interior of your cookie designs. This streamlines the decorating process, reducing preparation time and simplifying execution. It’s an excellent choice for decorators of all skill levels seeking efficiency without compromising the quality of their finished product.
Mastering the Hybrid Consistency Test
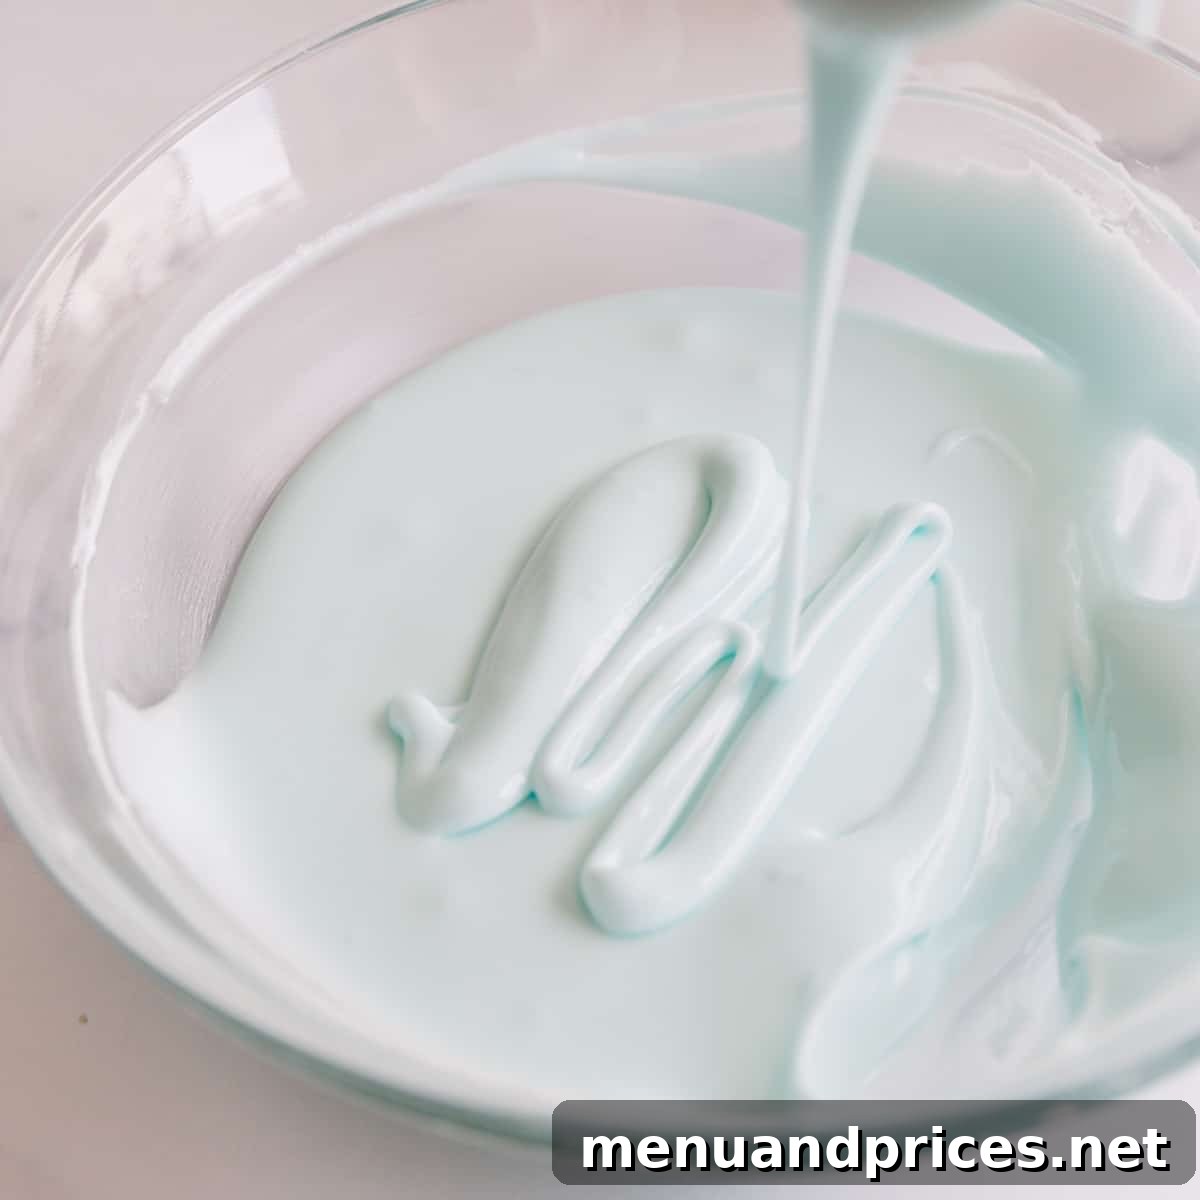
The ideal hybrid royal icing consistency should resemble a slightly thicker honey or maple syrup. Here’s a reliable method to test and confirm you’ve hit the sweet spot:
- Scoop a generous amount of icing with your spatula or spoon.
- Gently lift the spatula and let the icing drop back into the bowl.
- Observe the way the icing falls and integrates. The icing should slowly and smoothly fall in a continuous ribbon. Crucially, this ribbon should then fully melt back into the surface of the icing in the bowl within approximately 15 seconds. If it takes longer, add a tiny bit more water. If it disappears too quickly, you might need a touch more powdered sugar or a moment more of gentle mixing. A couple of gentle shakes of the bowl can also help it settle smoothly, confirming its perfect flow.
Decorating with Royal Icing: Techniques for Beautiful Results
Once your royal icing is prepared to the perfect consistency, it’s time to bring your designs to life:
First, transfer your colored and consistency-adjusted royal icing into piping bags. For royal icing, especially when working with intricate details or a hybrid consistency, I highly recommend using tipless piping bags. When preparing your bag, cut a tiny, tiny corner at the tip. Precision here is paramount: you need a small opening for fine lines, so always start with a minimal cut. You can always enlarge the hole if necessary, but you cannot reverse an overly large cut. A good rule of thumb is to snip off just the very tip, about 1-2mm.
To pipe an outline, hold the piping bag slightly elevated above the surface of your cookie, ensuring the seam of the bag is positioned towards the bottom for optimal control. Apply consistent pressure from the top of the bag, allowing the icing to flow freely. Rather than pushing the bag along the cookie, gently lead it. The icing should fall into place naturally, creating a smooth, unbroken line as you guide the bag around your desired shape. Practice on parchment paper first to get a feel for the pressure and flow.
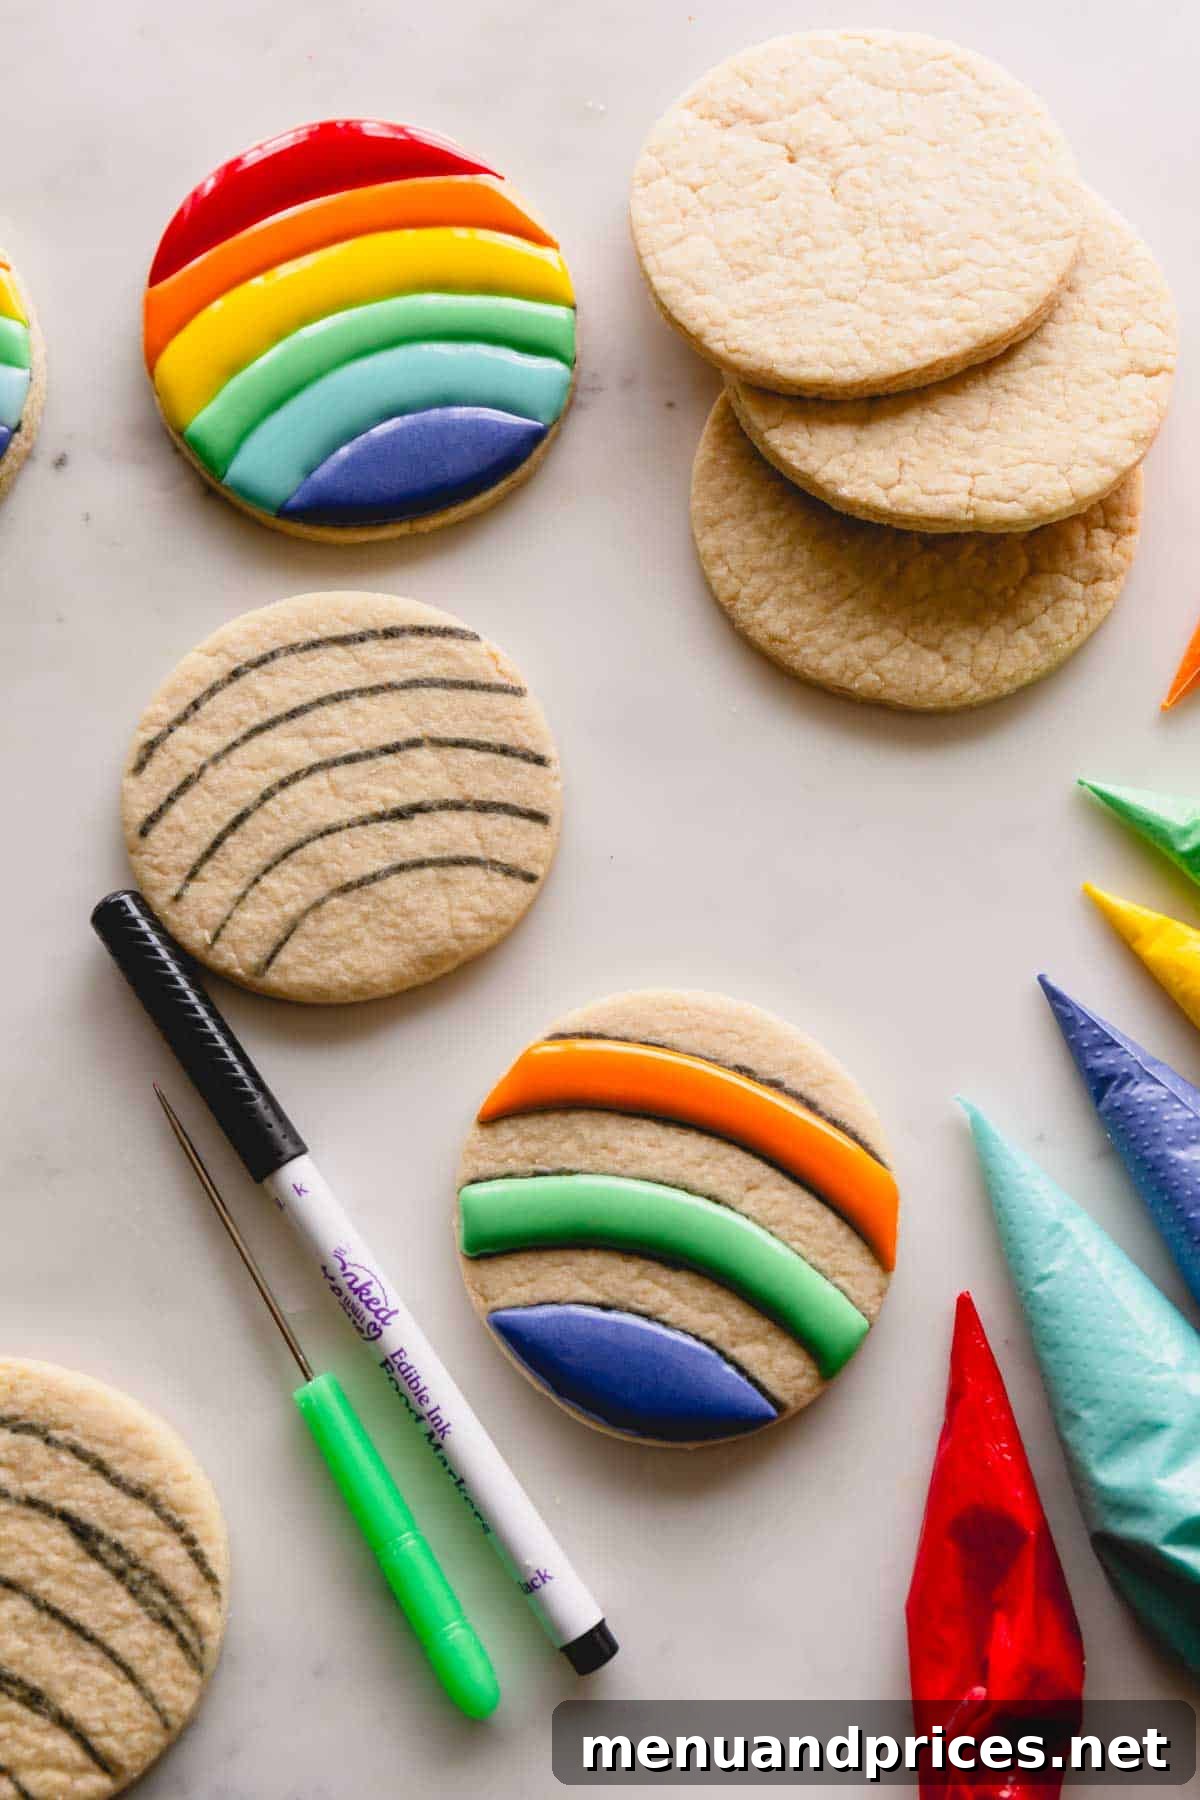
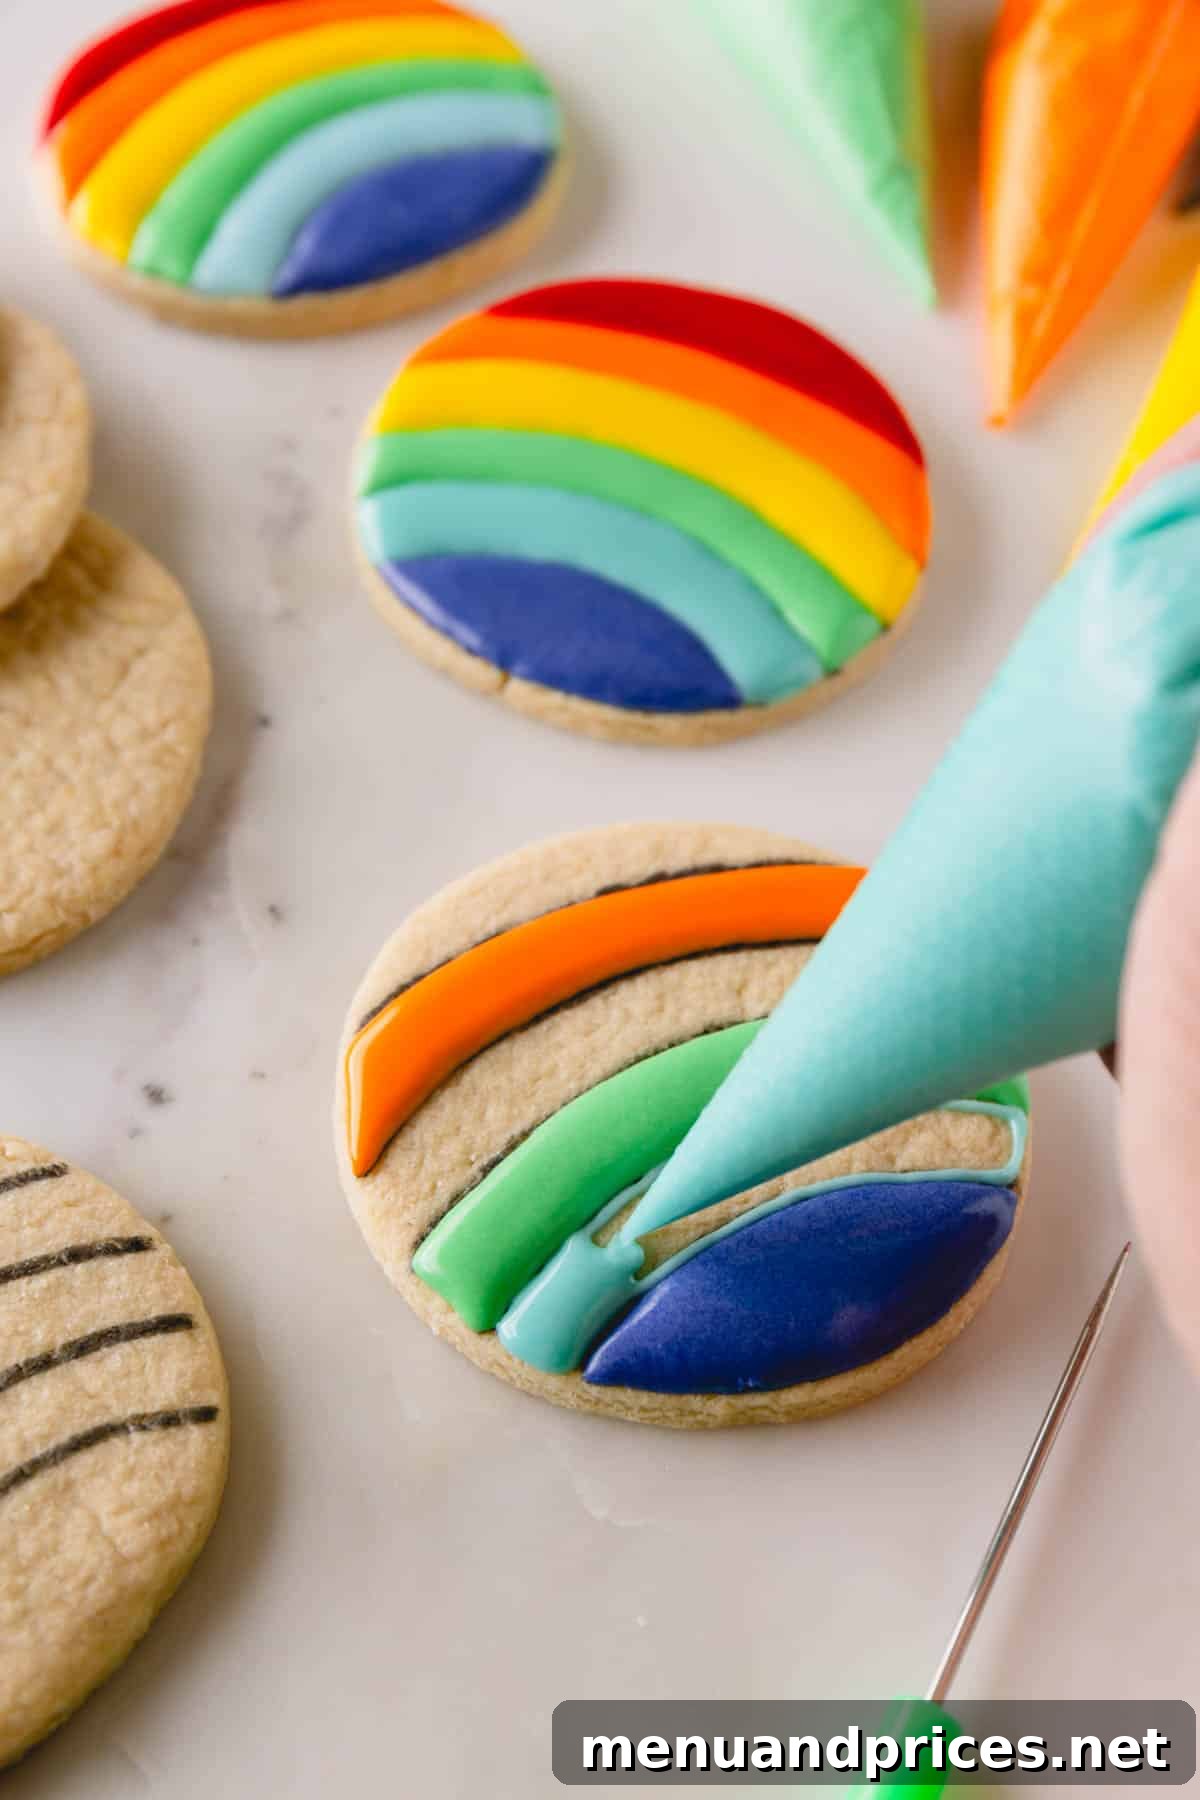
To flood the design, proceed immediately after piping the outline for each individual cookie. This is crucial for achieving a seamless, unified surface. Fill the interior of your piped outline with more icing, applying gentle but steady pressure. Once the area is sufficiently filled, use a scribe tool (or a clean toothpick if a scribe isn’t available) to gently spread the icing evenly, coaxing it into corners and along the outline. The scribe also helps to release any trapped air bubbles, preventing craters. You can also lightly tap or gently shake the cookie to help the icing settle and achieve a perfectly smooth, uniform flood. The key is to work quickly and efficiently on one cookie at a time: pipe the outline, then immediately flood it, before moving to the next cookie. This ensures the outline doesn’t dry prematurely and bond seamlessly with the flood layer.
The Art of Pressure: Controlling Your Flow
The amount of pressure you apply to your piping bag is directly proportional to the volume of icing that emerges from the tip, making it a fundamental skill in royal icing decoration. For delicate tasks like outlining cookies, a gentle, controlled squeeze is all that’s needed to produce a fine, steady line. This lighter pressure allows for precision and intricate details. Conversely, when it’s time to flood the interior of your cookie designs, increase the pressure on the piping bag. A firmer squeeze will release a greater volume of icing, enabling you to quickly and efficiently fill the outlined areas. Mastering this nuanced pressure control is vital for smooth transitions between outlining and flooding, ensuring your decorations are both beautiful and consistent.

Advanced Tips for Royal Icing Perfection:
To ensure your royal icing projects consistently yield stunning results, keep these expert tips in mind:
- Embrace Hybrid Consistency: As highlighted, I strongly advocate for using a single, versatile hybrid consistency for both outlining and flooding. This approach significantly streamlines the decorating process, saving time and reducing the complexity of managing multiple icing batches, particularly beneficial for beginners and large projects.
- Experiment with Flavor Extracts: Royal icing is a fantastic medium for flavor experimentation. While almond is a classic, don’t hesitate to infuse your icing with different extracts to complement your baked goods. Vanilla, peppermint, lemon, orange, or even clear butter extracts are excellent choices. Start with about ¼ teaspoon per batch, tasting and adjusting as needed, to achieve a balanced and delightful flavor.
- Avoid Overmixing: This is a critical warning. Once the powdered sugar is incorporated, do NOT overmix the royal icing. Excessive mixing, especially at high speeds, can damage the delicate protein structure of the egg whites (or meringue powder). This breakdown can lead to an icing that simply won’t set properly, remains sticky, or loses its stability, ultimately ruining your intricate designs. Mix only until smooth and combined.
- Ensure Complete Drying Before Storage: Patience is a virtue when working with royal icing. It is absolutely essential to allow your decorated items to dry completely and thoroughly before attempting to stack, store, or package them. Depending on ambient humidity and temperature, this drying process can take anywhere from 8 to 24 hours. For best results and peace of mind, I recommend letting your iced creations air dry overnight. Premature handling will result in smudges, dents, and ruined artwork.
- Always Store Icing in Airtight Conditions: Whether you’re working with a large batch or just small portions, always keep your royal icing in an airtight container or covered tightly with plastic wrap when not actively in use. This prevents the surface from drying out and forming a crust, which can then get mixed into your wet icing and clog your piping bags. When working with multiple colors in small bowls, press plastic wrap directly onto the surface of the icing in each bowl.
- Optimize Piping Bag Filling: When transferring icing to piping bags, avoid the temptation to overfill them. An overly full piping bag is cumbersome, difficult to control, and can lead to hand fatigue and messy decorating. Fill your bags to about two-thirds capacity, leaving enough space to comfortably twist the top closed.
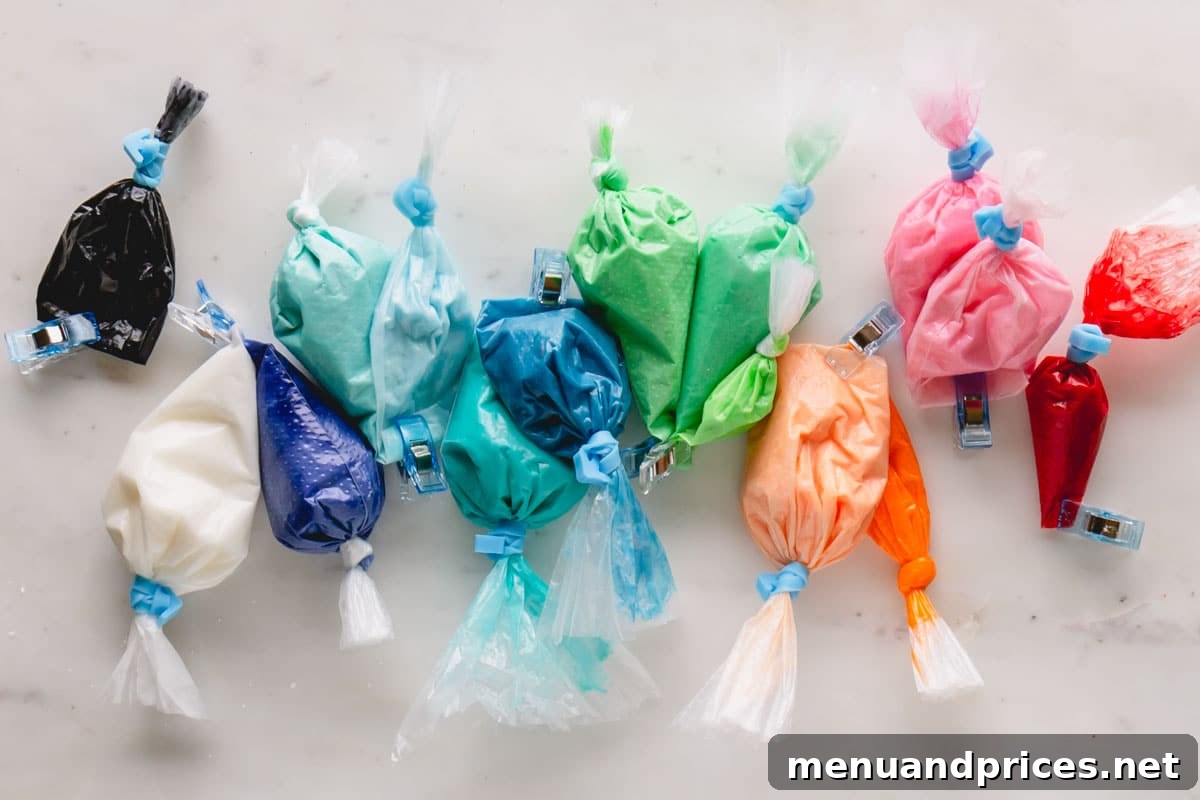
- Utilize Piping Bag Ties: For added convenience and to prevent icing from oozing out of the top of the bag, consider using piping bag ties or even small rubber bands. These are especially helpful when you’re juggling many different colors and frequently switching between bags, ensuring your workspace remains clean and your icing stays contained.
Smart Royal Icing Storage Strategies:
Proper storage ensures your royal icing remains fresh and ready for your next decorating adventure:
Store freshly made royal icing in an airtight container. It will keep well on the counter for up to 2 weeks, or in the refrigerator for the same duration. The colder temperature of the fridge won’t harm the icing, though it might make it a little stiffer initially.
Royal icing is exceptionally freezer-friendly! If you find yourself with a surplus of icing or want to prepare a batch in advance, freezing is an excellent option. Transfer the icing into an airtight container or a freezer-safe bag, ensuring as much air as possible is removed, and freeze for up to 2 months. This extends its usability significantly.
Maximizing Freshness: Keep Leftover Icing Airtight
An efficient way to store leftover royal icing, especially if it’s already in piping bags, is to simply secure the cut end of the piping bag with a clip or a small rubber band. Then, place these clipped bags into a larger airtight container or a heavy-duty freezer bag. This minimizes air exposure, prevents drying, and keeps your icing organized and ready for future use.
When you’re ready to use frozen icing, transfer the airtight container from the freezer to the refrigerator to thaw completely overnight, or allow it to come to room temperature on the counter for several hours. Once thawed, transfer the icing into a clean mixing bowl and re-mix it thoroughly with a spatula or your stand mixer (using the paddle attachment on low speed) before re-bagging and decorating your cookies. It’s perfectly normal for the icing to exhibit some separation during storage, where water may separate and pool at the bottom. This is why a good re-mixing is absolutely essential to restore its smooth, homogeneous consistency before you begin decorating again.
Troubleshooting Common Royal Icing Issues: Solutions for Flawless Decorating
Even experienced decorators encounter challenges. Here’s how to address the most common royal icing problems:
My Royal Icing Stays Wet and Won’t Dry
The most frequent culprit for stubbornly wet royal icing is over-whipping. When you overmix the icing, particularly at higher speeds, it weakens the delicate protein structure of the meringue. This compromised structure prevents the icing from properly setting and hardening. Additionally, very high humidity in your environment can significantly slow down or even prevent drying. Ensure you’re not overmixing and, if humidity is an issue, consider using a dehumidifier or directing a fan (on a low setting) towards your drying cookies to aid evaporation.
My Royal Icing Has Craters or Tiny Holes When Dry
Craters are a common frustration, but often fixable! They can result from overmixing, which incorporates too much air, or from improper flooding techniques. Air bubbles trapped beneath the surface of the wet icing can burst as it dries, leaving unsightly holes. The easiest fix is proactive: after flooding an area, gently tap the cookie on your work surface a few times. Then, use your scribe tool or a fine toothpick to actively pop any visible air bubbles before the icing begins to set. This allows the icing to settle back into a smooth surface as it dries.
My Royal Icing Wrinkled During Drying
Wrinkling in royal icing is almost always a sign of poor air circulation during the drying process. Do NOT cover your cookies with wet icing, as this traps moisture and prevents proper evaporation. Instead, ensure they have ample space around them for air to circulate freely. Let them air-dry in an open, well-ventilated area for much longer than you might initially think necessary. While drying, the cookies themselves should not dry out; only the icing needs to solidify. Proper airflow is essential for a smooth, unwrinkled finish.
The Royal Icing is Too Hard After It’s Set
If your royal icing sets to a rock-hard, overly brittle consistency, the most likely cause is using too much meringue powder in your recipe. A higher ratio of meringue powder will naturally result in a harder set. To avoid this issue and achieve that desirable soft bite, it is crucial to follow the recipe’s specified meringue powder quantity precisely. This recipe is formulated to provide a durable yet pleasingly edible texture. Additionally, omitting corn syrup can sometimes contribute to a harder bite.
My Royal Icing Dries Dull Instead of Glossy
A dull finish instead of a beautiful sheen often occurs when the royal icing dries too slowly. To encourage a glossy outcome, try placing your freshly iced cookies next to a small fan (on a very low setting) for the first 15-30 minutes after decorating. This gentle airflow accelerates the initial drying phase. Furthermore, remember not to skip the corn syrup in the recipe! Corn syrup is a key ingredient that contributes significantly to the lovely shine of the dried royal icing. Humidity and temperature also play roles; a lower humidity environment generally promotes a glossier finish.
Royal Icing Frequently Asked Questions (FAQs):
The primary distinction lies in their drying properties and structural integrity. Regular icing, such as buttercream or simple glaze, typically forms only a thin crust on its surface, or remains soft. It’s easily smudged, dented, or ruined if touched or if cookies are stacked prematurely. Royal icing, however, hardens completely and permanently as it dries, forming a solid, durable shell. Once set, royal icing is impervious to smudges and offers remarkable structural stability, making it the perfect medium for creating intricate, multi-layered, and elaborate designs that retain their pristine appearance even after handling and transport.
The hardening characteristic of royal icing is primarily attributed to the protein content found in the egg whites, or more commonly, the meringue powder. As the water in the icing evaporates during the drying process, these egg white proteins coagulate and solidify, creating a firm, stable matrix. This process is similar to how egg whites solidify when cooked, but in royal icing, it happens through air exposure. The presence of powdered sugar also contributes to this solid structure once the moisture is removed.
Bakers and decorators widely prefer royal icing for several compelling reasons. Its unique ability to harden completely allows for unparalleled precision and durability in decorative work. This means you can pipe highly detailed designs, create fine lines, and even sculpt three-dimensional elements that will hold their shape. Furthermore, the hard-setting nature of royal icing enables layered decorating: you can let one layer dry thoroughly before adding subsequent details, ensuring colors don’t bleed and designs remain flawless. This stability also makes royal icing-decorated treats easy to transport and stack without fear of damage, making it the ideal choice for professional-looking, long-lasting confectionery artistry.

How to Make Royal Icing
Saved Recipe
Pin Recipe
Comment
Print Recipe
Ingredients
- 3 tablespoons (18 g) meringue powder
- 3 oz (88 ml) water plus more if needed Note 1
- 16 ounces (450 g) powdered sugar
- 1 tablespoon (10 g) corn syrup Note 2
- ¼ teaspoon almond extract Note 3
Equipment
-
stand mixer with the whisk and paddle attachment
Instructions
-
In a large mixing bowl with a whisk attachment, hand mix meringue powder and water until frothy. Let it sit for 5 minutes.
-
Whisk the mixture on medium speed until soft peaks form, about 2 minutes.
-
Add the powdered sugar, corn syrup, and almond extract to the meringue.
-
Switch to the paddle attachment and whip the icing on speed 2 until nice and smooth, about 1 minute. The icing will thicken as you whip it. Don’t over-whip it!
-
Check the consistency of the royal icing by scooping it and letting it drop into a ribbon. If it melts back into the rest of the icing within 10-15 seconds, it’s perfect (this is our recommended hybrid consistency). If it’s too thick, add a little water, ½ teaspoon at a time, until you reach the desired consistency. If it’s too runny, whip it a little longer, or add more powdered sugar.
⭐️ Did you make this recipe?
Please leave a review and let us know how you liked it!
Tips & Notes
Note 2: Corn syrup is highly recommended as it imparts a beautiful, glossy sheen to the dried icing and contributes to a softer, more pleasant bite.
Note 3: Feel free to customize the flavor! You can substitute almond extract with any other flavoring extract you prefer, such as vanilla (use 1 teaspoon for a more pronounced flavor), peppermint, lemon, or clear butter extract.
Storing Tips:
– Store prepared royal icing in an airtight container at room temperature or in the refrigerator for up to 2 weeks. Ensure it is tightly sealed to prevent drying.
– For longer storage, royal icing is freezer-friendly! Place it in an airtight, freezer-safe container or bag and freeze for up to 2 months. This is perfect for preparing ahead or saving leftovers.
– When ready to use thawed icing, ensure it is completely defrosted. Transfer it to a clean bowl and thoroughly re-mix the icing using a spatula or mixer. This is essential because separation (where water pools at the bottom) is normal during storage. After re-mixing, you can re-bag it and proceed with decorating.
Nutrition