
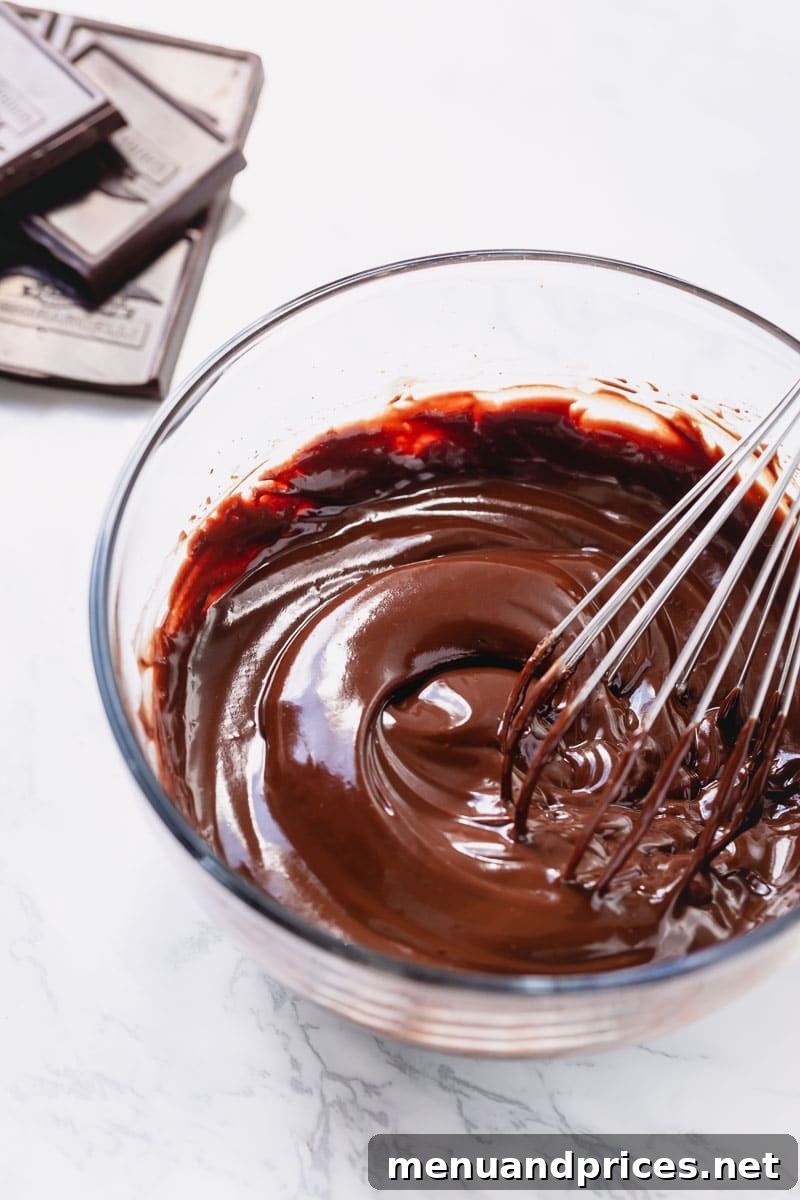
Here’s everything you need to know to make a silky smooth chocolate ganache. Master this ultimate, versatile pastry element to elevate your baking to the next level, transforming simple desserts into extraordinary culinary delights.
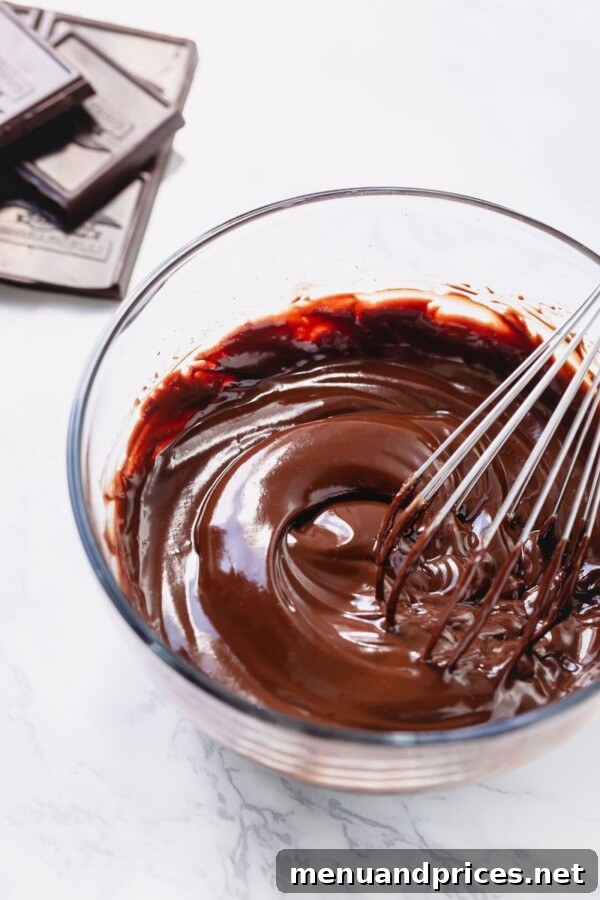
What is Chocolate Ganache? The Versatile Foundation of Decadent Desserts
Chocolate ganache is a classic French culinary preparation, essentially an exquisite emulsion created from just two primary ingredients: high-quality melted chocolate and rich heavy cream. This seemingly simple combination, when properly balanced and meticulously prepared, yields a stable, smooth, and glossy mixture celebrated for its luxurious texture and intense chocolate flavor. The magic happens as the fat from the cocoa butter in the chocolate and the milk fat in the cream bind together, forming a uniform and stable substance that can be used in myriad ways.
While the core definition remains consistent, the true artistry of ganache lies in its remarkable versatility. A basic, all-purpose ganache typically adheres to a 1:1 ratio by weight of chocolate to heavy cream. This balanced proportion results in a consistency that is pourable when warm and sets to a firm, yet still yielding, texture when cooled. However, this ratio is merely a guideline, a starting point for endless culinary exploration. You have the power to precisely adjust the amounts of each ingredient, allowing you to fine-tune the ganache’s consistency to suit any specific baking project or desired application.
For instance, if you’re aspiring to create perfectly formed, luscious chocolate truffles that are firm enough to roll and handle without melting in your hands, you would strategically decrease the proportion of cream relative to the chocolate. This creates a much thicker ganache, ideal for shaping. Conversely, if your vision calls for a delicate, thin chocolate sauce to elegantly drizzle over ice cream, or a shimmering glaze for pastries, you would increase the cream content, yielding a ganache with a more fluid, flowing consistency. Understanding these fundamental adjustments is key to mastering ganache, and we will explore these essential “ganache ratios” in greater detail in a dedicated section further down, ensuring you can customize your creation for every dessert dream imaginable.
Essential Ganache Ingredients: The Cornerstone of Quality
Because chocolate ganache is so incredibly simple, relying on only two core ingredients, the quality of each component is not just important – it’s absolutely paramount. Skimping on quality here will directly impact the flavor, texture, and overall success of your ganache. Investing in the best chocolate and cream you can reasonably source will elevate your ganache from merely adequate to truly exceptional, delivering a professional-grade finish every time.
Heavy Whipping Cream: The Indispensable Emulsifier
Heavy cream, also commonly known as heavy whipping cream, is fundamentally crucial for achieving the proper, stable consistency of your ganache. Its defining characteristic is its high milk fat content, typically 36% or more. This abundant fat is what enables the cream to effectively emulsify with the cocoa butter in the chocolate, creating that coveted smooth, velvety texture that defines a perfect ganache. Without sufficient fat, the emulsion simply won’t form correctly, leading to a grainy, thin, or separated mixture.
It is absolutely imperative to avoid substituting heavy cream with lower-fat dairy products like milk, half-and-half, or light cream. These alternatives lack the critical fat percentage needed for a stable ganache, which will undoubtedly throw off the delicate fat-to-liquid ratio, resulting in a ganache that is watery, refuses to set, or even splits completely. If you’re seeking a dairy-free option, a full-fat canned coconut milk can serve as an excellent substitute. For the best results, use only the thick, creamy portion that settles at the top of an unshaken can of full-fat coconut milk, as this mimics the richness of heavy cream. Be mindful that coconut milk may impart a subtle, tropical flavor, which can be a delightful addition to certain desserts but is a consideration depending on your desired flavor profile.
Chocolate: The Defining Flavor and Texture
Given that chocolate is unequivocally the star of the show in any ganache, its selection profoundly impacts the final product. We wholeheartedly recommend utilizing a high-quality chocolate to ensure the most delicious and beautifully textured ganache possible. Here’s what to consider when making your choice:
- I highly recommend opting for a bar of fine baking chocolate over standard chocolate chips. Baking bars typically contain a higher percentage of cocoa butter and fewer, if any, stabilizers. This composition allows them to melt far more smoothly and seamlessly emulsify with the cream, creating a truly superior, stable, and glossy ganache.
- Semi-sweet chocolate remains my favorite choice for its perfectly balanced sweetness and rich cocoa flavor, appealing to a broad range of tastes. For those who crave a deeper, more intense chocolate experience with minimal sweetness, bittersweet chocolate (often 60% cocoa or higher) is an excellent alternative that will yield a wonderfully complex and robust ganache.
- I generally advise against using milk chocolate for ganache. Milk chocolate has a significantly lower cocoa butter content and a higher proportion of sugar and milk solids compared to semi-sweet or bittersweet varieties. This composition makes it inherently more challenging to emulsify properly and far more prone to separating. The result can often be an overly sweet ganache that lacks the desirable structure and depth of flavor.
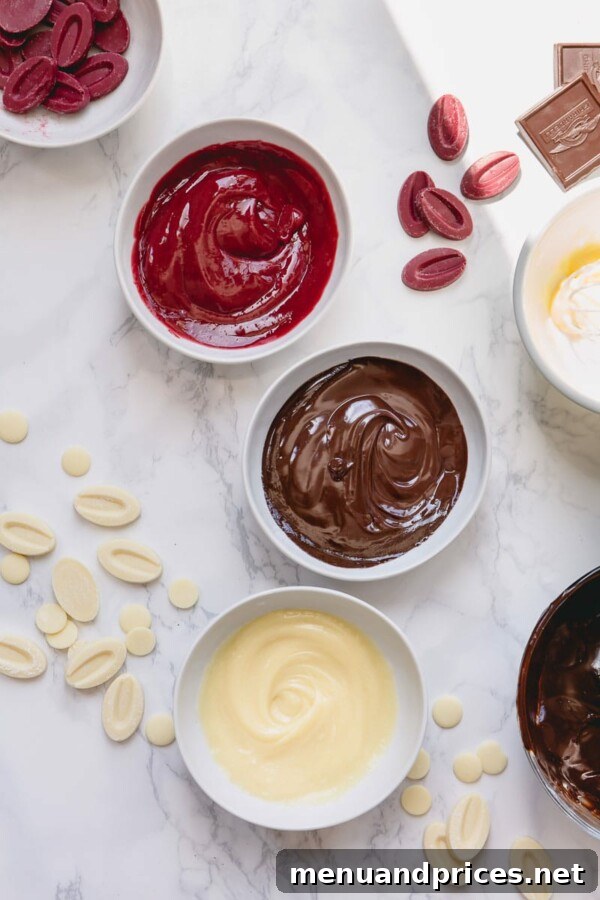
- It is absolutely possible to create a stunning white chocolate ganache. However, due to the unique composition of white chocolate (which contains cocoa butter but no cocoa solids), you’ll need to adjust the cream-to-chocolate ratio. Typically, less cream is required for white chocolate ganache to achieve the desired firmness and smooth consistency, preventing it from being too runny.
Can I Use Chocolate Chips to Make a Ganache? Understanding the Nuances
Yes, you can certainly use chocolate chips to prepare a ganache, and many home bakers do. However, it’s crucial to be aware of a key difference in their formulation. Chocolate chips are specifically engineered with stabilizers to help them maintain their distinctive shape even when exposed to high baking temperatures – think of how they hold their form in a chocolate chip cookie! While excellent for resisting melting in cookies, these stabilizers make chocolate chips considerably harder to fully melt down into a perfectly smooth, homogenous ganache.
If you choose to use chocolate chips, anticipate that you may need to apply additional gentle heat and diligent whisking to ensure all the chocolate particles dissolve completely and integrate seamlessly with the cream. Failing to do so can result in a ganache that feels grainy or has small, unmelted chocolate bits, detracting from the luxurious, silky texture that defines a perfect ganache. For the most consistently smooth and effortlessly beautiful ganache, a high-quality baking bar remains the preferred choice.
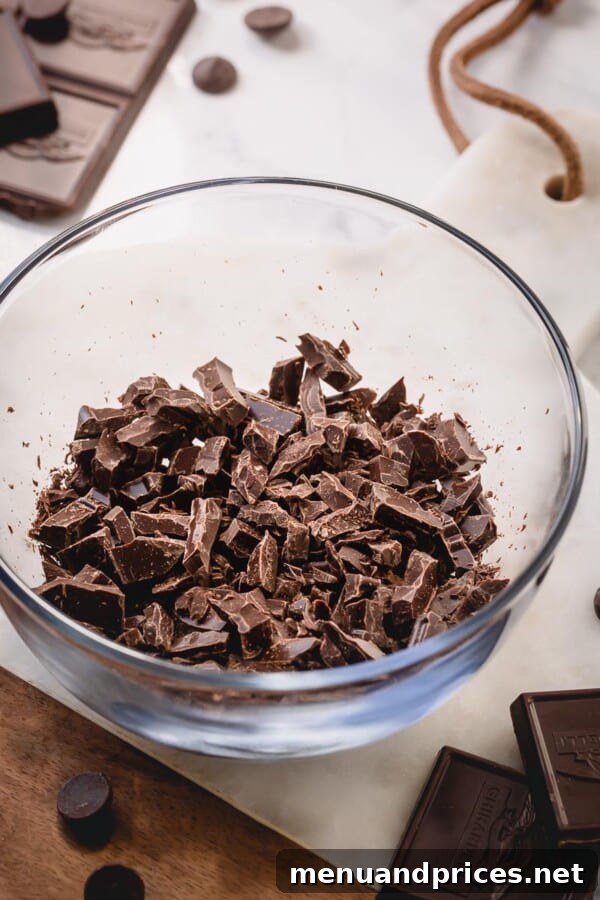
Recommended Premium Chocolate Brands for an Exceptional Ganache
To truly achieve an outstanding ganache, the quality of your chocolate is non-negotiable. Investing in superior chocolate means a richer flavor and a smoother, more stable emulsion. Here are some of my personal favorite brands that consistently deliver excellent results and melt beautifully for ganache:
- Ghirardelli: This brand offers fantastic quality that is both reliable and widely accessible. The Ghirardelli Premium Semi-Sweet Baking Bar is my absolute go-to. Its consistent melting properties and rich flavor make it a perfect choice for a consistently delicious ganache, and it’s readily available in most grocery stores.
- Cacao Barry: For those who enjoy exploring more specialized, professional-grade chocolates, Cacao Barry is an exceptional choice. They are renowned for their high-quality couvertures. I particularly adore their Blanc Satin 29% White Chocolate Discs, which produce an incredibly smooth and luxurious white chocolate ganache.
- Valrhona: Valrhona is synonymous with luxury and artisan chocolate, offering an impressive array of flavored and single-origin options. One of my favorites, the Raspberry Inspiration Chocolate Wafers, is a brilliant choice if you’re aiming for a naturally fruit-flavored ganache without the need for additional purees, delivering an authentic and vibrant taste experience.
Pro Tip: Sourcing Specialty Chocolates
My preferred online destination for a truly extensive selection of premium and specialty chocolates from various brands is the World Wide Chocolate website. They offer a diverse inventory that can cater to almost any specific baking need or unique flavor preference. (Please note: This is a genuine, unsponsored recommendation based on personal experience!)
Mastering Ganache Ratios for Customized Consistency
The secret to unlocking the full potential of ganache lies in understanding and manipulating its core ratios. As highlighted earlier, the traditional starting point for a versatile, all-purpose ganache is a 1:1 ratio, meaning equal parts by weight of chocolate to heavy cream. This balance typically yields a mixture that is beautifully pourable when warm and sets to a firm, yet still creamy, consistency when cooled. However, ganache is remarkably forgiving and adaptable, allowing you to fine-tune this ratio to achieve a myriad of textures and perfectly suit your specific dessert applications.
Let’s delve into the key ganache ratios and their ideal uses, always remembering to measure ingredients by weight for the utmost precision and consistent results:
1:2 Ratio (Chocolate to Cream): Light and Flowing
This ratio, comprised of one part chocolate to two parts heavy cream (for example, 4 ounces of chocolate to 8 ounces of cream), results in a ganache that is exceptionally runny and thin. Its liquid consistency is ideal for applications where a delicate, flowing texture is desired and a firm set is not necessary. Perfect uses for this lighter ganache include:
- Dipping Fruits & Desserts: It’s the perfect consistency for a luxurious chocolate fondue, allowing fresh strawberries, banana slices, or even small cakes and cookies to be elegantly coated.
- Glazing Éclairs, Doughnuts, or Pastries: Creates a thin, shimmering, and delicate glaze that adds visual appeal and a layer of chocolate flavor without overwhelming the pastry itself. This glaze will remain soft and slightly tacky.
- Dessert Sauce: An exquisite warm sauce to drizzle generously over ice cream, panna cotta, crepes, or pancakes, providing a rich, pourable chocolate finish.
Given its higher cream content, this ganache will remain quite fluid even after cooling to room temperature and will not firm up substantially, even when chilled, unlike other ratios. It’s best served warm or at a cool room temperature to maintain its pourable quality.
1:1 Ratio (Chocolate to Cream): The Ultimate All-Purpose Ganache
The 1:1 ratio (for example, 8 ounces of chocolate to 8 ounces of cream) is truly the most versatile and frequently used ganache. It strikes an optimal balance between richness and workability, making it suitable for a vast array of applications. When warm, it’s beautifully pourable and glossy; as it cools, it progressively thickens, setting into a firm yet yielding consistency. This adaptability makes it perfect for:
- Elegant Cake Drips and Glazes: Achieves that sought-after, professional-looking drip effect on layer cakes or a smooth, even, and slightly pliable glaze over various baked goods.
- Rich Fillings for Tarts and Cakes: Provides a stable, delicious filling for tarts, pies, or as a decadent layer between cake tiers that holds its structure when sliced.
- Cupcake Frosting (when whipped): Once fully cooled and then whipped vigorously with an electric mixer, this ratio transforms into a light, airy, and incredibly flavorful chocolate frosting, perfect for piping onto cupcakes or spreading onto cakes.
- Chocolate Tart Shells: Can be used as a luscious, slightly firm base for various chocolate tarts, offering a dense, rich texture.
This ratio is the ideal starting point for most ganache-based recipes, offering both ease of preparation and broad utility.
2:1 Ratio (Chocolate to Cream): Rich, Thick, and Fudgy
When your dessert demands a ganache with substantial body, a deep fudge-like texture, and a firm set, the 2:1 ratio (for example, 8 ounces of chocolate to 4 ounces of cream) is your go-to. The significantly higher chocolate content ensures a much firmer and denser final product, which is excellent for applications requiring structure and a robust mouthfeel. This ratio is specifically exceptional for:
- Crafting Decadent Chocolate Truffles: This is the classic ratio for truffles, providing the perfect consistency for rolling and shaping into dense, luxurious candies that hold their form at room temperature.
- Thick Cake Fillings: Creates a rich, almost brownie-like layer between cake tiers, offering a substantial and indulgent filling that stands up well to slicing and serving.
- Pipeable Frosting: When slightly cooled, this ganache becomes thick enough to pipe intricate designs or generous, sturdy swirls onto cupcakes or cakes, offering excellent definition.
- Homemade Candy Bar Centers: Forms a dense, chewy, or firm center for homemade chocolate bars and confections.
This ganache will set quite firm, especially when chilled, delivering a truly intense chocolate experience with a delightful, fudgy texture.
Step-by-Step Guide: Crafting the Perfect Silky Chocolate Ganache
Despite its luxurious reputation, creating a beautifully smooth and glossy chocolate ganache is surprisingly simple and requires minimal effort. With just a few key steps and a touch of patience, you’ll achieve a flawless result every time. Here’s a detailed guide to mastering this essential pastry technique:
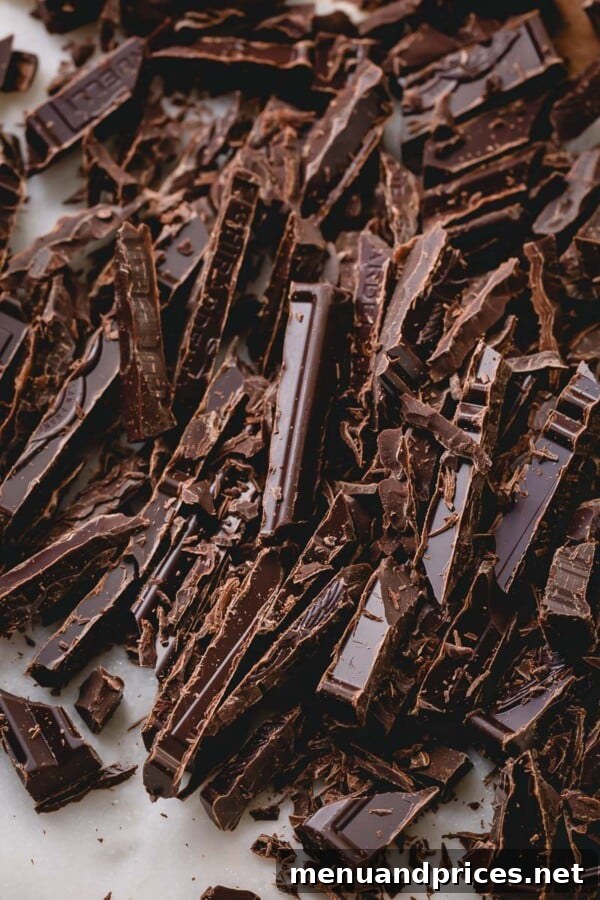
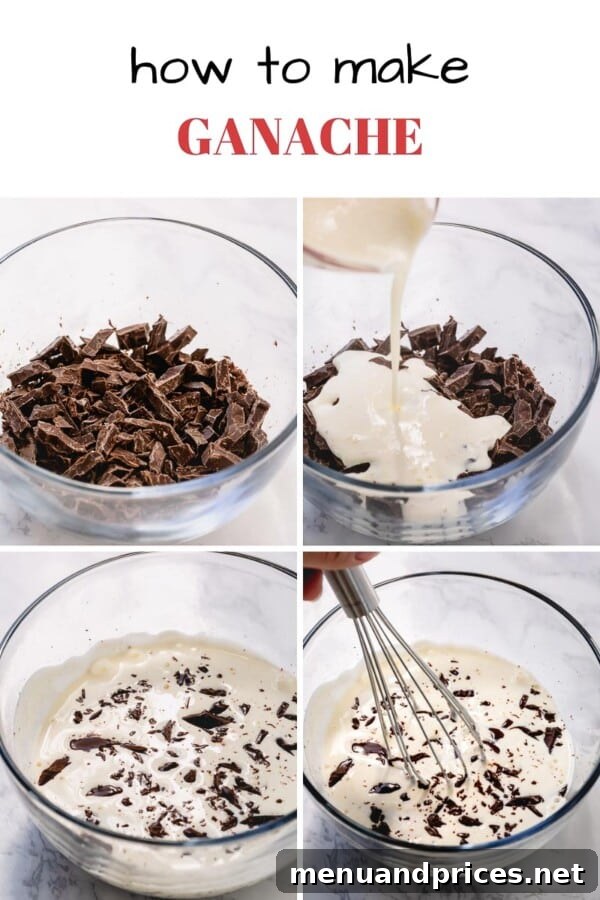
- Prepare Your Chocolate: Begin by taking your chosen high-quality chocolate and chopping it finely into small, uniform pieces using a sharp knife. The key here is consistency in size; smaller, evenly chopped pieces will melt more quickly and uniformly, which is crucial for achieving a perfectly smooth ganache. Place all the chopped chocolate into a clean, dry, heat-proof bowl.
- Heat the Heavy Cream: Gently heat your heavy cream until it is very hot but crucially, not boiling. You can accomplish this quickly and efficiently in a microwave by heating it for 1-2 minutes, stirring halfway through, until it’s steamy. Alternatively, if preparing a larger batch or simply preferring the stovetop, heat the cream over medium heat in a saucepan. Watch it carefully and remove it from the heat just as small bubbles begin to form around the edges of the pan, well before it reaches a vigorous boil. The objective is to get the cream hot enough to melt the chocolate effectively without scorching the cream or introducing too much aggressive heat.
- Combine and Steep for Melting: If desired, add a tiny pinch of coarse kosher salt to your chopped chocolate; this often enhances the depth of the chocolate flavor. Immediately and carefully pour the hot cream directly over the chopped chocolate in the bowl. This is a critical moment: resist the urge to stir! Allow the mixture to sit undisturbed for a good 2-3 minutes. This essential steeping time allows the intense residual heat from the cream to thoroughly warm and begin melting the chocolate from the bottom up, softening it significantly before you introduce any agitation. Patience during this step ensures the chocolate melts evenly and smoothly, making your subsequent whisking much easier.
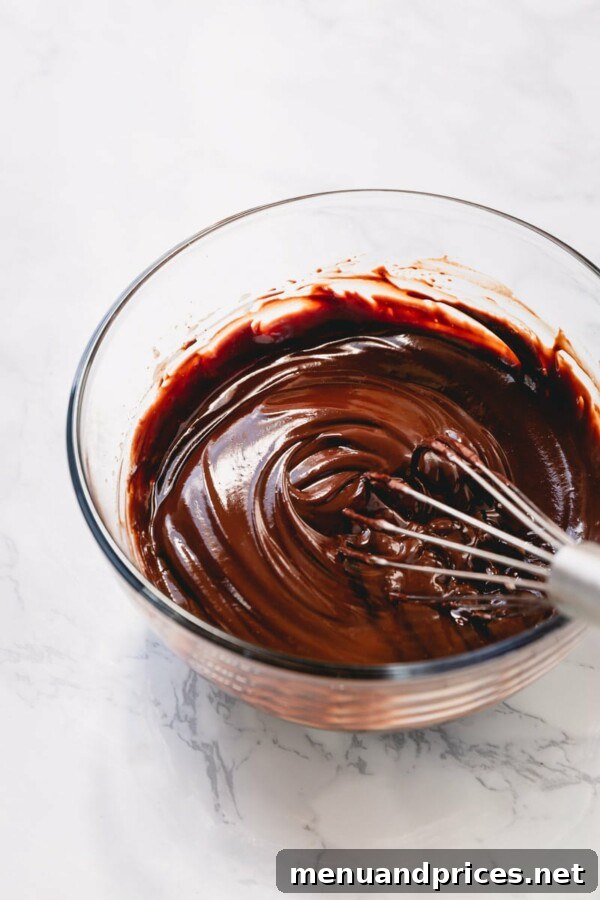
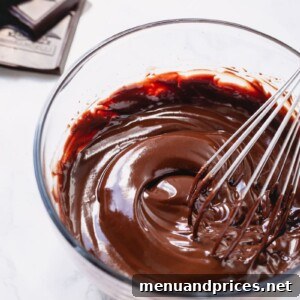
- Emulsify Gently: After the steeping period, it’s time to bring your ganache together. Begin whisking the mixture very gently, starting from the very center of the bowl. Continue stirring in a slow, consistent, and one-directional circular motion. As you gradually expand your whisking pattern to incorporate more of the cream and melted chocolate, you’ll observe a remarkable transformation. The mixture will transition from what might appear to be a separated, oily, or slightly chunky consistency to a beautifully cohesive, glossy, and perfectly emulsified ganache. Keep whisking gently until the ganache is utterly smooth, lustrous, and free of any visible chocolate pieces. This emulsification process typically takes about 2 minutes.
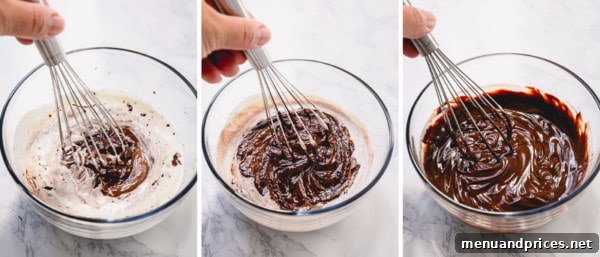
As you meticulously stir the chocolate and cream, the mixture will naturally progress through several distinct stages. Initially, it might look rather unappetizing—perhaps grainy, streaky, or even slightly oily and separated. This “questionable” appearance is a completely normal and expected part of the emulsification process, a momentary phase before the fats and liquids fully integrate. At this point, it’s common for even experienced bakers to wonder if they’ve made a mistake or somehow ruined their ganache.
But rest assured, there’s no need to worry! The key is to remain patient and simply continue stirring gently and consistently. With steady, continuous whisking, all the components will eventually come together harmoniously. The ganache will transform, becoming wonderfully homogeneous, perfectly glossy, and flawlessly smooth. Trust in the process, and you will be rewarded with a spectacular result.
If, after meticulously whisking, your ganache appears mostly smooth but you still detect a few stubborn solid pieces of chocolate (this is particularly common when using chocolate chips due to their stabilizing agents), it indicates that those bits haven’t fully melted. To remedy this, you’ll need to apply a little more gentle, controlled heat. Here are two highly effective methods to achieve that perfectly smooth consistency:
- Microwave Method (Gentle Heat): Place the bowl containing your ganache into the microwave. Heat it in very short increments, typically 15-30 seconds at 50% power. After each interval, remove the bowl and stir the ganache thoroughly. Repeat this process until all the chocolate has completely melted and the mixture is silky smooth. Using low power and short bursts is crucial to prevent overheating, which can cause the ganache to separate or scorch.
- Double Boiler Method (Indirect Heat): Alternatively, you can place the bowl of ganache over a saucepan containing about an inch or two of simmering water (ensure the bottom of the ganache bowl does not touch the water itself). The indirect heat from the steam will gently warm the ganache. Stir continuously until any remaining solid chocolate pieces have fully dissolved and the mixture is beautifully smooth and fluid. This method offers excellent control and minimizes the risk of overheating.
Ganache Troubleshooting: Common Issues and Expert Solutions
Even seasoned bakers can occasionally encounter challenges when making ganache. Understanding the most common problems and, more importantly, how to effectively fix them, is an invaluable skill. This knowledge will not only empower you to rescue a seemingly failed batch but also help you prevent similar issues in the future. Here are the most frequent troubleshooting scenarios:
Why Has My Ganache Separated, Appearing Oily or Grainy?
A separated ganache, which often presents as an oily, greasy, or gritty mixture, signifies that the delicate emulsion between the chocolate and cream has broken. This undesirable outcome typically occurs due to one or more of the following reasons:
- Extreme Temperatures: The chocolate and cream mixture was either too cold when whisked (preventing proper integration) or, more commonly, too hot when combined or during the whisking process. Excessive heat can cause the cocoa butter to separate from the other solids, leading to an oily appearance.
- Incorrect Fat-to-Liquid Ratio: An imbalanced ratio, particularly having too much fat relative to the liquid (for example, using a very high cocoa butter chocolate with an already rich cream), can destabilize the emulsion and cause it to split.
- Over-Whisking: While whisking is essential, overly vigorous or prolonged agitation can sometimes introduce too much air or over-agitate the fat particles, inadvertently leading to separation.
- To Fix It: The most reliable way to rescue a separated ganache is to slowly incorporate a small amount of warm liquid. Begin by adding just 1 tablespoon of warm (not hot!) milk, cream, or even water to the separated ganache. Whisk gently but continuously from the center outwards. Add one tablespoon at a time, whisking thoroughly after each addition, until the ganache magically comes back together into a smooth, cohesive, and perfectly emulsified mixture. Another highly effective method is to use an immersion blender; a few short pulses can often quickly re-emulsify the ganache beautifully.
Why Did My Chocolate Seize, Becoming a Thick Paste?
Chocolate seizing is a common and frustrating baking mishap where beautifully melted chocolate suddenly transforms into a stiff, gritty, and unworkable paste. This almost instantaneous reaction is caused by one critical factor: contact with even a minuscule amount of water or moisture. Here’s a deeper look into why it happens and, more importantly, how to prevent it:
- Inadvertent Water Contact: If your melted chocolate has turned gritty and clumpy, it has seized. This invariably happens if any form of water – whether it’s a stray drop, condensation from steam, or even residual moisture from a not-quite-dry bowl or utensil – comes into contact with the melted chocolate. Water causes the sugar crystals in the chocolate to clump together, leading to the seized texture.
- Prevention is Absolutely Key: The best approach to dealing with seized chocolate is to prevent it from happening in the first place. Always ensure that all your equipment – including bowls, spatulas, whisks, and even your hands – are completely dry when working with chocolate. If using a double boiler method, make certain that the water in the saucepan is simmering gently (not at a rolling boil that produces excessive steam), and that the bottom of your ganache bowl sits well above the waterline, preventing any steam from entering the chocolate mixture. Dryness is your best friend when melting chocolate.
The Many Forms of 1:1 Chocolate Ganache: Consistencies for Every Application
One of the most remarkable qualities of a perfectly balanced 1:1 ratio chocolate ganache is its incredible adaptability. Its texture transforms dramatically as it cools and solidifies, offering a spectrum of consistencies suitable for a myriad of culinary applications. Understanding these different stages empowers you to utilize your ganache precisely as needed:
- Runny (Warm): Immediately after preparation, while still warm from the hot cream, ganache is wonderfully fluid, glossy, and highly pourable. This stage is ideal for indulgent applications like a luxurious chocolate fondue, perfect for dipping fresh fruits, crunchy cookies, or fluffy marshmallows. It also makes an excellent thin glaze for pastries or cakes where you want a delicate, almost absorbed layer of chocolate flavor.
- Pourable (Slightly Cooled): After resting for approximately 10-20 minutes at room temperature, the ganache will have thickened slightly but will still retain its beautiful pourable quality. This is the optimal consistency for elegantly pouring over creamy cheesecakes, achieving those perfect, controlled drips down the sides of a tiered cake, or creating a smooth, even coating on sheet cakes and loaf cakes. Its increased viscosity allows for better coverage and a more refined, deliberate finish.
- Firm (Cooled/Chilled): Once completely cooled to room temperature (which can take several hours) or expedited with a stint in the refrigerator (about 30-60 minutes), a 1:1 ganache will firm up significantly. At this stage, it becomes thick enough to hold its shape beautifully, making it ideal for robust fillings in tarts, pies, or delicate macaron shells. It can also be spread as a rich, dense, and fudge-like frosting, offering a substantial chocolate experience.
- Whipped (Aerated): For a completely different and delightful texture, take a firm, thoroughly cooled ganache and whip it vigorously with an electric mixer fitted with a whisk attachment. Continue mixing until it becomes noticeably lighter in color, significantly increased in volume, and achieves a light, fluffy, and airy consistency. This transforms it into a melt-in-your-mouth chocolate frosting, perfect for piping elegant swirls onto cupcakes, filling delicate pastries, or creating a cloud-like, less intensely rich topping for various desserts. Whipped ganache offers a beautiful contrast in texture and flavor.
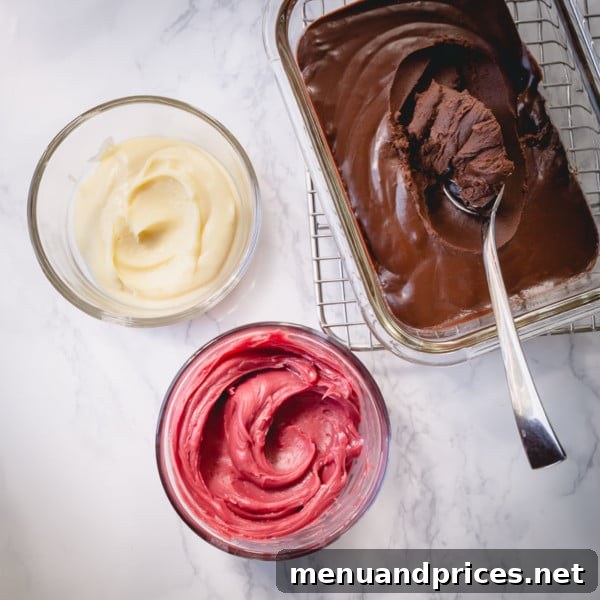
Unleash Your Creativity: Endless Applications for Chocolate Ganache
Once you’ve mastered the art of creating perfectly smooth and luscious chocolate ganache, a whole new world of decadent baking and dessert possibilities opens up before you. This incredibly versatile pastry element is far more than just a topping; it’s a foundational component that can dramatically elevate almost any sweet creation:
- Elegant Cake Decoration: Create stunning, professional-looking tiered cakes with a perfect, controlled chocolate drip. The slightly cooled, pourable consistency of a 1:1 ganache ensures beautiful cascading effects down the sides.
- Glossy Éclair Glaze: Drench freshly baked éclairs with a warm, thin ganache (a 1:2 ratio works wonderfully) for that signature shimmering finish and an irresistible layer of rich chocolate flavor that perfectly complements the pastry cream filling.
- Flawless Macaron Filling: A cooled, firm ganache (1:1 or slightly thicker) makes an exquisite and stable filling for delicate French macarons, providing a luxurious, rich contrast to their crisp, airy shells.
- Whipped Cupcake Frosting: Transform your cooled 1:1 ganache into a light, airy, and incredibly flavorful whipped frosting. This is ideal for piping generous, elegant swirls onto your favorite cupcakes, offering a less dense but equally satisfying chocolate experience.
- Irresistibly Decadent Truffles: Utilize a thicker 2:1 ratio ganache as the rich, fudge-like core for homemade chocolate truffles. Roll them in cocoa powder, chopped nuts, coconut flakes, or sprinkles for a personalized and impressive confection.
- Luxurious Fondue Experience: Keep a 1:2 ratio ganache warm in a fondue pot and serve it as an exquisite chocolate fondue. It’s perfect for a fun and interactive dessert, accompanied by a lavish platter of fresh fruits, pretzels, marshmallows, and bite-sized brownies.
- Rich Cheesecake Topping: Generously smother a creamy chocolate cheesecake, or even a classic New York-style cheesecake, with a smooth, slightly warm ganache for an added layer of richness, a beautiful sheen, and an undeniably indulgent presentation.
- Pastry and Tart Fillings: Use firm ganache as a robust, stable, and deeply flavored filling for chocolate tarts, savory-sweet pies, or as an indulgent, structured layer in multi-layered pastries and entremets.
With ganache in your baking repertoire, the creative possibilities are truly boundless. Let your imagination be your guide as you explore the many delicious ways to incorporate this essential element!
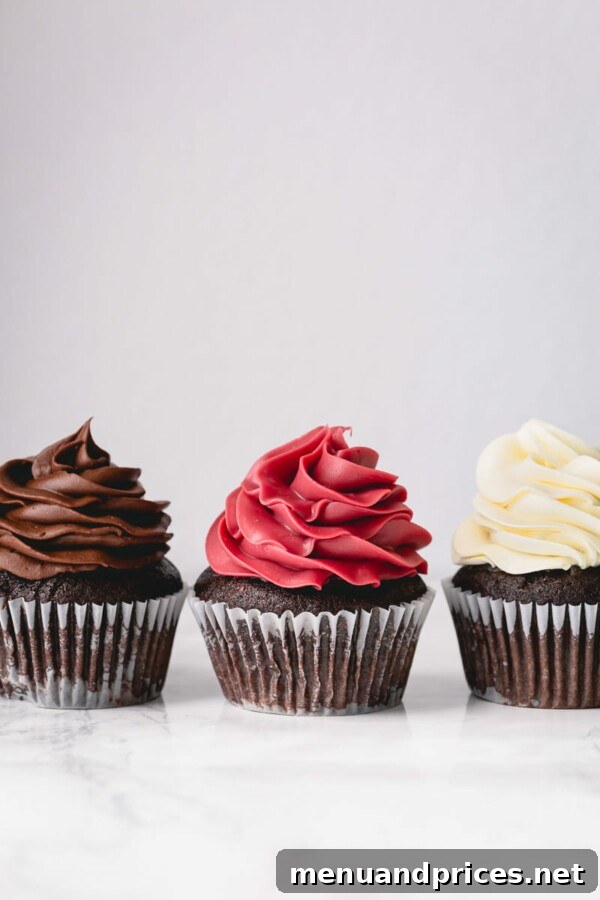
Exciting Ganache Variations to Explore and Customize
While the classic chocolate ganache is undeniably magnificent, there’s a world of innovative flavor and texture variations waiting to be discovered. These simple modifications can add an exciting and unique twist to your desserts, allowing you to perfectly tailor your ganache to any occasion or palate:
- White Chocolate Ganache: A delightful and creamy alternative, white chocolate ganache offers a sweeter, milder flavor profile. Remember, due to white chocolate’s unique composition (high cocoa butter, no cocoa solids), you’ll need to adjust the cream-to-chocolate ratio, typically using slightly less cream than for dark chocolate, to ensure it sets properly.
- Fruit-Flavored Ganache: Infuse your ganache with vibrant, natural fruit flavors. You can achieve this in a few ways: use high-quality fruit-flavored chocolate (like the Valrhona Raspberry Inspiration wafers mentioned earlier), or blend a small amount of strained fresh fruit puree (such as raspberry, passion fruit, or mango) into a cooled, basic ganache. Add purees gradually, as the added liquid can slightly alter the consistency.
- Dairy-Free Ganache: For those following a dairy-free diet, a luxurious ganache is still entirely achievable. Substitute heavy cream with full-fat canned coconut milk. For the best, richest results, use only the thick, creamy portion from the top of an unshaken can of full-fat coconut milk, as this closely mimics the richness and consistency of dairy cream.
- Herb and Spice-Infused Ganache: Elevate your ganache with sophisticated and aromatic herbal or spicy notes. Gently steep fresh herbs like mint, rosemary, or lavender, or whole spices such as cardamom pods, star anise, or cinnamon sticks, directly in the heavy cream while it heats. Strain the cream thoroughly before pouring it over the chocolate to remove all solids, leaving behind a beautifully fragrant and nuanced infusion.
- Liquor-Enhanced Ganache: A judicious splash of your favorite liqueur or spirit can add a wonderful depth, complexity, and adult sophistication to a basic ganache. Consider stirring in a tablespoon or two of rum, Kahlúa, Grand Marnier, orange liqueur, or bourbon to the warm ganache for an exquisite flavor boost.
- Espresso Powder for Deep Flavor: For an incredibly rich and intensely chocolatey flavor (without necessarily making it taste like coffee), stir in a teaspoon or two of instant espresso powder or very finely ground coffee to your warm ganache. This addition acts as a flavor enhancer, deepening and highlighting the natural chocolate notes.
- Nut Butter Swirl Ganache: For a unique and indulgent twist, once your ganache is smooth, gently swirl in a tablespoon or two of creamy, high-quality peanut butter, almond butter, or hazelnut spread. This creates a nutty, creamy variation that’s perfect for fillings or spreads.
How to Make Perfect Chocolate Ganache
Shinee Davaakhuu
Learn how to make a perfectly smooth, versatile chocolate ganache. Master this foundational pastry element to elevate your baking and create truly professional-quality desserts for any occasion.
5
5
12 servings
Comment
Print Recipe
Ingredients
- 1 cup (240 ml) heavy whipping cream
- 8 oz (240 g) semi-sweet chocolate Note 1
- 1/4 teaspoon coarse kosher salt
- 1 tablespoon unsalted butter softened, optional, Note 2
Instructions
-
Roughly chop your chosen high-quality chocolate with a sharp knife into small, uniform chunks and place them in a large, clean, heat-proof bowl.
-
Heat the heavy whipping cream in a microwave for 1-2 minutes, or until it is very hot and steamy but not boiling. (Alternatively, heat the cream on the stovetop over medium heat until small bubbles just begin to form around the edges of the pan.)
-
Add the optional coarse kosher salt to the chopped chocolate, then immediately pour the hot cream directly over the chocolate. Let it sit undisturbed for 2-3 minutes to allow the heat to melt the chocolate.
-
Gently whisk the mixture, starting from the center of the bowl and slowly expanding outwards, stirring in one consistent direction. Continue whisking for about 2 minutes until the ganache is glossy, completely smooth, and fully emulsified. (NOTE: The mixture might initially appear separated or grainy. This is a normal stage; continue whisking gently until it comes together beautifully.)
-
TIP: If any solid chocolate pieces remain (especially if using chocolate chips), gently heat the ganache. You can either: 1. Microwave it in 15-30 second increments at 50% power, stirring thoroughly after each interval, until smooth. 2. Or place the bowl over a double boiler, stirring gently until all chocolate is melted.
-
To add extra shine and a touch of richness, you may stir in the softened unsalted butter until it is fully incorporated into the ganache.
-
When warm, the ganache is runny, ideal for glazing or drizzling. As it cools, it will thicken significantly. For a firm, frosting-like texture, allow it to cool completely at room temperature or chill briefly in the fridge. To make it runny again, gently reheat it in a microwave in 15-second increments at 50% power.
⭐️ Did you make this recipe?
Please leave a review and let us know how you liked it!
Tips & Notes
Yields: This recipe typically yields approximately 1.5 cups of ganache, which is enough to generously frost about 12 standard cupcakes or to smoothly cover one 9-inch round cake.
Storing Tips:
- Refrigeration: Store any leftover ganache in an airtight container in the refrigerator for up to 5 days. Before using again, allow it to come to room temperature or gently reheat it in the microwave or over a double boiler to achieve your desired consistency.
- Freezing: For longer storage, ganache can be frozen in an airtight container for up to 1 month. To use, thaw it overnight in the refrigerator, then gently reheat and whisk until smooth.
Note 1 (Chocolate Quality): The quality of your chocolate significantly impacts the final taste and texture of your ganache. My top recommendations are Ghirardelli semi-sweet or bittersweet chocolate bars for their consistent performance and rich flavor. While chocolate chips can be used, be aware that they contain stabilizers (designed to hold their shape during baking) which can make them harder to melt smoothly. This may necessitate extra gentle heating and whisking as described in the instructions. For white chocolate ganache, remember that specific ratios and techniques will differ, so it’s best to consult a dedicated recipe.
Note 2 (Butter for Shine and Softness): The optional addition of 1 tablespoon of softened unsalted butter at the end serves two purposes: it imparts a beautiful, professional-looking sheen to your finished ganache, and it also makes the ganache ultra-soft and smooth. This extra softness is particularly desirable when the ganache is intended for use as a frosting or a pliable filling.
Nutrition Information (per serving, estimated)
Did you make this?
Leave a rating and your feedback. Thank you!