
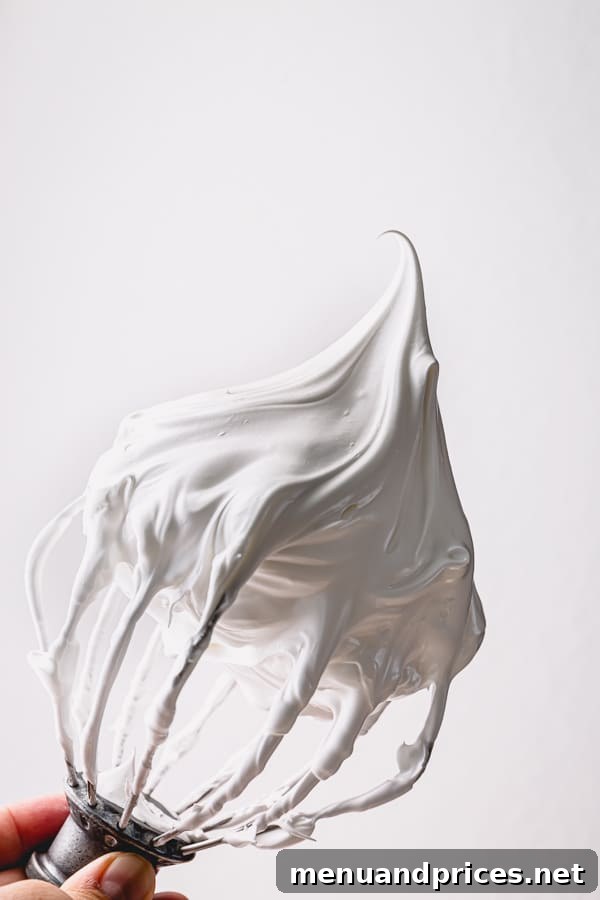
Welcome to the ultimate guide to mastering meringue! Whether you’re a seasoned baker or just starting your culinary journey, understanding the nuances of meringue can elevate your desserts from good to extraordinary. Meringue is a versatile and elegant base for countless sweet treats, known for its light, airy texture and delicate sweetness. Achieving a stable, shiny, and perfectly whipped meringue, especially the French variety, requires a blend of science, technique, and a few insider tips. This comprehensive post will demystify the process, ensuring your meringue creations are consistently successful.
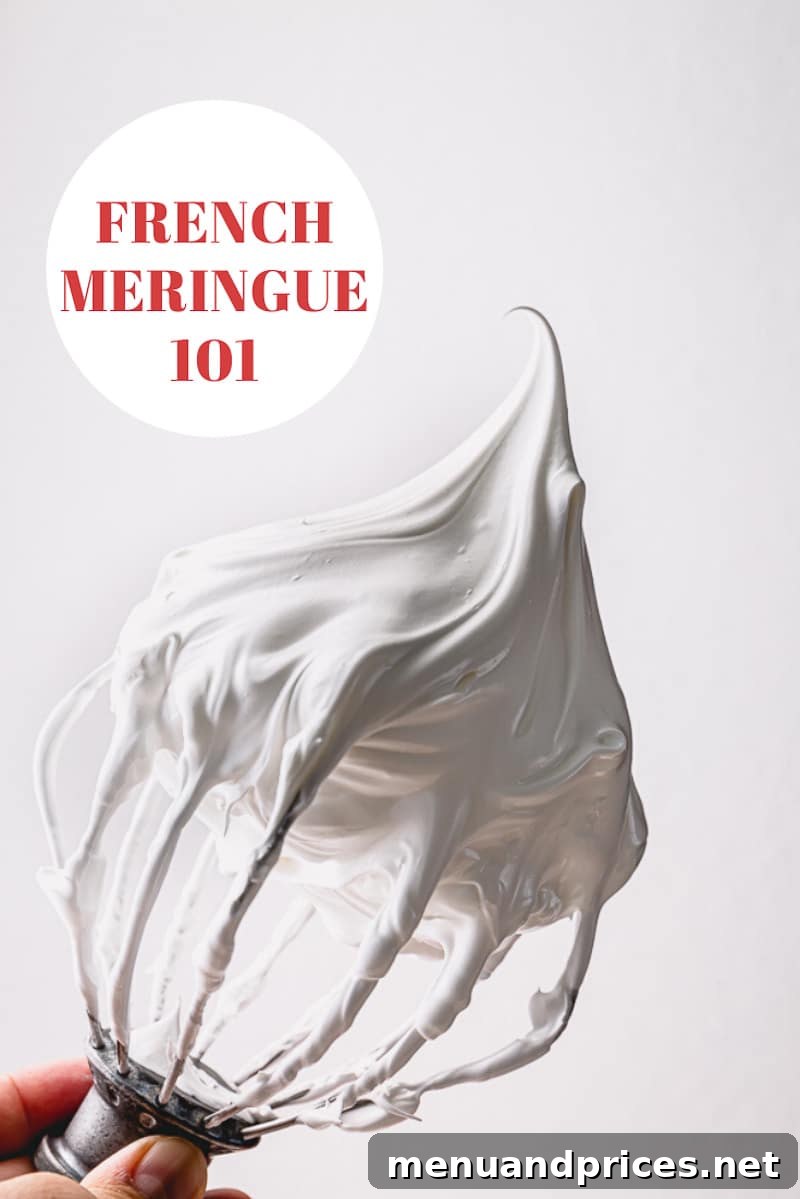
My passion for meringue-based desserts runs deep! From the crisp exterior and marshmallow-soft interior of a classic pavlova cake to the cloud-like texture of an angel food cake, the delicate crunch of meringue cookies, the tangy sweetness of a lemon meringue pie, the melt-in-your-mouth goodness of divinity, and of course, the ever-popular macarons – these treats are simply irresistible. Each one, a testament to the magic of whipped egg whites and sugar. To truly master these desserts, it’s essential to understand the foundation: a perfectly made meringue.
Over the years, through countless experiments and baking sessions, I’ve gathered invaluable tips and tricks for creating the most stable French meringue. Today, I’m thrilled to share all that knowledge with you, so you can achieve meringue perfection in your own kitchen.
In this ultimate guide, we’ll cover:
- What is Meringue? Unveiling the fascinating science behind its creation.
- Exploring the 3 primary types of meringue and their unique characteristics.
- Understanding the 4 crucial stages of meringue, with clear visual cues.
- A detailed recipe for crafting a stable French meringue.
- Plus, 6 essential tips for achieving the most robust and reliable French meringue every time.
For those who prefer a visual learning experience, you can also watch this helpful video:
WHAT IS MERINGUE? THE SCIENCE OF WHIPPED EGG WHITES
At its core, meringue is a delicate foam made by whipping egg whites, typically stabilized with sugar and an acidic agent. But there’s a captivating scientific process at play that dictates its structure and stability. Understanding this “why” behind the strict rules of meringue making is key to consistent success.
Egg whites are primarily composed of 90% water and 10% protein. These proteins are long, intricate chains of amino acids. Some amino acids possess a “water-loving” (hydrophilic) nature, while others are “water-fearing” (hydrophobic). When we begin whisking egg whites, we vigorously incorporate air bubbles into this water-protein mixture. This mechanical action causes the proteins to denature – essentially unraveling from their tightly coiled natural state.
As the proteins unfold, two critical events occur:
- The water-fearing amino acids, now exposed, instinctively move away from the water in the egg white and migrate towards the newly introduced air bubbles. They prefer to interact with air.
- As these hydrophobic amino acids coat the air bubbles, the water-loving amino acids are left to interact with each other and the surrounding water. They begin to link together, forming a robust, interconnected network that effectively traps and holds the air bubbles in place, creating the characteristic foamy structure of meringue.
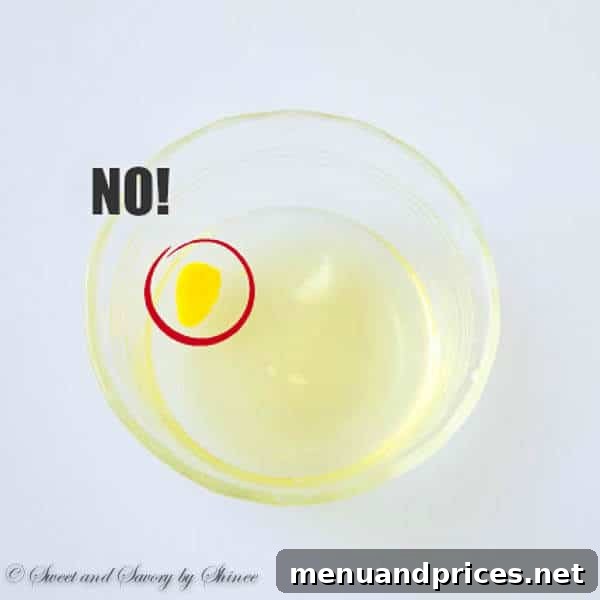
The Critical Absence of Fat: Why Even a Tiny Drop Matters
Fat is the arch-nemesis of a good meringue. It critically interferes with the delicate process of foam formation. Here’s why: Fat molecules are also attracted to air bubbles. When present, they compete with the egg proteins for space around the air bubbles. Instead of forming a protective, stable network like proteins do, fat molecules disrupt the protein structure and actually cause the air bubbles to collapse, preventing the formation of a stable foam. Egg yolks are rich in fat, which is precisely why it is paramount to be incredibly careful not to let even the smallest speck of yolk contaminate your egg whites!
RULE #1 for Meringue Success: Keep Everything Pristine. Always ensure your mixing bowls and whisks are impeccably clean and completely grease-free. Opt for stainless steel or glass bowls, as plastic bowls can sometimes retain traces of grease. Be meticulously careful when separating eggs; even the tiniest drop of egg yolk can compromise your meringue.
TIP 1: Separate Eggs When Cold for Ease. It’s significantly easier to separate egg whites from yolks when the eggs are cold, straight from the refrigerator. Cold yolks are firmer and less likely to break, making separation cleaner and reducing the risk of contamination.
TIP 2: Whip Egg Whites at Room Temperature for Volume. While cold eggs are best for separating, room temperature egg whites whip up with greater volume and more quickly. After separating your eggs, allow the whites to sit on the counter for about 20-30 minutes to come to room temperature before whipping. This allows the proteins to relax, making them easier to denature and incorporate air.
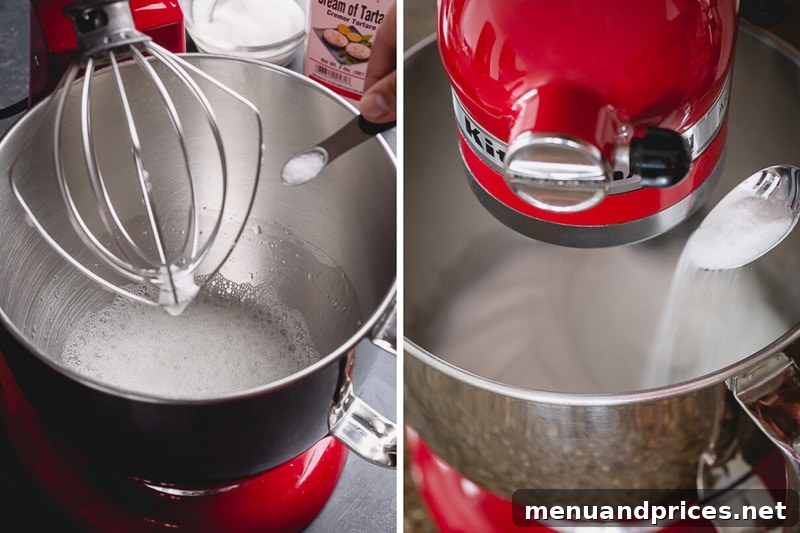
Once whipped, these protein-wrapped bubbles (our nascent egg white foam) are inherently fragile and will quickly break down if not further stabilized. This is where the crucial roles of sugar and acid come into play, transforming a fleeting foam into a robust and enduring meringue.
The Power Duo: Meringue Stabilizers
To ensure your meringue holds its structure beautifully, we rely on two primary stabilizers:
- Acid: Typically in the form of cream of tartar, lemon juice, or white vinegar.
- Sugar: Granulated sugar is most common, with finer grains preferred.
The Role of Acid in Meringue Stabilization
Adding an acidic ingredient, like cream of tartar, is a subtle but powerful step. While it might seem counterintuitive, acid actually slows down the initial foam formation process slightly. More importantly, it prevents the egg white proteins from linking together too tightly or too quickly. This results in a more flexible, elastic, and ultimately stronger network around the air bubbles. This enhanced stability makes the meringue less prone to weeping and collapse, especially important for delicate preparations.
The Multifaceted Role of Sugar in Meringue
Sugar plays several vital roles in meringue:
- Slows Protein Denaturation: Similar to acid, sugar gently slows the unfolding of proteins, delaying foam formation. This controlled process prevents over-beating, which can lead to a grainy, unstable meringue.
- Forms a Syrupy Coating: As sugar dissolves, it creates a thick, syrupy film around each air bubble. This sugary coating significantly strengthens the foam, providing a protective barrier that prevents the bubbles from popping. This contributes to a glossy, resilient meringue.
- Adds Volume and Shine: Sugar helps to create a larger volume of foam and gives the meringue its characteristic glossy, marshmallow-like sheen.
- Improves Texture: Beyond stability, sugar contributes to the desired texture of meringue-based desserts, from crisp cookies to chewy pavlovas.
How Much Sugar is Ideal for Meringue?
The precise amount of sugar used in meringue is often dictated by the specific recipe and the intended final product. However, it’s fascinating to note that each egg white can remarkably hold up to 50 grams (approximately ¼ cup) of sugar!
PRO TIP: The Higher the Sugar-to-Egg White Ratio, the Stronger the Meringue. This is a crucial principle, especially for French meringue. A higher sugar content creates a more robust and stable meringue, less susceptible to humidity and collapse. Furthermore, a higher sugar ratio makes it considerably harder to over-beat the meringue, offering a greater margin for error.
Conversely, be cautious with meringue recipes that call for a low sugar proportion relative to the egg whites. These meringues are far more delicate and can be easily over-whipped, leading to a “broken” meringue—a grainy, separated, and unusable liquid mess. Precision is key in low-sugar meringues.
THE 3 FUNDAMENTAL TYPES OF MERINGUE
Now that we’ve delved into the scientific underpinnings of meringue, let’s explore the three distinct methods of preparation, each yielding a unique texture and stability profile, suitable for different applications.
- Swiss Meringue: This method involves gently heating egg whites and sugar together over a double boiler (bain-marie) while whisking, until the sugar fully dissolves and the mixture reaches approximately 160°F (71°C). The warmed mixture is then removed from the heat and whipped until cool, glossy, and very stiff. The heat partially cooks the egg whites, making Swiss meringue more stable and less prone to weeping than French meringue, and also safe to eat raw. It’s famously used for creating incredibly smooth and stable Swiss meringue buttercream, as well as light frostings and baked meringue shells.
- Italian Meringue: Considered the most stable of the three, Italian meringue is made by carefully pouring a hot sugar syrup (heated to around 240-248°F or 115-120°C, soft-ball stage) into whipping egg whites in a slow, steady stream. The hot syrup not only cooks the egg whites, ensuring food safety, but also creates an incredibly stable and glossy foam. This method results in a dense, marshmallow-like meringue that is exceptionally strong, making it ideal for robust applications like pipeable decorations, fillings, light mousses, and especially stable toppings for pies (like lemon meringue pie) that resist weeping and hold their shape beautifully.
- French Meringue: This is arguably the simplest and most common method. French meringue is created by gradually adding granulated sugar to egg whites as they are whipped. The sugar is slowly incorporated once the egg whites have reached a foamy stage. While French meringue is generally the least stable of the three methods, it’s prized for its crisp texture when baked and its lighter, airier consistency. It’s my go-to choice for delicate creations like macaron shells, delicate meringue cookies, pavlovas, and angel food cake, where its lightness is a distinct advantage.
THE 4 ESSENTIAL STAGES OF MERINGUE: VISUAL CUES
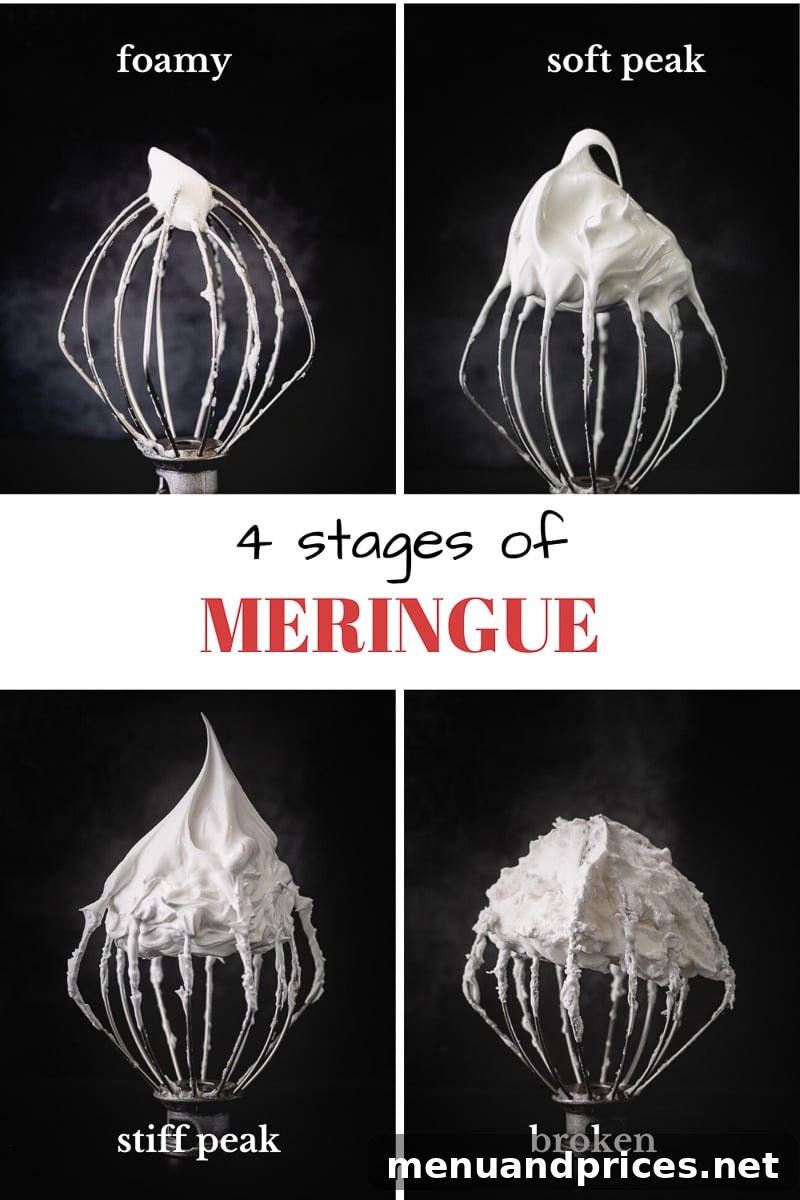
Different dessert recipes require specific meringue consistencies, often referred to as “stages.” There are four generally recognized stages of meringue, though the fourth is one we hope to avoid!
1. Foamy Meringue: This is the very first stage, reached after just a couple of minutes of beating the egg whites. The whites will appear light, translucent, and covered in large, loose bubbles, resembling dish soap foam. At this point, the proteins have just begun to unravel and trap air. This is the perfect moment to start slowly adding your sugar and any acidic stabilizers like cream of tartar.
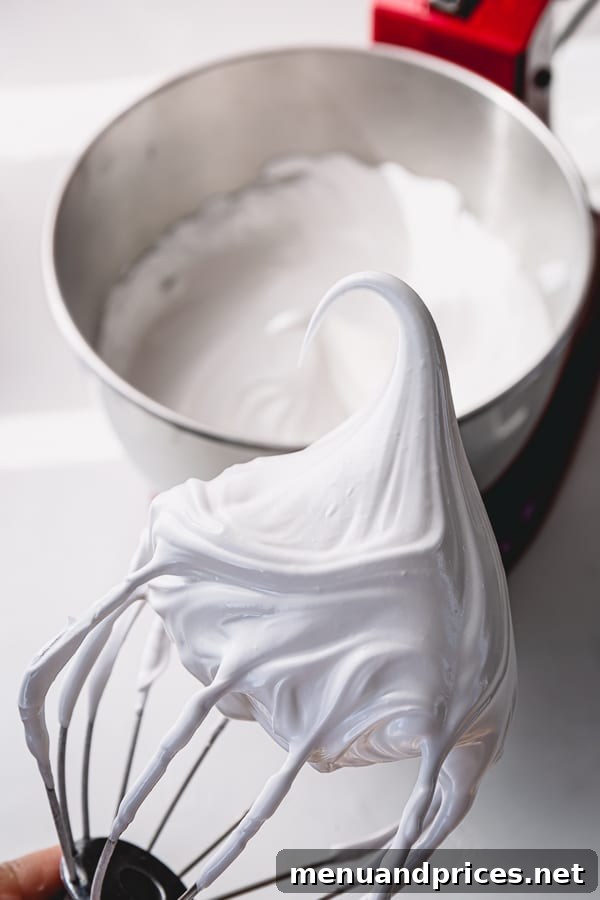
2. Soft Peak Meringue: As you continue to beat the egg whites and gradually incorporate the sugar, the meringue will transform. It becomes opaque, pure white, glossy, and significantly thicker. When you lift the whisk, the meringue will form a peak that gracefully curls over, resembling a soft serve ice cream cone. The tip won’t hold its shape rigidly. In my stand mixer on speed 4, this stage typically takes about 5 minutes to achieve. Soft peak meringue is often used for light and airy preparations such as Pavlova, angel food cake, and certain meringue pie toppings where a delicate, flowing texture is desired.
3. Stiff Peak Meringue: If you continue beating the meringue beyond the soft-peak stage, it will become even denser, thicker, and exceptionally shiny. When you lift the whisk, the meringue will form a sharp, distinct peak that stands upright without curling. The mixture will be very firm; if you gently tilt or even invert the bowl, the meringue should not budge. Reaching stiff peaks in my stand mixer on speed 4 usually takes 10-12 minutes. Stiff-peak meringue is essential for structurally sound desserts like crisp meringue cookies, stable macaron shells, and airy soufflé cheesecakes, where maximum stability and volume are paramount.
4. Broken Meringue (Over-whipped): This is the undesirable stage. If you whip the egg whites for too long, especially if your sugar-to-egg white ratio is low, the proteins can become over-coagulated and the structure collapses. A broken meringue will appear grainy, dull, lumpy, and separated, often with a watery liquid pooling at the bottom of the bowl. Unfortunately, once a meringue reaches this stage, it’s very difficult to fully recover, as the structural integrity is compromised.
Can a Broken Meringue Be Saved?
If your meringue is only *slightly* over-beaten and just starting to look a little grainy, there’s a slim chance you can salvage it. Try gently folding in a small amount (about a tablespoon) of fresh, unbeaten egg white. This can sometimes help reincorporate the separated proteins and bring back a bit of elasticity, but it’s not a guaranteed fix. The best approach is prevention: keep a close eye on your meringue as it whips and stop as soon as it reaches the desired stage.
So, to sum up the journey to meringue mastery…
6 ESSENTIAL TIPS FOR THE MOST STABLE FRENCH MERINGUE
Achieving a consistently stable and beautiful French meringue is entirely within reach with these crucial guidelines:
- Absolute Cleanliness is Non-Negotiable: This cannot be stressed enough. Every piece of equipment that will come into contact with your egg whites – the mixing bowl, whisk attachment, and even your hands – must be scrupulously clean and completely free of any grease or fat. Fat is the enemy of meringue, preventing the proteins from forming a stable foam. This includes ensuring no egg yolk contaminates the whites during separation. Even the tiniest speck of yolk is enough to ruin your meringue, so be exceedingly cautious. Use stainless steel or glass bowls, as plastic can sometimes harbor residual grease.
- Room Temperature Egg Whites for Optimal Volume: While cold eggs are easier to separate (as mentioned in Tip 1), egg whites whip up with significantly more volume and stability when they are at room temperature. The proteins in warmer egg whites are more relaxed and elastic, allowing them to denature and incorporate air more efficiently. After separating, let your egg whites sit out on the counter for 20-30 minutes before whipping.
- Whip on a Low to Medium-Low, Steady Speed: It’s tempting to blast your mixer on high speed to achieve volume quickly, but resist this urge! Whipping egg whites too fast introduces air too rapidly, creating large, unstable bubbles that are prone to collapsing. Instead, beat the meringue on a consistent low to medium-low speed (I typically use speed 2 or 4 on my KitchenAid mixer). This allows for the formation of smaller, more uniform air bubbles and a stronger, more resilient protein network, resulting in a much more stable meringue. Patience is a virtue here!
- Add Sugar Gradually and Allow Full Dissolution: This is a critical step. Once your egg whites reach the foamy stage, begin adding the sugar very slowly, one tablespoon at a time, while the mixer is still running. It’s essential to allow each addition of sugar to fully dissolve into the egg whites before adding the next increment. If you dump too much sugar in at once, it can deflate the air bubbles you’ve painstakingly created, compromising the meringue’s structure. Furthermore, undissolved sugar granules can lead to a gritty texture and cause your meringue to “weep” (leach liquid) later on. To test for dissolution, rub a tiny bit of meringue between your fingers – it should feel smooth, without any noticeable sugar crystals. As an added bonus, this slow sugar addition also helps prevent over-whipping!
- Opt for Fine Granulated Sugar (Caster Sugar/Baker’s Sugar): The type of sugar you use can make a difference. Super fine granulated sugar, often sold as caster sugar or baker’s sugar, has smaller crystals that dissolve much more quickly and uniformly into the egg whites compared to regular granulated sugar. This faster dissolution further reduces the risk of grainy meringue and weeping, contributing to a smoother, glossier, and more stable final product.
- Prepare Meringue Immediately Before Use: Meringue is a delicate creation and is best used as soon as it reaches its desired consistency. Its stability begins to degrade over time, especially if left exposed to air and humidity. The delicate foam structure will slowly break down, causing the meringue to lose volume and become watery. To ensure the freshest, most stable results for your recipe, time your meringue preparation to coincide with when you’re ready to incorporate it into your dessert.
How to Make French Meringue
Pin Recipe
Comment
Print Recipe
Ingredients
- 2 egg whites (65-70 g) at room temperature
- ¼ teaspoon cream of tartar (optional, but recommended for stability)
- ¼ teaspoon coarse kosher salt
- 1/3 cup + 2 tablespoons (75 g) fine granulated sugar (caster sugar)
Instructions
- In a perfectly clean mixing bowl fitted with a whisk attachment, begin beating the room temperature egg whites on medium-low speed until they become foamy. (For a KitchenAid stand mixer, speeds 2 to 4 are ideal).
- Once the egg whites are foamy and lightly bubbly, add the cream of tartar (if using) and salt. Continue to whisk on the same speed.
- Very slowly, begin to add the fine granulated sugar, one tablespoon at a time, allowing the mixer to run continuously. Ensure each addition of sugar is fully dissolved before adding the next. This creates a stable, glossy meringue.
- Continue beating the egg whites on the same medium-low speed until your desired meringue stage is achieved. This typically takes about 5 minutes for soft peaks and 10-12 minutes for stiff peaks.
- For Meringue Cookies: If you are making meringue cookies, refer to my specific recipes like Meringue Cookies recipe, Mummy Meringue Cookies, or Meringue Ghosts for detailed baking directions.
- For Other Desserts: If your meringue is for another dessert, follow the specific instructions of that recipe, such as for macarons, angel food cake, Pavlova, or lemon meringue pie.
⭐️ Did you make this recipe?
Please leave a review and let us know how you liked it!
Nutrition Facts (per serving)
Calories: 323 kcal |
Carbohydrates: 76 g |
Protein: 7 g |
Fat: 1 g |
Sugar: 75 g |
Sodium: 682 mg

Did you make this? Leave a rating and your feedback. Thank you!