
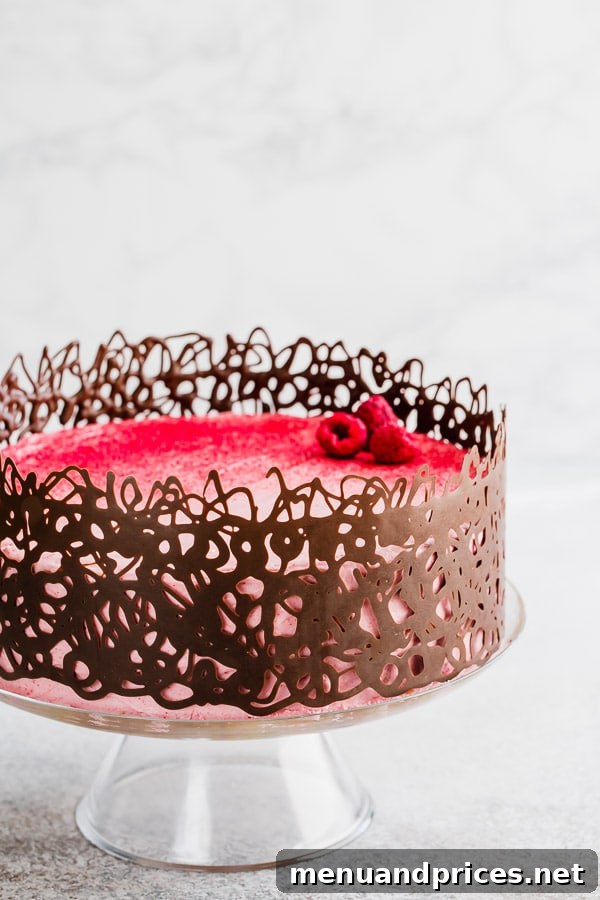
Ready to give your homemade cake an instant upgrade? This simple yet incredibly elegant chocolate cage is the ultimate secret weapon for creating a show-stopping dessert without needing any special skills or fancy equipment. In less than 15 minutes, you can transform a plain cake into a professional-looking masterpiece that will leave everyone amazed. Get ready to add that coveted “wow factor” with ease!
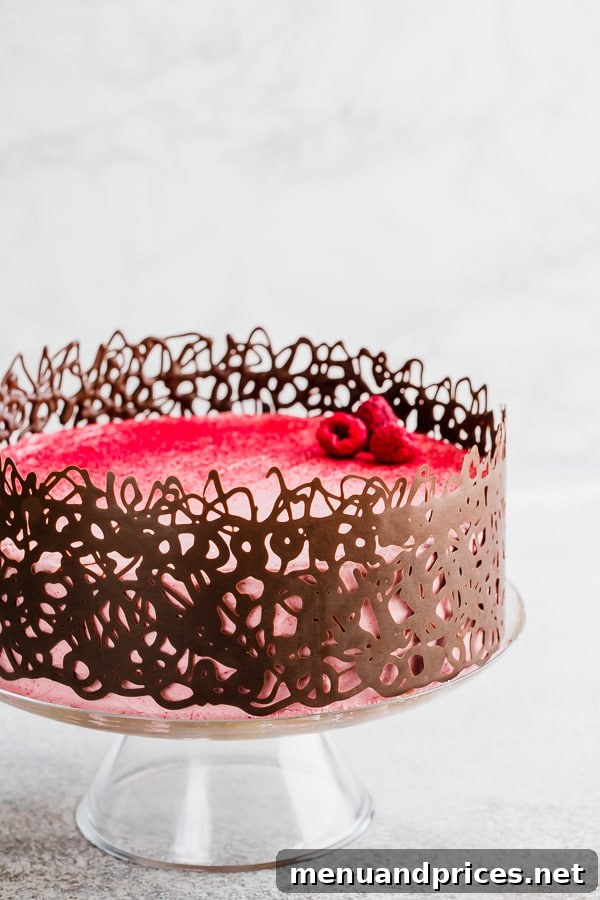
Easy Chocolate Cage Cake Decoration: The Ultimate Guide to Instant Elegance
Cake decorating doesn’t have to be daunting. While some intricate designs require years of practice, achieving a beautiful, professional finish can be surprisingly simple. This guide focuses on one of the most effective and least intimidating methods: the chocolate cage. It’s a game-changer for anyone who loves baking but feels intimidated by frosting techniques or elaborate fondant work. This technique is not just about making your cake look pretty; it’s about celebrating the joy of homemade goodness with a touch of accessible sophistication that will impress everyone at your next gathering.
Why You’ll Absolutely Love This Cake Decorating Secret
Forget the stress of perfect frosting or elaborate piping. The chocolate cage is a revelation for several reasons, making it an instant favorite for both novice and experienced bakers alike. It’s a quick fix that delivers high impact, turning any ordinary cake into an extraordinary centerpiece with minimal effort and maximum visual appeal:
- Effortless Elegance: This design instantly elevates any cake, transforming a simple homemade treat into a sophisticated dessert fit for any special occasion, from birthdays to dinner parties. Its intricate appearance beautifully contradicts its incredible simplicity of creation.
- Hides Imperfections Flawlessly: This is arguably the best part for beginners! If your cake frosting isn’t perfectly smooth, your sides are a little uneven, or your piping skills are still developing, the chocolate cage acts as a beautiful disguise. It covers all those minor flaws with its stunning design, creating a seamless, polished look. No need for expert cake frosting skills here; the chocolate does all the heavy lifting!
- Incredibly Quick & Time-Saving: You only need less than 15 minutes of active time to create this stunning decoration. This makes it perfect for last-minute party preparations, busy schedules, or when you want an impressive dessert without spending hours in the kitchen, freeing up your time for other tasks.
- Minimal Ingredients, Maximum Impact: Believe it or not, you only need one core ingredient – chocolate! This makes it an exceptionally cost-effective and straightforward decoration option, proving that you don’t need a pantry full of specialty items to create something spectacular.
- Highly Customizable & Versatile: From intricate lace patterns to bold geometric designs, the possibilities for your chocolate cage are endless. You can easily adapt the design to suit any cake size, theme, or personal preference, making each creation truly unique and tailored to the moment.
- Adds a “Wow Factor”: There’s something undeniably captivating and luxurious about a chocolate cage. It adds a delightful textural contrast and an element of surprise that always impresses guests, making your cake the undeniable star of the dessert table.
Essential Ingredients and Tools You’ll Need
Gathering the right components is the first step to a successful chocolate cage. While the list is short, selecting the correct type of chocolate and working surface is key to achieving that perfect finish and ensuring your design comes out flawless every time.
The Right Chocolate Matters: Quality for the Best Results
- Dark Chocolate is Your Best Friend: For this technique, dark chocolate – whether bittersweet or semi-sweet – works best. Its higher cocoa butter content allows it to melt smoothly, temper beautifully, and set with a desirable crispness and glossy sheen. This robust quality is crucial for a stable and appealing chocolate cage.
- Bar Chocolate vs. Chocolate Chips: I highly recommend using a bar of good quality dark chocolate over chocolate chips. Chocolate chips are often formulated with stabilizers and less cocoa butter to help them hold their shape during baking. This means they don’t melt as smoothly or temper as easily as chocolate bars. A solid bar will provide a much better consistency for piping and a superior, more professional finish to your chocolate work.
- Exploring Other Options: While dark chocolate is ideal for its structural integrity, you can certainly experiment with milk chocolate or white chocolate. However, be aware that these varieties contain more sugar and milk solids, and often less cocoa butter. This makes them softer, gives them a lower melting point, and can make them slightly trickier to temper and achieve a firm, snappy finish. If using white chocolate, you gain the fantastic advantage of being able to add oil-based food coloring to create a vibrant, customized cage to match any party theme!
Your Simple Tool Kit for Success
- Wax Paper: The Unsung Hero: I find that wax paper is the easiest and most accessible material to work with for chocolate cages. It’s generally thinner and more flexible than most parchment papers, making it incredibly easy to peel off the hardened chocolate without breakage. It’s readily available in any grocery store, making it a convenient choice.
- Clear Acetate Strips (Optional, for a Polished Finish): If you’re looking for an even more professional and consistently glossy finish, or if you plan to make chocolate decorations frequently, clear acetate strips are an excellent investment. They provide a perfectly smooth, non-porous surface that imparts an exceptionally beautiful sheen to your chocolate and are reusable.
- Piping Bag: A standard piping bag (disposable or reusable) is essential for controlling the flow and design of your melted chocolate. It allows for precision and neatness in your patterns.
- Round Piping Tip: The size of your piping tip will dictate the thickness and delicacy of your chocolate design. I used a pretty thin decorating tip for my intricate “cage” design (Wilton #2), which creates elegant, fine lines. However, if you prefer a more robust design, like specific shapes (flowers, hearts) or bolder, more pronounced patterns, a slightly larger round tip is advisable. Always avoid excessively thin lines, as they can be very fragile and prone to breaking during handling or slicing the cake.
- Ruler and Pen: These simple tools are crucial for accurately measuring your cake’s circumference and drawing guiding lines on your wax paper, ensuring your chocolate cage is the correct size and height.
- Microwave-Safe Bowl: Preferably one made of silicone or plastic, as these materials retain less heat and are easier to handle for the gentle melting process.
Mastering the Melt: 3 Crucial Tips for a Perfect Chocolate Cage
Achieving a beautiful, sturdy, and shiny chocolate cage hinges on a few key techniques. Pay close attention to these tips for flawless results every time, ensuring your chocolate sets perfectly with that professional snap and gleam:
1. The Golden Rule: Gentle Melting for Perfectly Tempered Chocolate
This is arguably the most important step for a visually stunning and structurally sound chocolate cage. To ensure your chocolate design sets quickly, has a lovely, lustrous sheen, and remains wonderfully crisp, we need to melt the chocolate gently, without allowing its temperature to rise above 90°F (approximately 32°C). This careful process is known as keeping the chocolate “in temper.” Tempering stabilizes the cocoa butter crystals in the chocolate, which is vital for preventing it from looking dull, streaky (a common issue known as “bloom”), and for giving it that desirable, satisfying snap when broken or bitten into.
To achieve this, strictly follow the microwave method as described in the instructions below, utilizing short bursts of heat at 50% power and constant, thorough stirring. This controlled and patient approach prevents the chocolate from overheating, which is the primary cause of chocolate losing its temper. Proper tempering ensures your cage is not only beautiful but also holds its form impeccably.
2. Work Smarter, Not Harder: Use Two Shorter Strips
Instead of wrestling with one long, unwieldy strip of wax paper that can be difficult to manage and prone to tearing or breaking your delicate chocolate design, work with two shorter strips. This technique makes handling and wrapping the chocolate around the cake significantly easier and dramatically reduces the risk of breakage during application. First, accurately measure the full circumference of your cake. Then, cut two strips of wax paper, each roughly half the length of your cake’s circumference. For example, if your cake measures 30 inches around, you’ll precisely need two 15-inch strips. The height of the strips should correspond to your desired chocolate design height, plus an extra inch or so at the top and bottom for ease of handling without touching the actual design.
3. Choose Your Piping Tip Wisely: Stability Meets Design
The choice of your decorating tip directly impacts both the aesthetic appeal and the structural integrity of your finished chocolate cage. A very thin tip, like a Wilton #2, allows for intricate, delicate patterns that look incredibly elegant and sophisticated. However, these fine lines can be more fragile and require careful handling. If you’re aiming for a more robust design, such as bold geometric shapes, sweeping swirls, or specific elements like flowers or hearts that need to be sturdy, a slightly bigger round tip is highly advisable. Thicker lines are inherently sturdier and far less prone to breaking when handled or when the cake is being cut, offering both beauty and resilience. Experiment with different sizes to find what best suits your creative vision while ensuring the necessary stability for your edible masterpiece.
Expert Troubleshooting Tips: When Things Don’t Go as Planned
Even with the best intentions and careful preparation, chocolate can sometimes be finicky. Don’t worry, most common issues encountered during the creation of a chocolate cage have simple, straightforward solutions. Here’s how to troubleshoot like a pro:
- If the Chocolate Doesn’t Set Within 5 Minutes (or sets too slowly): This is a classic sign that the chocolate was heated a bit too much and has unfortunately lost its temper. While it won’t have that super-crisp snap and shiny finish of perfectly tempered chocolate, it’s certainly not a lost cause! Just wait patiently for another 10-15 minutes at room temperature, giving it more time to solidify. If it’s still too soft after this, you can place it in the fridge for a few minutes to help it firm up quickly. Be sure to check it often, every couple of minutes, as leaving it in the fridge for too long can make it excessively brittle and highly prone to breaking when you attempt to wrap it around the cake.
- Chocolate Breaks When You Peel the Paper: This frustrating issue typically happens if the chocolate is either too cold (made brittle by excessive chilling) or not fully set before peeling. If it’s too cold, let the cake sit at room temperature for 5-10 minutes to allow the chocolate to soften slightly before attempting to peel. If it’s not fully set, place the cake back in the fridge for a little longer until the chocolate is completely firm. Always peel the paper slowly, gently, and evenly to prevent any sudden stress on the chocolate.
- Design Smears or Loses Shape: This indicates the chocolate was likely too warm when you started piping, or you handled it too much before it had a chance to properly set. Ensure your melted chocolate is at the correct working temperature (around 88-90°F / 31-32°C for dark chocolate) before beginning to pipe. Once piped onto the wax paper, minimize handling and allow it sufficient time to firm up before moving or applying it.
- Wax Paper Sticks to the Chocolate: While wax paper is generally excellent for chocolate release, if the chocolate isn’t completely firm, it might stick stubbornly. The most common solution is to ensure the chocolate is absolutely fully set before attempting to peel. In rare instances, a very warm and humid environment can also contribute to sticking, in which case a brief, strategic chill in the fridge usually resolves the issue.
Chocolate Cage – Effortless Cake Decoration
This simple yet elegant chocolate cage is a quick and easy way to decorate your homemade cake, adding an instant wow-factor without requiring special skills or equipment.
By: Shinee Davaakhuu
Total Time: 15 minutes
Yields: 1 cake
Ingredients
- 4 oz (approximately 113g) dark chocolate (bittersweet or semi-sweet, see Note 1 below)
Tools you’ll need:
- Wax paper or clear acetate strips
- Piping bag
- Round piping tip (e.g., Wilton #2 or slightly larger)
- Ruler and pen (optional, for guiding lines)
- Microwave-safe bowl (preferably silicone or plastic)
Instructions
Part 1: Preparing Your Wax Paper Strips
- Measure the circumference of your cake precisely. Cut two strips of wax paper, each roughly half that length. For instance, for a standard 9-inch cake, two 15-inch strips will work perfectly. The height of the strips should be determined by your desired chocolate design height, plus an extra inch or so at the top for easier handling.
- Using a ruler and a pen, accurately draw two parallel lines on your wax paper strips. These lines will serve as essential guides, ensuring your chocolate design is consistently tall and neatly contained.
Part 2: Melting the Chocolate to Perfection
- Finely chop the dark chocolate into small, uniform pieces and place them in a medium-sized silicone or plastic microwave-safe bowl.
- Microwave the chocolate for an initial 30 seconds at 50% power. Remove the bowl and stir the chocolate thoroughly with a spatula or spoon. Return it to the microwave for another 15 seconds at 50% power. Stir diligently again.
- Continue microwaving in short 15-second increments at 50% power, stirring thoroughly after each interval, until the chocolate is fully melted and beautifully smooth. Be extremely careful not to overheat it, aiming for an ideal temperature around 88-90°F (31-32°C) to maintain its temper.
- Once perfectly melted, carefully transfer the chocolate into a piping bag that has been fitted with your chosen round tip.
Part 3: Piping Your Unique Chocolate Design
- Begin piping your desired design within the guiding lines you drew on your wax paper strips. Get creative with swirls, geometric patterns, or abstract art! Ensure your lines are consistently thick enough to be sturdy once set; overly thin lines will be fragile and highly prone to breaking.
- Allow the piped chocolate design to set at room temperature for about 3-5 minutes, or until it is firm to the touch yet still pliable enough to bend without cracking. Properly tempered chocolate will set quite quickly. (Tip: If the chocolate doesn’t set within 5 minutes, please refer to the comprehensive troubleshooting tips section above for guidance.)
Part 4: Applying the Chocolate Cage to Your Cake
- Carefully lift one wax paper strip with the semi-set chocolate design and gently wrap it around the side of your frosted cake, pressing lightly to adhere. Repeat this process with the second strip, ensuring the ends meet seamlessly to form a continuous chocolate band around the entire cake.
- Allow the chocolate to fully firm up and adhere to the cake. This can be done at room temperature for an additional 5-10 minutes, or you can place the cake in the refrigerator for 15-30 minutes for a quicker and firmer set.
- Once the chocolate is completely firm and stable, carefully and slowly peel off the wax paper. If you encounter any resistance or if the chocolate still seems slightly soft, simply place the cake back in the fridge for a few more minutes before trying to peel again. Peel gently to prevent any breakage.
⭐️ Did you make this recipe?
Please leave a review and let us know how you liked it!
Tips & Notes
Note 1: Dark chocolate, either bittersweet or semi-sweet, works unequivocally best for this technique due to its superior tempering properties and firmer set. We strongly recommend using a solid bar of chocolate over chocolate chips, as chips often contain stabilizers that prevent them from melting as smoothly and setting as crisply, potentially hindering the success of your chocolate cage.
Approximate Nutrition Facts (per serving)
The following are approximate nutritional values for the 4 oz of dark chocolate used in this recipe, intended as a general guide:
- Calories: 678 kcal
- Carbohydrates: 52g
- Protein: 9g
- Fat: 48g
- Sugar: 27g
- Sodium: 23mg
Course: Dessert
Cuisine: American
Did you make this?
Leave a rating and your feedback. Thank you!
Frequently Asked Questions About Chocolate Cake Cages
To help you perfect your chocolate cage technique and confidently create stunning desserts, here are detailed answers to some of the most common questions:
- Can I use milk chocolate or white chocolate for the cage?
- Yes, you certainly can use milk chocolate or white chocolate, but it’s important to be aware of their differences. These varieties typically contain more sugar and milk solids, and often less cocoa butter than dark chocolate. This composition makes them generally softer, gives them a lower melting point, and can make them more challenging to temper and achieve a firm, snappy finish. You might need to adjust your melting times to be even shorter and potentially chill them for a longer period to ensure they set properly. On the bright side, white chocolate offers the fantastic advantage of being easily colored with oil-based food colorings, opening up a world of vibrant and customized possibilities to match any party palette!
- Can I make the chocolate cage ahead of time?
- Absolutely! Once your chocolate design is completely firm and has been carefully peeled from the wax paper, you can store the individual chocolate pieces flat on parchment paper in an airtight container. Keep them at cool room temperature, away from direct sunlight, heat, or humidity, for up to a week. It’s generally best to avoid refrigeration if possible, as changes in temperature and humidity can cause condensation and dullness (known as “sugar bloom” or “fat bloom”) on the chocolate’s surface. However, if your kitchen is particularly warm or humid, a brief, well-sealed chill might be a necessary compromise to maintain their integrity.
- What if I don’t have a proper piping bag and tip?
- No problem at all! You can easily improvise. A sturdy freezer bag or even a heavy-duty ziplock bag can serve as an excellent makeshift piping bag. Simply spoon your melted chocolate into one corner of the bag, twist the top tightly to seal it, and then snip a tiny bit off the corner with scissors to create your opening. The size of the snip will directly determine the thickness of your lines, so it’s always wise to start with a very small snip and widen it if needed, rather than starting too large.
- How should I store a cake decorated with a chocolate cage?
- For optimal taste, texture, and appearance, cakes decorated with a chocolate cage are best stored in an airtight container at cool room temperature for 2-3 days. If your cake contains fillings or frostings that require refrigeration (e.g., fresh cream, fruit fillings, or certain dairy-based frostings), it’s perfectly fine to refrigerate the entire cake. Just remember an important tip: allow the cake to come to room temperature for at least 30 minutes (or even an hour for very large cakes) before serving. This ensures the chocolate isn’t too hard to cut, and that the cake’s flavors and textures are at their absolute best.
Unleash Your Creativity: Variations & Customization Ideas
The true beauty of the chocolate cage lies in its incredible adaptability. Once you’ve mastered the basic technique, feel free to experiment and truly make it your own! The possibilities for customization are virtually endless, allowing you to tailor your cake to any occasion, theme, or personal preference:
- Play with Chocolate Varieties: Don’t limit yourself to just dark chocolate. Try captivating combinations! Create a striking two-tone cage using both dark and white chocolate, or use vibrant, colored white chocolate to perfectly match a party theme or holiday.
- Add Texture and Sparkle: Elevate your design by adding textural elements. Before your piped chocolate fully sets, gently sprinkle on edible glitter, colorful sprinkles, finely chopped nuts (like pistachios or almonds), or even a delicate dusting of cocoa powder for added visual interest and a delightful textural contrast.
- Design Inspiration: Go Beyond Swirls: While abstract swirls are beautiful, don’t limit yourself! Explore structured geometric patterns like cross-hatching, diamond shapes, or intricate lace designs. For special occasions, pipe delicate hearts for Valentine’s Day, shimmering stars for a festive celebration, or even personalized initials for a truly unique touch. The key is always to keep your lines connected and sufficiently sturdy.
- Seasonal and Themed Cages: Think seasonally and thematically! Create delicate snowflake patterns for a magical winter wonderland cake, eerie spiderwebs for a spooky Halloween treat, elegant floral motifs for a spring celebration, or autumn leaves for a harvest feast.
- Double-Layered Dimension: For a truly dramatic and sophisticated effect, pipe one intricate design, let it set slightly until firm but still tacky, then pipe a second, contrasting pattern directly over the first before it fully hardens. This technique adds incredible depth, complexity, and a breathtaking multi-dimensional look to your chocolate cage.
Ready to Create Your Edible Masterpiece?
You now have all the essential knowledge, expert tips, and creative inspiration you need to confidently create a stunning chocolate cage for your next homemade cake. This simple yet incredibly effective decorating technique promises impressive, professional-looking results with minimal effort, making you look like a seasoned pastry pro in no time. So, gather your high-quality chocolate, choose your favorite design, and get ready to transform your cake into an unforgettable centerpiece that will be the talk of the town. Don’t forget to share your amazing creations with us and let us know how much you loved making them!