
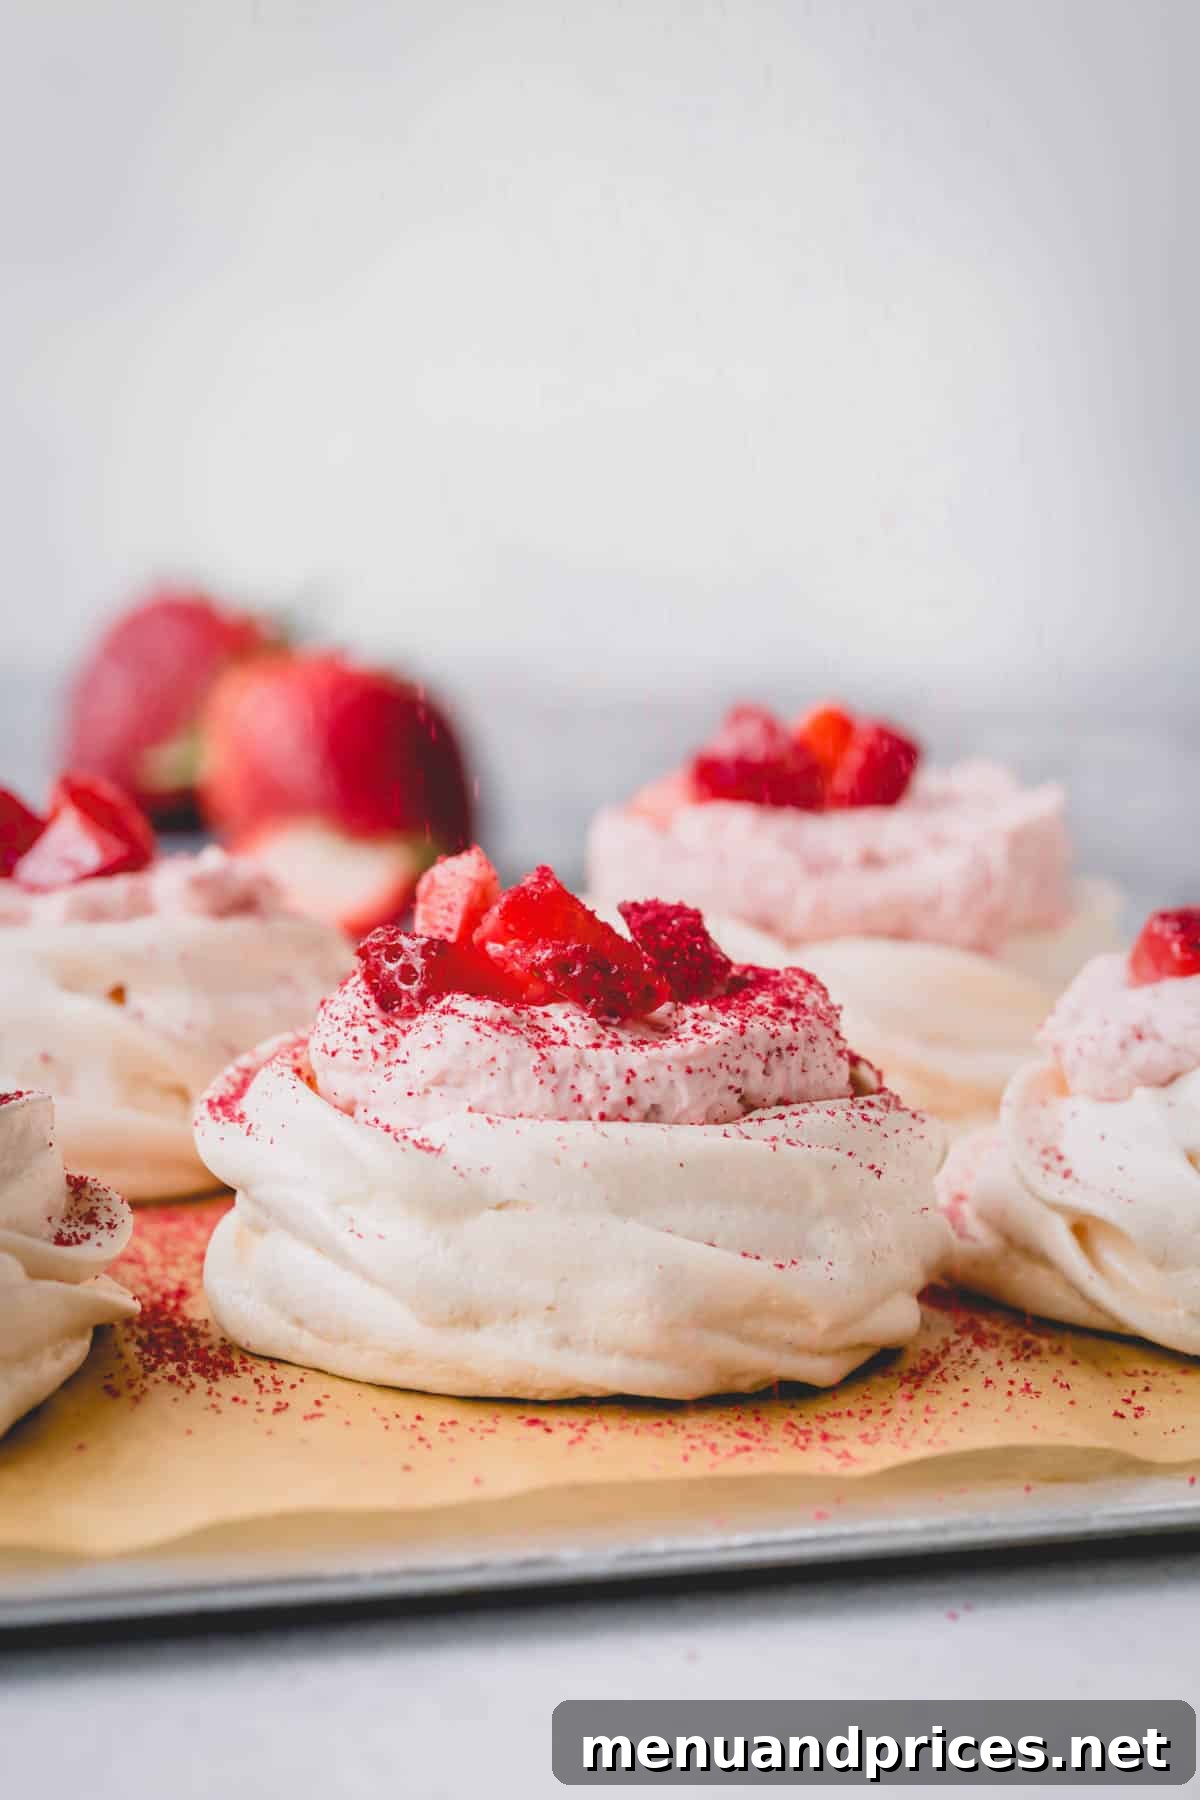
Delicate Mini Strawberry Pavlovas: Your Ultimate Guide to Perfect Meringue Desserts
Prepare to impress your guests with these dreamy, creamy, and oh-so-delicate Mini Pavlovas, generously adorned with fresh strawberries. This light and sweet dessert is not just a treat for the taste buds but a feast for the eyes, offering an elegant presentation that belies its simple preparation. With our expert tips and a handful of everyday ingredients, you’ll unlock the secret to crafting the perfect Pavlova every single time.
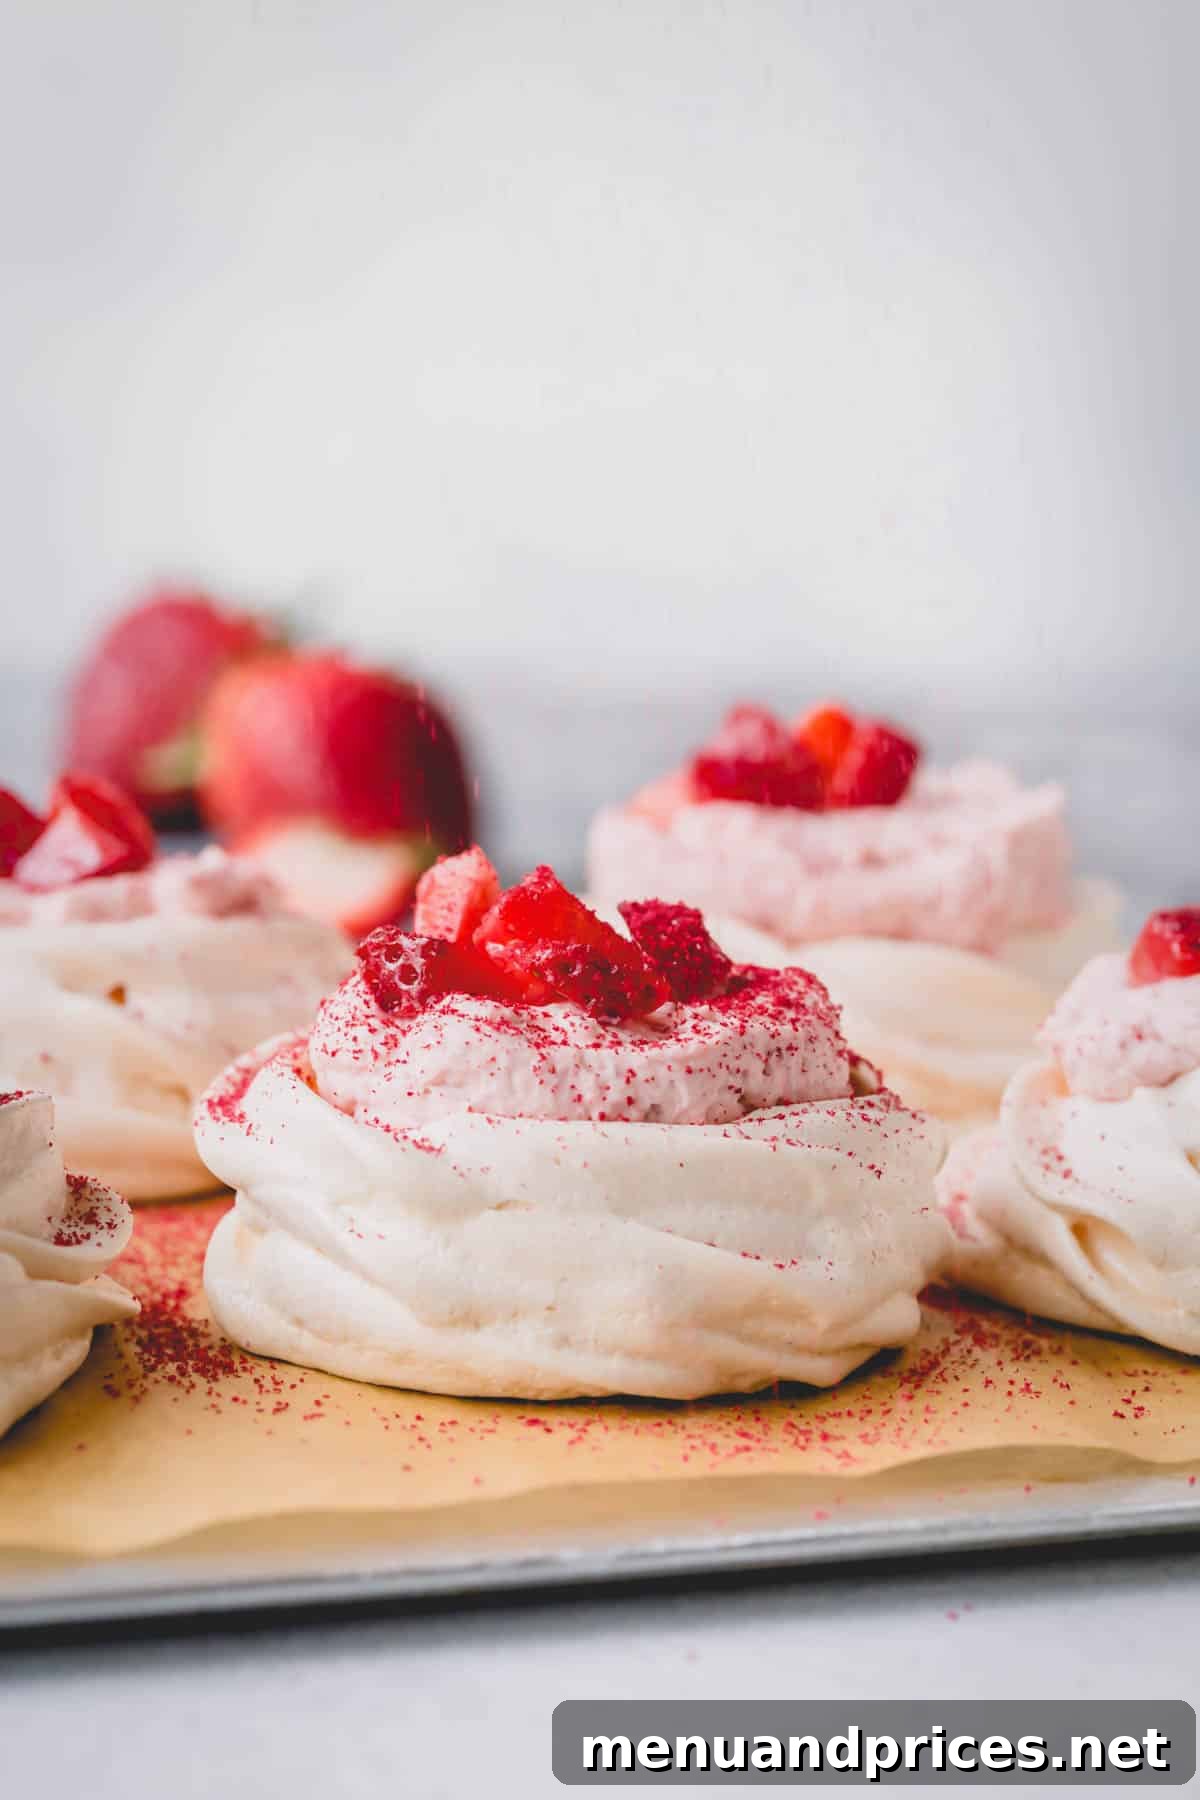
Pin this recipe now to save it for later!
Pin It
What is Pavlova? A Dessert with a Story
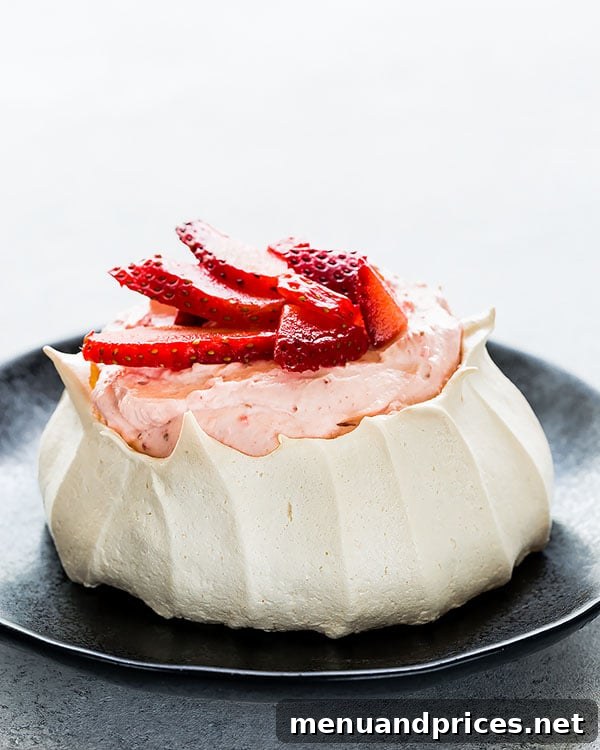
At the heart of any exceptional Pavlova lies a symphony of textures, and these mini strawberry versions are no exception. Named after the famed Russian ballerina Anna Pavlova, this iconic dessert is a true masterpiece of meringue. It’s characterized by a delicate, crisp meringue crust that shatters with the slightest touch, revealing a gloriously soft, chewy, and marshmallowy center within.
Often hailed as a culinary delight originating from either Australia or New Zealand, Pavlova stands apart from a traditional meringue. While both are built on a foundation of whipped egg whites, Pavlova incorporates ingredients like cornstarch and vinegar, which are crucial for achieving its distinctive soft interior. Topped with rich whipped cream and a medley of fresh fruits, it’s a dessert that combines simple elegance with incredible flavor, making it a surprisingly easy yet immensely impressive treat to prepare.
Why Mini Pavlovas are Your Go-To Dessert Solution
While a grand, single Pavlova cake certainly makes a statement, I find myself reaching for the mini version for several compelling reasons. These individual desserts offer unique advantages that make them perfect for any occasion:
- Effortlessly Quick & Easy: Forget the hours-long baking and cooling times of a large Pavlova. Mini versions are significantly faster to prepare, often ready in as little as 2 hours from start to finish, including essential cooling time. This makes them ideal for when you want something spectacular without the extensive wait.
- Perfect for Make-Ahead Preparation: One of the greatest benefits of mini Pavlovas is their make-ahead potential. The meringue shells can be baked days in advance, allowing you to assemble them just before serving. This flexibility takes the stress out of entertaining, letting you focus on other preparations.
- Incredibly Versatile & Customizable: Pavlova possesses an irresistible charm that makes it suitable for virtually any gathering, from casual brunches to elegant dinner parties. Mini Pavlovas offer individual portions, which are not only convenient but also allow for diverse toppings. While strawberries are a classic choice, don’t hesitate to experiment with other fruits, chocolate shavings, or even a drizzle of fruit coulis.
- Elegant Portion Control: Mini Pavlovas are naturally portioned, making them easy to serve and delightful for individual enjoyment. Each guest receives their own perfect little cloud of sweetness, eliminating the need for awkward slicing and serving from a large cake.
Follow our comprehensive step-by-step instructions below, and be sure to absorb our time-tested tips and tricks for guaranteed success. For another delightful variation, explore our equally delicious raspberry mini Pavlovas!
Key Ingredient Notes for Pavlova Perfection
Understanding the role of each ingredient is fundamental to achieving Pavlova perfection. Here’s what you need to know:
For the Mini Pavlovas:
- Granulated Sugar: Beyond merely sweetening the meringue, sugar is a critical structural component. It helps stabilize the whipped egg whites, creating a strong framework and contributing to the crispy exterior. For the best results, superfine sugar is recommended as it dissolves more easily, preventing a grainy texture. Remember, reducing the sugar content is not advisable as it impacts the meringue’s stability.
- Cornstarch: This unassuming ingredient is the secret to Pavlova’s signature soft, marshmallowy center. Cornstarch works to prevent the meringue from becoming completely dry and brittle, ensuring that delightful textural contrast.
- Egg Whites: The absolute foundation of your mini Pavlova cakes. For optimal whipping, separate your eggs while they are cold (this makes separation easier), then allow the whites to come to room temperature for about 30 minutes before beating. Room temperature egg whites whip to a greater volume and more stable peaks.
- Cream of Tartar (Optional, but Recommended): A powerful stabilizer, cream of tartar aids in achieving strong, voluminous, and stable meringue peaks. While optional, it’s a fantastic addition for beginners and seasoned bakers alike, offering an extra layer of insurance against collapsed meringues.
- Kosher Salt: Just a pinch is all it takes to balance the sweetness of the Pavlova, enhancing the overall flavor profile without making it taste salty.
- Pure Vanilla Extract: Added purely for its aromatic depth and classic dessert flavor. Using a high-quality extract, or even homemade vanilla extract, will elevate the taste of your Pavlova.
- White Distilled Vinegar: This acidic component is another key player in creating the desirable soft, marshmallow-like center. The acid in the vinegar (or increased cream of tartar) tenderizes the egg whites, contributing to that distinctive chewiness. If you don’t have vinegar, you can increase the cream of tartar to ¾ teaspoon.
For the Strawberry Whipped Cream:
- Freeze-Dried Strawberries: These are a fantastic ingredient for infusing intense strawberry flavor and a beautiful natural color into your whipped cream. Because all their water content is removed, they are light, airy, crunchy, and grind easily into a fine powder, retaining their vibrant color and concentrated flavor, with a much longer shelf life than fresh berries.
- Heavy Whipping Cream: The colder your heavy cream, the faster and more effectively it will whip to stiff peaks. Ensure it’s straight from the fridge. The high fat content of heavy whipping cream or heavy cream is essential; half-and-half or whole milk simply won’t whip sufficiently.
- Granulated Sugar: Sweetens the whipped cream to complement the meringue’s sweetness and the tartness of the strawberries.
- Fresh Strawberries: Diced fresh strawberries add a burst of juicy, fruity flavor and a beautiful textural contrast to each finished mini Pavlova, making them feel fresh and vibrant.
How to Make Mini Pavlova: A Step-by-Step Guide
Making mini Pavlovas is an enjoyable process, and by following these steps carefully, you’ll achieve perfect results every time. Before you begin, preheat your oven to 350°F (177°C) and prepare two baking sheets by lining them with parchment paper.
1. Crafting the Perfect Pavlova Base
- Prepare Dry Ingredients: In a small bowl, thoroughly whisk together the granulated sugar and cornstarch. Set this mixture aside for later use.
- Whip Egg Whites: Add the room-temperature egg whites to a large, impeccably clean mixing bowl fitted with a whisk attachment. Begin beating them on medium speed until they become frothy and soft peaks just start to form.
- Add Stabilizers: Gently stir in the cream of tartar (if using) and kosher salt. Continue beating the mixture on medium-high speed.
- Incorporate Sugar Gradually: While the mixer is still running on medium-high speed, slowly add the sugar and cornstarch mixture, one tablespoon at a time. This gradual addition is crucial for the sugar to dissolve properly and for the meringue to stabilize.
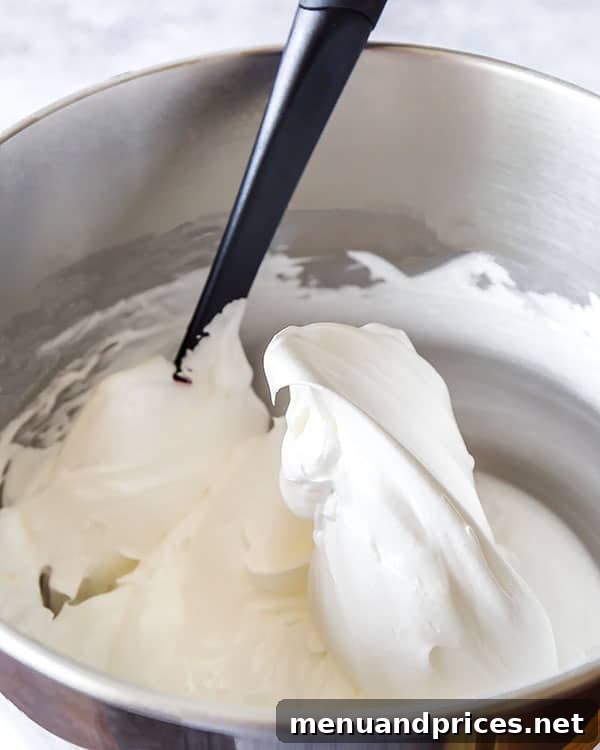
- Achieve Stiff Peaks: Once all the sugar is incorporated, increase the mixer speed to high. Continue beating the egg whites until stiff, glossy peaks form. The meringue should look smooth, shiny, and hold its shape firmly when the whisk is lifted.
- Fold in Flavor & Texture Enhancers: Pour in the pure vanilla extract and white distilled vinegar. Using a spatula, gently fold these ingredients into the meringue until just combined, being careful not to deflate the mixture.
2. Forming the Elegant Mini Pavlovas
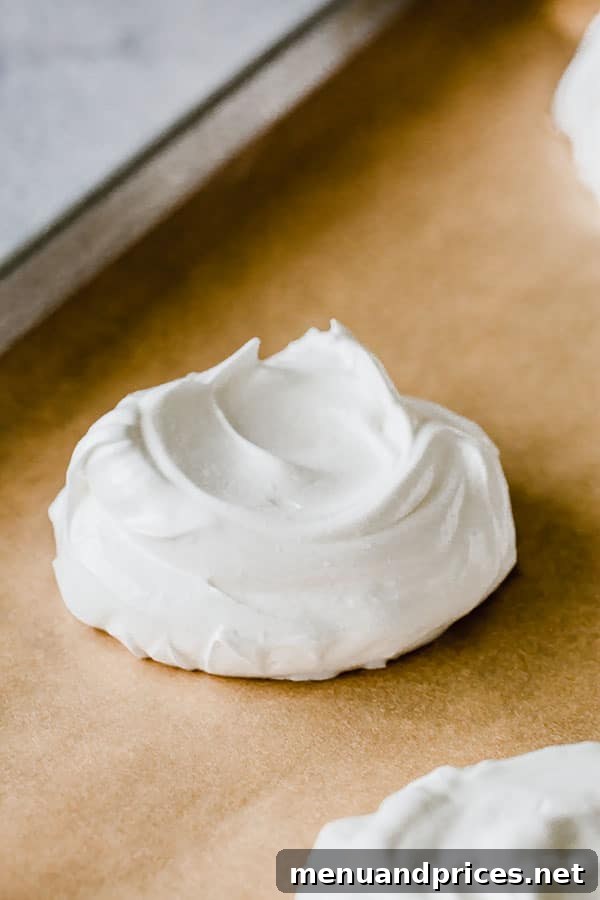
- Spoon onto Baking Sheets: Carefully spoon the meringue batter into 8 rounds on your prepared baking sheets. For uniform mini Pavlovas, a large cookie scoop (about 2 scoops per Pavlova) works wonders.
- Create a Well: Using the back of your spoon, gently create a shallow well or indentation in the center of each meringue round. This well will hold the delicious strawberry whipped cream later.
Achieving a Bakery-Worthy Appearance
For an even more stunning and delicate presentation, consider these techniques:
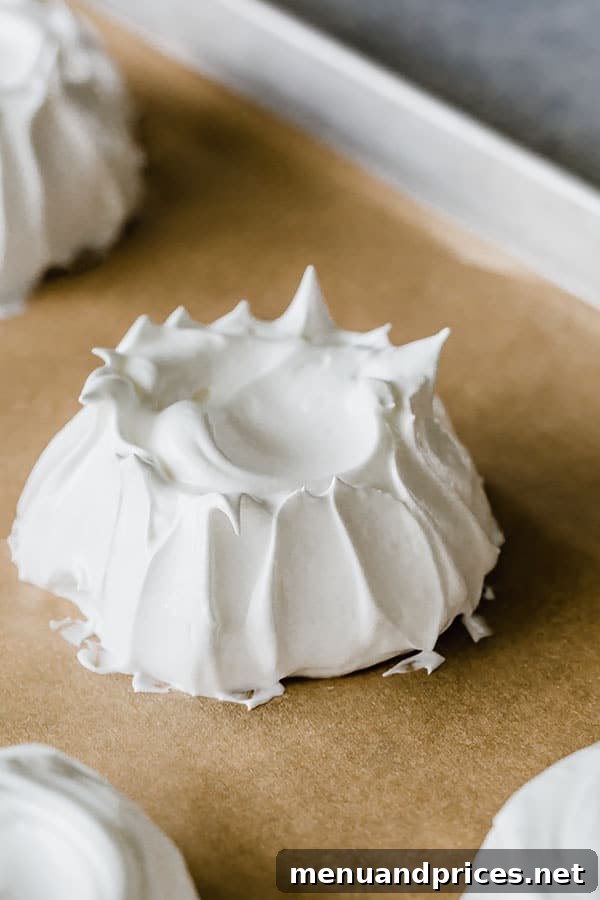
- Decorative Swipes: Gently swipe up the sides of the meringue with the back of a spatula to create a decorative, peaked edge, as shown in the left image below.
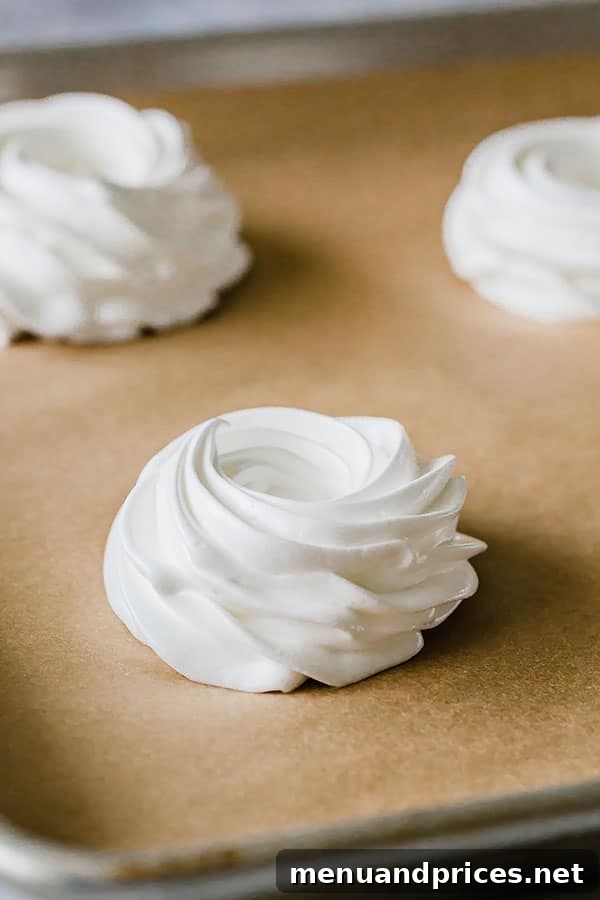
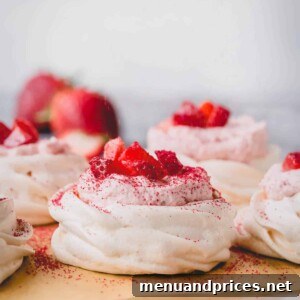
- Piped Nests: For an elegant, professional look, transfer the Pavlova batter to a piping bag fitted with a decorative tip (a Wilton 1M tip is excellent for this). Pipe the meringue into beautiful rosette nests, as demonstrated in the right image below.
- Securing Parchment Paper: If your parchment paper tends to shift while forming the rounds, use a small dab of meringue batter under each corner to “glue” it to the baking sheet.
3. The Art of Baking and Cooling Pavlova
- Initial Bake: Place the baking sheets into your preheated oven. Immediately decrease the oven temperature to 300°F (150°C). This initial high heat helps the Pavlova to set quickly and form a stable crust, preventing excessive spreading, before the lower temperature dries it out.
- Bake Time: Bake the mini Pavlovas for 30 minutes at 300°F (150°C).
- Crucial Cooling Process: After 30 minutes, turn off the oven completely. Crack open the oven door (using a wooden spoon to keep it ajar works well) and let the mini Pavlovas cool undisturbed in the oven for at least one hour, or even overnight. This slow cooling prevents cracking and ensures the crisp exterior and marshmallowy interior.
4. Preparing the Delicious Strawberry Whipped Cream Filling
- Make Strawberry Powder:
- Using a small food processor, crush the freeze-dried strawberries until they form a fine powder.
- Reserve about 1 tablespoon of this strawberry powder to use as a beautiful dusting over your finished Pavlovas.
No Food Processor? No Problem!
If you don’t have a food processor, you can still make strawberry powder. Simply place the freeze-dried berries between two pieces of parchment paper or inside a freezer bag. Then, use a rolling pin to crush them repeatedly until they transform into a fine, flavorful powder.
- Make the Whipped Cream:
- Pour the very cold heavy whipping cream into a large, clean mixing bowl.
- Begin beating the cream on low speed until it starts to visibly thicken and become airy.
- Add the granulated sugar and the prepared strawberry powder to the thickening cream. Mix on medium speed for 1-2 minutes, allowing the flavors to combine and the sugar to dissolve.
- Increase the speed to high and continue mixing until stiff peaks form. It’s crucial not to over-mix at this stage, as overmixing will cause the cream to separate and turn into sweet butter. Stop as soon as firm peaks are achieved.
5. Assembling Your Exquisite Mini Pavlova Treats
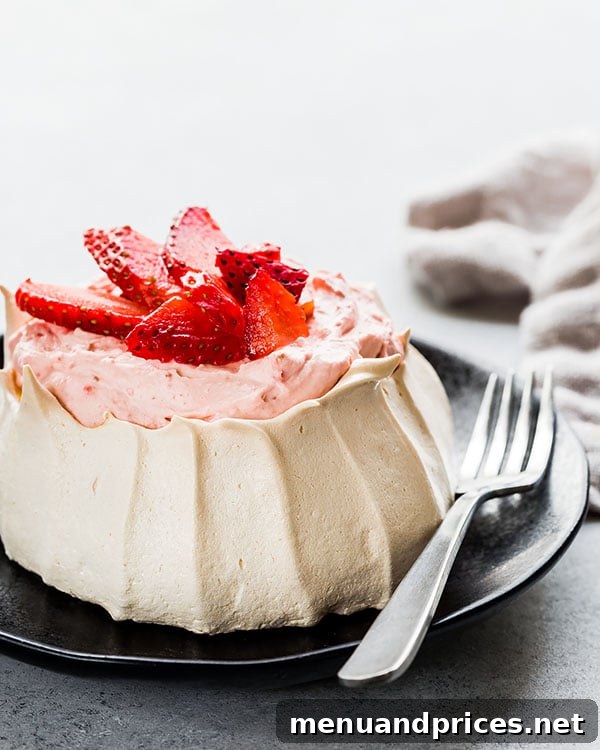
- Fill and Top: Once your Pavlova bases are completely cool and the whipped cream is ready, carefully fill each mini Pavlova well with the strawberry whipped cream filling. Then, generously top them with freshly chopped strawberries.
- Dust with Powder: For a final touch of elegance and an extra burst of strawberry flavor, lightly dust the assembled Pavlovas with the reserved strawberry powder.
Mastering Egg Whites: Essential Tips for Pavlova Success
The success of your Pavlova hinges entirely on how you handle the egg whites, as they form the very foundation of this delicate dessert. Paying close attention to these details will ensure your meringue whips up perfectly every time:
- Temperature Matters: It’s significantly easier to separate egg whites from yolks when the eggs are cold, straight from the refrigerator. However, room-temperature egg whites whip up with greater volume and stability. So, separate your eggs when cold, then let the whites sit on the counter for about 30 minutes to come to room temperature before you begin whipping.
- Spotless Equipment is Key: Egg whites are highly sensitive to fat and grease. Even the tiniest speck of yolk or oil can prevent them from whipping into a proper meringue. Ensure your mixing bowl and whisk attachment are impeccably clean and completely dry before you start.
- Choose the Right Bowl: Stainless steel or glass bowls are ideal for whipping egg whites because they are non-porous and do not absorb fats or oils like plastic bowls can. If using a plastic bowl, ensure it has been thoroughly washed and degreased.
- Careful Separation: This cannot be stressed enough: be extremely meticulous when separating the whites from the yolks. If any egg yolk accidentally gets into the whites, it’s best to discard that white and start fresh, as even a trace of fat will compromise the meringue’s ability to reach stiff, fluffy peaks.
Additional Tips for Pavlova Perfection
- Invest in an Electric Mixer: Whipping egg whites to stiff peaks takes time and effort. An electric mixer, whether a stand mixer or a powerful handheld mixer, is absolutely essential for consistently good results and to save your arm muscles!
- Parchment Paper is a Must: Always line your baking sheets with parchment paper or silicone mats. This prevents the delicate mini Pavlovas from sticking to the pan and makes them easy to transfer once baked.
- Allow for Spreading: Give your Pavlova rounds ample space on the baking sheets. While they don’t spread excessively, they will expand slightly, and overcrowding can lead to uneven baking.
- Low and Slow Baking is Non-Negotiable: The unique texture of Pavlova relies on a precise baking and cooling method. Starting the oven at 350°F (177°C) and immediately reducing it to 300°F (150°C) allows the meringue to quickly form a protective, strong crust without spreading too much. Crucially, do not forget to lower the temperature as soon as the Pavlovas go into the oven!
- Humidity is the Enemy: Baked Pavlovas are highly susceptible to humidity, which can turn their crisp exterior soft and gummy. It’s best to assemble and serve Pavlovas right before consumption, ideally within 2 hours. If you live in a particularly humid climate, consider leaving the baked (and cooled) Pavlova shells in the oven overnight, or until you are ready to assemble them, as the dry oven environment helps to maintain their crispness.
- Gentle Transfer: A flat spatula or turner is the ideal tool for carefully transferring your baked Pavlova shells from the baking sheet to a serving platter without breakage.
Smart Make-Ahead and Storing Tips
Pavlova, with its specific baking and extended cooling requirements, isn’t a last-minute dessert, but this makes it an excellent candidate for make-ahead preparation for any special occasion. I often prepare mine in the evening after dinner, which is an added bonus during warmer months when you prefer to avoid using the oven during the heat of the day.
- Prepare Components in Advance: You can prepare both the Pavlova meringue bases and the strawberry whipped cream filling 1-2 days ahead of your event.
- Storing Pavlova Bases: Store the baked and fully cooled Pavlova bases at room temperature, crucially away from any humidity. The cooled, turned-off oven provides an excellent, dry environment for storage. An airtight container at room temperature also works well.
- Storing Whipped Cream: Keep the strawberry whipped cream filling in an airtight container in the refrigerator.
- Assembling Pre-Made Components: When you’re ready to assemble the mini Pavlovas, allow the chilled whipped cream filling to come to room temperature for approximately 30 minutes. If it appears too stiff, re-whip it briefly with 2-3 tablespoons of fresh, cold heavy whipping cream until it regains its light and fluffy consistency.
- Serve Freshly Assembled: Pavlova is unequivocally at its best when assembled right before serving. The contrast between the crisp meringue and the soft cream is unparalleled.
- Consumption Window: For optimal texture, aim to consume assembled Pavlovas within 2 hours.
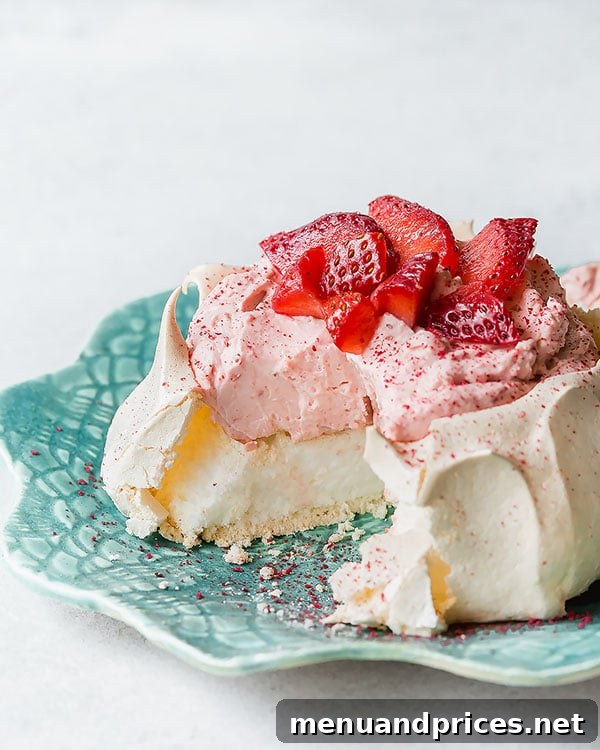
Storing Assembled Pavlovas: A Word of Caution
Once assembled, Pavlova does not keep well. The moisture from the whipped cream filling will gradually soften the delicate meringue base, causing it to become sticky and gummy over time. Therefore, the absolute best way to enjoy your mini Pavlovas is immediately after adding the topping and fresh strawberries!
If you’re not serving immediately, ensure the mini Pavlova shells remain in a dry environment—such as a cooled oven with the door slightly ajar—while you prepare the strawberry whipped cream filling. Alternatively, store the baked shells in an airtight container at room temperature until you’re ready for assembly. This allows you to have all components ready, simply combining them at the last moment for maximum freshness and enjoyment.
Frequently Asked Questions About Pavlova
Both meringue and Pavlova are delightful desserts made primarily from whipped egg whites and sugar, but their textures set them apart. Traditional meringue typically bakes to be dry and crisp throughout. Pavlova, on the other hand, boasts a distinct contrast: a delicately crisp exterior shell that gives way to a soft, chewy, marshmallow-like center. This unique texture is achieved through the addition of cornstarch and a touch of acid (like vinegar or cream of tartar) to the meringue base.
Pavlova offers a uniquely delightful taste and texture experience. It’s a light and airy dessert with a subtly sweet, vanilla-infused meringue base. The crisp edges provide a satisfying crunch, leading to a wonderfully soft, pillowy, and melt-in-your-mouth center. When topped with fluffy, slightly sweet whipped cream and fresh, tart strawberries, it creates a harmonious balance of sweet, creamy, and fruity flavors that is simply irresistible.
Don’t discard those valuable leftover egg yolks! They are incredibly versatile and can be used to create a variety of rich and delicious dishes. Consider transforming them into luscious homemade vanilla ice cream, comforting homemade vanilla pudding, flaky and tender all-butter pie crust, delightful egg yolk cookies, or a classic, indulgent crème brûlée.
Absolutely! While strawberries are a beloved classic, mini Pavlovas are incredibly versatile. Feel free to top them with any fresh berries like raspberries, blueberries, or mixed berries. Sliced kiwi, passion fruit, peaches, or even a tropical mango and lime combination would also be exquisite. Choose fruits that offer a good balance of sweetness and a little tartness to complement the rich cream and meringue.
Cracks in Pavlova are quite common and don’t necessarily affect the taste, but they can be minimized. Common causes include rapid temperature changes during baking or cooling, insufficient sugar dissolved in the meringue, or too high of an initial oven temperature. Ensuring a very gradual cooling process by leaving the Pavlova in the switched-off oven with the door ajar is the most effective way to prevent cracking.
More Meringue-Inspired Recipes to Explore
- Triple Raspberry Mini Pavlova
- Classic Pavlova
- Easy Meringue Cookies
- Raspberry Lemon Meringue Tartlets
Strawberry Mini Pavlova
By Shinee Davaakhuu
Dreamy, creamy, and oh-so-delicate strawberry mini Pavlova is a light and sweet mini dessert sure to impress your guests! Equipped with our top tips and simple ingredients, you’ll make perfect Pavlova every time.
Prep Time: 15 mins
Cook Time: 30 mins
Total Time: 45 mins
Servings: 8 mini pavlovas
Ingredients
For Mini Pavlovas:
- 1 cup (200 g) granulated sugar
- 2 tablespoons (16 g) cornstarch
- 4 (140 g) egg whites
- ¼ teaspoon cream of tartar (optional)
- ¼ teaspoon kosher salt
- ½ teaspoon pure vanilla extract
- 1 teaspoon white distilled vinegar
For Strawberry Whipped Cream:
- 1 cup (20 g) freeze-dried strawberries
- 1 cup (240 ml) heavy whipping cream (cold)
- 2 tablespoons (30 g) granulated sugar
- Fresh strawberries, chopped, for topping
Instructions
- To make the Pavlova base, preheat the oven to 350°F (177°C). Line 2 baking sheets with parchment paper.
- In a small bowl, whisk together 1 cup granulated sugar and 2 tablespoons cornstarch. Set aside.
- In a large clean mixing bowl with a whisk attachment, or using a handheld electric mixer, beat the 4 egg whites until frothy.
- Stir in ¼ teaspoon cream of tartar and ¼ teaspoon kosher salt and continue to beat on medium-high speed. (Cream of tartar is optional here; it stabilizes the egg whites and helps them whip bigger and better.)
- Add the sugar/cornstarch mixture one tablespoon at a time, while the mixer is running on medium-high speed. Increase the speed to high and continue to beat the egg whites until stiff peaks form. The mixture will look smooth and shiny.
- Add ½ teaspoon vanilla extract and 1 teaspoon white distilled vinegar, and gently fold the mixture with a spatula.
- Spoon the batter into 8 rounds on the prepared baking sheets. Make a shallow well in the center of each round. (TIP: Take a little bit of meringue batter and smear under 4 corners of the parchment paper, so it doesn’t move.) Alternatively, you can put the batter into a piping bag with a decorative tip (we used a Wilton 1M tip) and pipe the nests instead.
- Place the baking sheets in the oven and immediately turn the oven temperature down to 300°F (150°C).
- Bake for 30 minutes. Then turn the oven off and let it cool for at least an hour with the oven door ajar. Store cooled mini Pavlovas in an airtight container at room temperature, or in the cooled oven, until ready to assemble.
- To make the strawberry whipped cream filling, run the 1 cup freeze-dried strawberries in a small food processor until powdered. Or you can place the fruits between 2 parchment paper sheets and roll with a rolling pin until a fine powder. Reserve a tablespoon or so of strawberry powder for dusting.
- Pour 1 cup cold heavy whipping cream into a mixing bowl.
- Beat the cream on low speed (speed 2 or 4 on a stand mixer) until it slightly thickens.
- Add 2 tablespoons granulated sugar and the prepared strawberry powder. Continue to mix on medium speed (speed 4) for a minute or two. You can increase the speed to 6 on a stand mixer until the mixture reaches stiff peaks. Keep a close eye on it; you don’t want to over-beat it, or it’ll turn into sweet butter.
- To assemble the treats, fill the Pavlovas with strawberry whipped cream filling and top with fresh strawberries. If desired, dust the assembled Pavlovas with reserved strawberry powder. Serve immediately, or within 2 hours.
Tips & Notes
Make-Ahead Tips:
- You can prepare Pavlova bases and whipped cream frosting 1-2 days in advance, but store them separately.
- Keep Pavlova bases at room temperature, away from humidity. Store the strawberry whipped cream frosting, covered, in the fridge.
- When ready to assemble, bring out the frosting 30 minutes prior to assembling. If the frosting is too stiff, whip it with 2-3 tablespoons of fresh heavy whipping cream until nice and fluffy.
Egg Yolk Recipes: With leftover egg yolks, you can make rich homemade ice cream, homemade pudding, all-butter pie crusts, egg yolk cookies, and/or crème brûlée.
Nutrition
Servings: 1 mini Pavlova
Calories: 343 kcal
Carbohydrates: 57g
Protein: 2g
Fat: 11g
Sugar: 48g
Sodium: 109mg
Course: Dessert
Cuisine: Australian
This recipe was originally shared on June 6th, 2018.