
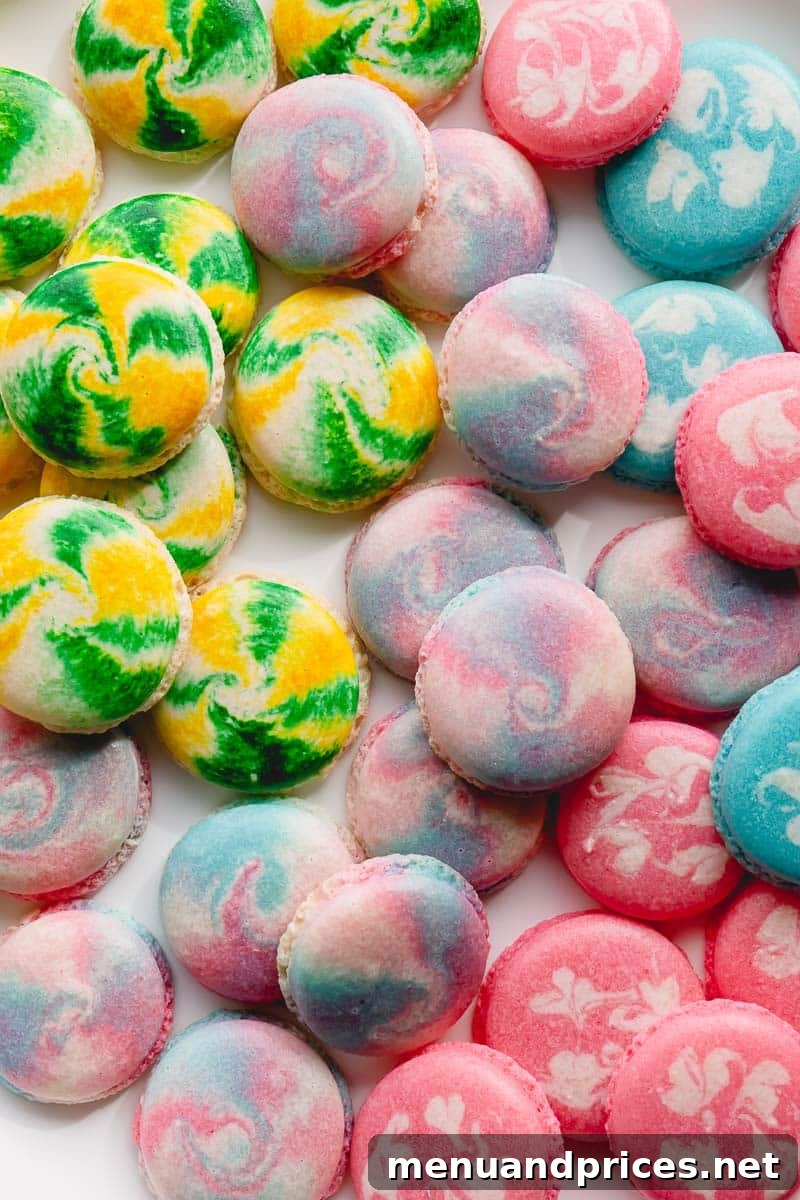
Master Marbled Macarons: 3 Easy & Stunning Techniques
Unlock the secret to instantly elevating your macaron game with these three incredibly easy methods to create breathtaking marbled macaron shells. From elegant swirls to vibrant tie-dye patterns, transform your homemade macarons into works of edible art that will impress everyone.
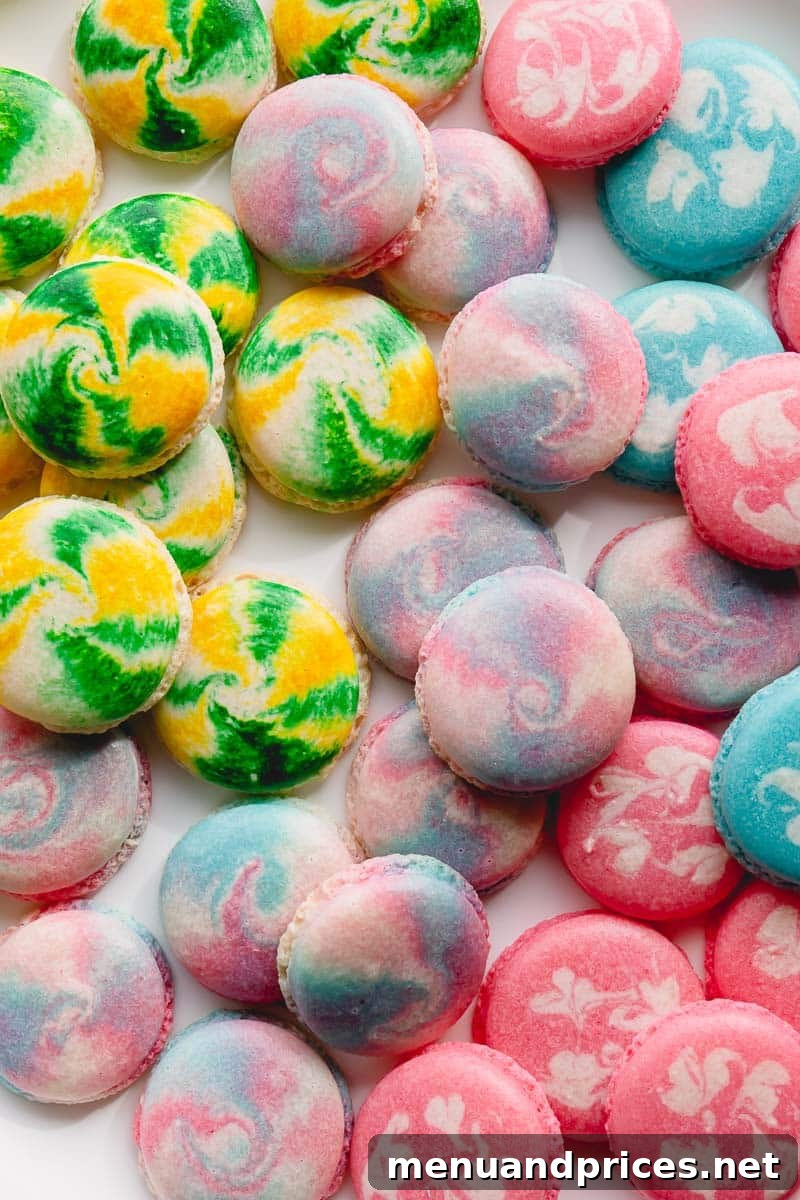
Pin this guide to create stunning marbled macarons later!
Pin It
Once you’ve mastered the foundational skills of baking perfect basic French macarons – achieving those coveted ‘feet,’ smooth shells, and ideal texture – you’ll naturally want to explore more intricate designs. Moving beyond plain, single-colored shells opens up a world of creative possibilities.
While elaborate character macarons are undoubtedly charming (a skill I often admire from talented artists!), sometimes you desire something equally special but with a more approachable elegance. This is precisely where marbled macarons shine. They offer a sophisticated, bespoke look without requiring advanced artistic skills, making them perfect for any baker looking to add a touch of flair to their repertoire.
Why Marbled Macarons Are a Game Changer
Marbled macarons are not just visually stunning; they’re a fantastic way to introduce creativity into your baking routine. Whether you’re preparing them for a special occasion, a thoughtful gift, or simply to treat yourself, the unique patterns ensure each macaron is a tiny masterpiece. They convey a sense of craftsmanship and attention to detail that elevates them far beyond their plain counterparts.
Before You Start: Mastering the Basics
Before diving into the mesmerizing world of marbling, ensure your basic macaron technique is solid. This means consistently achieving:
- Perfect Macaronage: The batter should flow like molten lava, forming a ribbon that disappears back into itself within 10-20 seconds. This is crucial for smooth shells and the proper consistency for piping.
- Beautiful Feet: Those signature ruffled edges are a hallmark of a well-baked macaron, indicating proper leavening and drying.
- No Hollows: A dense, chewy interior without empty spaces is key to a satisfying macaron.
If you’re still honing these fundamentals, a few more batches of basic macarons will build your confidence and ensure your marbled attempts are successful from the start. Remember, gel food colorings are essential for vibrant, non-diluted colors in your macaron batter.
3 Easy Ways to Make Marbled Macarons: Unleash Your Creativity
The beauty of marbled macarons lies in their versatility. There isn’t just one way to achieve these stunning effects; in fact, there are several methods, each yielding a distinct and captivating pattern. Experimenting with these techniques will allow you to discover your favorite and tailor your macarons to any aesthetic. Let’s explore the three most effective and visually appealing ways to marble your macaron shells.
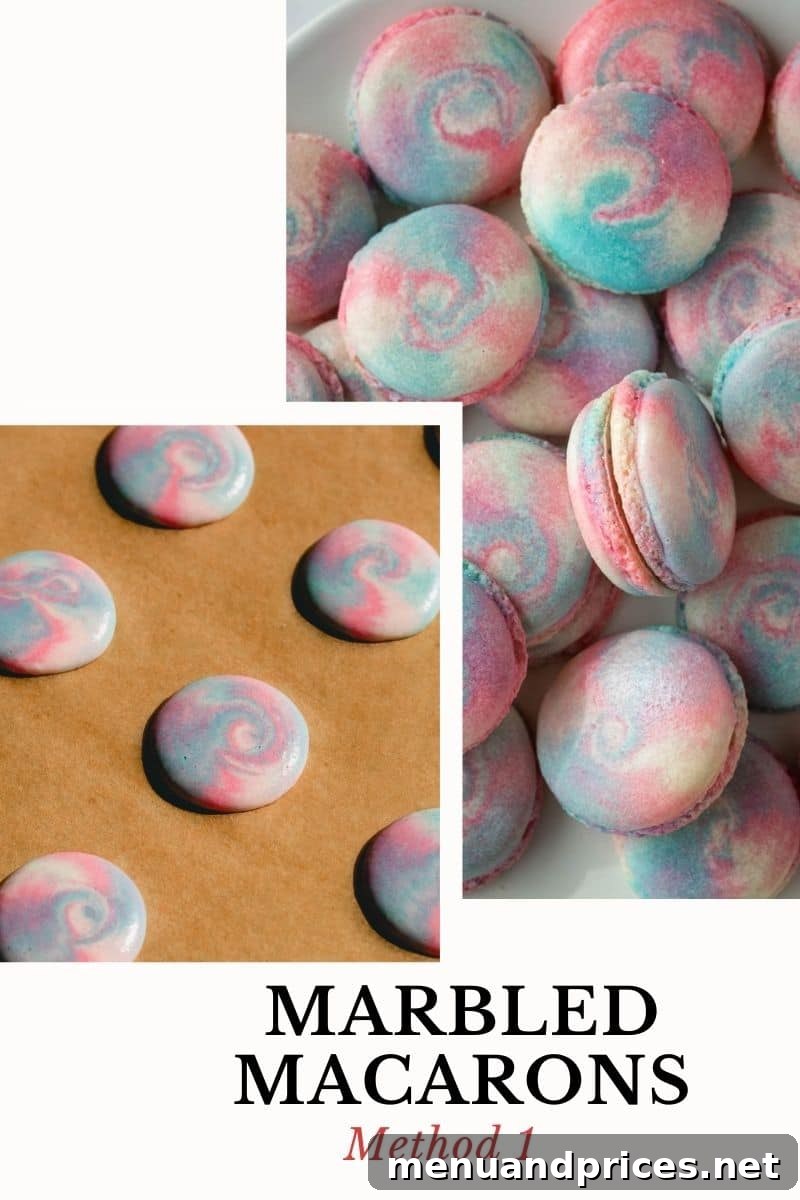
Method 1: The True Marble Effect
This method truly lives up to its name, creating an organic, intricate marble pattern reminiscent of polished stone. It’s perfect for achieving a sophisticated and unique look, as no two macarons will ever be exactly alike. The “True Marble” technique allows for incredible depth and blending of colors.
For this impressive method, you’ll need at least 2-3 (or even more!) distinctively colored macaron batters. The more colors you introduce, the more complex and vibrant your marbling will be. If you’re unsure how to divide and color a single batch of macaron batter, watch this helpful video on making 3 different colors from one macaron batch.
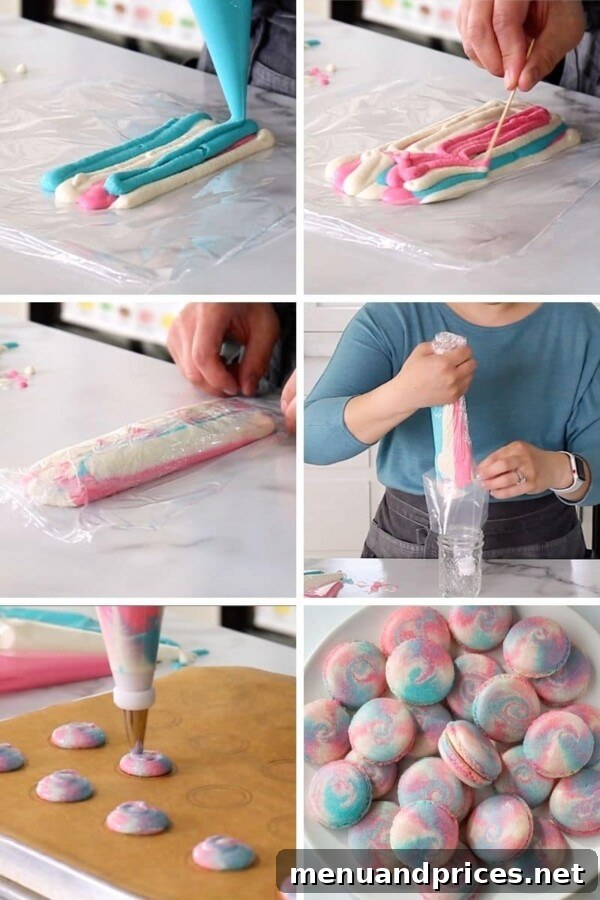
Steps for True Marble Macarons:
- Prepare Your Surface: Lay a large sheet of plastic wrap or parchment paper flat on your counter. This will serve as your canvas for layering the colors.
- Layer the Batters: Carefully pour your different colored macaron batters onto the plastic sheet in alternating lines, blobs, or any abstract pattern you prefer. Don’t overthink it; the magic happens in the next step. Aim for a relatively thin, elongated arrangement of colors.
- Form a Tube: Gently lift one side of the plastic wrap and carefully roll or fold it into a cylindrical tube, encasing all the colored batters. Be gentle to avoid excessive mixing at this stage.
- Transfer to Piping Bag: Snip off one end of your plastic wrap tube and carefully insert it into a piping bag fitted with your preferred round piping tip (e.g., Wilton 1A or a similar large round tip).
- Pipe Your Shells: Now, pipe the shells onto your prepared baking sheet (lined with parchment paper or a silicone mat) as you normally would. As you pipe, the different colored batters will naturally swirl together, creating beautiful, unpredictable marble patterns on each macaron shell.
Pro Tip: For more defined lines, twist the plastic wrap tube gently a few times before inserting it into the piping bag. For softer, more blended effects, handle it very gently.
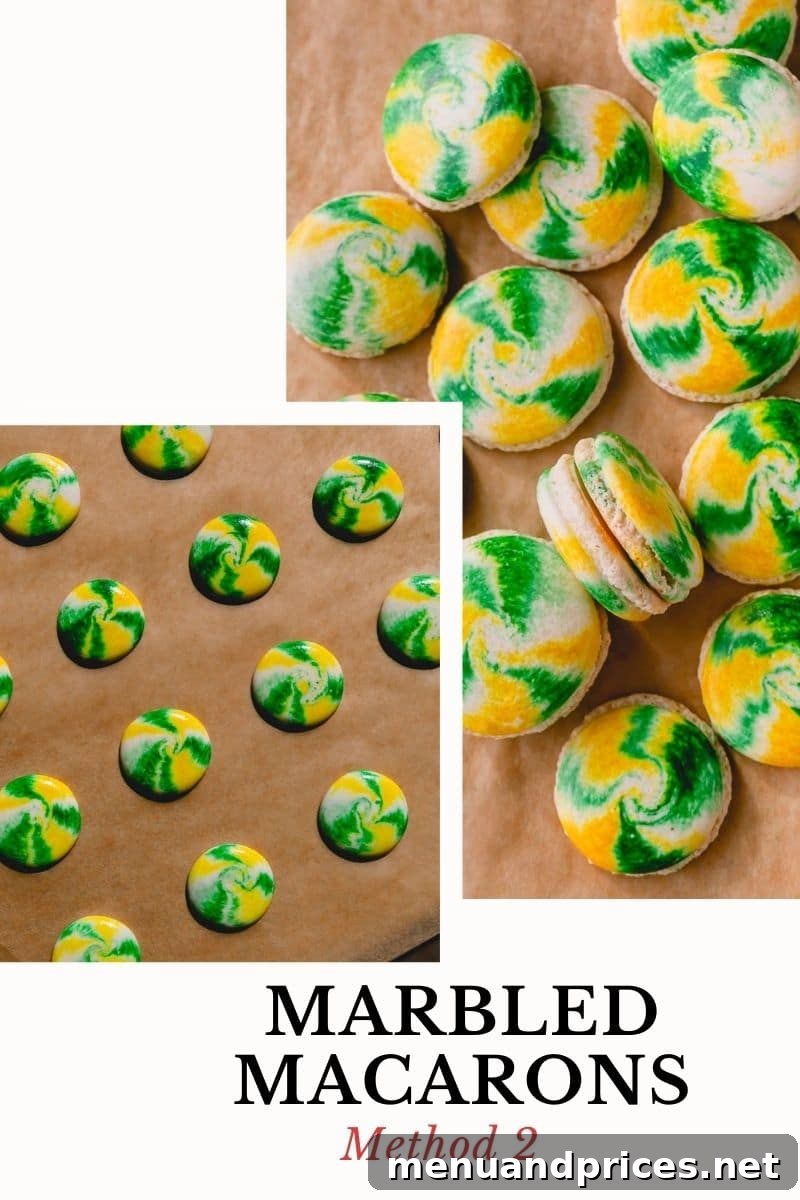
Method 2: The Vibrant Tie-Dye Effect
If you’re looking for the absolute easiest way to achieve stunning marbled macarons, the “Tie-Dye” method is your go-to. This technique requires minimal effort but delivers maximum visual impact, producing beautiful streaks and lines of color. It’s perfect for a playful, artistic look that reminds one of tie-dye fabric patterns.
For this method, you only need one base color of macaron batter and a selection of gel food colorings to create your vibrant streaks. The number of food colorings you choose will dictate the complexity of your tie-dye design.
Steps for Tie-Dye Macarons:
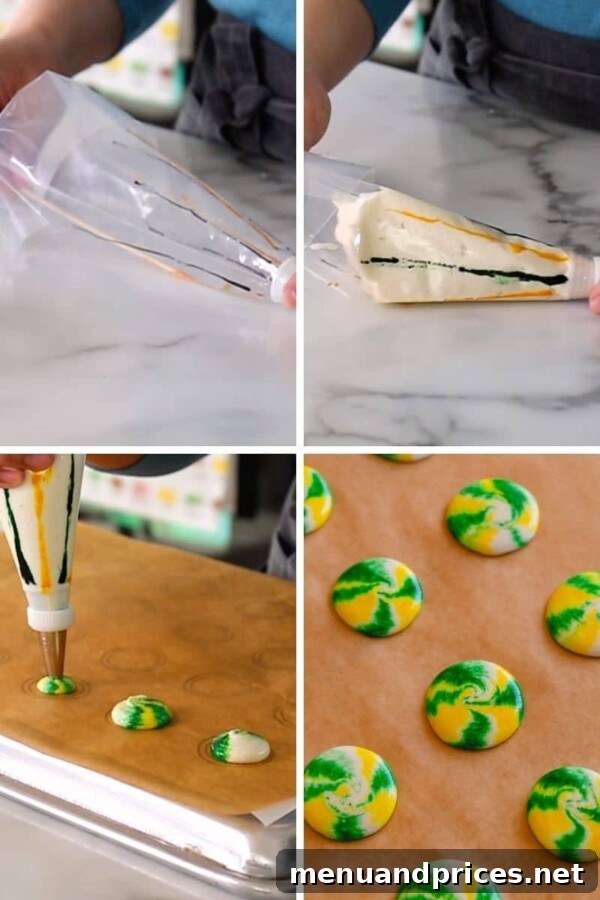
- Prepare Your Piping Bag: Fit a piping bag with your desired round tip. Using a clean, long wooden skewer, a small, clean paintbrush, or even a thin silicone spatula, apply lines of gel food coloring directly inside the piping bag. You can draw vertical stripes, spirals, or even abstract patterns along the inner walls of the bag. Use multiple colors for a rainbow effect or stick to two complementary colors for a more subtle look.
- Add the Batter: Carefully spoon your single-colored macaron batter into the prepared piping bag. Try to do this gently to avoid smudging the food coloring lines too much.
- Pipe Your Shells: As you pipe your macaron shells onto the baking sheet, the batter will pick up the lines of food coloring from the inside of the bag, creating beautiful, dynamic tie-dye patterns on each shell. The first few shells might be lighter in color, but the pattern will become more defined as you continue piping.
Pro Tip: For bolder streaks, apply thicker lines of gel food coloring. For finer, more delicate lines, use a smaller brush or toothpick to draw thin stripes. Experiment with the placement of your color lines inside the bag for varied effects.
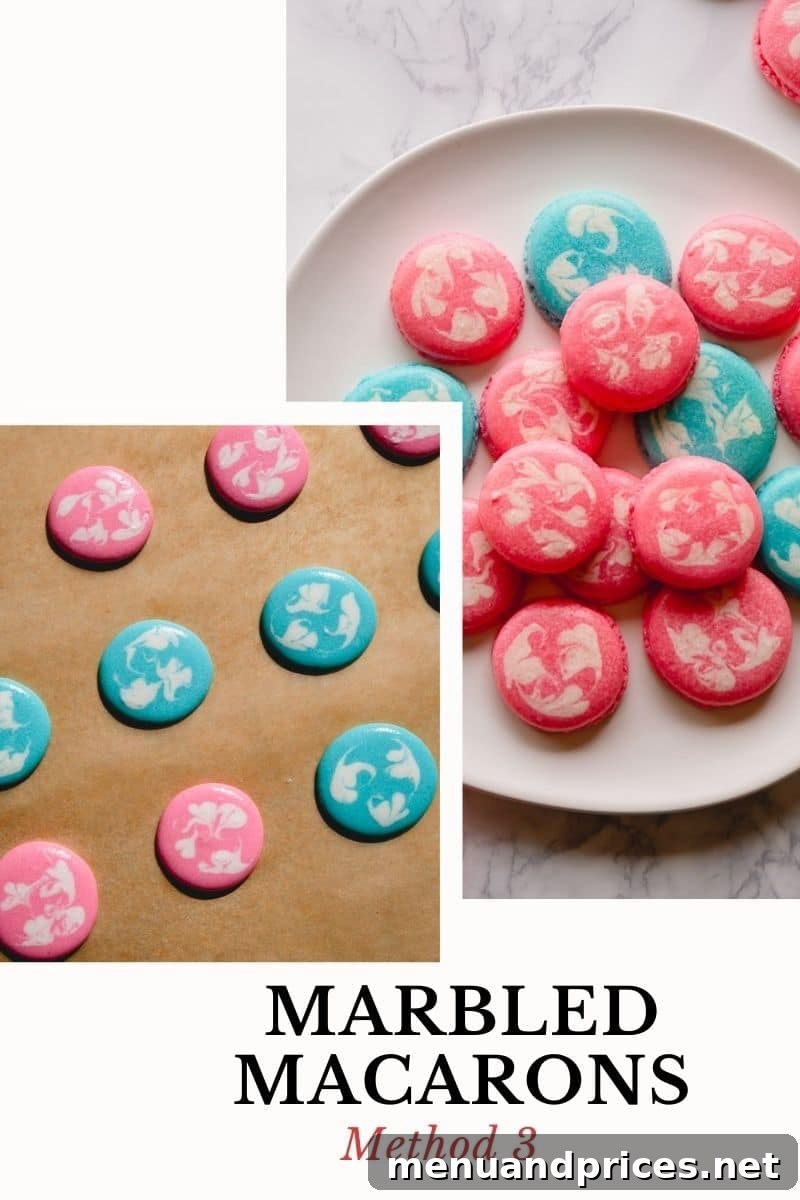
Method 3: The Elegant Swirl Design
This method holds a special place in my heart due to the incredibly chic and sophisticated macarons it creates. The “Swirl Design” allows for precise control over your marbling, resulting in an elegant, artistic finish that looks far more complex than it actually is. It’s a fantastic way to combine two complementary or contrasting colors for a striking visual.
Steps for Swirl Design Macarons:
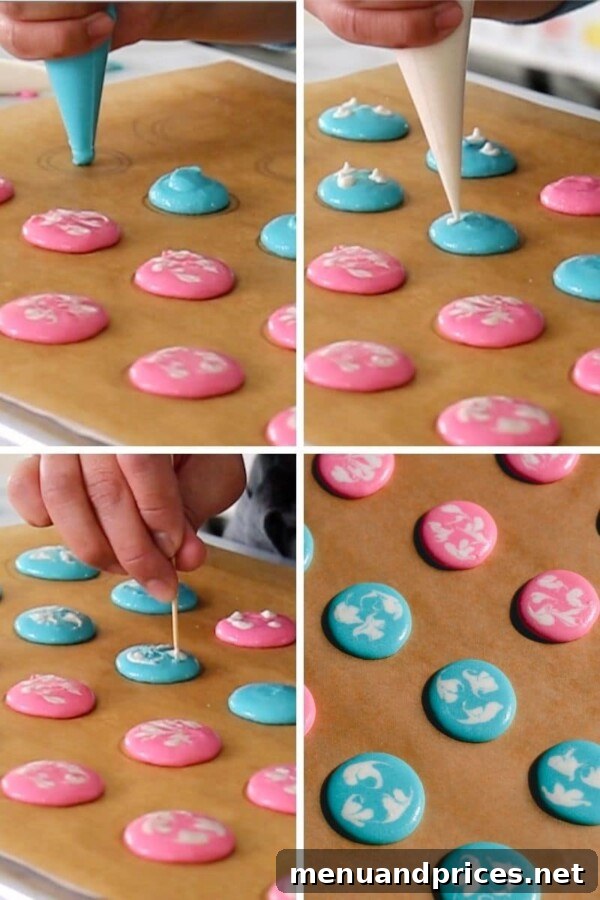
- Pipe Base Shells: Begin by piping your regular macaron shells using your primary color of macaron batter onto your prepared baking sheet. Aim for uniform size and shape, as these will form the foundation of your design.
- Add Contrast Dots: Using a second (or third) contrasting color of macaron batter (which can be in another piping bag or a small squeeze bottle with a fine tip), pipe 4-5 small dots directly on top of each freshly piped base shell. Arrange the dots evenly around the center, or create a pattern that suits your preference.
- Create the Swirl: Immediately after adding the dots, take a clean toothpick. Gently drag the toothpick through the dots and into the base color, creating swirl patterns. You can drag from the edge towards the center, or create figure-eights, or simple loops – the possibilities are endless. The goal is to blend the colors subtly without overmixing, forming beautiful, defined swirls.
Pro Tip: Work quickly before the macaron shells start to dry. For best results, clean your toothpick between each macaron shell to prevent color transfer and maintain crisp lines. Experiment with different dot arrangements and swirling motions to discover your favorite patterns.
Macaron 101: A Comprehensive Guide
Ready to dive deeper? Master the art of French macarons and create your signature flavors with our complete guide!
Common Troubleshooting Tips for Marbled Macarons
Even with the right technique, minor issues can arise. Here are some quick tips to ensure your marbled macarons turn out perfectly:
- Colors Blending Too Much? This often happens if the batter is overmixed after coloring, or if you’re too rough when transferring or swirling. Aim for gentle movements.
- Faded Colors? Ensure you’re using high-quality gel food coloring. Liquid food coloring can thin your batter and result in less vibrant shades.
- Loss of Definition? If your patterns disappear after baking, it might be due to over-macaronage (too runny batter) or baking at too high a temperature.
- Cracked Shells? This is a common macaron issue, often linked to insufficient drying time (allowing the “skin” to form) or inconsistent oven temperature.
Pairing Flavors with Your Marbled Masterpieces
The visual appeal of marbled macarons can be beautifully complemented by thoughtful flavor pairings. Consider:
- Fruity & Floral: A vibrant pink and purple swirl pairs wonderfully with raspberry rose or lavender fillings.
- Earthy & Rich: Green and brown marbling could indicate pistachio, matcha, or coffee flavors.
- Classic Combinations: Black and white marbling is perfect for cookies and cream, or a sophisticated vanilla bean ganache.
- Seasonal Themes: Red and green for Christmas, pastels for spring, or autumnal oranges and browns.
We truly hope this detailed marbled macarons tutorial has provided you with the confidence and inspiration to experiment with these fantastic techniques. Adding a marbled effect to your macaron shells is a simple yet incredibly effective way to elevate your baking and delight anyone who tastes them.
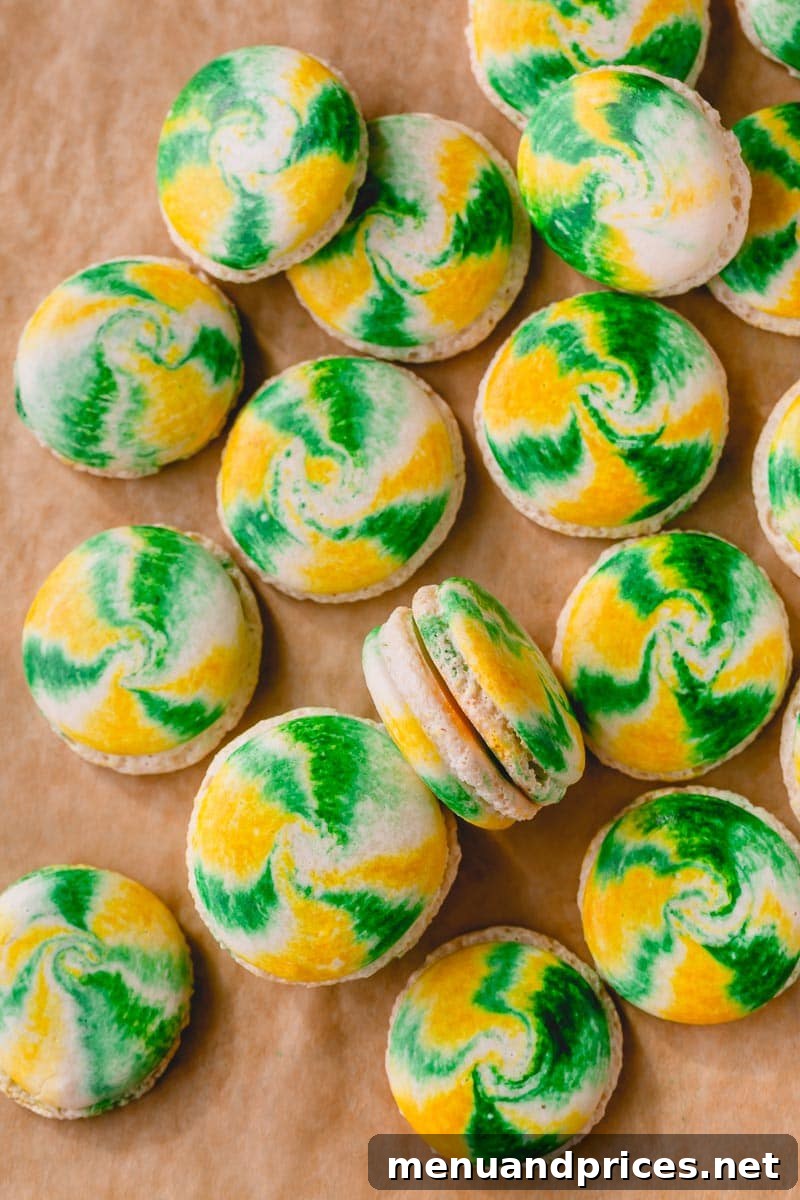
Which method are you most excited to try first? Share your favorite technique and your marbled macaron creations with us! Happy baking!