Mastering the art of making a perfect roux is one of the most transformative culinary skills you can acquire. This fundamental mixture of flour and fat serves as the backbone for countless beloved dishes, from velvety béchamel sauce to robust gumbo. This comprehensive guide will equip you with everything you need to know: understanding what a roux is, mastering the ideal flour-to-fat ratio, navigating the different types of roux, applying expert tips for flawless execution, and even practical advice on storing and freezing your homemade roux for future culinary adventures.
Whether you’re a seasoned chef or just starting your culinary journey, understanding roux will elevate your cooking to new heights. Say goodbye to lumpy gravies and thin sauces; with this guide, smooth, rich, and flavorful results are within your reach.
What is Roux? The Foundation of Flavor and Thickness
At its core, a roux (pronounced “roo”) is a classic culinary preparation made by cooking equal parts flour and fat together. This seemingly simple combination, when expertly prepared, transforms into a stable thickening agent and a powerful flavor enhancer. Originating in French cuisine, roux has become a global staple, forming the essential base for a wide array of sauces, gravies, stews, and soups across various cultures.
The magic of roux lies in the interaction between the flour’s starch and the fat. As the mixture cooks, the starch granules in the flour begin to absorb the fat and toast, developing a nutty aroma and a deeper flavor profile. This cooking process also breaks down the starch molecules, preventing them from clumping when later combined with liquids, ensuring a silky-smooth texture in your finished dish. It’s this unique characteristic that makes roux far superior to simply adding raw flour directly into a liquid, which often results in a lumpy, unpleasant, and raw-tasting mess.
Why is Roux Indispensable in Your Kitchen?
A roux serves two primary functions in cooking: thickening and flavor development. While its thickening power is perhaps its most recognized attribute, its ability to deepen and enrich the flavor of a dish is equally important, especially with darker rouxs. It provides a consistent, stable emulsion that carries flavor throughout a liquid, making it an essential component for:
- Cream Sauces: From the classic French Béchamel (a foundational “mother sauce”) to Alfredo, cheese sauces for macaroni and cheese, and luscious gravies.
- Soups and Stews: Lending body and depth to hearty stews like Beef Bourguignon or Creole Gumbo, and creamy soups such as clam chowder or broccoli cheddar.
- Casseroles: Creating a binding and flavorful base for dishes like scalloped potatoes or green bean casserole.
The roasting of the flour in fat eliminates the raw, pasty taste that uncooked flour can impart. Instead, it contributes a nuanced, toasted flavor that evolves with the cooking time, adding complexity that cannot be achieved by other thickening methods. For instance, while cornstarch or arrowroot can thicken, they don’t offer the same rich mouthfeel or depth of flavor that a properly made roux provides.

How to Make a Roux: A Step-by-Step Guide to Perfection
Making a roux is straightforward, but achieving perfection requires attention to detail and a few key considerations. Once you master the technique, you’ll find yourself confidently building incredible sauces and dishes.
The Essential Roux Ratio: Precision for Consistency
The most crucial aspect of a successful roux is the flour-to-fat ratio. For consistent results, a 1:1 ratio by weight is highly recommended. While many recipes refer to 1:1 by volume, this can lead to varying consistencies because flour is less dense than fat. For example, 1 cup of butter weighs more than 1 cup of all-purpose flour. Therefore, focusing on weight provides predictable outcomes.
For a standard batch, we recommend:
- 56 grams (approximately 4 tablespoons) of unsalted butter
- 56 grams (approximately 7 tablespoons) of all-purpose flour
This 1:1 weight ratio yields a perfectly smooth, thick, yet pourable paste that is ideal for building various sauces. Should you prefer a slightly thicker or thinner roux for specific applications, you can subtly adjust this ratio, but always start with this balanced foundation.
Choosing Your Ingredients: Fat and Flour
- Fat: Unsalted butter is a popular choice due to its flavor and ease of use. However, other fats like bacon fat, duck fat, ghee, or various vegetable oils (avocado, canola) can also be used, especially for darker rouxs where butter might burn. We’ll delve into other fat options in more detail below.
- Flour: All-purpose flour is the most common and versatile choice for roux. Its moderate protein content and finely milled texture create a smooth paste without excessive gluten development. While other flours like bread flour or whole wheat flour can technically be used, they may yield a slightly tougher texture or impact the final flavor. For gluten-free alternatives, rice flour or a gluten-free all-purpose blend can be substituted, though the thickening power and cooking times may vary.
Essential Equipment
A heavy-bottomed saucepan or skillet is your best friend when making roux. The heavy base distributes heat evenly, preventing scorching. A sturdy whisk is also indispensable for continuous stirring, ensuring the flour cooks evenly and doesn’t stick to the bottom of the pan.
Mastering the Cooking Process: Attention to Detail
Making roux demands your undivided attention. Butter and flour can burn quickly, and a burnt roux has a bitter taste that cannot be salvaged. This isn’t the time to multitask; stay focused on your pan!
While there’s no single “magic number” for exact cooking time, as it varies based on stove heat, cookware, and the type of roux you’re aiming for, we’ll teach you the crucial visual and aromatic cues to look for at each stage.
In a nutshell, the process is simple:
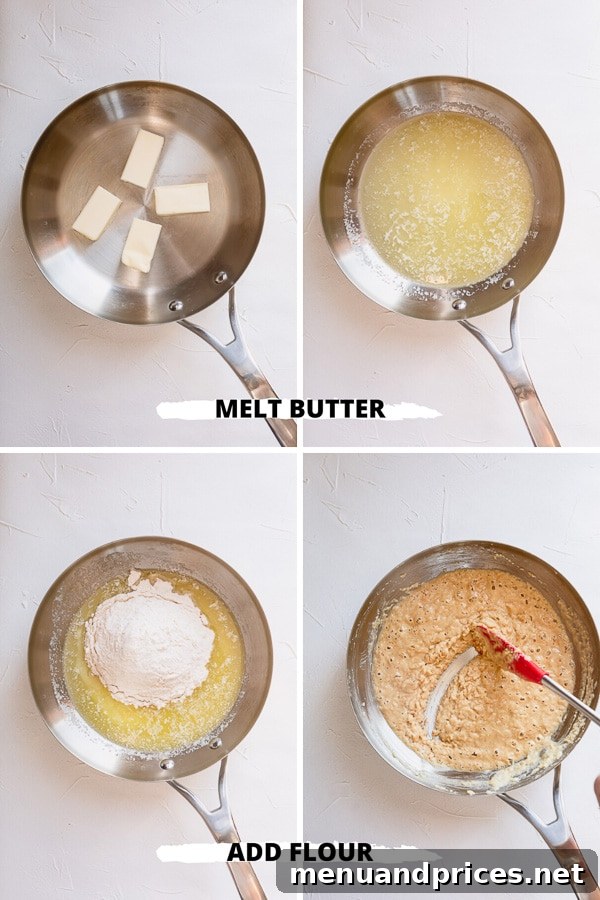
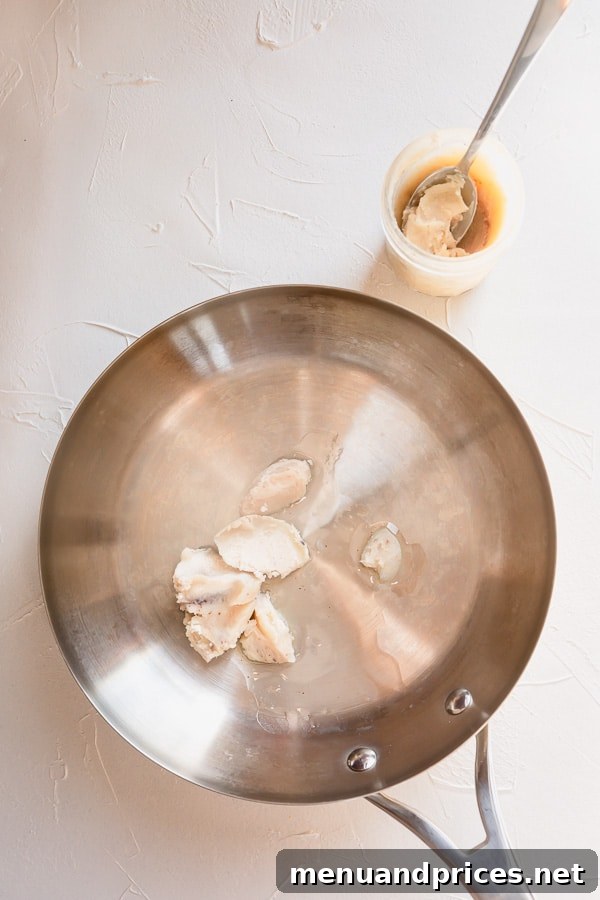
- Melt the Fat: Begin by melting your chosen fat (butter, oil, etc.) in a stainless steel skillet or saucepan over medium-low heat.
- Evaporate Moisture: Once the fat is fully melted, allow it to gently simmer for about a minute to cook off any excess moisture. Be careful not to let the butter brown at this stage if you’re aiming for a lighter roux.
- Add the Flour: Gradually whisk in the all-purpose flour, ensuring it fully incorporates with the melted fat. Continue whisking constantly, breaking up any clumps, until a smooth paste forms.
- Roast to Desired Shade: Continue cooking the mixture, stirring constantly, until it reaches the desired color and aroma, which defines the type of roux you are making.
The 3 Types of Roux: Color, Flavor, and Application
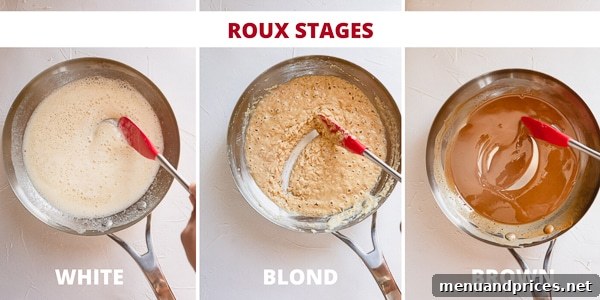
While all three types of roux start with the same basic ingredients and ratio, their cooking time dictates their color, flavor profile, and thickening power. Understanding these differences is key to choosing the right roux for your dish.
1. White Roux
- Appearance: A pale, very light blonde color, almost white.
- Cooking Time: 1-2 minutes. Cook just long enough to remove the raw flour taste, without allowing it to brown.
- Flavor: Neutral, allowing the flavors of the liquid it thickens to shine. It has a slightly “cooked flour” smell but should not be nutty.
- Thickening Power: This is the most potent thickening agent among the three types because the starch molecules are largely intact.
- Applications: Perfect for delicate, white, and creamy sauces such as Béchamel, classic cheese sauces for mac and cheese, cream-based soups, and scalloped potatoes. It’s designed to thicken without altering the color or primary flavor of the dish.
- Tip for White Roux: As you stir, pay close attention to the aroma. Initially, you’ll detect a distinct raw flour smell. Continue cooking until this raw smell dissipates and is replaced by a faint, cooked flour scent. This signals it’s ready.
2. Blonde Roux
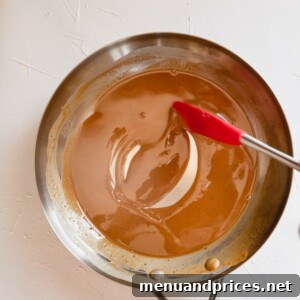
- Appearance: A light, golden caramel color, similar to peanut butter.
- Cooking Time: 4-6 minutes.
- Flavor: Develops a subtle, nutty aroma and flavor due to the increased toasting of the flour.
- Thickening Power: Slightly less thickening power than white roux, as some starch molecules begin to break down, but still very effective.
- Applications: Extremely versatile, blonde roux can be used in almost any recipe calling for a white roux, adding a little more depth of flavor. It’s excellent for lighter gravies, velouté sauce, or cream sauces where a hint of toasted flavor is desired without significant darkening.
- Tip for Blonde Roux: The scent will evolve from “cooked flour” to a noticeably toasted and nutty aroma. The visual cue of a pale golden color is also crucial.
3. Brown Roux
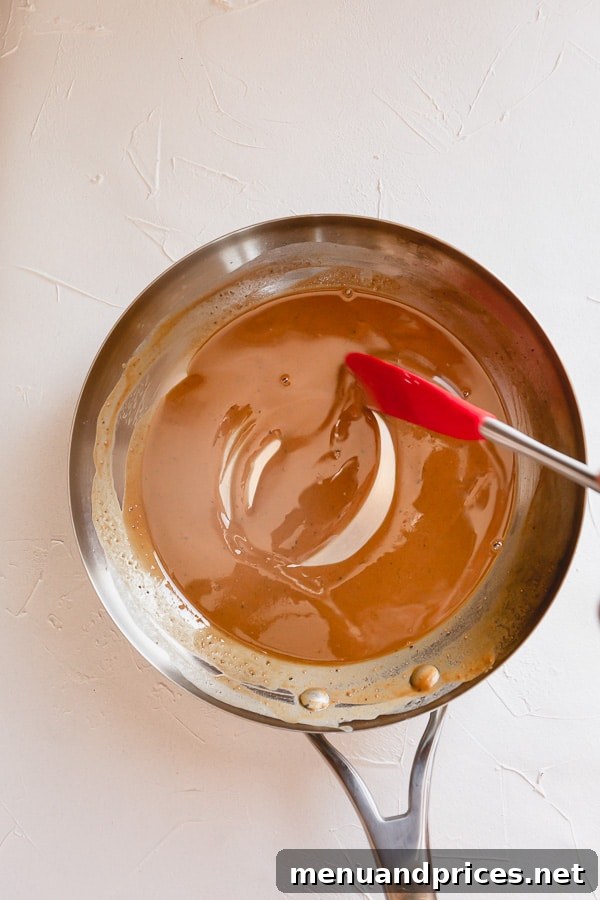
- Appearance: A rich, deep brown color, resembling milk chocolate or dark coffee.
- Cooking Time: 6-8 minutes, or even longer depending on the desired darkness and heat. This stage requires patience and constant vigilance.
- Flavor: Possesses a pronounced, deep nutty and toasted flavor. This roux is primarily added for its incredible flavor contribution rather than just thickening.
- Thickening Power: Significantly less thickening power compared to white or blonde roux. The extensive cooking breaks down most of the starch molecules. You’ll often need to use more brown roux to achieve the same thickness as a white roux.
- Applications: The indispensable base for classic Creole and Cajun dishes like Gumbo, Étouffée, and robust dark gravies or stews. Its deep flavor profile is integral to these cuisines.
- Tip for Brown Roux: When aiming for a dark roux, it is highly recommended to use an oil (like canola, vegetable, or avocado oil) or rendered animal fat (such as bacon fat or duck fat) instead of butter. Butter’s milk solids can burn much more easily over the longer cooking times required for a brown roux, leading to a bitter taste. If using butter, clarified butter (ghee) is a better option.
Beyond Butter: Exploring Fat Options for Your Roux
While butter is a popular choice for its rich flavor, various other fats can be used to make a roux, each offering unique characteristics in terms of flavor, smoke point, and application. The choice of fat can significantly influence the final taste of your dish.
- Bacon Fat: A personal favorite for many, rendered bacon fat imparts a smoky, savory depth that is particularly excellent for gravies, stews, and especially dark rouxs used in Southern cuisine. Its robust flavor pairs wonderfully with pork or poultry-based dishes.
- Duck Fat: Prized for its rich, silky texture and subtle gamey flavor, duck fat creates an incredibly luxurious roux. It’s ideal for gourmet sauces and dishes featuring duck, game birds, or even elevated vegetable preparations.
- Coconut Oil: For a plant-based option, refined coconut oil can be used. It has a neutral flavor and a relatively high smoke point, making it suitable for various roux types. Avoid unrefined coconut oil if you don’t want a distinct coconut flavor in your dish.
- Ghee (Clarified Butter): If you love the flavor of butter but need a higher smoke point for darker rouxs, ghee is an excellent choice. By removing the milk solids, ghee can be cooked for longer without burning, retaining butter’s characteristic richness.
- Avocado Oil: With a very high smoke point and neutral flavor, avocado oil is a healthy and versatile option for any type of roux, especially when you want the other ingredients to be the star.
- Canola Oil / Vegetable Oil: These neutral oils are economical and have moderate to high smoke points, making them reliable choices for all roux types, particularly brown rouxs where long cooking times are involved. They won’t add any distinct flavor, allowing the other ingredients to shine.
Troubleshooting Your Roux: Common Issues and How to Fix Them
Even experienced cooks encounter hiccups. Here’s how to address common roux challenges:
- My roux burned! Unfortunately, a burnt roux is beyond saving. It will impart a bitter, acrid taste to your dish. Discard it immediately, clean your pan thoroughly, and start fresh. This is why continuous stirring and appropriate heat control are so vital.
- My roux is too thick/too thin for my needs. If your roux seems too thick before adding liquid, you can gently melt in a bit more fat. If it’s too thin, you can add a small amount of extra flour, ensuring you cook it out for a minute or two to remove the raw flour taste. For future batches, adjust your initial ratio slightly.
- My sauce is lumpy after adding liquid. This usually happens when the roux and liquid are added at similar temperatures, or when the liquid is added too quickly. The key is contrasting temperatures: always add cold liquid to a hot roux, or hot liquid to a cold (prepared ahead of time) roux. Whisk continuously as you slowly pour in the liquid to ensure a smooth, lump-free sauce.
Incorporating Roux: The Art of a Smooth Sauce
Once your roux has reached the desired color, it’s ready to thicken your liquid. The golden rule for a lump-free sauce is to combine liquids and roux at contrasting temperatures:
- Hot Roux + Cold Liquid: If your roux is fresh off the stove and hot, gradually whisk in cold (or room temperature) liquid. The temperature difference helps prevent the starch from clumping.
- Cold Roux + Hot Liquid: If you’ve made your roux ahead of time and it’s chilled, you can gradually whisk it into a hot liquid.
In both cases, add the liquid slowly, a little at a time, whisking constantly until completely smooth before adding more. This gradual process ensures a perfectly smooth and consistent sauce.
How to Make a Roux
Comment
Print Recipe
Ingredients
- 4 tablespoons 56gr butter (See Note 1)
- 7 tablespoons 56gr all-purpose flour
Instructions
-
In a stainless steel skillet or saucepan, melt butter over medium-low heat.
-
Once melted, let it cook for a minute or so to evaporate excess moisture. (Do NOT brown the butter.)
-
Add flour and cook the mixture, stirring constantly with a whisk, until desired shade is reached. (TIP: When making white or blond roux, keep smelling the mixture. At first, you’ll smell raw flour, then that raw flour smell will disappear and you’ll smell slightly roasted flour. For blond roux, it’ll smell distinctly toasted and nutty.)
Estimated cook time:
-
White roux: 1-2 minutes
-
Blond roux: 4-6 minutes
-
Brown roux: 6-8 minutes (or longer for very dark roux)
⭐️ Did you make this recipe?
Please leave a review and let us know how you liked it!
Tips & Notes
Note 2: This batch makes enough roux to thicken approximately 4 cups of liquid (e.g., milk for béchamel, broth for gravy).
How to store: Allow the roux to cool completely. Refrigerate in an airtight container for up to 3 months.
How to freeze roux: Once cooled, divide the mixture into roughly 1-tablespoon portions (about 15-20g each). Place in an ice cube tray and freeze until solid. Once frozen, remove the roux cubes from the tray and transfer them to a freezer-safe bag. It can be stored in the freezer for up to 6 months.
Thickening Power: As a general guideline, 1 tablespoon of roux will effectively thicken about 1 cup of liquid to a medium consistency. Adjust based on your desired thickness and the type of roux used (darker rouxs have less thickening power).
Nutrition (per serving – approx. 1 tbsp of roux)