
The Essential Guide to Room Temperature Butter for Perfect Baking
Mastering the nuances of butter temperature is a transformative skill for any baker. This comprehensive guide will demystify what “room temperature butter” truly means for your culinary endeavors, meticulously highlighting its critical distinctions from merely softened or melted butter. We’ll delve into the science behind why this specific consistency is paramount for achieving professional-level results, from light, airy cakes to perfectly chewy cookies. Furthermore, you’ll learn to recognize the unmistakable signs of ideally tempered butter and be equipped with foolproof methods to prepare it efficiently. Elevate your baking from merely good to truly extraordinary by understanding and correctly utilizing this fundamental ingredient.
The Critical Role of Butter Temperature in Baking Success
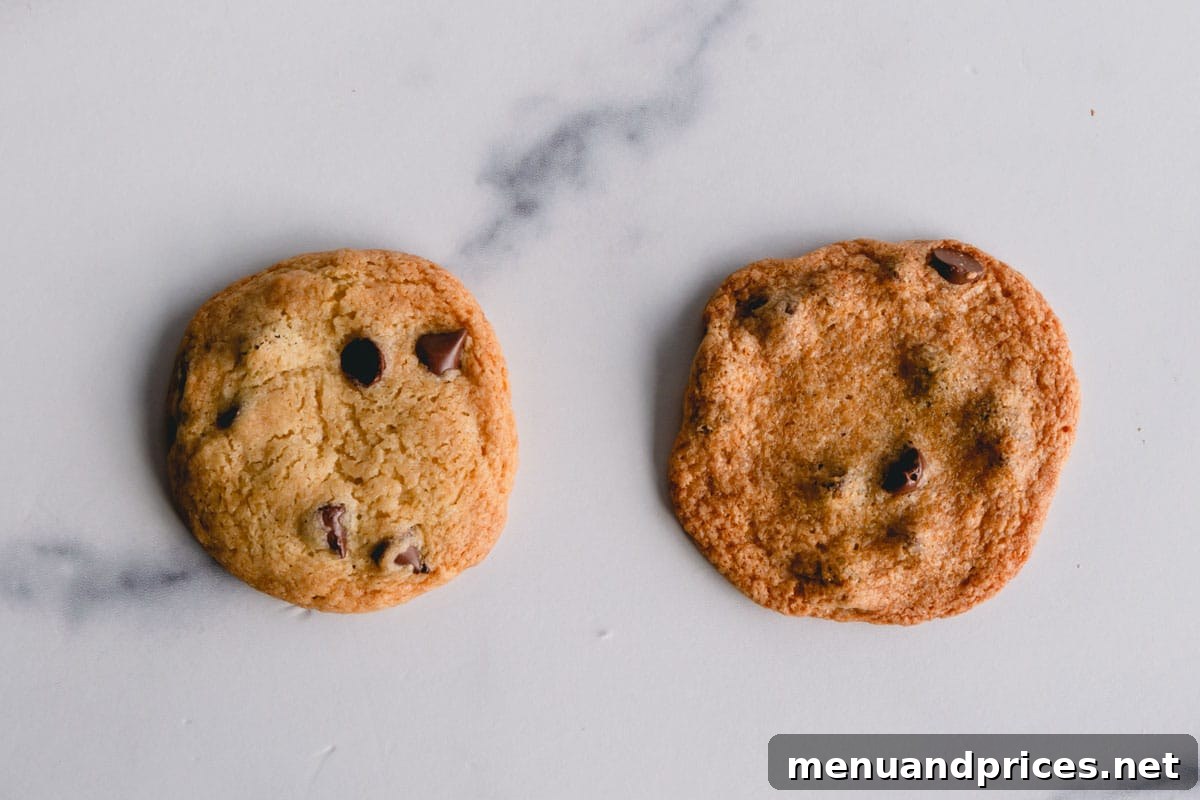
Did you know that the precise temperature and consistency of butter are not interchangeable and profoundly impact the texture, rise, and even the flavor distribution of your baked goods? This seemingly small detail is, in fact, one of the most significant factors in determining the success or failure of your baking projects. For instance, using melted butter in a cookie recipe typically results in a flatter, crispier cookie because the fat spreads more readily and fewer air pockets are incorporated into the dough. Conversely, butter that is too cold and hard will resist proper creaming with sugar, leading to a denser, heavier product that lacks the desired aeration and tender crumb.
Similarly, butter that is overly soft or oily can cause a batter to become greasy and separated, resulting in a collapsed structure or an unpleasantly dense texture. Each state of butter – melted, softened, or perfectly at room temperature – serves a unique purpose in baking, designed to achieve specific textural and structural outcomes. Therefore, adhering strictly to a recipe’s specified butter temperature is not just a suggestion; it’s a foundational principle for achieving consistently excellent results, influencing everything from the lightness of a cake to the flakiness of a pie crust.
Softened Butter vs. Room Temperature Butter: Understanding the Crucial Distinction
While the terms “softened butter” and “room temperature butter” are often used interchangeably by novice bakers, there’s a distinct and important difference that can make or break a recipe. Understanding this nuance is absolutely crucial for mastering recipes that call for one over the other, particularly when baking delicate pastries and fluffy cakes.
When a recipe specifically calls for room temperature butter, it implies a very precise state: the butter should be no warmer than 68°F (20°C). This ideal temperature range ensures the butter is pliable enough to incorporate easily with other ingredients, yet still firm enough to hold its structure and trap air during the vital creaming process. It feels cool to the touch but yields slightly to gentle pressure, a state we will describe in detail below. This precise consistency is paramount for recipes where aeration, a delicate crumb, and a stable emulsion are desired, such as in most cakes, cookies, and certain quick breads, providing the foundation for their light and tender structure.
On the other hand, if a recipe simply states “softened butter,” it generally refers to butter that is soft enough to be easily mixed without clumping, but the exact temperature isn’t as critically defined. This butter might be slightly warmer than true room temperature butter, possibly closer to the ambient temperature of your kitchen, which could be up to 72°F (22°C) or even slightly higher. While perfectly suitable for applications like making a spreadable compound butter or incorporating into a pan sauce, overly soft butter will not perform as effectively in recipes requiring significant aeration through creaming. It’s vital to note that if a recipe explicitly demands “room temperature” butter, using merely “softened” butter (especially if it’s too warm and starting to melt) can lead to subpar results, including greasy textures or a lack of desired lift.
Why Room Temperature Butter is Indispensable for Achieving Perfect Baked Goods
Using butter at the correct room temperature is far more than a mere suggestion; it’s a foundational technique that dictates whether your baked goods achieve their intended texture, flavor, and impressive rise. This seemingly small detail plays a monumental role in the intricate chemistry and mechanics of successful baking. For instance, my highly acclaimed blueberry cheesecake muffins owe their airy height and incredibly tender crumb to precisely prepared room temperature butter. Let’s explore the key reasons why this specific consistency is so vital:
- Achieving Homogeneous Mixing and Stable Emulsification: Butter at its optimal room temperature is pliable enough to seamlessly blend with other core ingredients, such as granulated sugar, eggs, and flour. This ensures a perfectly smooth and consistent batter or dough, free from undesirable lumps or streaks. When butter is too cold, it breaks into small, hard pieces, leading to an uneven distribution of fat throughout the mixture, which can result in a crumbly or inconsistent texture. Conversely, if the butter is too warm and oily, it can prevent proper emulsion, causing the batter to separate and creating a greasy final product. A homogeneous mixture, where fats and sugars are evenly distributed, is the cornerstone for a uniform texture and consistent taste in the finished product.
- Superior Creaming Ability for Enhanced Leavening: Many classic baking recipes, particularly for light cakes, tender cookies, and airy frostings, rely on the “creaming method.” This involves vigorously beating butter and sugar together until the mixture becomes light, fluffy, and pale in color. Room temperature butter is uniquely structured to trap countless tiny air pockets during this rigorous creaming process. These microscopic air bubbles are incredibly critical; they expand significantly when exposed to the heat of the oven, acting as a powerful natural leavening agent. This expansion is precisely what gives cakes their light, tender crumb, cookies their desired chewiness and slight lift, and muffins their domed tops. If the butter is too cold, it won’t cream properly or trap sufficient air. If it’s too warm, the air pockets will collapse, resulting in a dense, heavy product that lacks the desired volume and delicate texture.
- Better Incorporation of Ingredients for Optimal Structure: Beyond the initial mixing, properly tempered room temperature butter facilitates the superior incorporation of subsequent ingredients. It melds effortlessly with eggs, flour, and other liquids, forming a cohesive, well-integrated mixture without developing undesirable lumps or clumps. This leads to a smoother, more stable batter or dough, which translates directly into baked goods with an even texture, a pleasant mouthfeel, and the desired structural integrity. It helps create a fine crumb in cakes, a tender chew in cookies, and a consistent rise in quick breads, ensuring every bite is consistently delightful and structurally sound.
- Enhanced Flavor Distribution: Butter, as a fat, is an excellent carrier of flavor compounds. When butter is properly incorporated at room temperature, it ensures that all fat-soluble flavors – both from the butter itself and other ingredients like vanilla extract, lemon zest, or spices – are evenly and thoroughly dispersed throughout the batter. This results in a more balanced and harmonious flavor profile in your baked goods, preventing pockets of blandness or overwhelming richness and ensuring a consistently delicious taste experience with every bite.
What Exactly Constitutes Perfect Room Temperature Butter for Baking?
Defining “room temperature” can be surprisingly subjective, as ambient room temperatures vary significantly based on climate, season, and heating/cooling systems. However, for the specific, exacting demands of baking, “room temperature butter” refers to a much more precise state than simply leaving butter out on your counter. While average room temperature typically falls between 68 and 72°F (20-22°C), the absolute ideal temperature range for butter specifically for baking is slightly cooler, making it firm enough to hold its shape but perfectly pliable for creaming and mixing.
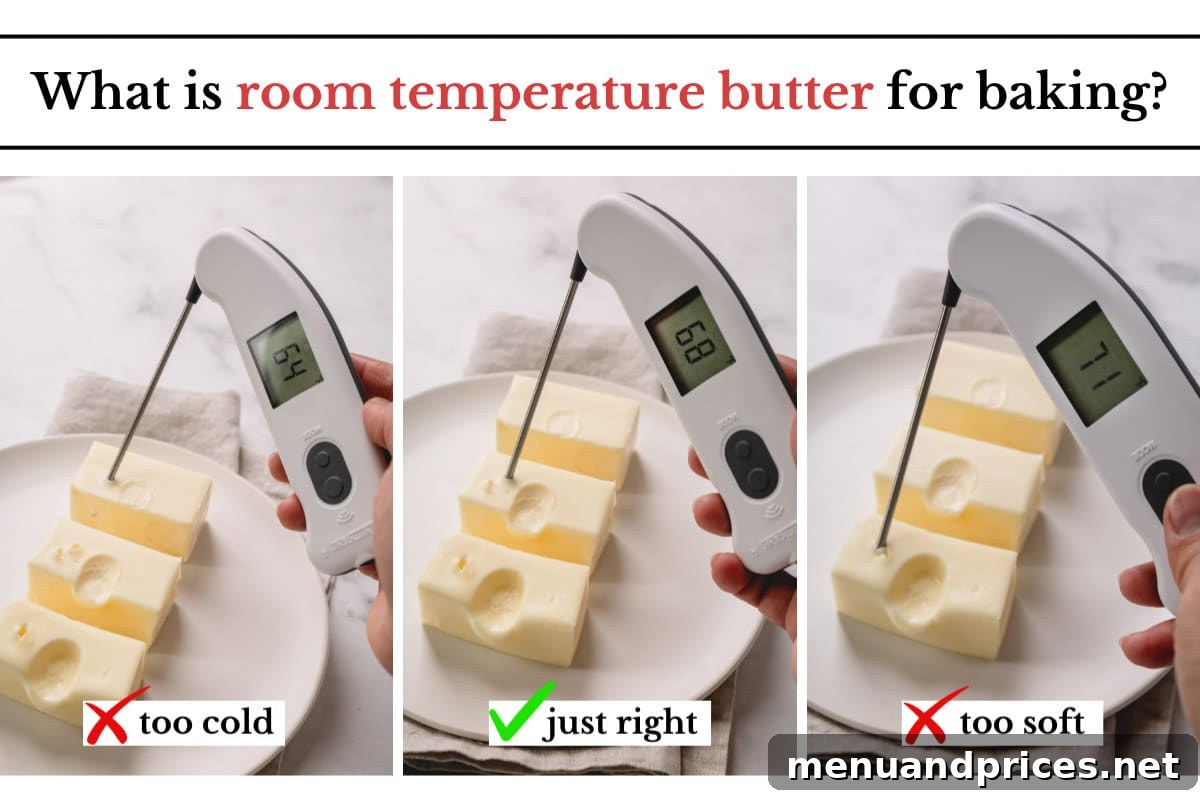
The golden standard for room temperature butter in baking is approximately 65-68°F (18-20°C). Butter within this precise range is cooperative and performs optimally: it will easily blend with sugar, emulsify beautifully with eggs, and trap air effectively during the creaming process. If butter is colder than this, it will be too hard to cream properly, leading to a lumpy mixture and insufficient air incorporation. If it’s warmer, particularly above 70°F (21°C), it will start to melt, becoming greasy and losing its crucial ability to hold those vital air pockets, ultimately leading to a flat, dense, or greasy final product that lacks the desired lift and texture.
3 Indispensable Signs of Perfect Room Temperature Butter:
Forget the guesswork! These three sensory and tactile cues will help you confidently identify whether your butter is impeccably prepared and ready for your baking masterpiece, ensuring consistent success every time:
- It’s cool to the touch, not cold or warm. When you pick up a stick of butter, it should feel distinctly cool, but not hard and rigid like it just came straight from the refrigerator. Crucially, it should also not feel greasy, oily, or slippery, which would indicate it’s too warm and beginning to melt. For absolute accuracy, the most reliable way to verify this is by using an instant-read thermometer; the internal temperature should ideally register squarely between 65-68°F (18-20°C). This small investment can save you from countless baking disappointments.
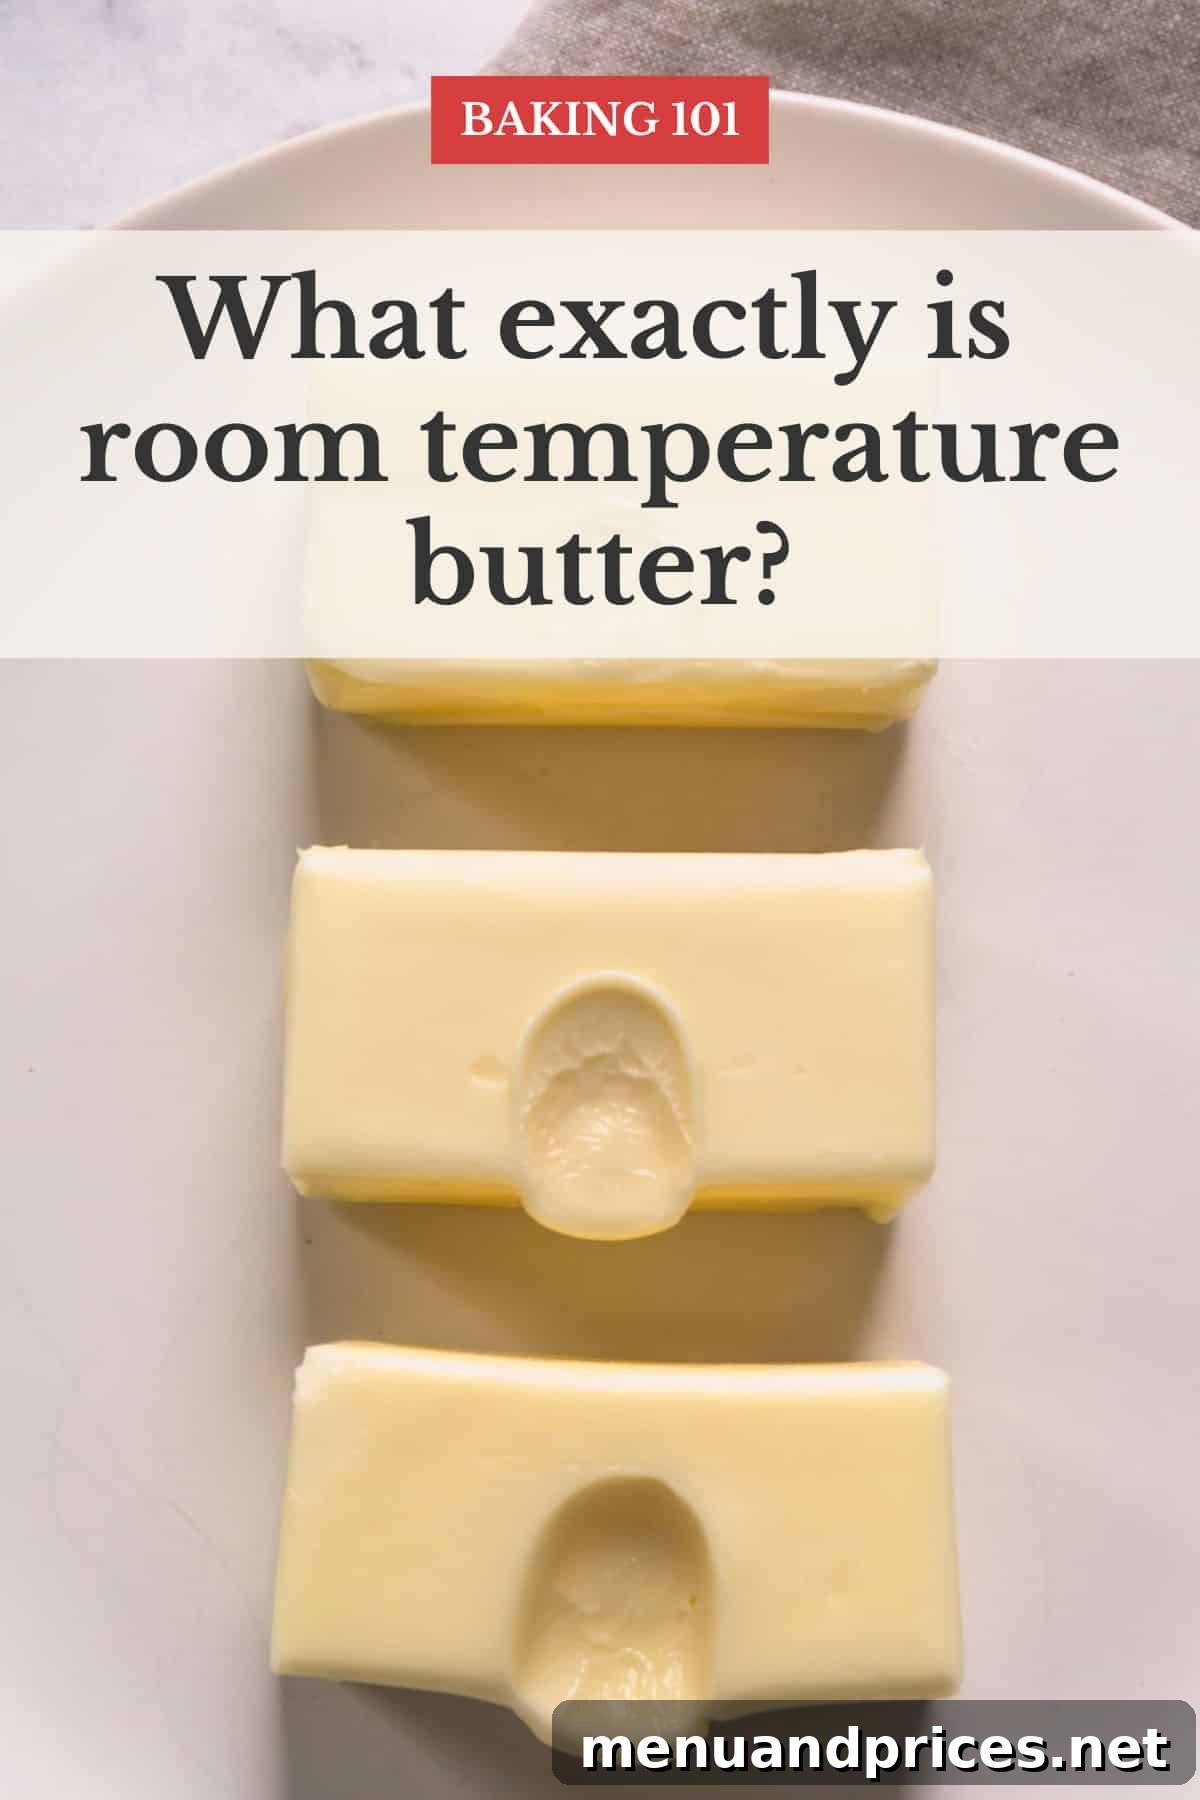
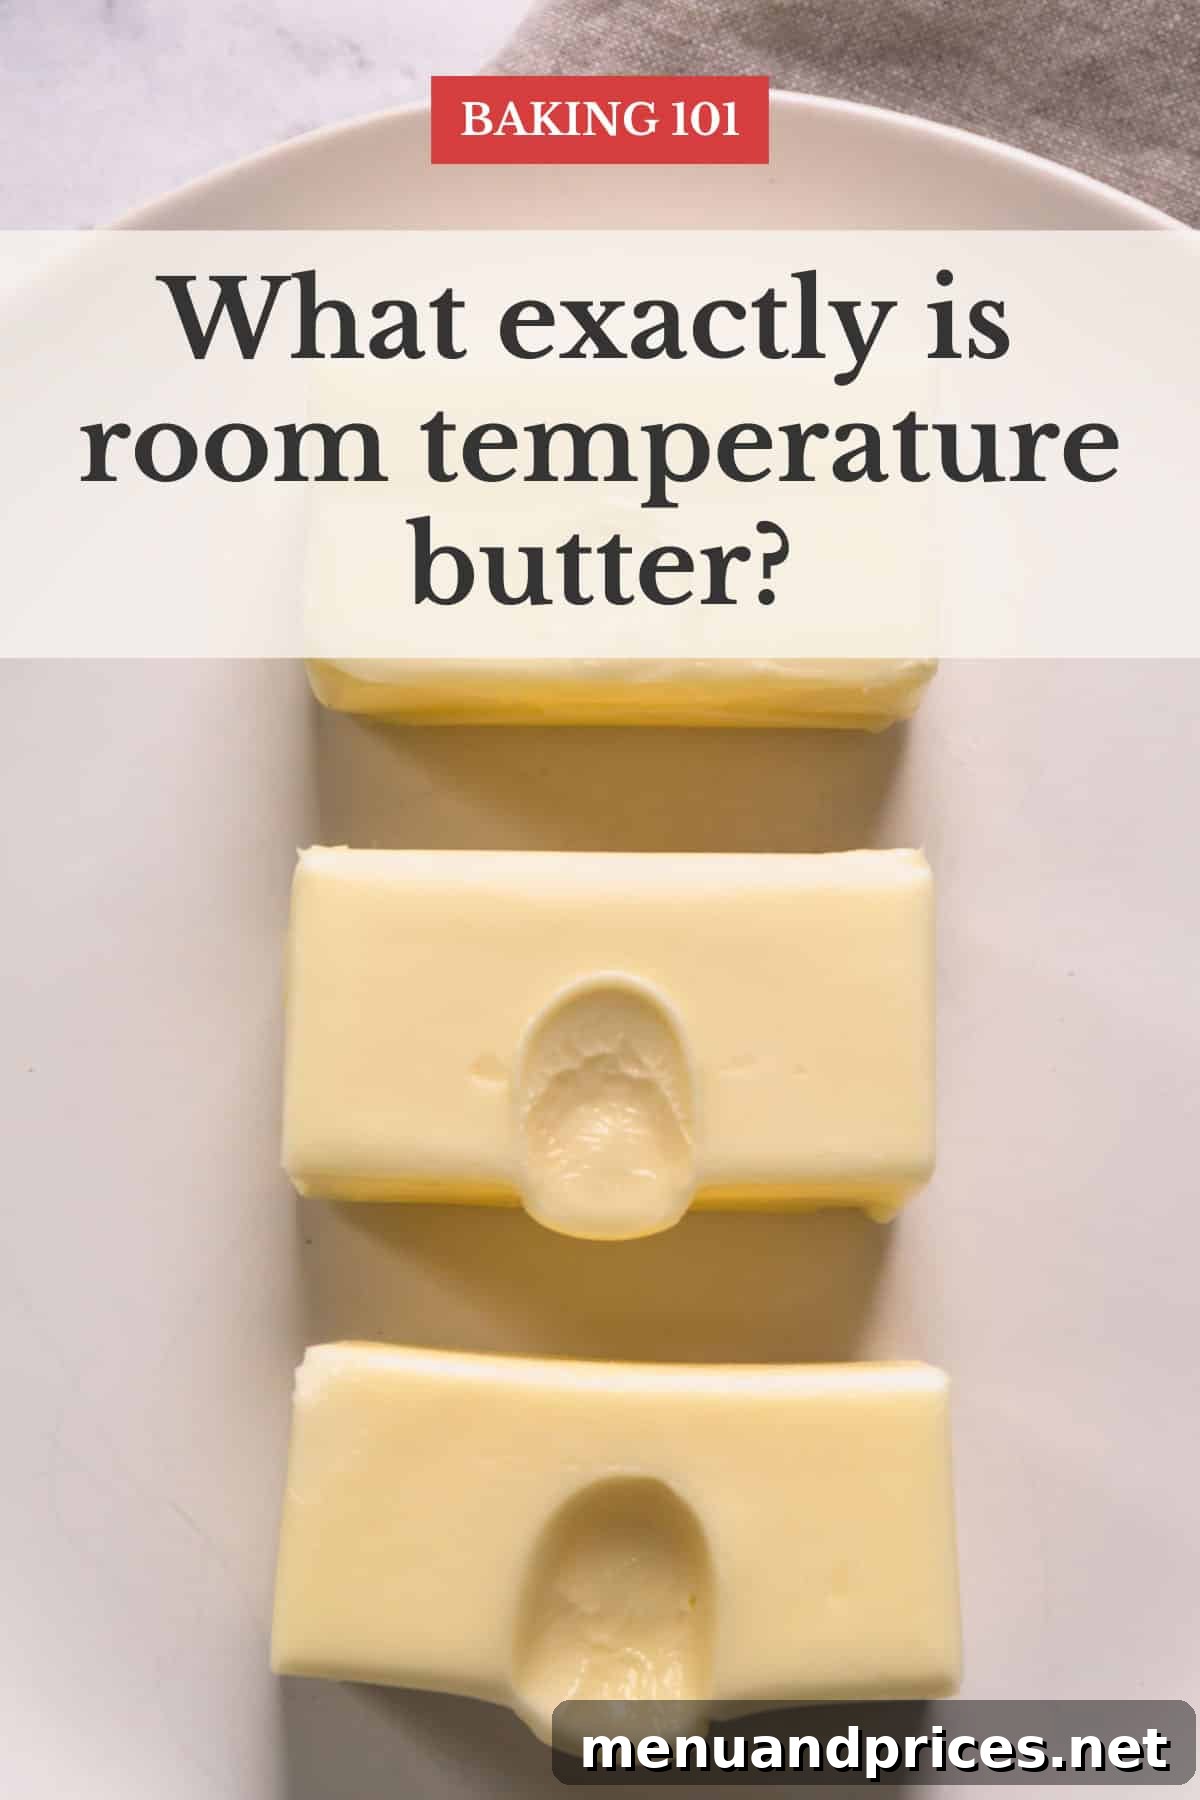
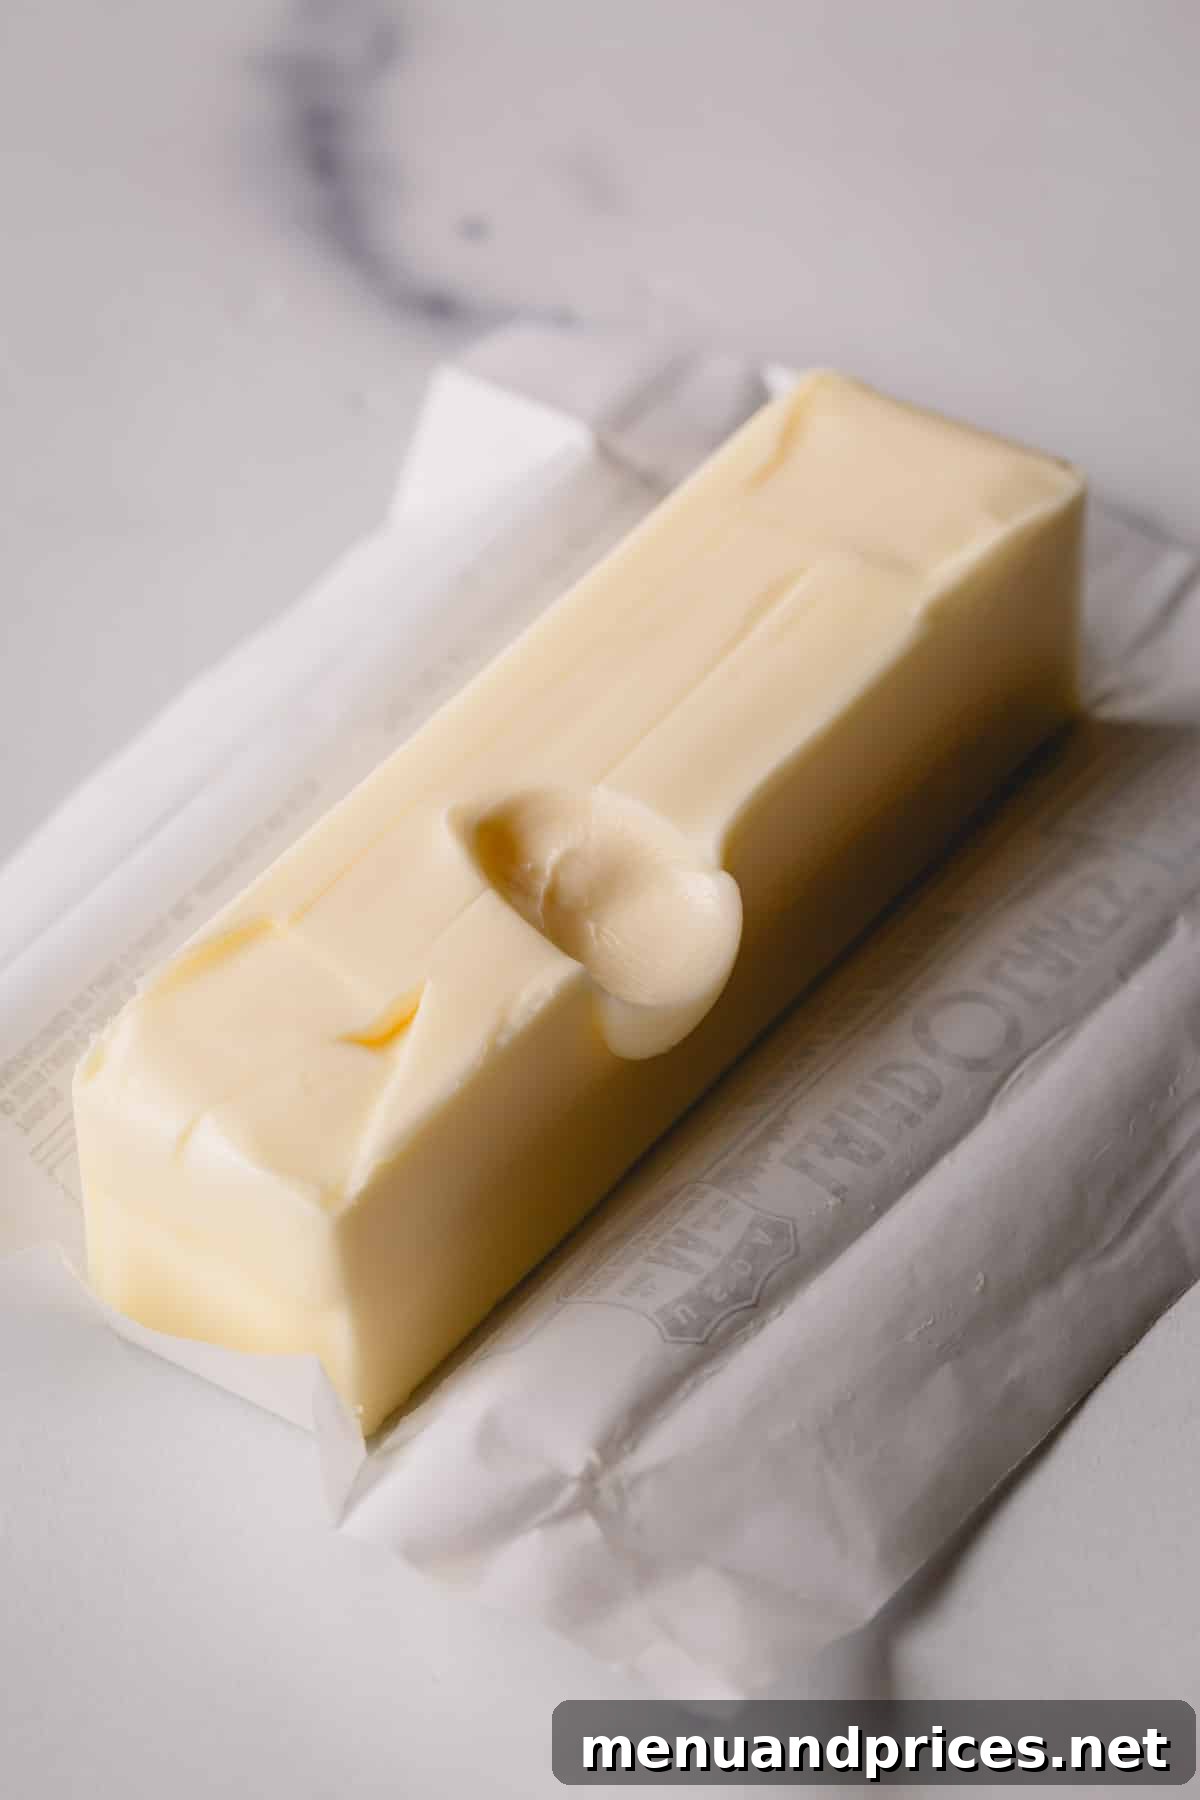
- It yields with distinct resistance when gently pressed. This is arguably the most reliable physical indicator of perfect room temperature butter. Gently press your finger into the side of the butter stick. It should leave a visible indentation, but you should feel a distinct, slight resistance, much like pressing into firm modeling clay. The butter should not feel squishy or allow your finger to sink straight through without any effort. If your finger goes in too easily, almost like pushing into softened play-doh or ointment, the butter is too soft and greasy. This overly soft state will negatively impact the aeration and structure of your baked goods, potentially leading to a dense cake, spread-out cookies, or a broken emulsion. Conversely, if it’s too hard and doesn’t dent at all, it’s too cold for most creaming applications and needs more time.
- It maintains its shape and isn’t shiny or greasy on the surface. Visually inspect the butter carefully. It should still largely hold its original stick shape; it shouldn’t be slumping or collapsing. Most crucially, it should not appear shiny, oily, or greasy on the surface. These are immediate telltale signs that the butter has begun to melt and the fat solids have started to separate from the water content. Oily or shiny butter signifies that it’s overheated and will not perform correctly in recipes requiring aeration, as the delicate crystalline structure necessary for trapping air will have broken down.
By attentively observing these three critical signs, you’ll be able to consistently achieve the perfect butter consistency, ensuring your ingredients work in perfect harmony to produce flawlessly delicious results every single time you bake.
Foolproof Methods to Achieve Perfect Room Temperature Butter, Fast or Slow
Time is often a precious commodity in the kitchen, and waiting for butter to naturally come to temperature can sometimes feel like an eternity. While there are many different methods to soften butter, not all techniques yield the precise “room temperature” consistency required for optimal baking. Some methods risk melting the butter unevenly, which can compromise your recipe. Here are the most effective and reliable techniques to ensure your butter is perfectly prepared, whether you have ample time to spare or need a quick solution:
- Method #1: The Patient Countertop Approach (1-2 Hours)
This is the gold standard when you have the foresight to plan ahead. Simply remove your butter from the refrigerator 1 to 2 hours before you plan to begin baking. The exact timing will depend significantly on several factors: the ambient temperature of your kitchen (a warmer kitchen means faster tempering), the size and quantity of the butter (a full pound block will take considerably longer than a single stick), and whether it’s salted or unsalted (salted butter typically has a slightly lower melting point due to its water content). As a general guideline, a single stick (4 ounces or 113 grams) of butter typically reaches its ideal room temperature on a kitchen counter that is around 70°F (21°C) in approximately one hour. For frozen butter, allow significantly more time, usually several hours, or thaw it in the refrigerator overnight before setting it out. This method allows the butter to warm evenly throughout, minimizing the risk of melting the exterior while the interior remains stubbornly cold. - Method #2: The Controlled Microwave Method (Less than 30 Seconds!)
When you’re truly short on time, the microwave can be your best friend, but extreme caution is paramount to avoid accidental melting. My preferred quick method involves microwaving a stick of butter in its original wrapper, seam-side down, for exactly 10 seconds at 40% power (this is based on a standard 1000-watt microwave; you may need to adjust power and time for different wattages). Immediately after, turn the butter to the opposite side and microwave for another 10 seconds at 40% power. This technique allows for gentle, controlled, and relatively even warming. After this, promptly check the butter using the essential “finger dent” test. If it’s still too firm, you can repeat the process in even shorter 5-second intervals at even lower power (20-30%) until it reaches the perfect consistency. Be exceptionally vigilant, as butter can transition from perfectly tempered to a greasy, unusable puddle in a matter of mere seconds in the microwave. - Method #3: The Small Cube Strategy (30-45 Minutes)
If you find yourself with a little more time than the microwave allows but less than the full countertop wait, this method offers an excellent compromise. Cutting your butter into small, uniform ½-inch (1.25 cm) cubes greatly increases its surface area, allowing it to warm up much more quickly and evenly. Spread these cubes out in a single layer on a plate or cutting board. Depending on your kitchen’s temperature, these smaller pieces should reach the ideal room temperature in approximately 30 to 45 minutes. This method offers more control than the microwave and is considerably less prone to accidental melting, making it a reliable middle-ground solution.
Mastering one or more of these methods will ensure you never have to delay your baking projects waiting for butter, or worse, compromise the integrity of your recipes with improperly tempered butter. Personally, my second method, the controlled microwave technique, is my absolute go-to for bringing butter to perfect room temperature in under a minute when time is of the essence.
Effortless Baking: Delicious Recipes That Don’t Demand Room Temperature Butter
While understanding and mastering room temperature butter is crucial for countless classic baking recipes, we all have those days when we simply want to whip up something delicious without the extra step of precise butter tempering. The good news is, plenty of fantastic recipes are specifically designed to work beautifully with butter at different temperatures – whether melted, straight from the refrigerator and cold, or simply softened (without the strict temperature requirements of “room temperature”). These recipes offer foolproof results and incredible flavors, proving that delicious baking doesn’t always require perfection with butter consistency.
Delightful Recipes Using Melted Butter:
Melted butter is perfect for recipes where you desire a dense, chewy texture or a rich, buttery flavor that distributes effortlessly throughout the batter. It’s often featured in bars, fudgy brownies, and certain types of quick breads and muffins where air incorporation isn’t the primary goal for leavening, but rather moisture, richness, and a sturdy crumb.
- Overnight Caramel Rolls
- Easy Fruit Crisp
- Sourdough Discard Crackers
Baking Wonders with Cold Butter:
Cold butter is absolutely essential for creating incredibly flaky, tender pastries, pie crusts, and biscuits. When cold butter is meticulously cut into flour, it creates tiny pockets of steam as it melts during baking. This process results in the distinct, delicate, layered texture that simply cannot be achieved with warmer butter, forming the hallmark of classic pastry work.
- All-Butter Pie Crust
- Pain au Chocolat
- Homemade Croissants
Versatile Recipes Using Simply Softened Butter:
This category encompasses recipes that benefit from butter that is soft enough to mix easily and smoothly, but doesn’t necessarily require the extremely precise temperature of “room temperature” butter for optimal aeration. This includes a wide range of frosting recipes, some cookie doughs, and dishes where a smooth, uniform blend is desired without extensive air incorporation being the primary goal for structure.
- Egg Yolk Cookies
- Raspberry Lemon Tartlets
- How to Brown Butter